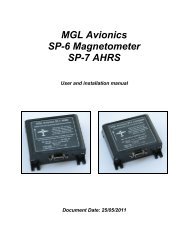
Enigma/Odyssey installation manual - MGL Avionics
Enigma/Odyssey installation manual - MGL Avionics
Enigma/Odyssey installation manual - MGL Avionics

Create successful ePaper yourself
Turn your PDF publications into a flip-book with our unique Google optimized e-Paper software.
<strong>Enigma</strong>/<strong>Odyssey</strong> <strong>installation</strong> <strong>manual</strong><br />
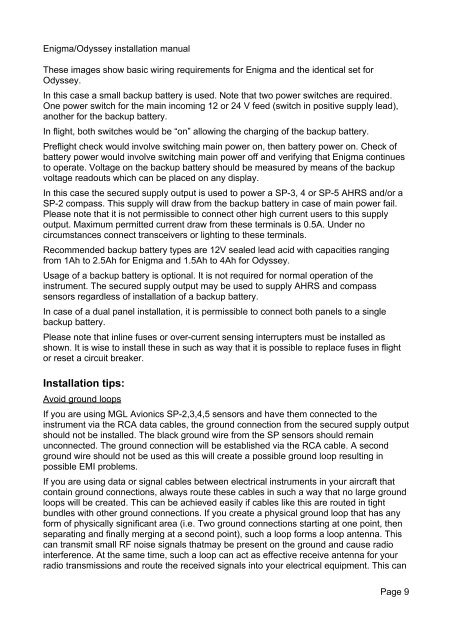
These images show basic wiring requirements for <strong>Enigma</strong> and the identical set for<br />
<strong>Odyssey</strong>.<br />
In this case a small backup battery is used. Note that two power switches are required.<br />
One power switch for the main incoming 12 or 24 V feed (switch in positive supply lead),<br />
another for the backup battery.<br />
In flight, both switches would be “on” allowing the charging of the backup battery.<br />
Preflight check would involve switching main power on, then battery power on. Check of<br />
battery power would involve switching main power off and verifying that <strong>Enigma</strong> continues<br />
to operate. Voltage on the backup battery should be measured by means of the backup<br />
voltage readouts which can be placed on any display.<br />
In this case the secured supply output is used to power a SP-3, 4 or SP-5 AHRS and/or a<br />
SP-2 compass. This supply will draw from the backup battery in case of main power fail.<br />
Please note that it is not permissible to connect other high current users to this supply<br />
output. Maximum permitted current draw from these terminals is 0.5A. Under no<br />
circumstances connect transceivers or lighting to these terminals.<br />
Recommended backup battery types are 12V sealed lead acid with capacities ranging<br />
from 1Ah to 2.5Ah for <strong>Enigma</strong> and 1.5Ah to 4Ah for <strong>Odyssey</strong>.<br />
Usage of a backup battery is optional. It is not required for normal operation of the<br />
instrument. The secured supply output may be used to supply AHRS and compass<br />
sensors regardless of <strong>installation</strong> of a backup battery.<br />
In case of a dual panel <strong>installation</strong>, it is permissible to connect both panels to a single<br />
backup battery.<br />
Please note that inline fuses or over-current sensing interrupters must be installed as<br />
shown. It is wise to install these in such as way that it is possible to replace fuses in flight<br />
or reset a circuit breaker.<br />
Installation tips:<br />
Avoid ground loops<br />
If you are using <strong>MGL</strong> <strong>Avionics</strong> SP-2,3,4,5 sensors and have them connected to the<br />
instrument via the RCA data cables, the ground connection from the secured supply output<br />
should not be installed. The black ground wire from the SP sensors should remain<br />
unconnected. The ground connection will be established via the RCA cable. A second<br />
ground wire should not be used as this will create a possible ground loop resulting in<br />
possible EMI problems.<br />
If you are using data or signal cables between electrical instruments in your aircraft that<br />
contain ground connections, always route these cables in such a way that no large ground<br />
loops will be created. This can be achieved easily if cables like this are routed in tight<br />
bundles with other ground connections. If you create a physical ground loop that has any<br />
form of physically significant area (i.e. Two ground connections starting at one point, then<br />
separating and finally merging at a second point), such a loop forms a loop antenna. This<br />
can transmit small RF noise signals thatmay be present on the ground and cause radio<br />
interference. At the same time, such a loop can act as effective receive antenna for your<br />
radio transmissions and route the received signals into your electrical equipment. This can<br />
Page 9