

Gaymar FW600 Operator's Manual
Gaymar FW600 Operator's Manual
Gaymar FW600 Operator's Manual

You also want an ePaper? Increase the reach of your titles
YUMPU automatically turns print PDFs into web optimized ePapers that Google loves.
ENGLISH<br />
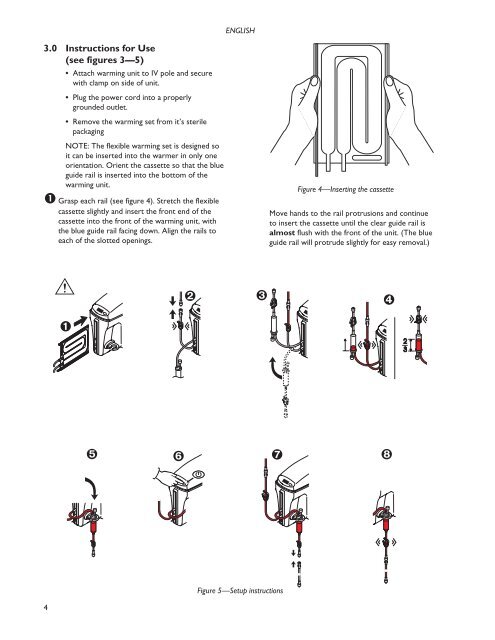
3.0 Instructions for Use<br />
(see figures 3—5)<br />
• Attach warming unit to IV pole and secure<br />
with clamp on side of unit.<br />
• Plug the power cord into a properly<br />
grounded outlet.<br />
• Remove the warming set from it’s sterile<br />
packaging<br />
NOTE: The flexible warming set is designed so<br />
it can be inserted into the warmer in only one<br />
orientation. Orient the cassette so that the blue<br />
guide rail is inserted into the bottom of the<br />
warming unit.<br />
ΠGrasp each rail (see figure 4). Stretch the flexible<br />
cassette slightly and insert the front end of the<br />
cassette into the front of the warming unit, with<br />
the blue guide rail facing down. Align the rails to<br />
each of the slotted openings.<br />
Figure 4—Inserting the cassette<br />
Move hands to the rail protrusions and continue<br />
to insert the cassette until the clear guide rail is<br />
almost flush with the front of the unit. (The blue<br />
guide rail will protrude slightly for easy removal.)<br />
Figure 5—Setup instructions<br />
4


