How to Build a Rotary Tiller - Vintage Projects
How to Build a Rotary Tiller - Vintage Projects
How to Build a Rotary Tiller - Vintage Projects

Create successful ePaper yourself
Turn your PDF publications into a flip-book with our unique Google optimized e-Paper software.
for the mounting bolts allow these <strong>to</strong> be<br />
slid forward or back <strong>to</strong> adjust chain<br />
tension. Make sure that the shaft turns<br />
freely after all the bolts are pulled tight.<br />
The sprocket is best held on the countershaft<br />
with a taper pin. A setscrew<br />
will secure the pulley provided you drill<br />
a dimple in the shaft for it <strong>to</strong> seat in.<br />
Both for your own safety and <strong>to</strong> keep<br />
sticks and gravel out of the chain, a<br />
guard should be fitted. Cut one flange<br />
off 1" angle iron where it is <strong>to</strong> be bent <strong>to</strong><br />
a radius, as shown in the drawing on<br />
page 176. Use flathead bolts, with the<br />
heads countersunk inside the guard, <strong>to</strong><br />
join the ends and attach mounting brackets,<br />
one above, two at the lower end.<br />
Handle is brazed up. Cut ¾" electric<br />
conduit for the handle parts. Remove<br />
the zinc coating with abrasive cloth<br />
where the brazed joints must be made.<br />
Flatten the lower ends before drilling<br />
them for the 5/16" mounting bolts.<br />
The bracing fork consists of two pieces<br />
of 5/16" rod bent, threaded and brazed<br />
<strong>to</strong> a 3/16" plate. This is clamped under<br />
one engine-head bolt. With a nut on each<br />
side of the handle crossbar, the fork can<br />
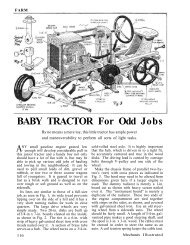
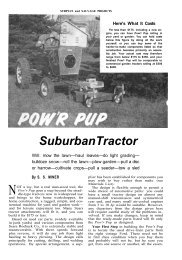
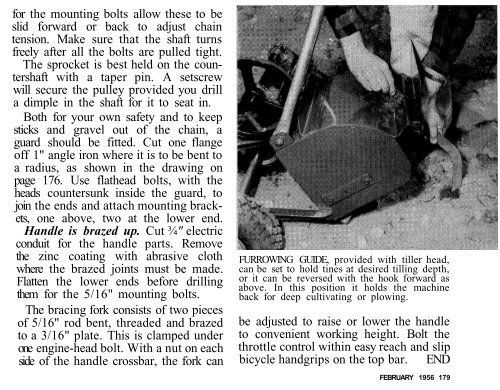
FURROWING GUIDE, provided with tiller head,<br />
can be set <strong>to</strong> hold tines at desired tilling depth,<br />
or it can be reversed with the hook forward as<br />
above. In this position it holds the machine<br />
back for deep cultivating or plowing.<br />
be adjusted <strong>to</strong> raise or lower the handle<br />
<strong>to</strong> convenient working height. Bolt the<br />
throttle control within easy reach and slip<br />
bicycle handgrips on the <strong>to</strong>p bar. END<br />
FEBRUARY 1956 179