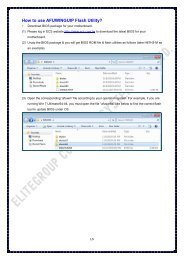
How to use AFUDOS Flash Utility by USB device To update the - ECS
How to use AFUDOS Flash Utility by USB device To update the - ECS
How to use AFUDOS Flash Utility by USB device To update the - ECS

You also want an ePaper? Increase the reach of your titles
YUMPU automatically turns print PDFs into web optimized ePapers that Google loves.
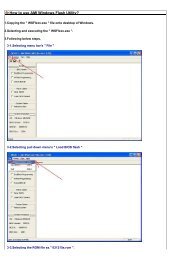
<strong>How</strong> <strong>to</strong> <strong>use</strong> <strong>AFUDOS</strong> <strong>Flash</strong> <strong>Utility</strong> <strong>by</strong> <strong>USB</strong> <strong>device</strong><br />
<strong>To</strong> <strong>update</strong> <strong>the</strong> BIOS file using <strong>the</strong> <strong>AFUDOS</strong> utility:<br />
1. Visit <strong>the</strong> <strong>ECS</strong> website (http://www.ecs.com.tw/) and download <strong>the</strong> latest BIOS file for <strong>the</strong><br />
mo<strong>the</strong>rboard. Extracted <strong>the</strong> BIOS file <strong>to</strong> a bootable <strong>USB</strong> <strong>device</strong>.<br />
The extracted file list:<br />
� BIOS file (eg. 070607s.ROM)<br />
� <strong>AFUDOS</strong>.exe<br />
� AFUWIN.exe<br />
� DOS <strong>Flash</strong> <strong>Utility</strong> User Guide.pdf<br />
� Ucoredll.dll<br />
� Ucoresys.sys<br />
� Ucorevxd.vxd<br />
� UCOREW64.sys<br />
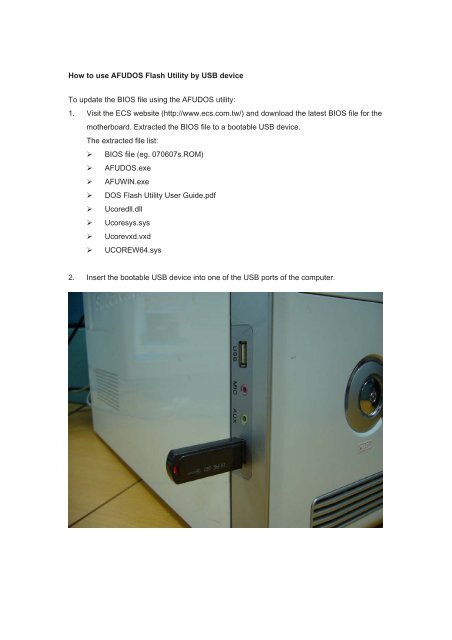
2. Insert <strong>the</strong> bootable <strong>USB</strong> <strong>device</strong> in<strong>to</strong> one of <strong>the</strong> <strong>USB</strong> ports of <strong>the</strong> computer.
3. Enter CMOS Setup Menu <strong>by</strong> pressing [DEL] key.
4. Highlight <strong>the</strong> “Advanced Chipset Features” item and set option “Legacy <strong>USB</strong> Support”<br />
as “Enabled”.<br />
� Note: If this option is invisible in <strong>the</strong> CMOS Setup Menu, it means that Legacy <strong>USB</strong><br />
Support is enabled <strong>by</strong> default.
5. Highlight <strong>the</strong> “Save Changes & Exit Setup” item and press [OK] <strong>to</strong> confirm <strong>the</strong> changes<br />
(or just press [F10] key). And <strong>the</strong>n <strong>the</strong> system will reboot <strong>to</strong> apply <strong>the</strong> new settings.
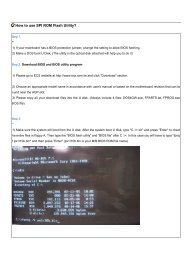
6. Open <strong>the</strong> Boot Menu <strong>by</strong> pressing [F11] key during booting.<br />
� Note: In some older mo<strong>the</strong>rboard, it will be [F8] key or some o<strong>the</strong>r keys <strong>to</strong> open <strong>the</strong><br />
Boot Menu. It depends on <strong>the</strong> message displayed on <strong>the</strong> screen, as <strong>the</strong> figure<br />
shown below.
7. Select your bootable <strong>USB</strong> <strong>device</strong> in <strong>the</strong> Boot Menu and <strong>the</strong> system will boot in<strong>to</strong> DOS<br />
system.<br />
8. After booting <strong>the</strong> system in<strong>to</strong> DOS mode, type <strong>the</strong> following command at <strong>the</strong> prompt <strong>to</strong><br />
flash BIOS,<br />
afudos [filename] /p /b /n /c /x<br />
where [filename] is <strong>the</strong> latest BIOS file in <strong>the</strong> bootable <strong>USB</strong> <strong>device</strong>.<br />
Note that, <strong>the</strong> filename of <strong>the</strong> BIOS file will always have an extension name as ROM (i.e.<br />
filename.rom). Take 070607s.rom for example, <strong>the</strong> command you should type at prompt<br />
will be<br />
afudos 070607s.rom /p /b /n /c /x<br />
Just as <strong>the</strong> figure below shows.
9. The utility verifies <strong>the</strong> file and starts updating <strong>the</strong> BIOS.<br />
� Note: DO NOT shut down or reset <strong>the</strong> system while updating <strong>the</strong> BIOS <strong>to</strong> prevent<br />
system boot failure!
10. The utility returns <strong>to</strong> <strong>the</strong> DOS prompt after <strong>the</strong> BIOS <strong>update</strong> process is completed.<br />
Reboot <strong>the</strong> system.<br />
� During <strong>the</strong> rebooting, <strong>the</strong> boot up screen will display your mo<strong>the</strong>rboard model and<br />
current BIOS version.<br />
� Note: The system will redetect all <strong>device</strong>s after BIOS has been upgraded.<br />
Therefore, we highly recommend reloading <strong>the</strong> BIOS defaults after BIOS has been<br />
upgraded. The steps for reloading <strong>the</strong> default values of BIOS are listed below.<br />
11. Press [F1] key <strong>to</strong> enter CMOS Setup Menu during booting as <strong>the</strong> below message<br />
appearing on <strong>the</strong> screen.<br />
Press F1 <strong>to</strong> Run Setup<br />
� Note: For some mo<strong>the</strong>rboards, this message won’t displayed, please press [DEL]<br />
key (or some o<strong>the</strong>r keys) <strong>to</strong> enter CMOS Setup Menu.
12. Use <strong>the</strong> arrow keys <strong>to</strong> highlight <strong>the</strong> item "Load Optimum Settings" and press [Enter].<br />
System will ask "Load Optimal Defaults ([Ok] / [Cancel])?" Press "[OK]" <strong>to</strong> confirm.<br />
� For some mo<strong>the</strong>rboards, <strong>the</strong> item would be “Load Default Settings.”<br />
13. Highlight <strong>the</strong> “Save Changes & Exit Setup” item and press [OK] <strong>to</strong> confirm <strong>the</strong> changes<br />
(or just press [F10] key). And <strong>the</strong>n <strong>the</strong> system will reboot <strong>to</strong> apply <strong>the</strong> default settings.