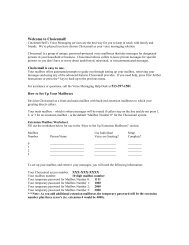
Cisco 504 and 508 End User Guide - Cincinnati Bell
Cisco 504 and 508 End User Guide - Cincinnati Bell
Cisco 504 and 508 End User Guide - Cincinnati Bell

Create successful ePaper yourself
Turn your PDF publications into a flip-book with our unique Google optimized e-Paper software.
C<br />
2012
Contents<br />
Page<br />
Place/Receive Calls ................................................................................................................................................... 2<br />
Answering a Call .................................................................................................................................................... 2<br />
Dialing a Number or Extension .............................................................................................................................. 2<br />
<strong>End</strong> a Call ............................................................................................................................................................... 2<br />
Place a Call on hold ............................................................................................................................................... 2<br />
Transferring a call (Attended, Blind) ...................................................................................................................... 2<br />
Direct Voicemail Transfer ....................................................................................................................................... 3<br />
Call Waiting Service: Answering a Second Incoming call ...................................................................................... 3<br />
Placing a Conference Call ........................................................................................................................................... 4<br />
Call Forwarding ......................................................................................................................................................... 4<br />
Do Not Disturb ........................................................................................................................................................... 4<br />
Group Paging ......................................................................................................................................................... 4<br />
Features Codes .......................................................................................................................................................... 5<br />
Call Pick-up from a Different Extension ................................................................................................................. 5<br />
Parking a Call ......................................................................................................................................................... 5<br />
Push to Talk ........................................................................................................................................................... 5<br />
Voice Mail Flow Chart ..................................................................................................................................................... 6<br />
Emerge Voicemail ...................................................................................................................................................... 6<br />
Accessing the Voicemail Message Main Menu...................................................................................................... 7<br />
Record Your Personalized Greetings .................................................................................................................... 8<br />
Busy Greeting Menu .............................................................................................................................................. 8<br />
Voice Mail Overview ............................................................................................................................................... 9<br />
Distribution List Options (from the Voice Messaging Menu Options) .................................................................. 12<br />
Accessing Your Voice Messaging Menu .............................................................................................................. 13<br />
Personalizing your IP Phone .................................................................................................................................... 14<br />
Accessing your Call History ................................................................................................................................. 14<br />
Dialing from your Call History............................................................................................................................... 14<br />
Adding Contacts to Your Directory ....................................................................................................................... 14<br />
Editing a Contact .................................................................................................................................................. 15<br />
Deleting a Contact ................................................................................................................................................ 15<br />
Change the Ring Tone ......................................................................................................................................... 15<br />
Other Feature Codes ........................................................................................................................................... 16<br />
Rebooting your IP Phone ..................................................................................................................................... 17<br />
Customer Service <strong>and</strong> Support ........................................................................................................................................ 18<br />
Page | 1
Place/Receive Calls<br />
Answering a Call<br />
Pick up the h<strong>and</strong>set, press the Answer soft key, or press Speakerphone key.<br />
Dialing a Number or Extension<br />
• Pick up the h<strong>and</strong>set, or use the speaker phone key <strong>and</strong> dial the extension or number.<br />
• Press the Dial soft key<br />
Note: You may switch to a different call mode during a call in progress by pressing Speakerphone key , or<br />
picking up the h<strong>and</strong>set.<br />
<strong>End</strong> a Call<br />
Speaker Key<br />
Hang up the h<strong>and</strong>set, or press the Speaker phone button to end call.<br />
Place a Call on hold<br />
• While you are on a call, press the Hold Button.<br />
• To resume the call, press the Resume soft key, or, press the flashing red line key.<br />
If receiving a call while on another call:<br />
• Click answer to place the call on hold <strong>and</strong> answer incoming call<br />
• Use the up <strong>and</strong> down arrows to toggle between the call on hold <strong>and</strong> active call<br />
• Pushing the red line button does the same thing, toggles between the calls<br />
• Once on the call you can press a soft key to perform an action (e.g. end call, resume, hold, etc.)<br />
Transferring a call (Attended, Blind)<br />
Attended Transfer<br />
Follow the steps below to announce the call prior to transferring.<br />
Step<br />
Action<br />
1 During the call, press the xfer soft key.<br />
2 Dial the number or extension you wish to transfer the call, press the Dial soft key<br />
then announce the caller.<br />
3 Press the xfer soft key again to connect the parties.<br />
4 If the party is unavailable press the cancel soft key to bring the caller back to you.<br />
Page | 2
Blind Transfer (unattended)<br />
Follow the steps below to transfer the call without an announcement.<br />
Step Action<br />
1 During the call, use the Right Arrow key, <strong>and</strong> select the bxfer soft key<br />
2 Enter the number or extension<br />
3 Press Dial soft key <strong>and</strong> Hang up<br />
Direct Voicemail Transfer<br />
This feature allows you to send a caller directly to a user’s voicemail box bypassing the user’s ring cycle <strong>and</strong><br />
instantly plays their recorded greeting.<br />
• Press the xfer soft key<br />
• Enter *55, followed by the voicemail extension <strong>and</strong> the # key.<br />
Call Waiting Service: Answering a Second Incoming call<br />
Call waiting service is provided with your service which allows the user to answer a second incoming call<br />
on the user’s direct dial number or extension.<br />
Step<br />
Action<br />
1 Press the Answer soft key to answer the 2 nd caller. This will automatically put<br />
the first caller on hold.<br />
The Call being held will Flash at the top of the LCD screen indicating the caller on<br />
hold.<br />
2<br />
Utilize the Up <strong>and</strong> Down Arrow Keys to toggle back <strong>and</strong> forth between the callers.<br />
Page | 3
Placing a Conference Call<br />
Basic Conferencing / 3 way<br />
Step<br />
Action<br />
1 Call the first party then press the conf soft key.<br />
2 Call the second party, when the second party answers press the conf soft<br />
key to join all parties.<br />
3 To end the conference call, hang up.<br />
Call Forwarding<br />
Step<br />
Action<br />
1 Press the cfwd soft key<br />
2<br />
Enter the number where you would like to forward your calls <strong>and</strong> press the<br />
dial soft key<br />
3 To deactivate forwarding service, press the –cfwd soft key<br />
Do Not Disturb<br />
Step Action<br />
1 Press the dnd soft key. Callers will go directly to the user’s Busy greeting.<br />
2 Press -dnd soft key to deactivate service.<br />
Group Paging<br />
Any user can page all other phones in the group. Dial ext. 800#, make announcement<br />
Multicast paging is one-way. This means that the person who dials 800# can speak but others cannot reply. If twoway<br />
communication is preferred, refer to Push to Talk listed in Feature Access Codes<br />
Note: Ask your Emerge Application Specialist or Emerge Trainer about this option.<br />
Page | 4
Features Codes<br />
Your Emerge service includes a variety of star feature codes which use a 2 digit number prefixed with a *<br />
(star). Each feature code maps directly to an action on the phone system. Below is a quick reference to our<br />
most commonly used feature codes.<br />
Call Pick-up from a Different Extension<br />
Directed Call Pick-up<br />
This is a premium feature <strong>and</strong> allows you to pick up a call from any ringing phone from your own phone using the<br />
feature code *97.<br />
• Enter *97, press the “dial” soft key.<br />
• Enter the extension of the ringing phone, followed by the # key.<br />
Group Call Pick- up<br />
The feature allows you to pick up any ring phone in your group <strong>and</strong> can be programmed for basic, st<strong>and</strong>ard, <strong>and</strong><br />
premium users. Service must be programmed for use.<br />
• Enter *98, press the dial soft key.<br />
Parking a Call<br />
Call Park is a feature that allows a person to put a call on hold at one H<strong>and</strong>set set <strong>and</strong> continue the conversation<br />
from any other h<strong>and</strong>set.<br />
• Press the Hold key <strong>and</strong> enter *68 <strong>and</strong> the extension where you want to park the call followed by<br />
the # key.<br />
• Pressing # will park the call to your own phone.<br />
Retrieving a parked call<br />
Enter *88, <strong>and</strong> press the dial soft key, followed by the extension <strong>and</strong> the # key. The parked is<br />
retrieved.<br />
Push to Talk<br />
This feature code allows for immediate communication useful for quick conversations between callers. The call will<br />
be answered automatically, if the party is available.<br />
• Enter *50, press the dial soft key.<br />
• Enter the extension you wish to call, followed by the # key. You will hear a tone soon as the<br />
connection is made.<br />
Note: Push to Talk is a premium seat feature.<br />
Page | 5
Voice Mail Flow Chart<br />
1 – Play Messages<br />
2 – Busy Greeting Menu<br />
3 – No Answer Greeting Menu<br />
5 – Compose Message Menu<br />
7 – Delete All Messages<br />
* - Return to Previous<br />
# - Repeat Menu<br />
Play Message Menu<br />
2 – Play/Repeat:Skip Envelope<br />
4 – Play Previous<br />
5 – Play Envelope<br />
6 – Play Next<br />
7 – Delete<br />
8 – Call Sender<br />
9 – Additional Opts<br />
# - Save Messages<br />
“ – Return to Previous<br />
While Playing Msgs<br />
1 – Skip Back<br />
2 – Pause<br />
3 – Fast Forward<br />
4 – Skip to beginning<br />
6 – Skip to END<br />
8 – Call Sender<br />
Additional Options<br />
1 – Reply to MSG<br />
2 – Forward message<br />
“ – Return to Previous<br />
# - repeat Menu<br />
Compose Message<br />
1 – Change<br />
2 – Listen<br />
3 – Send<br />
4 – Send to Group<br />
5 – Send to Dist<br />
6 – Set/Clear Urgent<br />
7 – Set/Clear Private<br />
* – Return to Previous<br />
# - Repeat Menu<br />
Greeting Menu<br />
1 – Record<br />
2 – Listen<br />
3 – Revert to Default<br />
* – Return to Previous<br />
# - Repeat Menu<br />
Reply to Message<br />
1 – Change<br />
2 – Listen<br />
3 – Send<br />
6 – Set/Clear Urgent<br />
7 – Set/Clear Private<br />
* – Return to Previous<br />
# - Repeat Menu<br />
Select Dist List<br />
1 – Select List 1 ---<br />
15 – Select List 15<br />
* – Return to Previous<br />
# - Repeat Menu<br />
Distribution List<br />
1 – Select Another List<br />
2 - Review List<br />
* – Return to Previous<br />
# - Repeat Menu<br />
While Playing Msgs<br />
1 – Change<br />
2 – Listen<br />
3 – Send<br />
4 – Send to Group<br />
5 – Send to Dist<br />
6 – Set/Clear Urgent<br />
7 – Set/Clear Private<br />
* – Return to Previous<br />
# - Repeat Menu<br />
Page | 6
Emerge Voicemail<br />
Accessing the Voicemail Message Main Menu<br />
Setting up your voicemail box<br />
Step<br />
Action<br />
1<br />
Pick up the h<strong>and</strong>set <strong>and</strong> press the Message Key<br />
2 Enter the Default Passcode ___<br />
3 Enter a new 4-6 digit passcode at the Voice Portal prompt<br />
4<br />
Re-enter your new passcode at the prompt<br />
Follow the prompts to record your Personalized Name Greeting by recording<br />
your First <strong>and</strong> Last name. The voicemail box has now been initialized<br />
Subsequent Use<br />
Step<br />
1<br />
Action<br />
Press the Message Key<br />
2 Enter your new passcode<br />
3<br />
Press 1 to access your voice mail box<br />
4 Follow the menu table to record personalized greetings <strong>and</strong> play messages.<br />
Voice Messaging Main Menu<br />
Key<br />
Option<br />
1 Play message (enabled with new or saved)<br />
2 Record/Change Busy Greeting<br />
3 Change No Answer Greeting<br />
5 Compose <strong>and</strong> Send Menu<br />
7 Delete ALL Messages<br />
* Voice portal Admin Menu<br />
# Repeat this menu<br />
Page | 7
Record Your Personalized Greetings<br />
The System has two greetings; Busy <strong>and</strong> No Answer. The default greetings will play until a personal greeting has<br />
been recorded.<br />
Busy Greeting Menu<br />
The busy greeting will play when Do not Disturb is on or the Ignore soft key is pressed on incoming call.<br />
To Record a Busy Greeting<br />
Step<br />
Action<br />
1 Access the Voice Message Main Menu<br />
2 Press 2 <strong>and</strong> follow the voice prompts.<br />
Key<br />
Option<br />
1 Record new Busy Greeting<br />
2 Listen to current Busy Greeting<br />
3 Revert to System Default Busy Greeting<br />
* Voice Messaging Main Menu<br />
# Repeat this menu<br />
No Answer Greeting Menu<br />
The no answer greeting plays when a call is not answered.<br />
To Record a No Answer Greeting<br />
Step<br />
Action<br />
1 Access the Voice Message Main Menu<br />
Page | 8
2 Press 3 <strong>and</strong> follow voice prompts.<br />
Key Option<br />
1 Record New No Answer Greeting<br />
2 Listen to current No Answer Greeting<br />
3 Revert to System default No Answer Greeting<br />
* Voice Messaging Main Menu<br />
# Repeat this menu<br />
To listen to your messages<br />
Step<br />
Action<br />
1 Access the Voice Message Main Menu<br />
2 Press 1 to listen to messages. You are now in the *Play Messages Menu.<br />
(See voicemail overview for more options)<br />
Note: if there are no new or saved<br />
messages you will hear the voice announcement indicating the status<br />
Voice Mail Overview<br />
From your Voice Messaging Main Menu you can play delete, or save these messages. From the Menus advanced<br />
sending <strong>and</strong> group distribution options are available.<br />
Page | 9
Voice Messaging Main Menu<br />
Key Option<br />
1 Play messages<br />
# Save a Message<br />
7 Delete a Message<br />
2 **Play or repeat message: skip envelope<br />
Key<br />
Option<br />
1 Skip Backward 3 seconds<br />
2 Pause Playback<br />
4 Return to previous message<br />
3 Skip forward 3 seconds<br />
4 Skip to beginning of message<br />
6 Skip to end of message<br />
5 Play message envelope (date & time info)<br />
6 Move to next message<br />
8 **Initiate Call to Sender<br />
**Additional Options Menu ( See Menu below)<br />
Key<br />
Option<br />
1 Reply to Message Menu<br />
2 Forward Message Menu (more below)<br />
* Return to Play Messages Menu<br />
# Repeat this menu<br />
Key Option<br />
1 Change Current introduction<br />
2 Listen to current introduction<br />
3 Send Message to specific group member(s)<br />
4 Send Message to entire group<br />
5 Send message to distribution list- (See Select<br />
Distribution List Menu)<br />
6 Set or clear urgent indicator<br />
7 Set or clear confidential indicator<br />
* Return to Play Messages Menu<br />
# Repeat this Menu<br />
Note: Messages marked Confidential cannot be forwarded.<br />
Page | 10
Key Option<br />
2 Record/ Change Busy Greeting<br />
3 Change No Answer Greeting<br />
5 Compose <strong>and</strong> Send Menu<br />
Key Option<br />
1 Change current message<br />
2 Listen to current message<br />
3 Send message to specific group member<br />
4 Send Message to entire group<br />
5 Send Message to distribution list (if configured)<br />
6 Set or clear urgent indicator<br />
7 Set or clear confidential indicator<br />
* Return to voice Messaging Main Menu<br />
# Repeat this menu<br />
7 Delete ALL Messages<br />
* Voice portal Admin Menu<br />
Key Option<br />
1 Access voice message Main Menu<br />
2 Change CommPilot Express Profile<br />
3 Record personalized name<br />
4 Change Call forwarding Options<br />
6 Make Calls<br />
8 Change Passcode<br />
9 Exit<br />
# Repeat this menu<br />
# Repeat this menu<br />
Page | 11
Distribution List Options (from the Voice Messaging Menu Options)<br />
Distribution Lists are created in the users Profile through the eVolve Customer Dashboard. Up to 15 distribution list(s)<br />
can be created.<br />
Select Distribution List Menu- (from Forward Message menu, Key 5)<br />
Key<br />
Description<br />
0 Select distribution list 0<br />
1 Select Distribution list 1 (Distribution lists are numbered<br />
consecutively 1 through 15.)<br />
* Return to previous Menu<br />
# Repeat this menu<br />
Distribution List Menu (from key 0-15 in Select Distribution List Menu)<br />
Key<br />
Description<br />
1 Select another distribution List<br />
2 Review the selected distribution list<br />
3 Send the message<br />
* Return to the previous Menu<br />
# Repeat this menu<br />
Reply to Message Menu (from Key 1 in Additional Options Menu).<br />
Key<br />
Description<br />
1 Change current reply<br />
2 Listen to current reply<br />
3 Send reply<br />
6 Set or clear urgent indicator<br />
7 Set or clear confidential indicator<br />
* Return to Play Messages Menu<br />
# Repeat this menu.<br />
Note: If this is the first time you are accessing this voicemail box, use the default passcode then you will be<br />
prompted to enter a new passcode.<br />
Page | 12
Accessing Your Voice Messaging Menu<br />
From your <strong>Cisco</strong> phone<br />
Step<br />
Action<br />
1 Press the Message key<br />
2 Enter your password<br />
3 Press 1 to access your voicemail box<br />
From Any Internal <strong>Cisco</strong> Phone<br />
Step Action<br />
1 Call the extension or mailbox ID of the voicemail box<br />
2 When the greeting plays, press the * key.<br />
3 Enter your passcode <strong>and</strong> press the # key<br />
4 Press 1 to access your voicemail box<br />
From Any External Telephone<br />
Step<br />
Action<br />
1 Dial your Personal DID (Direct Dial number)<br />
2 Press *, during your greeting<br />
3 Enter your passcode press the (#) Key<br />
4 Press 1 to access your voicemail box<br />
Or, dial your organizations Voice Portal Backdoor Number<br />
Step Action<br />
1 Enter the extension number or Mailbox ID.<br />
2 Enter the password press #.<br />
3 Press 1 to access your voicemail box<br />
Page | 13
Personalizing your IP Phone<br />
Accessing your Call History<br />
To view the Call History lists<br />
Step<br />
Action<br />
1 Press the Menu Key, select or press 3 for Call History<br />
• Press 1 for redial List<br />
• Press 2 for Answered Calls<br />
• Press 3 for Missed Calls<br />
2<br />
Use the soft keys to Dial the contact, Delete, or Save the entry to the Contact<br />
Directory.<br />
Dialing from your Call History<br />
Once in your Redial, Received or Missed Call Lists, select the Dial Soft Key.<br />
Adding Contacts to Your Directory<br />
Step<br />
Action<br />
1 Press the MENU key. Press 1 (Directory)<br />
2 Press 1 for New Entry<br />
3 Fill out the Name <strong>and</strong> Number Fields using the Dial Pad.<br />
4 Use the up <strong>and</strong> down arrow keys to highlight the field to fill out<br />
Note: To Toggle between upper <strong>and</strong> lower characters press the dial pad key to alternate.<br />
Page | 14
Editing a Contact<br />
Editing Contact Phone Information<br />
Step<br />
Action<br />
1 Press the Menu Key, press 1 or highlight <strong>and</strong> select Directory<br />
2 Use the Arrow Keys to locate the contact to edit. Press the Edit soft key<br />
3 Update the contact information <strong>and</strong> press the Save soft key.<br />
Deleting a Contact<br />
Step<br />
Action<br />
1 Once in the contact directory use the Arrow Key to locate the contact to be deleted,<br />
press the Delete soft key<br />
2 Press Back <strong>and</strong> Exit Soft Keys to return to the idle display.<br />
Change the Ring Tone<br />
Step<br />
Action<br />
1 Press the Menu Key, press 4 or use the arrows keys to highlight option <strong>and</strong> select<br />
Ring Tone.<br />
2 Select the extension you wish to change the ring tone. If you have multiple<br />
numbers programmed on your phone select 1-4, <strong>and</strong> change each desired ring<br />
tone.<br />
3 Select Change soft key <strong>and</strong> use the arrow keys to select the new ring tone <strong>and</strong><br />
press the Select soft key.<br />
• Press the Play Soft Key to hear the ring<br />
• Press Select Soft Key to make this the new ring tone.<br />
• Press Cancel to return to the previous menu.<br />
Page | 15
Other Feature Codes<br />
Feature Codes are the key comm<strong>and</strong>s used on the phone to change settings. The most common have been<br />
outline previously. The following, is a complete list of the access codes available.<br />
Note: Feature codes may vary per company policy. See your administrator for a list of your Feature Codes.<br />
Feature Access Code Name<br />
Sequence<br />
Call Forwarding Always Activation *72<br />
Call Forwarding Always Deactivation *73<br />
Call Forward Busy Deactivation *91<br />
Call Forwarding No Answer Deactivation *93<br />
Call Park *68<br />
Call Park Retrieve *88<br />
Call Pickup ( Group extension *98<br />
assignment)<br />
Call Return *69<br />
Cancel Call Waiting #43<br />
Call Waiting Activation *43<br />
Clear Voice Message Waiting Indicator *99<br />
Directed Call Pickup ( premium feature) *97<br />
Direct Voice Mail Transfer *55<br />
Do Not Disturb Activation *78<br />
Do Not Disturb Deactivation *79<br />
Last Number Redial *66<br />
Push to Talk *50<br />
All Over Page 800#<br />
Page | 16
Rebooting your IP Phone<br />
Due to upgrades, or work on your phone you may be asked to reboot your phone. If you are asked by a technician<br />
to reboot you phone do the following.<br />
Step<br />
Action<br />
1 Press the Menu Key<br />
2 Using arrow key scroll down to Option 12<br />
3 Press the Select soft key<br />
Page | 17
Customer Service <strong>and</strong> Support<br />
Congratulations <strong>and</strong> Welcome to your new Emerge Service we are pleased to have you on board <strong>and</strong> look<br />
forward to serving your organization!<br />
Please contact our Customer Care Support Number with questions about your service, billing or changes<br />
that need to be made to your system.<br />
Customer Care: 877.290.2777 Option 4 or customersupport@cinbell.com<br />
To report any service issues or to place a trouble ticket, please contact Technical Support.<br />
Technical Support: 877.290.2777 Option 3<br />
If you would like to learn more about your Emerge system please check out our Emerge Webinars.<br />
Available free to all Emerge customers every other week! Visit us on the web at<br />
www.cincinnatibell.com/webinar<br />
To find out more about new features <strong>and</strong> service on your Emerge system go to<br />
www.cincinnatibell.com/voip<br />
Page | 18