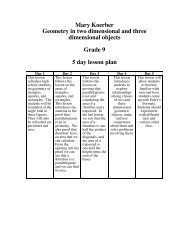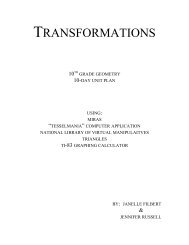
%Unit: Perimeter & Area% %Grade level: 10- Geometry% %Time ...
%Unit: Perimeter & Area% %Grade level: 10- Geometry% %Time ...
%Unit: Perimeter & Area% %Grade level: 10- Geometry% %Time ...

You also want an ePaper? Increase the reach of your titles
YUMPU automatically turns print PDFs into web optimized ePapers that Google loves.
<strong>%Unit</strong>: <strong>Perimeter</strong> & <strong>Area%</strong><br />
<strong>%Grade</strong> <strong>level</strong>: <strong>10</strong>- <strong>Geometry%</strong><br />
<strong>%Time</strong> span: Five days (45 minute classes) %<br />
%Tools used: Geometer’s Sketchpad, Geoboards, National<br />
Library of Virtual Manipulatives, TI-84 Plus%
This portion of the area and perimeter unit should take five days. Topics<br />
include perimeter and area of rectangles and squares, inputting data into the<br />
calculator and then analyzing it.<br />
Day 1:<br />
Review of perimeter.<br />
Discussion of perimeter and area, and their relation to real life situations.<br />
Discussion of an upcoming journal entry.<br />
Development of perimeter formula’s.<br />
Day 2:<br />
A Day in the computer lab with Geometer’s Sketchpad.<br />
Developing a house layout, and then finding the perimeter and area of the house.<br />
Day 3:<br />
Introduction to area with geoboards.<br />
Development of area formulas.<br />
Day 4-5:<br />
Flower Science, given perimeter, find all area possibilities.<br />
Enter data into calculator, graph the data, and what do you notice?<br />
Overall Objectives:<br />
® Students will be able to determine the difference between area and<br />
perimeter.<br />
® Students will be able to use their knowledge of area and perimeter to<br />
handle real life situations.<br />
® Students will develop general understanding for area and perimeter<br />
and they will see where the formulas are derived from.<br />
® Students will use the TI-84 and its graphing functions to see relations<br />
of area.<br />
® The students will further their knowledge of GSP (Geometer’s Sketch<br />
Pad) and measure area and perimeter within GSP.<br />
® Basic introduction of Geoboards (also seen in the National Library of<br />
Virtual Manipulatives).
Title: Intro-discussion.<br />
Objective: This will be a class mainly consisting of discussion. The students will<br />
begin to “think” about math and relating it to real life situations. A journal entry will<br />
also be included in the lesson to encourage the understanding of perimeter vs. area.<br />
The writing of word problems will give the students good practice with writing and<br />
allow them to become creative when it comes to math.<br />
Procedure: After homework is collected and gone over, the students will get into<br />
groups (fellow students they are sitting near). They will then listen to me and<br />
complete the following activity.<br />
Activity:<br />
1) The students will get into groups and they will draw the following on the<br />
provided graph paper:<br />
• A rectangle with length of 5 cm and width 3 cm (P = 16 cm, A = 15 sq. cm).<br />
• A rectangle with height 2 cm and base 8 cm (P = 20 cm, A = 16 sq. cm).<br />
• A rectangle with each side measuring 4 cm (P = 16 cm, A = 16 sq. cm).<br />
*note: answers will not be provided to the students.<br />
At this time, I will have a student from the class designing these rectangles<br />
in the National Library of Virtual Manipulatives- Geoboard section. I will<br />
have my computer hooked up to a projector for all the students to see. I<br />
will be able to use this student’s work as the class progresses and questions<br />
arise.<br />
2) After a quick review/introduction of perimeter, the students will find the<br />
perimeter of each of the rectangles (the students already have previous<br />
knowledge of perimeter, so I will not be spending much time on it).<br />
3) Once the students have recalled perimeter and they have answered the above<br />
questions, the following discussion questions will be asked and discussed:<br />
• To find area, record the number of square centimeter in the interior. Find<br />
the area of each rectangle.<br />
• Do the rectangles with the same area; have the same perimeter (No)?<br />
Why (Different measurements)? *note: this question will be part of a<br />
journal entry that they are going to do for tonight’s homework.<br />
4) After these questions are gone over, we will begin to relate this part of math to<br />
real life situations. We will discuss how the following sorts of questions relate<br />
to math. The questions will consist of:<br />
• How many posters could be placed around Sally’s bedroom? (<strong>Perimeter</strong>)<br />
• How many tiles does Martha need to tile her bathroom? (Area)<br />
• Mrs. Jacobs wants to put a fence around her house, how much fence will she<br />
need? (<strong>Perimeter</strong>)<br />
• How much space will the math club’s poster take up when they hang it in the<br />
union? (Area)<br />
5) While still in their groups, the students will think of word problems that only<br />
relate to perimeter. This will help the students to better understand perimeter
vs. area. Once the problems are written, I will have some volunteers read<br />
their problems aloud.<br />
Conclusion: If time permits, we will begin working on actual perimeter examples<br />
(like finding perimeter with measurements). By looking at the rectangles we drew at<br />
the start of class, we will review how we got the actual perimeter of the rectangles (by<br />
adding the sides together). We will begin to develop the formulas to find perimeter,<br />
that is, perimeter of a rectangle = 2(b)+2(h) and perimeter of a square= 4(s).<br />
Development of these formulas will prepare the students for tomorrow’s lesson.<br />
Homework: Journal entry (Do the rectangles with the same area; have the same<br />
perimeter? Why? Also, page 245 (4 - 11).
Title: Designer for the Day.<br />
Objective: The students will be designing a layout and estimating measurements<br />
in relation to height. Then, they will find the area and perimeter of the layout, seeing<br />
that math can be handy and helpful. The students will be using yesterday’s perimeter<br />
formulas and the definition of area that we also went over yesterday.<br />
Procedure: For today’s class, we will all be heading to the computer lab (or we<br />
could just meet in the computer lab). Each student will have their own computer<br />
and once they enter the lab, their computer will be “locked” (by me) until directions<br />
are gone over.<br />
Activity:<br />
1) Once the students have entered the lab and are settled down, I will<br />
begin the lesson. For today’s class, we will be finding the perimeter<br />
of one story in the student’s house (the story that their bedroom is<br />
located on) using GSP.<br />
2) Since the students already have so much experience with GSP, no<br />
much explanation of the program will be needed (they will have<br />
many notes and handouts on the program from previous classes).<br />
3) I will begin by showing the students a floor plan for my studio<br />
apartment (the entire demonstration of my apartment can be found<br />
in appendix).<br />
4) I expect the student’s layout to be in some sort of ratio, for<br />
instance, one foot = one centimeter (like my layout is). I want<br />
them estimate the size of the room’s in their house in relation to<br />
their height. For example, let’s say that a student is five feet tall,<br />
how many of that student (lying down) could fit along a specific<br />
wall?<br />
5) I want the perimeter of each room/closet/hallway/etc and the area<br />
of each if we have time. The perimeter of each room is something<br />
that must be completed using the formulas that we used yesterday.<br />
Conclusion: Once the students have completed the project and handed it in,<br />
they will be starting their homework until the bell rings.<br />
Assignment: Page 245 (12- 20 and 22, 23). Also, answer the following question:<br />
Why would we need to know the area of your living room or bedroom (so we could<br />
put in carpet or tile)?
Title: “How would you define area?”<br />
Objective: After this lesson is complete, students will have the general<br />
understanding that area is the number of units that fit within a figure. From these<br />
observations, students will be developing formulas based upon their discoveries.<br />
Procedure:<br />
We shall begin the class by discussing area. I will be asking the students such<br />
questions as, “How would you define area?”, “What kinds of things have area?”, and<br />
having the students distinguish the differences between perimeter, area and volume.<br />
I will ask the students to recall the definition of area that we discussed on day 1.<br />
After I feel that students generally have an idea of area, we shall begin the activity.<br />
Activity:<br />
1) Nailing Down Area: An introduction activity to the geoboard<br />
to help students to better understand the meaning of area.<br />
2) Students will get with a partner (the student sitting beside<br />
them), and each pair will be given a geoboard (including rubber<br />
bands), and geoboard paper (a piece for each student). As a<br />
class we will quickly review the rules of the geoboard.<br />
3) I will give the students about five minutes to “play” with the<br />
geoboards. This will allow to students to see how they can<br />
form different shapes and such with the rubber bands and the<br />
pegs.<br />
4) While the students are “playing” with the geoboards, I will be<br />
putting a few questions on the black board. These questions<br />
will consist of:<br />
‣ Create a triangle whose area is half of a unit.<br />
‣ Create quadrilaterals whose area is exactly 1 unit.<br />
‣ Create quadrilaterals/triangles whose area is larger than<br />
1 unit.<br />
5) The students will now begin to work on the questions that I<br />
have written on the board. The students will also begin to<br />
generate some formulas for the area of quadrilaterals. Once<br />
students have generated a formula for quadrilaterals I will then<br />
encourage them to use that information to develop a formula<br />
for triangles. As a class we will review the student’s<br />
observations and their formulas they have developed. I will be<br />
asking for volunteers to come to the overhead and present their<br />
findings.<br />
Conclusion: As a closing to this activity, I will be putting a picture of an<br />
arbitrary shape on the overhead. I will ask the students to tell me what the closed
shape area would be (I will present the size of the unit to the students as well). This<br />
closing part of the activity will allow students to get a better understanding that the<br />
“unit” can very in size depending upon the shape. This will prepare students to do<br />
their homework and for the upcoming activity.<br />
Homework Assignment: In the text book, page 245-248 (24-33,35-42).
Title: Flower Science<br />
Objective: Students will be applying all their knowledge of area and perimeter to a<br />
real life situation. From their knowledge of the calculator, they will be inputting<br />
their data and then graphing it as well.<br />
Procedure:<br />
Class will begin by reviewing the formulas that we went over yesterday and<br />
the previous days as well. The students will be expected to have a formula page<br />
within their notebook and this is where the formula for area (and perimeter) will be<br />
written out. We, as a class, will do a quick review of what we discovered yesterday<br />
(area formula for rectangles and triangles) and we will be writing them in their<br />
notebook, if they are not already in there.<br />
Activity:<br />
1) After we have discussed the formulas, I will be handing out the<br />
worksheet that the students will be doing in class today (see<br />
Appendix for the worksheet and its answers). Graph paper<br />
will also be handed out.<br />
2) After a quick overview of the worksheet, the students will begin<br />
their work. The students will be asked to complete the entire<br />
problem (all parts) and then asked to graph their findings. The<br />
directions of the activity are on the actual worksheet.<br />
3) For the rest of the class, the students will just follow the<br />
directions on the worksheet until it’s complete. There is a lot of<br />
data on the worksheet, and I do expect it to take two days. The<br />
first day (day 4) the students will be completing the chart. The<br />
chart is quite long and should take an entire class period.<br />
4) On day 5, I will be doing a quick review of inputting data into<br />
the calculator and then graphing it (the transparency will be<br />
used and can be found in the Appendix).<br />
Conclusion: At the end of day five, once the chart is complete and the data is<br />
graphed, the students will be asked to graph their findings (in more detail) on graph<br />
paper for homework. They can begin this once the worksheet is complete.<br />
Homework Assignment: Finish the worksheet, if it’s not already done,<br />
and graph Flower Science in greater detail.
Appendix<br />
Day 2<br />
This is my presentation of my apartment. This is what I will be expecting of the<br />
students. I’m not looking for the students to have tabs or buttons like mine does,<br />
but I do expect them to include the measurements (lengths, area and perimeters)<br />
of the following things:<br />
Bedrooms<br />
Bathrooms<br />
Closets<br />
Entire floor<br />
Kitchen, etc.<br />
This is the first picture that the students will see. This is the general outline of my<br />
apartment. For this picture, 1 cm= 1 foot. To see the actual measurements, just<br />
press the button.<br />
Show Distance Measurements<br />
A<br />
D<br />
H<br />
F<br />
E<br />
I<br />
C
After you have pressed the button, this is what you will see:<br />
Hide Distance Measurements<br />
A<br />
D<br />
AD = 17.99 cm<br />
DC = 12.04 cm<br />
AE = 12.01 cm<br />
H<br />
FH = 4.52 cm<br />
F<br />
IH = 6.03 cm<br />
E<br />
I<br />
C<br />
EC = 17.99 cm<br />
CI = 4.50 cm<br />
Now, we will press the tab (at the bottom of the sketch) to see the next page. Here,<br />
we have found the perimeter of the apartment:<br />
A<br />
D<br />
AD = 17.97 cm<br />
AE = 12.01 cm<br />
<strong>Perimeter</strong> of entire apartment = 59.95 cm<br />
DC = 12.01 cm<br />
DC = 12.01 cm<br />
H<br />
FH = 4.52 cm<br />
F<br />
IH = 6.03 cm<br />
E<br />
I<br />
C<br />
EC = 17.97 cm<br />
CI = 4.49 cm
If you click on the next tab (page 3), it will show us the perimeter of the bathroom:<br />
A<br />
D<br />
AD = 17.97 cm<br />
AE = 12.01 cm<br />
<strong>Perimeter</strong> of entire apartment = 59.95 cm<br />
DC = 12.01 cm<br />
DC = 12.01 cm<br />
H<br />
FH = 4.52 cm<br />
F<br />
IH = 6.03 cm<br />
<strong>Perimeter</strong> of Bathroom = 21.08 cm<br />
E<br />
I<br />
C<br />
EC = 17.97 cm<br />
CI = 4.49 cm<br />
The next tab (page 4) will then show you the area of the entire apartment:<br />
A<br />
D<br />
AD = 17.97 cm<br />
AE = 12.01 cm<br />
<strong>Perimeter</strong> of entire apartment = 59.95 cm<br />
DC = 12.01 cm<br />
DC = 12.01 cm<br />
Area of Entire Apartment = 215.80 cm 2<br />
H<br />
FH = 4.52 cm<br />
F<br />
IH = 6.03 cm<br />
<strong>Perimeter</strong> of Bathroom = 21.08 cm<br />
E<br />
I<br />
C<br />
EC = 17.97 cm<br />
CI = 4.49 cm
Lastly, tab 5 will show you the area of the bathroom:<br />
A<br />
D<br />
AD = 17.97 cm<br />
AE = 12.01 cm<br />
<strong>Perimeter</strong> of entire apartment = 59.95 cm<br />
DC = 12.01 cm<br />
DC = 12.01 cm<br />
Area of Entire Apartment = 215.80 cm 2<br />
H<br />
FH = 4.52 cm<br />
F<br />
IH = 6.03 cm<br />
<strong>Perimeter</strong> of Bathroom = 21.08 cm<br />
Area of Bathroom = 27.29 cm 2<br />
E<br />
I<br />
C<br />
EC = 17.97 cm<br />
CI = 4.49 cm<br />
This is the end of my apartment presentation.
Worksheet for Day 4-5, the answers are provided in RED.<br />
Appendix<br />
Flower Science<br />
Name: _______________<br />
Jon has 32 yards of fencing. Jon wants to make a garden for his mom for her<br />
birthday. He knows that if he doesn’t put a fence around the garden, that the deer<br />
will eat all of her tomatoes. Jon wants to make a rectangular garden for his mother.<br />
What are the dimensions of the garden to result in the maximum area?<br />
Draw some possible rectangular gardens and find their area.<br />
Dimensions<br />
(yards)<br />
Students will be asked to generate a chart like the following one:<br />
Base<br />
Height<br />
(16-b=H)<br />
Amount of<br />
fencing<br />
(perimeter)<br />
Area<br />
(square yards)<br />
15 x 1 1 15 32 yards 15<br />
14 x 2 2 14 32 yards 28<br />
13 x 3 3 13 32 yards 39<br />
12 x 4 4 12 32 yards 48<br />
11 x 5 5 11 32 yards 55<br />
<strong>10</strong> x 6 6 <strong>10</strong> 32 yards 60<br />
9 x 7 7 9 32 yards 63<br />
8 x 8 8 8 32 yards 64<br />
7 x 9 9 7 32 yards 63<br />
6 x <strong>10</strong> <strong>10</strong> 6 32 yards 60<br />
5 x 11 11 5 32 yards 55<br />
4 x 12 12 4 32 yards 48<br />
3 x 13 13 3 32 yards 39<br />
2 x 14 14 2 32 yards 28<br />
1 x 15 15 1 32 yards 15<br />
After the chart is complete, make a graph of it (in your calculator). Graph the values<br />
of the base on the horizontal axis and the values of the area on the vertical axis (see<br />
graphing transparency for directions on inputting lists into the calculator and then<br />
graphing them).
Answer the following questions:<br />
1. Where does the maximum area occur? The maximum area occurs when the<br />
base is 8 and so is the height. The maximum area is 64 square yards.<br />
2. To have the maximum area for his mother’s garden, what should his<br />
dimensions be? 8 x 8.<br />
3. If you decided to put the garden along the garage, so you would only need to<br />
fence three sides, how would this affect your area? It would make my area<br />
bigger because I could use the same amount of fencing but I would only need<br />
it for three sides instead of four.<br />
4. Jon wants to buy his mother some seeds so she can plant them in her garden<br />
as well. One package of seeds costs $1.59 and covers three square yards.<br />
How many packets of seeds will he need and how much will it cost him? He<br />
will need 22 packets, because three goes into 64 21.33 times, and we round up<br />
so he will have enough seed. He will be spending $34.98 on seeds for his<br />
mother’s garden. We got the price by multiplying 22 times $1.59.<br />
For homework: Draw the graph on graph paper in more detail. Be sure to include labels and<br />
titles.
Appendix<br />
Transparency for Day 5 (Steps on inputting the chart into their calculator and creating a graph<br />
of the information they gathered- what the students will actually see on their calculator is<br />
provided).<br />
Using the TI-84 we begin inputting our data into our calculator by naming our list 1<br />
our base column and our list 2, our area column.<br />
Step 1: Go to List and hit ENTER(or hit 1 on the key pad).<br />
Step 2: This will bring up a screen to enter your data into list 1, list 2, etc. We will<br />
begin by highlighting list 1, hitting clear and then enter. This will clear out any<br />
information that is already in list 1. We should do the same for list 2 as well.<br />
Step 3: Begin to type your data into list 1 (your base answers will be entered here).<br />
Simply hit enter after each entry. Once you have done this, do the same for list 2 but<br />
enter the area answers here. Be sure the correct area matches up with right base.
Step 5: Now, choose Stat Plot.<br />
Step 6: Choose Plot 1 by hitting enter. Highlight ON, select the desired graph, and<br />
a marker of your choice.<br />
Step 7: Now, choose Zoom, and highlight 9: ZoomStat.<br />
Step 8: Now, simply hit enter, and the graph will appear on your screen.