Model 11 Plus Syringe Pump Manual - Instech Laboratories, Inc.
Model 11 Plus Syringe Pump Manual - Instech Laboratories, Inc.
Model 11 Plus Syringe Pump Manual - Instech Laboratories, Inc.

You also want an ePaper? Increase the reach of your titles
YUMPU automatically turns print PDFs into web optimized ePapers that Google loves.
7<br />
Installation<br />
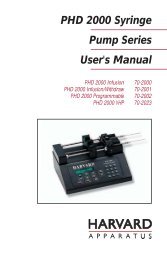
H a r v a r d A p p a r a t u s P u m p '<strong>11</strong>' P l u s S y r i n g e P u m p<br />
Initial Setup<br />
1. Read the manual to become familiar with all features and functions of the <strong>Pump</strong><br />
'<strong>11</strong>' <strong>Plus</strong>.<br />
2. Connect the external DC Power Supply and line cord to the pump and main<br />
supply.<br />
3. Turn on main power switch located on the rear panel. The display will now<br />
illuminate indicating that the power connections are correct. The display will<br />
indicate POWER FAIL. (this is normal as the pump indicates on the display if<br />
power was disrupted since last use.)<br />
Location Requirements for the <strong>Syringe</strong> <strong>Pump</strong><br />
• A sturdy, level, clean and dry surface<br />
• Minimum of one inch (2cm) clearance around the pump<br />
• Appropriate environmental conditions<br />
• A well ventilated room<br />
Loading the <strong>Syringe</strong> & Limit Switch Calibration<br />
1. Release the <strong>Syringe</strong> pusher block (4) by pressing the bronze button (3) on the side<br />
of the pusher.<br />
2. While holding the bronze button ‘in’, slide the pusher to the right.<br />
3. Raise the spring loaded syringe retainer (1) and swing it out of the way.<br />
4. Lay the loaded syringe in the ‘V’ shaped syringe block (5).<br />
5. Swing the syringe retainer (1) so it holds the syringe in place.<br />
6. Move the pusher so it makes contact with the syringe plunger.<br />
7. Adjust pusher block Thumbscrews & bracket (2) until the syringe plunger is<br />
completely captured.<br />
8. Tighten down thumbscrews on syringe block bracket (6) so that it captures<br />
flanges on syringe barrel.<br />
9. The Infuse limit switch can be easily adjusted by loosening the thumbscrew (7)<br />
on the pusher block and sliding the dowel pin in or out to the desired position.<br />
Tighten thumbscrew into place when switch is set.<br />
10. For units with RS232 option, the Withdraw limit switch is adjusted via the shaft<br />
collar (8). Slide the collar to the desired position, and use the hex key provided to<br />
lock it into place.