
Create successful ePaper yourself
Turn your PDF publications into a flip-book with our unique Google optimized e-Paper software.
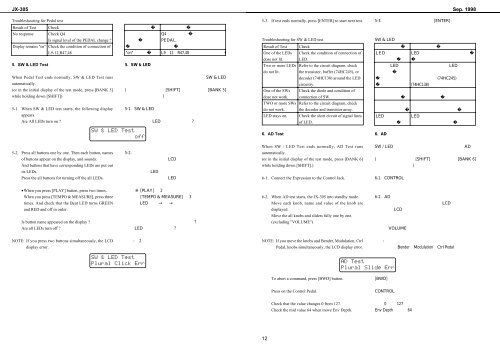
JX-305 Sep. 1998<br />
Troubleshooting for Pedal test<br />
<br />
5-3. If test ends normally, press [ENTER] to start next test.<br />
<br />
Result of Test<br />
Check<br />
<br />
<br />
<br />
No response<br />
Check Q4<br />
Is signal level of the PEDAL change ?<br />
<br />
<br />
<br />
<br />
Troubleshooting for SW & LED test<br />
<br />
Display remains "on"<br />
Check the condition of connection of<br />
L9-12,R47,48<br />
<br />
<br />
<br />
<br />
Result of Test<br />
One of the LEDs<br />
Check<br />
Check the condition of connection of<br />
<br />
<br />
<br />
<br />
5. SW & LED Test<br />
<br />
dose not lit.<br />
Two or more LEDs<br />
LED.<br />
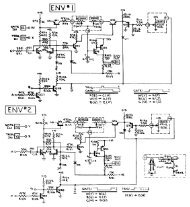
Refer to the circuit diagram, check<br />
<br />
<br />
<br />
<br />
When Pedal Test ends normally, SW & LED Test runs<br />
automatically.<br />
(or in the initial display of the test mode, press [BANK 5]<br />
while holding down [SHIFT])<br />
5-1. When SW & LED test starts, the following display<br />
appears.<br />
Are All LEDs turn on ?<br />
<br />
<br />
<br />
<br />
<br />
<br />
<br />
do not lit.<br />
One of the SWs<br />
dose not work.<br />
TWO or more SWs<br />
do not work.<br />
LED stays on.<br />
the transistor, buffer (74HC245), or<br />
decoder (74HC138) around the LED<br />
circuitry.<br />
Check the diode and condition of<br />
connection of SW.<br />
Refer to the circuit diagram, check<br />
the decoder and transistor array.<br />
Check the short circuit of signal lines<br />
of LED.<br />
<br />
<br />
<br />
<br />
<br />
<br />
<br />
<br />
<br />
<br />
<br />
6. AD Test<br />
<br />
When SW / LED Test ends normally, AD Test runs<br />
<br />
5-2. Press all buttons one by one. Then each button, names<br />
<br />
automatically.<br />
<br />
of buttons appear on the display, and sounds.<br />
<br />
(or in the initial display of the test mode, press [BANK 6]<br />
<br />
And buttons that have corresponding LEDs are put out<br />
<br />
while holding down [SHIFT].)<br />
<br />
its LEDs.<br />
<br />
Press the all buttons for turning off the all LEDs.<br />
<br />
6-1. Connect the Expression to the Control Jack.<br />
<br />
<br />
<br />
•When you press [PLAY] button, press two times.<br />
<br />
When you press [TEMPO & MEASURE], press three<br />
<br />
6-2. When AD test starts, the JX-305 into standby mode.<br />
<br />
times. And check that the Beat LED turns GREEN<br />
<br />
Move each knob, name and value of the knob are<br />
<br />
and RED and off in order.<br />
<br />
displayed.<br />
<br />
Move the all knobs and sliders fully one by one.<br />
<br />
Is button name appeared on the display ?<br />
<br />
(excluding "VOLUME")<br />
<br />
Are all LEDs turn off ?<br />
<br />
<br />
NOTE: If you press two buttons simultaneously, the LCD<br />
<br />
<br />
NOTE: If you move the knobs and Bender, Modulation, Ctrl<br />
<br />
<br />
display error.<br />
Pedal, knobs simultaneously, the LCD display error.<br />
<br />
<br />
To abort a command, press [BWD] button.<br />
<br />
Press on the Control Pedal.<br />
<br />
Check that the value changes 0 from 127.<br />
Check the mid value 64 when move Env Depth.<br />
<br />
<br />
12