LP 1.6 Series - Kilotech
LP 1.6 Series - Kilotech
LP 1.6 Series - Kilotech

You also want an ePaper? Increase the reach of your titles
YUMPU automatically turns print PDFs into web optimized ePapers that Google loves.
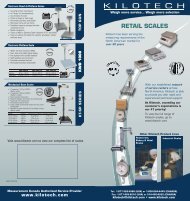
Label Printing Scale<br />
<strong>LP</strong> <strong>1.6</strong> <strong>Series</strong><br />
OWNER’S MANUAL
CONTENTS<br />
PRECAUTIONS 4<br />
1. Installation Procedures 6<br />
1.1 Cautions 6<br />
1.2 Assembling the Display Pole 6<br />
1.3 Installing the Label Roll 9<br />
2. Keypad & Display 11<br />
2.1 Numeric Keypad 11<br />
2.2 PLU Keypad 12<br />
2.3. Displays 14<br />
2.3.1 Weight Display 14<br />
2.3.2 Unit Price Display 14<br />
2.3.3 Total Price Display 14<br />
2.4. Printer Mechanism 14<br />
3. Operation 16<br />
3.1 REG mode Operations 16<br />
3.1.1 Simple Weighing 16<br />
3.1.2 How to Use TARE 17<br />
3.1.3 Add-up Sales 17<br />
3.1.4 How to Use PAY Key 18<br />
3.1.5 How to Use FOR Key 19<br />
3.<strong>1.6</strong> Multiple Labels 20<br />
3.1.7 Auto Printing (AUTO MODE) 21<br />
4. PROGRAM Mode 22<br />
4.1 System Maps 22<br />
4.2 PLU Programming 23<br />
4.3 Preset keys Programming 27<br />
4.4 Message (Ingredients) Programming 28<br />
4.5 Programming the Head Data 29<br />
4.6 Programming the Shop Data 30<br />
4.7 SET 32<br />
4.7.1 Programming the Date (SET #1) 34<br />
4.7.2 Programming the Time (SET #2) 35<br />
4.7.3 Programming the Department Number (SET #3) 36<br />
4.7.4 Programming the Label (SET #4) 37<br />
4.7.5 Programming the Adjust Number (SET #5) 42<br />
4.7.6 Programming the Printing Information (SET #6) 43<br />
4.7.7 Programming the Auto Print Function (SET #7) 45<br />
4.7.8 Programming Address (SET #8) 46<br />
4.7.9 Programming Baud Rate (SET #9) 47<br />
4.8 INT(Initialize PLU and MSG data) 48<br />
4.9 Password 49<br />
5. ACCOUNT Mode 50<br />
5.1 System Maps 50<br />
5.2 Print Report 51<br />
5.2.1 Grand Total 51<br />
5.2.2 All PLU 52<br />
5.2.3 Individual PLU 52<br />
5.2.4 Non-PLU 53<br />
5.3 Clearing Sales Data 54<br />
5.3.1 Grand Total 54<br />
5.3.2 All PLU 55<br />
5.3.3 Non- PLU 55<br />
5.3.4 All 56<br />
5.4 Printhead Check (CHESS) 57<br />
6. Error Messages 58<br />
7. Specifications 59<br />
APPENDIX 60
4<br />
PRECAUTIONS WARNING<br />
Precautions when installing the scale. To ensure that you get the most from your scale,<br />
please follow these instruction.<br />
Do not disassemble the scale.<br />
When any damage or defect occurs,<br />
contact your CAS<br />
authorized dealer<br />
immediately for<br />
proper repair.<br />
Do not pull the plug by its cord when<br />
unplugging. Damaged cord could cause<br />
electric shock or fire.<br />
Avoid placing the scale near heater<br />
or in direct sunlight.<br />
Warning<br />
Do not overload beyond the maximum<br />
weight limit.<br />
To prevent from fire occurring, Do not<br />
place or use the scale near flammable or<br />
corrosive gas.<br />
Insert plug firmly to wall outlet to<br />
prevent electric shock.<br />
Scale must be grounded to minimize<br />
electricity static. This will minimize<br />
defect or electric shock.<br />
To reduce electric shock or incorrect<br />
reading, Do not spill water on the scale<br />
or place it in humid condition.<br />
Make sure to plug your scale into the proper power outlet. For maximum performance,<br />
plug into a power outlet 30 minutes before the usage for warm up.<br />
For consistent and accurate reading,<br />
maintain periodical check by your<br />
CAS authorized dealer.<br />
Take the battery out when scale is not in<br />
use for long time. Leakage from the<br />
batteries is hazardous.<br />
Keep the scale away from other<br />
electromagnetic generating devices.<br />
This may interfere with accurate<br />
reading.<br />
Attention<br />
Avoid sudden shock to the scale.<br />
Internal mechanism could be damaged.<br />
Place the scale on firm and temperature<br />
consistent environment.<br />
Grab on the bottom of the scale when<br />
moving. Do not hold by the platter.<br />
By adjusting 4 corners of the scale, set<br />
the scale even using the built in scale<br />
leveling indicator.<br />
Note: This scale uses a rechargeable battery to retain programmed information. While the scale is ON or in use it keeps the battery<br />
charged. The battery must be fully charged before turning power OFF or memory contents can be lost. It takes approximately 48<br />
hours to fully charge the battery from complete discharge. Even though the scale’s battery will most likely not be completely<br />
discharged when you receive the scale, you should still charge it for 48 hours. Once fully charged, the battery can retain<br />
programmed information for at least 6 months with power OFF. To ensure memory contents do one of the following:<br />
Leave power ON for at least 2 days before programming.<br />
OR<br />
Do not turn OFF power for at least 2 days after programming.<br />
5
6<br />
1. Installation Procedures<br />
1.1 Cautions<br />
A) Environment : This scale must be installed in a dry and liquid free environment.<br />
B) Location : This scale must be placed on a flat and stable surface. Please keep the scale<br />
away from oscillating fans, ventilation systems, or drafts as these air disturbances can be<br />
picked-up by the scale and may cause incorrect weight readings.<br />
C) Leveling : If the scale is not properly level, please adjust the 4 legs at the bottom of the<br />
scale (turn legs clockwise or counter-clockwise) so as to center the bubble of the leveling<br />
gauge inside the indicated circle. (See below Fig.)<br />
LEVELING GAUGE<br />
NOTE : Scale is to be used in-doors ONLY<br />
D) The socket-outlet shall be installed near the equipment and shall be easily accessible.<br />
E) Danger of explosion if battery is incorrectly replaced. Replace only with the same or<br />
equivalent type recommended by the manufacturer. Dispose of used batteries according to<br />
the manufacturer instructions.<br />
1.2 Assembling the Display Pole<br />
If your scale is the “Pole” type then you must follow this section and then continue to the<br />
next. However, if your scale is the “Non-Pole” type then you may skip this section and go on<br />
to the next. To begin installing the Pole display, make sure your scale comes with the display<br />
bracket & the pole display. (See below fig.)<br />
Feed the pole display connectors down the display bracket and up through the hole in the<br />
scale under-body. Attach the bracket cover to the display pole and then attach the bracket<br />
cover to the bracket itself.(See below fig.)<br />
Remove the platter from the platform. Open the printer side cover and then remove the three<br />
rear cover screws. Feed the connectors in through the printer bay into the scale. (See below fig.)<br />
7
8<br />
Tilt the rear cover towards the back of the scale and connect the three connectors to their<br />
adequate receptacles on the rear display P.C.B (See below fig.)<br />
Place the rear cover back to its original position and re-attach the three screws that hold it in<br />
place. The pole display installation is now complete.<br />
This display can turn about 180°. However, if the display head does not turn freely, please<br />
loosen the twist lock nut on the display pole. (See below fig.)<br />
1.2 Installing the Label Roll<br />
To install the label roll at any time you must follow the directions in this section.<br />
Remove the printer front-cover and the printer side-cover. As you can see there is detailed<br />
diagram affixed onto the inside of the printer side-cover. Use this diagram (or this manual) for<br />
future reference on how to properly install the label roll. (See below fig.)<br />
Find and remove the Label Roll Pin and the Pick-up Pin. Also find the Print Head Release<br />
Lever and lift it upwards. Release the Print Head Release Lever and the print head will<br />
automatically lift up. If there were any labels previously installed please remove all the<br />
collected backing paper on the pick-up spool. Also remove the cardboard paper roll core if<br />
there was a label roll previously installed. (See below fig.)<br />
9
10<br />
Take the new roll of labels and find the ending. Peel-off and discard about 3 labels. Place the<br />
label in the scale and thread the backing through the appropriate places.<br />
Please view the checkpoints on the diagram. Feed the backing paper over the Paper Pressure<br />
Shaft lifting the Pressure Plate in order to place backing between the two ( ); Feed the<br />
backing paper between the two green Sensor Caps ( ); under the Label Guide Roller making<br />
sure that the backing paper lies between the two washers on the Label Guide Roller ( ); feed<br />
the backing over the red Rubber Roller and under the Print Head being careful not to touch<br />
the underside of the Print Head ( ); over the Peel-off Bar ( ); under the Return roller( );<br />
feed the backing under and around the Pick Up Spool( ).<br />
Now Attach the Pick Up Spool Pin into the spool and turn it slowly counterclockwise in order<br />
to tighten the backing paper.<br />
Push the Print Head down in order to lock it back in place( ).<br />
You will feel and hear it lock in place. Replace the printer covers. You have completed the<br />
label roll installation. (See below fig.)<br />
2. Keypad & Display<br />
2.1 Numeric Keypad<br />
The Numeric Keypad is used to enter all numerical data in PGM mode. In REG Mode, the<br />
Numeric Keypad is used to enter prices, quantities, and counts. (See below fig.)<br />
KEY Function<br />
Numeric Keys used to enter numerical data.<br />
Clear Key used to clear error conditions and bring displays to their initial state.<br />
Used to enter by piece sales, i.e. 3 Pieces FOR $1.00.<br />
Price Look Up Key. This key is used to “call-up” PLU’s by their numbers.<br />
The multiple label Key. This key is used to generate more than one label with the same data.<br />
This is the print Key. It is used to manually print out a label in REG mode. It also works as an<br />
“ENTER” key in PGM mode.<br />
This is the FEED Key. It is used to feed a blank label through the printer mechanism.<br />
Used to cancel account data.<br />
Used to calculate change after adding several transactions.<br />
Used to add several transactions<br />
When ON, this function will not let the unit price or tare weight of a PLU automatically clear<br />
even after you remove the item from the platter. The function acts like a toggle switch : you<br />
will know the function is ON by the indicator lamp in the Unit Price display.<br />
Notice : The PAY and + Keys may not be legal in some countries.<br />
11
12<br />
2.2 PLU Keypad<br />
The PLU Keypad is used to enter alpha-numerical data. To use the keypad for programming<br />
you must remove the pull-out sheet. To use the PLU Keypad in REG mode, you can write the<br />
name and number of the PLU’s on the corresponding speed keys on the pull-out sheet. All<br />
commodity names, message data, and store name and address are typed using these keys. The<br />
scale automatically programs the PLU Keypad to be PLU 1 to 54. A speed key’s number is<br />
shown circled on the lower left-hand side of each key.<br />
KEY Functions<br />
This key displays the time and date in REG mode.<br />
Used to go to PROGRAM mode and ACC mode.<br />
This key works like a Caps Lock key on a computer. It is used to type capital letters. You can<br />
tell if the SHIFT function is active by an indicator lamp in the UNIT PRICE display.<br />
This is the Left Arrow Key. It is used to scroll the cursor to the left when programming alphanumeric<br />
data.<br />
This is the Right Arrow Key. It is used to scroll the cursor to the right when programming<br />
alpha-numeric data.<br />
This is the Up Arrow Key. It is used to scroll from Line to Line when programming commodity<br />
names, message data, or store name and address. It is also used to move up the System<br />
Maps. In REG mode, it is used to go to AUTO mode.<br />
This is the Down Arrow Key. It is used to scroll from Line to Line when programming<br />
commodity names, message data, or store name and address. It is also used to move down<br />
the System Maps.<br />
This key is used to set the Zero Point to 0.00.<br />
Used to clear Tare entries and to enter Tare weight.<br />
These keys are used to enter numbers as “text” for a commodity name, message data, or<br />
store name and address. The symbol keys are also used to type text.<br />
These are the Letter Keys. They are used to type in text.<br />
This is the Space Key. It functions the same as a space bar on a computer keyboard.<br />
This key is the ENTER Key. It functions just like an Enter Key on a computer. It is used to go<br />
to Line 2 or the next Line after typing some text.<br />
PGM mode is used to set all of the scale's functions and PLUs.<br />
REG mode is used for operating the scale.<br />
ACC is used to generate sales reports.<br />
In AUTO mode labels are issued when the weight is stabilized and greater than the weight that<br />
you set in PROGRAM mode. The use of PRT/* key will also generate a label.<br />
13
14<br />
2.3. Displays<br />
2.3.1 Weight Display<br />
The WEIGHT display shows the weight of an item on the platter whether it be positive or<br />
negative and within the range of the scale. The WEIGHT display also indicates if the scale is<br />
at ZERO or if there is a tare entered into the scale by way of a ZERO and NET lamps.<br />
2.3.2 Unit Price Display<br />
The UNIT PRICE display shows the price per pound of an item to be weighed. It also<br />
indicates whether the SAVE function is active by way to the indicator lamp. The UNIT<br />
PRICE display, in program mode only, indicates the condition of the SHIFT lamp. If the<br />
SHIFT lamp is OFF, you can type in capital letters, but if the SHIFT lamp is ON, you can<br />
only type lowercase letters. Finally, the UNIT PRICE display also indicates if the scale is in<br />
AUTO mode by way of an indicator lamp.<br />
2.3.3 Total Price Display<br />
The TOTAL PRICE display shows the unit price multiplied by the weight to give the total<br />
price.<br />
2.4. Printer Mechanism<br />
It is very important that you be familiar with the printer mechanism. Every time your labels<br />
run out you will be required to install the label roll and you will need to know the general<br />
parts of the printer.<br />
Front View: (With Printer Front Cover removed)<br />
LABEL PEEL SENSOR : This sensor is used in conjunction with IR LED to detect if there is a<br />
printed label waiting to be taken.<br />
THERMAL PRINTHEAD : The Thermal Printhead is the part that does the actual printing. The<br />
printhead is VERY sensitive! Please keep water and other liquids AWAY from the printhead.<br />
DO NOT TOUCH the underside of the printhead. If labels become jammed and stuck to the<br />
printhead, please call a qualified CAS Dealer to solve this problem. When finished installing<br />
labels, it is necessary to push down on the TOP of the printhead to lock it in place.<br />
RED RUBBER ROLLER : This is the part that the printhead press the labels against in order to<br />
print. Please do not scratch or harm in any way this roller. Any damage to the roller can result in<br />
bad print or lower quality print.<br />
PEEL-OFF BAR : This part causes the labels to peel-off their backing paper when the paper slides<br />
over it. Always install the labels OVER the Peel-Off Bar.<br />
IR LED : This part is used in conjunction with the Label Peel Sensor to detect if there is a printed<br />
label waiting to be taken. (Infra-Red Light Emiting Diode)<br />
NOTE : Always replace the Printer Side Cover and the Printer Front Cover to ensure proper<br />
operation of the scale. Failure to do so can result in printer failure. Also, failure to comply with<br />
any or all of the guidelines for proper maintenance can adversely affect your scales warrantee.<br />
15
16<br />
3. Operation<br />
3.1 REG mode Operations<br />
3.1.1 Simple Weighing<br />
There are two types of sales you can generate; PLU Sales and NON-PLU Sales. PLU Sales<br />
are sales based on a programmed PLU whereas Non-PLU Sales are sales you generate<br />
without calling up a PLU.<br />
PLU Sales :<br />
To call up a PLU, simply type the PLU’s number on the Numeric keypad and then press the<br />
PLU key. Another way to call up a PLU is to simply press 1 of 54 preset keys which are set to<br />
a particular PLU.<br />
Press speed key or press 1 key on the numeric keypad<br />
and PLU key.<br />
NON-PLU Sales:<br />
Put an item on the<br />
platter.<br />
Enter a unit price. Place the commodity<br />
on the platter.<br />
Press the PRT/* key.<br />
Press the PRT/* key.<br />
3.1.2 How to Use TARE<br />
Known Tare:<br />
If you know the weight of container you may use this method to enter the tare.<br />
For example, if the weight of the container is 10g press the 1, 0, and TARE key. Call up a<br />
PLU and place a commodity then you will see the net weight.<br />
Unknown Tare:<br />
If you do not know the weight of the container you may use this method. Place the container<br />
on the platter and press the TARE key. Call up a PLU and place the commodity on the platter<br />
then you will see the net weight.<br />
Releasing the Tare<br />
To release the tare, remove all items from the platter and then press the TARE key.<br />
3.1.3 Add-up Sales<br />
Call up a PLU and put an item on the platter.<br />
Remove an item<br />
from the platter<br />
If you want to add up this item.<br />
press the + key. You will have a label automatically.<br />
You can add up non-PLU item. Enter a unit price and place an item on the<br />
platter. If you want to add up.<br />
press the + key.<br />
17
18<br />
Call up a PLU and put an item on the platter. If you want to add up.<br />
press the + key.<br />
3.1.4 How to Use PAY Key<br />
Call up a PLU and put an item on the platter. If you want to add up.<br />
press the + key.<br />
Call up a PLU and put an item on the platter. If you do not want to add up,<br />
press the PRT/* key instead of + key.<br />
NOTE : If you made a incorrect label printed you can cancel it in sales report.<br />
Press COR key after printing label then you will see “dELEtE”.<br />
If you want to have a total<br />
report label.<br />
press the PRT/* key.<br />
Press the PAY key to calculate your<br />
changes after add-up sales and<br />
enter customer payment. Ex)<br />
$90.00, type 9,0,0,0.<br />
Press the PRT/* key. You will see changes on the display.<br />
(If you press the PRT/* key again, you will have a total price label.)<br />
3.1.5 How to Use FOR Key<br />
Call up a PLU or enter unit price of non PLU. Press the FOR key. Press 5 key on the<br />
numeric keypad.<br />
Press the PRT/* key.<br />
19
20<br />
3.<strong>1.6</strong> Multiple Labels<br />
You can generate identical labels by using multiple label printing. To use multiple label<br />
printing, and press the X key, enter the quantity of duplicate labels you need, and then press<br />
the PRT/* key.<br />
Enter the quantity of duplicate labels you need.<br />
Press the PRT/* key.<br />
Call up a PLU. Press X Key<br />
3.1.7 Auto Printing (AUTO MODE)<br />
In AUTO mode, labels are issued when the weight is stabilized and greater than 100g. The<br />
use of PRT/* key will also generate a label.<br />
How to go to AUTO mode : Press the key. If the scale is in AUTO mode AUTO lamp is<br />
ON in the UNIT PRICE display. To finish AUTO mode, press the key again.<br />
Press speed key or press 1 key on the<br />
numeric keypad and press PLU key.<br />
Put an item on the<br />
platter.<br />
A label will be issued<br />
automatically.<br />
21
22<br />
4. PROGRAM Mode<br />
4.1 System Maps<br />
To go to PROGRAM mode, press 10000 by using numeric keys and VOID key.<br />
You can press the key or key to go up and down the Main Menu in PROGRAM mode<br />
ONLY if the UNIT PRICE and TOTAL PRICE displays are BLANK! The same rule is<br />
applied to ACC mode.<br />
If you want to use the key or key to go up and down a menu and the UNIT PRICE and<br />
TOTAL PRICE displays are NOT blank, you must first press the PRT/* key. After the UNIT<br />
PRICE and TOTAL PRICE displays are blank, You can use the key or keys.<br />
4.2 PLU Programming<br />
PLU means Price Look Up. PLUs are used to store the price, name, and other data of items<br />
being sold.<br />
Every PLU has seven data fields: Item Code, Name, Message no. Unit price,<br />
Shelf Life, Tare, Group code.<br />
How to program PLU<br />
23
24<br />
1) To go to PROGRAM mode, press 10000 by using numeric keys and VOID key.<br />
2) The display shows: “PLU ”.<br />
3) Press PRT/* key. The display shows: “PLUno 4000”.<br />
The number in the UNIT PRICE display indicates the amount of empty PLUs ready to be<br />
programmed.<br />
4) Type a PLU number you wish to program. Remember, this number must be<br />
between 1 and 4000.<br />
5) Press PRT/* key. The display shows “iCodE”.<br />
Press PRT/* key. (If you do not wish to program an item code, press the key) The<br />
display shows “iCodE EntEr 0”.<br />
6) Type the item code number. The item code can be from 1 to 999999. If you enter 0, item<br />
code will not be printed on the label. (This number is used by the scanning device in order<br />
to reference PLU. In most cases, the item code is programmed to be the same as the PLU<br />
number). Press PRT/* key when you’re done.<br />
7) The display shows “nAME”(The name field is composed of 2 lines of text. Each line can<br />
contain up to 30 characters. Name is commonly referred to as commodity name.)<br />
8) Press PRT/* key. (If you do not wish to program name, press the key) The display shows<br />
“nAME 01.01”. The numbers in the unit price display represent the line number and<br />
character number on which your cursor is at. The number to the left of the decimal is the<br />
line number you are on(01 to 02). The number to the right is the number of the character<br />
position on which you are about to type(01 to 30).<br />
9) Now type in the first line of text using the Alpha-numeric keypad on the left side. If you<br />
want to type second line of text, press ENTER key. (To skip, press PRT/* key.)<br />
25
26<br />
10) The display shows “nAME 02.01 ”.<br />
Type in the second line of name.<br />
11) Press PRT/* key.<br />
12) The display shows “MSGno ”.<br />
13) Press PRT/* key. (If you do not wish to program the price, please press key)<br />
The display shows “MSGno EntEr”.<br />
14) Type the message number using the Numeric keypad. The message number can be from 0<br />
to 1000. Press the PRT/* key when finished.<br />
15) The display shows “PriCE ”.<br />
16) Press PRT/* key. (If you do not wish to program the price, please press key) The<br />
display shows “PriCE EntEr 0.00”.<br />
17) Type the price amount using the Numeric keypad. The price can be from 0 to 999999.<br />
Press PRT/* key when finished.<br />
18) The display shows “LiFE”. (The number in this field will represent the amount of days<br />
this commodity can be sold by. It can be from 0 to 365.)<br />
19) Press PRT/* key. (If you do not wish to program the shelf life, please press key) The<br />
display shows “LiFE EntEr 0”. Type the shelf life using the Numeric keypad. The shelf<br />
life can be from 0 to 365 which represent the number of days after the Packed On Date.<br />
This is how the Sell By Date is calculated: Packed On Date + Shelf Life = Sell By Date.<br />
20) Press the PRT/* key.<br />
21) The display shows “tArE”. (Tare is used to store the weight of the container to be used<br />
with this PLU. The tare is subtracted from the gross weight of the item at the time of<br />
weighing.)<br />
22) Press PRT/* key. (If you do not want a tare, please press key) The display shows “tArE<br />
EntEr 0.00”. Type the tare value you want on the Numeric keypad. Press the PRT/* key.<br />
23) The display shows “GCodE”. (The group code is a number from 0 to 99 that is printed on<br />
the label. It can be used to group PLUs in to sections, for example: all beef PLUs are<br />
group code 10, all poultry PLUs are group code 20, etc.. )<br />
24) Press PRT/* key (If you do not want to enter a group code, press key) The display<br />
shows “GCodE EntEr 0”. Type the group code number you want on the Numeric keypad.<br />
Press PRT/* key.<br />
25) The display shows “SAvE”. If you want to save this PLU to memory, press the PRT/*<br />
key. The display shows “PLU”.<br />
(If you do not want to save this PLU to memory press key and the display shows<br />
“ESC”. Press the PRT/* key to exit without saving this PLU.<br />
26) If you wish to program another PLU, go back to step 2.<br />
If you wish to finish PLU programming, press the C key.<br />
4.3 Preset keys Programming<br />
The preset keys are used to quickly access a PLU with only one key press. For example, if<br />
you had preset key programmed to call up PLU number 100, all you need to press is preset<br />
key . When you initialize the scale (it automatically sets up all the preset keys as: preset =<br />
PLU 1, preset = PLU 2... preset 54 = PLU 54.<br />
1) To go to PROGRAM mode press 10000 by using numeric keys and VOID key. And then<br />
press key.<br />
2) The display shows “PrSEt”.<br />
3) Press PRT/* key.<br />
27
28<br />
4) The display shows “S kEy 0”. Press the Preset key (1 to 54) you wish to program. The<br />
number in the UNIT PRICE display is the number of the Preset key you have just pressed.<br />
The number in the TOTAL PRICE display is the PLU number that has been assigned to<br />
that Preset key.<br />
5) Type the number of the PLU you wish to assign to that preset key. Press the PRT/* key<br />
when done.<br />
6) If you want to program another preset key go back to step 2). If you wish to finish<br />
PROGRAM mode press the C key<br />
4.4 Message (Ingredients) Programming<br />
<strong>LP</strong> <strong>1.6</strong> is able to have maximum 1000 messages. Each message has up to 8 lines of text and<br />
each line contains up to 50 characters.<br />
1) To go to PROGRAM mode press 10000 by using numeric keys and VOID key.<br />
2) Press key two times. The display shows “MSG”.<br />
3) Press PRT/* key. The display shows “MSG 1000 ”.<br />
4) Type the number of the MSG you wish to program or edit using the Numeric Keypad.<br />
Remember, the number can be from 1 to 1000. If you make any mistakes press the C key<br />
and repeat step 4.<br />
5) Press the PRT/* key. The display shows : “MSG 01.01”. You may now begin typing your<br />
MSG data using your Alpha-numeric keypad. Each message has 8 lines of text and each<br />
line contains 50 characters.<br />
After you type each line press ENTER key when you are done typing a line. If you wish to<br />
skip a line press the key. If you want to go up a line, press the key. Press key or<br />
key to scroll left or right on a line of text. As you type you will see the text scroll in the<br />
TOTAL PRICE display.<br />
6) When you are done press PRT/* key, the display shows “SAvE” and then press the PRT/*<br />
key. If you do not want to save it press key, the display shows “ESC” and then press the<br />
PRT/* key. If you want to edit it press key until the display shows “Edit” and then press<br />
the PRT/* key.<br />
7) If you wish to program another MSG go back to step 2). If you wish to finish PROGRAM<br />
mode press the C key<br />
4.5 Programming<br />
The header or head data is two lines of commodity name that appears on a label when you<br />
generate a Non-PLU label.<br />
29
30<br />
How to program the head data<br />
1) To go to PROGRAM mode press 10000 by using numeric keys and VOID key.<br />
2) Press key three times, the display shows “HEAd”.<br />
3) Press PRT/* key. The display shows “HEAd 01.01”. The numbers in the UNIT PRICE<br />
display represent the line number and character number on which your cursor is at. The<br />
number to the left of the decimal is the line number you are on(01 to 01). The number to<br />
the right is the number of the character position on which you are(01 to 30).<br />
4) Type in the NON-PLU commodity name using the Alpha-numeric keypad. If you make<br />
any mistakes press C key. You may now begin typing your head data using your Alphanumeric<br />
keypad. After you type each line press ENTER key when you are done typing a<br />
line. If you wish to skip a line press key. If you want to go up a line press key. Press<br />
key or key to scroll left or right on a line of text. As you type you will see the text scroll<br />
in the TOTAL PRICE display.<br />
5) Press PRT/* key.<br />
6) If you wish to finish PROGRAM mode press C key<br />
4.6 Programming<br />
The shop data are the 2 lines of text that get printed on the bottom of the label when it is not<br />
suppressed by the label format. You can use these two lines to print the name and address of<br />
the store or anything else you wish the scale to print at the bottom. Each line contains 30<br />
characters of text.<br />
How to program the shop data<br />
1) To go to PROGRAM mode press 10000 by using numeric keys and VOID key.<br />
2) Press key four times.<br />
3) The WEIGHT display shows “SHoP”.<br />
4) Press PRT/* key. The display shows “SHoP 01.01”. The numbers in the UNIT PRICE<br />
display represent the line number and character number on which your cursor is at. The<br />
number to the left of the decimal is the line number you are on(01 to 02). The number to<br />
the right is the number of the character position on which you are(01 to 30).<br />
5) Type in the shop name using the Alpha-numeric keypad. If you make any mistakes press C<br />
key. You may now begin typing your shop data using your Alpha-numeric keypad. After<br />
you type each line press ENTER key when you are done typing a line. If you wish to skip a<br />
line press key. If you want to go up a line press key. Press key or key to scroll<br />
left or right on a line of text. As you type you will see the text scroll in the TOTAL PRICE<br />
display.<br />
6) Press PRT/* key.<br />
7) If you wish to finish PROGRAM mode press C key<br />
31
32<br />
4.7 SET<br />
SET MENU DEFINITIONS<br />
Date (For details, see page 34)<br />
Time (For details, see page 35)<br />
Department Number (For details,<br />
see page 36)<br />
Label Length<br />
(For details, see page 37)<br />
Label Format<br />
(For details, see page 38)<br />
Label Mask<br />
(For details, see page 39)<br />
Label Barcode<br />
(For details, see page 40)<br />
SET MENU DEFINITIONS<br />
Adjust<br />
(For details, see page 42)<br />
Printing Information<br />
(For details, see page 43)<br />
Auto Printing<br />
(For details, see page 45)<br />
Address<br />
(For details, see page 46)<br />
Baud Rate<br />
(For details, see page 47)<br />
33
34<br />
4.7.1 Programming the Date (SET #1)<br />
How to program the date<br />
1) To go to PROGRAM mode, press 10000 by using numeric keys and VOID key.<br />
2) Press key five times.<br />
3) The WEIGHT display shows “SEt”.<br />
4) Press PRT/* key and the display shows “SEt EntEr 0”.<br />
5) Press 1 key and PRT/* key.<br />
6) The display shows “dAtE EntEr”.<br />
7) Now type in the date in DAY/ MONTH/YEAR format. For example, April 19, 2005,<br />
would be entered as follows: 190405 The display shows “SEt”.<br />
8) If you wish to finish PROGRAM mode, press C key.<br />
4.7.2 Programming the Time (SET #2)<br />
How to program the Time<br />
1) To go to PROGRAM mode press 10000 by using numeric keys and VOID key.<br />
2) Press key five times.<br />
3) The WEIGHT display shows “SEt”.<br />
4) Press PRT/* key and the display shows “SEt EntEr”.<br />
5) Press 2 key and PRT/* key. The display shows “tiME EntEr”.<br />
6) Now type in the time in HOURS/MINUTES/SECONDS format. For example, 3:28:00 PM,<br />
would be entered as follows: 152800. The display shows “SEt”.<br />
7) If you wish to finish PROGRAM mode, press C key.<br />
35
36<br />
4.7.3 Programming the Department Number (SET #3)<br />
How to program the department number<br />
1) To go to PROGRAM mode press 10000 by using numeric keys and VOID key.<br />
2) Press key five times.<br />
3) The WEIGHT display shows “SEt”.<br />
4) Press PRT/* key and the display shows “SEt EntEr”.<br />
5) Press 3 key and PRT/* key.<br />
6) The display shows “dPtno EntEr 0”.<br />
7) The number in the TOTAL PRICE display is what the department number is currently<br />
programmed to. Type the department number. Department number can be from 0 to 999.<br />
8) Press PRT/* key. The display shows “SEt”.<br />
9) If you wish to finish PROGRAM mode, press C key.<br />
4.7.4 Programming the Label (SET #4)<br />
The label format type controls the label size and barcode format.<br />
1) Label length<br />
How to program the label length<br />
1) To go to PROGRAM mode, press 10000 by using numeric keys and VOID key.<br />
2) Press key five times.<br />
3) The WEIGHT display shows “SEt”.<br />
4) Press PRT/* key and the display shows “SEt EntEr”.<br />
5) Press 4 key and PRT/* key.<br />
6) The display shows “LAbEL EntEr 1”.<br />
7) To program label length, press 1 key. The display shows “LAbEL LEnGtH 40”.<br />
8) Enter label length that you have and presse PRT/* key. (Label length can be from 1 to 99.)<br />
9) The display shows “LAbEL EntEr”. If you want to program label format press 2 key. If<br />
you want to go to SET menu, press C key.<br />
37
38<br />
2) Label format 3) Label mask<br />
How to program the label format<br />
1) To go to PROGRAM mode, press 10000 by using numeric keys and VOID key.<br />
2) Press key five times.<br />
3) The WEIGHT display shows“SEt”.<br />
4) Press PRT/* key and the display shows “SEt EntEr”.<br />
5) Press 4 key and PRT/* key.<br />
6) The display shows “LAbEL EntEr 1”.<br />
7) To program label format, press 2 key. The display shows “LAbEL ForMAt 0”.<br />
8) Enter label format number and press PRT/* key.<br />
(Label format number can be from 0 to 36. 0~30 : fixed format, 31~36 : free format. Refer<br />
to Appendix)<br />
9) The display shows “LAbEL EntEr”. If you want to program label mask press 3 key. If you<br />
want to go to SET menu, press C key.<br />
How to program the label mask<br />
1) To go to PROGRAM mode, press 10000 by using numeric keys and VOID key.<br />
2) Press key five times.<br />
3) The WEIGHT display shows “SEt”.<br />
4) Press PRT/* key and the display shows “SEt EntEr”.<br />
5) Press 4 key and PRT/* key.<br />
6) The display shows “LAbEL EntEr 1”.<br />
7) To program label mask, press 3 key. The display shows “LAbEL MASk”.<br />
8) If you do not want to print Shop, you have to enter FDFF by hexadecimal and press PRT/*<br />
key.<br />
39
40<br />
NOTE : If there is no Head on the label format it is not printed even though you set it to “1” in<br />
label mask.<br />
9) The display shows “LAbEL EntEr”. If you want to program label barcode press “4” key.<br />
If you want to go to SET menu, press C key.<br />
4) Label barcode<br />
How to program the label barcode<br />
1) To go to PROGRAM mode, press 10000 by using numeric keys and VOID key.<br />
2) Press key five times.<br />
3) The WEIGHT display shows “SEt”.<br />
4) Press PRT/* key and the display shows “SEt EntEr”.<br />
5) Press 4 key and PRT/* key.<br />
6) The display shows “LAbEL EntEr 1”.<br />
7) To program label barcode, press “4” key. The display shows “LAbEL bArCod “.<br />
8) Look at the table and enter barcode number and press PRT/* key.<br />
No TYPE<br />
0 EAN 13<br />
1 EAN 13<br />
2 EAN 13<br />
3 EAN 13<br />
4 EAN 13<br />
5 EAN 13<br />
6 EAN 13<br />
7 EAN 13<br />
8 EAN 13<br />
9 EAN 13<br />
10 EAN 13<br />
11 EAN 13<br />
12 EAN 13<br />
13 12 of5<br />
14 12 of5<br />
1<br />
D<br />
D<br />
D<br />
D<br />
D<br />
D<br />
D<br />
D<br />
D<br />
D<br />
D<br />
D<br />
D<br />
D<br />
D<br />
2<br />
D<br />
D<br />
D<br />
D<br />
D<br />
D<br />
D<br />
D<br />
D<br />
D<br />
D<br />
D<br />
D<br />
D<br />
D<br />
D Department code or Group code of each PLU<br />
I Item code number<br />
S Check-sum for price (4 digit)<br />
s Check-sum for price (5 digit)<br />
T Check-sum for weight (4 digit)<br />
t Check-sum for weight (5 digit)<br />
P Price<br />
W Weight<br />
C check-sum for all characters<br />
3<br />
I<br />
I<br />
I<br />
I<br />
I<br />
I<br />
I<br />
I<br />
I<br />
I<br />
I<br />
I<br />
I<br />
I<br />
I<br />
4<br />
I<br />
I<br />
I<br />
I<br />
I<br />
I<br />
I<br />
I<br />
I<br />
I<br />
P<br />
I<br />
I<br />
I<br />
I<br />
5<br />
I<br />
I<br />
I<br />
I<br />
I<br />
I<br />
I<br />
I<br />
I<br />
P<br />
P<br />
I<br />
I<br />
I<br />
I<br />
6<br />
I<br />
I<br />
I<br />
I<br />
I<br />
P<br />
I<br />
I<br />
I<br />
P<br />
P<br />
I<br />
I<br />
I<br />
I<br />
9) The display shows “LAbEL EntEr”. If you want to go to SET menu, press C key.<br />
7<br />
I<br />
S<br />
I<br />
I<br />
P<br />
P<br />
I<br />
I<br />
S<br />
P<br />
P<br />
t<br />
I<br />
W<br />
U<br />
8<br />
S<br />
P<br />
I<br />
P<br />
P<br />
P<br />
w<br />
I<br />
W<br />
P<br />
P<br />
W<br />
T<br />
W<br />
U<br />
9<br />
P<br />
P<br />
P<br />
D<br />
P<br />
D<br />
W<br />
W<br />
W<br />
P<br />
P<br />
W<br />
W<br />
W<br />
U<br />
10<br />
P<br />
P<br />
P<br />
D<br />
P<br />
D<br />
W<br />
W<br />
W<br />
P<br />
P<br />
W<br />
W<br />
W<br />
U<br />
11<br />
P<br />
P<br />
P<br />
D<br />
P<br />
D<br />
W<br />
W<br />
W<br />
P<br />
P<br />
W<br />
W<br />
W<br />
U<br />
12<br />
P<br />
P<br />
P<br />
P<br />
P<br />
P<br />
W<br />
W<br />
W<br />
P<br />
P<br />
W<br />
W<br />
P<br />
P<br />
13<br />
C<br />
C<br />
C<br />
C<br />
C<br />
C<br />
C<br />
C<br />
C<br />
C<br />
C<br />
C<br />
C<br />
P<br />
P<br />
14<br />
P<br />
P<br />
15<br />
P<br />
P<br />
16<br />
P<br />
P<br />
17<br />
P<br />
P<br />
18<br />
C<br />
C<br />
41
42<br />
4.7.5 Programming the Adjust Number (SET #5)<br />
- ADJUST is to adjust the position of label.<br />
- FEED is to feed label(or receipt).<br />
How to program the adjust number<br />
1) To go to PROGRAM mode press 10000 by using numeric keys and VOID key.<br />
2) Press key five times.<br />
3) The WEIGHT display shows “SEt”.<br />
4) Press PRT/* key, “SEt EntEr”.<br />
5) Press “5” key and PRT/* key.<br />
6) The display shows “AdJSt EntEr 30 ”.<br />
7) Type the new adjust value by pixel unit on the Numeric keypad. (1mm/8pixel )<br />
8) Press PRT/* key. The display shows “FEEd EntEr 60 ”.<br />
9) Type the new feed value by pixel unit Numeric keypad. (1mm/8pixel )<br />
10) Press PRT/* key. The display shows “SEt”.<br />
11) If you wish to finish PROGRAM mode press C key<br />
4.7.6 Programming the Printing Information (SET #6)<br />
The printing information controls the label size, PLU item description and barcode format.<br />
43
44<br />
How to program printing information<br />
1) To go to PROGRAM mode, press 10000 by using numeric keys and VOID key.<br />
2) Press key five times.<br />
3) The WEIGHT display shows “SEt”.<br />
4) Press PRT/* key, “SEt EntEr”.<br />
5) Press 6 key and PRT/* key.<br />
6) The display shows “PmodE EntEr 0”.<br />
7) Look at the table below and type number that you want.<br />
pMode 0 : No change with unit price<br />
pMode 1 : Temporary change with unit price<br />
pMode 2 : Permanent change with unit price<br />
8) Press PRT/* key. The display shows “PEEL EntEr 1”.<br />
9) Look at the table below and type number that you want.<br />
<br />
0 : Peel sensor OFF<br />
1 : Peel sensor ON<br />
10) Press PRT/* key. The display shows “SEt”.<br />
11) If you wish to finish PROGRAM mode, press C key<br />
4.7.7 Programming the Auto Print Function (SET #7)<br />
The auto print function is used to determine when an automatic buffered label should be<br />
printed or buffered. The number stored in auto print is a weight value which is equal to the<br />
amount of stabilized positive weight variance needed to print or buffer a label. For example, if<br />
the auto print value is set to “0.100”, then the scale will automatically print a label when the<br />
weight changes by 0.100g and stabilizes.<br />
How to program auto print function<br />
1) To go to PROGRAM mode, press 10000 by using numeric keys and VOID key.<br />
2) Press key five times.<br />
3) The WEIGHT display shows “SEt”.<br />
4) Press PRT/* key, “SEt EntEr”.<br />
5) Press 7 key and PRT/* key.<br />
6) The display shows “AUtoP EntEr 100”.<br />
7) The number in the Total Price display represents the weight sensitivity number by which<br />
your scale calculates auto print. The default is “0.100”. Enter the weight sensitivity number<br />
by using numeric keys.<br />
8) Press PRT/* key. The display shows “SEt”.<br />
9) If you wish to finish PROGRAM mode, press C key.<br />
45
46<br />
4.7.8 Programming Address (SET #8)<br />
Address means the ID of the scale when you network scales. The address can be from 0 to 99,<br />
How to program address<br />
1) To go to PROGRAM mode, press 10000 by using numeric keys and VOID key.<br />
2) Press key five times.<br />
3) The WEIGHT display shows “SEt’.<br />
4) Press PRT/* key, “SEt EntEr”.<br />
5) Press 8 key and PRT/* key.<br />
6) The display shows “Addr EntEr 0”.<br />
7) Enter address number by using numeric keys.<br />
8) Press PRT/* key. The display shows “SEt”.<br />
9) If you wish to finish PROGRAM mode, press C key.<br />
4.7.9 Programming Baud Rate (SET #9)<br />
How to program baud rate<br />
1) To go to PROGRAM mode, press 10000 by using numeric keys and VOID key.<br />
2) Press key five times.<br />
3) The WEIGHT display shows “SEt”.<br />
4) Press PRT/* key, “SEt EntEr”.<br />
5) Press 9 key and PRT/* key.<br />
6) The display shows “bAUd EntEr 3=9600”.<br />
7) Look at table below and type number that you want.<br />
<br />
‘1’ = 2400bps<br />
‘2’ = 4800bps<br />
‘3’ = 9600bps<br />
‘4’ = 19200bps<br />
‘5’ = 38400bps<br />
‘6’ = 57600bps<br />
8) Press PRT/* key. The display shows “SEt”.<br />
9) If you wish to finish PROGRAM mode, press C key.<br />
47
48<br />
4.8 INIT (Initialize PLU and MSG data)<br />
You can initialize all PLU’s data , MESSAGE data or ALL data.<br />
How to clear memory<br />
1) To go to PROGRAM mode, press 10000 by using numeric keys and VOID key.<br />
2) Press key six times.<br />
3) The WEIGHT display shows “init”.<br />
4) Press PRT/* key and the display shows “init ALL”. If you want to clear all PLU data and<br />
message data, press the PRT/* key. If you want to clear PLU or MESSAGE, press key or<br />
key to select PLU or MSG and press PRT/* key to clear it.<br />
5) If you wish to finish PROGRAM mode, press C key.<br />
4.9 Password<br />
Password can be from 1000 to 999999 but you have to set the numbers of four digits. If you<br />
set it to 0, there is no password. Once you set password, you have to enter it to go to program<br />
mode.<br />
How to program password<br />
1) To go to PROGRAM mode, press 10000 by using numeric keys and VOID key.<br />
2) Press key seven times.<br />
3) The WEIGHT display shows “PASS”.<br />
4) Press PRT/* key and the display shows “PASS ------”.<br />
5) Type your password. (Password can be from 1000 to 999999 but you have to set the<br />
numbers of four digits. If you set it to 0, there is no use of password.)<br />
6) Press PRT/* key. The display shows “PASS”<br />
7) If you wish to finish PROGRAM mode, press C key.<br />
49
50<br />
5. ACCOUNT Mode<br />
ACC mode is used for accessing sales totals, clearing all sales totals, and printhead check<br />
5.1 System Maps<br />
To go to ACCOUNT MODE, press 20000 by using numeric keys and VOID key.<br />
You can press the key or key to go up and down the Main Menu in PROGRAM mode<br />
ONLY if the UNIT PRICE and TOTAL PRICE displays are BLANK! The same rule applies<br />
in PGM mode.<br />
If you want to use the key or key to go up and down a menu and the UNIT PRICE and<br />
TOTAL PRICE displays are NOT blank, you must first press the PRT/* key. After the UNIT<br />
PRICE and TOTAL PRICE displays are blank. You can use the key or keys.<br />
5.2 Print Report<br />
There are four types of sales reports : Grand Total, ALL PLU, Non-PLU, and PLU no. Each<br />
of the reports prints on a label; the PLU prints a report label for each PLU that had sales<br />
activity. All reports labels contain the starting time and date, since the last time the sales<br />
report was cleared, the current time and date, and other data.<br />
You can use the<br />
PLU.<br />
key or key to select Grand total, ALL PLU, non PLU, or Individual<br />
5.2.1 Grand Total<br />
Grand Total sales report tells you how much money the Non-PLU item made, how much all<br />
PLUs made, and both together.<br />
51
52<br />
1) To go to ACCOUNT mode, press 20000 by using numeric keys and VOID key.<br />
2) The display shows “Print”.<br />
3) Press PRT/* key. The display shows “Print GrAnd”.<br />
4) Press PRT/* key. The scale will issue a Report Label and the display shows “Print<br />
GrAnd”.<br />
5) You can use the key or key to select ALL PLU, non PLU, or Individual PLU. (To go<br />
to PRINT menu, press the C key. To finish ACCOUNT mode, press the C key again.)<br />
5.2.2 All PLU<br />
There are two ways to take the PLU sales report: individually or ALL PLU. The All PLU<br />
report will generate labels of those PLUs that had sales activity.<br />
To take the All PLU sales report,<br />
1) To go to ACCOUNT mode, press 20000 by using numeric keys and VOID key.<br />
2) The display shows “Print”.<br />
3) Press PRT/* key. The display shows “Print GrAnd”.<br />
4) Press key or keys until the display shows “Print AL<strong>LP</strong>LU”.<br />
5) Press PRT/* key. The scale will issue a Report Label of all the PLUs with sales activity.<br />
6) You can use the key or key to select, Grand total, non PLU, or Individual PLU. To go<br />
to PRINT menu, press the C key. To finish ACCOUNT mode, press the C key again.<br />
5.2.3 Individual PLU<br />
1) To go to ACCOUNT mode, press 20000 by using numeric keys and VOID key.<br />
2) The display shows “Print”.<br />
3) Press PRT/* key. The display shows “Print GrAnd”.<br />
4) Press key or keys until the display shows “Print PLUno”.<br />
5) Press PRT/* key. The display shows “Print PLUno 0”.<br />
6) Type PLU number that you wish to take, and press the PRT/* key. The scale will issue a<br />
Report Label of individual PLU with sales activity.<br />
7) You can use the key or key to select Grand total, ALL PLU, or non PLU. (To go to<br />
PRINT menu, press the C key. To finish ACCOUNT mode, press the C key again.)<br />
5.2.4 Non-PLU<br />
Non-PLU Report allows you to see how much and items were sold under the NON-PLU item<br />
descriptor.<br />
1) To go to ACCOUNT mode, press 20000 by using numeric keys and VOID key.<br />
2) The display shows “Print”.<br />
3) Press PRT/* key. The display shows “Print GrAnd”.<br />
4) Press key or keys until the display shows “Print nonPLU”.<br />
5) Press PRT/* key. The scale will issue a Report Label of non-PLU with sales activity.<br />
6) You can use the key or key to select Grand total, ALL PLU, or individual PLU. (To<br />
go to PRINT menu, press C key. To finish ACCOUNT mode, press the C key again.)<br />
53
54<br />
5.3 Clearing Sales Data<br />
If you want to clear sales data, you have to use this function after you have already printed the<br />
sales data you needed.<br />
5.3.1 Grand Total<br />
1) To go to ACCOUNT mode, press 20000 by using numeric keys and VOID key.<br />
2) Press key. The display shows “CLEAr”.<br />
3) Press PRT/* key. The display shows “CLEAr GrAnd”.<br />
4) Press PRT/* key. The display shows “CLEAr GrAnd End”.<br />
5) You can use the key or key to select ALL PLU, nonPLU, or ALL. (To go to CLEAR<br />
menu, press the C key. To finish ACCOUNT mode, press the C key again.)<br />
5.3.2 All PLU<br />
1) To go to ACCOUNT mode, press 20000 by using numeric keys and VOID key.<br />
2) Press key. The display shows “CLEAr”.<br />
3) Press PRT/* key. The display shows “CLEAr GrAnd”.<br />
4) Press key or keys until the display shows “CLEAr AL<strong>LP</strong>LU’.<br />
5) Press PRT/* key. The display shows “CLEAr AL<strong>LP</strong>LU End’.<br />
6) You can use the key or key to select nonPLU, ALL, or GrAnd. (To go to CLEAR<br />
menu, press key. To finish ACCOUNT mode, press the C key again.)<br />
5.3.3 Non- PLU<br />
1) To go to ACCOUNT mode, press 20000 by using numeric keys and VOID key.<br />
2) Press key. The display shows “CLEAr”.<br />
3) Press PRT/* key. The display shows “CLEAr GrAnd”.<br />
4) Press key or keys until the display shows “CLEAr nonPLU”.<br />
5) Press PRT/* key. The display shows “CLEAr nonPLU End”.<br />
6) You can use the key or key to select ALL, GrAnd, or AL<strong>LP</strong>LU. (To go to CLEAR<br />
menu, press C key. To finish ACCOUNT mode, press the C key again.)<br />
55
56<br />
5.3.4 All 5.4 Printhead Check (CHESS)<br />
You can use this function to check the quality of print and if there are any scratches or burn<br />
on the printhead. This function produces a pattern on the label which you can use to determine<br />
the condition of the printhead.<br />
1) To go to ACCOUNT mode, press 20000 by using numeric keys and VOID key.<br />
2) Press key. The display shows “CLEAr”.<br />
3) Press PRT/* key. The display shows “CLEAr GrAnd”.<br />
4) Press key or keys until the display shows “CLEAr ALL”.<br />
5) Press PRT/* key. The display shows “CLEAr ALL END”.<br />
6) You can use the key or key to select GrAnd, AL<strong>LP</strong>LU or nonPLU. (To go to CLEAR<br />
menu, press C key. To finish ACCOUNT mode, press the C key again.)<br />
1) To go to ACCOUNT mode, press 20000 by using numeric keys and VOID key.<br />
2) Press key two times. The display shows “CHESS”.<br />
3) Press PRT/* key. The display shows “CHESS tyPE 1”<br />
4) Enter chess type and press PRT/* key. The scale will issue a label. Compare labels to the<br />
samples above to determine the condition of your printhead.<br />
5) To go to CHESS menu, press C key. To Finish ACCOUNT mode, press the C key again.<br />
57
58<br />
6. Error Messages<br />
Error 1 The PLU number you have called up does not exist.<br />
Error 2 The PLU number you have called up is out of range.<br />
Error 3 The weight on the platter is not stable or you have pressed the keys before the weight became stable.<br />
Error 4 Tare weight was set.<br />
Error 5 PLU data is corrupted or broken. Backup RAM, initialize the scale, re-enter the bad data, and load new data<br />
into scale.<br />
Error 6 You have pressed the PRT/* while the Printer Control Switch was in STOP mode.<br />
Error 7 The RS-232C cable that you are using is not wired properly, possible break in the cable, or communications<br />
error.<br />
Error 8 Impossible to transfer PLU data between two scales. Remove unit price by pressing C key.<br />
Error 9 You have an RS-232C communication error, please try again.<br />
Error 10 The tare weight you entered was not valid: re-enter tare weight.<br />
Error 11 The tare weight you entered was out of range.<br />
Error 12 Loaded weight is below minimum weight of OIML regulation.<br />
Error 14 You have pressed the PRT/* key after the label roll was exhausted. Exchange the label roll, press the C key<br />
and release the error message. Adjust the initial printing state by pressing the FEED key. The label roll you<br />
used was broken away from the interrupt sensor : replace the label roll between the two green sensor caps<br />
and fix the label roll pin.<br />
Error 15 You attempted to print a label when there is an issued label, please remove the issued one. You have<br />
pressed PRT/* key when the printer front cover is not placed properly. You attempted to print a label when<br />
the print head is in the lifted-up : push it down and it is issued a label paper automatically.<br />
Zero range Error Initial weight is not valid. Make sure platter is properly installed<br />
SCALE is not stable : scale is installed on a unstable place<br />
dO CAL : Setup data is broken.<br />
7. Specifications<br />
MODEL <strong>LP</strong>-<strong>1.6</strong>, <strong>LP</strong>-<strong>1.6</strong>R<br />
CAPACITY<br />
6 kg 15 kg 30 kg<br />
TARE WEIGHT RANGE<br />
DISPLAY<br />
LAMP INDICATOR<br />
MEMORY CAPACITY<br />
PRINTING TYPE<br />
LABEL & ROLL STOCK<br />
CAPACITY (SIZE)<br />
PRINTABLE WEIGHT<br />
INTERFACE<br />
POWER SOURCE<br />
POWER CONSUMPTION<br />
OPERATING TEMPERATURE<br />
DIMENSION<br />
NET WEIGHT<br />
UP TO 2.990 kg UP TO 5.990 kg UP TO 9.995 kg<br />
WEIGHT (5) / UNIT PRICE (6) / TOTAL PRICE (7)<br />
ZERO, TARE, SAVE, AUTO, SHIFT<br />
4000 PLUs - 1000 MSGs<br />
THERMAL DIRECT PRINT<br />
1,000 LABELS (58mm 30mm) / 700 LABELS (58mm 40mm)<br />
500 LABELS (58mm 50mm) / 400 LABELS (58mm 60mm)<br />
NOT FOLLOWING OIML 4.17 FOLLOWING OIML 4.17<br />
MANUAL<br />
MANUAL<br />
AUTO MODE<br />
MODE MODE<br />
OVER 0 kg OVER 2 DIGlT OVER 20 DIGIT<br />
RS232C<br />
AC 110V / 120V / 220V / 240V (50Hz / 60Hz)<br />
MAX, 100W<br />
-10 ~ +40<br />
<strong>LP</strong>-<strong>1.6</strong> <strong>LP</strong>-<strong>1.6</strong>(R)<br />
410 430 195 410 430 595(R)<br />
13kg<br />
AUTO MODE<br />
OVER 20<br />
DIGIT<br />
59
60<br />
APPENDIX<br />
LABEL FORMAT<br />
0 58mm 40mm (W H) 1 58mm 30mm<br />
2 58mm 40mm (W H) 3 58mm 30mm<br />
4 54mm 35mm 5 54mm 35mm<br />
6 54mm 35mm 7 58mm 40mm<br />
8 58mm 40mm 9 58mm 40mm<br />
10 58mm 40mm 11 58mm 40mm<br />
12 58mm 40mm 13 48mm 40mm<br />
14 48mm 40mm 15 48mm 40mm<br />
61
62<br />
16 54mm 53mm 17 54mm 53mm<br />
18 48mm 54mm 19 48mm 54mm<br />
20 58mm 51mm 21 58mm 51mm<br />
22 58mm 60mm 23 58mm 60mm<br />
24 48mm 68mm 25 48mm 68mm<br />
63
64<br />
26 48mm 68mm 27 58mm 63mm<br />
28 58mm 63mm 29 58mm 60mm<br />
30 58mm 60mm<br />
65