4.4 initial diagnostic check: icm - harley-davidson-sweden.se
4.4 initial diagnostic check: icm - harley-davidson-sweden.se
4.4 initial diagnostic check: icm - harley-davidson-sweden.se

Create successful ePaper yourself
Turn your PDF publications into a flip-book with our unique Google optimized e-Paper software.
HOME<br />
MISFIRE 4.12<br />
GENERAL<br />
d0273x8x<br />
Misfire at Idle or Under Load<br />
●<br />
●<br />
Battery condition and connections may also cau<strong>se</strong> misfires.<br />
Fuel system problems may also cau<strong>se</strong> misfires. Refer to<br />
Table 4-3.<br />
DIAGNOSTICS<br />
Diagnostic Notes<br />
The reference numbers below correlate with the circled numbers<br />
on the Test 4.12 flow chart.<br />
1WARNING<br />
Any open spark around gasoline or other combustibles<br />
may result in fire or explosion. Thoroughly wipe up any<br />
spilt fuel and dispo<strong>se</strong> of rags in a suitable manner. Inadequate<br />
safety precautions could result in death or <strong>se</strong>rious<br />
injury.<br />
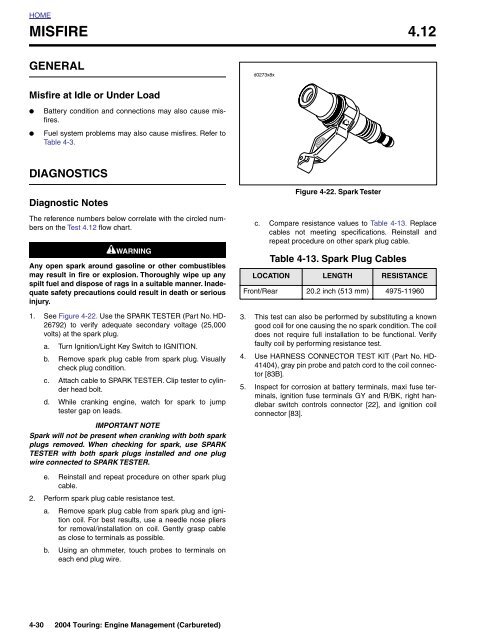
1. See Figure 4-22. U<strong>se</strong> the SPARK TESTER (Part No. HD-<br />
26792) to verify adequate <strong>se</strong>condary voltage (25,000<br />
volts) at the spark plug.<br />
a. Turn Ignition/Light Key Switch to IGNITION.<br />
b. Remove spark plug cable from spark plug. Visually<br />
<strong>check</strong> plug condition.<br />
c. Attach cable to SPARK TESTER. Clip tester to cylinder<br />
head bolt.<br />
d. While cranking engine, watch for spark to jump<br />
tester gap on leads.<br />
IMPORTANT NOTE<br />
Spark will not be pre<strong>se</strong>nt when cranking with both spark<br />
plugs removed. When <strong>check</strong>ing for spark, u<strong>se</strong> SPARK<br />
TESTER with both spark plugs installed and one plug<br />
wire connected to SPARK TESTER.<br />
Figure 4-22. Spark Tester<br />
c. Compare resistance values to Table 4-13. Replace<br />
cables not meeting specifications. Reinstall and<br />
repeat procedure on other spark plug cable.<br />
Table 4-13. Spark Plug Cables<br />
LOCATION LENGTH RESISTANCE<br />
Front/Rear 20.2 inch (513 mm) 4975-11960<br />
3. This test can also be performed by substituting a known<br />
good coil for one causing the no spark condition. The coil<br />
does not require full installation to be functional. Verify<br />
faulty coil by performing resistance test.<br />
4. U<strong>se</strong> HARNESS CONNECTOR TEST KIT (Part No. HD-<br />
41404), gray pin probe and patch cord to the coil connector<br />
[83B].<br />
5. Inspect for corrosion at battery terminals, maxi fu<strong>se</strong> terminals,<br />
ignition fu<strong>se</strong> terminals GY and R/BK, right handlebar<br />
switch controls connector [22], and ignition coil<br />
connector [83].<br />
e. Reinstall and repeat procedure on other spark plug<br />
cable.<br />
2. Perform spark plug cable resistance test.<br />
a. Remove spark plug cable from spark plug and ignition<br />
coil. For best results, u<strong>se</strong> a needle no<strong>se</strong> pliers<br />
for removal/installation on coil. Gently grasp cable<br />
as clo<strong>se</strong> to terminals as possible.<br />
b. Using an ohmmeter, touch probes to terminals on<br />
each end plug wire.<br />
4-30 2004 Touring: Engine Management (Carbureted)