New Hire/Newly Eligible Benefits Enrollment (pdf)
New Hire/Newly Eligible Benefits Enrollment (pdf)
New Hire/Newly Eligible Benefits Enrollment (pdf)

You also want an ePaper? Increase the reach of your titles
YUMPU automatically turns print PDFs into web optimized ePapers that Google loves.
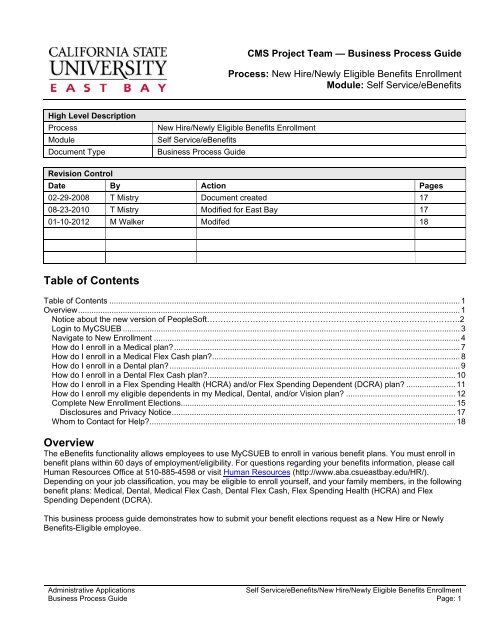
CMS Project Team — Business Process Guide<br />
Process: <strong>New</strong> <strong>Hire</strong>/<strong>New</strong>ly <strong>Eligible</strong> <strong>Benefits</strong> <strong>Enrollment</strong><br />
Module: Self Service/e<strong>Benefits</strong><br />
High Level Description<br />
Process<br />
Module<br />
Document Type<br />
<strong>New</strong> <strong>Hire</strong>/<strong>New</strong>ly <strong>Eligible</strong> <strong>Benefits</strong> <strong>Enrollment</strong><br />
Self Service/e<strong>Benefits</strong><br />
Business Process Guide<br />
Revision Control<br />
Date By Action Pages<br />
02-29-2008 T Mistry Document created 17<br />
08-23-2010 T Mistry Modified for East Bay 17<br />
01-10-2012 M Walker Modifed 18<br />
Table of Contents<br />
Table of Contents ............................................................................................................................................................. 1<br />
Overview ........................................................................................................................................................................... 1<br />
Notice about the new version of PeopleSoft………………………………………………………………………………….2<br />
Login to MyCSUEB ....................................................................................................................................................... 3<br />
Navigate to <strong>New</strong> <strong>Enrollment</strong> ......................................................................................................................................... 4<br />
How do I enroll in a Medical plan? ................................................................................................................................ 7<br />
How do I enroll in a Medical Flex Cash plan? ............................................................................................................... 8<br />
How do I enroll in a Dental plan? .................................................................................................................................. 9<br />
How do I enroll in a Dental Flex Cash plan? ............................................................................................................... 10<br />
How do I enroll in a Flex Spending Health (HCRA) and/or Flex Spending Dependent (DCRA) plan? ...................... 11<br />
How do I enroll my eligible dependents in my Medical, Dental, and/or Vision plan? ................................................. 12<br />
Complete <strong>New</strong> <strong>Enrollment</strong> Elections........................................................................................................................... 15<br />
Disclosures and Privacy Notice ............................................................................................................................... 17<br />
Whom to Contact for Help? ......................................................................................................................................... 18<br />
Overview<br />
The e<strong>Benefits</strong> functionality allows employees to use MyCSUEB to enroll in various benefit plans. You must enroll in<br />
benefit plans within 60 days of employment/eligibility. For questions regarding your benefits information, please call<br />
Human Resources Office at 510-885-4598 or visit Human Resources (http://www.aba.csueastbay.edu/HR/).<br />
Depending on your job classification, you may be eligible to enroll yourself, and your family members, in the following<br />
benefit plans: Medical, Dental, Medical Flex Cash, Dental Flex Cash, Flex Spending Health (HCRA) and Flex<br />
Spending Dependent (DCRA).<br />
This business process guide demonstrates how to submit your benefit elections request as a <strong>New</strong> <strong>Hire</strong> or <strong>New</strong>ly<br />
<strong>Benefits</strong>-<strong>Eligible</strong> employee.<br />
Administrative Applications<br />
Self Service/e<strong>Benefits</strong>/<strong>New</strong> <strong>Hire</strong>/<strong>New</strong>ly <strong>Eligible</strong> <strong>Benefits</strong> <strong>Enrollment</strong><br />
Business Process Guide Page: 1
Notice about the new version of PeopleSoft<br />
All page shots used in this guide are from the previous version of PeopleSoft (HCM 8.9). Please be advised that from<br />
the fourth week of February 2012, we are using the new version of PeopleSoft (HCM 9.0) and you may experience a<br />
difference in the way the new pages look and feel.<br />
In the new version of<br />
PeopleSoft (HCM 9.0), the<br />
format of how the Main Menu<br />
expands has changed, but the<br />
actual navigation path and<br />
functionality has not changed.<br />
See the sample page shot.<br />
Other minor changes include<br />
the following:<br />
• Improved color<br />
scheme<br />
• <strong>New</strong> look for<br />
Processing and Save<br />
indicators<br />
• Pop-up Search<br />
Window and Edit<br />
Boxes<br />
• Number of Search<br />
Results Option<br />
• Type Ahead Matching<br />
Administrative Applications<br />
Self Service/e<strong>Benefits</strong>/<strong>New</strong> <strong>Hire</strong>/<strong>New</strong>ly <strong>Eligible</strong> <strong>Benefits</strong> <strong>Enrollment</strong><br />
Business Process Guide Page: 2
Login to MyCSUEB<br />
The MyCSUEB homepage<br />
displays.<br />
1. Go to MyCSUEB<br />
(http://my.csueastbay.edu<br />
/)<br />
2. Enter your NetID and<br />
Password<br />
3. Click the Sign In button<br />
Note: If you have difficulty<br />
logging in, please click on the<br />
“help” link on the upper right<br />
corner of the homepage.<br />
Administrative Applications<br />
Self Service/e<strong>Benefits</strong>/<strong>New</strong> <strong>Hire</strong>/<strong>New</strong>ly <strong>Eligible</strong> <strong>Benefits</strong> <strong>Enrollment</strong><br />
Business Process Guide Page: 3
Navigate to <strong>New</strong> <strong>Enrollment</strong><br />
Your home page displays.<br />
Depending on the roles you<br />
play on campus, you may see<br />
multiple tabs:<br />
• Student<br />
• Applicant<br />
• Faculty<br />
• Manager<br />
• Timekeeper<br />
• Employee<br />
1. Click the Employee tab if<br />
it is not displayed already<br />
2. Click the <strong>New</strong><br />
<strong>Enrollment</strong> link in the<br />
<strong>Benefits</strong> Information<br />
section<br />
Administrative Applications<br />
Self Service/e<strong>Benefits</strong>/<strong>New</strong> <strong>Hire</strong>/<strong>New</strong>ly <strong>Eligible</strong> <strong>Benefits</strong> <strong>Enrollment</strong><br />
Business Process Guide Page: 4
The <strong>New</strong> <strong>Enrollment</strong> page<br />
displays.<br />
Note: If you click the<br />
information icon, it will display<br />
more details about various<br />
Benefit programs, eligibility<br />
and enrollment.<br />
The other hyperlinks on this<br />
page provide more<br />
information about each<br />
highlighted item.<br />
Administrative Applications<br />
Self Service/e<strong>Benefits</strong>/<strong>New</strong> <strong>Hire</strong>/<strong>New</strong>ly <strong>Eligible</strong> <strong>Benefits</strong> <strong>Enrollment</strong><br />
Business Process Guide Page: 5
Current Marital Status:<br />
3. Use the drop-down menu<br />
to select your current<br />
marital status<br />
Administrative Applications<br />
Self Service/e<strong>Benefits</strong>/<strong>New</strong> <strong>Hire</strong>/<strong>New</strong>ly <strong>Eligible</strong> <strong>Benefits</strong> <strong>Enrollment</strong><br />
Business Process Guide Page: 6
How do I enroll in a Medical plan?<br />
The <strong>New</strong> <strong>Enrollment</strong> page<br />
displays.<br />
1. Follow steps 1 and 2 in<br />
the Navigate to <strong>New</strong><br />
<strong>Enrollment</strong> section<br />
Note: The Medical Plan<br />
Selection defaults with the<br />
<strong>New</strong> <strong>Enrollment</strong> radio button<br />
selected.<br />
2. Use the drop-down menu<br />
to select the Medical<br />
Plan you wish to enroll in<br />
3. Information: Click the<br />
Medical <strong>Benefits</strong><br />
hyperlink to get more<br />
information about the<br />
medical plans and the<br />
providers<br />
Notes: If you select Blue<br />
Shield plan, the Primary<br />
Care Provide field is<br />
required.<br />
Steps on how to enroll your<br />
eligible dependents in your<br />
medical plan are provided on<br />
page 11.<br />
4. After selecting all<br />
changes, skip to the<br />
Complete <strong>New</strong><br />
<strong>Enrollment</strong> Elections<br />
section (on page 14) to<br />
complete the process<br />
Administrative Applications<br />
Self Service/e<strong>Benefits</strong>/<strong>New</strong> <strong>Hire</strong>/<strong>New</strong>ly <strong>Eligible</strong> <strong>Benefits</strong> <strong>Enrollment</strong><br />
Business Process Guide Page: 7
How do I enroll in a Medical Flex Cash plan?<br />
The <strong>New</strong> <strong>Enrollment</strong> page<br />
displays.<br />
1. Follow steps 1 and 2 in<br />
the Navigate to <strong>New</strong><br />
<strong>Enrollment</strong> section<br />
2. Under the Medical Plan<br />
Selection section, read<br />
the Flex Cash coverage<br />
eligibility information to<br />
determine whether or not<br />
you are eligible for the<br />
Flex Cash plan<br />
3. If you are eligible for the<br />
Flex Cash plan, select<br />
the Decline Coverage<br />
radio button to decline<br />
medical coverage<br />
4. To enroll in Medical Flex<br />
Cash plan, select the<br />
<strong>New</strong> <strong>Enrollment</strong> radio<br />
button under the Medical<br />
Flex Cash section<br />
5. Information: Click the<br />
FlexCash Plan hyperlink<br />
to get more information<br />
about this plan<br />
6. Provide your alternate<br />
medical insurance policy<br />
information including the<br />
following:<br />
• Social Security<br />
number of the person<br />
who holds the<br />
alternate policy under<br />
which you are<br />
covered under<br />
• Alternate medical<br />
insurance carrier<br />
name<br />
• Policy number<br />
7. After selecting all<br />
changes, skip to the<br />
Complete <strong>New</strong><br />
<strong>Enrollment</strong> Elections<br />
section (on page 14) to<br />
complete the process<br />
Administrative Applications<br />
Self Service/e<strong>Benefits</strong>/<strong>New</strong> <strong>Hire</strong>/<strong>New</strong>ly <strong>Eligible</strong> <strong>Benefits</strong> <strong>Enrollment</strong><br />
Business Process Guide Page: 8
How do I enroll in a Dental plan?<br />
The <strong>New</strong> <strong>Enrollment</strong> page<br />
displays.<br />
1. Follow steps 1 and 2 in<br />
the Navigate to <strong>New</strong><br />
<strong>Enrollment</strong> section<br />
Note: The Dental Plan<br />
Selection defaults with <strong>New</strong><br />
<strong>Enrollment</strong> radio button<br />
selected.<br />
2. Use the drop-down menu<br />
to select the Dental Plan<br />
in which you wish to<br />
enroll<br />
3. Information: Click<br />
Dental <strong>Benefits</strong><br />
hyperlink to get more<br />
information about the<br />
dental plans and the<br />
providers<br />
Notes: If you select<br />
DeltaCare USA-Enhanced,<br />
the Primary Office ID Number<br />
field is required. Use the<br />
Select a Provider hyperlink to<br />
search for a Primary Dental<br />
Office ID.<br />
Steps on how to enroll your<br />
eligible dependents in your<br />
dental plan are provided on<br />
page 11.<br />
4. After selecting all<br />
changes, skip to the<br />
Complete <strong>New</strong><br />
<strong>Enrollment</strong> Elections<br />
section (on page 14) to<br />
complete the process<br />
Administrative Applications<br />
Self Service/e<strong>Benefits</strong>/<strong>New</strong> <strong>Hire</strong>/<strong>New</strong>ly <strong>Eligible</strong> <strong>Benefits</strong> <strong>Enrollment</strong><br />
Business Process Guide Page: 9
How do I enroll in a Dental Flex Cash plan?<br />
The <strong>New</strong> <strong>Enrollment</strong> page<br />
displays.<br />
1. Follow steps 1 and 2 in<br />
the Navigate to <strong>New</strong><br />
<strong>Enrollment</strong> section<br />
2. Under the Dental Plan<br />
Selection section, read<br />
the Flex Cash coverage<br />
eligibility information to<br />
determine whether or not<br />
you are eligible for the<br />
Flex Cash plan<br />
3. If eligible for Flex Cash<br />
plan, first decline dental<br />
coverage. Select the<br />
Decline Coverage radio<br />
button to decline dental<br />
coverage<br />
4. To enroll in Dental Flex<br />
Cash plan, select the<br />
<strong>New</strong> <strong>Enrollment</strong> radio<br />
button under the Dental<br />
Flex Cash section<br />
5. Information: Click the<br />
FlexCash Plan hyperlink<br />
to get more information<br />
about this plan<br />
6. Provide your alternate<br />
dental insurance policy<br />
information including the<br />
following:<br />
• Social Security<br />
number of the person<br />
who holds the<br />
alternate policy under<br />
which you are<br />
covered under<br />
• Alternate dental<br />
insurance carrier<br />
name<br />
• Policy number<br />
7. After selecting all<br />
changes, skip to the<br />
Complete <strong>New</strong><br />
<strong>Enrollment</strong> Elections<br />
section (on page 14) to<br />
complete the process<br />
Administrative Applications<br />
Self Service/e<strong>Benefits</strong>/<strong>New</strong> <strong>Hire</strong>/<strong>New</strong>ly <strong>Eligible</strong> <strong>Benefits</strong> <strong>Enrollment</strong><br />
Business Process Guide Page: 10
How do I enroll in a Flex Spending Health (HCRA) and/or Flex Spending Dependent (DCRA)<br />
plan?<br />
The <strong>New</strong> <strong>Enrollment</strong> page<br />
displays.<br />
1. Follow steps 1 and 2 in<br />
the Navigate to <strong>New</strong><br />
<strong>Enrollment</strong> section<br />
2. Under the Flex Spending<br />
Accounts section, read<br />
the information about the<br />
following voluntary benefit<br />
plans:<br />
• Health Care<br />
Reimbursement<br />
Account (HCRA):<br />
Select the <strong>New</strong><br />
<strong>Enrollment</strong> radio<br />
button to enroll in the<br />
HCRA plan<br />
• Dependent Care<br />
Reimbursement<br />
Account (DCRA):<br />
Select the <strong>New</strong><br />
<strong>Enrollment</strong> radio<br />
button to enroll in<br />
DCRA plan<br />
3. Information: Click the<br />
Health Care<br />
Reimbursement<br />
Account or Dependent<br />
Care Reimbursement<br />
Account hyperlink to get<br />
more information about<br />
these plans.<br />
4. As appropriate, type in<br />
your deduction amount in<br />
the Monthly HCRA<br />
Amount field and/or the<br />
Monthly DCRA Amount<br />
field<br />
5. After selecting all<br />
changes, skip to the<br />
Complete <strong>New</strong><br />
<strong>Enrollment</strong> Elections<br />
section (on page 14) to<br />
complete the process<br />
Administrative Applications<br />
Self Service/e<strong>Benefits</strong>/<strong>New</strong> <strong>Hire</strong>/<strong>New</strong>ly <strong>Eligible</strong> <strong>Benefits</strong> <strong>Enrollment</strong><br />
Business Process Guide Page: 11
How do I enroll my eligible dependents in my Medical, Dental, and/or Vision plan?<br />
The <strong>New</strong> <strong>Enrollment</strong> page<br />
displays.<br />
1. Follow steps 1 and 2 in<br />
the Navigate to <strong>New</strong><br />
<strong>Enrollment</strong> section<br />
At the bottom section of the<br />
<strong>New</strong> <strong>Enrollment</strong> page, you<br />
can add <strong>New</strong> Dependents<br />
and cover them in your<br />
Medical, Dental, and/or<br />
Vision plan.<br />
2. To add a new dependent,<br />
click the Add <strong>New</strong><br />
Dependent button<br />
The Dependent Personal<br />
Information page displays.<br />
3. Enter the Personal<br />
Information of the<br />
dependent.<br />
Note: Fields marked with an<br />
asterisk are required. Social<br />
Security number is required<br />
for all dependents.<br />
4. Enter the Address &<br />
Telephone information.<br />
5. If address and phone are<br />
the same as the<br />
employee, then mark the<br />
Same Address as<br />
Employee checkbox<br />
Administrative Applications<br />
Self Service/e<strong>Benefits</strong>/<strong>New</strong> <strong>Hire</strong>/<strong>New</strong>ly <strong>Eligible</strong> <strong>Benefits</strong> <strong>Enrollment</strong><br />
Business Process Guide Page: 12
Note: In this example, we<br />
have added a son as a new<br />
dependent.<br />
6. Click the OK button to<br />
save the new dependent<br />
in the database and<br />
return to the <strong>New</strong><br />
<strong>Enrollment</strong> page<br />
The dependents you added<br />
in the database will appear<br />
at the bottom section of the<br />
<strong>New</strong> <strong>Enrollment</strong> page.<br />
Note: In this example, we<br />
have added a spouse and a<br />
son.<br />
Administrative Applications<br />
Self Service/e<strong>Benefits</strong>/<strong>New</strong> <strong>Hire</strong>/<strong>New</strong>ly <strong>Eligible</strong> <strong>Benefits</strong> <strong>Enrollment</strong><br />
Business Process Guide Page: 13
Note: You must have a<br />
medical or dental plan<br />
selected for yourself before<br />
you can cover your eligible<br />
dependents in the same plan.<br />
7. Use the drop-down menu<br />
to select Add from the<br />
Medical Coverage,<br />
Dental Coverage, and/or<br />
Vision Coverage<br />
Note: You may provide the<br />
Primary Care Physician when<br />
enrolling dependents in Blue<br />
Shield.<br />
8. After selecting all<br />
changes, skip to the<br />
Complete <strong>New</strong><br />
<strong>Enrollment</strong> Elections<br />
section (on page 14) to<br />
complete the process<br />
Administrative Applications<br />
Self Service/e<strong>Benefits</strong>/<strong>New</strong> <strong>Hire</strong>/<strong>New</strong>ly <strong>Eligible</strong> <strong>Benefits</strong> <strong>Enrollment</strong><br />
Business Process Guide Page: 14
Complete <strong>New</strong> <strong>Enrollment</strong> Elections<br />
The <strong>New</strong> <strong>Enrollment</strong> page<br />
displays.<br />
1. After you have made all<br />
your elections on the<br />
<strong>New</strong> <strong>Enrollment</strong> page,<br />
click the Continue button<br />
at the bottom of the page<br />
Administrative Applications<br />
Self Service/e<strong>Benefits</strong>/<strong>New</strong> <strong>Hire</strong>/<strong>New</strong>ly <strong>Eligible</strong> <strong>Benefits</strong> <strong>Enrollment</strong><br />
Business Process Guide Page: 15
The final submit page for<br />
<strong>New</strong> <strong>Enrollment</strong> displays.<br />
2. Effective Date of<br />
Coverage: Review this<br />
section to understand<br />
when your new elections<br />
will be effective<br />
3. Eligibility<br />
Documentation: Review<br />
this section to find out if<br />
any additional<br />
documentation is needed<br />
by the Human<br />
Resources Office before<br />
your election request can<br />
be finalized<br />
4. Disclosures and<br />
Privacy Notice: Click this<br />
hyperlink to read the<br />
disclosures and privacy<br />
information about the<br />
benefit plans you have<br />
selected<br />
Note: See next page to<br />
understand the disclosures<br />
and privacy page.<br />
5. After reading the<br />
Disclosures and<br />
Privacy Information,<br />
mark the checkbox to<br />
affirm that you have read<br />
it and understand it<br />
6. Click the Sign button to<br />
electronically authorize<br />
your elections<br />
Administrative Applications<br />
Self Service/e<strong>Benefits</strong>/<strong>New</strong> <strong>Hire</strong>/<strong>New</strong>ly <strong>Eligible</strong> <strong>Benefits</strong> <strong>Enrollment</strong><br />
Business Process Guide Page: 16
Disclosures and Privacy Notice<br />
The hyperlink mentioned in step 5 of the previous page provides legal disclosures and privacy information about<br />
various benefit plans such as Health (Medical & Dental), Flex Cash and Flexible Spending. The information is<br />
applicable to you only for the benefit plans you have elected. It is recommended that you read all the information to<br />
gain a better understanding of the legal aspects of the benefit plans you are electing to enroll in. Below is a sample of<br />
the Disclosures & Privacy Information section. To read the entire Disclosures and Privacy notice, click on the<br />
Disclosures and Privacy Notice hyperlink displayed on the final submit page.<br />
Administrative Applications<br />
Self Service/e<strong>Benefits</strong>/<strong>New</strong> <strong>Hire</strong>/<strong>New</strong>ly <strong>Eligible</strong> <strong>Benefits</strong> <strong>Enrollment</strong><br />
Business Process Guide Page: 17
Your name displays in the<br />
Sign field as an electronic<br />
signature.<br />
7. Click the Submit button to<br />
send your final election<br />
request to the Human<br />
Resources Office<br />
The submit confirmation<br />
page displays.<br />
8. After reading the<br />
information on this page,<br />
click the OK button<br />
Notes: You and the Benefit Programs Specialist in the Human Resources Office will receive an email notification<br />
indicating that you have submitted your benefits election request. Within 3 business days, the Benefit Programs<br />
Specialist will process and finalize your elections and send you another email notification indicating that your<br />
benefits enrollment is completed by the Human Resources Office.<br />
The email notifications are sent to your preferred email address on your MyCSUEB account. If you have not saved<br />
your preferred email address in MyCSUEB, please update it under Personal Information section > Email<br />
Addresses.<br />
Employees without a preferred email address in MyCSUEB will be contacted via phone by the Human Resources<br />
Office.<br />
Whom to Contact for Help?<br />
For additional help or to report problems with this functionality, please log a ticket via the Service Desk<br />
(http://www.csueastbay.edu/servicedesk).<br />
Administrative Applications<br />
Self Service/e<strong>Benefits</strong>/<strong>New</strong> <strong>Hire</strong>/<strong>New</strong>ly <strong>Eligible</strong> <strong>Benefits</strong> <strong>Enrollment</strong><br />
Business Process Guide Page: 18