LANTEK CABLE TESTER USER'S GUIDE - Ideal Industries
LANTEK CABLE TESTER USER'S GUIDE - Ideal Industries
LANTEK CABLE TESTER USER'S GUIDE - Ideal Industries

You also want an ePaper? Increase the reach of your titles
YUMPU automatically turns print PDFs into web optimized ePapers that Google loves.
<strong>LANTEK</strong> TM <strong>CABLE</strong> <strong>TESTER</strong> USER’S <strong>GUIDE</strong><br />
This document contains information proprietary to IDEAL INDUSTRIES, Inc. The<br />
information in this document is not to be used or duplicated in any manner without<br />
prior written approval from IDEAL INDUSTRIES.<br />
IDEAL INDUSTRIES and the IDEAL INDUSTRIES logo are registered trademarks of<br />
IDEAL INDUSTRIES.<br />
All other product names mentioned in this book are trademarked or copyrighted by<br />
their respective manufacturers.<br />
IDEAL INDUSTRIES, Inc.<br />
9650 Chesapeake Drive<br />
San Diego, CA 92123<br />
Phone: (800) 854-2708<br />
Fax: (858) 715-7003<br />
Manual Part No. 6510-00-5000 Rev. F<br />
© 2006, IDEAL INDUSTRIES, Inc. Printed in USA 2006-07
IDEAL INDUSTRIES STANDARD WARRANTY POLICY<br />
IDEAL INDUSTRIES warrants that all <strong>LANTEK</strong> Products manufactured or procured by<br />
IDEAL INDUSTRIES conform to IDEAL INDUSTRIES’ published specifications and are<br />
free from defects in materials and workmanship for a period of two (2) years from the<br />
date of delivery to the original Buyer, when used under normal operating conditions<br />
and within the service conditions for which they are designed. This warranty is not<br />
transferable and does not apply to used or demonstration products.<br />
The obligation of IDEAL INDUSTRIES arising from a Warranty claim shall be limited to<br />
repairing, or at its option, replacing without charge, any assembly or component<br />
(except batteries and cable adapters), which in IDEAL INDUSTRIES’ sole opinion<br />
proves to be defective within the scope of the Warranty. In the event <strong>Ideal</strong> <strong>Industries</strong><br />
is not able to modify, repair or replace nonconforming defective parts or components<br />
to a condition as warranted within a reasonable time after receipt thereof, Buyers shall<br />
receive credit in the amount of the original invoiced price of the product.<br />
IDEAL INDUSTRIES must be notified in writing of the defect or nonconformity within<br />
the Warranty period and the affected Product returned to IDEAL INDUSTRIES’ factory,<br />
designated Service Provider, or Authorized Service Center within thirty (30) days after<br />
discovery of such defect or nonconformity. Buyer shall prepay shipping charges and<br />
insurance for Products returned to IDEAL INDUSTRIES or its designated Service<br />
Provider for warranty service. IDEAL INDUSTRIES or its designated Service Provider<br />
shall pay costs for return of Products to Buyer.<br />
IDEAL INDUSTRIES shall have no responsibility for any defect or damage caused by<br />
improper storage, improper installation, unauthorized modification, misuse, neglect,<br />
inadequate maintenance, accident or for any Product which has been repaired or<br />
altered by anyone other than IDEAL INDUSTRIES or its authorized representative or<br />
not in accordance with instructions furnished by IDEAL INDUSTRIES.<br />
The Warranty described above is Buyer’s sole and exclusive remedy and no other<br />
warranty, whether written or oral, expressed or implied by statute or course of dealing<br />
shall apply. IDEAL INDUSTRIES specifically disclaims the implied warranties of<br />
merchantability and fitness for a particular purpose. No statement, representation,<br />
agreement, or understanding, oral or written, made by an agent, distributor, or<br />
employee of IDEAL INDUSTRIES, which is not contained in the foregoing Warranty will<br />
be binding upon IDEAL INDUSTRIES, unless made in writing and executed by an<br />
authorized representative of IDEAL INDUSTRIES. Under no circumstances shall IDEAL<br />
INDUSTRIES be liable for any direct, indirect, special, incidental, or consequential<br />
damages, expenses, or losses, including loss of profits, based on contract, tort, or any<br />
other legal theory.<br />
IDEAL INDUSTRIES recommends that the user review all of the information in<br />
Appendix A, SAFETY PRECAUTIONS, prior to using the <strong>LANTEK</strong> tester.
TABLE OF CONTENTS<br />
OPERATIONAL NOTES, CAUTIONS, AND WARNINGS................................................................VII<br />
TYPOGRAPHICAL CONVENTIONS.......................................................................................VII<br />
CHAPTER 1 YOUR <strong>CABLE</strong> <strong>TESTER</strong>............................................................... 1-1<br />
PRODUCT FEATURES ................................................................................................. 1-1<br />
PRODUCT AND PERFORMANCE SPECIFICATIONS................................................................... 1-2<br />
Product Specifications ........................................................................................ 1-2<br />
Performance Specifications ................................................................................. 1-3<br />
THE DISPLAY HANDSET (DH) ...................................................................................... 1-5<br />
Display Controls, Indicators and Interface ............................................................. 1-5<br />
1/4 VGA Front Panel .......................................................................................... 1-7<br />
Hard and Soft Keys............................................................................................ 1-8<br />
THE REMOTE HANDSET (RH) ....................................................................................... 1-9<br />
Display, Controls, Indicators and Interface .......................................................... 1-10<br />
POWER MANAGEMENT.............................................................................................. 1-11<br />
Operating the DH and RH From AC Power ........................................................... 1-11<br />
Battery Charging ............................................................................................. 1-11<br />
OVERVIEW OF LINK TESTING AND REQUIREMENTS ............................................................. 1-12<br />
Permanent Link Test Setup ............................................................................... 1-12<br />
Channel Link Test Setup ................................................................................... 1-12<br />
CHAPTER 2 <strong>CABLE</strong> SETUP PROCEDURES .................................................... 2-1<br />
SETTING PREFERENCES .............................................................................................. 2-1<br />
User Information ............................................................................................... 2-1<br />
Autotest Preferences.......................................................................................... 2-2<br />
Contrast........................................................................................................... 2-3<br />
Timeout Options................................................................................................ 2-4<br />
Measurement Units............................................................................................ 2-4<br />
Baud Rate ........................................................................................................ 2-5<br />
Talkset............................................................................................................. 2-5<br />
Date and Time .................................................................................................. 2-6<br />
Language ......................................................................................................... 2-7<br />
Restore Defaults................................................................................................ 2-7<br />
Pack Memory .................................................................................................... 2-8<br />
Clear Memory ................................................................................................... 2-8<br />
Select Save Media ............................................................................................. 2-9<br />
Wiremap Color Scheme ...................................................................................... 2-9<br />
Temperature................................................................................................... 2-10<br />
<strong>CABLE</strong> ID/AUTO AND 606 INCREMENT OPTIONS............................................................... 2-10<br />
Simple ID....................................................................................................... 2-10<br />
Standard Cable ID ........................................................................................... 2-11<br />
i
Setting <strong>LANTEK</strong> to TIA/EIA 606-A Standards Format............................................. 2-13<br />
DUALMODE ......................................................................................................... 2-14<br />
Performing in DUALmode: ................................................................................ 2-15<br />
OTHER OPERATIONS ............................................................................................... 2-16<br />
Changing Default NVP Value of a Cable............................................................... 2-16<br />
Changing the Default Reference Temperature (Tref) Value...................................... 2-16<br />
Custom Cable Settings and Parameters .............................................................. 2-17<br />
TONE GENERATOR.................................................................................................. 2-19<br />
Activating the Tone Generator Using the DH........................................................ 2-19<br />
Activating the Tone Generator Using the RH ........................................................ 2-20<br />
CHAPTER 3 STRUCTURED <strong>CABLE</strong> FIELD CALIBRATION AND TESTING ....... 3-1<br />
ii<br />
FIELD CALIBRATION – CAT3/5E/6/6A AND CLASS C/D/E/EA/F/FA (TERA AND EC 7) ................. 3-1<br />
FIELD CALIBRATION - GG45 ....................................................................................... 3-2<br />
GG45 – Troubleshooting ..................................................................................... 3-4<br />
Testing a GG45 Cabling System........................................................................... 3-4<br />
FIELD CALIBRATION - PATCHCORD TESTING ...................................................................... 3-5<br />
FIELD CALIBRATION - BLOCK TESTING 66/110/BIX .......................................................... 3-6<br />
AUTOTEST AND SINGLE TEST FOR STRUCTURED <strong>CABLE</strong>.......................................................... 3-8<br />
Autotest Suite Overview ..................................................................................... 3-8<br />
Test Setup...................................................................................................... 3-11<br />
Test Sequence ................................................................................................ 3-12<br />
Setting Autotest Preferences ............................................................................. 3-12<br />
Running Autotest and Understanding Results....................................................... 3-12<br />
Interpreting Autotest Results ............................................................................ 3-13<br />
Warning Screens ............................................................................................. 3-14<br />
Using Jobs to Store Test Results ........................................................................ 3-15<br />
Saving Current Autotest Results ........................................................................ 3-15<br />
Viewing or Deleting Stored Autotest Results ........................................................ 3-16<br />
Autotest Graphs .............................................................................................. 3-17<br />
ANALYZE TESTING FOR STRUCTURED <strong>CABLE</strong> .................................................................... 3-20<br />
Analyze Single Test Mode Overview ................................................................... 3-20<br />
Analyze Test Setup .......................................................................................... 3-32<br />
Analyze Test Sequence..................................................................................... 3-33<br />
Running a Single Test ...................................................................................... 3-33<br />
Interpreting Analyze Test Results ...................................................................... 3-34<br />
TROUBLESHOOTING TOOLS: TDR ................................................................................ 3-35<br />
How TDR Works .............................................................................................. 3-35<br />
How to Perform a TDR Test............................................................................... 3-35<br />
The TDR Plot................................................................................................... 3-36<br />
Viewing TDR Results ........................................................................................ 3-37<br />
Interpreting TDR Results .................................................................................. 3-37<br />
Evaluating a TDR Graph ................................................................................... 3-37<br />
Storing, Retrieving, and Deleting TDR Results...................................................... 3-38
TROUBLESHOOTING 10/100/1000 BASE-T ................................................................... 3-39<br />
CHAPTER 4 COAX <strong>CABLE</strong> FIELD CALIBRATION AND TESTING.................... 4-1<br />
UNDERSTANDING COAX <strong>CABLE</strong> .................................................................................... 4-1<br />
COAX STANDARDS .................................................................................................. 4-1<br />
COAX AUTOTEST SUITE............................................................................................. 4-2<br />
COAX FIELD CALIBRATION AND TESTING PROCEDURE .......................................................... 4-2<br />
TROUBLESHOOTING COAX CABLING............................................................................... 4-4<br />
CHAPTER 5 FIBER OPTICS <strong>CABLE</strong> FIELD CALIBRATION AND TESTING<br />
(FIBERTEK TM ) ............................................................................................ 5-1<br />
SETTING AUTOTEST PREFERENCES ................................................................................. 5-1<br />
Specifying a Module (Fiber Type) ......................................................................... 5-1<br />
FIELD CALIBRATION (GENERAL) .................................................................................... 5-3<br />
PERFORMING A FIELD CALIBRATION................................................................................ 5-4<br />
AUTOTEST CONFIGURATION......................................................................................... 5-4<br />
Method ‘A’ ........................................................................................................ 5-5<br />
Method ‘A’ Alternate .......................................................................................... 5-6<br />
PERFORMING A FIBER AUTOTEST ................................................................................... 5-7<br />
Setup & Calibration for Loopback Testing (Single Handset) ...................................... 5-7<br />
Loopback Testing .............................................................................................. 5-8<br />
Length Test (Dual Handset) ................................................................................ 5-9<br />
Dual Wavelength Attenuation Test Setup ............................................................ 5-10<br />
Dual Wavelength Attenuation Testing ................................................................. 5-10<br />
TESTING WITH FIBER STANDARDS ............................................................................... 5-11<br />
INTERPRETING AUTOTEST RESULTS FOR FIBER OPTICS ....................................................... 5-12<br />
Pass/Fail Reporting .......................................................................................... 5-12<br />
Saving Current Autotest Results ........................................................................ 5-12<br />
Manually Saving Autotest Results (AutoSave Disabled) ......................................... 5-12<br />
Manipulating Job Folders .................................................................................. 5-12<br />
Viewing Result Details ...................................................................................... 5-13<br />
MEASURING RETURN LOSS ........................................................................................ 5-13<br />
CHAPTER 6 FIBER OPTICS DIAGNOSTICS (TRACETEK TM )........................... 6-1<br />
TRACETEK VS. OTDR ............................................................................................. 6-1<br />
OTDR Operating Principles .................................................................................. 6-1<br />
TRACETEK OPERATING PRINCIPLES .............................................................................. 6-3<br />
USING TRACETEK .................................................................................................. 6-3<br />
High Resolution................................................................................................. 6-4<br />
Medium (Med) Resolution ................................................................................... 6-4<br />
Low Resolution.................................................................................................. 6-4<br />
TRACETEK OVERVIEW ................................................................................................ 6-4<br />
TRACETEK DISPLAY ................................................................................................ 6-5<br />
TESTING WITH TRACETEK ......................................................................................... 6-8<br />
SAVING TRACETEK RESULTS...................................................................................... 6-9<br />
iii
TROUBLESHOOTING WITH TRACETEK .......................................................................... 6-10<br />
Q&A: IDENTIFYING TRACETEK CONFIGURATION PROBLEMS................................................ 6-11<br />
CHAPTER 7 <strong>LANTEK</strong> REPORTER SOFTWARE............................................... 7-1<br />
iv<br />
SYSTEM REQUIREMENT .............................................................................................. 7-1<br />
<strong>LANTEK</strong> REPORTER INSTALLATION AND START-UP ........................................................... 7-1<br />
<strong>LANTEK</strong> Reporter Upgrades................................................................................. 7-1<br />
Installation Procedure ........................................................................................ 7-1<br />
Starting the <strong>LANTEK</strong> Reporter Program................................................................. 7-2<br />
<strong>TESTER</strong>-TO-PC CONNECTIVITY ..................................................................................... 7-2<br />
PC Cables......................................................................................................... 7-2<br />
Establishing a Connection ................................................................................... 7-3<br />
<strong>LANTEK</strong> REPORTER USER INTERFACE .......................................................................... 7-5<br />
The Menu Bar ................................................................................................... 7-5<br />
The Status Bar ................................................................................................ 7-10<br />
The Toolbar .................................................................................................... 7-10<br />
The Right Mouse Button ................................................................................... 7-10<br />
<strong>LANTEK</strong> REPORTER HELP SYSTEM OVERVIEW ............................................................... 7-11<br />
Help Topics Option........................................................................................... 7-11<br />
Help Topics Screen .......................................................................................... 7-11<br />
Using Help Screen ........................................................................................... 7-12<br />
About <strong>LANTEK</strong> Reporter Screen ......................................................................... 7-12<br />
UPLOADING DH TESTS TO THE PC ............................................................................... 7-12<br />
Upload procedure ............................................................................................ 7-12<br />
WORKING WITH THE DATABASE .................................................................................. 7-14<br />
Creating a New Database ................................................................................. 7-15<br />
Opening an Existing Database ........................................................................... 7-15<br />
WORKING AT THE JOB LEVEL...................................................................................... 7-16<br />
Navigating the Job Tree.................................................................................... 7-16<br />
Adding a Job................................................................................................... 7-16<br />
Editing a Job................................................................................................... 7-17<br />
Adding or Editing Customer Details .................................................................... 7-18<br />
Adding or Changing the Test Set Operator Name ................................................. 7-19<br />
Finding a Job or Test........................................................................................ 7-19<br />
WORKING AT THE TEST LEVEL .................................................................................... 7-20<br />
Displaying the Test Grid ................................................................................... 7-20<br />
Viewing Test Details......................................................................................... 7-20<br />
Moving Tests Between Jobs............................................................................... 7-23<br />
Editing Tests................................................................................................... 7-24<br />
Sorting the Tests............................................................................................. 7-24<br />
BACKING UP AND RESTORING A DATABASE ..................................................................... 7-25<br />
Backing Up a Database .................................................................................... 7-25<br />
Restoring a Database....................................................................................... 7-25<br />
PRODUCING AND PRINTING A REPORT ........................................................................... 7-26
Headers and Footers Command ......................................................................... 7-26<br />
Print Command ............................................................................................... 7-27<br />
APPENDIX A SAFETY PRECAUTIONS ......................................................... A-1<br />
HANDLE BATTERY PACKS WITH CARE.............................................................................. A-1<br />
STATEMENT OF LIABILITY............................................................................................ A-1<br />
ENVIRONMENTAL STATEMENT ....................................................................................... A-2<br />
IMPORTANT USER INFORMATION.................................................................................... A-2<br />
APPENDIX B CUSTOMER SUPPORT ............................................................ B-1<br />
CUSTOMER SERVICE ................................................................................................. B-1<br />
Technical Assistance .......................................................................................... B-1<br />
Service in the USA............................................................................................. B-1<br />
Service Outside the USA..................................................................................... B-1<br />
WEB SERVICES ....................................................................................................... B-3<br />
APPENDIX C FIBER OPTIC CABLING STANDARDS & APPLICATION<br />
REQUIREMENTS ........................................................................................ C-1<br />
v
LIST OF TABLES<br />
Table 1-1: <strong>LANTEK</strong> Product Features.......................................................................... 1-1<br />
Table 1-2: <strong>LANTEK</strong> Performance Specification ............................................................. 1-3<br />
Table 1-3: FIBERTEK Performance Specification .......................................................... 1-3<br />
Table 1-4: TRACETEK Performance Specification.......................................................... 1-4<br />
Table 1-5: Display Handset (DH) Keys, LCD, and Connectors ........................................ 1-5<br />
Table 1-6: Ready Screen Indicators ........................................................................... 1-7<br />
Table 1-7: Soft Key Descriptions ............................................................................... 1-8<br />
Table 1-8: Remote Handset (RH) Keys, LED, and Connectors ...................................... 1-10<br />
Table 2-1: Autotest Preference Options ...................................................................... 2-2<br />
Table 2-2: Single ID Counting Examples................................................................... 2-12<br />
Table 2-3: Double ID Counting Examples ................................................................. 2-12<br />
Table 2-4: Custom Cable Parameter Options............................................................. 2-18<br />
Table 3-1: Preset Autotest Suites Available for Specific Cable Types ............................... 3-9<br />
Table 3-2: Test Result Symbols............................................................................... 3-13<br />
Table 3-3: Job Options .......................................................................................... 3-16<br />
Table 3-4: Test Options ......................................................................................... 3-17<br />
Table 3-5: Autotest Graph View Layout and Controls.................................................. 3-19<br />
Table 3-6: TDR Graphical Plot Layout and Controls .................................................... 3-36<br />
Table 6-1: Resolution Settings and Recommendations.................................................. 6-4<br />
Table 6-2: Key Elements of the TRACETEK Display....................................................... 6-5<br />
vi
OPERATIONAL NOTES, CAUTIONS, AND WARNINGS<br />
The following symbols are used in this manual to indicate that the user should use<br />
particular caution in order to prevent personal injury or damage to the tester or the<br />
system under test.<br />
Exercise caution when you see this symbol. It indicates actions that could be<br />
harmful to the user or to the equipment.<br />
Exercise extreme caution when you see this symbol. It indicates potentially<br />
lethal voltages.<br />
TYPOGRAPHICAL CONVENTIONS<br />
Boldface<br />
Refers to the name of a button on the keypad or screen. For example,<br />
the Enter key will be referred to as Enter.<br />
Italics Refers to a section, heading, or title within this manual.<br />
Quotation marks Identifies a “Screen Message”.<br />
vii
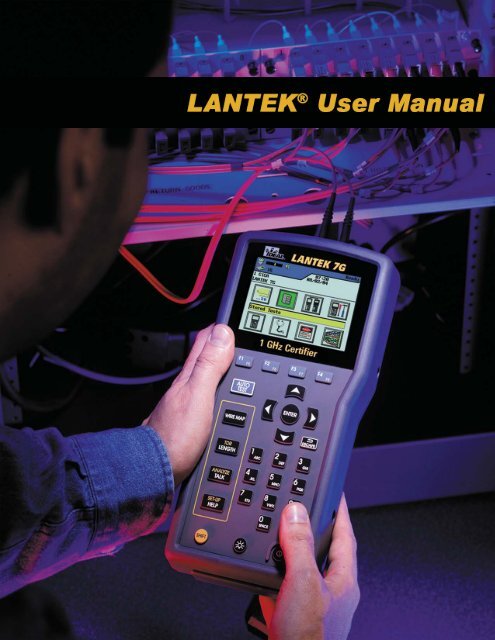
PRODUCT FEATURES<br />
FEATURES<br />
Table 1-1: <strong>LANTEK</strong> Product Features<br />
<strong>LANTEK</strong> 6<br />
Basic<br />
CHAPTER 1<br />
YOUR <strong>CABLE</strong> <strong>TESTER</strong><br />
<strong>LANTEK</strong> 6A<br />
Premium<br />
<strong>LANTEK</strong> 7G<br />
Premium<br />
Frequency Range 350 MHz 500 MHz 1 GHz<br />
Supports CAT 7 & ISO F Upgradeable Upgradeable<br />
Supports CAT 6a Upgradeable � �<br />
Supports CAT 6/5e/3 and ISO –E/D/C � � �<br />
Accuracy Level III/IIIe (Draft)/IV<br />
(<strong>LANTEK</strong> 6/6A/7G)<br />
ETL ETL ETL<br />
Support DUALmode Testing to save time � � �<br />
Test with Patchcords to save money � � �<br />
CAT 6 Test Storage with graphs 500 500 500<br />
Expansion Slots 2 PCMCIA 2 PCMCIA 2 PCMCIA<br />
Standard External Compact Flash Memory Option 64 MB 64 MB<br />
USB/Serial Port � � �<br />
Copper TDR Trace � � �<br />
Fiber Loss Measurement (FIBERTEK) Option Option Option<br />
Fiber Distance to Event (TRACETEK) Option Option Option<br />
Talk over Fiber & Copper (Full Duplex) � � �<br />
Display Screen on Remote � � �<br />
Troubleshooting Tone Generator on Near<br />
End and Remote<br />
� � �<br />
External Rapid Battery Charger & Extra<br />
Batteries<br />
Option � �<br />
�<br />
1-1
Chapter 1<br />
Your Cable Tester<br />
PRODUCT AND PERFORMANCE SPECIFICATIONS<br />
1-2<br />
The <strong>LANTEK</strong> family of LAN cable certification testers is designed to test and measure<br />
twisted pair, coaxial and fiber-optic cable used for high-speed data communications<br />
networks. The following tables describes the <strong>LANTEK</strong> product specification as well as<br />
the <strong>LANTEK</strong>, FIBERTEK, and TRACETEK performance specifications<br />
PRODUCT SPECIFICATIONS<br />
Standard Test Compliance<br />
ANSI/TIA/EIA 568B, CAT 6A(Draft)/6/5e/3, ISO-F/E/D/C, AS/NZS 3080, IEEE 802.3<br />
Ethernet, EN50173 – F/E/D/C<br />
Cable Types<br />
UTP/ScTP/FTP CAT 3/5e/6/7; IBM STP Type 1, 2, 6 Coax, 110/66/210 Block<br />
Dimensions (Display and Remote)<br />
10.1” x 5.0” x 2.3”<br />
256mm x 127mm x58mm<br />
Weight<br />
Display 2.3 lb (1050g)<br />
Remote 2.0 lb (914g)<br />
Battery 1.2 lb (548g)<br />
Battery Packs<br />
NiMH (Rechargeable)<br />
Typical Operating Life (Battery)<br />
8 hours<br />
Maximum Operating Temperature<br />
0 o C to 50 o C<br />
Maximum Storage Temperature<br />
-20 o C to +70 o C<br />
Humidity<br />
5 to 90% noncondensing
PERFORMANCE SPECIFICATIONS<br />
<strong>LANTEK</strong> TM<br />
Table 1-2: <strong>LANTEK</strong> Performance Specification<br />
Chapter 1<br />
Your Cable Tester<br />
Range Resolution Accuracy<br />
Length (50-100μ cable) 0-2000 ft 1 ft/0.1 m + (3% + 3 ft)<br />
Delay 0-8000 ns 1 ns/0.1 m + (3% + 1 ns)<br />
Average Impedance 35-180 Ω 0.1 Ω + (3% + 1 Ω)<br />
Capacitance (Bulk) 0-100 nF 1 pF or 3 dig + (2% + 20 pF)<br />
Capacitance 0-100 pF/ft 0.1 pF + (2% + 1 pF)<br />
DC Loop Resistance 35-200 Ω 0.1 Ω + (1% + 2 Ω)<br />
Attenuation 1 MHz – 1 GHz 0.1 dB Level III/IIIe(Draft)/IV<br />
NEXT 1 MHz – 1 GHz 0.1 dB Level III/IIIe(Draft)/IV<br />
Return Loss 1 MHz – 1 GHz 0.1 dB Level III/IIIe(Draft)/IV<br />
ELFEXT 1 MHz – 1 GHz 0.1 dB Level III/IIIe(Draft)/IV<br />
Table 1-3: FIBERTEK Performance Specification<br />
Specifications FIBERTEK TM<br />
Detector<br />
Receive Wavelength:<br />
Transmitter Laser Type<br />
MM 850 nm:<br />
MM 1300 nm:<br />
SM 1310 nm:<br />
SM 1550 nm:<br />
Measurement Accuracy<br />
Attenuation:<br />
Length:<br />
Display Resolution<br />
Attenuation:<br />
Length:<br />
Linearity 0.2 dB<br />
Length Range<br />
MM: 850 nm, 1300 nm<br />
SM: 1310 nm, 1550 nm<br />
VCSEL<br />
Fabry-Perot MCW (Grin Lens Focused)<br />
Fabry-Perot MCW (Grin Lens Focused)<br />
Fabry-Perot MCW (Grin Lens Focused)<br />
MM 850/1300 nm:<br />
SM 1310/1550 nm:<br />
(+/- 3%) + 1 meter<br />
MM 850/1300 nm:<br />
SM 1310/1550 nm:<br />
MM 850/1300 nm:<br />
SM 1310/1550 nm:<br />
MM 850 nm:<br />
MM 1300 nm:<br />
SM 1310 nm:<br />
SM 1550 nm:<br />
0.25 dB<br />
0.25 dB<br />
0.1 dB<br />
0.1 dB<br />
1.0 meter<br />
1.0 meter<br />
3,000 meters<br />
6,000 meters<br />
10,000 meters<br />
10,000 meters<br />
1-3
Chapter 1<br />
Your Cable Tester<br />
Table 1-3: FIBERTEK Performance Specification (Continued)<br />
1-4<br />
Specifications FIBERTEK TM<br />
Minimum Length 5 meters<br />
Physical<br />
Operating Temperature:<br />
Ambient Airflow:<br />
Network Specifications<br />
18 to 30 o C at Specified Accuracy<br />
0.3 Ms @ 20 o C<br />
1000BASE-SX/LX<br />
1000BASE-F<br />
10BASE-FL/FB<br />
Table 1-4: TRACETEK Performance Specification<br />
Specifications TRACETEK TM<br />
Detector<br />
Center Wavelength: 1300 nm, 1310 nm<br />
Minimum Reflection for Event Detection: -40 dB<br />
Detector Type: INGaAs<br />
Distances<br />
High Resolution: 800 meters<br />
Medium Resolution: 850 meters<br />
Low Resolution: 4000 meters<br />
Distance Accuracy: (+/- 3%) + 1 meter<br />
IEEE-802.3z<br />
ATM-155/622<br />
Event Spatial Resolution: 2 meters – High Resolution<br />
8 meters – Medium and Low Resolution<br />
Display Resolution: 0.01 meter<br />
Transmitters<br />
MM Power Output: 40mW, (+16.0 dBm)<br />
MM Source Type: 1300 nm Fabry-Perot Laser<br />
SM Power Output: 20mW, (+13.0 dBm)<br />
SM Source Type: 1310 nm Fabry-Perot Laser
THE DISPLAY HANDSET (DH)<br />
Chapter 1<br />
Your Cable Tester<br />
The <strong>LANTEK</strong> Display Handset performs as the command unit to control preference and<br />
test functions during various cable test activities.<br />
DISPLAY CONTROLS, INDICATORS AND INTERFACE<br />
Figure 1-1: Display Handset (DH)<br />
Table 1-5: Display Handset (DH) Keys, LCD, and Connectors<br />
Item DH Front Panel Description<br />
1 Graphical Display Presents menus, test results, graphs, action choices, and<br />
option keys.<br />
2 Option Keys Select menu options displayed on screen.<br />
3 Arrow/Enter Keys Allow up, down, left, and right movement on the display.<br />
Enter key selects a highlighted option or saves changes.<br />
4 AUTOTEST Key Perform a fast suite of tests. Test results are presented as<br />
pass/fail. Suites for established standards are<br />
preprogrammed in the tester.<br />
5 Wiremap Key Find shorts, opens, and miswires such as split and reversed<br />
pairs.<br />
6 Length/TDR Key Initiate a Length or TDR.<br />
7 Talk/Analyze Key Activate/deactivate the Talkset function or Select option to<br />
perform individual cable tests (real time).<br />
8 Help/Setup Key Display Help info or open language setup screen<br />
9 Escape Key Abort and exit the current screen without making changes.<br />
1-5
Chapter 1<br />
Your Cable Tester<br />
1-6<br />
Item DH Front Panel Description<br />
10 Alphanumeric Keys Enter numbers, letters or special characters. Select<br />
numbered menu options.<br />
11 Shift Key Toggle key activities having dual functions.<br />
12 Backlight Key Toggle the screen backlight on/off.<br />
13 On/Off Switch Power the Display Handset on/off.<br />
14 Low-Crosstalk<br />
Connector Port<br />
Attach adapters for all types of cables.<br />
15 Talkset Jack Connect a Talkset headset and microphone.<br />
16 DC Input Jack Connect an external power supply.<br />
17 PCMCIA Slots Insert memory cards for data storage. See Removable Mass<br />
Storage below.<br />
18 USB Port Supports the following functions:<br />
Upload stored test results to a PC.<br />
Load firmware updates.<br />
19 DB-9 Serial Port Supports the following functions:<br />
Print test results on a serial printer.<br />
Upload stored test results to a PC.<br />
Load firmware updates.<br />
Removable Mass Storage<br />
Caution: When removing the Compact Flash card from its slot as sustained<br />
usage will cause the card to become hot to the touch. This condition does not affect<br />
the operation of the card.<br />
The <strong>LANTEK</strong> tester provides two PCMCIA slots (Slot 1/Slot 2) for Compact Flash<br />
memory, which can be used for storing test results. Storage is organized in a standard<br />
Windows file structure with folder names corresponding to job names containing the<br />
test data files.<br />
The storage system can accommodate Compact Flash memory up to 256 MB. The<br />
firmware will automatically present the option of moving test data from the internal<br />
memory to the Compact Flash, if the flash card is installed. The stored test data from<br />
the flash card can be transferred to a PC or laptop through the use of a flash card<br />
reader.
1/4 VGA FRONT PANEL<br />
The Ready screen appears when the unit is powered up.<br />
Note: A “Field Calibration is Required” screen will appear if the test being performed<br />
requires a field calibration prior to testing.<br />
Figure 1-2: LCD Ready Screen<br />
Table 1-6: Ready Screen Indicators<br />
Item Function Description<br />
1 Battery Meter, or<br />
AC Cable<br />
Chapter 1<br />
Your Cable Tester<br />
Display remaining battery power level (from Empty to<br />
Full) or indicates when the unit is running off AC power.<br />
2 Talk Set Indicator Indicate when the Talk Set function is available.<br />
3 Storage Device<br />
Indicator and Memory<br />
Usage<br />
Display whether Compact Flash Memory or alternate<br />
device is used to store data. Also indicates the total<br />
number of records stored.<br />
4 Screen Title Display the screen title.<br />
5 Time and Date Display time and date information.<br />
6 Setting Display the cable type selected for testing.<br />
7 Job Title Display the current job name.<br />
8 Function Title Display the title of the highlighted function.<br />
9 Cable ID Icon Select the cable naming function.<br />
10 Stored Test Icon Select the stored test file manager function.<br />
11 Field Calibration Icon Select the field calibration function.<br />
12 Preferences Icon Select the instrument preferences function.<br />
13 Instrument Information<br />
Icon<br />
Select the instrument information function.<br />
14 Analyze Icon Select the option to perform individual cable tests (real<br />
time).<br />
15 Fiber Optics Icon Select the fiber optics function.<br />
16 Cable Type Icon Select or edit a cable type.<br />
1-7
Chapter 1<br />
Your Cable Tester<br />
1-8<br />
HARD AND SOFT KEYS<br />
User options will often appear at the bottom of the tester display screen above the<br />
four function keys (F1 to F4) directly below the display. To select an action, press its<br />
corresponding function key. Pressing and hold down the SHIFT key while<br />
simultaneously pressing one of the F1 to F4 keys will activate the F5 to F8 keys.<br />
(Example F4 is the F8 key.)<br />
In the example below, press the Function keys below the screen to adjust the Timeout<br />
options: F1 to increase or F2 to decrease.<br />
Soft Keys<br />
Function Keys<br />
Table 1-7: Soft Key Descriptions<br />
Soft Key Description<br />
Delete alphanumeric character(s) at the cursor; delete left of the<br />
cursor; and insert alphanumeric character(s) at the cursor<br />
Automatic naming function on the near-end and far-end<br />
Show a list of options to select from<br />
Begin or Run the selected activity<br />
Accept the new changes upon exiting the activity; or exits without<br />
making changes<br />
Selection of USB mode<br />
Save data to the current file or use the auto naming convention;<br />
and rename or overwrite on existing file<br />
Print data<br />
Show a list of manufactured cables used to set the correct NVP<br />
value<br />
Create a Custom Cable<br />
Display/Set Nominal Velocity of Propagation<br />
Page-up/down or increase/decrease values
Table 1-7: Soft Key Descriptions (Continued)<br />
Soft Key Description<br />
THE REMOTE HANDSET (RH)<br />
Increase/Decrease values by 1 and 10 units<br />
Time format in 12 or 24 hours<br />
Measurement in feet or meters<br />
Settings in Manual or Automatic<br />
Calculates a new NVP value with known length of cable<br />
Shrinks or Magnifies graph view<br />
Overwrites the highlighted data entry<br />
Activates or deactivates the highlighted option<br />
Edits existing data previous recorded<br />
Runs the selected activity<br />
Chapter 1<br />
Your Cable Tester<br />
Automatically scans and identifies storage media for use and<br />
refreshes info<br />
Changes Reference Temperature<br />
Changes color wiremap display (568 A/B)<br />
Show list of Fiber Optic Cabling Standards & Applications<br />
Manually enter value for Fiber Budget Loss Computation<br />
Calculate for value of budget loss<br />
Display the worst case values or margins<br />
The Remote Handset works with the DH (Display Handset) to perform Autotest or<br />
individual real time Analyze tests. The RH terminates the cable link and communicates<br />
with the DH. When performing measurements, the RH is automatically activated by<br />
the DH.<br />
Note: The RH needs to have power available when performing a field calibration,<br />
otherwise, the DH will not find it.<br />
1-9
Chapter 1<br />
Your Cable Tester<br />
1-10<br />
DISPLAY, CONTROLS, INDICATORS AND INTERFACE<br />
Figure 1-3: Remote Handset (RH)<br />
Table 1-8: Remote Handset (RH) Keys, LED, and Connectors<br />
Item RH Front Panel Description<br />
1 B/W LCD Two line alphanumeric display<br />
2 Hazard LED Excessive line voltage present (TELCO)<br />
3 Pass LED Successful test results<br />
4 Fail LED Unsuccessful test result(s)<br />
5 On LED RH unit on<br />
6 Autotest Key Press to activate Autotest<br />
7 Escape Key Abort and exit the current activity without<br />
making changes.<br />
8 Tone Key Press to activate/deactivate Tone<br />
9 Talk Key Press to activate/deactivate Talkset<br />
10 Shift Key Toggle key activities having dual functions<br />
11 Backlight Key Screen backlight, unused<br />
12 On/Off Switch Power the Remote Handset on/off<br />
13 Low-Crosstalk Connector Port Test access cable connector<br />
14 Talkset Jack Connect a Talkset headset and microphone<br />
15 DC Input Jack Connect an external power supply<br />
16 DB-9 Serial Port Interface to a PC or serial printer<br />
17 USB Port Interface to a PC
POWER MANAGEMENT<br />
Chapter 1<br />
Your Cable Tester<br />
Both the Display (DH) and Remote (RH) Handsets use interchangeable rechargeable<br />
NiMH (Nickel Metal-Hydride) battery packs.<br />
� The DH and RH can be run on battery power for approximately eight hours.<br />
Actual battery power times will vary based on factors such as operating time<br />
versus standby time, use of the display backlight, and ambient temperature.<br />
� When the battery is almost empty, the tester displays a warning message. The<br />
tester will automatically shut down before testing results are affected.<br />
� After a brief period of inactivity, the DH and RH automatically power down to<br />
save battery power.<br />
� If the tester will not be used for several days, it is recommended that the yellow<br />
battery protection strips be inserted to conserve battery charge.<br />
OPERATING THE DH AND RH FROM AC POWER<br />
The DH and RH handsets can be operated from an external DC source (AC/DC Wall<br />
Cube).<br />
Figure 1-4: Tester AC/DC Wall Cube Adapter<br />
When the AC/DC Wall Cube Adapter is used to power the handsets:<br />
� Both handset batteries will receive a trickle charge.<br />
� The DH handset will display the AC plug and cable indicator at the top left of the<br />
screen.<br />
Only the Wall Cube provided with the instrument should be used. Other<br />
types of Wall Cubes may cause damage to the tester. Adapters are<br />
currently available for European, United Kingdom and North American<br />
AC power.<br />
Note: Do not connect to AC power when testing shielded cables as a ground, loop<br />
may result and cause input protection warnings.<br />
BATTERY CHARGING<br />
The handset batteries are recharged using the AC/DC Wall Cube. The process can take<br />
up to approximately 8 hours to fully recharge batteries. The DH uses battery-powered<br />
flash ROM to store handset data and settings whenever the battery is removed from<br />
the tester. The internal flash ROM battery has a three-year life expectancy.<br />
Note: Charge time will vary depending upon battery level at the time of charging.<br />
1-11
Chapter 1<br />
Your Cable Tester<br />
OVERVIEW OF LINK TESTING AND REQUIREMENTS<br />
1-12<br />
The following sections describe typical setup for permanent link and channel link<br />
testing. Specific requirements for calibration of copper, coax, and fiber testing are<br />
discussed in Chapter 3: Structured Cable Field Calibration and Testing, Chapter 4:<br />
Coax Cable Field Calibration and Testing, and Chapter 5: Fiber Optics Cable Field<br />
TM<br />
Calibration and Testing (FIBERTEK ) .<br />
PERMANENT LINK TEST SETUP<br />
ANSI, EIA, TIA, and ISO all provide two network communication circuit specifications:<br />
permanent link and channel link. A permanent link consists of up to 90 meters of<br />
horizontal network cabling (maximum length limit applies to TIA standards only). The<br />
permanent link (shown below) is used to certify the horizontal network cable<br />
installation before network connection and user hookup. It excludes adapters,<br />
patchcords, and jumpers.<br />
CHANNEL LINK TEST SETUP<br />
A channel link includes all aspects of the cabling system. It consists of up to 90 meters<br />
of horizontal network cabling, as well as user patchcords, jumpers, and channel<br />
adapters at each end. The channel link (shown below) is used to certify the network<br />
installation, including the horizontal link and user patchcords.<br />
Figure 1-5: Permanent Link Test Connections<br />
Note: Ensure that the Cable Type is set to the correct testing links. Twisted Pair<br />
Permanent Link or Twisted Pair Channel Link. If you exceed the tester length limits,<br />
the tester will fail the link.
SETTING PREFERENCES<br />
CHAPTER 2<br />
<strong>CABLE</strong> SETUP PROCEDURES<br />
Most of the tester configuration parameters are set from the Preferences screen.<br />
To open the Preferences screen:<br />
1. Select Preferences on the Ready screen. The Preferences screen appears.<br />
Figure 2-1: Preferences Screen<br />
2. Use the UP/DOWN ARROW keys to select one or more options. These options<br />
are described in the sub-sections below.<br />
USER INFORMATION<br />
User information identifies the unit operator for test reports.<br />
3. Select User Information on the Preferences screen. The User Information screen<br />
appears.<br />
Figure 2-2: User Information Screen<br />
4. Use the ALPHA/NUMERIC keys to enter your name. Press the LEFT/RIGHT<br />
ARROW keys to move the cursor from one character to the next.<br />
5. Use the UP/DOWN ARROW keys to move between the fields.<br />
6. Press ENTER to save or ESCAPE to exit.<br />
Note: In most screens, press ESCAPE, the user will have the option to save or not<br />
save the changes selected during this procedure.<br />
2-1
Chapter 2<br />
Test Setup Procedures<br />
AUTOTEST PREFERENCES<br />
Autotest can be set to automatically stop on the first failed test, as well as to save,<br />
and name test results at the completion of each test series.<br />
1. Select Autotest Preferences on the Preferences screen. Press ENTER. The Autotest<br />
Preference screen appears.<br />
2. Press the UP/DOWN ARROW keys to highlight the desired option.<br />
3. Press to activate or deactivate the highlighted option.<br />
Figure 2-3: Autotest Preference Screen<br />
4. Press ENTER to save or ESCAPE to exit.<br />
Option Action<br />
Table 2-1: Autotest Preference Options<br />
Simple Cable ID Assign a fixed alpha value for the Cable ID.<br />
Stop on Fail Autotest aborts at the first failed test. Otherwise, Autotest continues until all<br />
tests are completed, regardless of results.<br />
Note: If a wire map cannot be completed due to gross miss-wiring, the Autotest<br />
may abort regardless of the setting of this preference.<br />
AutoSave Autotest automatically names and saves any passed AUTOTEST results. Failed<br />
tests are not automatically saved.<br />
Save Graphs Displaying graphs on the DH requires data to be transferred from the RH to the<br />
DH. To save time during testing, do not select this option.<br />
Note: De-selecting this option will not allow graphs to be loaded to the PC<br />
software or printed on certification reports.<br />
Auto Increment Autotest automatically increments Single and Double Cable ID test counters.<br />
Confirm Delete Activate request to confirm any Delete operation.<br />
Disable Fiber<br />
Autotest Length<br />
Disable or enable fiber Autotest length procedure.<br />
Enable 606A Enable 606-A Cable ID naming standard.<br />
Dim Backlight Toggle illumination of screen display backlighting during Autotest.<br />
2-2
Table 2-1: Autotest Preference Options (continued)<br />
Option Action<br />
Enable Tera to<br />
Tera Mode<br />
Enable Wiremap<br />
on Failed Autotest<br />
CONTRAST<br />
Chapter 2<br />
Test Setup Procedures<br />
<strong>LANTEK</strong> is set to default with Tera-to-Tera enable mode.<br />
In this mode, <strong>LANTEK</strong> firmware assumes that there is Tera-to-Tera<br />
patchcords connected and will treat an Autotest as a Cat 7 Autotest.<br />
If unselected, <strong>LANTEK</strong> firmware will assume that there is Tera-to-RJ45<br />
patchcords attached and the Autotest will be treated as a Cat 6 Autotest.<br />
Mode dictates whether or not the <strong>LANTEK</strong> will automatically enter the advanced<br />
failure analysis when an Autotest fails.<br />
1. Select Contrast on the Preferences screen. Press ENTER. The Contrast screen<br />
appears.<br />
2. Select / or / to adjust the screen contrast.<br />
Figure 2-4: Contrast Screen<br />
3. Press ENTER to save or ESCAPE to exit.<br />
2-3
Chapter 2<br />
Test Setup Procedures<br />
2-4<br />
TIMEOUT OPTIONS<br />
Set time-out options to help conserve battery power when the tester is not in use.<br />
Default Timeout Settings:<br />
Backlight 1 minute<br />
Power 30 minutes<br />
1. Select Timeout Options on the Preferences screen. Press ENTER. The Timeout<br />
Options screen appears with the cursor on the Backlight Timeout option.<br />
Note: The timers begin counting from the last key press.<br />
2. Press the ARROW Keys to highlight the desired parameters.<br />
3. Select or to adjust the desired setting.<br />
Figure 2-5: Timeout Options Screen<br />
4. Press ENTER to save or ESCAPE to exit.<br />
MEASUREMENT UNITS<br />
Use this option to set the unit of measurement parameter for length measurements.<br />
The default setting is feet.<br />
1. Select Measurement Units on the Preferences screen. Press ENTER. The<br />
Measurement Units screen appears.<br />
2. Select either or to set the unit of measure to feet or meters.<br />
Figure 2-6: Measurement Units Screen
3. Press ENTER to save or ESCAPE to exit.<br />
Note: Refer to the following conversion for differences in measurement units:<br />
1 meter = 3.28084 ft<br />
1 foot = 0.3048006 m<br />
BAUD RATE<br />
Chapter 2<br />
Test Setup Procedures<br />
When using the RS-232 serial port, this option can configure the baud rate at which<br />
information will be transmitted.<br />
1. Select Baud Rate on the Preferences screen. Press ENTER. The Baud Rate screen<br />
appears.<br />
Figure 2-7: Baud Rate Screen<br />
2. Select or to choose the desired setting.<br />
3. Press ENTER to save or ESCAPE to exit.<br />
TALKSET<br />
<strong>LANTEK</strong> testers are “Talkset ready.” Use this option to configure communications<br />
between the Display Handset and the Remote Handset through an externally attached<br />
microphone/headset.<br />
To talk with someone using the talkset, both the Display Handset and the Remote<br />
Handset must be connected to a cable.<br />
If the Talkset is set to “Auto,” the Talkset feature is automatically enabled when<br />
Autotest is not running. If the Talkset is set to “Manual,” the TALK button must be<br />
pressed momentarily to enable the Talkset feature.<br />
The units will remain in “Talk” mode until the ESCAPE button on either unit is<br />
pressed, the AUTOTEST button is pressed, or after a period of no talk activity is<br />
detected by the Display Handset.<br />
1. Select Talkset on the Preferences screen. Press ENTER. The Talkset screen<br />
appears.<br />
2. Press the ARROW keys to highlight the desired setting.<br />
3. The default setting for Talkset is “Manual”. Select or to select the<br />
desired setting.<br />
2-5
Chapter 2<br />
Test Setup Procedures<br />
2-6<br />
Figure 2-8: Talkset Screens<br />
4. If the talkset is in Manual setting, select<br />
adjust the audible volume.<br />
5. Press ENTER to save or ESCAPE to exit.<br />
/ or / to<br />
DATE AND TIME<br />
Accurate date and time settings are necessary to create reliable record and report<br />
information.<br />
1. Select Date and Time on the Preferences screen. Press ENTER. The Date and Time<br />
screen appears.<br />
2. Select or to select the desired time format setting.<br />
3. Use the ARROW keys to highlight the parameter to be changed.<br />
4. Press or select the ALPHA/NUMERIC or SOFT keys to enter the desired setting.<br />
5. Repeat steps 2 and 3 until all of the desired parameters have been set.<br />
6. Press ENTER to save or ESCAPE to exit.<br />
Figure 2-9: Date and Time Screen
LANGUAGE<br />
The following languages are built into the <strong>LANTEK</strong>:<br />
Chinese Czech Deutsch<br />
Dutch English Espanol<br />
French Italian Korean<br />
Norwegian Polish Portuguese<br />
Russian<br />
Chapter 2<br />
Test Setup Procedures<br />
1. Select Language on the Preferences screen. Press ENTER. The Language screen<br />
appears.<br />
2. Select or to select the desired language.<br />
3. Press ENTER to save or ESCAPE to exit.<br />
Figure 2-10: Language Screen<br />
Note: Press SET-UP keys to quickly access the Language menu.<br />
RESTORE DEFAULTS<br />
Use this option to reset all unit settings to their factory defaults.<br />
1. From the Preferences screen, press the ARROW keys to highlight Restore<br />
Defaults.<br />
2. Press ENTER to restore the unit to the factory default settings.<br />
3. A Warning screen will appear. Select to accept the changes or select<br />
to exit this screen without making changes.<br />
Figure 2-11: Restore Defaults Warning Screen<br />
2-7
Chapter 2<br />
Test Setup Procedures<br />
2-8<br />
PACK MEMORY<br />
Use this option to clear the tester memory of test(s) marked for deletion in the Stored<br />
Results screen.<br />
Note: Using Pack Memory is similar to emptying the “Recycle Bin” on your computer.<br />
No active records will be deleted.<br />
1. From the Preferences screen, press the ARROW keys to highlight Pack Memory.<br />
2. Press ENTER to clear the tester memory of scheduled deletions.<br />
3. A Warning screen will appear. Select to accept the changes or select<br />
to exit this screen without making changes.<br />
CLEAR MEMORY<br />
Figure 2-12: Pack Memory Warning Screen<br />
Use this option to clear the tester memory of all data.<br />
1. From the Preferences screen, press the ARROW keys to highlight Clear Memory.<br />
2. Press ENTER to clear the tester memory.<br />
3. A Warning screen will appear. Select to accept the changes or select<br />
to exit this screen without making changes.<br />
Figure 2-13: Clear Memory Warning Screen<br />
Warning: There is NO UNDELETE option when Clear Memory is used. All stored<br />
tests will be permanently deleted.
SELECT SAVE MEDIA<br />
Use this option to select the type of tester storage memory to use.<br />
Chapter 2<br />
Test Setup Procedures<br />
1. From the Preferences screen, press the ARROW keys to highlight Select Save<br />
Media.<br />
2. Press ENTER, the Select Save Media screen appears.<br />
3. Use to automatically scan and identify all storage media operating within<br />
the DH.<br />
Figure 2-14: Select Save Media Screen<br />
4. Highlight the desired saving option and press ENTER to save or ESCAPE to exit<br />
without saving changes.<br />
WIREMAP COLOR SCHEME<br />
Use this option to select the type of wiremap color scheme to use.<br />
1. From the Preferences screen, press the ARROW keys to highlight Wiremap Color<br />
Scheme.<br />
2. Press ENTER. The Wiremap Color Scheme screen appears.<br />
3. Use the F1, F2, F3, or F2 Keys to select either STD, 568-A, 568-B, or<br />
Tera type cable.<br />
4. Press F4 to save selection.<br />
Figure 2-15: Wiremap Color Scheme Screen<br />
5. Press ENTER to save or ESCAPE to exit without saving changes.<br />
2-9
Chapter 2<br />
Test Setup Procedures<br />
TEMPERATURE<br />
Use this option to select the temperature to use.<br />
Note: This feature is a legacy option for early Category 6 installations where the<br />
ambient temperature was considered during cable certification.<br />
1. From the Preferences screen, press the ARROW keys to highlight Temperature.<br />
2. Press ENTER. The Temperature screen appears.<br />
3. Select or to choose either Fahrenheit or Celsius.<br />
4. Press ENTER to save or ESCAPE to exit.<br />
Note: Refer to the following equations for differences in temperature conversion:<br />
Celsius = (Temp Fahrenheit – 32*5/9)<br />
Fahrenheit = (9/5* Temp Celsius ) + 32.<br />
Figure 2-16: Temperature Screen<br />
<strong>CABLE</strong> ID/AUTO AND 606 INCREMENT OPTIONS<br />
2-10<br />
There are two type of cable naming available:<br />
� Simple Cable ID: Only the cable name and current value can be changed.<br />
� Standard Cable ID: Additionally, the counting range may be defined and<br />
individual digits may be locked.<br />
The type of cable naming is selected from the Preferences screen under Autotest<br />
Preferences.<br />
SIMPLE ID<br />
Selecting the Simple ID Option<br />
1. Select Autotest Preferences on the Preference screen. The Autotest Preferences<br />
screen appears.<br />
2. Press the ARROW keys to highlight Simple Cable ID.<br />
3. Press to activate the Simple Cable ID.
STANDARD <strong>CABLE</strong> ID<br />
Chapter 2<br />
Test Setup Procedures<br />
If the Simple Cable ID option is not activated in the Preferences screen under Autotest<br />
Preference, you have further options available to set the required cable.<br />
Setting a Cable ID<br />
1. In the Cable ID screen, highlight Set ‘Cable From’.<br />
2. Press ENTER to open the screen.<br />
Figure 2-17: Cable ID Screens<br />
Note: The screen that appears will reflect the most recently assigned Cable ID (either<br />
Single or Double). Double ID is used in this example.<br />
3. Enter the following parameters as required:<br />
a. ‘Cable From’ name, twelve (12) characters maximum.<br />
b. Current, Start, and End point of the counter, four digits each. After reaching the<br />
End point the counter will be reset.<br />
c. Select the icon to activate a lock and to activate the Auto Increment<br />
feature for a character.<br />
� Select to go to the ‘Cable To’ screen. Repeat steps a, b and c.<br />
4. After entering the desired ‘Cable From’ and ‘Cable To’ names and parameters,<br />
press ENTER to save and return to the Main Cable ID screen.<br />
Test Counter<br />
In addition to the cable name, you can assign up to four characters to identify<br />
individual tests.<br />
� The icon below a digit designates a non-incrementing field.<br />
� The icon indicates an automatically incrementing field.<br />
The default numbering scheme is set to starts counting from 0000 and ends at 9999.<br />
Custom numbering schemes may be used. Table 2-2 and Table 2-3 contain some<br />
examples for counting Single and Double IDs.<br />
2-11
Chapter 2<br />
Test Setup Procedures<br />
2-12<br />
Table 2-2: Single ID Counting Examples<br />
Preset Parameters Custom Settings<br />
Cable Name: TEST Cable Name: PANEL Cable Name: PANEL<br />
Start: 0 0 0 0 Start: 0 0 0 0 Start: 0 0 0 A<br />
End: 9 9 9 9 End: 0 0 2 2 End: 0 9 9 D<br />
Lock:<br />
Lock:<br />
Lock:<br />
Current: 0 0 0 0 Current: 0 0 0 0 Current: 0 1 8 A<br />
0 0 0 0 0 0 0 0 0 1 8 A<br />
0 0 0 1 0 0 0 1 0 1 8 B<br />
0 0 0 2 0 0 0 2 0 1 8 C<br />
0 0 0 3 0 0 1 0 0 1 8 D<br />
0 0 0 4 0 0 1 1 0 1 9 A<br />
0 0 0 5 0 0 1 2 0 1 9 B<br />
0 0 0 6 0 0 2 0 0 1 9 C<br />
0 0 0 7 0 0 2 1 0 1 9 D<br />
0 0 0 8 0 0 2 2 0 2 0 A<br />
0 0 0 9 0 0 0 0 0 2 0 B<br />
0 0 1 0 0 0 0 1 0 2 0 C<br />
0 0 1 1 0 0 0 2 0 2 0 D<br />
0 0 1 2 0 0 1 0 0 2 1 A<br />
Table 2-3: Double ID Counting Examples<br />
“Cable To” “Cable From”<br />
Cable name: OFFICE Cable name: DISTRIB<br />
Counter Counter<br />
Start: 0 0 0 A<br />
End: 0 0 9 D<br />
Lock:<br />
Current: 0 0 0 A<br />
Start: 0 0 0 0<br />
End: 9 9 9 9<br />
Lock:<br />
Current: 0 0 0 0<br />
0 0 0 A 0 0 0 0<br />
0 0 0 B 0 0 0 1<br />
0 0 0 C 0 0 0 2<br />
0 0 0 D 0 0 0 3<br />
0 0 1 A 0 0 0 4<br />
0 0 1 B 0 0 0 5<br />
0 0 1 C 0 0 0 6<br />
0 0 1 D 0 0 0 7<br />
0 0 2 A 0 0 0 8<br />
0 0 2 B 0 0 0 9<br />
0 0 2 C 0 0 1 0<br />
0 0 2 D 0 0 1 1<br />
0 0 3 A 0 0 1 2
SETTING <strong>LANTEK</strong> TO TIA/EIA 606-A STANDARDS FORMAT<br />
Chapter 2<br />
Test Setup Procedures<br />
The TIA/EIA 606-A standards for telecommunications infrastructures include the<br />
following elements:<br />
� Horizontal pathways and cabling,<br />
� Backbone pathways and cabling,<br />
� Telecommunications grounding/bonding,<br />
� Spaces (e.g., entrance facility, telecommunications room, equipment room), and<br />
� Firestopping.<br />
These Standards address the administration of telecommunications infrastructure by:<br />
� Assigning identifiers to components of the infrastructure,<br />
� Specifying elements of information which make up the infrastructure,<br />
� Specifying relationships between these records to access the information they<br />
contain,<br />
� Specifying reports presenting information on groups of records, and<br />
� Specifying graphical and symbolic requirements.<br />
Selecting Autotest Preferences to perform TIA/EIA 606-A Standards<br />
1. From the Preferences screen, use the UP/DOWN ARROW keys to select Autotest<br />
Preferences. Press ENTER. The Autotest Preferences screen appears.<br />
2. From the Autotest Preferences screen, use the UP/DOWN ARROW keys to select<br />
Enable 606A.<br />
Figure 2-18: Autotest Pref Screen – Enable 606A Selected<br />
3. Press to highlight the box green.<br />
4. Press ENTER to save or ESCAPE to exit.<br />
2-13
Chapter 2<br />
Test Setup Procedures<br />
Saving in TIA/EIA 606A Format<br />
1. Once the Enable 606A selection process has been completed, press AUTOTEST to<br />
begin.<br />
Note: <strong>LANTEK</strong> uses the Standards format to apply identification to the cables and<br />
their infrastructure relationship.<br />
2. At completion of the Autotest activity, select one of three cable parameters (Drop,<br />
Backbone or Backbone Pair) to set the cable name for saving the results. Cable<br />
naming can be completed using the Auto Increment feature or manually.<br />
Figure 2-19: TIA 606A Cable Parameter Screens<br />
3. Press ENTER to save the cable name and results or ESCAPE to exit.<br />
4. If Enable 606A is selected in the Autotest Preference, then a 606A Standards Cable<br />
parameter can be edited by pressing F1 or selecting the Cable ID on the DH Ready<br />
Screen.<br />
DUALMODE<br />
2-14<br />
The DUALmode TM feature on the <strong>LANTEK</strong> is designed to provide both Permanent Link<br />
and Channel Link test results in about the same time that it would take to do each<br />
Autotest separately. For Category 6, that means both Channel and Permanent Link<br />
results are obtained and stored in about 20 seconds.<br />
Based on the patent-pending technique that <strong>LANTEK</strong> uses to produce Permanent Link<br />
results, the dual mode adapters physically resemble Channel Adapters and patchcords<br />
that gather both phase and magnitude data for the full channel. The <strong>LANTEK</strong> Cable<br />
Certifier process removes the patchcords losses and signal reflections to produce<br />
Permanent Link results. The DUALmode function saves the results in two separate<br />
records.<br />
Other significant tests can be performed under the DUALmode process. For example,<br />
consider the case where you, the installer, have a job to install a Category 6 class<br />
system in a government installation in a country that uses an ISO-based National<br />
Standard. You use cable and connectivity manufactured by a US-based company. The<br />
government may require the installer to certify the ISO-based CLASS E standard but<br />
the US Company may require certification to the TIA 568 Category 6 Standard in order<br />
to issue a warranty. Previously, this might have required running both ISO and TIA<br />
certifications and passing the increased costs to your client, the buyer. But with<br />
DUALmode, certifications to ISO CLASS E Permanent Link and TIA 568B Category 6<br />
can be performed at the same time with no more effort than running only one test.
Chapter 2<br />
Test Setup Procedures<br />
Another example of performing DUALmode would be the determination of headroom<br />
with regards to higher bandwidth for future applications. Previously, you could visually<br />
inspect Category 5e Permanent Link Certification records and assess whether there is<br />
enough headroom to run the higher bandwidth applications. But in order to access<br />
complete definitive data, a Category 6 certification tests would also be required. These<br />
actions would normally be ignored due to the increased testing costs.<br />
With DUALmode, you could require that the system be certified to Category 5e<br />
Standards and that the system also be tested against the Category 6 limits. That way,<br />
in the future, your client would have definitive data about which of the links could<br />
support higher bandwidth applications. This information would be essential in any<br />
decision to re-terminate links using higher Category jacks or to pull higher category<br />
cable.<br />
PERFORMING IN DUALMODE:<br />
1. Move the cursor to select the Cable Type and press ENTER. The Cable Type screen<br />
appears.<br />
2. Move the cursor to Twisted Pair DUALmode and press ENTER. The DUALmode<br />
tests menu appears.<br />
3. Select the two (2) cable type combination to be tested in DUALmode and press<br />
ENTER.<br />
4. Press AUTOTEST. The PASS/FAIL results will be displayed. (Figure 2-20)<br />
Worst-case margins and values for NEXT, RL, ACR and Attenuation are shown for<br />
each of the DUALmode tests.<br />
Figure 2-20: DUALmode Autotest<br />
5. Press ENTER on the highlighted test to display its related graphic results.<br />
2-15
Chapter 2<br />
Test Setup Procedures<br />
OTHER OPERATIONS<br />
2-16<br />
CHANGING DEFAULT NVP VALUE OF A <strong>CABLE</strong><br />
1. From the Test Standard screen, select to change the NVP. The NVP screen<br />
will appear.<br />
Figure 2-21: NVP Screen<br />
2. Use the ALPHA/NUMERIC keys to manually enter one or more NVP value(s).<br />
3. To automatically calculate a new NVP value, select . The Measure NVP<br />
screen appears.<br />
4. Connect a test cable of known length.<br />
5. Using the ARROW and NUMERIC keys, enter the known cable length.<br />
6. Select to calculate a new NVP value. The display returns to the main NVP<br />
screen after the new NVP value has been calculated.<br />
Note: This is a channel measurement. Include the length of both patchcords when<br />
entering the cable length information.<br />
CHANGING THE DEFAULT REFERENCE TEMPERATURE (TREF) VALUE<br />
This function is typically used in very warm environments where cable performance<br />
degrades as temperature rises. Input the maximum expected temperature that the<br />
cable will be exposed to and the attenuation limits will changes accordingly. This<br />
ensures that the network will operate properly even in extreme heat. Be aware that<br />
the longer links may fail the autotest since the attenuation limits are more strict as<br />
higher temperature values are entered into the TREF function.<br />
1. From the Test Standard screen, select to change the Reference<br />
Temperature. The Reference Temperature screen will appear.<br />
2. Use the ALPHA/NUMERIC keys to manually enter a new Reference Temperature<br />
Value.<br />
3. Press ENTER to accept the new Reference Temperature.
CUSTOM <strong>CABLE</strong> SETTINGS AND PARAMETERS<br />
Chapter 2<br />
Test Setup Procedures<br />
All of the cable types pre-programmed into the <strong>LANTEK</strong> tester are associated with a<br />
predefined test standard. You cannot change these pre-programmed settings. If you<br />
want to run a different set of tests for a given cable you must create a Custom Cable.<br />
For example, if you would like to run Return Loss in addition to the TIA 568B Category<br />
5 tests (Return Loss is not a required TIA test), you must create a Custom Cable and<br />
select the tests you want to include in the test suite for this cable.<br />
A maximum of ten (10) custom cable settings can be created, stored, removed, and<br />
retrieved when needed.<br />
Creating a New Custom Cable Type<br />
1. Press F4 or select the Cable Type on the DH Ready screen. The Cable<br />
Type screen appears.<br />
2. Press the ARROW keys to highlight the desired cable type.<br />
3. Press ENTER, the Test Standard screen appears with list of cable type names.<br />
4. Position the cursor over the desired cable type and select . The Custom<br />
Cable screen appears.<br />
5. Change the desired cable settings, and then proceed to the next step, naming the<br />
cable.<br />
6. Position the cursor over Custom Name/NVP and press ENTER. The NVP Screen<br />
appears.<br />
7. Change NVP parameters as required and then name your new custom cable.<br />
8. Press SAVE to accept the changes and return to the Custom Cable screen.<br />
The new custom cable is now selected as the cable under test.<br />
Figure 2-22: Custom Name/NVP Screen<br />
Selecting or Deleting a Custom Cable Type<br />
1. Press F4 or select the Cable Type on the DH Ready screen. The Cable<br />
Type screen appears.<br />
2. Press the ARROW Key to highlight the Custom Cable type.<br />
3. Press ENTER to open the Custom Cable screen.<br />
4. Position the cursor over the desired custom cable type.<br />
5. Press ENTER to make the custom cable you highlighted the new cable type or<br />
select to delete the selected custom cable type.<br />
2-17
Chapter 2<br />
Test Setup Procedures<br />
2-18<br />
Editing an Existing Custom Cable Type<br />
1. Repeat Steps 1 to 3 from previous procedure.<br />
2. Select the cable type to be customized.<br />
3. Press the soft key. The Custom Cable parameter screen appears.<br />
4. Highlight the desired custom cable parameter and press ENTER to edit the<br />
settings.<br />
5. After making the desired changes, select the Custom Name/NVP option.<br />
The NVP screen appears.<br />
6. Press ENTER to save the cable under its current name or under a new name.<br />
Note: Refer to the section below for a description of custom cable parameter options.<br />
Custom Cable Parameters<br />
Figure 2-23: Custom Cable Parameter Screen<br />
Table 2-4: Custom Cable Parameter Options<br />
Item Parameter Description<br />
1 Frequency Range Use this menu to set minimum and maximum certification<br />
and cable performance frequencies.<br />
2 Connector Pinout This screen is used to define connector pinouts.<br />
Note: If one wire pair is not selected, tests for NEXT,<br />
attenuation, capacitance, DC resistance, and impedance<br />
will not be performed on that pair.<br />
3 Test Limits This screen is used to customize Autotest pass/fail limits.<br />
4 Link Models Custom NEXT and Attenuation limits are set by using a<br />
flat line limit or one of several different models.<br />
Frequency limits will vary depending on the <strong>LANTEK</strong><br />
model and link type.<br />
5 Select Autotests Not all cables will require the full suite of Autotests. Use<br />
this menu to select the Autotests to be performed.<br />
6 Custom Name/NVP Use the ALPHA/NUMERIC keys to enter a custom name<br />
or change the NVP parameters. The <strong>LANTEK</strong> testers can<br />
store up to 10 custom cables.
TONE GENERATOR<br />
Chapter 2<br />
Test Setup Procedures<br />
Both the Display Handset and Remote Handset can generate a “low” tone, “high” tone,<br />
or “warble” tone (alternating “low” and “high” tone at 2 Hz rate) that is detectable by<br />
most standard wire tracing amplifiers.<br />
Figure 2-24: Typical Tone Generator Setup<br />
Note: The WIREMAP, SHIFT, and TONE buttons are hard keys. Pair A, Pair B, Pair C,<br />
Pair D, Low, High, and Warble are soft keys that appear on the Display Handset.<br />
ACTIVATING THE TONE GENERATOR USING THE DH<br />
1. Connect the Display Handset to the cable under test.<br />
2. Press WIRE MAP to enter Tone mode.<br />
Note: The Tone mode will remain active until ESCAPE is pressed.<br />
3. Using the soft keys, select the pair (Pair 78, Pair 36, Pair 54, or Pair 12) on which<br />
to place the tone.<br />
4. Select the tone, press SHIFT, and select LOW, HIGH, or WARBLE using the soft<br />
keys.<br />
2-19
Chapter 2<br />
Test Setup Procedures<br />
2-20<br />
ACTIVATING THE TONE GENERATOR USING THE RH<br />
1. Connect the Remote Handset to the cable under test.<br />
2. Press TONE on the Remote Handset to enter Tone mode. The Remote Handset<br />
two-line display shows the first line TONE. The second line shows the tone type<br />
and placement of tone in the XY form of characters.<br />
X Character<br />
(Tone Type)<br />
Y Character<br />
(Placement of tone)<br />
L = Low 78 = Pair 78<br />
H = High 36 = Pair 36<br />
W = Warble 54 = Pair 54<br />
12 = Pair 12<br />
Example: L78 = Low tone, Pair 78<br />
Note: The Tone mode will remain active until ESCAPE is pressed.<br />
3. Select the pair on which to place the tone by pressing the TONE key to cycle<br />
through the options.<br />
4. Select the tone for the selected pair by pressing TONE to cycle through<br />
the options.
CHAPTER 3<br />
STRUCTURED <strong>CABLE</strong> FIELD<br />
CALIBRATION AND TESTING<br />
FIELD CALIBRATION – CAT3/5E/6/6A AND CLASS C/D/E/Ea/F/Fa<br />
(TERA AND EC 7)<br />
This Field Calibration is a 4-step process. Steps 1 and 2 are performed with the<br />
patchcords connected to the Handsets. Steps 3 and 4 are performed with open-ended<br />
patchcords (Only one end connected to the Handsets).<br />
To calibrate the tester, perform the following:<br />
Step 1<br />
� Connect the adapters to the Display Handset (DH) and Remote Handset (RH).<br />
� Power both units on.<br />
� Connect the patchcord that you plan to use as the RH patchcord to the adapters<br />
of the DH and RH units.<br />
� From the DH Ready screen, select Field Calibration. The Calibration screen<br />
appears.<br />
� From the DH Field Calibration screen, select START to begin the calibration<br />
process on the first (RH) patchcord. This first process takes about 10-20 seconds<br />
to complete.<br />
� At the completion of the first calibration process, tag the RH end of the first<br />
patchcord. Disconnect the first patchcord from the DH and RH unit adapters.<br />
This tag will remind you which end to reinsert into the RH for Step 4.<br />
Step 2<br />
� Insert the second (DH) matching patchcord into both the DH and RH adapters.<br />
� From the DH Field Calibration screen, select START to begin the second<br />
calibration step.<br />
� At the completion of the second patchcord step, disconnect one end of the<br />
second patchcord from the RH unit adapter (leaving the second end still attached<br />
to the DH unit).<br />
3-1
Chapter 3<br />
Structured Cable Field Calibration and Testing<br />
3-2<br />
Step 3<br />
� Re-insert the tagged end of the first patchcord into the RH unit adapter.<br />
� From the DH Field Calibration screen, select START or press AUTOTEST to<br />
begin the third calibration step.<br />
Step 4<br />
� From the RH, press AUTOTEST to begin the fourth calibration step.<br />
� If calibration is successful, the DH will briefly Display “Calibration Complete” and<br />
the RH will briefly display the PASS light.<br />
� If calibration is unsuccessful, the DH will briefly display either a Warning screen<br />
displaying “No Remote Handset” or a Calibration Failure screen.<br />
FIELD CALIBRATION - GG45<br />
This field calibration is a 4-step process. Steps 1 and 2 are performed with the GG45<br />
Calibration Adapters connected to the handsets. Steps 3 and 4 are performed with the<br />
GG45 Permanent Link Adapters open-ended patchcords and then the GG45 Calibration<br />
Load Terminator attached.<br />
The GG45 test kit comprises a Category 6/7 connector product that is backward<br />
compatible with Category 6 - RJ45s.
To calibrate the tester, perform the following:<br />
Steps 1 and 2<br />
Chapter 3<br />
Structured Cable Field Calibration and Testing<br />
� Connect the GG45 Calibration Adapters to the Display Handset (DH) and Remote<br />
Handset (RH). Power both units on.<br />
� From the DH Ready screen, select Field Calibration. The Calibration screen<br />
appears.<br />
� From the DH Field Calibration screen, select START to begin the first calibration<br />
process. When this process ends, select START again to perform the second<br />
calibration process. Each process will take about 10-20 seconds to complete.<br />
� At the completion of steps 1 and 2, disconnect the GG45 Calibration Adapters.<br />
Step 3<br />
� Insert the GG45 Permanent Link Adapters into both the Display and Remote<br />
Handsets.<br />
� From the DH Field Calibration screen, select START to begin the third calibration<br />
step.<br />
� Terminate the open end of the patchcord by connecting the GG45 Calibration<br />
Load Terminator and select START again.<br />
Step 4<br />
� From the RH, press AUTOTEST to begin the fourth calibration step.<br />
� Terminate the open end of the patchcord by connecting the GG45 Calibration<br />
Load Terminator and press AUTOTEST again.<br />
� When Step 4 is completed, the <strong>LANTEK</strong> is ready for testing Permanent Links.<br />
3-3
Chapter 3<br />
Structured Cable Field Calibration and Testing<br />
3-4<br />
GG45 – TROUBLESHOOTING<br />
A field calibration should be performed prior to implementing a test of the GG45<br />
cabling system. This process will ensure (1) synchronizing of the units, (2) qualifying<br />
(testing) of the patchcords and (3) gathering of loss data regarding the patchcords<br />
and mated connections.<br />
The equipment required for a GG45 calibration procedure is:<br />
� Display Handset<br />
� Remote Handset<br />
� GG45 Calibration Adapters<br />
(Two adapters joined by a short segment of Category 7 cable)<br />
� GG45 Calibration Load Terminator (100Ω Jack)<br />
� GG45 Permanent Link Adapters<br />
(A set of two adapters, each with a patchcord (approximately 2 meters) soldered<br />
to the adapter at one end and a GG45 Category 7 plug at the opposite end)<br />
TESTING A GG45 CABLING SYSTEM<br />
Figure 3-1: Typical Configuration for GG45 Cable Testing<br />
Typical configuration for testing has the DH unit and RH unit connected to the GG45<br />
Permanent Link Adapters. The cable under test is connected at the Category 7 plug<br />
end of both the DH and RH ends.
FIELD CALIBRATION - PATCHCORD TESTING<br />
Chapter 3<br />
Structured Cable Field Calibration and Testing<br />
This Field Calibration is a 4-step process. Steps 1 and 2 are performed with the hybrid<br />
(RJ45 Plug to RJ45-TIA-Reference-Jack) patchcords connected to the Handsets using<br />
the kit’s mini patchcord. Steps 3 and 4 are performed with open-ended hybrid<br />
patchcords (Only one end connected to the Handsets).<br />
To calibrate the tester, perform the following:<br />
Step 1<br />
� Connect the Category 5e/6 – RJ45 adapters to the Display Handset (DH) and<br />
Remote Handset (RH). Power both units on.<br />
� Connect the RJ45 plug of the first hybrid patchcord to the Remote Handset (RH).<br />
Using the RJ45 mini patchcord attach the DH RJ45-TIA Reference Jack end of the<br />
hybrid patchcord to one end of the mini patchcord and then connect the other<br />
end of the mini patchcord to the Display Handset (DH).<br />
Note: Patchcords can vary in length. The most common length used is the 2-meter<br />
length patchcords.<br />
� From the DH Ready Screen, select Field Calibration. The Calibration screen<br />
appears.<br />
� From the RH, press AUTOTEST to perform the first step of the calibration<br />
process. At the completion of step 1, disconnect the mini patchcord and hybrid<br />
patchcord from the RH and DH.<br />
Step 2<br />
� Connect the RJ45 plug of the second hybrid patchcord to the Display Handset<br />
(DH). Using the RJ45 mini patchcord attach the DH RJ45-TIA Reference Jack<br />
end of the hybrid patchcord to one end of the mini patchcord and then connect<br />
the other end of the mini patchcord to the Remote Handset (RH).<br />
� From the DH Field Calibration screen, select START or press AUTOTEST from<br />
the RH to perform the second step of the calibration process.<br />
� At the completion of step 2, disconnect the mini patchcord.<br />
3-5
Chapter 3<br />
Structured Cable Field Calibration and Testing<br />
3-6<br />
Step 3<br />
� Remove the RJ45 mini patchcord from the RH and the hybrid patchcord.<br />
� With the DH hybrid patchcord open-ended, select START from the DH Field<br />
Calibration screen to perform the third calibration process.<br />
Step 4<br />
� Re-connect the RJ45 plug of the first hybrid patchcords to the Remote Handset<br />
(RH).<br />
� With the RH hybrid patchcord open-ended, press AUTOTEST from the RH to<br />
perform the fourth calibration process. Upon completion of the calibration<br />
process, the <strong>LANTEK</strong> handsets and the hybrid patchcords are ready for use in<br />
testing cables.<br />
FIELD CALIBRATION - BLOCK TESTING 66/110/BIX<br />
This Field Calibration is a 4-step process. Steps 1 and 2 are performed with a<br />
patchcord connected to the Handsets. Steps 3 and 4 are performed with open-ended<br />
patchcords (only one end connected to each Handset).<br />
For Block 66 Systems<br />
The RJ45 block calibration adapters connected to the block during calibration is either<br />
the T568A or 568B RJ45/66 Block adapter. The T568A adapter is used with patchcords<br />
connected in a TIA-568A configuration. The T568B adapter is used with patchcords<br />
connected in a TIA-568B configuration. Both block adapters have the standard RJ45<br />
plug at the opposite end.
Calibrating the tester for the 110/BIX Block System:<br />
Step 1 and 2<br />
Chapter 3<br />
Structured Cable Field Calibration and Testing<br />
� Connect the adapters to the Display Handset (DH) and Remote Handset (RH).<br />
Power both units on.<br />
� Connect the RJ45-to-RJ45 patchcord that you plan to use as the RH patchcord to<br />
the adapters of the DH and RH units.<br />
� From the DH Ready screen, select Field Calibration. The Calibration screen<br />
appears. Select START to begin the calibration.<br />
� Select START again to perform the second calibration process. Each step will<br />
take about 10-20 seconds to complete.<br />
� At the completion of this calibration process disconnect the RJ45 patchcord from<br />
the DH unit, leaving the RJ45-to-RJ45 patchcord attached to the RH unit.<br />
Step 3<br />
� Insert the second (DH) RJ45 to Block Plug patchcord into the DH unit where the<br />
RJ45 end is connected into the DH unit adapter and the block plug is left openended.<br />
� From the DH Field Calibration screen, select START or press AUTOTEST to<br />
begin the third calibration process.<br />
Step 4<br />
� From the RH, press AUTOTEST to begin the fourth calibration step.<br />
� If calibration is successful, the DH will briefly Display “Calibration Complete” and<br />
the RH will briefly display the PASS light. The handsets and the patchcords are<br />
now ready for testing procedures.<br />
� If calibration is unsuccessful, the DH will briefly display either a Warning screen<br />
displaying “No Remote Handset” or a Calibration Failure screen.<br />
Calibrating the tester for the 66 Block System:<br />
Steps 1 and 2<br />
� Connect the RJ45 adapters to the Display Handset (DH) and Remote Handset<br />
(RH). Power both units on.<br />
� Connect the RJ45-to-RJ45 Patchcord that you plan to use as the RH Patchcord to<br />
the adapters of the DH and RH units.<br />
� From the DH Ready screen, select Field Calibration. The Calibration screen<br />
appears. Select START to begin the calibration process on the (RH) Patchcord.<br />
� Then select START again to perform the calibration process. This will take about<br />
10-20 seconds to complete.<br />
� At the completion of this calibration process disconnect the RJ45 patchcord from<br />
the DH unit leaving the RJ45-to-RJ45 patchcord attached to the RH unit.<br />
3-7
Chapter 3<br />
Structured Cable Field Calibration and Testing<br />
3-8<br />
Step 3<br />
� Connect the RJ45/66 Block adapter to one end of the DH RJ45 patchcord.<br />
Note: If field testing a TIA-568A connection system, use a T568A calibration adapter.<br />
If field testing a TIA-568B connection system, use a T568B calibration adapter.<br />
� Insert the other end of the DH patchcord into the DH unit, leaving the block<br />
adapter connection open-ended.<br />
� From the DH Field Calibration screen, select START, or press AUTOTEST to<br />
perform the third calibration process.<br />
Step 4<br />
� Press AUTOTEST on the RH to perform the fourth calibration process.<br />
� If calibration is successful, the DH will briefly Display “Calibration Complete” and<br />
the RH will briefly display the PASS light. The handsets and the patchcords are<br />
now ready for testing procedures.<br />
� If calibration is unsuccessful, the DH will briefly display either a Warning screen<br />
displaying “No Remote Handset” or a Calibration Failure screen.<br />
AUTOTEST AND SINGLE TEST FOR STRUCTURED <strong>CABLE</strong><br />
AUTOTEST SUITE OVERVIEW<br />
Autotest is the easiest and quickest way to measure and verify your cable installation.<br />
When the AUTOTEST key is pressed, the <strong>LANTEK</strong> tester automatically performs a<br />
series of pre-programmed tests. These test suites are pre-determined based on either<br />
adopted or proposed standards as well as specific parameters. After all tests have<br />
been completed, the tester displays a single overall pass/fail result and individual test<br />
pass/fail results.<br />
Autotests are performed with the Display Handset (DH) and Remote Handset (RH)<br />
connected at opposite ends of the cable under test.<br />
Test Suites<br />
Tests run during an Autotest depend on the cable type selected.<br />
Autotest can be preset to automatically save test results immediately following each<br />
suite of tests, or results can be saved and printed manually. To preset these functions,<br />
see Autotest Preferences.<br />
Individual sub-tests can be selected and viewed with more detailed data following<br />
completion of the Autotest using the Autotest Results screen.
Chapter 3<br />
Structured Cable Field Calibration and Testing<br />
Table 3-1: Preset Autotest Suites Available for Specific Cable Types<br />
Resistance<br />
Wiremap<br />
<strong>CABLE</strong> TYPES<br />
TWISTED PAIR PERMANENT<br />
Cat 5E, UTP/STP Perm * * * * * * * * * * * *<br />
Cat 6-250 UTP/STP Perm * * * * * * * * * * * * *<br />
Cat 6 Midspan POE Perm * * * * * * * * * * * *<br />
Cat 6 10GbE TSB155D 3.0 UTP/STP Perm * * * * * * * * * * * * *<br />
Cat 6a 500 Draft 3.0 UTP/STP Perm * * * * * * * * * * * * *<br />
ISO C UTP/STP 2nd Perm * * * * * * *<br />
ISO D UTP/STP 2nd Perm * * * * * * * * * * * *<br />
ISO E UTP/STP Perm * * * * * * * * * * * *<br />
ISO Ea 500 Draft 753 UTP/STP Perm * * * * * * * * * * * *<br />
ISO F 600 STP Perm * * * * * * * * * * * *<br />
ISO F 350 STP Perm * * * * * * * * * * * *<br />
EN50173-1 D UTP/STP Perm * * * * * * * * * * * *<br />
EN50173-1 E UTP/STP Perm * * * * * * * * * * * *<br />
EN50173-1 F 600 STP Perm * * * * * * * * * * * *<br />
EN50173-1 F 350 STP Perm * * * * * * * * * * * *<br />
EN50173.A1 D UTP/STP Perm * * * * * * * * * * * *<br />
AS/NZS 3080 UTP/STP Perm * * * * * * * * * * * * * *<br />
Graybar VIP 1000 UTP/STP Perm * * * * * * * * * * * *<br />
Graybar VIP 2000 UTP/STP Perm * * * * * * * * * * * * *<br />
Nexans LANmark D UTP/STP Perm * * * * * * * * * * * *<br />
Nexans LANmark E UTP/STP Perm * * * * * * * * * * * * *<br />
Nexans Epsilon E UTP/STP Perm * * * * * * * * * * * * *<br />
Nexans Class D UTP/STP Perm * * * * * * * * * * * *<br />
Korean Govt Residential Perm * * *<br />
Korean Govt Commercial Perm<br />
TWISTED PAIR BASIC<br />
* * *<br />
Cat 3 UTP Link * * * *<br />
Cat 5 UTP/STP Link * * * *<br />
Cat 5 Gbit UTP/STP Link * * * * * * *<br />
Cat 5E UTP/STP Link * * * * * * * * * * * *<br />
ISO C UTP/STP 1st Link * * * * * * * *<br />
ISO D UTP/STP 1.2 Link * * * * * * * *<br />
TPPMD UTP Link * * * * * * * * *<br />
TPDDI STP Link * * * * * * * * *<br />
AS/NZS C UTP/STP Link * * * * * * * * * *<br />
AS/NZS D UTP/STP Link * * * * * * * * * *<br />
BOSCH STP Link * * * * * * * * * *<br />
BOSCH 120S Link<br />
TWISTED PAIR CHANNEL<br />
* * * * * * * * *<br />
Cat 3 UTP Chan * * * *<br />
Cat 5 UTP/STP Chan * * * *<br />
Cat 5 Gbit UTP/STP Chan * * * * * * *<br />
Cat 5E UTP/STP Chan * * * * * * * * * * * *<br />
Cat 6-250 UTP/STP Chan * * * * * * * * * * * * *<br />
Cat 6 Midspan POE Chan * * * * * * * * * * * *<br />
Cat 6 10GbE TSB155D 1.3.2 UTP/STP Chan * * * * * * * * * * * * *<br />
Cat 6a 500 Draft 3.0 UTP/STP Chan * * * * * * * * * * * * *<br />
Length<br />
Capacitance<br />
NEXT<br />
Attenuation<br />
ACR<br />
Return Loss<br />
Impedance<br />
Delay and Skew<br />
Power Sum NEXT<br />
Power Sum ACR<br />
Headroom<br />
ELFEXT<br />
Power Sum ELFEXT<br />
3-9
Chapter 3<br />
Structured Cable Field Calibration and Testing<br />
3-10<br />
Resistance<br />
Wiremap<br />
<strong>CABLE</strong> TYPES<br />
TWISTED PAIR CHANNEL<br />
ISO C UTP/STP 2nd Chan * * * * * * *<br />
ISO D UTP/STP 1.2 Chan * * * * * * * *<br />
ISO D UTP/STP 2nd Chan * * * * * * * * * * * *<br />
ISO E UTP/STP Chan * * * * * * * * * * * *<br />
ISO Ea 500 Draft 753 UTP/STP Chan * * * * * * * * * * * *<br />
ISO E 10GbE Draft 762 UTP/STP Chan * * * * * * * * * * * *<br />
ISO TR24750 Draft 762 UTP/STP Chan * * * * * * * * * * * *<br />
ISO F 600 STP Chan * * * * * * * * * * * *<br />
ISO F 350 STP Chan * * * * * * * * * * * *<br />
EN50173-1 D UTP/STP Chan * * * * * * * * * * * *<br />
EN50173-1 E UTP/STP Chan * * * * * * * * * * * *<br />
EN50173-1 F 600 STP Chan * * * * * * * * * * * *<br />
EN50173-1 F 350 STP Chan * * * * * * * * * * * *<br />
EN50173.A1 C UTP Chan * * * * * * *<br />
EN50173.A1 D UTP/STP Chan * * * * * * * * * * * *<br />
AS/NZS C UTP/STP Chan * * * * * * * * * *<br />
AS/NZS D UTP/STP Chan * * * * * * * * *<br />
BOSCH STP Chan * * * * * * * * *<br />
BOSCH 120S Chan * * * * * * * *<br />
Graybar VIP 1000 UTP/STP Chan * * * * * * * * * * * *<br />
Graybar VIP 2000 UTP/STP Chan * * * * * * * * * * * * *<br />
Korean Govt Residential Chan * * *<br />
Korean Govt Commercial Chan * * * *<br />
SiemonUltra 6 UTP/STP Chan<br />
MISC. TYPES<br />
* * * * * * * * * * * * *<br />
LOCAL TALK * * * * *<br />
ISDN * * * * * * *<br />
DIN 44312-1 * * * * * * * * * *<br />
Bavaria STP Link * * * * * * * * * *<br />
AUTOMATCH * * * * * * * * *<br />
ECOMATCH * * * * * * * * *<br />
FOILTEK * * * * * * * * * *<br />
PAIRTEK * * * * * * * * * *<br />
SINGLE PAIR * * * * *<br />
USOC * * * * * * *<br />
IBM COAX * * *<br />
TWINAXIAL * * *<br />
ARCNET * * *<br />
CATV * * *<br />
VW STP Link * * * * * * * * * *<br />
Cat 6-200 UTP/STP Chan * * * * * * * * * * * * *<br />
Cat 6-200 UTP/STP Link * * * * * * * * * * * * *<br />
ALLIANZ 900 Chan * * * * * * * * * * * *<br />
Korean Emblem Grade 3 Chan * * * *<br />
Korean Emblem Grade 2 Chan * * * * * * * * * * * *<br />
Korean Emblem Grade 1 Chan * * * * * * * * * * * *<br />
Korean Emblem Premier Chan * * * * * * * * * * * *<br />
TPPMD UTP Chan * * * * * * *<br />
TPDDI STP Chan * * * * * * * * * *<br />
Length<br />
Capacitance<br />
NEXT<br />
Attenuation<br />
ACR<br />
Return Loss<br />
Impedance<br />
Delay and Skew<br />
Power Sum NEXT<br />
Power Sum ACR<br />
Headroom<br />
ELFEXT<br />
Power Sum ELFEXT
Resistance<br />
Chapter 3<br />
Structured Cable Field Calibration and Testing<br />
Wiremap<br />
<strong>CABLE</strong> TYPES<br />
MISC. TYPES<br />
RG59 100ft/31m MAX * * * * *<br />
RG59 Tri-Shield 100ft/31m MAX * * * * *<br />
RG59 Quad-Shield 100ft/31m MAX * * * * *<br />
RG59 300ft/92m MAX * * * * *<br />
RG59 Tri-Shield 300ft/92m MAX * * * * *<br />
RG59 Quad-Shield 300ft/92m MAX * * * * *<br />
RG6 100ft/31m MAX * * * * *<br />
RG6 Tri-Shield 100ft/31m MAX * * * * *<br />
RG6 Quad-Shield 100ft/31m MAX * * * * *<br />
RG6 300ft/92m MAX * * * * *<br />
RG6 Tri-Shield 300ft/92m MAX * * * * *<br />
RG6 Quad-Shield 300ft/92m MAX * * * * *<br />
TIA 568-B.2 UTP/STP Patchcord * * * *<br />
CAT6 Patchcord Quality Test<br />
TERA Patchcord Quality Test<br />
* * * *<br />
CAT5E Patchord Quality Test * * * *<br />
ISO F 1000 Draft STP Chan * * * * * * * * * * * *<br />
ISO F 1000 Draft STP Perm<br />
ETHERNET<br />
* * * * * * * * * * * *<br />
10Base T * * * * * * *<br />
10Base 2 * * *<br />
10Base 5 * * *<br />
100Base T Basic * * * *<br />
100Base T Channel * * * *<br />
Cat6 10GbE TSB155D 3.0 UTP/STP Chan * * * * * * * * * * * * *<br />
Cat 6a 10GbE Draft 3.0 UTP/STP Chan * * * * * * * * * * * * *<br />
ISO E 10GbE Draft 762 UTP/STP Chan * * * * * * * * * * * *<br />
Note: ISO F 600 is available only on the <strong>LANTEK</strong> 7/7G.<br />
TEST SETUP<br />
1. If the <strong>LANTEK</strong> tester has not been calibrated in the past 7 days, it is recommended<br />
that you perform a field calibration.<br />
2. Configure the tester as required. See Setting Preferences.<br />
3. Select the Cable Type.<br />
4. Disconnect the cable to be tested from all network equipment.<br />
5. Connect the Adapters to both handsets.<br />
6. With the appropriate patchcords, connect the Display Handset patchcord to one<br />
end of the link and the Remote Handset patchcord to the opposite end.<br />
7. Press ON/OFF key to power up the Display Handset.<br />
Note: The Remote Handset will be powered up automatically by the Display Handset<br />
when the AUTOTEST begins. <strong>LANTEK</strong> Channel Adapters and patchcords are used for<br />
both Permanent Link and Channel Link testing. The <strong>LANTEK</strong> unit will set the<br />
Reference Plane and Test Limits according to the type of test selected. For Fiber<br />
testing, the RH must be powered on manually.<br />
Length<br />
Capacitance<br />
NEXT<br />
Attenuation<br />
ACR<br />
Return Loss<br />
Impedance<br />
Delay and Skew<br />
Power Sum NEXT<br />
Power Sum ACR<br />
Headroom<br />
ELFEXT<br />
Power Sum ELFEXT<br />
3-11
Chapter 3<br />
Structured Cable Field Calibration and Testing<br />
3-12<br />
TEST SEQUENCE<br />
When the AUTOTEST button is pressed, the following actions occur:<br />
1. The DH firsts attempt to communicate with the RH (Remote Handset) using one<br />
correctly wired pair. If it is unable to establish communication, the DH will display<br />
a message that it is looking for the RH and continue trying until the Autotest is<br />
manually canceled or the RH is found.<br />
2. Once communication with the RH is established, its serial number is checked to see<br />
if current field calibration data exists. If a field calibration has not been performed<br />
in the last 7 days with the RH unit, the Autotest will be aborted and a “Calibration<br />
Required” message will display.<br />
3. If the serial number is valid, the DH will proceed with the specified Autotest. The<br />
first test performed in most Autotests is the Wire Map for twisted pair cable types.<br />
4. After running the Wire Map test, Autotest runs the remaining tests specified for the<br />
currently selected cable type. You have the option of specifying (in Autotest<br />
Preferences) that testing halt after any failed test or proceed through the entire<br />
Autotest series regardless of test failures.<br />
5. Once an Autotest has been completed, all of the test data can be reviewed, saved,<br />
and printed.<br />
� The test results for the last Autotest are held in non-volatile memory and<br />
available for review or storage, even after power is cycled off and back on.<br />
� The last Autotest results remain in non-volatile memory until they are either<br />
replaced by new test results, the memory is cleared, or any Analyze test is<br />
performed.<br />
SETTING AUTOTEST PREFERENCES<br />
1. Select the Preferences on the Ready screen. The Preferences screen appears.<br />
2. Select Autotest Preferences. The Autotest Preference screen appears.<br />
3. Press the ARROW keys to highlight the desired option.<br />
4. Press to activate or deactivate an option.<br />
5. Press ENTER to accept the selected Autotest Preferences or press ESCAPE to exit<br />
this screen without making changes.<br />
RUNNING AUTOTEST AND UNDERSTANDING RESULTS<br />
Autotest performs comprehensive tests using programmed testing limits. An overall<br />
pass or fail is displayed along with individual test results.<br />
Before beginning Autotesting, connect the Display and Remote handsets to the cable<br />
or link to be tested.<br />
1. Press AUTOTEST. During the Autotest, the handset unit will display a progress<br />
screen.<br />
2. If the RH unit is not found, a “Searching for Remote Handset” warning message is<br />
displayed on the DH. Press ESCAPE to cancel the test and return to the Ready<br />
screen.<br />
3. If the RH is found, Autotest compares the cable test readings to standards for the<br />
cable type selected and issues pass/fail statements for each test.<br />
4. When the Autotest is completed, an overall result of pass or fail is displayed at the<br />
top right of the test information columns. Results for individual tests are displayed<br />
opposite each test name.
Chapter 3<br />
Structured Cable Field Calibration and Testing<br />
5. To begin another Autotest, press AUTOTEST. If results from the current test have<br />
not been saved, you will be prompted to discard or save the current test results<br />
before the next Autotest will run.<br />
Note: The tester also performs real time Analyze testing that enables you to<br />
troubleshoot problem areas. If Autotest results indicate a failure, refer to the Analyze<br />
Testing section for further details.<br />
INTERPRETING AUTOTEST RESULTS<br />
Pass/Fail Reporting<br />
The overall Autotest result is displayed at the top right of the Autotest display screen.<br />
Individual Autotest results are displayed to the right of each test.<br />
Figure 3-2: Typical Overall Autotest Results Screen<br />
Table 3-2: Test Result Symbols<br />
Symbol Overall Autotest Result<br />
Overall test result is a pass if each individual test is a pass or a pass*.<br />
Overall test result is a fail if one or more individual test is either a fail or a fail*.<br />
Viewing Current Autotest Results<br />
Results can be viewed at completion of the test sequence or saved for later viewing.<br />
1. Press the ARROW keys to highlight the desired test.<br />
2. Press ENTER to view test results.<br />
Figure 3-3: Typical Individual Autotest Results Screen<br />
3-13
Chapter 3<br />
Structured Cable Field Calibration and Testing<br />
3-14<br />
3. When finished, press ESCAPE to return to the Autotest screen.<br />
Understanding Test Failures<br />
A failure result for Autotest indicates that one or more tests did not meet minimum<br />
cable parameter levels for the cable type selected.<br />
Note: Be sure that you have selected the correct cable type and are using appropriate<br />
connectors and links.<br />
Identifying which tests failed and the characteristics of the failure will determine the<br />
type of fault. If the Autotest shows a failure on a particular sub-test, perform Analyze<br />
testing for the failing test in order to troubleshoot the cable.<br />
When more than one test fails on Autotest, the test order used for troubleshooting is<br />
an important element in eliminating the source of the problem.<br />
If any tests fail, Analyze tests should be performed in the following order:<br />
1. Wire Map<br />
2. DC Resistance<br />
3. Length<br />
4. Delay and Skew<br />
5. Impedance<br />
6. Attenuation<br />
7. NEXT<br />
8. Dual Return Loss<br />
Refer to the Analyze Testing section to run these tests.<br />
WARNING SCREENS<br />
In response to a change in parameter(s), failure, harmful condition, or operational<br />
limitation, the tester will display a warning screen advising you of the activity or<br />
request you are engaged in. The screen will prompt you to YES (continue) or NO<br />
(exit).<br />
Figure 3-4: Sample Warning Screen
USING JOBS TO STORE TEST RESULTS<br />
Chapter 3<br />
Structured Cable Field Calibration and Testing<br />
The <strong>LANTEK</strong> tester can store cable test results under separate Job names. You can<br />
create Jobs, assign any name to them, and store test results on a Job-by-Job basis.<br />
By using Jobs, you can logically group and store test results in a descriptive manner<br />
You can set up a separate Job for each floor in a building, each building on a campus,<br />
each customer, or for any other user-defined classification.<br />
To create a New Job:<br />
1. Select Stored Results on the Ready screen. Press ENTER. At this point, you will<br />
see a list of all the jobs which are currently available. If you have never created a<br />
Job, the list will be empty.<br />
2. To create a new Job select . The Job Options screen appears.<br />
3. Press the ARROW keys to select New Job. Press ENTER. The New Job screen<br />
appears.<br />
4. Type a name into the text field on the New Job screen using the alphanumeric<br />
keyboard. Press a key a second or third time to select the second or third<br />
character on the key. Press the RIGHT ARROW key or wait a few seconds to<br />
advance to the next character position.<br />
5. After entering the name, press ENTER, returning to the Job Options screen where<br />
you can Access Job information, Delete Jobs, Rename Jobs, make a Job the current<br />
Job, or create more Jobs. The new active job name is displayed at the top left<br />
corner of the display.<br />
SAVING CURRENT AUTOTEST RESULTS<br />
The maximum individual Autotest results of 500 TIA CAT 6 with graphs or 30,000 plus<br />
without graphs can be stored in the <strong>LANTEK</strong> internal tester memory and accessed<br />
later using the Test Results menu. Autotest results can be saved immediately following<br />
the test.<br />
� Only overall passed Autotests can be automatically saved.<br />
� The entire set of test results is saved as one file.<br />
� Test results are automatically saved if the AutoSave preference is enabled. Refer<br />
to Setting Preferences.<br />
� Test names are automatically assigned to completed tests. If a different name is<br />
desired, a test can be named manually using the ‘Rename’ selection.<br />
To manually save Autotest results (AutoSave Disabled):<br />
1. Press SAVE. The Test Saved screen will be displayed for a brief period, showing<br />
the name the test is saved under.<br />
2. If the current name already exists, a warning screen appears asking you to<br />
overwrite the currently existing file or rename the results to another file or new file<br />
name.<br />
3. Press NO to exit and return to the previous screen without performing a save<br />
operation. Press YES to overwrite the existing file.<br />
4. Select to rename the current test. The Save Test screen will appear with a<br />
new name option.<br />
5. Press ENTER to accept the change and return to the Test Results screen.<br />
3-15
Chapter 3<br />
Structured Cable Field Calibration and Testing<br />
3-16<br />
VIEWING OR DELETING STORED AUTOTEST RESULTS<br />
You can view, print, delete or rename the Stored Results files.<br />
When an Autotest or TDR is saved, the data is stored with a unique name. Test results<br />
can be viewed, printed, or deleted from the Stored Results screen.<br />
1. Select Stored Results on the Ready screen to open the Job List screen.<br />
2. Highlight the desired Job.<br />
3. Select to choose the desired Job.<br />
4. Select to open the Options screen.<br />
5. Press the ARROW keys to highlight the desired selection.<br />
6. Press ENTER to perform the desired option.<br />
7. Press ESCAPE at any time to return to the previous screen.<br />
Job and Test Options<br />
Option Description<br />
Figure 3-5: Job Options Screen<br />
Table 3-3: Job Options<br />
Current Job Info Total number of tests passed/failed, cable length, and memory used<br />
for current job.<br />
All Job Info Total number of tests passed/failed, cable length, and memory used<br />
for all jobs.<br />
Delete Selected Jobs Selected jobs are deleted and sent to the internal wastebasket.<br />
Rename Job Change name of currently highlighted job.<br />
New Job Add new job to the job list.<br />
Make Job Current Activate the highlighted job. Saved tests (Autotests) will be stored<br />
in this job.<br />
Restore All Deleted<br />
Jobs<br />
Copy Selected Jobs to<br />
Compact Flash<br />
Restore all deleted jobs currently in the internal wastebasket.<br />
Copy all tests of the selected job from internal memory to Compact<br />
Flash.
Option Description<br />
Figure 3-6: Test Options Screen<br />
Table 3-4: Test Options<br />
Select All Select all stored test results.<br />
Select All Passed Select only passed tests for processing.<br />
Select All Failed Select only failed tests for processing.<br />
De-select All Unmark all stored test results.<br />
Print Selected Print selected test results.<br />
Print All Print a summary of stored test results.<br />
Restore All Deleted Tests Restore all deleted test.<br />
Delete Selected Test Delete marked test results.<br />
Delete All Delete all stored test results.<br />
Chapter 3<br />
Structured Cable Field Calibration and Testing<br />
Result Info Display test result information such as number of tests, number<br />
passed and failed, length tested, and memory used.<br />
Selected Result Info Display the results of selected tests.<br />
Rename Test Rename selected test result.<br />
AUTOTEST GRAPHS<br />
Autotest results can be viewed at the completion of the test sequence in either a<br />
tabular or graphical format.<br />
Graphing Facts<br />
Graphs can be very useful for viewing test results. There are a few things you need to<br />
know before you start using them:<br />
� In Autotest Preferences, you can set your tester to include and save graphs with<br />
test results.<br />
� The limit and worst case margin parameters are displayed at the bottom of the<br />
tabular test screen.<br />
� When you go to graph view, the vertical cursor is placed at the worst case<br />
margin location.<br />
3-17
Chapter 3<br />
Structured Cable Field Calibration and Testing<br />
3-18<br />
To view an Autotest graph:<br />
1. Configure the Autotest Preferences.<br />
2. In Autotest Preferences, make sure the Save Graphs checkbox is selected.<br />
3. Press AUTOTEST. Upon completion of the test suite for the cable type selected,<br />
the Overall Autotest results screen displays.<br />
4. To display tabular data, highlight the desired test result (the NEXT test) and press<br />
ENTER.<br />
5. To display a graph of the tabular data, highlight the tabular data of interest (pairs<br />
7, 8 and 3, 6) and press ENTER.<br />
6. The graph will always open with the cursor positioned on the worst case margin. In<br />
this example, the cursor is positioned on the horizontal axis at 215.00 MHz.<br />
7. Press ESCAPE to return to the previous screen.<br />
Figure 3-7: Typical Autotest Graphic Display<br />
Graph Formats, Layouts, and Controls<br />
Graphs are useful for observing the relationship between two network cable<br />
parameters, actual measured parameters and predefined worst case margins.<br />
There are two different graph formats: single and dual plot.<br />
Single Plot Dual Plot<br />
Figure 3-8: Single and Dual Plot Graphic Display
Layout and Controls<br />
Chapter 3<br />
Structured Cable Field Calibration and Testing<br />
The horizontal axis represents frequency data and the vertical axis represents the<br />
measured values in dB, with limits indicated as a solid line trace.<br />
Tabular View Graphic View<br />
Figure 3-9: Autotest Tabular Data and Graphic View Layout<br />
Note: The margin data at the bottom right of the Tabular screen represents the worst<br />
case difference between the actual measured data and the predefined limit threshold<br />
as shown by the cursor position in the graph on the right.<br />
Item Function<br />
Table 3-5: Autotest Graph View Layout and Controls<br />
1 Wire pair plotted from tabular data.<br />
2 The horizontal axis represents frequency data.<br />
3 The vertical axis represents measurements in dB.<br />
4 When a wire pair graph is first displayed, the cursor is automatically positioned at<br />
the worst case limit and frequency point.<br />
5 Actual data plot for a wire pair. Attenuation is plotted in this example.<br />
6 Predefined worst case limit plot for attenuation.<br />
7 Predefined worst case limit plot for NEXT.<br />
8 Actual data plot for a wire pair. NEXT is plotted in this example.<br />
9 Expands or compresses the horizontal axis of the graph. At full magnification, these<br />
keys become inactive.<br />
10 Arrow keys are used to move the cursor horizontally. As the cursor moves, screen<br />
readouts will change to reflect cursor position.<br />
- Use the soft keys to move the cursor in large steps.<br />
- Use the key pad keys to move the cursor in small steps.<br />
- Hold the SHIFT key while using the ARROW keys to make large cursor steps.<br />
3-19
Chapter 3<br />
Structured Cable Field Calibration and Testing<br />
ANALYZE TESTING FOR STRUCTURED <strong>CABLE</strong><br />
3-20<br />
ANALYZE SINGLE TEST MODE OVERVIEW<br />
Analyze mode allows you to troubleshoot by running individual tests, making<br />
adjustments, and observing changed test results. For example, a failed capacitance<br />
measurement can indicate crimped or stretched cable. With Analyze testing, you can<br />
walk the cable and check for damage and stretching. Freeing the cable at suspected<br />
problem areas should improve the measured reading.<br />
Depending on the cable type and defined test standard, any or all of the following<br />
individual tests are available:<br />
Wire Map Resistance Length<br />
Capacitance NEXT Attenuation/Insertion Loss<br />
ACR Return Loss Impedance<br />
Delay and Skew Power Sum NEXT Power Sum ACR<br />
Headroom ELFEXT Power Sum ELFEXT<br />
TDR<br />
Note: The RH is required to perform all tests with the exception of: TDR, Resistance,<br />
Length, Capacitance, Impedance, and Delay & Skew.<br />
Wire Map Test<br />
Wire Map testing is used to locate shorts, opens, and miswires. Test results are<br />
displayed graphically for easy visual indication of any problems.<br />
Wire Map Errors<br />
Figure 3-10: Wire Map Test Screen<br />
A failure in a Wire Map should always be the first problem corrected, since it causes<br />
faults in other tests. One open pin can cause DC loop resistance and attenuation tests<br />
to fail. An open may also cause a zero capacitance reading, and will cause false<br />
readings in NEXT tests.<br />
A wire map test will always look for and map all nine possible wires (four pairs +<br />
shield) but will only consider wires defined as present in the selected cable type for<br />
pass/fail criteria. For example, a wire that is not specified in the cable type will show<br />
on the map but will not cause a test failure.
Chapter 3<br />
Structured Cable Field Calibration and Testing<br />
The Wire Map test guarantees the following minimum level of error detection (based<br />
on four pairs of conductors, shield optional):<br />
� Any wiring error or combination of wiring errors will indicate a wire map failure.<br />
� Any combination of up to three opens, shorts, or cross-connections will be<br />
correctly identified.<br />
� Opens and shorts will provide an indication of the cable end that the error<br />
occurred on (provided by Length screen results in Autotest).<br />
� Split pairs will be identified based on specific patterns of inconsistent NEXT<br />
(Near-End Crosstalk).<br />
Troubleshooting Wire Map Problems<br />
Problem: One or more open pins<br />
Probable Causes Connector-to-wire punch down not mated<br />
Defective jack or plug.<br />
Broken wire(s).<br />
Other Tests Affected Test Possible Result<br />
DC Resistance Fail.<br />
Attenuation Fail.<br />
NEXT Some false measurements.<br />
Mutual Capacitance 0 reading possible.<br />
Length May be low if the open is near the DH.<br />
Problem: Shorted pins<br />
Probable Causes Conductors making contact at a connector.<br />
Jack or plug has pin or circuit defect.<br />
Cable damaged.<br />
Other Tests Affected Test Possible Result<br />
DC Resistance Low or zero.<br />
Attenuation Fail.<br />
NEXT Some false measurements.<br />
Capacitance Over limit.<br />
Length Reduced or shorted pairs.<br />
Problem: Miswired pins<br />
Probable Causes Conductors reversed at a connector.<br />
Other Tests Affected Test Possible Result<br />
Usually none Infrequently, one or more tests may fail.<br />
3-21
Chapter 3<br />
Structured Cable Field Calibration and Testing<br />
3-22<br />
Wire Length Test<br />
This test measures the length of each wire pair to make sure that the recommended<br />
limits for the particular cable type are not exceeded. The Wire Length Test is mainly<br />
used for informational purpose only. Depending on the units selected in the Setup<br />
menu, length is reported in either feet or meters.<br />
Length and NVP<br />
Figure 3-11: Wire Length Test Screen<br />
Measuring the length of the cable requires that you know the Nominal Velocity of<br />
Propagation (NVP) of the cable. Refer to the specification or the manufacturer of the<br />
cable you are testing for the cable NVP. If the wire specification is not available, use a<br />
known length of good cable (100 - 200 feet) and use the calculate NVP function to<br />
enter the total length of the cable and calculate the correct NVP.<br />
Wire Length Errors<br />
Lengths may differ slightly between pairs in the same cable, due to minor NVP<br />
differences between the pairs and physical length differences due to twisting patterns.<br />
When electrically measured cable length varies too much from actual length, a<br />
problem exists.<br />
Troubleshooting Wire Length Problems<br />
Problem: Length between a pair of the same cables varies by more than 10%.<br />
Probable Causes Incorrect NVP.<br />
Excessive cable length.<br />
Installed matched terminator not functioning correctly.<br />
Cable insulation damage to longer pairs.<br />
Break or short in a pair.<br />
Elevated capacitance on a pair.<br />
Other Tests Affected Test Possible Result<br />
DC Loop Resistance May be slightly high or fail.<br />
Attenuation May be slightly high or fail.
Resistance Test<br />
Chapter 3<br />
Structured Cable Field Calibration and Testing<br />
This test measures the loop resistance of each pair of wires. The test is performed to<br />
ensure total loop resistance does not exceed recommended limits. Results are<br />
displayed with resistance in ohms for each pair and a comparison limit for the cable<br />
type.<br />
Resistance Errors<br />
Figure 3-12: Resistance Test Screen<br />
All four pairs of a network link should have approximately the same resistance. Pair<br />
resistance that exceeds the limit is indicated as a failure. The maximum limits in the<br />
default tables are based on the maximum length limit of the link or cable segment.<br />
Troubleshooting Resistance Problems<br />
Problem: Excessive Resistance<br />
Probable Causes Mismatched cable types.<br />
Poor punch block connection.<br />
Poor RJ-45 termination connections.<br />
Wire pair has a tap (never done).<br />
Cable damage.<br />
Shorted cable.<br />
Other Tests Affected Test Possible Result<br />
Wire Map May fail.<br />
Attenuation May fail.<br />
NEXT May have false readings.<br />
Capacitance May fail.<br />
Problem: One wire pair has a very high DC loop resistance, others are normal.<br />
Probable Causes Poor connection points.<br />
Cable damage.<br />
Connector blades not fully piercing wire insulation.<br />
Worn Connector<br />
Other Tests Affected Test Possible Result<br />
Wire Map May fail.<br />
Attenuation May fail.<br />
NEXT May have false readings.<br />
Capacitance May fail.<br />
3-23
Chapter 3<br />
Structured Cable Field Calibration and Testing<br />
3-24<br />
NEXT, ELFEXT, and Power Sum Tests<br />
The NEXT (Near End Crosstalk) and ELFEXT (Equal Level Far-End Crosstalk) tests<br />
measure crosstalk at the near and far ends of the cable in one Autotest. High levels of<br />
crosstalk can cause excessive retransmissions, data corruption, and other problems<br />
that slow the network system.<br />
NEXT, FEXT, and ELFEXT<br />
Figure 3-13: NEXT and ELFEXT Test Screens<br />
The NEXT test measures cross-talk from a transmitting pair to an adjacent pair in the<br />
same cable sheath. NEXT is measured at the DH and RH.<br />
1<br />
2<br />
3<br />
6<br />
4<br />
5<br />
7<br />
8<br />
Effect of<br />
Adjacent Pair<br />
� The FEXT test is similar to the NEXT test except that the traffic is generated at<br />
the RH and crosstalk is measured at the DH.<br />
� NEXT measurements are made at each end of the cable for all pair combinations<br />
(pair 1-2 vs. 3-6, etc.), yielding a total of twelve measurements.<br />
� ELFEXT measurements are made with the DH and RH for all possible pair<br />
combinations (1-2 vs. 3-6, 3-6 vs. 1-2, 1-2 etc.) at both ends yielding a total of<br />
twenty-four measurements.<br />
2<br />
1<br />
6<br />
3<br />
5<br />
4<br />
8<br />
7
Power Sum NEXT and Power Sum ELFEXT<br />
Chapter 3<br />
Structured Cable Field Calibration and Testing<br />
Power Sum tests measure the crosstalk effects of three transmitting pairs on the<br />
fourth pair in the same cable sheath.<br />
1<br />
2<br />
3<br />
6<br />
4<br />
5<br />
7<br />
8<br />
Effects of<br />
3 Pairs on 1 Pair<br />
During the Power Sum NEXT test, six measurements are made at each end of the<br />
cable and combined (pairs 1-2, 3-6, and 4-5 vs. pair 7-8, etc.) for a total of eight<br />
measurements.<br />
Figure 3-14: Power Sum NEXT Test Screen<br />
During the Power Sum ELFEXT test, twelve measurements are made at the DH side of<br />
the cable and combined (pairs 1-2, 3-6, 4-5 vs. pair 7-8, etc.) for a total of four<br />
measurements.<br />
Figure 3-15: Power Sum ELFEXT Test Screen<br />
Note: Power Sum NEXT measurements will generally read 2 - 3 dB lower in value<br />
(higher crosstalk) than conventional NEXT.<br />
2<br />
1<br />
6<br />
3<br />
5<br />
4<br />
8<br />
7<br />
3-25
Chapter 3<br />
Structured Cable Field Calibration and Testing<br />
3-26<br />
NEXT and ELFEXT Errors<br />
Crosstalk is usually caused by poor connector termination on the ends of the cable. A<br />
low value of dB measurement reading indicates presence of high crosstalk.<br />
Troubleshooting NEXT and ELFEXT Problems<br />
Problem: Low dB test readings<br />
Probable Causes Installed cable or patch cable not correctly rated.<br />
Defective, poor quality cable or too many connectors.<br />
Poor quality installation at the connection points.<br />
Too much insulation has been stripped from the wires at<br />
termination.<br />
A pair of wires has been untwisted too much at termination.<br />
Split-pairs.<br />
Poor quality connectors or connectors not rated to desired<br />
category.<br />
Delay skew (ELFEXT).<br />
Excessive noise entering the cabling system from external sources.<br />
Other Tests Affected Test Possible Result<br />
Return Loss May be over limit.<br />
NEXT May show same symptoms.<br />
Attenuation Test<br />
This test measures the overall signal strength loss in the cable and verifies that it is<br />
within acceptable limits. Low attenuation is essential for error-free transmission.<br />
Attenuation is measured by injecting a signal of known amplitude at the Remote<br />
Handset and reading the amplitude at the Display Handset.<br />
Attenuation Errors<br />
Figure 3-16: Attenuation Test Screen<br />
Attenuation causes a loss of signal strength over a cable. The loss increases with cable<br />
length, signal frequency, and temperature. Attenuation testing can be used to find<br />
problems in the cable, connectors, or connecting hardware. A high value of dB test<br />
reading indicates a high value of attenuation, leading to greater loss of signal.
Troubleshooting Attenuation Problems<br />
Problem: High Attenuation Reading<br />
Probable Causes Poor connector termination points.<br />
Excessive cable length.<br />
Incorrect or poor quality adapter cable.<br />
Incorrect cable.<br />
Chapter 3<br />
Structured Cable Field Calibration and Testing<br />
Other Tests Affected Test Possible Result<br />
DC Loop Resistance May be high.<br />
Capacitance May be high.<br />
Length May be over limit.<br />
NEXT May be low on pair combinations.<br />
Average Impedance May be low.<br />
Return Loss May be over limit.<br />
Return Loss Test<br />
This test measures the ratio of reflected to transmitted signal strength. Good quality<br />
cable runs will have little reflected signal, indicating good impedance matches in the<br />
run’s various components.<br />
Return Loss Errors<br />
Figure 3-17: Return Loss Test Screen<br />
Like attenuation, excessive return loss reduces signal strength at the receive end. It<br />
also indicates a mismatched impedance at some point along the cable run. A value of<br />
20 dB or greater indicates a good twisted pair cable. A value of 10 dB or less is<br />
severe, and causes a large reflection of signal back to the source.<br />
3-27
Chapter 3<br />
Structured Cable Field Calibration and Testing<br />
3-28<br />
Troubleshooting Return Loss Problems<br />
Problem: Excessive Return Loss (Value of 10 dB or less)<br />
Probable Causes Open, shorted, or damaged cable.<br />
Installed cable, cable segments, or patch cord have improper<br />
characteristics.<br />
Damaged or worn cable or connectors.<br />
Poor punch-down.<br />
Factory splice in cable.<br />
Other Tests Affected Test Possible Result<br />
Attenuation May be high.<br />
Capacitance and Could be affected if the impedance<br />
Average Impedance mismatch is caused by cable damage.<br />
DC Loop Resistance May be high if due to a poor punch-down.<br />
Impedance Test<br />
Average impedance is derived from electrical delay and capacitance measurements.<br />
The results of this test are expressed in ohms. Average impedance testing can help<br />
identify physical damage to the cable, connector defects, or cable segments with<br />
incorrect characteristic impedance.<br />
This test uses capacitive measurements; therefore, it is necessary to specify the<br />
correct cable type in order to accurately perform the test.<br />
Note: If a CAT 3 cable is selected (specified as the cable type where PVC is used in<br />
the cable insulation) but a CAT 5 cable (where Teflon ® is used as the cable insulation)<br />
is actually used, the average impedance will be calculated incorrectly. To avoid this<br />
problem, be sure to specify the correct cable type.<br />
Impedance Errors<br />
Figure 3-18: Impedance Test Screen<br />
Impedance errors cause signal reflection and strength reduction. Average impedance<br />
of each pair should be equal to the LAN system impedance of 100, 120, or 150 Ω.
Troubleshooting Impedance Problems<br />
Problem: High Impedance Readings<br />
Chapter 3<br />
Structured Cable Field Calibration and Testing<br />
Probable Causes Compression, stretching, or excessive bending damage to the<br />
cable.<br />
Defective connectors.<br />
Insulation damage at a connector.<br />
Ground loops created between cable shielding (if used) and<br />
equipment grounding (via RS-232 cable to computer, or auxiliary<br />
power).<br />
Improperly chosen cables or patch cords.<br />
Moisture in the cable.<br />
Other Tests Affected Test Possible Result<br />
Length Affected pairs will appear longer.<br />
Average Impedance Change in average impedance is inversely<br />
proportional to change in capacitance.<br />
Delay and Skew Test<br />
This test measures the period of time for a test signal applied to one end of a cable<br />
run to reach the other end. Skew indicates the difference between the measured time<br />
delay for that pair and the pair with the lowest value (displayed as 0.0 ns). Delay and<br />
Skew limits are set according to the currently selected cable type.<br />
Delay and Skew Errors<br />
Figure 3-19: Delay and Skew Test Screen<br />
Delay and skew measurements will usually differ slightly between pairs in the same<br />
cable. A substantial difference indicates a cable installation problem or a pair defect.<br />
Troubleshooting Delay and Skew Problems<br />
Problem: Excessive Differences between Measurements<br />
Probable Causes Cables which use different materials for insulating the four pairs of<br />
wires.<br />
A break or short in the pair.<br />
Excessive cable length.<br />
Cable installation problems.<br />
Other Tests Affected Not Applicable<br />
3-29
Chapter 3<br />
Structured Cable Field Calibration and Testing<br />
3-30<br />
Capacitance Test<br />
This test measures the mutual capacitance between the two conductors of each wire<br />
pair to verify that installation has not affected the capacitance for the particular cable<br />
type.<br />
� Bulk capacitance measurements are displayed in nanofarad (nF) in the Analyze<br />
Capacitance test.<br />
� Autotest measures the bulk capacitance in picofarads (pF) per foot or meter.<br />
Capacitance Errors<br />
Figure 3-20: Capacitance Test Screen<br />
The larger the capacitance; the higher the error rate. Small changes in the<br />
capacitance measurements are normal due to the handling of the cable during<br />
shipping and installation. The addition of connectors and patch cables will also affect<br />
capacitance values.<br />
Troubleshooting Capacitance Problems<br />
Problem: Capacitance Exceeds the Maximum Limit<br />
Probable Causes Compression, stretching, or excessive bending damage to the<br />
cable.<br />
Defective connectors.<br />
Insulation damage at a connector.<br />
Ground loops created between cable shielding (if used) and<br />
equipment grounding (via RS-232 cable to computer, or auxiliary<br />
power).<br />
Improperly chosen cables or patch cords.<br />
Moisture in the cable.<br />
Poor connections at punch downs and wall plates<br />
Other Tests Affected Test Possible Result<br />
Length Affected pairs will appear longer.<br />
Average Impedance Change in average impedance is inversely<br />
proportional to change in capacitance.
ACR and Power Sum ACR Test<br />
Chapter 3<br />
Structured Cable Field Calibration and Testing<br />
The ACR (Attenuation-to-Crosstalk Ratio) test performs a mathematical comparison<br />
(difference calculation) between the results of the Attenuation and NEXT tests. The<br />
difference reading between each pair gives an indication of how problem-free the<br />
cable pair will be for transmissions.<br />
The ACR measurements are calculated pair-to-pair. The Power Sum ACR<br />
measurements are calculated by summing the NEXT between a selected pair and the<br />
other three pairs in the same cable sheath.<br />
Figure 3-21: ACR and Power Sum Test Screens<br />
ACR and Power Sum ACR Errors<br />
A large difference reading is desirable, since it indicates a strong signal and little noise<br />
interference.<br />
Troubleshooting ACR and Power Sum ACR Problems<br />
Refer to the NEXT and Attenuation troubleshooting suggestions.<br />
3-31
Chapter 3<br />
Structured Cable Field Calibration and Testing<br />
3-32<br />
Headroom Test<br />
The Headroom measurement is a mathematical analysis of the data already existing<br />
from previous tests. The calculated value is the sum of the Power Sum ACR test<br />
(Power Sum ACR of the worst pair after the attenuation for that pair has been<br />
normalized to 100 meters or 328 feet) and the additional margin between the worst<br />
case PS NEXT and the limit for PS NEXT.<br />
Headroom provides a simplified means of reporting the margin available in a single<br />
cable run which will support an application with error-free performance. It also gives<br />
an indication of additional margin which may be achieved through the utilization of<br />
“enhanced” cable and connectors and careful installation practices.<br />
Headroom Errors<br />
Figure 3-22: Headroom Test Screen<br />
The Headroom number, reported in dB, characterizes the worst-case margin found in<br />
a single cable run. A large number is desirable, since it indicates a strong signal and<br />
little noise interference. The pass/fail limit for Headroom is the same as Power Sum<br />
ACR.<br />
ANALYZE TEST SETUP<br />
1. If the <strong>LANTEK</strong> tester has not been calibrated in the past 7 days, perform a field<br />
calibration.<br />
2. Configure the tester as required.<br />
3. Select the Cable Type.<br />
4. Disconnect the cable to be tested from all network equipment.<br />
5. Connect adapters and patchcords to both the Display and Remote Handsets using<br />
the connectors.<br />
6. Connect the Display Handset patchcord to one end of the link and the Remote<br />
Handset patchcord to the opposite end.<br />
Note: Refer to Permanent and Channel Link testing for details regarding typical<br />
connections.<br />
7. Press ON/OFF to power up the Display Handset.
ANALYZE TEST SEQUENCE<br />
When an individual test is running, the following actions occur:<br />
Chapter 3<br />
Structured Cable Field Calibration and Testing<br />
1. If the test requires the RH (Remote Handset), the DH will first attempt to<br />
communicate with the RH. If it is unable to establish communication, the DH will<br />
display a message that it is looking for the RH and continue trying until the<br />
Analyze test is manually canceled or the RH is found.<br />
2. Once communication with the RH is established, its serial number is verified to the<br />
current field calibration data. If a field calibration has not been performed in the<br />
last 7 days with this RH, an appropriate “Calibration Recommended” message will<br />
display.<br />
3. If the serial number is valid, the DH will proceed with the specified individual test.<br />
4. If the test does not require the RH, the DH will run the test and display test data.<br />
Note: Pressing the ESCAPE key will cause the display to STOP scanning for the<br />
Remote and initiate the test in situations where the Remote is not required.<br />
5. Once a test is completed, the test data can be reviewed or printed.<br />
RUNNING A SINGLE TEST<br />
Before beginning Analyze testing, connect the Display and Remote Handsets to the<br />
cable or link to be tested.<br />
All Analyze tests are performed using the following procedure:<br />
1. Select Analyze on the Ready screen to open the Analyze screen. The Analyze<br />
screen lists the tests that can be performed on the currently selected cable type.<br />
2. Press the ARROW keys to highlight the desired test. Below is an example of the<br />
Length test.<br />
Figure 3-23: Analyze Screen<br />
3. Press ENTER to start the test. During the execution of the test, the handset unit<br />
will display a progress screen.<br />
4. Upon test completion, the tabular results screen is displayed.<br />
3-33
Chapter 3<br />
Structured Cable Field Calibration and Testing<br />
3-34<br />
INTERPRETING ANALYZE TEST RESULTS<br />
Pass/Fail Reporting<br />
The overall Analyze test result is displayed below the Title Bar at the top right of the<br />
display screen. Individual wire pair test results are displayed to the right of each test.<br />
Figure 3-24: Test Results Screen<br />
In the example above, the DC Resistance test results screen is displayed.<br />
� An overall test result of pass or fail is displayed at the top right, below the date.<br />
� Individual wire pair test results are displayed in the last column on the right<br />
(Result column).<br />
Overall and Individual test result reporting is similar to the Autotest function.<br />
Printing Analyze Test Results<br />
A tabular test result screen can be sent directly to a serial printer. Before sending a<br />
result screen to the printer, the printer port needs to be configured.<br />
Analyze Graphs<br />
Certain Analyze test results can be viewed at the completion of the test sequence in<br />
either a tabular or a graphical format. Analyze graphs are similar to the Autotest<br />
graphs.<br />
1. Run an Analyze test.<br />
2. Position the highlighted cursor on the desired table data.<br />
3. Press ENTER to display the wire pair table data as a graph.
TROUBLESHOOTING TOOLS: TDR<br />
Chapter 3<br />
Structured Cable Field Calibration and Testing<br />
Time Domain Reflectometer is one of the most powerful diagnostic tools available for<br />
metallic cable troubleshooting. While conventional test methods cannot locate the<br />
fault, TDR is used to reveal conditions about a cable that simple Pass/Fail reports and<br />
raw measurements may not show.<br />
The <strong>LANTEK</strong> tester uses the TDR test to scan the length of a cable for impedance<br />
problems, or to accurately verify the cable length. TDR is not limited to identifying just<br />
shorts or opens; it also points out any disturbances in the cable.<br />
HOW TDR WORKS<br />
The TDR function transmits energy into a cable pair, and the returning reflections are<br />
monitored in a manner similar to radar.<br />
� The shape of the reflection identifies a cable deformity, open, short, or<br />
termination.<br />
� The length of time it takes a transmitted pulse to return is used to calculate<br />
cable length.<br />
HOW TO PERFORM A TDR TEST<br />
Prior to running the TDR, connect the <strong>LANTEK</strong> DH to the cable or link to be tested. The<br />
TDR function is not a selected test available through custom cable setting.<br />
TDR Test Setup<br />
1. Select the Cable Type.<br />
Note: All TDR numerical information is NVP details of custom cables can be derived<br />
from the data in the cable database.<br />
2. Calibrate and configure the tester as required.<br />
3. Disconnect the cable to be tested from all network equipment.<br />
4. Connect the required test lead to the Display Handset and to one end of the link<br />
(TDR does not require a Remote Handset). Refer to Overview of Link Testing and<br />
Requirements.<br />
5. Press ON/OFF to power up the Display Handset.<br />
Performing a TDR Analyze Function<br />
1. Select the Analyze on the Ready screen. The Analyze screen appears.<br />
2. Press the ARROW keys to highlight the TDR function.<br />
3. Press ENTER to start the TDR test.<br />
Note: When TDR is running, relays will be heard clicking in the Display Handset.<br />
4. At the completion of the TDR test, a graph is displayed.<br />
3-35
Chapter 3<br />
Structured Cable Field Calibration and Testing<br />
3-36<br />
THE TDR PLOT<br />
The TDR graph is an image of the structure of the cable under test along its entire<br />
length, up to a limit of 2000 feet (609.6 meters). This graph shows anomalies by<br />
displaying blips, peaks, or valleys on an otherwise flat line.<br />
TDR Plot Layout and Controls<br />
The horizontal axis represents distance data and the vertical axis represents the<br />
percentage of reflection.<br />
Item Function<br />
Figure 3-25: TDR Graphical Plot Layout and Controls<br />
Table 3-6: TDR Graphical Plot Layout and Controls<br />
1 Actual TDR data plot for a wire pair. When a wire graph is first displayed, the<br />
cursor is automatically positioned at the midpoint of the data.<br />
2 Designated wire pair plotted from TDR data. (Pair A, B, C, or D)<br />
3 Distance in meters or feet and impedance value at the cursor.<br />
4 The vertical axis represents percentage of reflection data.<br />
5 The horizontal axis represents distance data.<br />
6 Left side of the display shows total length in meters or feet.<br />
Right side of the display shows the minimum/maximum level of Distance of<br />
cursor vs. total length measured in points and associated measured levels of<br />
impedance.<br />
7 Zoom out/Zoom in keys to expand or compress the horizontal axis of the graph<br />
at the cursor.<br />
8 Arrow keys are used to move the cursor horizontally. The screen data displayed<br />
will change to reflect the cursor position.
VIEWING TDR RESULTS<br />
Chapter 3<br />
Structured Cable Field Calibration and Testing<br />
When the TDR diagnostic function is first started, the graphical plot is automatically<br />
scaled to the full length of the cable. A maximum of 2000 feet (609.6 meters) of cable<br />
results can be displayed on a TDR graph.<br />
When TDR is first activated, the left 10% of the graph displays prelaunch impedance<br />
signal rise distance data and the right 10% of the graph displays reflection data.<br />
� Press the LEFT/RIGHT ARROW keys to move the cursor horizontally. As the<br />
cursor moves, screen data displays will change to reflect cursor position.<br />
� Press the UP/DOWN ARROW keys to view TDR results from a different wire<br />
pair. The TDR test runs one time and displays the results.<br />
� Press the ZOOM keys to scale the graph. At the maximum or minimum limits<br />
the key becomes inactive.<br />
� TDR results can be uploaded and saved to a PC and printed.<br />
INTERPRETING TDR RESULTS<br />
Always note the cable pair currently being displayed. The shape of the reflections<br />
plotted for the pair can be used to identify and locate problems. If the cable pair has<br />
no problems along the entire length of the pair, the graph will appear as follows:<br />
� The graph has an upswing point on the left most 10% of the display (start of the<br />
cable).<br />
� The following 80% of the graph is relatively flat.<br />
� The graph has an upswing or downswing point on the right most 10% of the<br />
graph (end of the cable).<br />
At the end of the cable (right-side), a slope to the top means the pair is open, while a<br />
slope to the bottom of the screen indicates that the pair is shorted.<br />
EVALUATING A TDR GRAPH<br />
When evaluating the TDR graph, the first consideration should be the average<br />
impedance of the cable being tested:<br />
� A graph with sharp dips or spikes can identify anomalies.<br />
� For subtle problems, interpretations should be based on benchmark data<br />
obtained from the analysis of many cable segments.<br />
When anomalies are detected in the cable pair, the cursor is automatically placed on<br />
the first anomaly. Press the ARROW keys to highlight the anomaly of interest.<br />
Impedance and distance values will be displayed on the screen.<br />
3-37
Chapter 3<br />
Structured Cable Field Calibration and Testing<br />
3-38<br />
The following troubleshooting tips identify typical cable conditions and their<br />
corresponding screen plots.<br />
Condition TDR Plot Indication<br />
Open, Near End Upswing develops early. In comparison to good cable pairs,<br />
this pair appears shorter in length.<br />
Short, Near End Downswing develops early. In comparison to good cable pairs,<br />
this pair appears shorter in length.<br />
Open, Far End Fully developed upswing at the Far End.<br />
Short, Far End Fully developed downswing at the Far End.<br />
Split Pair 20% to 30% rise in relative impedance at the split with a<br />
corresponding drop in impedance where the pair is<br />
reconnected.<br />
Cable segment with higher<br />
than nominal impedance<br />
Peak in the level area of the plot.<br />
Cable segment with lower<br />
than nominal impedance<br />
Dip in the level area of the plot.<br />
Level Plot, much higher<br />
than the known cable NVP<br />
Wrong cable type selected, or wrong cable type installed.<br />
No distinct upswing or Matched terminator attached to the cable. The pair appears to<br />
downswing at the Far End have a very long length.<br />
STORING, RETRIEVING, AND DELETING TDR RESULTS<br />
Storing a Graph<br />
The TDR results can be stored in the Current Job.<br />
1. Press the UP/DOWN ARROW keys to select the desired cable pair graph.<br />
2. Press SHIFT key to save/print.<br />
3. Select . The Save Test screen appears. Press SHIFT to bring up the “Save<br />
As” or “Rename” selection if the test has already been stored.<br />
4. The test name is automatically assigned. If a different name is desired, press<br />
DELETE to change the highlighted character(s).<br />
5. When you have entered the name, press ENTER to accept the changes and return<br />
to the ready screen.<br />
Retrieving or Deleting a Graph<br />
For detailed instructions regarding retrieving or deleting stored TDR results, refer to<br />
Viewing or Deleting Stored Autotest Results.
TROUBLESHOOTING 10/100/1000 BASE-T<br />
Chapter 3<br />
Structured Cable Field Calibration and Testing<br />
10/100/1000 BASE-T Ethernet systems use twisted pair cabling for transmission of<br />
network data frames. Both the cable and connecting hardware must meet minimum<br />
standards as specified in the IEEE 802.3 standard. The default settings for 10BASE-T<br />
network links in the <strong>LANTEK</strong> tester reflect these standards.<br />
10/100 BASE-T systems use the 1 and 2 pins for transmit and the 3 and 6 pins for<br />
receive, as shown in Figure 7-5. The instrument passes or fails the Wire Map based on<br />
this pin configuration. If your system does not use the IEEE 802.3 wiring standard, a<br />
custom adapter is required to align nonstandard transmit and receive pairs.<br />
1000 BASE-T systems use all four pairs in a full-duplex (bi-directional) configuration.<br />
Figure 3-26: 10BASE-T Connector<br />
3-39
UNDERSTANDING COAX <strong>CABLE</strong><br />
CHAPTER 4<br />
COAX <strong>CABLE</strong> FIELD<br />
CALIBRATION AND TESTING<br />
Coax has many desirable characteristics. It is highly resistant to EMI (Electrical<br />
Magnetic Interference) and can support high bandwidths. Many customers prefer<br />
using coax cable for CATV as well as Data applications.<br />
A typical coax cable has the following components:<br />
� Center Conductor: This conductor usually consists of a fairly heavy, solid yet<br />
flexible wire; stranded wires can also be used. Solid conductors are preferred<br />
for permanent wiring, but stranded conductors make the cable more flexible and<br />
easier to connect to equipment.<br />
� Insulation Layer: Also called a dielectric layer, this layer provides electrical<br />
insulation and keeps the inner and outer conductors in precise coaxial<br />
relationship.<br />
� Outer Conductor or Shield: This layer shields the inner conductor from<br />
outside electrical interference. The shield can consist of braided wires, metal<br />
foil, or a combination of both. Because of this shield, coax is highly resistant to<br />
electrical magnetic interference (EMI).<br />
� Jacket or sheath: A durable plastic or Teflon jacket coats the cable to prevent<br />
damage.<br />
Coax cable varies in impedance measurement (measured in unit of ohm), which is an<br />
indication of the cable’s resistance to current flow. For example, a RG-59 and RG-6<br />
coax cable will have an expected Impedance of 75-ohm, while a RG-58 coax cable will<br />
have a 50-ohm Impedance.<br />
COAX STANDARDS<br />
<strong>LANTEK</strong> can support the following Coax Standards:<br />
CATV Standards Ethernet Standards Misc. Cable Types<br />
RG59 100 or 300 ft<br />
(Tri or Quad-Shield)<br />
RG6 100 or 300 ft<br />
(Tri or Quad-Shield)<br />
10Base 2 IBM Coax<br />
10Base 5 TWINAXIAL<br />
ARCNET<br />
4-1
Chapter 4<br />
COAX Cable Field Calibration and Testing<br />
With <strong>LANTEK</strong>, AUTOTEST is the easiest and quickest way to measure and verify your<br />
cable installation. A variety of supported coaxial cable type can be found under “Cable<br />
Types”. <strong>LANTEK</strong> can support coaxial cable testing to the standards identified below.<br />
Under each specific cable type, you will also find the specific test limits by executing<br />
the following steps:<br />
1. From the DH Ready Screen, press F4 or select “Cable Type”<br />
2. Using the ARROW Keys, select “Ethernet”.<br />
3. Within the Ethernet Cable Type screen, highlight cable type “10Base 2”, then<br />
select the softkey CREATE.<br />
4. The Create Custom Cable screen appears, use the ARROW KEYS and highlight<br />
“Test Limits” and press ENTER to view the specific test limits for this cable.<br />
COAX AUTOTEST SUITE<br />
<strong>CABLE</strong> TYPES Resistance Length Attenuation Return Loss Impedance<br />
RG59 100 or 300 ft X X X X X<br />
RG6 100 or 300 ft X X X X X<br />
IBM Coax X X X<br />
TWINAXIAL, ARCNET X X X<br />
10BASE2<br />
(IEEE 802.3)<br />
X X X<br />
10BASE5<br />
(IEEE 802.3)<br />
X X X<br />
COAX FIELD CALIBRATION AND TESTING PROCEDURE<br />
4-2<br />
Field Calibration using COAX adapters uses a modification of the <strong>LANTEK</strong> 4-step<br />
process. Since COAX testing is done for low frequencies, the additional data obtained<br />
during the calibration process is essentially ignored, and therefore the <strong>LANTEK</strong> will<br />
request one calibration process step to be performed.<br />
To start testing COAX cable, refer to Setting Preferences and Autotest & Single Test<br />
for Structured Cable as indicated in previous Chapters for details.<br />
Please follow the procedures below to perform cable selection of COAX cables:<br />
Note: The <strong>LANTEK</strong> COAX adapters are configured with BNC connectors. User<br />
supplied adapters will be necessary to convert to-from BNC to F (CATV) or other<br />
connector types.<br />
1. From the DH Ready Screen, press F4 or highlight the Cable Type icon,<br />
press ENTER.<br />
2. Using the ARROW KEYS highlight “Misc. Types” and press ENTER.<br />
3. Highlight the desired Cable Test Standard, press ENTER. The display will revert to<br />
the Ready Screen with the selected cable type updated.<br />
Note: Other COAX Cable Types Available: RG59 & RG6
Figure 4-1: IBM COAX Cable Type Screen<br />
For COAX Field Calibration, please follow the instruction below:<br />
Chapter 4<br />
Coax Cable Field Calibration and Testing<br />
1. Connect the COAX adapters to the Display Handset (DH) and Remote Handset<br />
(RH).<br />
2. Insert the short COAX calibration cable into both the DH and RH adapters.<br />
3. From the DH Ready Screen, press F3 or highlight Field Calibration icon and press<br />
ENTER.<br />
4. Select START by pressing F1 to begin the calibration process. Once the<br />
calibration process completion screen appears, select ESCAPE to return to the<br />
main screen.<br />
5. When the calibration process is completed, the <strong>LANTEK</strong> is ready for testing.<br />
Figure 4-2: IBM COAX Field Calibration Screen<br />
4-3
Chapter 4<br />
COAX Cable Field Calibration and Testing<br />
TROUBLESHOOTING COAX CABLING<br />
4-4<br />
Always use high quality connectors and tools to properly terminate COAX network. In<br />
case of a cable fail, look for the following cases:<br />
� FAULTY TERMINATION - Make sure you have properly separated the center<br />
conductor from the shield.<br />
� <strong>CABLE</strong> SHORT - This could occur from improper termination both at near-end<br />
and far-end. In case of a SHORT, look for the Resistance value on the tester. A<br />
zero (0) – Ohm resistance value will suggest the fault is at the near-end of the<br />
cable, while a ~ 20 – Ohm value will suggest the fault is at the far-end.<br />
� <strong>CABLE</strong> OPEN - A common case. To diagnose this situation, look at the cable<br />
length measurement. A zero (0) cable length will suggest a fault at the nearend.<br />
� USE of TDR to Diagnose Problem - The <strong>LANTEK</strong> build-in copper TDR is a good<br />
tool to identify the location of the fault and distance of the fault. Refer to the<br />
TDR operation in this manual for more details.
SETTING AUTOTEST PREFERENCES<br />
CHAPTER 5<br />
FIBER OPTICS <strong>CABLE</strong> FIELD<br />
CALIBRATION AND TESTING<br />
(FIBERTEK TM )<br />
Autotest is the most frequently used test mode. A number of preferences can be<br />
selected for the Autotest function:<br />
� Autosave<br />
� Pass Fail<br />
� Disable Fiber Autotest Length<br />
1. From the Display Handset Tools screen, select the Preferences.<br />
2. Select Autotest Preferences.<br />
3. From the open Autotest Preferences screen, set the preferences as required.<br />
Note: It is important that your fiber autotest settings match your certification<br />
requirements.<br />
SPECIFYING A MODULE (FIBER TYPE)<br />
The <strong>LANTEK</strong> must be configured by selecting the fiber test mode that corresponds to<br />
the FIBERTEK module installed in the handset.<br />
1. Select the Fiber Optics on the Display Handset Ready screen. The Fiber Cable Type<br />
screen appears.<br />
2. Highlight the option that corresponds to the installed FIBERTEK module.<br />
3. If the loss budget has already been set, press ENTER to continue with the<br />
previously set values.<br />
OR:<br />
4. Press the key to enter the loss budget mode.<br />
Loss Budget Description<br />
The loss budget setting adjusts the pass/fail threshold for attenuation measurements<br />
made with FIBERTEK. Since the loss budget value does not affect the actual<br />
attenuation measurements, this function is for informative purposes only. When the<br />
measured attenuation is less than or equal to the loss budget, a is displayed. If<br />
the attenuation is greater than the loss budget, a is displayed. The loss budget<br />
can be set in one of two ways:<br />
Manual Loss Budget configures a fixed loss limit value for each applicable<br />
wavelength. This mode is useful when the acceptable system loss has been specified<br />
or when testing to application specific limits such as those listed in Appendix C, Fiber<br />
Optic Cabling Standards and Application Requirements.<br />
5-1
Chapter 5<br />
Fiber Optics Cable Field Calibration and Testing<br />
5-2<br />
Calculated Loss Budget lets FIBERTEK calculate the limits for each wavelength<br />
based on parameters you specify. Fiber length, number of connectors and splices, and<br />
maximum attenuation for each of these are entered into the calculator to determine<br />
the proper loss budget.<br />
Setting the Loss Budget<br />
1. Select a wavelength by pressing the F1–F4 keys.<br />
2. Use the ARROW keys and NUMERIC keypad to enter a value into the Loss Budget<br />
field.<br />
3. Select another wavelength with the F1-F4 keys and enter the loss budget.<br />
4. Press ENTER to complete the process.<br />
Calculated Loss Budget<br />
1. Choose a wavelength to adjust by pressing the F1-F4 keys.<br />
2. Press the SHIFT key and then select to enter the Budget Loss Calculator.<br />
3. Using the UP/DOWN ARROW keys to move between fields, and the<br />
LEFT/RIGHT ARROW keys to scroll through a field, enter values with the<br />
NUMERIC keypad for cable length, loss/km, splices, connectors, and repair<br />
margin.<br />
4. Press to update the budget then press ENTER to save. Repeat for each<br />
wavelength. Press again to store values and return to the READY screen.<br />
Figure 5-1: Calculated Loss Budget Screens
FIELD CALIBRATION (GENERAL)<br />
Chapter 5<br />
Fiber Optics Cable Field Calibration and Testing<br />
Field calibration allows the FIBERTEK to obtain a reference level for loss measurement.<br />
The accuracy of the field calibration depends on the amount of warm-up time allowed<br />
prior to starting the calibration process.<br />
Figure 5-2: Preferred Setup for Field Calibration<br />
Note: Allow the adapter a proper warm up time prior to field calibration. This will<br />
ensure specified accuracy. Be sure the launch cables are the same type of fiber as<br />
the cable being tested. (i.e. 50μm jumpers to test 50μm cabling)<br />
If the FIBERTEK unit has been stored in a location substantially colder than the area<br />
where measurements are to be taken, allow the unit to warm up to the ambient<br />
temperature with the protective dust caps in place to prevent condensation on the<br />
transmitter or receiver diode lenses.<br />
Thoroughly clean the laser and receiver lenses prior to attaching the launch cables<br />
using the Fiber Cleaning package supplied with your Basic or Premium Kit, which<br />
contains a high-quality cleaning solution and lint free wipes. Contact your local<br />
distributor for refills.<br />
Replace dust caps immediately after launch cables are removed.<br />
The setup depicted on this page is the normal calibration configuration for all tests<br />
that use both handsets. This includes Autotest as well as the Attenuation and Length<br />
tests, which are accessed through the Analyze menu. Calibration configuration for<br />
Loopback Attenuation is described later in this manual.<br />
The calibration data is recorded and stored by the Display Handset. The loss effects of<br />
launch cables and couplers that were present during field calibration are subtracted<br />
from the attenuation results during testing.<br />
5-3
Chapter 5<br />
Fiber Optics Cable Field Calibration and Testing<br />
When testing fiber optic cable, a field calibration is recommended every time one or<br />
more of the following events occur:<br />
� Substantive physical movement or change to the launch cables<br />
� Change in fiber cable type<br />
� Change in the adapters<br />
� Power turned OFF or ON for either of the units<br />
� When the test setup is moved<br />
� When a connector is disconnected from the “TX” port of a FIBERTEK module<br />
PERFORMING A FIELD CALIBRATION<br />
1. Connect the Display and Remote handsets as indicated in Figure 5-2. Make certain<br />
that the patch cords connected are compatible with the fiber type under test (i.e.<br />
50μm vs. 62.5μm).<br />
2. Turn on both handsets. For best accuracy, wait 5 minutes to allow the lasers to<br />
warm-up and settle. During the warm up time, clean all couplers and launch cables<br />
and check launch cables for dirt, scratches, and chips with a fiber optic inspection<br />
scope. Clean the connectors inside the FIBERTEK modules with optical cleaning<br />
swabs as well.<br />
3. Select Field Calibration from the Ready screen and press ENTER.<br />
4. To start the field calibration process press the F1 key. Calibration takes about a<br />
minute after which you should see a icon indicating the calibration was<br />
successful. If the calibration fails check for the following conditions, as they are the<br />
most common causes of failure:<br />
� Verify the polarity of the patch cords. The transmit port (Tx) of one module must<br />
be connected to the receive port (Rx) of the other module.<br />
� Dirty connectors on the patchcords. Clean and inspect with a fiber inspection<br />
scope (IDEAL #45-332).<br />
Warning: Never look into a connector where the opposite end is connected to<br />
live equipment, including the FIBERTEK modules.<br />
� Clean the connectors on the FIBERTEK modules with cleaning swabs. Any dirt on<br />
patch cords will be transferred to the module connectors.<br />
� Check for continuity of patchcords with a fiber continuity tester (IDEAL #VFF5).<br />
AUTOTEST CONFIGURATION<br />
5-4<br />
Having the correct test configuration is critical to achieving accurate test results. Since<br />
FIBERTEK is a dual-fiber test system, the test configuration will vary slightly from the<br />
usual methods used with single fiber test systems.<br />
There are two general methods used for calibration, and two methods used for testing<br />
with optical loss test sets such as FIBERTEK. These methods are described in the<br />
TIA/EIA 526-7 and 525-14 standards. These methods are commonly described as<br />
Method ‘A’ and Method ‘A’ Alternate.
METHOD ‘A’<br />
Calibration Setup<br />
Chapter 5<br />
Fiber Optics Cable Field Calibration and Testing<br />
The Method ‘A’ calibration uses two launch cables and a set of couplers. This is the<br />
recommended calibration procedure for FIBERTEK, as it does not require disconnecting<br />
the launch cables from the modules.<br />
Test Setup<br />
Figure 5-3: Method 'A' Calibration Setup<br />
The Method ‘A’ test setup is best used for long fiber links where the majority of the<br />
attenuation is caused by the cable itself, not the connectors. With this configuration,<br />
the calibration reference plane is at the patch panel and work area outlet.<br />
The measurement taken will include the loss of the fiber optic cable (including inline<br />
splices and couplers) and the individual connector at each end of the link (one pair).<br />
Since there is only one pair of connectors included in this measurement, the overall<br />
loss values may be lower than one would expect, particularly when this setup is used<br />
to test very short cables.<br />
When used on long links of over 1km (multimode) or 4km (single mode) the loss of<br />
the connectors is small compared with the fiber, making this an acceptable setup for<br />
longer links. Use this configuration when knowing the loss of the optical fiber is more<br />
important than knowing the total link loss.<br />
Figure 5-4: Method ‘A’ Test Setup<br />
5-5
Chapter 5<br />
Fiber Optics Cable Field Calibration and Testing<br />
5-6<br />
METHOD ‘A’ ALTERNATE<br />
Test Setup<br />
The Method ‘A’ Alternate test configuration makes it possible to use a dual fiber test<br />
system while measuring the actual loss of all the connections and fiber optic cable. By<br />
using the ‘A’ Method for calibration and adding a new test jumper for testing, the<br />
Method ‘A’ Alternate is useful for testing short links where the connectors make up a<br />
large portion of the link attenuation.<br />
Recommended Setup<br />
Figure 5-5: Method 'A' Alternate Test Setup<br />
Calibration Method ‘A’ & Test Method ‘A’ Alternate<br />
1. Following a successful field calibration as described in Method ‘A’, disconnect the<br />
Remote Handset launch cables from the couplers.<br />
2. Connect another set of launch cables to the Display Handset launch cables. You<br />
should have two sets of launch cables connected to the Display Handset and one<br />
set connected to the Remote Handset.
PERFORMING A FIBER AUTOTEST<br />
Chapter 5<br />
Fiber Optics Cable Field Calibration and Testing<br />
Autotest performs comprehensive tests using programmed testing limits. An overall<br />
pass or fail is displayed along with individual test results.<br />
Fiber autotesting can be performed in either Multimode (in accordance with the<br />
TIA/EIA-526-14A Standards) or Singlemode (in accordance with the TIA/EIA-526-7<br />
Standards).<br />
Fiber Testing (Singlemode and Multimode)<br />
There are four types of test that can be performed: Duplex Length, Loopback Length,<br />
Loopback Attenuation and Dual Fiber Attenuation.<br />
Field calibration must be completed prior to performing tests. A field calibration is also<br />
recommended every time there is a change to the launch cables, fiber cable type,<br />
adapters, or when the power is turned OFF or ON for either of the units.<br />
� The attached adapters of the handset units should be allowed to warm up for a<br />
minimum of 5 minutes to ensure accuracy.<br />
� The launch cables of the same fiber type should be the same as the fiber to be<br />
tested. Position unattached launch cable leads on a flat surface. Allow the fiber<br />
to relax but not dangle in the air.<br />
SETUP & CALIBRATION FOR LOOPBACK TESTING (SINGLE HANDSET)<br />
Loopback testing allows testing fiber links using only the display handset. This type of<br />
test is convenient for testing short links or patch cords since the use of a single<br />
handset is less cumbersome than dual handsets. When loopback mode is used, only<br />
one wavelength is measured. Additionally the length result is the round trip distance.<br />
Remember that when testing a two-fiber link, the actual length will be half the<br />
reported length.<br />
Field calibration for loopback testing requires only the <strong>LANTEK</strong> display handset, and<br />
sets the reference power level for attenuation measurements.<br />
1. Attach the desired FIBERTEK module to the display handset. Choose Fiber from the<br />
Ready screen.<br />
2. Select the single wavelength test that matches the module attached to the<br />
handset.<br />
3. Select a loss budget as described earlier in the manual.<br />
4. Select the Field Calibration option from the Ready Screen.<br />
5. Connect one end of the reference cord to the display handset. Connect the<br />
opposite ends together with a coupler and begin calibration by pressing F1.<br />
5-7
Chapter 5<br />
Fiber Optics Cable Field Calibration and Testing<br />
5-8<br />
LOOPBACK TESTING<br />
Figure 5-6: Loop Calibration Setup<br />
Loopback testing can be performed by using either pressing the AUTOTEST button or<br />
selecting Analyze on the Ready Screen. Autotest performs the attenuation and round<br />
trip length, while the Analyze modes test either attenuation, length, or loopback<br />
length.<br />
Figure 5-7: Configuration for Loopback Testing
Chapter 5<br />
Fiber Optics Cable Field Calibration and Testing<br />
A test result screen will appear at the completion of the test procedure.<br />
LENGTH TEST (DUAL HANDSET)<br />
Figure 5-8: Loopback Test Results Screen<br />
Configuration Setup for Length Testing<br />
1. With the appropriate test adapter on the Display Handset and the appropriate test<br />
adapter on the Remote Handset, connect one end of the near end launch cable<br />
leads to the TX and RX connectors on the Display Handset adapter.<br />
2. Connect the other end of the launch cable leads to the patch panel that connects<br />
to the fiber under test.<br />
3. Connect one end of the far end launch cable leads to the TX and RX connectors on<br />
the Remote Handset adapter.<br />
4. Connect the other end of the far end launch cable to the wall plate (fiber cable<br />
under test).<br />
5. Check all connections to ensure proper contact. Upon completion, you are ready to<br />
perform a fiber test.<br />
Figure 5-9: Configuration for Dual Handset Testing<br />
6. Press the LENGTH key on the Display Handset or select Analyze on the Ready<br />
screen and press ENTER.<br />
7. Then, select Length, and press ENTER.<br />
8. At the completion of the test procedure, a test result screen will appear.<br />
5-9
Chapter 5<br />
Fiber Optics Cable Field Calibration and Testing<br />
5-10<br />
DUAL WAVELENGTH ATTENUATION TEST SETUP<br />
1. With the appropriate test adapter on the Display Handset and the appropriate test<br />
adapter on the Remote Handset, connect one end of the near end launch cable<br />
leads to the TX and RX connectors on the Display Handset adapter.<br />
2. Connect the other end of the launch cable leads to the patch panel that connects<br />
to the fiber under test.<br />
3. Connect one end of the far end launch cable leads to the TX and RX connectors on<br />
the Remote Handset adapter.<br />
4. Connect the other end of the far end launch cable to the wall plate (fiber cable<br />
under test).<br />
5. Check all connections to ensure proper contact. Upon completion, you are ready to<br />
perform a fiber test.<br />
Figure 5-10: Dual Wavelength Attenuation Testing Configuration<br />
DUAL WAVELENGTH ATTENUATION TESTING<br />
1. Press AUTOTEST on the Display Handset or Remote Handset to begin the test, or<br />
select Analyze on the Display Handset Ready Screen and select Attenuation in the<br />
Analyze screen.<br />
2. When the Autotest is completed, the results of the test are displayed.<br />
3. Use the UP/DOWN ARROW Keys to view test results of different wavelengths.<br />
Screen Results thru Autotest process Screen Results thru Analyze process<br />
Figure 5-11: Dual Wavelength Attenuation Test Result Screens
TESTING WITH FIBER STANDARDS<br />
Chapter 5<br />
Fiber Optics Cable Field Calibration and Testing<br />
Certification of Fiber Optic Cabling is typically performed in accordance with the TIA-<br />
568 or ISO 11801 Cabling Standards where a Pass/Fail criterion is based on the length<br />
of the cable and the number of splices and connectors in a fiber link. In addition to<br />
these criteria, <strong>LANTEK</strong> can be configured to perform application specific fiber tests,<br />
which are useful when trying to determine whether a fiber link will support specific<br />
types of networking equipment such as 100BaseSX or 1000BaseLX.<br />
To utilize these options, please follow the steps below:<br />
1. From the DH Ready Screen, press F3 or select the Fiber icon, press<br />
ENTER<br />
2. The Fiber Cable Type screen appears. Highlight the option corresponds to the<br />
installed adapters and select the softkey “Fiber Std.” or F2.<br />
3. Use the UP/DOWN ARROW Keys to highlight the desired standards for testing,<br />
and press ENTER.<br />
4. The Fiber Standards screen appears. Select the applicable core size (F1),<br />
wavelength (F2), and/or setting the loss budget (F3) keys. Upon completion,<br />
press ENTER.<br />
5. <strong>LANTEK</strong> units are now ready for testing with specified Fiber wavelength and<br />
standards.<br />
Note: With different Standards, different softkeys of operations are provided for test<br />
setup. Refer to Appendix C – Fiber Optic Cabling Standards & Application<br />
Requirement for specific Fiber Standards.<br />
5-11
Chapter 5<br />
Fiber Optics Cable Field Calibration and Testing<br />
INTERPRETING AUTOTEST RESULTS FOR FIBER OPTICS<br />
5-12<br />
PASS/FAIL REPORTING<br />
The overall Autotest result is displayed at the top right of the Autotest display screen.<br />
Individual Autotest results are displayed to the right of each test.<br />
Overall Test Result Symbols<br />
Symbol Overall Autotest Result<br />
Overall test result is a pass if each individual test is a pass.<br />
Overall test result is a fail if one or more individual tests is a fail.<br />
Individual Autotest Reports<br />
Symbol Individual Autotest Result<br />
Pass - All values pass with sufficient margin.<br />
Fail - One or more values fail by a margin of failure greater than the<br />
instrument’s specified accuracy.<br />
SAVING CURRENT AUTOTEST RESULTS<br />
Autotest results can be stored in the <strong>LANTEK</strong> internal tester memory or Compact Flash<br />
memory card and accessed later using the Stored Results feature. Autotest results can<br />
be saved immediately following the test.<br />
� Only overall passed Autotests can be saved using the Autosave feature. Failed<br />
tests can be saved manually.<br />
� Test results are automatically saved if the AutoSave preference is enabled. Refer<br />
to Setting Preferences.<br />
� Test names are automatically assigned to completed tests when the Auto<br />
Increment feature is enabled. If a different name is desired, a test can be named<br />
manually using .<br />
MANUALLY SAVING AUTOTEST RESULTS (AUTOSAVE DISABLED)<br />
1. To manually save an Autotest, select , located at the bottom of the screen.<br />
2. The Test Saved screen will be displayed for a brief period, showing the name the<br />
test is saved under.<br />
3. If the current name already exists, a warning screen appears asking you to<br />
overwrite the currently existing file or enter a new file name.<br />
4. Press ESCAPE to exit and return to the previous screen without performing a save<br />
operation, or select to overwrite the existing file.<br />
MANIPULATING JOB FOLDERS<br />
When an Autotest is saved, the data is stored with a unique name. Test results can be<br />
viewed, printed, or deleted from the Stored Tests screen.<br />
1. On the Ready screen, select Stored Tests to open the Job List screen.<br />
2. Highlight the desired Job. Press to view the folder options list.<br />
3. Highlight the desired function and Press ENTER.
VIEWING RESULT DETAILS<br />
Chapter 5<br />
Fiber Optics Cable Field Calibration and Testing<br />
When an Autotest is saved, the data is stored with a unique name. Test results can be<br />
viewed, printed, or deleted from the Stored Tests screen.<br />
1. On the Ready screen, select Stored Tests to open the Job List screen.<br />
2. Highlight the desired Job. Press ENTER to open the job.<br />
3. Press the ARROW keys to highlight the desired test record.<br />
4. Press ENTER to open the record.<br />
5. Press ESCAPE at any time to return to the previous screen.<br />
MEASURING RETURN LOSS<br />
Simply stated, return loss is the ratio of power reflected by a connector or other event<br />
compared to the power that arrived at the event. The scale of measure for return loss<br />
is dB (decibel). Because the scale of return loss is by definition a negative value, a<br />
larger (negative) number is better.<br />
However, by convention, most people usually omit the negative sign and use it as a<br />
positive value. For example, a return loss measurement of 0 dB means that 100% of<br />
the power arriving at the connector was reflected back to the transmitter.<br />
In reality a 0 dB measurement is impossible in fiber-optic systems; the worst<br />
reflection possible is about –14 dB which would be created by a perfect glass-to-air<br />
interface. In most cases a field polished connector will yield a return loss of<br />
approximately -30 to -40 dB, meaning .1% to .01% of the power was reflected<br />
upstream. Factory terminated Ultra Physical Contact (UPC) connectors usually perform<br />
to –50 dB or better (.001% reflection).<br />
5-13
CHAPTER 6<br />
FIBER OPTICS DIAGNOSTICS<br />
(TRACETEK TM )<br />
TRACETEK is a Reflective Anomaly Detection (RAD) system composed of two parts:<br />
� <strong>LANTEK</strong> Cable Certifiers, and<br />
� TRACETEK Optical Transceiver Module<br />
The <strong>LANTEK</strong> Display Handset provides power, user interface, storage and signal<br />
processing capability to the TRACETEK module. The TRACETEK module converts the<br />
<strong>LANTEK</strong> electronic TDR signals to optical and optical signals back to electronic.<br />
The primary use of this system is to locate optical reflections from cable discontinuities<br />
such as connectors, splices, fractures (i.e. cracked or broken strands) or other<br />
anomalies occurring within an optical fiber network.<br />
Warning: The TRACETEK adapter generates light pulses exceeding 40 milliwatts<br />
of power. DO NOT look into the adapter or the fiber under test as serious eye damage<br />
may result.<br />
TRACETEK is an alternative to using an OTDR (Optical Time Domain Reflectometer)<br />
and functions in a similar manner. Both methods will produce traces of optical back<br />
reflection for analysis by technicians. However, the Rayliegh scatter measurement<br />
used by the OTDR to infer fiber loss is not used in TRACETEK.<br />
Note: True loss measurements can only be made with an Optical Loss Test Set such<br />
as TRACETEK’s companion product, FIBERTEK.<br />
TRACETEK VS. OTDR<br />
OTDR OPERATING PRINCIPLES<br />
The OTDR (Optical Time Domain Reflectometer) is a device that is able to “look” at a<br />
fiber optic cable and display a graphical representation of the events that occur on the<br />
cable. The basic concept is that a high-speed laser fires a precise pulse of light into<br />
the fiber, after which the device monitors the same fiber for reflections. The time<br />
between the launched pulse and reflected pulses represents the distance to the events<br />
that caused the pulses. This gives the OTDR the ability to not only measure the length<br />
of the fiber but to also measure the distance to each event on the fiber. This function<br />
allows the OTDR to be used as a trouble-shooting tool to find breaks in the fiber and<br />
to identify the location of individual connectors and splices.<br />
The second feature of an OTDR is its ability to measure the tiny amounts of light that<br />
are reflected back by the fiber optic cable itself. This phenomena is known as Rayleigh<br />
scattering and is caused by light reflecting off molecules in the glass whose diameter<br />
is 1/10 the wavelength of the light. This is the same phenomenon that makes the sky<br />
appear blue. When the OTDR is able to detect these tiny reflections it can calculate the<br />
loss of the cable as well as the insertion loss of connectors and splices on the fiber<br />
cable.<br />
6-1
Chapter 6<br />
Fiber Optics Diagnostics (TRACETEK)<br />
6-2<br />
OTDR History<br />
Figure 6-1: OTDR Block Diagram<br />
OTDRs were first used in long distance outside plant fiber optic installations such as<br />
telecom or CATV to help document and troubleshoot fiber networks. The first<br />
generation OTDRs were massive, complex and very expensive. Most models required<br />
the use of a cart or dolly of some type to be moved, as they were heavy and bulky.<br />
These early machines did not offer any of the automatic setup features we are used to<br />
seeing today, meaning that the operator had to have a very thorough understanding<br />
of the operation of the equipment to properly configure it.<br />
Today, OTDRs are smaller, less expensive and easier to use. But that still does not<br />
mean that the average installer can pick one up and begin using it. The technician still<br />
needs to understand the complex relationship between pulse width, dynamic range,<br />
acquisition time, Rayleigh scattering, and a myriad of other factors that determine<br />
what type of picture the technician will get from an OTDR.<br />
Figure 6-2: Typical OTDR Trace
TRACETEK OPERATING PRINCIPLES<br />
Chapter 6<br />
Fiber Optics Diagnostics (TRACETEK)<br />
TRACETEK is able to provide most of the troubleshooting functions of an OTDR at a<br />
fraction of the cost with a simple, easy-to-use interface that requires almost no<br />
training. Like an OTDR, TRACETEK fires a precise laser pulse into a fiber and monitors<br />
the fiber for return pulses. This means that like an OTDR, TRACETEK can measure the<br />
overall length of a fiber, as well as measure the distance to reflective events within<br />
the fiber.<br />
Unlike an OTDR, TRACTEK is exceptionally easy to use. The only setup consists of<br />
choosing from one of three operating modes (High, Medium, or Low Resolution). The<br />
lightweight module is small enough that it can be carried in the installer’s test<br />
equipment case, making it available in any situation that requires fiber<br />
troubleshooting. Since TRACETEK does not measure fiber scattering, it cannot<br />
measure the insertion loss of the link or individual connectors like an OTDR.<br />
Unlike fiber test kits that also measure overall length, TRACETEK only needs to be<br />
connected to one side of the fiber to make its measurements. Traditional fiber test kits<br />
need to either have hardware connected at both ends of the fiber, or a loop-back cable<br />
installed at the far end to make its length measurement. This means that two<br />
technicians are required to test the length, or one technician can perform the test by<br />
walking back and forth to test each strand, taking twice as long to finish the job.<br />
USING TRACETEK<br />
The TRACETEK module uses a very high-power infrared laser for both multimode and<br />
single mode testing. The light emitted from TRACETEK is invisible, so take care when<br />
using TRACETEK or examining connectors not to look directly into the connector or<br />
examine it with an inspection scope unless you are certain the module is powered off<br />
or disconnected.<br />
With the TRACETEK module attached to <strong>LANTEK</strong>, connect the module to the fiber<br />
under test with the included FC-ST (FC-FC for single mode) launch cable. Unlike an<br />
OTDR, TRACETEK does not require the use of long launch cables; its dead-zone is<br />
short enough that any jumper of 2 m (6 ft) or more can be used.<br />
1. With the TRACETEK module attached to <strong>LANTEK</strong>, connect the module to the fiber<br />
under test with the included FC-ST (FC-FC for single mode) launch cable. Unlike an<br />
OTDR, TRACETEK does not require the use of long launch cables; its dead-zone is<br />
short enough that any jumper of 2 m (6 ft) or more can be used.<br />
2. Turn on the power to the <strong>LANTEK</strong>. Choose the Analyze icon, press ENTER.<br />
3. In the TRACETEK Analyze menu there are three options to choose from: High<br />
Resolution, Medium Resolution and Low Resolution. This setting will change the<br />
pulse with “laser power” that is fired into the cable. In this case resolution is the<br />
opposite of distance, meaning that the short cables are better tested with High<br />
Resolution and long cables are better tested with Low Resolution.<br />
6-3
Chapter 6<br />
Fiber Optics Diagnostics (TRACETEK)<br />
Resolution<br />
Setting<br />
Table 6-1: Resolution Settings and Recommendations<br />
Power Distance<br />
Scale<br />
Distance Recommendation<br />
High Low Short 0-800 m (0-2625 ft)<br />
Med High Short 250-850 m (820-2790 ft)<br />
Low High Long 500-4000 m (1640-13120 ft)<br />
Note: The recommendations for distance do not reflect the absolute minimum or<br />
maximum distance capabilities of TRACETEK. These are recommendations that will<br />
yield the best results in most cases. You should feel free to experiment and<br />
determine the setting that gives the best result for a particular test configuration.<br />
HIGH RESOLUTION<br />
High Resolution provides accurate back reflection measurement of fiber and will<br />
resolve individual events as close as 2 meters apart at rated accuracy. This setting is<br />
used to check for connector quality, optimized for short-distance cables with lengths of<br />
no more than 800 meters and mostly used on horizontal links and shorter backbone<br />
cables. This mode has a “low power” setting.<br />
MEDIUM (MED) RESOLUTION<br />
Medium Resolution provides accurate back reflection measurement of lengths and will<br />
resolve measure events 8 meters and up at distances of 850 meters. This setting is<br />
primarily used to locate high quality connections for documentation purposes. It is on<br />
cables between 250-850 m in length or when trying to locate low-reflection events<br />
such as mechanical splices or connectors where the polish is so good that they do not<br />
reflect enough light in the low power mode to be detected. This mode has a “long<br />
laser pulse” setting.<br />
LOW RESOLUTION<br />
Low Resolution provides accurate back reflection measurements for cables between<br />
500 and 4000 meters in length, since most connectors and mechanical splices will be<br />
visible in this mode. This mode combines the “high power/long pulse” of the Medium<br />
Resolution mode with long-distance scaling.<br />
TRACETEK OVERVIEW<br />
6-4<br />
High-bandwidth optical networks have become increasingly sensitive to signal<br />
transmission problems. In many cases the channel insertion loss is the only parameter<br />
that is measured to make a determination that a link’s performance is satisfactory.<br />
Channel insertion loss only measures the weakening of the signal from one end of a<br />
fiber optic link to the other, making sure that enough optical power is present at the<br />
receiver to ensure the optical transceivers can “see” each other.<br />
FIBERTEK is an exceptional tool to certify proper link channel loss. However, in a<br />
situation when a certification test fails or there are unusual network performance<br />
problems, another tool can help isolate cabling problems.<br />
TRACETEK is a unique tool that provides many of the useful features of an OTDR<br />
without the high cost or complex parameters to set up. An easy to use diagnostic tool,<br />
TRACETEK allows the user to measure the total length of a link, measure the distance<br />
to a reflective event such as a connector, and most importantly, identify faulty<br />
connections.
Chapter 6<br />
Fiber Optics Diagnostics (TRACETEK)<br />
TRACETEK works by launching a high-power laser pulse down the fiber and monitoring<br />
reflections returned by the end of the cable, connectors, mechanical splices, and cable<br />
breaks. This important functionality will help locate sources of excessive reflection in<br />
the cabling system. Excessive reflection in an optical system leads to high bit error<br />
rates, preventing the network from operating at its full capability.<br />
One of the most common sources of excessive return loss is dirty or poorly polished<br />
connectors. When there is too much reflection in a system, the reflected power can<br />
interact with the downstream signal, either increasing or decreasing the amplitude of<br />
the transmitted signal. Additionally, if the reflection is strong enough it can interfere<br />
with the feedback circuit on the laser transmitter causing fluctuations in output power.<br />
Unlike a power meter, which measures the loss across a link, TRACETEK displays the<br />
relative reflection of events in a link allowing the user to isolate and remedy problems.<br />
TRACETEK DISPLAY<br />
After deciding which setting is best for your situation, select the appropriate mode and<br />
press ENTER. TRACETEK will sample the fiber for about 30 seconds before displaying<br />
the acquired trace data.<br />
Figure 6-3: TRACETEK Display<br />
Table 6-2: Key Elements of the TRACETEK Display<br />
1 Start pulse (first connector)<br />
2 Reflective events<br />
3 End of fiber (last connector or break in cable)<br />
4 Moveable Cursor<br />
5 Total length of fiber<br />
6 Cursor position<br />
6-5
Chapter 6<br />
Fiber Optics Diagnostics (TRACETEK)<br />
6-6<br />
TRACETEK displays its measurement data in a graphical format similar to that of an<br />
ODTR, with the X-axis representing the distance from the handset and the Y-axis<br />
displaying the relative reflection (Return Loss) of each event. TRACETEK instantly<br />
displays the overall length to the end of the fiber and allows the operator to scroll a<br />
cursor to find the distance to any event on the screen. This functionality allows the<br />
operator to quickly measure overall fiber length, locate breaks in the fiber, locate<br />
individual reflective events, and check the relative reflection of events to identify<br />
defective connections.<br />
The TRACETEK display provides a “roadmap” of the fiber at a glance. The number at<br />
the bottom of the screen, marker 5, indicates the measured distance to the end of the<br />
fiber. As with an OTDR, TRACETEK does not require a piece of equipment or a person<br />
at the opposite end of the fiber under test. For this reason, TRACETEK cannot<br />
differentiate between the expected end of the fiber or a break in the cable. If there is<br />
a break in the cable this reading will tell you how far down to look for the break.<br />
� Marker 1 indicates the first connector attached to your launch jumper.<br />
� Marker 2 indicates the two connectors in the middle of the fiber under test. The<br />
height of the reflected pulse (called a Fresnel) indicates the relative reflection of<br />
each event. In the High-Resolution mode, a good connector should not go much<br />
above the halfway point on the display. In this example, the two connectors<br />
should be cleaned, and the first appears to be a bit worse than the second.<br />
� Marker 3 is at the end of fiber. This reflection is expected to be quite large since<br />
it is at the end of the cable and represents a glass-to-air interface.<br />
Markers 1 and 6 indicate the user-moveable cursor and its position respectively. The<br />
cursor can be move by three methods: in very fine steps using the left and right arrow<br />
keys on the keypad, in medium size steps using the and soft-keys, or<br />
in large steps by holding the SHIFT button while pressing the LEFT/RIGHT ARROW<br />
keys on the keypad.<br />
In the figure above, the display shows a trace of the same fiber as before, but the two<br />
connectors in the middle were cleaned using the IDEAL Starter Cleaning Kit included<br />
with your TRACETEK module. It is clearly evident that a dirty connector, even one that<br />
appears clean to the naked eye, can cause significant return loss problems in the link.<br />
After being cleaned, both connectors are well below half scale and should present no<br />
problems with network operation.<br />
Cleaning connectors with any fiber-optic system is of utmost importance. Whenever<br />
there is any doubt about a test result, the first action is to clean the suspect<br />
connectors and retest the link.
Chapter 6<br />
Fiber Optics Diagnostics (TRACETEK)<br />
There are many creative ways to clean connectors, and we’ve seen quite a few of<br />
these methods used in the field. It’s also common that test technicians do not take the<br />
time to visually inspect or clean connectors before testing the link. Some technicians<br />
will check for cleanliness with their naked eyes, but the human eye cannot possibly<br />
see the type of contaminants that affect fiber-optic connectors. Cleaning is a mundane<br />
but very important task.<br />
To illustrate this point, we have provided some magnified images of connectors<br />
cleaned with various methods.<br />
Dirty<br />
connector<br />
Wiped<br />
“clean”<br />
with finger<br />
“Cleaned”<br />
on shirt<br />
Cleaned<br />
w/IDEAL<br />
cleaning kit<br />
Again, using the same fiber, but before the connectors were cleaned, the figure above<br />
displays the results when the optimal TRACETEK resolution mode is not selected. In<br />
this case the Medium Resolution mode was used. The resulting Fresnels are much<br />
higher than before and the “Batman ears” are caused by the saturation of the<br />
receiver. This is due to excessive reflection.<br />
6-7
Chapter 6<br />
Fiber Optics Diagnostics (TRACETEK)<br />
After cleaning the two center connectors, shown in the figure above, it is apparent<br />
there is some improvement in return loss. However, in this case we expect the Fresnel<br />
to be larger than before because of the higher launch power TRACETEK uses in the<br />
Medium Resolution mode. Also notice that the Fresnels are wider than before. This<br />
width is known as the dead zone, which is the distance that the receiver is blinded by<br />
the reflection of each event. High output power and dirty or poorly polished<br />
connectors will lead to an increased dead zone.<br />
In its High Resolution mode with clean connectors, TRACETEK will have a dead zone of<br />
2 m, while in the Medium and Low Resolution Modes the dead-zones will be about 8<br />
m. When testing through patch panels or other cross-connect devices best results will<br />
be achieved with the High-Resolution mode. Refer to Table 1 when deciding which of<br />
the three resolution modes is best for your application.<br />
TESTING WITH TRACETEK<br />
6-8<br />
The TRACETEK system is simple to use and requires no warm-up time.<br />
1. Insert the TRACETEK adapter into the <strong>LANTEK</strong> Cable Certifier.<br />
2. Clean the launch cable and attach it to the adapter.<br />
3. Using a Good Quality mating adapter, attach the launch cable to the fiber to be<br />
tested. Clean all connections. Make sure the launch cable connector is aligned with<br />
the TRACETEK connector slot to assure proper mating of the connector.<br />
Figure 6-4: <strong>LANTEK</strong>/TRACETEK Configuration on a Fiber<br />
4. Select Fiber Optics on the Display Handset Ready screen. The Fiber Cable Type<br />
screen appears.<br />
5. Highlight the desired fiber type and press ENTER to accept the new fiber type.<br />
6. From the Ready screen of the <strong>LANTEK</strong> main unit, Press AUTOTEST or select<br />
Analyze to open the Analyze menu screen.<br />
7. The Analyze menu provides three resolution options: High, Medium, and Low. The<br />
default resolution is High.
Figure 6-5: TRACETEK Analyze Menu Screen<br />
Chapter 6<br />
Fiber Optics Diagnostics (TRACETEK)<br />
8. Highlight the desired resolution and press ENTER. The <strong>LANTEK</strong> Cable Certifiers will<br />
conduct the measurement.<br />
9. When the test is complete, the results are displayed on screen, left to right, with<br />
the last event usually taking place at the end of the fiber.<br />
Note: Sometimes the end of the fiber (EOF) is not where it is expected due to poor<br />
splices or cuts. EOF is the point where TRACETEK detects a large reflection<br />
(about -14dB) which can be the actual EOF, a bad connector, or a break in the fiber.<br />
Figure 6-6: TRACETEK Test Results Screen<br />
Using the high resolution setting is best for cables under 800 m (2625 ft) in length.<br />
The distance to the end of the fiber is displayed on the screen in the lower left-hand<br />
corner of the display. The vertical cursor can be used to find the distance to an event<br />
by moving it along the trace where the event is indicated. The distance to this point<br />
appears on the screen in the upper right-hand corner of the display.<br />
SAVING TRACETEK RESULTS<br />
Like other tests, the resultant plot from TRACETEK can be stored in the <strong>LANTEK</strong><br />
handset and recalled or uploaded to a PC using the <strong>LANTEK</strong> Reporter software.<br />
1. From the TRACETEK display, press SHIFT and the key.<br />
2. Enter a test record name and press ENTER to save the record.<br />
6-9
Chapter 6<br />
Fiber Optics Diagnostics (TRACETEK)<br />
TROUBLESHOOTING WITH TRACETEK<br />
6-10<br />
TRACETEK can be an invaluable tool for troubleshooting a variety of network<br />
problems. One application is to locate a break in a cable. In a new installation,<br />
TRACETEK can be used with a power meter/light source test kit such as FIBERTEK to<br />
characterize a link and map the distance to known events.<br />
In this example we’re testing a backbone link consisting of 44 m of cross-connect<br />
cable to a 717 m backbone, followed by another 40 m of cross-connect. Figure A is the<br />
FIBERTEK (power meter/light source) result from the link indicating a passing result.<br />
In Figure B, we see the connectors at 40 m and 760 m, as well as the end of the fiber<br />
at 801m. The connectors at 40 m and 760 m appear to be in good condition with a<br />
reflection that is just below half scale.<br />
Figure A Figure B<br />
Figures C and D show the same link failing. The FIBERTEK screen tells the degree of<br />
link failure but it does not help isolate the problem. TRACETEK screen (Figure D)<br />
shows the connector at 761 m is nearly full scale, an indication that it has become<br />
dirty or damaged.<br />
Figure C Figure D<br />
In this situation, the best course of action is to clean the connection at 760 m and<br />
check it with a microscope (IDEAL P/N 45-332) before re-testing. Consult the<br />
instructions included with the IDEAL Starter Cleaning Kit for the best methods to clean<br />
connectors and couplers.
Chapter 6<br />
Fiber Optics Diagnostics (TRACETEK)<br />
Q&A: IDENTIFYING TRACETEK CONFIGURATION PROBLEMS<br />
Q1: Why is it so important that my launch cable connectors be kept clean?<br />
A1: Unlike a traditional light source, the most high-powered of which have output<br />
levels significantly less than 1mW, TRACETEK’s high-power laser source launches up<br />
to 40 mW of power. When dealing with return loss measurements, more power out<br />
means more power back. With the levels that TRACETEK operates at, a dirty launch<br />
cable will immediately reflect a large amount of power back at the detector, essentially<br />
causing temporary blindness of the detector. Keep your connectors clean!<br />
Q2: What will happen if I set the Resolution incorrectly?<br />
A2: Incorrectly setting the Resolution of TRACETEK will not cause any damage to the<br />
tester or cable. It will usually result in a garbled display that is a result of too much<br />
power being injected into a short cable, leading to very high reflections since the cable<br />
itself cannot attenuate the return pulse. Or, in the case of a very long cable, there will<br />
not be enough power for TRACETEK to see the end, meaning it will be unable to<br />
properly scale the screen. Here are a few images that result when the Resolution<br />
setting is not optimally set for the fiber being tested (Figures E-H).<br />
� In this example a 1000 m cable was tested with the Resolution set to MED. The<br />
result is that the ramp time, which adjusts the scaling, is too short. The<br />
recommended maximum distance for MED mode is 850 m. Change to LOW<br />
Resolution and try again<br />
Figure E<br />
� With the Resolution now set to LOW, the end of the 1000 m fiber is clearly<br />
visible.<br />
Figure F<br />
6-11
Chapter 6<br />
Fiber Optics Diagnostics (TRACETEK)<br />
6-12<br />
� Here, a 45 m cable is tested with the MED Resolution mode. Although the length<br />
of the cable is correctly identified, there is so much power that the receiver is<br />
detecting echoes in the cable. Choosing the HIGH-Resolution mode should help.<br />
Figure G<br />
� In the HIGH-Resolution mode the power output is decreased and the echoes are<br />
eliminated. Also that notice the dead-zones of the first and last events are<br />
noticeably narrower.<br />
Figure H<br />
Q3: Why is TRACETEK only available in 1300 nm modules?<br />
A3: Since TRACETEK does not make attenuation measurements, the reason for<br />
choosing a 1300 nm laser is based purely on performance. Multimode fiber has less<br />
than half the attenuation at 1300nm than it does at 850 nm. By using the 1300 nm<br />
laser, TRACETEK can be used to test much longer cables than it could with an 850 nm<br />
laser whose power attenuates very rapidly.<br />
Q4: Does TRACETEK support single mode testing?<br />
A4: Yes. TRACETEK is also available in a single mode kit with a 1310 nm laser. For<br />
single mode fibers the attenuation difference between 1310 nm and 1550 nm is small<br />
enough that there is no major performance gain obtained by operating at 1550 nm. In<br />
this case the 1310 nm laser helps make TRACETEK the most affordable solution for<br />
reflectance testing of single mode fiber.
Chapter 6<br />
Fiber Optics Diagnostics (TRACETEK)<br />
Q5: If I lose my TRACETEK launch cable, do I need to replace it with a special<br />
one?<br />
A5: No, the included launch cable with TRACETEK is an ordinary FC-ST multimode or<br />
FC-FC single mode jumper. Any high-quality replacement jumper will work, and there<br />
is no calibration necessary. The length of the launch cable is only important in that its<br />
length is added to your distance measurements and keeping a conveniently short<br />
cable will minimize any offset in length measurements. TRACETEK utilizes a special<br />
technology that allows the use of very short launch cables, unlike an OTDR whose<br />
front-end dead zone may be 20-100 m long and require the use of very long launch<br />
cables.<br />
6-13
SYSTEM REQUIREMENT<br />
Your PC should have the following capability:<br />
CHAPTER 7<br />
<strong>LANTEK</strong> REPORTER SOFTWARE<br />
Minimum Pentium 90, Windows 95B, 32 MB RAM, 100 MB of available disk storage,<br />
one serial communications port, video card capable of providing<br />
resolution of 1024 x 768 and an inkjet printer.<br />
Recommended Pentium 300 MHz, one of the following (Windows 98, ME, XP, 2000, or NT<br />
SP5), 128 MB RAM, 100 MB available disk storage, video card capable of<br />
providing resolution of 1024 x 768, a laser printer and an available USB<br />
port.<br />
Note: Windows 95 and Windows NT do not support USB connections. Uploading test<br />
results in these operating systems are therefore limited to a serial port connection.<br />
<strong>LANTEK</strong> REPORTER INSTALLATION AND START-UP<br />
<strong>LANTEK</strong> REPORTER UPGRADES<br />
The CD supplied with your tester may not contain the latest version of the <strong>LANTEK</strong><br />
Reporter program. <strong>Ideal</strong> <strong>Industries</strong> provides a web (www) site for LAN cable test<br />
products that allows you to use a PC and modem to obtain the latest <strong>LANTEK</strong> Reporter<br />
maintenance release. Refer to Appendix B, World Wide Web Services.<br />
INSTALLATION PROCEDURE<br />
The <strong>LANTEK</strong> Reporter software is installed using the standard Windows program<br />
installer.<br />
1. Insert the <strong>LANTEK</strong> Reporter CD-ROM.<br />
2. Click on the Start button, and then click Run.<br />
3. Type, d:\ setup<br />
Note: If your CD-ROM drive is not the “d” drive, replace “d” with the correct drive<br />
letter.<br />
4. Follow the instructions on your screen.<br />
Note: Install the <strong>LANTEK</strong> Reporting System in the default directory, c:\…\ <strong>LANTEK</strong><br />
Reporter. An empty database will be created in c:\…\ <strong>LANTEK</strong> Reporter \db.<br />
7-1
Chapter 7<br />
<strong>LANTEK</strong> REPORTER Software<br />
Figure 7-1: Typical Installation Window<br />
STARTING THE <strong>LANTEK</strong> REPORTER PROGRAM<br />
There are two ways to start the <strong>LANTEK</strong> Reporter program:<br />
1. From the Windows desktop, select <strong>LANTEK</strong> Reporter.<br />
2. From the Windows desktop select Start. Then, select Programs, <strong>LANTEK</strong> Reporter.<br />
<strong>TESTER</strong>-TO-PC CONNECTIVITY<br />
7-2<br />
PC <strong>CABLE</strong>S<br />
Use the USB or the Serial Port interface cables supplied with your tester.<br />
USB Interface Cable<br />
The USB (Universal Serial Bus) interface cable is supported by the Windows 98 SE,<br />
ME, 2000, and XP (Pro and Home) operating systems and can upload data<br />
approximately 20 times faster than uploads via the serial port. The USB interface<br />
provides the same functionality as the serial port but does not support printing.<br />
Serial Port Interface Cable<br />
The serial cable, commonly referred to as a Null modem cable, connects to the RS-232<br />
serial port and is capable of uploading data (test results) to the PC or laptop as well as<br />
establishing a connection to a serial port printer.
Chapter 7<br />
<strong>LANTEK</strong> REPORTER Software<br />
If you supply your own serial port cable, Figure 7-2 shows the wiring specifications.<br />
ESTABLISHING A CONNECTION<br />
For USB Connection<br />
Figure 7-2: PC Uploading Cable Pinout<br />
Figure 7-3: PC to Tester Connections<br />
1. Attach the USB cable to the tester and an available USB port on the PC.<br />
2. Turn on the tester. The tester has an Operating System and must complete<br />
booting up before actions can be taken.<br />
3. After Booting is complete, press F2. Then select USB by pressing F3.<br />
4. Designate an upload location.<br />
5. From the <strong>LANTEK</strong> Reporter’s File Menu select Upload From Tester or select the<br />
Upload Test icon on the Toolbar to complete the Upload. A “Browse for folder”<br />
dialog appears. A new drive should appear as a “Removable Disk (E:) Double Click<br />
on the drive and a sub-folder should also appear. Click once on the “Stored Tests”<br />
folder to select it, then click the OK button.<br />
Note: Drive letter may vary depending on the number of drives installed on the user’s<br />
PC.<br />
7-3
Chapter 7<br />
<strong>LANTEK</strong> REPORTER Software<br />
7-4<br />
For RS-232 Serial Connection<br />
1. Attach the RS-232 cable to the tester and an available RS-232 port on the PC.<br />
2. Turn on the tester. The tester has an Operating System and must complete<br />
booting up before actions can be taken.<br />
3. Start the <strong>LANTEK</strong> Reporter program on the PC, go to the Options menu and select<br />
Upload Target. Then, select Comm Port.<br />
4. Designate an upload location.<br />
5. From <strong>LANTEK</strong> Reporter’s File Menu select Upload From Tester or select the<br />
Upload Test icon on the Toolbar to complete the Upload.<br />
For a serial port connection that is not responsive:<br />
1. Go to the <strong>LANTEK</strong> Reporter Options menu and select the Tester ID command.<br />
The program will automatically scan the available communications ports and baud<br />
rates to locate and identify the attached Tester. If the tester is not identified,<br />
proceed to the next step.<br />
2. Some PCs may have difficulties with this function and the following dialog box<br />
displays. Click OK.<br />
3. Shut down any other applications that use the serial communication ports.<br />
4. Click on the Options menu and select the Serial Port command. Select the<br />
correct Port and match the Baud Rate to that of your <strong>LANTEK</strong> tester.<br />
5. After you have entered the values, click the Test button. If the Tester is identified,<br />
its serial and model numbers will be displayed.<br />
6. Click OK.<br />
Note: If you have tried alternative baud rates and ports and <strong>LANTEK</strong> Reporter still<br />
cannot find the Tester, call IDEAL INDUSTRIES Customer Support.<br />
For Compact Flash Transfer<br />
1. Insert the Flash card with the test results into the Flash Card Reader on the PC.<br />
2. Start the <strong>LANTEK</strong> Reporter program on the PC, go to the Options menu and select<br />
Upload Target. Then select USB Compact Flash.<br />
3. From <strong>LANTEK</strong> Reporter’s File Menu select Upload From Tester or select the<br />
Upload Test icon on the Toolbar to complete the upload. A “Browse for folder”<br />
should appear. A new drive should appear as a “Removable Disk (E:)” Double Click<br />
on the drive and a sub-folder should appear. Click once on the “Stored Tests”<br />
folder to select it. Then click the OK button.<br />
Note: Drive letter may vary depending on the number of drives installed on the user’s<br />
PC.
<strong>LANTEK</strong> REPORTER USER INTERFACE<br />
THE MENU BAR<br />
Chapter 7<br />
<strong>LANTEK</strong> REPORTER Software<br />
The menu bar at the top of the screen displays the pull-down menu names.<br />
When you choose a menu, a list of commands drops down under the menu. You can<br />
choose only the commands that are solid black. Gray commands or options are<br />
disabled or may be context-sensitive. For example, to use test commands such as<br />
Find Test and Select Test, the cursor must be in the test grid portion of the screen<br />
or the commands are not available.<br />
To open a menu<br />
1. Move the mouse so that the tip of the mouse pointer is on the desired menu.<br />
2. Click the left mouse button.<br />
The File Menu<br />
Many of the selections on this menu are standard Windows options.<br />
7-5
Chapter 7<br />
<strong>LANTEK</strong> REPORTER Software<br />
7-6<br />
Command Description<br />
Upload From Tester Pull result data from the <strong>LANTEK</strong> tester.<br />
Pack Tester Memory Erase all tests in the tester memory that are marked for deletion<br />
(Serial mode only).<br />
Erase Tester Memory Erase all tests in the tester memory.<br />
Upgrade <strong>LANTEK</strong><br />
Firmware<br />
Copy new firmware code to the <strong>LANTEK</strong> tester.<br />
Upgrade LTxxx<br />
Firmware<br />
Copy new firmware code to the LTxxxx tester.<br />
Export Export test results as Comma-Separated Values (CSV) or standard<br />
ASCII text files.<br />
Backup Database Archive current data in the current folder.<br />
Restore Database Restore a closed database from a zipped archive file into the current<br />
folder.<br />
Re-Index Database Re-index the database.<br />
Archive Create a backup zip file of databases.<br />
The Edit Menu<br />
Click Edit to display the Edit menu. The Edit menu will vary based on which view (Job<br />
or Database) you are in.<br />
Job View<br />
Command Description<br />
Add Job Add a Job.<br />
Edit Job Modify a Job.<br />
Edit Tests Edit test information such as Test Company/Contractor, and names.<br />
Select Job Select an item in the database view in preparation for printing or<br />
reporting.<br />
Select All Select all entries in the database view.<br />
Find Job… Locate a database item.
Database (Test) View<br />
Command Description<br />
Edit Test Modify a test name and details.<br />
Chapter 7<br />
<strong>LANTEK</strong> REPORTER Software<br />
Select Test Select a test in the database view for printing or reporting.<br />
Set Operator Provide details about the operator for the currently selected test.<br />
Find Test Locate a database test item.<br />
Note: In order to activate the Test View, at least one Autotest must be activated in the<br />
right main section of the screen. In the left section, the job tree (see Job View) is<br />
shown.<br />
The View Menu<br />
The View menu allows you to hide or display the toolbar or status bar and view.<br />
While in database (test) view, select a test and click Test Information to open the<br />
Test Information window.<br />
7-7
Chapter 7<br />
<strong>LANTEK</strong> REPORTER Software<br />
7-8<br />
The Test Summary Information is located at the top of the screen.<br />
Command Description<br />
Job Name The name of the job to which this test belongs.<br />
Customer The customer for whom the test and job have been performed.<br />
Test Standard The standard used by the handset to perform the test.<br />
Date The date the test was performed.<br />
Operator The name of the operator who performed the test.<br />
Test Instrument The type and serial number of the instrument used to perform the<br />
test.<br />
Frequency Range The test frequency range of the tested cable.<br />
NVP The Nominal Velocity of Propagation value defined for the cable on<br />
which the test was performed.<br />
Individual tests can be viewed by double-clicking on a test tab to display stored test<br />
results.<br />
� A red dot on a test tab indicates one or more tests within the tab failed.<br />
� A green dot indicates that all tests within the tab passed.
The Options Menu<br />
Chapter 7<br />
<strong>LANTEK</strong> REPORTER Software<br />
Use the Options menu to configure the program to match the hardware and user<br />
preferences.<br />
Command Description<br />
Sort Sort tests in the database view.<br />
Units Choose feet or meters as the measurement units for both the screen<br />
display and printouts.<br />
Serial Port Configure the serial port for your <strong>LANTEK</strong> tester.<br />
Upload Target Designate the source of the data.<br />
Font Change the screen display font.<br />
Language Change the language for both the screen display and printouts.<br />
Tester ID Locate and identify a connected tester. (Serial mode only)<br />
The Help Menu<br />
This menu provides the standard windows Help support and displays the About dialog.<br />
7-9
Chapter 7<br />
<strong>LANTEK</strong> REPORTER Software<br />
7-10<br />
THE STATUS BAR<br />
The Status Bar at the bottom of the screen lists the functions that are currently<br />
operating and indicates the number of tests residing in the currently highlighted job.<br />
THE TOOLBAR<br />
The toolbar icons are shortcuts for many of the commands on the pulldown menus.<br />
<strong>LANTEK</strong> Unique Tool Button Identification<br />
Export<br />
Upload Test<br />
Find Tester ID<br />
Set Operator<br />
THE RIGHT MOUSE BUTTON<br />
Backup<br />
Select All<br />
Sort Test<br />
The right mouse button provides a shortcut to either display the Job or Test Edit menu<br />
depending on the area of the window where the click is performed.
<strong>LANTEK</strong> REPORTER HELP SYSTEM OVERVIEW<br />
HELP TOPICS OPTION<br />
Chapter 7<br />
<strong>LANTEK</strong> REPORTER Software<br />
The Help Topics menu option is the primary way to gain access to the <strong>LANTEK</strong><br />
Reporter Help system.<br />
To open the Help System<br />
1. Pull down the Help menu and click the Help Topics command. The Help Topics<br />
screen displays.<br />
HELP TOPICS SCREEN<br />
The <strong>LANTEK</strong> Reporter Help Topics screen contains three tabs and three buttons.<br />
The Content tab displays a list of topics in the <strong>LANTEK</strong> Reporter Help system,<br />
organized by category.<br />
The Index tab is similar to a traditional book index, listing keywords and phrases<br />
alphabetically.<br />
The Find tab allows a search for any word or phrase in the Help system.<br />
Display button Open the selected <strong>LANTEK</strong> Reporter Help item.<br />
Print button Print the selected item.<br />
Cancel button Close the <strong>LANTEK</strong> Reporter Help system.<br />
7-11
Chapter 7<br />
<strong>LANTEK</strong> REPORTER Software<br />
USING HELP SCREEN<br />
The Using Help screen consists of four tabs and a menu bar. The screen contains<br />
instructions for using and customizing the <strong>LANTEK</strong> Reporter Help system. The Web<br />
Help feature allows you to access Microsoft Product Support Online.<br />
ABOUT <strong>LANTEK</strong> REPORTER SCREEN<br />
The About <strong>LANTEK</strong> Reporter screen displays the <strong>LANTEK</strong> Reporter version number<br />
running on your computer.<br />
Note: The appearance of this screen depends on the operating system.<br />
UPLOADING DH TESTS TO THE PC<br />
7-12<br />
The <strong>LANTEK</strong> tester is capable of storing tests in individual job folders that can be<br />
uploaded to the PC. To upload a job folder to the PC, you must create a new job folder<br />
on the PC or use an existing job folder before uploading the tests.<br />
To create a new database, refer to Creating a New Database. To create a new job<br />
name, refer to Adding a Job.<br />
UPLOAD PROCEDURE<br />
1. Designate the upload location (database) on the PC or Laptop. Before uploading<br />
test data from the <strong>LANTEK</strong> DH, select a destination database in the Database View.
Chapter 7<br />
<strong>LANTEK</strong> REPORTER Software<br />
2. From the File menu, select Upload From Tester. The Upload dialog box displays.<br />
3. Click the desired Upload Test Type button.<br />
4. Select a job in the Select Upload Job text box.<br />
Note: If you want to add AutoTests from a job in the cable tester to an existing<br />
<strong>LANTEK</strong> Reporter project with the same name, you have to select the mother project<br />
as , that is located one level higher. (For example, for JOB 1 in the cable<br />
tester, select as the upload job)<br />
5. Select a Data Source. Click OK to begin the uploading process.<br />
� Select Comm Port for direct connection (Serial) with the tester.<br />
� Select USB/PCMCIA Compact Flash if you have stored the test results on the<br />
compact flash card and are using the USB flash card reader.<br />
� Select USB <strong>LANTEK</strong> if you have stored test results in the <strong>LANTEK</strong> Internal<br />
Memory.<br />
� Select Browse for Tests if you have Stored Tests kept on a local or network<br />
drive.<br />
7-13
Chapter 7<br />
<strong>LANTEK</strong> REPORTER Software<br />
6. With USB/PCMCIA Compact Flash selected, the following dialog will appear. Click<br />
OK to continue; CANCEL to exit.<br />
7. A status box will remain on screen during the uploading process and you will have<br />
the option to cancel at any time.<br />
Note: If you want to use the USB port under Windows 98 SE, you will need special<br />
drivers. These can be found in the subdirectory \WIN98 USB Driver in the <strong>LANTEK</strong><br />
REPORTER folder. The Windows 98 USB drivers must be installed before using the<br />
USB interface.<br />
To install the drivers, proceed as follows:<br />
Start Windows Explorer and go to the \WIN98 USB Driver subdirectory. Right click on<br />
the file USBLS120.INF and select INSTALL.<br />
WORKING WITH THE DATABASE<br />
7-14<br />
On start-up, the database that was opened last will automatically reload.<br />
Note: The first startup of <strong>LANTEK</strong> Reporter will load an ‘empty’ database (c:\<strong>LANTEK</strong><br />
Reporter\...) from the database directory.
CREATING A NEW DATABASE<br />
Chapter 7<br />
<strong>LANTEK</strong> REPORTER Software<br />
1. Select New command on the File menu or click the Create a new database icon on<br />
the toolbar.<br />
2. You can either type the new path and database name or choose Browse and<br />
select an existing path and then type in the database name.<br />
Note: The name of the new database displays only in the title bar of the main window.<br />
3. Click OK to enter your selection.<br />
Note: We recommend creating a new database for each new customer. When all of<br />
the reporting has been completed, make a final database backup and move the file off<br />
the computer to another media device (i.e. CD ROM or backup disk). This practice will<br />
ensure the optimum performance and test data integrity.<br />
OPENING AN EXISTING DATABASE<br />
1. Select Open on the File menu or click on the toolbar.<br />
2. Use the Browse feature to locate the desired database folder and file.<br />
3. Click OK to open the database.<br />
7-15
Chapter 7<br />
<strong>LANTEK</strong> REPORTER Software<br />
WORKING AT THE JOB LEVEL<br />
7-16<br />
NAVIGATING THE JOB TREE<br />
Tests are stored in folders called Jobs. For example, each floor of a building can be<br />
listed as a separate Job. Another Job can represent the entire building or just those<br />
tests conducted by a particular technician.<br />
The left side of the Database View shows the hierarchy of Jobs. Clicking on a Job<br />
folder that is preceded by a plus (+) sign reveals the Jobs it contains. This hierarchy<br />
can be up to five levels deep.<br />
Jobs that have attached test records are indicated by a icon. When you click on<br />
this icon, the test records become visible on the right side of the screen.<br />
You may move Jobs from one folder to another by selecting and dragging them. The<br />
current selection is indicated by a highlight bar.<br />
ADDING A JOB<br />
You must click on the left side of the main database view for the Add or Edit Job<br />
functions to be available. You can create a new collection of tests by adding a Job<br />
folder.<br />
1. Select the folder that you want to add a Job to.
2. From the Edit menu, click Add Job. The Add Job dialog box displays.<br />
3. Type in a name for the Job folder and any notes you want to add.<br />
4. Click OK to create the new job folder.<br />
Note: An alternate method of initiating the Add Job function is to right click the<br />
mouse on the job list where the new job is to be defined as a sub job.<br />
EDITING A JOB<br />
To change the name of a Job folder or attach text notes to it:<br />
1. Select a Job<br />
2. From the Edit menu, click Edit Job. The Edit job dialog box appears.<br />
3. Click on the Name or Notes text boxes to perform the desired edits.<br />
Chapter 7<br />
<strong>LANTEK</strong> REPORTER Software<br />
7-17
Chapter 7<br />
<strong>LANTEK</strong> REPORTER Software<br />
7-18<br />
4. Click OK when you are finished.<br />
ADDING OR EDITING CUSTOMER DETAILS<br />
You may want to add or modify customer details for a specific Job entry.<br />
1. From the Edit menu, select Edit Job.<br />
2. Click Customer. The Add Customer or Modify Customer dialog box displays.<br />
3. Add new customer information or edit existing information. If a customer name is<br />
supplied it will appear at the beginning of a report.
ADDING OR CHANGING THE TEST SET OPERATOR NAME<br />
Chapter 7<br />
<strong>LANTEK</strong> REPORTER Software<br />
You may change the operator name for one or more tests. An operator name is<br />
assigned to each Autotest.<br />
1. Open a job and position the cursor in the desired test field on the right side of the<br />
screen. Select one or several Autotest(s).<br />
2. Select the Edit menu. Click Set Operator or click . The Set Operator dialog<br />
box displays.<br />
3. Click on the drop-down Menu for a list of all operators.<br />
4. Select an operator from the drop-down list or enter a new operator name.<br />
5. Click OK when you are finished.<br />
FINDING A JOB OR TEST<br />
The Find function searches for Job Names, Cable IDs, and Tests. You can control both<br />
the type of match and the direction of the search.<br />
1. Before opening the Find dialog box:<br />
� Click on a folder at the Job level on the left side of the main database screen to<br />
find a job.<br />
� Click on a test in the test grid on the left side of the main database screen to<br />
find a test.<br />
2. Select the Edit menu. Click Find Job or Find Test or click on the toolbar. The<br />
Find dialog box displays.<br />
3. Enter the job name and then specify the Find criteria using the Match case and<br />
Direction buttons.<br />
4. Click Find Next to search for the next occurrence of the text.<br />
5. Click Cancel when you are done searching.<br />
NOTE: If the Test/Job is not found in the UP direction, use the DOWN direction and<br />
repeat Steps 5 and 6.<br />
7-19
Chapter 7<br />
<strong>LANTEK</strong> REPORTER Software<br />
WORKING AT THE TEST LEVEL<br />
7-20<br />
DISPLAYING THE TEST GRID<br />
1. Click on a Job folder that contains tests, as indicated by a icon.<br />
2. A list of test records will appear on the right side of the Database View.<br />
This is referred to as the Test Grid.<br />
VIEWING TEST DETAILS<br />
1. Click on a Job folder that contains tests, as indicated by an icon.<br />
2. Double-click on any test entry in the test grid (left side of the main database<br />
screen) or hold down the Control key and type “V”. Depending on the type of<br />
cable, you will see individual tabs for each test.<br />
3. Click on the desired Test Tab to view the test results.
Chapter 7<br />
<strong>LANTEK</strong> REPORTER Software<br />
7-21
Chapter 7<br />
<strong>LANTEK</strong> REPORTER Software<br />
7-22<br />
Graph Button<br />
The Graph button, located at the bottom of the result sheet, may or may not be<br />
enabled, depending on whether graph data was saved during the uploading of the test<br />
results. If it is enabled, you can select this button to view graphs of individual test<br />
results performed.<br />
The Graph Display<br />
Depending upon the test tab that has been selected, the graphical data display<br />
provides radio buttons on the left side to select the pair and/or test reference site of<br />
the graphed data.<br />
The window displays the test result data over the plot area. The small popup window<br />
shows the frequency and dB value of the data point at the cursor.
The Graph Display has its own tool bar.<br />
Save<br />
Copy<br />
Color<br />
Zoom<br />
Vertical<br />
Horizontal<br />
Data<br />
Print Preview<br />
Print<br />
MOVING TESTS BETWEEN JOBS<br />
Chapter 7<br />
<strong>LANTEK</strong> REPORTER Software<br />
Save a graph in one of five different file formats (Chart FX files, Chart<br />
FX templates (no data), Text file (data only), Metafile picture, or<br />
Bitmap picture).<br />
Copy a chart in one of four formats (Bitmap, Metafile, Text (data only)<br />
or OLE object) to the Windows clipboard. Data in the clipboard can be<br />
pasted into other applications.<br />
Bitmaps and Metafiles can be pasted into a Word document.<br />
Text data can be pasted into an Excel spreadsheet.<br />
Change the color of various items on the graph. Click and select a color<br />
from the drop-down dialog. Click, hold and drag the color to the<br />
desired item on the chart.<br />
Magnify an area of the graph. Click and move to the area of the plot<br />
that is to be magnified. Click, hold and drag on the area to be zoomed.<br />
This zoom operation can be repeated to intensify the magnification.<br />
Toggle between showing and hiding the vertical grid lines.<br />
Toggle between showing and hiding the horizontal grid lines.<br />
Show or hide the data values in a grid.<br />
Display the graph in a hard copy format prior to printing.<br />
Open the print dialog to select a printer and set the print options. Click<br />
OK to print the graph.<br />
Tests may be moved between different Job folders.<br />
1. Click on a test (or a range of tests) to select it.<br />
� To select an individual test, click the first column of the preferred test.<br />
� To select a range of tests, click the first column then hold and drag to the last<br />
test preferred.<br />
� To select a set of non-contiguous tests, click the first column of each test while<br />
holding down the Control key.<br />
7-23
Chapter 7<br />
<strong>LANTEK</strong> REPORTER Software<br />
7-24<br />
2. Move the cursor to the bottom of the highlighted area. The cursor will show a<br />
rectangle.<br />
3. Hold the left mouse button while you drag the test(s) into a new Job folder on the<br />
left side of the screen.<br />
4. Release the mouse.<br />
Note: You can also use commands and then . If you just<br />
want to copy a test, you can use the Command instead of .<br />
EDITING TESTS<br />
This function becomes available on the Edit menu when a test record is selected or<br />
when using the right mouse button.<br />
1. Before opening the Edit menu:<br />
� Click on a folder at the Job level at the left side of the main database screen to<br />
find a job.<br />
� Click on a test in the test grid on the left side of the main database screen to<br />
find a test.<br />
2. Select the Edit menu.<br />
3. Click Edit Test to open the Edit Test dialog box.<br />
4. Enter the cable ID in the text box labeled “From”. Enter the destination of the<br />
cable in the text box labeled “To.”<br />
5. Enter data into the From, To, and Notes text boxes.<br />
6. Click OK.<br />
SORTING THE TESTS<br />
The Sort function allows reorganization of tests in the Database view. The selections<br />
are by Result, Cable ID, Cable Origin, Cable Destination, Cable Type, Test Type, Date,<br />
or Time. The Sort function is available when more than one test is selected in the grid<br />
view by clicking on a column title. Sorting can be performed by ascending, descending<br />
or natural order<br />
1. Click on a test in the test grid on the left side of the main database screen to sort<br />
the tests.<br />
2. On the Options menu, click Sort.<br />
3. Click the Down Arrow next to each field and choose from the sorting options that<br />
are displayed.<br />
4. Click OK to begin the sort.
Chapter 7<br />
<strong>LANTEK</strong> REPORTER Software<br />
You can sort tests according to three different values, with highest sort criteria listed<br />
first, followed by the second, and then the least significant sort criteria.<br />
BACKING UP AND RESTORING A DATABASE<br />
Regular data backups to a removable storage device are recommended. You may also<br />
restore databases to the PC from these archives.<br />
The database is automatically backed up prior to every test upload.<br />
BACKING UP A DATABASE<br />
Click the File menu and select the Backup command or Click on the toolbar. The<br />
backup will be placed in the current folder.<br />
Following a backup, the program will compact the database and remove any deleted<br />
records.<br />
Note: Prior to performing an uploading of test results the currently open database is<br />
automatically backed up.<br />
RESTORING A DATABASE<br />
This function uses the back.zip file and will overwrite the current database files.<br />
1. Click the File menu.<br />
2. Select the Restore Database command. The backup file will be restored to the<br />
current folder.<br />
Note: If you have received a database backup file named back.zip on a data storage<br />
device, proceed as follows to display the data in <strong>LANTEK</strong> REPORTER:<br />
Create a new database in <strong>LANTEK</strong> Reporter.<br />
Copy the backup.zip (e.g. using Explorer) into the database folder just created.<br />
Restore the database in <strong>LANTEK</strong> Reporter.<br />
7-25
Chapter 7<br />
<strong>LANTEK</strong> REPORTER Software<br />
PRODUCING AND PRINTING A REPORT<br />
7-26<br />
HEADERS AND FOOTERS COMMAND<br />
Headers and footers can be added to your printed report. In a printed report, lines will<br />
separate the header and footer from the body of the report if the header or footer<br />
contains any information.<br />
1. From the File menu, click Headers/Footers. The Headers/Footers dialog box<br />
appears.<br />
2. Select a position for your header or footer and click the accompanying Down<br />
Arrow.<br />
3. From the drop-down text box, select one of the displayed options.<br />
� If you select Text, the Text Box will open. Enter your information.<br />
� If you select Logo, you must supply the location of the Bitmap file<br />
(.bmp file) to be used as the logo. Type the name of the file directly into the box<br />
titled “Logo File:” or use the Browse function to locate the file.<br />
Note: Customer is a value that is set in the Edit Job function.<br />
4. Click OK.
PRINT COMMAND<br />
Chapter 7<br />
<strong>LANTEK</strong> REPORTER Software<br />
Printing involves two steps: selecting the printer; and specifying what you want to<br />
print.<br />
1. From the File menu, click Print or click on the toolbar. The Print dialog box<br />
displays.<br />
2. Select Report Type, Printer, Print Range, and the number of Copies.<br />
3. Click Preview to display your report as it will appear in print.<br />
4. Click OK.<br />
The Single Line Report Layout<br />
The Single Line Report prints one line for each test. The tests included in the report<br />
are determined by what item(s) are selected in the views.<br />
� If a job is selected in the Tree view, all tests in that job are included.<br />
� If tests have been selected in the Grid view, the selected tests are reported.<br />
To view summary test information for the selected job, check the ‘‘Show Summary<br />
Data” box.<br />
The Brief Report Layout<br />
The Brief Test Report prints out summary information about all subordinate tests for<br />
each test. The tests included in the report are determined by what item(s) are<br />
selected in the views.<br />
� If a job is selected in the Tree view, all tests in that job are included.<br />
� If tests have been selected in the Grid view, the selected tests are reported.<br />
7-27
Chapter 7<br />
<strong>LANTEK</strong> REPORTER Software<br />
7-28<br />
To view summary test information for the selected job, check the ‘‘Show Summary<br />
Data” box.<br />
Note: In order to print the graphics presented in this report, select Save Graphs in the<br />
Auto Preference prior to performing tests.<br />
The Detailed Layout<br />
The Detailed Test Report prints out detailed subordinate test information for all<br />
selected tests. The tests included in the report are determined by what item(s) are<br />
selected in the views.<br />
� If a job is selected in the Tree view, all tests in that job are included.<br />
� If tests have been selected in the Grid view, the selected tests are reported.<br />
To view summary test information for the selected job, check the ‘‘Show Summary<br />
Data” box.
HANDLE BATTERY PACKS WITH CARE<br />
APPENDIX A<br />
SAFETY PRECAUTIONS<br />
DO NOT dispose of NiMH battery packs in a fire or with regular trash. NiMH batteries<br />
may explode if exposed to open flame, create hazardous waste, and contaminate<br />
ground water sources if disposed of in landfills.<br />
CAUTION - All Nickel-Metal Hydride (NiMH) battery packs, regardless of their<br />
indicated charge state, are capable of producing electrical currents sufficient to cause<br />
personal injury and/or property damage.<br />
IDEAL INDUSTRIES has tried to provide the maximum protection possible by installing<br />
an automatic reset fuse in every battery pack to help stop high current discharges as<br />
quickly as possible. However, this fuse may not completely protect against a<br />
momentary arc, which can result if the battery pack’s electrical contacts are shorted.<br />
The following battery pack handling precautions must be closely followed to avoid risk<br />
of injury.<br />
� When a battery pack is not installed in the handset or the charger, it should be<br />
kept in a clean, dry, non-conductive package.<br />
� Keep conductive materials away from the battery contacts at all times.<br />
� Keep the contact sides of the battery packs away from each other at all times.<br />
� Batteries are normally charged while in the handsets or when using the optional<br />
Dual Bay Battery Charger. Charging with other chargers or in any other manner<br />
may cause the battery packs to explode.<br />
� Always install, remove, store, and charge the battery packs in a non-explosive<br />
atmosphere.<br />
� Use and store battery packs in locations that do not exceed 122 degrees<br />
Fahrenheit (50 degrees Celsius).<br />
� Do not allow children or persons unfamiliar with the precautionary instructions in<br />
this manual to handle or recharge the battery packs.<br />
� Leave the sealed battery pack case intact. There are no user-serviceable parts<br />
inside the case and the batteries in the case are not replaceable.<br />
Note: Charge battery packs prior to use.<br />
STATEMENT OF LIABILITY<br />
IDEAL INDUSTRIES does NOT assume any liability for death, injury or damage to<br />
equipment or property resulting from the use of this charger in a manner inconsistent<br />
with the use for which it was intended. IDEAL INDUSTRIES will not be liable for<br />
consequences that may result from tampering with the battery packs or charger or<br />
consequences resulting from their use thereafter.<br />
A-1
Appendix A<br />
Safety Precautions<br />
ENVIRONMENTAL STATEMENT<br />
A-2<br />
If you have any questions concerning these precautions, the operating instructions, or<br />
any other concerns about the safe use and disposal of the <strong>LANTEK</strong> battery packs,<br />
please contact an IDEAL INDUSTRIES representative at one of the offices listed in<br />
Appendix B, Customer Service.<br />
IMPORTANT USER INFORMATION<br />
Please read this information before proceeding with any cable testing/certification<br />
using the <strong>LANTEK</strong> testers.<br />
All cable parameter default settings preprogrammed in the <strong>LANTEK</strong> testers are based<br />
on generic standards, proposed industry recommendations for cables and network<br />
links, the latest technical information available from International LAN cabling<br />
standards committees, the LAN industry, and IDEAL INDUSTRIES’ own experience and<br />
testing. However, the default settings in the tester may not yield the desired<br />
certification / test results in every given instance because each network is a custom<br />
installation designed to suit the requirements of the users. It is therefore imperative<br />
that specific network parameter limits be obtained from the network designer(s) and<br />
employed during certification and testing.
CUSTOMER SERVICE<br />
TECHNICAL ASSISTANCE<br />
APPENDIX B<br />
CUSTOMER SUPPORT<br />
For technical assistance or service questions in the U.S.A. and Canada, call IDEAL<br />
INDUSTRIES at 1-800-854-2708 or 858-627-0100.<br />
SERVICE IN THE USA<br />
Your <strong>LANTEK</strong> tester may require annual calibration to meet accuracy specifications.<br />
Before returning a unit for calibration or service, call IDEAL INDUSTRIES Technical<br />
Support at 1-800-854-2708 or 858-627-0100.<br />
Note: If cleaning is required, use a soft cloth and mild cleaner suitable for plastic. Do<br />
not immerse the tester in water.<br />
When returning a unit for service or calibration:<br />
1. Customer name, company, address, telephone number, proof of purchase (for<br />
warranty repairs), and a description of the service are required.<br />
2. Pack in a soft carrying case, hard-sided carrying case, or wrap the instrument in<br />
heavy paper or plastic.<br />
3. Use a strong shipping container. A double-walled carton of 250-pound test material<br />
is recommended.<br />
4. Use a layer of shock-absorbing material 70 to 100 mm (3 to 4 inches) thick around<br />
all sides of the instrument to provide firm cushioning and to prevent the unit from<br />
moving inside the container.<br />
5. Seal the shipping container securely.<br />
Ship prepaid to:<br />
IDEAL INDUSTRIES Corporation<br />
9650 Chesapeake Drive<br />
San Diego, CA 92123<br />
ATTN: Instrument Repair/Service<br />
Return shipping to the customer within the domestic U.S.A. will be paid by IDEAL<br />
INDUSTRIES Corporation.<br />
SERVICE OUTSIDE THE USA<br />
For technical assistance or service questions outside the U.S.A. and Canada, call your<br />
local distributor.<br />
IDEAL INDUSTRIES recommends annual calibration of the <strong>LANTEK</strong> testers to ensure<br />
that it continually meets its accuracy specifications. Before returning a unit for<br />
calibration or service outside the U.S.A., contact your local distributor or one of the<br />
IDEAL INDUSTRIES Corporation offices listed below. If your local distributor does not<br />
have a service facility, they will provide assistance in returning the tester to an<br />
authorized IDEAL INDUSTRIES service facility.<br />
B-1
Appendix B<br />
Customer Support<br />
B-2<br />
Americas<br />
IDEAL INDUSTRIES Corporation<br />
9650 Chesapeake Drive<br />
San Diego, CA 92123<br />
Tel: 800-854-2708<br />
Fax: 858-715-7003<br />
Europe (Germany, France, Italy, Spain, Portugal, Switzerland, Austria,<br />
Eastern Europe, MEA)<br />
IDEAL INDUSTRIES GmbH<br />
Gutenbergstrasse 10<br />
85737 Ismaning, Germany<br />
Tel: +49-89-99686-0<br />
Fax: +49-89-99686-111<br />
United Kingdom (Netherlands, Belgium, Luxembourg, Sweden, Norway,<br />
Finland, Denmark, Iceland)<br />
IDEAL INDUSTRIES (UK) Ltd.<br />
225 Europa Boulevard, Gemini Business Park<br />
Warrington, Cheshire WA5 7TN, England<br />
TEL: +44-1925-444446<br />
FAX: +44-1925-445501<br />
IDEAL <strong>Industries</strong> China, L.L.C.<br />
Unit 911, Tower W1, Oriental Plaza<br />
No. 1 East Chang An Avenue, Dongcheng District<br />
Beijing, 100738, China<br />
Tel: +86-10-8518-3141<br />
Fax: +86-10-8518-3143<br />
IDEAL <strong>Industries</strong> Brazil Comercio LTDA<br />
Av. Major Sylvio de M. Padilha, 5200, Bloco F, Cj 201<br />
CEP – 05677-000<br />
Sao Paulo – SP – Brazil<br />
05677-000 – Brazil<br />
Tel: +55-11-3759-8777<br />
Fax: +55-11-3759-8775<br />
IDEAL <strong>Industries</strong> Mexico<br />
Parque Intermex<br />
Periferico Sur 7999 A<br />
Col. Sta. Ma. Tequepexpan<br />
Tlaquepaque, Jalisco 45601<br />
Mexico<br />
Tel: +52-33-37702320<br />
Fax: +52-33-37702300
IDEAL <strong>Industries</strong> (Australia) PTY.Limited<br />
Level 6<br />
75-85 Elizabeth Street<br />
Sydney NSW 2000 Australia<br />
Tel: 61300-765-800 (Australia)<br />
Tel: 61405-123-100 (New Zealand)<br />
Fax: 61300-765-801<br />
Appendix B<br />
Customer Support<br />
WEB SERVICES<br />
IDEAL INDUSTRIES provides a Web (www) site for LAN cable test products that allows<br />
you to use a PC and modem to obtain the latest information on cable test application<br />
notes or firmware version upgrades. A question and answer forum allows you to share<br />
information with other users and submit questions to IDEAL INDUSTRIES product<br />
managers.<br />
You can download the latest firmware updates for your <strong>LANTEK</strong> tester and the<br />
corresponding version of the <strong>LANTEK</strong> Reporter analysis software using a PC with an<br />
Internet service connection. Upgrade files are available on the World Wide Web at:<br />
http://www.idealindustries.com<br />
B-3
APPENDIX C<br />
FIBER OPTIC CABLING<br />
STANDARDS & APPLICATION<br />
REQUIREMENTS<br />
Summary of Fiber Optic Cabling Standards & Application Requirements<br />
Standards<br />
Organization<br />
Classification or<br />
Application<br />
Fiber Type<br />
Core size (um) /<br />
wavelength (nm)<br />
Max Link Channel<br />
Loss (dB)<br />
Max Connector<br />
Insertion Loss (dB)<br />
Max Splice<br />
Insertion Loss (dB)<br />
Min Connector<br />
Return Loss (dB)<br />
Maximum Distance<br />
(m)<br />
Min Operating<br />
Distance (m)<br />
(50um/62.5um)<br />
Max Fiber<br />
Attenuation<br />
(dB/km)<br />
Min Fiber<br />
Bandwidth (MHzkm)<br />
TIA 568-B.3 Horizontal link Multimode 62.5/850 n/s 0.75 0.3 >20 90 n/s 3.5 160<br />
Generic<br />
Cabling<br />
ISO 11801<br />
Generic<br />
Cabling<br />
Horizontal link Multimode 50/850 n/s 0.75 0.3 >20 90 n/s 3.5 500<br />
Horizontal link Multimode 62.5/1300 n/s 0.75 0.3 >20 90 n/s 1.5 500<br />
Horizontal link Multimode 50/1300 n/s 0.75 0.3 >20 90 n/s 1.5 500<br />
Backbone Multimode 62.5/850 n/s 0.75 0.3 >20 2km n/s 3.5 160<br />
Backbone Multimode 50/850 n/s 0.75 0.3 >20 2km n/s 3.5 500<br />
Backbone Multimode 62.5/1300 n/s 0.75 0.3 >20 2km n/s 1.5 500<br />
Backbone Multimode 50/1300 n/s 0.75 0.3 >20 2km n/s 1.5 500<br />
Horizontal link Single mode 9/1310 n/s 0.75 0.3 >26 90 n/s 1.0 n/a<br />
Horizontal link Single mode 9/1550 n/s 0.75 0.3 >26 90 n/s 1.0 n/a<br />
Backbone (ISP) Single mode 9/1310 n/s 0.75 0.3 >26 3km n/s 1.0 n/a<br />
Backbone (ISP) Single mode 9/1550<br />
Backbone -<br />
n/s 0.75 0.3 >26 3km n/s 1.0 n/a<br />
(OSP)<br />
Backbone -<br />
Single mode 9/1310 n/s 0.75 0.3 >26 3km n/s 0.5 n/a<br />
(OSP) Single mode 9/1550 n/s 0.75 0.3 >26 3km n/s 0.5 n/a<br />
50 or<br />
0.75 ea/<br />
OF-300 OM1 62.5/1300 1.95 1.5 total 0.3 >20 n/s 300 1.5 500<br />
50 or<br />
0.75 ea/<br />
OF-300 OM2 62.5/850 2.55 1.5 total 0.3 >20 n/s 300 3.5 500<br />
OF-300 OM2<br />
50 or<br />
62.5/1300 1.95<br />
0.75 ea/<br />
1.5 total 0.3 >20 n/s 300 1.5 500<br />
C-1
Appendix C<br />
Fiber Optic Cabling<br />
Standards & Application Requirements<br />
C-2<br />
Standards<br />
Organization<br />
Classification or<br />
Application<br />
Fiber Type<br />
Core size (um) /<br />
wavelength (nm)<br />
Max Link Channel<br />
Loss (dB)<br />
Max Connector<br />
Insertion Loss (dB)<br />
Max Splice<br />
Insertion Loss (dB)<br />
Min Connector<br />
Return Loss (dB)<br />
Maximum Distance<br />
(m)<br />
Min Operating<br />
Distance (m)<br />
(50um/62.5um)<br />
Max Fiber<br />
Attenuation<br />
(dB/km)<br />
Min Fiber<br />
Bandwidth (MHzkm)<br />
ISO 11801<br />
0.75 ea/<br />
Generic OF-300 OM3 50/850 2.55 1.5 total 0.3 >20 n/s 300 3.5 1500<br />
Cabling<br />
0.75 ea/<br />
OF-300 OM3 50/1300 1.95 1.5 total 0.3 >20 n/s 300 1.5 500<br />
9/1310 or<br />
0.75 ea/<br />
OF-300 OS1 1550 1.80 1.5 total 0.3 >35 n/s 300 1.0 n/s<br />
50 or<br />
0.75 ea/<br />
OF-500 OM1 62.5/850 3.25 1.5 total 0.3 >20 n/s 500 3.5 200<br />
50 or<br />
0.75 ea/<br />
OF-500 OM1 62.5/1300 2.25 1.5 total 0.3 >20 n/s 500 1.5 500<br />
50 or<br />
0.75 ea/<br />
OF-500 OM2 62.5/850 3.25 1.5 total 0.3 >20 n/s 500 3.5 500<br />
50 or<br />
0.75 ea/<br />
OF-500 OM2 62.5/1300 2.25 1.5 total<br />
0.75 ea/<br />
0.3 >20 n/s 500 3.5 500<br />
OF-500 OM3 50/850 3.25 1.5 total<br />
0.75 ea/<br />
0.3 >20 n/s 500 3.5 1500<br />
OF-500 OM3 50/1300 2.25 1.5 total 0.3 >20 n/s 500 1.5 500<br />
9/1310 or<br />
0.75 ea/<br />
OF-500 OS1 1550 2.00 1.5 total 0.3 >35 n/s 500 1.0 n/a<br />
50 or<br />
0.75 ea/<br />
OF-2000 OM1 62.5/850 8.50 1.5 total 0.3 >20 n/s 2km 3.5 200<br />
50 or<br />
0.75 ea/<br />
OF-2000 OM1 62.5/1300 4.50 1.5 total 0.3 >20 n/s 2km 1.5 500<br />
50 or<br />
0.75 ea/<br />
OF-2000 OM2 62.5/850 8.50 1.5 total 0.3 >20 n/s 2km 3.5 500<br />
50 or<br />
0.75 ea/<br />
OF-2000 OM2 62.5/1300 4.50 1.5 total<br />
0.75 ea/<br />
0.3 >20 n/s 2km 1.5 500<br />
OF-2000 OM3 50/850 8.50 1.5 total 0.3 >20 n/s 2km 3.5 1500<br />
ISO 11801<br />
0.75 ea/<br />
Generic OF-2000 OM3 50/1300 4.50 1.5 total 0.3 >20 n/s 2km 1.5 500<br />
Cabling<br />
9/1310 or<br />
0.75 ea/<br />
OF-2000 OS1 1550 3.50 1.5 total 0.3 >35 n/s 2km 1.0 n/a<br />
Multimode/<br />
0.75 ea/<br />
IEEE 802.3 10Base-FL OM1-OM2 62.5/850 12.50 1.5 total n/s >20 2km 0 3.75 160<br />
Multimode/<br />
0.75 ea/<br />
10Base-FL OM1-OM3 50/850 12.50 1.5 total n/s >20 1.5km 0 3.75 160<br />
Multimode/ 62.5 or<br />
0.75 ea/<br />
100Base-FX OM1-OM3 50/1300 11.00 1.5 total n/s n/s 2km 0 3.75 500<br />
Multimode/<br />
0.75 ea/<br />
1000Base-SX OM1-OM2 62.5/850 2.33 1.5 total n/s >20 n/s 220 3.75 160<br />
Multimode/<br />
0.75 ea/<br />
1000Base-SX OM2-OM3 62.5/850 2.53 1.5 total n/s >20 n/s 275 3.75 200<br />
Multimode/<br />
0.75 ea/<br />
1000Base-SX OM1-OM3 50/850 3.25 1.5 total n/s >20 n/s 500 3.5 400<br />
Multimode/<br />
0.75 ea/<br />
1000Base-SX OM2-OM3 50/850 3.43 1.5 total n/s >20 n/s 550 3.5 500<br />
Multimode/<br />
0.75 ea/<br />
1000Base-LX OM1-OM2 62.5/1300 2.32 1.5 total n/s >20 n/s 550 1.5 500<br />
Multimode/<br />
0.75 ea/<br />
1000Base-LX OM1-OM2 50/1300 2.32 1.5 total n/s >20 n/s 550 1.5 400/500<br />
Singlemode/<br />
0.75 ea/<br />
1000Base-LX OS1 9/1310 4.50 1.5 total n/s >26 n/s 5km 0.5 n/a<br />
Multimode-<br />
0.75 ea/<br />
10GBase-SR OM1 62.5/850 2.60 1.5 total n/s >20 n/s 26 3.5 160<br />
Multimode-<br />
0.75 ea/<br />
10GBase-SR OM1 62.5/805 2.50 1.5 total n/s >20 n/s 33 3.5 200<br />
Multimode/<br />
0.75 ea/<br />
10GBase-SR OM2-OM3 50/850 2.20 1.5 total n/s >20 n/s 66 3.5 400
Standards<br />
Organization<br />
Classification or<br />
Application<br />
Fiber Type<br />
Core size (um) /<br />
wavelength (nm)<br />
Max Link Channel<br />
Loss (dB)<br />
Max Connector<br />
Insertion Loss (dB)<br />
Max Splice<br />
Insertion Loss (dB)<br />
Appendix C<br />
Fiber Optic Cabling<br />
Standards & Application Requirements<br />
Min Connector<br />
Return Loss (dB)<br />
Maximum Distance<br />
(m)<br />
Min Operating<br />
Distance (m)<br />
(50um/62.5um)<br />
Max Fiber<br />
Attenuation<br />
(dB/km)<br />
Min Fiber<br />
Bandwidth (MHzkm)<br />
Multimode/<br />
0.75 ea/<br />
IEEE 802.3 10GBase-SR OM2-OM3 50/850 2.30 1.5 total n/s >20 n/s 82 3.5 500<br />
Multimode/O<br />
0.75 ea/<br />
10GBase-SR M3 50/850 2.60 1.5 total n/s >20 n/s 300 3.5 2000<br />
Singlemode/<br />
0.75 ea/<br />
10GBase-LR OS1 9/1310 6.00 1.5 total n/s >26 n/s 10km 0.5 n/a<br />
Singlemode/<br />
0.75 ea/<br />
10GBase-EW OS1 9/1550 5>11 1.5 total n/s >26 n/s 30-40km n/s n/a<br />
ISO/IEC 133MbB/s Fibre Multimode/<br />
0.75 ea/<br />
14165 Channel OM1-OM3 62.5/1300 6.00 1.5 total n/s n/s n/s 1500 n/s 500<br />
266Mb/s Fibre Multimode/ 50 or<br />
0.75 ea/<br />
Channel OM1-OM3 62.5/850 12.00 1.5 total n/s n/s n/s 2000/700 n/s 500<br />
266Mb/s Fibre Multimode/<br />
0.75 ea/<br />
Channel OM1-OM3 62.5/1300 6.00 1.5 total n/s n/s n/s 330 n/s 500<br />
266Mb/s Fibre Multimode/<br />
0.75 ea/<br />
Channel OM1-OM3 50/1300 5.50 1.5 total n/s n/s n/s 500 n/s 500<br />
266Mb/s Fibre Singlemode/<br />
0.75 ea/<br />
Channel OS1 9/1310 6.00 1.5 total n/s n/s n/s 2000 n/s n/a<br />
531Mb/s Fibre Multimode/ 50 or<br />
0.75 ea/<br />
Channel OM1-OM3 62.5/850 8.00 1.5 total n/s n/s n/s 1000/350 n/s 500/160<br />
531Mb/s Fibre Singlemode/<br />
0.75 ea/<br />
Channel OS1 9/1310 14.00 1.5 total n/s n/s n/s 2000 n/s n/a<br />
1062Mb/s Fibre Multimode/ 50 or<br />
0.75 ea/<br />
Channel OM1-OM3 62.5/850 4.00 1.5 total n/s n/s n/s 1000/350 1.5/3.5 500/200<br />
1062Mb/s Fibre Singlemode/<br />
0.75 ea/<br />
Channel OS1 9/1310 6.00 1.5 total n/s n/s n/s 2000 0.5 n/a<br />
Definitions Link channel loss - The maximum allowable loss measured with a power meter/light source kit<br />
Minimum operating distance - Most standards do not limit the length, instead require operation to a minimum lentgh<br />
Max fiber attenuation - Indicates max allowable loss per km. Verify from mfg that your cable is less than spec'd limit<br />
Connector return loss - Indicate reflected power from connectors. Failures indicate polishing or cleaning problems.<br />
C-3