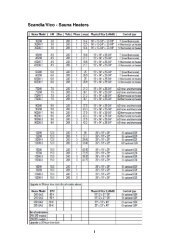
Tylo Sauna Heater - Bathroom Glass Vanities
Tylo Sauna Heater - Bathroom Glass Vanities
Tylo Sauna Heater - Bathroom Glass Vanities

Create successful ePaper yourself
Turn your PDF publications into a flip-book with our unique Google optimized e-Paper software.
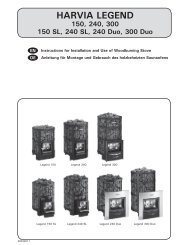
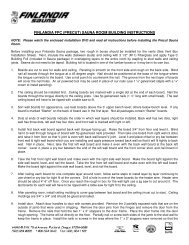
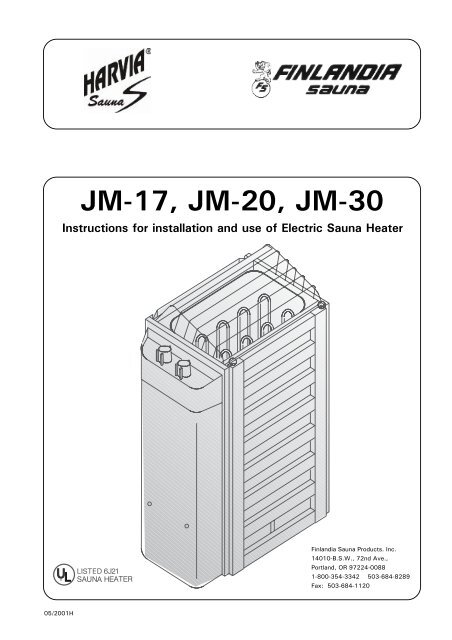
JM-17, JM-20, JM-30<br />
Instructions for installation and use of Electric <strong>Sauna</strong> <strong>Heater</strong><br />
Finlandia <strong>Sauna</strong> Products. Inc.<br />
14010-B.S.W., 72nd Ave.,<br />
Portland, OR 97224-0088<br />
1-800-354-3342 503-684-8289<br />
Fax: 503-684-1120<br />
05/2001H
Purpose of the electric heater:<br />
The JM heater is designed for the heating of family saunas to bathing temperature. It is forbidden to use the<br />
heater for any other purposes.<br />
The guarantee period of a JM electric heater in family use is one year and in communal use, 3 months.<br />
Please read the user’s instructions carefully before using the heater.<br />
NOTE!<br />
These instructions for installation and use are intended for the owner or the person in charge of the sauna, as well<br />
as for the electrician in charge of the electrical installation of the heater.<br />
After completing the installation, the person in charge of the installation should give these instructions to the<br />
owner of the sauna or to the person in charge of its operation.<br />
Congratulations on your choice!<br />
CONTENTS<br />
1. INSTRUCTIONS FOR USE ....................................................................... 3<br />
1.1. Piling of the <strong>Sauna</strong> rocks ............................................................... 3<br />
1.2. Heating of the <strong>Sauna</strong> .................................................................... 3<br />
1.3. Control Unit ................................................................................. 3<br />
1.3.1. Timer ................................................................................ 3<br />
1.3.2. Thermostat ........................................................................ 4<br />
1.3.3. Overheating limiter .............................................................. 4<br />
1.4. Throwing Water on Heated Stones .................................................... 4<br />
1.4.1. <strong>Sauna</strong> Water ....................................................................... 4<br />
1.4.2. Temperature and Humidity of the <strong>Sauna</strong> Room ........................... 5<br />
1.5. Instructions for Bathing ................................................................. 5<br />
1.6. Warnings ..................................................................................... 5<br />
1.7. Warning signs ............................................................................... 5<br />
1.8. Malfunctions ................................................................................ 5<br />
2. THE SAUNA ROOM ............................................................................... 6<br />
2.1. Insulation and Wall Materials of the <strong>Sauna</strong> Room .............................. 6<br />
2.1.1. Room construction – general information ............................... 6<br />
2.2. <strong>Sauna</strong> Room Floor ........................................................................ 6<br />
2.3. <strong>Heater</strong> Output .............................................................................. 7<br />
2.4. Ventilation of the <strong>Sauna</strong> Room ....................................................... 7<br />
2.5. Hygienic Conditions of the <strong>Sauna</strong> Room .......................................... 7<br />
3. INSTRUCTIONS FOR THE INSTALLATION ................................................ 7<br />
3.1. Prior to Installation ....................................................................... 7<br />
3.2. Fastening the <strong>Heater</strong> on a Wall....................................................... 8<br />
3.3. Installation capillary tubing and bulb ............................................... 8<br />
3.4. Safety Railing .............................................................................. 8<br />
3.5. Electrical Connections ................................................................... 9<br />
3.6. Electric heater insulation resistance ................................................ 9<br />
3.7. Testing of <strong>Sauna</strong> heater ................................................................ 9<br />
3.8. Troubleshooting ......................................................................... 10<br />
3.9. Caution! Electrician or service person! ........................................... 10<br />
3.10. Maintenance instructions ............................................................. 10<br />
3.11. Guarantee ................................................................................. 11<br />
4. Spare parts ......................................................................................... 12<br />
2
1. INSTRUCTIONS FOR USE<br />
This heater shall not be operated unless the rock<br />
compartment in the top of the heater is filled with the<br />
rocks, and the guard is in place.<br />
1.1. Piling of the <strong>Sauna</strong> rocks<br />
The sauna rocks for an electric heater should be 1 9/16"<br />
– 3 1/8" (4–8 cm) in diameter. The heater rocks should be<br />
solid blocks of rock specially intended for use in the heater.<br />
Neither light, porous ceramic “rocks “ of the same size nor<br />
soft potstones should be used in the heater, because they<br />
may cause the resistance temperature to rise too high as<br />
a result of which the resistance may be broken.<br />
Rocks dust should be washed off before piling the rocks.<br />
The rocks should be piled into the rock compartment over<br />
the grating, between the heating elements (resistances) so<br />
that the rocks support each other. The weight of the rocks<br />
should not lie on the heating elements.<br />
The rocks should not be piled too tightly, so that air<br />
can flow through the heater. See figure 1. The rocks<br />
should be fitted loosely, and not wedged between the<br />
heating elements. Very small rocks should not be put<br />
into the heater at all.<br />
Therocksshouldcompletelycovertheheatingelements.<br />
However, they should not form a high pile on the elements.<br />
The rocks disintegrate with use. Therefore, they should<br />
be rearranged at least once a year or even more often if the<br />
sauna is in frequent use. At the same time, any pieces of<br />
rocks should be removed from the bottom of the heater,<br />
and disintegrated rocks should be replaced with new ones.<br />
The guarantee does not cover any faults caused by the<br />
use of rocks not recommended by the plant. Neither does<br />
the guarantee cover any faults caused by disintegrated or<br />
too small rocks blocking the heater ventilation.<br />
No such objects or devices should be placed inside the<br />
heater rock space or near the heater that could change<br />
the amount or direction of the air flowing through the<br />
heater, thus causing the resistance temperature to rise<br />
too high, which may set the wall surfaces on fire!<br />
Figure 1.<br />
Piling of the sauna rocks<br />
1.3. Control Unit<br />
1.3.1. Timer<br />
The heaters JM-17 and JM-20 are switched on by<br />
using the timer switch. The indicator lights will come<br />
on. The timer has two scales: the first one (with larger<br />
figures) is the ”instantly on” section; that is, the<br />
heater is on for a selected period of time (0–1 hours).<br />
The other section is the so called ”pre-set section” (1–<br />
8 hours), which is used to start the heater after a<br />
certain time. The heater starts when the timer has<br />
turned the switch back to the ”instantly on” section,<br />
that is, at number one(1). After this, the heater will be<br />
on for about 1 hour, unless the switch is turned to zero<br />
before that. At zero (0), the supply to the elements is<br />
cut off and the heater is switched off. See fig 2.<br />
The JM-30 heater is equipped with 1 hour timer<br />
without pre-set time function. See fig. 2.<br />
If you wish to use the full 60 min. cycle, turn the<br />
timer knob past the first 1 to number 2 or 3 on the<br />
dial. Then turn backward to the large 1 until a click<br />
is heard. Leave knob at that setting, and <strong>Sauna</strong> will<br />
operate for 1 hour before shutting off automatically.<br />
1.2. Heating of the <strong>Sauna</strong><br />
When the heater is switched on for the first time, both<br />
the heater and the rocks emit smell. To remove the smell,<br />
the sauna room needs to be efficiently ventilated.<br />
The purpose of the heater is to raise the temperature<br />
of the sauna room and the sauna rocks to the required<br />
bathing temperature. If the heater output is suitable<br />
for the sauna room, it will take about an hour for a<br />
properly insulated sauna to reach that temperature.<br />
See item 2.1., ”Insulation and wall materials of the<br />
<strong>Sauna</strong> Room”. A suitable temperature for the sauna<br />
room is about +150°F–+175°F (+65°C–+80°C).<br />
The sauna rocks normally reach the required bathing<br />
temperature at the same time as the sauna room. If the<br />
heatercapacityistoobig,theairinthesaunawillheatvery<br />
quickly, whereas the temperature of the rocks may<br />
remain insufficient; consequently, the water thrown on<br />
the rocks will run through. On the other hand, if the heater<br />
capacity is too low for the sauna room, the room will heat<br />
slowly and, by throwing water on the rocks, the bather<br />
may try to raise the temperature of the sauna. However,<br />
the water will only cool down the rocks quickly, and after<br />
a while the sauna will not be warm enough and the heater<br />
will not be able to provide enough heat.<br />
In order to make bathing enjoyable, the heater capacity<br />
should be carefully chosen to suit the size of the sauna<br />
room. See item 2.3. ”<strong>Heater</strong> Output”.<br />
Figure 2.<br />
Control panel<br />
3
Example 1.<br />
You want to go jogging and have a sauna bath after<br />
that. The estimated duration of your run is 5 hours.<br />
Turn the timer clockwise over the scale 0–1 to the preset<br />
section (scale 1–8) at number 4.<br />
The timer will start, and after four hours, the heater<br />
will come on. Because it takes about one hour for the<br />
sauna to be heated, it will be warm and ready for<br />
bathing after about 5 hours, that is, when you come<br />
back from your run.<br />
Example 2.<br />
If you want to bathe ”immediately” and thus do not<br />
want to use the pre-set timing, the timer must be set<br />
to the desired point in the section 0–1. Then, the<br />
heater will be switched immediately on and the<br />
sauna will be ready for bathing after about one hour.<br />
Switch the heater off immediately after bathing<br />
and check that the sauna rocks are dry. Sometimes<br />
it may be advisable to leave the heater on for a while<br />
to let the wooden parts of the sauna dry properly.<br />
NOTE! It is absolutely necessary to check that the<br />
timer has cut off the supply of the elements after the<br />
set time.<br />
1.3.2. Thermostat<br />
The temperature is adjusted by the thermostat to a<br />
position between minimum and maximum. See<br />
figure 2. The correct position of the thermostat<br />
switch is found by experimenting.<br />
Begin experimenting at the maximum position (far<br />
right) to find how quickly the sauna room and rocks<br />
can be heated to the desired temperature. If, during<br />
bathing, the temperature seems to be becoming too<br />
high, turn it down a little by turning the switch<br />
counter-clockwise. It must be noted that even a<br />
small difference within the maximum section will<br />
change the temperature of the sauna considerably.<br />
1.3.3. Overheating limiter<br />
Each heater i equipped with a overheating limiter<br />
which is a safety device.<br />
If, for some reason, the temperature of the sauna<br />
room becomes too high, the overheating limiter will<br />
permanently cut off the supply of the resistances.<br />
The overheating limiter cannot be reset to the<br />
position allowing electricity until the heater has<br />
cooled down. The overheating limiter is reset by<br />
pressing the reset button, which is located in bottom<br />
of heater. See figure 3.<br />
To reset the overheating limiter, locate the reset<br />
button and push upward until contactor kicks in. If<br />
reset button continues to trip, contact a qualified<br />
service person.<br />
Do not remove the overheating limiter bulb. See<br />
spare parts no. 2.<br />
Prior to pressing the button, the cause of the fault<br />
must be found:<br />
• are the rocks crumbled and pressed together<br />
• has the heater been on for a long time while<br />
unused<br />
• has the heater been banged or shaken<br />
1.4. Throwing Water on Heated Stones<br />
The air in the sauna room becomes dry when<br />
warmed up. Therefore, it is necessary to throw<br />
water on the heated rocks to reach a suitable level<br />
of humidity in the sauna.<br />
The humidity of the air in the sauna room is controlled<br />
by the amount of water thrown on the rocks. A correct<br />
level of humidity makes the bather’s skin sweat and<br />
makes breathing easy. By throwing water on the rocks<br />
with a small ladle, the bather should feel the effect of<br />
air humidity on his skin. Both too high a temperature and<br />
air humidity will give an unpleasant feeling.<br />
Staying in the hot sauna for long periods of time<br />
makes the body temperature rise, which may be<br />
dangerous.<br />
The maximum volume of the ladle is 2 decilitres.<br />
The amount of water thrown on the rocks at a time<br />
should not exceed 2 dl, because if an excessive<br />
amount of water is poured on the rocks, only part of<br />
it will evaporate and the rest may splash as boiling<br />
hot water on the bathers.<br />
Never throw water on the rocks when there are<br />
people near the heater, because hot steam may burn<br />
their skin.<br />
1.4.1. <strong>Sauna</strong> Water<br />
The water to be thrown on the heated rocks should<br />
meet the requirements of clean household water.<br />
The factors essentially affecting the quality of water<br />
include the following:<br />
• humuos content (colour, taste, precipitates);<br />
• recommended content less than 12 mg/litre.<br />
• iron content (colour, smell, taste, precipitates);<br />
• recommended content less than 0,2 mg/litre.<br />
• hardness – the most important substances are<br />
manganese (Mn) and calcium (Ca); recommended<br />
• content of manganese 0.05 mg/litre, calcium<br />
less than 100 mg/litre.<br />
Calcareous water leaves a white, sticky layer on<br />
the rocks and metal surfaces of the heater.<br />
Calcification of the rocks deteriorates the heating<br />
properties.<br />
Ferrous water leaves a rusty layer on the surface<br />
of the heater and elements, and causes corrosion.<br />
The use of humous, chlorinated water and<br />
seawater is forbidden.<br />
Only special perfumes designed for sauna water<br />
may be used. Follow the instructions given on the<br />
package.<br />
1.4.2. Temperature and Humidity of the <strong>Sauna</strong> Room<br />
Figure 3. Place of the reset button<br />
4
Both thermometers and hygrometers suitable for use in<br />
a sauna are available. As the effect of steam on people<br />
varies, it is impossible to give an exact, universally<br />
applicable bathing temperature or percentage of<br />
moisture. The bather’s own comfort is the best guide.<br />
The sauna room should be equipped with proper<br />
ventilation to guarantee that the air is rich in oxygen<br />
and easy to breathe. See item 2.4., ”Ventilation of<br />
the <strong>Sauna</strong> Room”.<br />
Bathing in a sauna is considered a refreshing<br />
experience and good for the health. Bathing cleans<br />
and warms your body, relaxes the muscles, soothes<br />
and alleviates oppression. As a quiet place, the<br />
sauna offers the opportunity to meditate.<br />
1.5. Instructions for Bathing<br />
• Begin by washing yourself; for example, by<br />
taking a shower.<br />
• Stay in the sauna for as long as you feel<br />
comfortable. See item "1.6. Warnings".<br />
• According to established sauna conventions,<br />
you must not disturb other bathers by speaking<br />
in a loud voice.<br />
• Do not force other bathers from the sauna by<br />
throwing excessive amounts of water on the rocks.<br />
• Forget all your troubles and relax.<br />
• Cool your skin down as necessary.<br />
• If you are in good health, you can have a swim<br />
if a swimming place or pool is available.<br />
• Wash yourself properly after bathing. Have a<br />
drink of fresh water or a soft drink to bring your<br />
fluid balance back to normal.<br />
• Rest for a while and let your pulse go back to<br />
normal before dressing.<br />
1.6. Warnings<br />
• Sea air and a humid climate may corrode the<br />
metal surfaces of the heater.<br />
• Do not hang clothes to dry in the sauna, as this<br />
may cause a risk of fire. Excessive moisture<br />
content may also cause damage to the electrical<br />
equipment.<br />
• Do not place any combustible material over the<br />
sauna heater (towels, bathing suits, wooden<br />
bucket or dipper)!<br />
• Keep away from the heater when it is hot. The<br />
rocks and outer surface of the heater may burn<br />
your skin.<br />
• Do not throw too much water on the rocks. The<br />
evaporating water is boiling hot.<br />
• Use only clean tap water on the rocks – Do not<br />
usepoolorspawater,aschlorinegascanbeproduced<br />
and the heating elements can be damaged!<br />
• Do not let young, handicapped or ill people bathe<br />
in the sauna on their own.<br />
• Consult your doctor about any health-related<br />
limitations to bathing.<br />
• Parents should keep children away from the hot<br />
heater.<br />
• Consult your child welfare clinic about taking little<br />
babies to the sauna.<br />
- age<br />
- temperature of the sauna<br />
- time spent in the warm sauna<br />
• Be very careful when moving in the sauna, as the<br />
platform and floors may be slippery.<br />
• Never go to a hot sauna if you have taken alcohol,<br />
strong medicines or narcotics.<br />
• Do not exceed 30 min. in the sauna at one time,<br />
as excessive exposure can be harmful to health. The<br />
sauna should not be used as an endurance test!<br />
• Hyperthermia occurs when the internal<br />
temperature of the body reaches a level several<br />
degrees above the normal body temperature of<br />
98,6°F (37°C). The symptoms of hyperthermia<br />
include an increase in the internal temperature of<br />
the body, dizziness, lethargy, drowsiness, and<br />
fainting.<br />
The effects of hyperthermia include:<br />
a) Failure to perceive heat<br />
b) Failure to recognize the need to exit the room<br />
c) Unawareness of impending hazard<br />
d) Fetal damage in pregnant women<br />
e) physical inability to exit the room<br />
f) Unconsiciousness<br />
1.7. Warning signs<br />
Warning signs – are furnished with <strong>Sauna</strong> heater.<br />
The metal "CAUTION" sign should be fastened to<br />
wall, close to heater, in a visible place. The metal<br />
"WARNING" sign should be fastened outside, to the<br />
<strong>Sauna</strong> room door.<br />
1.8. Malfunctions<br />
If the heater does not heat, check the following points:<br />
• the electricity has been switched on<br />
• the timer has been switched to a section where the<br />
heater should be heated (0–1).<br />
• the thermostat shows a higher figure than the<br />
temperature of the sauna.<br />
• the fuses to the heater are in good condition.<br />
(Note. The stud does not always come out when<br />
the fuse has blown).<br />
• the temperature guard has not gone off. The<br />
timer sound is heard but the elements are not heated.<br />
Reset the guard to its functioning position by<br />
pressing it so that a clicking sound is heard. See<br />
item 1.3.2., ”Thermostat" and 1.3.3.<br />
"Overheating limiter".<br />
5
2. THE SAUNA ROOM<br />
2.1. Insulation and Wall Materials of the<br />
<strong>Sauna</strong> Room<br />
In an electrically heated sauna, all the massive wall<br />
surfaces which store plenty of heat (such as bricks,<br />
glass blocks, plaster etc.), must be sufficiently<br />
insulated in order to keep the heater output at a<br />
reasonably low level.<br />
A wall and ceiling construction can be considered<br />
to have efficient thermal insulation if:<br />
• the thickness of carefully fitted insulating<br />
wool inside the house is 4" (100 mm) minimum<br />
2" (50 mm).<br />
• the moisture protection consists of e.g.<br />
aluminium paper with tightly taped edges. The<br />
paper must be fitted so that the glossy side is<br />
towards the inside of the sauna.<br />
• there is a 3/8" (10 mm) vent gap between the<br />
moisture protection and panel boards<br />
(recommendation).<br />
• the inside is covered by 1/2" – 5/8" (12–16 mm)<br />
thick panelling.<br />
• there is a vent gap of a few millimetres at the<br />
top of the wall covering at the edge of the<br />
ceiling panelling.<br />
When aiming at a reasonable heater output, it may<br />
be advisable to lower the ceiling of the sauna<br />
(normally 6'–10 11/16 " (2100 mm), minimum height 59<br />
1/16" (1500 mm). As a result, the volume of the<br />
sauna is decreased, and a smaller heater output may<br />
be sufficient. The ceiling can be lowered so that the<br />
ceiling joists are fixed at a suitable height. The spaces<br />
between the joists are insulated (minimum insulation<br />
4" (100 mm) and surfaced as described above.<br />
Because heat goes upwards, a maximum distance<br />
of 38" (970 mm) is recommended between the<br />
bench and ceiling.<br />
NOTE! Consult fire-extinguishing authorities to find<br />
out which part of the fireproof wall may be insulated.<br />
NOTE! The protection of the walls or ceiling with<br />
heat protection, such as mineral board fitted directly<br />
on the wall or ceiling, may cause the temperature of<br />
the wall and ceiling materials to rise dangerously high.<br />
2.1.1. Room construction – general information<br />
FRAMING 2" x 4" Dry Douglas Fir, 16" o.c.<br />
CEILING HEIGHT No higher than 7' 0".<br />
INSULATION R11 Fiberglas with foil back in<br />
walls and ceiling, foil facing<br />
into room.<br />
DRYWALL See local codes. Is not<br />
required in most residences.<br />
See local codes for<br />
commercial. If drywall is used,<br />
apply 1" x 2" nailers so that<br />
wall and ceiling boards can be<br />
attached to solid wood.<br />
PANELING Use kiln-dried, clear, T&G<br />
softwood such as California<br />
Redwood, Western Red Cedar,<br />
Alaska yellow Cedar, with<br />
moisture content not exceeding<br />
11%.<br />
Figure 4. <strong>Sauna</strong> room<br />
BENCHES<br />
HEATER<br />
GUARDRAIL<br />
DOOR<br />
ROOM LIGHT<br />
Use matching wood of vertical<br />
grain with 2"x 2" tops – 1/2"<br />
spacing - and 2"x 4" facing,<br />
fastening from bottom to prevent<br />
burning of bathers.<br />
Use matching softwood<br />
of1"x2"or2"x2".<br />
Must open out and should not<br />
have a lock. Size – 2' 0"x 6'8" with<br />
fir rails and double sealed,<br />
tempered glass.<br />
Should be a vapor proof, wallmounted<br />
type, with rough-in box<br />
mounted flush with inside paneling.<br />
It should mount 6" (150 mm) from<br />
ceiling, not directly over the <strong>Sauna</strong><br />
heater, and not over upper<br />
benches; light bulb should not<br />
exceed 75 watts.<br />
Note! Receptacles OR PLUGS are not allowed in a<br />
<strong>Sauna</strong> room. If a speaker is installed in a <strong>Sauna</strong> room,<br />
it should not be installed higher than 3' from floor,<br />
away from the <strong>Sauna</strong> heater (consult manufacturer<br />
for ratings).<br />
2.2. <strong>Sauna</strong> Room Floor<br />
Due to a large variation in temperature, the sauna<br />
rocks disintegrate in use.<br />
Small pieces of rock are washed down on the<br />
sauna room floor along with the water thrown on the<br />
rocks. Hot pieces of rock may damage plastic floor<br />
coverings installed underneath and near the heater.<br />
A light-cocoured joint grout, used for a tiled floor,<br />
may absorb impurities from the rocks and water (e.g<br />
iron content).<br />
To prevent aesthetic damage (due to the reasons<br />
presented above) only dark joint grouts and floor<br />
coverings made of rock materials should be used<br />
underneat and near the heater.<br />
6
2.3. <strong>Heater</strong> Output<br />
When the walls and ceiling are covered with panels,<br />
and the insulation behind the panels is sufficient to<br />
prevent thermal flow into the wall materials, the<br />
heater output is defined according to the cubic volume<br />
of the sauna. See table 1.<br />
If the sauna has visible uninsulated wall surfaces, such<br />
as walls covered with brick, glass block, concrete or tile,<br />
each 10 square feet (ca. 1m²) of said wall surface causes<br />
thecubicvolumeofthesaunatoincreaseby42 Cu.Ft.(ca.<br />
1.2m 3 ).Theheateroutputisthenselectedaccordingtothe<br />
values given in the table.<br />
Because log walls are heated slowly, the cubic<br />
volume of a log sauna should be multiplied by 1.5,<br />
and the heater output should then be selected on the<br />
basis of this information.<br />
2.4. Ventilation of the <strong>Sauna</strong> Room<br />
Sufficient ventilation is extremely important for the<br />
sauna. The air in the sauna room should be changed<br />
six times per hour. The fresh air pipe should come<br />
directly from outside.<br />
Inlet ventilation openings shall be located at the<br />
bottom of the wall, as close to the floor level as<br />
possible.<br />
Outlet ventilation openings shall be located at the<br />
top of the wall, as close to the ceiling as bossible, and<br />
shall comply with the minimum size requirements for<br />
inlet ventilations openings. See fig. 4.<br />
<strong>Sauna</strong> shall be provided with intended ventilation as<br />
required per the local code authorities.<br />
3. INSTRUCTIONS FOR THE<br />
INSTALLATION<br />
3.1. Prior to Installation<br />
• Prior to installing the heater, study the<br />
instructions for installation, as well as checking<br />
the following points:<br />
• Is the output and type of the heater suitable for<br />
the sauna room<br />
The cubic volumes given in table 1 should be<br />
followed.<br />
• Are there a sufficient number of high quality<br />
sauna rocks<br />
• Is the supply voltage suitable for the heater<br />
• The location of the heater fulfils the minimum<br />
requirements concerning safety distances given<br />
in fig. 5 and table 1.<br />
It is absolutely necessary to ensure that the<br />
installation is carried out according to these values.<br />
Neglecting them can cause a risk of fire.<br />
Only one electrical heater may be installed in the<br />
sauna room.<br />
2.5. Hygienic Conditions of the <strong>Sauna</strong> Room<br />
Good hygienic standards of the sauna room will make<br />
bathing a pleasant experience.<br />
The use of sauna seat towels is recommended to<br />
prevent sweat from flowing onto the platforms. The<br />
towels should be washed after each use. Separate<br />
towels should be provided for guests.<br />
It is advisable to vacuum or sweep the floor of the<br />
sauna room in connection with cleaning. In addition,<br />
the floor may be wiped with a damp cloth.<br />
The sauna room should be thoroughly washed at<br />
least every six months. Brush the walls, platforms<br />
and floor by using a scrubbing-brush and sauna<br />
cleanser.<br />
Wipe dust and dirt from the heater with a damp cloth.<br />
Figure 5.<br />
Min. distances to combustible materials<br />
Table 1. Installation details of a JM heater. See fig. 4<br />
and item 2.3. "<strong>Heater</strong> output"<br />
7
3.2. Fastening the <strong>Heater</strong> on a Wall<br />
1. Fasten the wall-mounting rack on the wall byusing<br />
the screws which come with the rack. Observe<br />
the minimum safety distances given in table 1 and<br />
fig. 5. The fastening of the mounting rack is shown<br />
in figure 6.<br />
NOTE! There should be a support, e.g. a board,<br />
behind the panel, so that the fastening screws can<br />
be screwed into a thicker wooden material than<br />
the panel. If there are no boards behind the panel,<br />
the boards can also be fastened on the panel. See<br />
figure 4.<br />
2. Lift the heater onto the rack on the wall so that the<br />
connecting box switches are easily accessible.<br />
3. The steam distributor / rock guard must always be<br />
fastened on the wall side of the heater. To turn the<br />
distributor / guard, loosen the fastening screw and<br />
then turn it. See figure 9.<br />
3.3. Installation capillary tubing and bulb<br />
Before hooking up electrical wires to junction box of<br />
heater, remove capillary tubing and bulb from<br />
junction box and bring up wall to left or right side of<br />
heater. Cover tubing with wooden molding provided,<br />
coil up excess tubing, and place under heater close<br />
to floor.<br />
Be sure to cover thermostat bulb with protective<br />
metal cover by threading bulb through holes in cover,<br />
and fasten bulb cover to wall with screws provided.<br />
Also, take care when nailing protective wood strips<br />
over capillary tubing, so that nails do not puncture<br />
tubing. If punctured, entire thermostat must be<br />
replaced. See figure 7.<br />
Figure 6.<br />
Location of the mounting rack of<br />
the heater<br />
3.4. Safety Railing<br />
If a safety railing is built around the heater, the<br />
minimum distances given in fig. 8 must be observed.<br />
Figure 7.<br />
Installation of the thermostat sensor<br />
Figure 8.<br />
Safety railing of the heater<br />
Figure 9.<br />
Connections and parts of the heater<br />
8
3.5. Electrical Connections<br />
The heater may only be connected to the electrical<br />
network in accordance with the current regulations<br />
by an authorised, professional electrician.<br />
Refer to the chart in table 2 to determine the wire<br />
size and circuit protection required. The complete<br />
sauna system should be properly grounded as per<br />
NEC or as required by local codes. A grounding<br />
terminal is provided in the wiring compartment of<br />
each heater, complate the wiring according to the<br />
appropriate wiring figure 10.<br />
See table 1 for required clearances. Any wiring<br />
within internal <strong>Sauna</strong> walls must be rated for 90°C<br />
(194°F) and copper wire must be used. Run wire<br />
through seal tight flex conduit from wall to heater<br />
and connect to junction box.<br />
Note! If connection to heater will be made at a later<br />
time, bring flex into <strong>Sauna</strong> room 4–6" (100–150<br />
mm) from floor, and leave 3' (900 mm) of flex for<br />
hookup (can be cut to right lenght later).<br />
Further instructions concerning exceptional installations<br />
can be obtained from local electrical<br />
authorities.<br />
3.6. Electric heater insulation resistance<br />
When performing the final inspection of the electrical<br />
installations, a “leakage” may be detected when<br />
measuring the heater’s insulation resistance. The<br />
reason for this is that the insulating material of the<br />
heating resistors has absorbed moisture from the air<br />
(storage transport). After operating the heater for a<br />
few times, the moisture will be removed from the<br />
resistors.<br />
Note! A ground fault interrupter (GFI) shoud not be<br />
installed in and does not belong in a <strong>Sauna</strong>.<br />
3.7. Testing of <strong>Sauna</strong> heater<br />
Before testing heater, fill rock cavity with igneous<br />
stones provided with heater and fasten rock guard at<br />
top of heater. See item 1.1." Piling of the <strong>Sauna</strong> rocks".<br />
1. After <strong>Sauna</strong> heater has been properly wired,<br />
according to appropriate wiring diagram and local<br />
codes, turn <strong>Sauna</strong> breaker on in the main breaker<br />
panel. (Note! Electrician must label "<strong>Sauna</strong>"<br />
breaker.)<br />
2. Turn thermostatic (heat) control to on position<br />
(this is located on your heater). Set timer to 10 or<br />
15 minutes.<br />
3. Within 5 minutes, you should be able to feel heat<br />
from heater elements when holding your hand over<br />
heater.<br />
4. If <strong>Sauna</strong> does not heat, refer to troubleshooting<br />
information.<br />
5. It is normal for smoke to appear during the first<br />
heating, as protective element coating needs to<br />
burn off. TURN SAUNA ON FOR 1 HOUR BEFORE<br />
USING THE FIRST TIME, TO ELIMINATE<br />
SMOKING.<br />
Figure 10.<br />
Electrical connections of the<br />
heaters JM-17, JM-20 and JM-30<br />
<strong>Heater</strong> Input Voltage Phase Amperage Min. 90°C Copper supply<br />
Model kW wire A.W.G. No.<br />
JM-17 1,7 120 1 14,2 12<br />
JM-20 2,0 120 1 16,7 12<br />
JM-30 3,0 240 1 12,5 14<br />
Table 2.<br />
Supply wires<br />
9
3.8. Troubleshooting<br />
A. If sauna does not operate after initial installation<br />
and wiring:<br />
1. Check breaker to be sure that it is on. Also,<br />
breaker should be correct size.<br />
2. Make sure that a neutral wire has been included<br />
3. Check circuit breaker in contactor to be sure that<br />
it has not been shorted out.<br />
4. Be sure that thermostat and timer are both in on<br />
position.<br />
5. Be sure that timer winds down. If timer has been<br />
shorted out, heater will not operate.<br />
B. If sauna has been in operation, but heater ceases<br />
to operate:<br />
1. Check breaker to make sure it is on.<br />
2. Check timer to see if it winds down.<br />
3. Check high limit reset button in heater (reset is<br />
under the heater to see if it has been released).<br />
4. Call your electrician or service person for further<br />
help.<br />
C. If <strong>Sauna</strong> heater operates, but room does not come<br />
up to <strong>Sauna</strong> temperature (160–185°F (70–85°C)<br />
normal <strong>Sauna</strong> temperature):<br />
1. You must allow at least 30 minutes for <strong>Sauna</strong> heatup<br />
time.<br />
2. Is <strong>Sauna</strong> thermometer located 6” (150 mm) from<br />
ceiling, and is it above or close to <strong>Sauna</strong> heater<br />
(This is proper location for <strong>Sauna</strong> temperature<br />
reading.) Thermometer readings vary with room<br />
heights and location. Eg. 180°F (82°C) above<br />
<strong>Sauna</strong> heater = 165°F (74°C) on opposite wall =<br />
140°F (60°C) on upper bench level = 120°F<br />
(49°C) on lower bench level = 100°F (38°C)at<br />
floor level.<br />
3. Check for proper wire size, amp size and proper<br />
wiring (according to diagrams and information)<br />
also necessary copper wiring.<br />
4. Check for placement of stones to make sure they<br />
are loosely spaced around elements, to insure<br />
good air flow. Stones packed too tightly will<br />
restrict air flow and reduce heating capacity.<br />
5. Check for heat loss (around or under door, around<br />
ceiling light or fan – we do not recommend ceiling<br />
light and a fan does not belong in the <strong>Sauna</strong>.<br />
6. Is room properly insulated<br />
7. Is ceiling higher than in figure 4<br />
8. After checking all of the above, remove rocks and<br />
check heater elements for holes or burned areas.<br />
(Only if heater has been in use for some time.)<br />
3.9. Caution! Electrician or service person!<br />
1. Before servicing heater, control, or contactor, turn<br />
power off at breaker!<br />
2. Open junction box to make sure wires are tightly<br />
secured with no loose connections. <strong>Heater</strong> wire<br />
and all connecting wires should be copper.<br />
3. Check for burned spots or short in wiring of timer<br />
or thermostat.<br />
3.10. Maintenance instructions<br />
1. Use only clean water on <strong>Sauna</strong> stones. Do not use<br />
spa or pool water as it will destroy your heater.<br />
2. Clean water should always be used in <strong>Sauna</strong><br />
buckets and water should be dumped out after<br />
every use. Scour buckets and dippers occasionally<br />
when film collects from usage. Use plastic bucket<br />
liner in bucket to prevent water leakage.<br />
3. Scrub benches with a soft brush, using soap and<br />
water or a mild disinfectant, when needed - about<br />
once a week in commercial <strong>Sauna</strong>s, or depending<br />
upon sauna usage. For sanitation, each bather<br />
should sit or lie on a towel (this will prolong bench<br />
life).<br />
4. Remove Super Dek and wash waterproof floor<br />
with disinfectant (e.g. Pine Sol) about once a week<br />
or as often as needed. Hose off Super Dek to clean.<br />
5. To maintain beautiful appearance of <strong>Sauna</strong> heater,<br />
remove water stains by wiping a damp cloth<br />
occasionally.<br />
6. Harvia <strong>Sauna</strong> <strong>Heater</strong>s require no special<br />
maintenance when properly installed by a qualified<br />
electrical contractor. After 1 years of usage, the<br />
rocks may need replacing if they have crumbled or<br />
powered.<br />
7. Harvia <strong>Sauna</strong> strongly recommends a floor that<br />
can be easily cleaned (concrete, ceramic tile, or<br />
a poured type of flooring). When this is provided,<br />
the <strong>Sauna</strong> can be easily cleaned and kept in a<br />
sanitary condition with little effort. A carpet is<br />
NOT recommended for a <strong>Sauna</strong>! A carpet<br />
becomes a perfect breeding ground for bacteria<br />
in the moist conditions of a <strong>Sauna</strong>; and a carpet<br />
promotes the spread of foot diseases such as<br />
athlete‘s foot. For same reasons, wooden<br />
duckboard should not be used for flooring.<br />
8. In new construction, a floor drain should also be<br />
provided, especially in commersial <strong>Sauna</strong>s for<br />
sanitary cleaning and maintenance.<br />
9. Seal wood around glass in door - inside and outside<br />
– with Thompson‘s Water Seal to prevent<br />
warpage.<br />
10. When <strong>Sauna</strong> wood becomes stained from<br />
perspiration, the wood may lightly sanded with fine<br />
sandpaper to restore beautiful appearance. We do<br />
not recommend stains or sealers as toxic vapors<br />
may appear when heated. However, 2 coats of<br />
Thompson‘s Water Seal may be used on the wood<br />
benches in a commersial <strong>Sauna</strong>, so that the wood<br />
may be more easily cleaned and kept sanitary – the<br />
wood will not absorb perspiration.<br />
11. The <strong>Sauna</strong> room will heat faster if the higher vent<br />
is kept in a closed position when heating. The lower<br />
vent may always be kept in an open position.<br />
12. Required warning signs should be posted<br />
according to the instructions.<br />
10
3.11. Guarantee<br />
This HARVIA SAUNA heater is guaranteed for one<br />
year date of purchase, and includes all heater parts<br />
such as heating elements, controls, contactors, etc.<br />
This guarantee covers faults in manufacture and<br />
material only, and includes the exchange of new parts<br />
supplied by the manufacturer or manufacturer‘s agent,<br />
after the faulty parts have been returned to same. The<br />
replacement of parts under warranty does not extend<br />
the warranty period beyond the original one year.<br />
The guarantee does not cover defects caused by<br />
normal wear and tear, defects caused by improper<br />
installation, poor maintenance, or failure to follow<br />
the manufacturer‘s instructions for installation, use<br />
and care, or alterations made to the <strong>Sauna</strong> product.<br />
This guarantee is void if the heater is used<br />
improperly. Pool or spa water should not be poured<br />
over the <strong>Sauna</strong> stones, as chemicals are harmful to<br />
the heater; the <strong>Sauna</strong> room must be heated for at<br />
least 30 minutes before water is poured over the<br />
stones; only one or two dippers ful of water should be<br />
poured over the hot stones at one time. This guarantee<br />
will be void if a shower has been installed in the <strong>Sauna</strong><br />
room.<br />
The guarantee does not cover delivery costs of the<br />
faulty part or costs of the person carrying out the<br />
repair in the field. If the <strong>Sauna</strong> heater is returned to<br />
the manufacturer or manufacturer‘s agent within<br />
five years after date of purchase, the agent will<br />
provide free labor for repair, but will charge for parts<br />
if date of purchase is past one year.<br />
This guarantee will be void if installation and wiring<br />
is not carried out by a certified electrician or<br />
authorized and qualified service representative, who<br />
must sign below.<br />
This guarantee will be void if information below is<br />
not filled out and returned within 15 days of<br />
purchase, and it applies only to original installation of<br />
product and to original purchaser.<br />
SAUNA HEATER<br />
MODEL NUMBER<br />
______________________________________________<br />
______________________________________________<br />
DATE OF PURCHASE<br />
ORIGINAL OWNER<br />
ADDRESS<br />
______________________________________________<br />
______________________________________________<br />
______________________________________________<br />
______________________________________________<br />
PURCHASED FROM<br />
______________________________________________<br />
______________________________________________<br />
ELECTRICAL CONTRACTOR<br />
MUST SIGN HERE<br />
______________________________________________<br />
DATE OF ELECTRICAL<br />
WIRING & HOOKUP<br />
______________________________________________<br />
11
4. SPARE PARTS<br />
2. Overheating limiter ZSV-330<br />
3. Thermostat ZSK-762<br />
4. Timer 1+8 / 120V ZSJ-290<br />
4. Timer 1h/240V ZSA-720 JM-30<br />
5. Fitting ZSK-555<br />
6. Supply terminal block ZSK-779<br />
7. Lamp ZSJ-245<br />
7. Lamp 240 V ZSA-530 JM-30<br />
8. Control box plastic part ZSA-480<br />
9. Scale plate ZSJ-3<br />
9. Scale plate ZSA-670 JM-30<br />
10. Knob + Cap ZSA-660<br />
11. Mounting rakk ZSJ-170<br />
12. Rock guard ZSJ-180<br />
13. Wooden fence ZSJ-190<br />
14. Water cask ZSJ-200<br />
15. Axlelock ø6 ZSA-580<br />
16. Control compartment cover ZSV-150S<br />
17. Bulb cover ZSK-750<br />
18. Heating element ZSJ-110 JM-17<br />
19. Heating element ZSJ-320 JM-20<br />
20. Heating element ZSJ-330 JM-30