minimum clearances, min-max space, adequate ... - Sauna Supplies
minimum clearances, min-max space, adequate ... - Sauna Supplies
minimum clearances, min-max space, adequate ... - Sauna Supplies

Create successful ePaper yourself
Turn your PDF publications into a flip-book with our unique Google optimized e-Paper software.
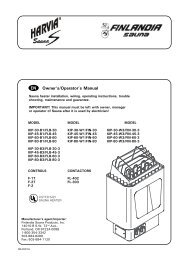
EN<br />
Owner’s / Operator’s Manual<br />
<strong>Sauna</strong> heater installation, wiring, operating instructions, trouble shooting,<br />
maintenance and guarantee.<br />
IMPORTANT! This manual must be left with owner, manager,<br />
or operator of <strong>Sauna</strong> after it is used by electrician!<br />
MODEL<br />
K-90-F1 / FLC-90<br />
K-105-F1 / FLC-105<br />
K-120-F1 / FLC-120<br />
K-150-F1 / FLC-150<br />
CONTROLS<br />
MODEL<br />
K-90-F3 / FLC-90-3<br />
K-105-F3 / FLC-105-3<br />
K-120-F3 / FLC-120-3<br />
K-150-F3 / FLC-150-3<br />
CONTACTORS<br />
F-2T<br />
FL-404<br />
F-2 FL-303<br />
FL-503<br />
Finlandia <strong>Sauna</strong> Products, Inc.<br />
14010-B S.W. 72nd Ave., Portland, OR 97224-0088<br />
1-800-354-3342 503-684-8289 Fax: 503-684-1120<br />
08/2001H
THE SAUNA ROOM SHALL BE PROVIDED WITH PROPER VENTILATION FLOOR MODEL HEATERS –<br />
MINIMUM CLEARANCES, MIN-MAX SPACE, ADEQUATE VENTILATION<br />
Figure 4<br />
Figure 2<br />
Figure 4A<br />
Figure 3<br />
MODEL<br />
K-90-F1/F3<br />
FLC-90-1/3<br />
INPUT<br />
kW<br />
9,0<br />
MIN. HEIGHT<br />
FT.<br />
6,5<br />
FLOOR AREA<br />
MIN. MAX.<br />
SQ.FT SQ.FT.<br />
46 77<br />
SAUNA ROOM<br />
MIN. MAX.<br />
CU.FT CU.FT.<br />
300 525<br />
MIN. SPACING<br />
FROM ADJACENT<br />
SURFACE INCHES<br />
5”<br />
K-105-F1/F3<br />
FLC-105-1/3<br />
10,5<br />
6,5<br />
60 94<br />
390 600<br />
5”<br />
K-120-F1/F3<br />
FLC-120-1/3<br />
12,0<br />
6,5<br />
78 114<br />
500 750<br />
6”<br />
K-150-F1/F3<br />
FLC-150-1/3<br />
15,0<br />
6,5<br />
97 146<br />
630 1000<br />
6”<br />
Table 1<br />
3
Figure 5<br />
COMMERCIAL SAUNA HEATER (240 V 1PH)<br />
MODEL<br />
WATTS AMPS VOLTS PH WIRE SIZE WIRE SIZE CONTROL CONTACTOR<br />
breaker to contactor contactor to control 3 3/4” x 2 1/2” x<br />
8” x 4” x 12”<br />
9 1/4”<br />
K/FLC-90<br />
K/FLC-105<br />
9000 37,5 240 1 #6 copper (4) #8 F-2T FL-404<br />
10500 43,8 240 1 #6 copper (4) #8 F-2T FL-404<br />
Note! See additional info for models K/FLC-120-1 and K/FLC-150-1 regarding load center<br />
(Figure 1A and 7)<br />
SAUNA HEATER WIRING AND HOOKUP –<br />
ALSO REFER TO FIGURE 1<br />
Refer to chart above for proper wire size and<br />
amperage. See page 3 for required <strong>clearances</strong>. Use<br />
copper wire from breaker to wall-mounted<br />
contactor. Supply cable must have 4 wires including<br />
insulated neutral and separate ground.<br />
Use 90°C copper wire from contactor to control<br />
and from control to room light. Also use 90°C copper<br />
wire from contactor to <strong>Sauna</strong> heater (within seal<br />
tight flex conduit), and connect to junction box under<br />
heater at back, with 90°C connector.<br />
Connect to ter<strong>min</strong>als 1, 2, 3 and 4 and connect<br />
ground wire to lug marked ground. (Cover plate at<br />
back of heater must be removed first).<br />
Important! Follow wiring instructions carefully to<br />
prevent shorting of 6 amp circuit breaker in<br />
contactor. Do not force wires against circuit breaker:<br />
be sure there are no bare wires or shorts. The circuit<br />
breaker has been factory tested, and if it is shorted<br />
out, it will be the responsibility of the electrical<br />
contactor to replace it!<br />
If connection to heater will be made at a later time,<br />
bring flex into <strong>Sauna</strong> room 4–6” from floor, and leave<br />
3’ of flex for hookup (can be cut to right length later).<br />
Before testing heater, fill rock cavity with igneous<br />
stones provided with heater and fasten metal rock<br />
guard at top of heater. (See gen. info concerning<br />
washing and placing of stones.)<br />
4
Figure 6<br />
COMMERCIAL SAUNA HEATER (240 V 1PH)<br />
MODEL<br />
WATTS AMPS VOLTS PH WIRE SIZE WIRE SIZE CONTROL CONTACTOR<br />
breaker to contactor contactor to control 3 3/4” x 2 1/2” x<br />
8” x 4” x 12”<br />
9 1/4”<br />
K/FLC-120<br />
12000 50,0 240 1 #4 copper (4) #8 F-2T FL-404<br />
K/FLC-150<br />
For more information see page 6.<br />
15000 62,5 240 1 #4 copper (4) #8 F-2T FL-404<br />
SAUNA HEATER WIRING AND HOOKUP –<br />
ALSO REFER TO FIGURE 1<br />
Refer to chart above for proper wire size and<br />
amperage. See page 3 for required <strong>clearances</strong>. Use<br />
copper wire from breaker to wall-mounted<br />
contactor. Supply cable must have 4 wires including<br />
insulated neutral and separate ground.<br />
Use 90°C copper wire from contactor to control<br />
and from control to room light. Also use 90°C copper<br />
wire from contactor to <strong>Sauna</strong> heater (within seal<br />
tight flex conduit), and connect to junction box under<br />
heater at back, with 90°C connector.<br />
Connect to ter<strong>min</strong>als 1, 2, 3 and 4 and connect<br />
ground wire to lug marked ground. (Cover plate at<br />
back of heater must be removed first).<br />
Important! Follow wiring instructions carefully to<br />
prevent shorting of 6 amp circuit breaker in<br />
contactor. Do not force wires against circuit breaker:<br />
be sure there are no bare wires or shorts. The circuit<br />
breaker has been factory tested, and if it is shorted<br />
out, it will be the responsibility of the electrical<br />
contactor to replace it!<br />
If connection to heater will be made at a later time,<br />
bring flex into <strong>Sauna</strong> room 4–6” from floor, and leave<br />
3’ of flex for hookup (can be cut to right length later).<br />
Before testing heater, fill rock cavity with igneous<br />
stones provided with heater and fasten metal rock<br />
guard at top of heater. (See gen. info concerning<br />
washing and placing of stones.)<br />
5
Figure 7.<br />
COMMERCIAL SAUNA HEATER (208 V 3PH)<br />
MODEL<br />
K/FLC-90-3<br />
K/FLC-105-3<br />
K/FLLC-120-3<br />
K/FLC-150-3<br />
WATTS AMPS VOLTS PH WIRE CONTROL CONTACTOR CONTACTOR SIZE<br />
SIZE SIZE W x D x H inches<br />
9000 25,0 208 3 10 F-2T FL-503 8 x 4 x 10<br />
10500 29,2 208 3 8 F-2T FL-503 8 x 4 x 10<br />
12000 33,3 208 3 8 F-2T FL-505 8 x 4 x 10<br />
15000 41,7 208 3 8 F-2T FL-505 8 x 4 x 10<br />
SAUNA HEATER WIRING AND HOOKUP –<br />
ALSO REFER TO FIGURE 1<br />
Refer to chart above for proper wire size and<br />
amperage. See page 3 for required <strong>clearances</strong>. Use<br />
copper wire from breaker to wall-mounted<br />
contactor. Supply cable must have 4 wires including<br />
insulated neutral and separate ground.<br />
Use 90°C copper wire from contactor to control<br />
and from control to room light. Also use 90°C copper<br />
wire from contactor to <strong>Sauna</strong> heater (within seal<br />
tight flex conduit), and connect to junction box under<br />
heater at back, with 90°C connector.<br />
Connect to ter<strong>min</strong>als 1, 2, 3 and 4 and connect<br />
ground wire to lug marked ground. (Cover plate at<br />
back of heater must be removed first).<br />
Important! Follow wiring instructions carefully to<br />
prevent shorting of 6 amp circuit breaker in<br />
contactor. Do not force wires against circuit breaker:<br />
be sure there are no bare wires or shorts. The circuit<br />
breaker has been factory tested, and if it is shorted<br />
out, it will be the responsibility of the electrical<br />
contactor to replace it!<br />
If connection to heater will be made at a later time,<br />
bring flex into <strong>Sauna</strong> room 4–6” from floor, and leave<br />
3’ of flex for hookup (can be cut to right length later).<br />
Before testing heater, fill rock cavity with igneous<br />
stones provided with heater and fasten metal rock<br />
guard at top of heater. (See gen. info concerning<br />
washing and placing of stones.)<br />
6
Figure 8.<br />
F-2 SAUNA CONTROL<br />
This control can be used with any heater and proper<br />
contactor. See chart for contactor model.<br />
This control can be used only with use of a time<br />
clock.<br />
This control can be used only when an attendant<br />
is on duty during hours of operation.<br />
7
SAUNA – GENERAL INFORMATION<br />
ROCK PLACEMENT – Do not operate heater<br />
without stones!<br />
Use only the stones which are supplied with the<br />
<strong>Sauna</strong> heater. Wash stones with water hose and<br />
place inside of heater box so that rocks are between<br />
and around heating elements. However, do not force<br />
rocks between elements.<br />
Use smaller stones first, and continue to fill heater<br />
with larger stones until they are about 2” below rock<br />
guard. You may not need all of the stones.<br />
Stones should be placed loosely within heater so<br />
that there is good heat circulation around and<br />
through them. Stones should completely cover the<br />
heating elements, however!<br />
Pouring water over exposed elements could cause<br />
heater damage!<br />
TESTING OF SAUNA HEATER<br />
1. After <strong>Sauna</strong> heater has been properly wired,<br />
according to appropriate wiring diagram and<br />
local codes, turn <strong>Sauna</strong> breaker on in the main<br />
breaker panel.<br />
(Note! Electrician must label “<strong>Sauna</strong>” breaker.)<br />
2. Turn thermostatic (heat) control to on position<br />
(this is located either on your heater or on your<br />
remote wall control. If you have a wall control,<br />
the indicator light will come on to show that the<br />
<strong>Sauna</strong> is heating). Set timer to 10 or 15 <strong>min</strong>utes.<br />
3. Within 5 <strong>min</strong>utes, you should be able to feel heat<br />
from heater elements when holding your hand<br />
over heater.<br />
4. If <strong>Sauna</strong> does not heat, refer to troubleshooting<br />
information.<br />
5. It is normal for smoke to appear during the first<br />
heating, as protective element coating needs to<br />
burn off. Turn sauna on for 1 hour before using<br />
the first time, to eli<strong>min</strong>ate smoking.<br />
TROUBLESHOOTING<br />
A. If sauna does not operate after initial installation<br />
and wiring:<br />
1. Check breaker to be sure that it is on.<br />
Also, breaker should be correct size.<br />
2. Make sure that a neutral wire has been included<br />
(necessary for all heaters except model with<br />
built-in control).<br />
3. Check circuit breaker in contactor to be sure that<br />
it has not been shorted out.<br />
4. Be sure that thermostat and timer are both in on<br />
position.<br />
5. Be sure that timer winds down. If timer has been<br />
shorted out, heater will not operate.<br />
B. If sauna has been in operation, but heater ceases<br />
to operate:<br />
1. Check breaker to make sure it is on.<br />
2. Check timer to see if it winds down.<br />
3. Check high limit reset button in heater (reset is<br />
under the heater (wall models) or on the back of<br />
the junction box (floor models)) to see if it has<br />
been released.<br />
4. Call your electrician or service person for<br />
further help.<br />
NOTE! A GROUND FAULT INTERRUPTER (GFI)<br />
should not be installed in and does not belong in a<br />
<strong>Sauna</strong>. If used, the breaker will trip, and damage<br />
could result.<br />
C. If <strong>Sauna</strong> heater operates, but sauna room does not<br />
come up to sauna temperature (160–185ºF normal<br />
<strong>Sauna</strong> temperature)<br />
1. You must allow at least 30 <strong>min</strong>utes for <strong>Sauna</strong><br />
heat-up time.<br />
2. Is <strong>Sauna</strong> thermometer located 6” from ceiling,<br />
and is it above or close to <strong>Sauna</strong> heater (This<br />
is proper location for <strong>Sauna</strong> temperature<br />
reading.) Thermometer readings vary with room<br />
heights and location. Eg. 180ºF above <strong>Sauna</strong><br />
heater = 165 on opposite wall = 140 on upper<br />
bench level = 120 on lower bench level = 100<br />
at floor level.<br />
3. Check for proper wire size, amp size, and proper<br />
wiring (according to diagrams and information)<br />
also necessary copper wiring.<br />
4. Check for placement of stones to make sure<br />
they are loosely <strong>space</strong>d around elements, to<br />
insure good air flow. Stones packed too tightly<br />
will restrict air flow and reduce heating capacity.<br />
5. Check for heat loss (around or under door,<br />
around ceiling light or fan – we do not<br />
recommend ceiling light and a fan does not<br />
belong in the <strong>Sauna</strong>.<br />
6. Is room properly insulated<br />
7. Is ceiling higher than 7’<br />
8. After checking all the above, remove rocks and<br />
check heater elements for holes or burned areas.<br />
(Only if heater has been in use for some time.)<br />
Caution! Electrician or service person!<br />
1. BEFORE SERVICING HEATER, CONTROL, OR<br />
CONTACTOR, TURN POWER OFF AT<br />
BREAKER!<br />
2. Open junction box to make sure wires are<br />
tightly secured with no loose connections.<br />
Heater wire and all connecting wires should<br />
be copper.<br />
3. Check for burned spots or short in wiring of<br />
timer or thermostat.<br />
8
Finlandia <strong>Sauna</strong>´s warranty on parts is void if<br />
installer/electrician fails to follow necessary wiring<br />
information provided or fails to follow code for<br />
proper wire size, amperage, etc.<br />
OVERHEATING LIMITER<br />
Each heater is equipped with a overheating limiter<br />
which is a safety device. If an abnormal heating<br />
condition should occur, the heater will automatically<br />
shut off, and it will not come on again until it cools.<br />
To reset overheating limiter, locate the reset<br />
button (bottom front on wall models, behind junction<br />
box at back bottom of heater on floor models) and<br />
push upward until contactor kicks in. If reset button<br />
continues to trip, contact a qualified service person.<br />
Be sure that a GFI has not been installed.<br />
Receptacles OR PLUGS are not allowed in a <strong>Sauna</strong><br />
room. If a speaker is installed in a <strong>Sauna</strong> room, it<br />
should not be installed higher than 3’ from floor,<br />
away from the <strong>Sauna</strong> heater (consult manufacturer<br />
for ratings).<br />
ROOM LIGHT should be a vapor proof, wallmounted<br />
type, with rough-in box mounted flush with<br />
inside paneling. It should mount 6’6” from floor, not<br />
directly over <strong>Sauna</strong> heater, and not over upper<br />
benches; light bulb should not exceed 75 watts.<br />
HEATER FENCE is necessary for safety and should<br />
be constructed of 1” x 2” or 2” x 2” softwood to<br />
match <strong>Sauna</strong> interior. See figures 2-4 for <strong>clearances</strong><br />
from <strong>Sauna</strong> heater. Fence should attach to wall and<br />
should not be placed higher than top of heater below<br />
rock line.<br />
ROOM CONSTRUCTION –<br />
GENERAL INFORMATION<br />
A. Fra<strong>min</strong>g<br />
2” x 4” dry Douglas Fir, 16” o.c.<br />
B. Ceiling height<br />
no higher than 7’0”.<br />
C. Insulation<br />
R11 Fiberglas with foil back in walls and<br />
ceiling, foil facing into room.<br />
D. Drywall<br />
See local codes. Is not required in most residences.<br />
See local codes for commercial. If drywall is<br />
used, apply 1” x 2” nailers so that wall and<br />
ceiling boards can be attached to solid wood.<br />
E. Paneling<br />
Use kiln-dried, clear, T & G softwood such as<br />
California Redwood, Western Red Cedar,<br />
Alaska Yellow Cedar, with moisture content not<br />
exceeding 11 %.<br />
F. Benches<br />
Use matching wood of vertical grain with<br />
2” x 2” tops – ½” spacing – and 2” x 4” facing,<br />
fastening from bottom to prevent burning of bathers.<br />
G. Heater guardrail<br />
Use matching softwood of 1” x 2” or 2” x 2”.<br />
H. Door<br />
Must open out and should not have a lock.<br />
Size – 2’0” x 6’8” with fir rails and double<br />
sealed, tempered glass.<br />
I. Flooring<br />
concrete, ceramic tile, or heavyduty Vinyl<br />
with walking area of removeable SuperDek.<br />
J. Ventilation<br />
should be provided by lower vent close to heater,<br />
4” from floor, and upper vent on opposite wall<br />
(if possible) 6” from ceiling or as low as 24” from<br />
floor. Vents should be adjustable and should<br />
allow air to change 5 times per hour. <strong>Sauna</strong> shall<br />
be provieded with intended ventilation as<br />
required per the local code authorities.<br />
K. Light<br />
should be wall-mounted, vapor proof type,<br />
located 6” from ceiling.<br />
L. Accessories<br />
bucket, dipper and thermometer are essential.<br />
Thermometer should be placed over the <strong>Sauna</strong><br />
heater, 6” from ceiling, for correct temperature<br />
reading. Other accessories such as hygrometer,<br />
sand timer, brushes,etc. are available.<br />
M. Maintenance instructions – are included at<br />
the end of this manual.<br />
N. Warning signs<br />
are furnished with <strong>Sauna</strong> heater. The metal<br />
“CAUTION” sign should be fastened to wall,<br />
close to heater, in a visible place. The metal<br />
“WARNING” sign should be fastened outside, to<br />
the <strong>Sauna</strong> room door.<br />
WARNINGS!<br />
• Do not smoke, use alcohol, or exercise in<br />
the <strong>Sauna</strong>!<br />
• Do not exceed 30 <strong>min</strong>. in the <strong>Sauna</strong> at one time,<br />
as excessive exposure can be harmful to health.<br />
The <strong>Sauna</strong> should not be used as an<br />
endurance test!<br />
• Persons with poor health should consult their<br />
physicians before using the <strong>Sauna</strong>!<br />
• Do not place any combustible material over<br />
the <strong>Sauna</strong> Heater (towels, bathing suits,<br />
wooden bucket or dipper)!<br />
• Use only clean tap water on the stones –<br />
do not use pool or spa water, as chlorine gas<br />
can be produced and the heating elements<br />
can be damaged!<br />
• Hyperthermia occurs when the internal<br />
temperature of the body reaches a level<br />
several degrees above the normal body<br />
temperature of 98,6ºF.<br />
The symptoms of hyperthermia include<br />
an increase in the internal temperature of the<br />
body, dizziness, lethargy, drowsiness, and<br />
fainting.<br />
The effects of hyperthermia include:<br />
A) Failure to perceive heat<br />
B) Failure to recognize the need to<br />
exit the room.<br />
C) Unawareness of impending hazard<br />
D) Fatal damage in pregnant women<br />
E) Physical inability to exit the room<br />
F) Unconsciousness<br />
WARNING – the use of alcohol, drugs,<br />
or medication is capable of greatly<br />
increasin the risk of fatal hyperthermia.<br />
9
MAINTENANCE INSTRUCTIONS<br />
1. Use only clean water on <strong>Sauna</strong> stones. Do not use spa or pool water as it will destroy your heater.<br />
2. Clean water should always be used in <strong>Sauna</strong> buckets and water should be dumped out after every<br />
use. Scour buckets and dippers occasionally when film collects from usage. Use plastic bucket<br />
liner in bucket to prevent water leakage.<br />
3. Scrub benches with a soft brush, using soap and water or a mild disinfectant, when needed—<br />
about once a week in commercial <strong>Sauna</strong>s, or depending upon <strong>Sauna</strong> usage. For sanitation, each<br />
bather should sit or lie a on towel (this will prolong bench life).<br />
4. Remove Super Dek and wash waterproof floor with disinfectant (e.g. Pine Sol) about once a week<br />
or as often as needed. Hose off Super Dek to clean.<br />
5. To maintain beautiful appearance of <strong>Sauna</strong> heater, remove water stains by wiping with a damp<br />
cloth occasionally.<br />
6. Finlandia/Harvia Heaters require no special maintenance when properly installed by a qualified<br />
electrical contractor. After 5 years of usage, the rocks may need replacing if they have crumbled<br />
or powdered.<br />
7. Finlandia/Harvia <strong>Sauna</strong> strongly recommends a floor that can be easily cleaned (concrete,<br />
ceramic tile, or a poured type of flooring). When this is provided, the <strong>Sauna</strong> can be easily cleaned<br />
and kept in a sanitary condition with little effort. A carpet is NOT recommended for a <strong>Sauna</strong>! A<br />
carpet becomes a perfect breeding ground for bacteria in the moist conditions of a <strong>Sauna</strong>; and<br />
a carpet promotes the spread of foot diseases such as athlete’s foot. For the same reasons,<br />
wooden duckboard should not be used for flooring.<br />
8. In new construction, a floor drain should also be provided, especially in commercial <strong>Sauna</strong>s for<br />
sanitary cleaning and maintenance.<br />
9. Seal wood around glass in door—inside and outside—with Thompson’s Water Seal to prevent<br />
warpage.<br />
10. When <strong>Sauna</strong> wood becomes stained from perspiration, the wood may be lightly sanded with fine<br />
sandpaper to restore beautiful appearance. We do not recommend stains or sealers as toxic<br />
vapors may appear when heated. However, 2 coats of Thompson’s Water Seal may be used on<br />
the wood benches in a commercial <strong>Sauna</strong>, so that the wood may be more easily cleaned and<br />
kept sanitary—the wood will not absorb perspiration.<br />
11. The <strong>Sauna</strong> room will heat faster if the higher vent is kept in a closed position when heating. The<br />
lower vent may always be kept in an open position.<br />
12. Required warning signs should be posted according to the instructions.<br />
10
GUARANTEE<br />
This FINLANDIA HARVIA SAUNA heater is guaranteed<br />
for one year from date of purchase, and includes all<br />
heater parts such as heating elements, controls,<br />
contactors, etc.<br />
This guarantee covers faults in manufacture and<br />
material only, and includes the exchange of new<br />
parts supplied by the manufacturer or manufacturer’s<br />
agent, after the faulty part has been returned<br />
to same. The replacement of parts under warranty<br />
does not extend the warranty period beyond the<br />
original one year.<br />
The guarantee does not cover defects caused by<br />
normal wear and tear, defects caused by improper<br />
installation, poor maintenance, or failure to follow<br />
the manufacturer’s instructions for installation, use<br />
and care, or alterations made to the <strong>Sauna</strong> product.<br />
This guarantee is void if the heater is used<br />
improperly, pool or spa water should not be poured<br />
over the <strong>Sauna</strong> stones, as chemicals are harmful to<br />
the heater; the <strong>Sauna</strong> room must be heated for at<br />
least 30 <strong>min</strong>utes before water is poured over the<br />
stones; only one or two dippers full of water should<br />
be poured over the hot stones at one time. This<br />
guarantee will be void if a shower has been installed<br />
in the <strong>Sauna</strong> room.<br />
This guarantee does not cover delivery costs of the<br />
faulty part or costs of the person carrying out the<br />
repair in the field. If the <strong>Sauna</strong> heater is returned to the<br />
manufacturer or manufacturer’s agent in Portland,<br />
Oregon, within five years after date of purchase, the<br />
agent will provide free labor for repair, but will charge<br />
for parts if date of purchase is past one year.<br />
This guarantee will be void if installation and wiring<br />
is not carried out by a certified electrician or<br />
authorized and qualified service representative, who<br />
must sign below.<br />
This guarantee will be void if is not filled out and<br />
returned within 15 days of purchase, and it applies<br />
only to original installation of product and to original<br />
purchaser.<br />
HARVIA SAUNA HEATER<br />
MODEL NUMBER<br />
______________________________________________<br />
______________________________________________<br />
DATE OF PURCHASE<br />
ORIGINAL OWNER<br />
ADDRESS<br />
______________________________________________<br />
______________________________________________<br />
______________________________________________<br />
______________________________________________<br />
PURCHASED FROM<br />
______________________________________________<br />
______________________________________________<br />
ELECTRICAL CONTRACTOR<br />
MUST SIGN HERE<br />
______________________________________________<br />
DATE OF ELECTRICAL<br />
WIRING & HOOKUP<br />
______________________________________________<br />
Finlandia <strong>Sauna</strong> Products, Inc.<br />
14010-B S.W. 72nd Ave., Portland, OR 97224-0088<br />
1-800-354-3342 503-684-8289 Fax: 503-684-1120<br />
11
1. Casing, assembled<br />
2. Rating plate<br />
3. Pop rivet<br />
4. Heating element<br />
5. Slothead screw<br />
6. Stone compartment, assembled<br />
7. Main radiation shield<br />
8. Side radiation shield<br />
9. Screw with bore point<br />
10. Upper radiation shield<br />
11. Lower radiation shield<br />
12. Electrical casing, assembled<br />
13. Base plate<br />
14. Screw with bore point<br />
15. Cable clamp bracket<br />
16. Cable clamp<br />
17. Diaphragm seal<br />
18. Tapping screw<br />
19. Ter<strong>min</strong>al strip cover<br />
20. Tapping screw<br />
21. Grounding connector<br />
22. Ter<strong>min</strong>al strip<br />
23. Overheating limiter/switch<br />
24. Protective grille<br />
SAUNA HEATERS<br />
FLC-90...FLC-150/FLC-90-3...FLC-150-3<br />
K-90...K-150/K-90-3...K-150-3