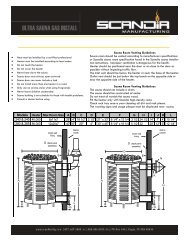
KV-45, KV-60, KV-80 - Sauna Supplies
KV-45, KV-60, KV-80 - Sauna Supplies
KV-45, KV-60, KV-80 - Sauna Supplies

You also want an ePaper? Increase the reach of your titles
YUMPU automatically turns print PDFs into web optimized ePapers that Google loves.
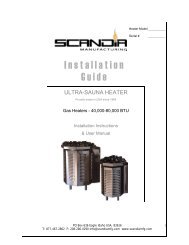
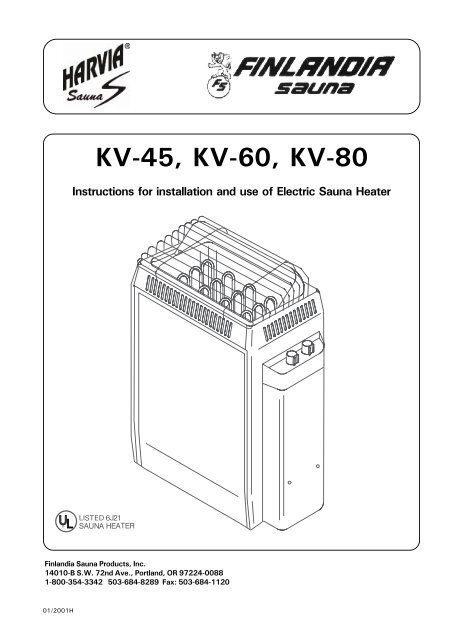
<strong>KV</strong>-<strong>45</strong>, <strong>KV</strong>-<strong>60</strong>, <strong>KV</strong>-<strong>80</strong>Instructions for installation and use of Electric <strong>Sauna</strong> HeaterFinlandia <strong>Sauna</strong> Products, Inc.14010-B S.W. 72nd Ave., Portland, OR 97224-00881-<strong>80</strong>0-354-3342 503-684-8289 Fax: 503-684-112001/2001H
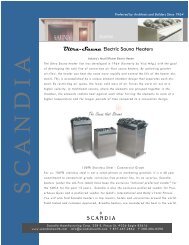
Purpose of the electric heater:The <strong>KV</strong> heater is designed for the heating of familysaunas to bathing temperature. It is forbidden touse the heater for any other purposes.The guarantee period of a <strong>KV</strong> electric heater infamily use is one year and, in communal use, 3months.Please read the user’s instructions carefully beforeusing the heater.NOTE!These instructions for installation and use areintended for the owner or the person in charge ofthe sauna, as well as for the electrician in charge ofthe electrical installation of the heater.After completing the installation, the person incharge of the installation should give theseinstructions to the owner of the sauna or to theperson in charge of its operation.Congratulations on your choice!CONTENTS1. INSTRUCTIONS FOR USE .................................................................. 31.1. Piling of the <strong>Sauna</strong> rocks ........................................................... 31.2. Heating of the <strong>Sauna</strong> ................................................................ 31.3. Control Unit ............................................................................ 31.3.1. Timer ........................................................................... 31.3.2. Thermostat ................................................................... 41.3.3. Overheating limiter .......................................................... 41.4. Throwing Water on Heated Stones .............................................. 41.4.1. <strong>Sauna</strong> Water .................................................................. 41.4.2. Temperature and Humidity of the <strong>Sauna</strong> Room ...................... 51.5. Instructions for Bathing ............................................................ 51.6. Warnings ............................................................................... 51.7. Warning signs ......................................................................... 51.8. Malfunctions ........................................................................... 52. THE SAUNA ROOM .......................................................................... 62.1. Insulation and Wall Materials of the <strong>Sauna</strong> Room .......................... 62.1.1. Room construction - general information .............................. 62.2. <strong>Sauna</strong> Room Floor .................................................................... 72.3. Heater Output ......................................................................... 72.4. Ventilation of the <strong>Sauna</strong> Room .................................................... 72.5. Hygienic Conditions of the <strong>Sauna</strong> Room ........................................ 73. INSTRUCTIONS FOR THE INSTALLATION............................................. 73.1. Prior to Installation................................................................... 73.2. Fastening the Heater on a Wall .................................................. 83.3. Installation capillary tubing and bulb............................................. 83.4. Safety Railing ......................................................................... 83.5. Electrical Connections .............................................................. 93.6. Electric heater insulation resistance ............................................ 93.7. Testing of <strong>Sauna</strong> heater ............................................................ 93.8. Troubleshooting ..................................................................... 103.9. Caution! Electrician or service person! ....................................... 103.10. Maintenance instructions ........................................................ 103.11. Guarantee ............................................................................ 114. SPARE PARTS ............................................................................... 122.
1. INSTRUCTIONS FOR USEThis heater shall not be operated unless the rockcompartment in the top of the heater is filled withthe rocks, and the guard is in place.1.1. Piling of the <strong>Sauna</strong> rocksThe sauna rocks for an electric heater should be 19/16" – 3 1/8" (4–8 cm) in diameter. The heater rocksshould be solid blocks of rock specially intended foruse in the heater. Neither light, porous ceramic “rocks“of the same size nor soft potstones should be used inthe heater, because they may cause the resistancetemperature to rise too high as a result of which theresistance may be broken.Rock dust should be washed off before piling therocks. The rocks should be piled into the rockcompartment over the grating, between the heatingelements (resistances) so that the rocks support eachother. The weight of the rocks should not lie on theheating elements.The rocks should not be piled too tightly, so thatair can flow through the heatgr. See figure 1. Therocks should be fitted loosely, and not wedgedbetween the heating elements. Very small rocksshould not be put into the heater at all.The rocks should completely cover the heatingelements. However, they should not form a highpile on the elements.The rocks disintegrate with use. Therefore, theyshould be rearranged at least once a year or evenmore often if the sauna is in frequent use. At thesame time, any pieces of rocks should be removedfrom the bottom of the heater, and disintegratedrocks should be replaced with new ones.The guarantee does not cover any faults causedby the use of rocks not recommended by the plant.Neither does the guarantee cover any faults causedby disintegrated or too small rocks blocking theheater ventilation.No such objects or devices should be placed insidethe heater rock space or near the heater that couldchange the amount or direction of the air flowingthrough the heater, thus causing the resistancetemperature to rise too high, which may set thewall surfaces on fire!Figure 1.Piling of the sauna rocksthe sauna. However, the water will only cool down therocks quickly, and after a while the sauna will not bewarm enough and the heater will not be able to provideenough heat.In order to make bathing enjoyable, the heater capacityshould be carefully chosen to suit the size of the saunaroom. See item 2.3. ”Heater Output”.1.3. Control Unit1.3.1. TimerThe heater is switched on by using the timer switch.The indicator lights will come on. The timer has twoscales: the first one (with larger figures) is the”instantly on” section; that is, the heater is on for aselected period of time (0–1 hours). The other sectionis the so called ”pre-set section” (1–8 hours), whichis used to start the heater after a certain time. Theheater starts when the timer has turned the switchback to the ”instantly on” section, that is, at numberone(1). After this, the heater will be on for about 1hour, unless the switch is turned to zero before that.At zero (0), the supply to the elements is cut off andthe heater is switched off. See fig 2.If you wish to use the full <strong>60</strong> min. cycle, turn the timerknob past the first 1 to number 2 or 3 on the dial. Thenturn backward to the large 1 until a click is heard. Leaveknob at that setting, and <strong>Sauna</strong> will operate for 1 hourbefore shutting off automatically.1.2. Heating of the <strong>Sauna</strong>When the heater is switched on for the first time, boththe heater and the stones emit smell. To remove thesmell, the sauna room needs to be efficiently ventilated.The purpose of the heater is to raise the temperatureof the sauna room and the sauna rocks to the requiredbathing temperature. If the heater output is suitablefor the sauna room, it will take about an hour for aproperly insulated sauna to reach that temperature.See item 2.1., ”Insulation and wall materials of the<strong>Sauna</strong> Room”. A suitable temperature for the saunaroom is about +150°F – +175°F (+65°C – +<strong>80</strong>°C).The sauna rocks normally reach the required bathingtemperature at the same time as the sauna room. Ifthe heater capacity is too big, the air in the sauna willheat very quickly, whereas the temperature of therocks may remain insufficient; consequently, the waterthrown on the rocks will run through. On the otherhand, if the heater capacity is too low for the saunaroom, the room will heat slowly and, by throwing water onthe rocks, the bather may try to raise the temperature ofFigure 2.Control panel3.
Example 1.You want to go jogging and have a sauna bath afterthat. The estimated duration of your run is 5 hours.Turn the timer clockwise over the scale 0–1 to thepre-set section (scale 1–8) at number 4.The timer will start, and after four hours, the heaterwill come on. Because it takes about one hour for thesauna to be heated, it will be warm and ready forbathing after about 5 hours, that is, when you comeback from your run.Example 2.If you want to bathe ”immediately” and thus do notwant to use the pre-set timing, the timer must beset to the desired point in the section 0–1. Then, theheater will be switched immediately on and the saunawill be ready for bathing after about one hour.Switch the heater off immediately after bathing andcheck that the sauna stones are dry. Sometimes it maybe advisable to leave the heater on for a while to let thewooden parts of the sauna dry properly.NOTE! It is absolutely necessary to check that thetimer has cut off the supply of the elements after theset time.1.3.2. ThermostatThe temperature is adjusted by the thermostat to aposition between minimum and maximum. Thecorrect position of the thermostat switch is foundby experimenting.Begin experimenting at the maximum position (farright) to find how quickly the sauna room and stonescan be heated to the desired temperature. If, duringbathing, the temperature seems to be becoming toohigh, turn it down a little by turning the switch counterclockwise.It must be noted that even a small differencewithin the maximum section will change the temperatureof the sauna considerably.1.3.3. Overheating limiterEach heater i equipped with a overheating limiterwhich is a safety device.If, for some reason, the temperature of the saunaroom becomes too high, the overheating limiter willpermanently cut off the supply of the resistances.The overheating limiter cannot be reset to theposition allowing electricity until the heater hascooled down. The overheating limiter is reset bypressing the reset button, which is located in bottomof heater. See figure 3.To reset the overheating limiter, locate the resetbutton and push upward until contactor kicks in. If resetbutton continues to trip, contact a qualified serviceperson. Do not remove the overheating limiter bulb.See spare parts no. 2.Prior to pressing the button, the cause of the faultmust be found:• are the stones crumbled and pressed together?• has the heater been on for a long time whileunused?• has the heater been banged or shaken?1.4. Throwing Water on Heated StonesThe air in the sauna room becomes dry when warmedup. Therefore, it is necessary to throw water on theheated rocks to reach a suitable level of humidity inthe sauna.The humidity of the air in the sauna room is controlledby the amount of water thrown on the rocks. A correctlevel of humidity makes the bather’s skin sweat andmakes breathing easy. By throwing water on the rockswith a small ladle, the bather should feel the effect ofair humidity on his skin. Both too high a temperatureand air humidity will give an unpleasant feeling.Staying in the hot sauna for long periods of timemakes the body temperature rise, which may bedangerous.The maximum volume of the ladle is 2 decilitres.The amount of water thrown on the stones at a timeshould not exceed 2 dl, because if an excessive amountof water is poured on the rocks, only part of it willevaporate and the rest may splash as boiling hot wateron the bathers.Never throw water on the rocks when there are peoplenear the heater, because hot steam may burn their skin.1.4.1. <strong>Sauna</strong> WaterThe water to be thrown on the heated rocks shouldmeet the requirements of clean household water.The factors essentially affecting the quality of waterinclude the following:• humuos content (colour, taste, precipitates);recommended content less than 12 mg/litre.• iron content (colour, smell, taste, precipitates);recommended content less than 0,2 mg/litre.• hardness – the most important substances aremanganese (Mn) and calcium (Ca);recommended content of manganese0,05 mg/litre, calcium less than 100 mg/litre.Calcareous water leaves a white, sticky layer on thestones and metal surfaces of the heater. Calcificationof the stones deteriorates the heating properties.Ferrous water leaves a rusty layer on the surface ofthe heater and elements, and causes corrosion.The use of humous, chlorinated water and seawateris forbidden.Only special perfumes designed for sauna water maybe used. Follow the instructions given on the package.Figure 3.Place of the reset button4.
1.4.2. Temperature and Humidity of the<strong>Sauna</strong> RoomBoth thermometers and hygrometers suitable for usein a sauna are available. As the effect of steam onpeople varies, it is impossible to give an exact,universally applicable bathing temperature orpercentage of moisture. The bather’s own comfortis the best guide.The sauna room should be equipped with properventilation to guarantee that the air is rich in oxygenand easy to breathe. See item 2.4. ”Ventilation ofthe <strong>Sauna</strong> Room”.Bathing in a sauna is considered a refreshingexperience and good for the health. Bathing cleansand warms your body, relaxes the muscles, soothesand alleviates oppression. As a quiet place, the saunaoffers the opportunity to meditate.1.5. Instructions for Bathing• Begin by washing yourself; for example,by taking a shower.• Stay in the sauna for as long as you feelcomfortable. See item "1.6. Warnings".• According to established sauna conventions,you must not disturb other bathers by speakingin a loud voice.• Do not force other bathers from the sauna bythrowing excessive amounts of wateron the rocks.• Forget all your troubles and relax.• Cool your skin down as necessary.• If you are in good health, you can have a swimif a swimming place or pool is available.• Wash yourself properly after bathing. Have adrink of fresh water or a soft drink to bring yourfluid balance back to normal.• Rest for a while and let your pulse go back tonormal before dressing.1.6. Warnings• Sea air and a humid climate may corrode themetal surfaces of the heater.• Do not hang clothes to dry in the sauna, as thismay cause a risk of fire. Excessive moisturecontent may also cause damage to the electricalequipment.• Do not place any combustible material over thesauna heater (towels, bathing suits, woodenbucket or dipper)!• Keep away from the heater when it is hot.The rocks and outer surface of the heater mayburn your skin.• Do not throw too much water on the rocks.The evaporating water is boiling hot.• Use only clean tap water on the rocks –Do not use pool or spa water, as chlorine gascan be produced and the heating elements canbe damaged!• Do not let young, handicapped or ill people bathein the sauna on their own.• Consult your doctor about any health-relatedlimitations to bathing.• Parents should keep children away from thehot heater.• Consult your child welfare clinic about takinglittle babies to the sauna.- age?- temperature of the sauna?- time spent in the warm sauna?• Be very careful when moving in the sauna,as the platform and floors may be slippery.• Never go to a hot sauna if you have taken alcohol,strong medicines or narcotics.• Do not exceed 30 min. in the sauna at one time,as excessive exposure can be harmful to health.The sauna should not be used as anendurance test!• Hyperthermia occurs when the internaltemperature of the body reaches a level severaldegrees above the normal body temperature of98,6°F (37°C). The symptoms of hyperthermiainclude an increase in the internal temperatureof the body, dizziness, lethargy, drowsiness,and fainting.• The effects of hyperthermia include:a) Failure to perceive heatb) Failure to recognize the need to exit the roomc) Unawareness of impending hazardd) Fetal damage in pregnant womene) physical inability to exit the roomf) Unconsiciousness1.7. Warning signsWarning signs – are furnished with <strong>Sauna</strong> heater. Themetal "CAUTION" sign should be fastened to wall,close to heater, in a visible place. The metal"WARNING" sign should be fastened outside, to the<strong>Sauna</strong> room door.1.8. MalfunctionsIf the heater does not heat, check the followingpoints:• the electricity has been switched on• the timer has been switched to a section wherethe heater should be heated (0–1).• the thermostat shows a higher figure than thetemperature of the sauna.• the fuses to the heater are in good condition.(Note. The stud does not always come out whenthe fuse has blown).• the temperature guard has not gone off. Thetimer sound is heard but the elements are notheated. Reset the guard to its functioningposition by pressing it so that a clicking soundis heard. See item 1.3.2., ”Thermostat" and1.3.3. "Overheating limiter".5.
2. THE SAUNA ROOM2.1. Insulation and Wall Materials of the<strong>Sauna</strong> RoomIn an electrically heated sauna, all the massive wallsurfaces which store plenty of heat (such as bricks,glass blocks, plaster etc.), must be sufficiently insulatedin order to keep the heater output at a reasonably lowlevel.A wall and ceiling construction can be considered tohave efficient thermal insulation if:• the thickness of carefully fitted insulating woolinside the house is 4" (100 mm) minimum2" (50 mm).• the moisture protection consists of e.g.aluminium paper with tightly taped edges.The paper must be fitted so that the glossy sideis towards the inside of the sauna.• there is a 3/8" (10 mm) vent gap between themoisture protection and panel boards(recommendation).• the inside is covered by 1/2" – 5/8" (12–16 mm)thick panelling.• there is a vent gap of a few millimetres at thetop of the wall covering at the edge of the ceilingpanelling.When aiming at a reasonable heater output, it may beadvisable to lower the ceiling of the sauna (normally 6' –10 11/16" (2100 mm). See figure 4. As a result, thevolume of the sauna is decreased, and a smaller heateroutput may be sufficient. The ceiling can be lowered sothat the ceiling joists are fixed at a suitable height. Thespaces between the joists are insulated (minimuminsulation 4" (100 mm) and surfaced as described above.Because heat goes upwards, a maximum distance of 47"(1200 mm) is recommended between the bench and ceiling.NOTE! Consult fire-extinguishing authorities to find outwhich part of the fireproof wall may be insulated.NOTE! The protection of the walls or ceiling with heatprotection, such as mineral board fitted directly on thewall or ceiling, may cause the temperature of the walland ceiling materials to rise dangerously high.2.1.1. Room construction – general informationFRAMING2" x 4" Douglas Fir, 16" o.c.CEILING HEIGHT See figure 4.INSULATION R11 Fiberglas with foil back inwalls and ceiling, foil facinginto room.DRYWALL See local codes. Is not requiredin most residences. See localcodes for commercial. If drywall is used, apply 1" x 2"nailers so that wall and ceilingboards can be attached to solidwood.PANELING Use kiln-dried, clear, T & Gsoftwood such as CaliforniaRedwood, Western Red Cedar,Alaska yellow Cedar, with moisturecontent not exceeding 11%.BENCHESUse matching wood of verticalgrain with 2"x 2" tops –1/2"spacing – and 2"x 4" facing,fastening from bottom to preventburning of bathers.HEATERGUARDRAIL Use matching softwood of1" x 2" or 2" x 2".DOORMust open out and should nothave a lock. Size – 2' 0"x 6'8"with fir rails and double sealedtempered glass.ROOM LIGHTShould be a vapor proof,wall-mounted type, withrough-in box mounted flushwith inside paneling. It shouldmount 6" (150 mm) from ceiling,not directly over the <strong>Sauna</strong>heater, and not over upperbenches; light bulb should notexceed 75 watts.Note! Receptacles OR PLUGS are not allowed in a <strong>Sauna</strong>room. If a speaker is installed in a <strong>Sauna</strong> room, it shouldnot be installed higher than 3' from floor, away from the<strong>Sauna</strong> heater (consult manufacturer for ratings).Figure 4.<strong>Sauna</strong> room6.
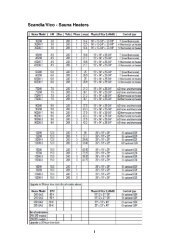
2.2. <strong>Sauna</strong> Room FloorDue to a large variation in temperature, the saunarocks disintegrate in use.Small pieces of rock are washed down on thesauna room floor along with the water thrown onthe stones. Hot pieces of rock may damage plasticfloor coverings installed underneath and near theheater.A light-cocoured joint grout, used for a tiled floor,may absorb impurities from the rocks and water(e.g iron content).To prevent aesthetic damage (due to thereasons presented above) only dark joint groutsand floor coverings made of rock materials shouldbe used underneat and near the heater.2.3. Heater OutputWhen the walls and ceiling are covered withpanels, and the insulation behind the panels issufficient to prevent thermal flow into the wallmaterials, the heater output is defined accordingto the cubic volume of the sauna. See table 1.If the sauna has visible uninsulated wallsurfaces, such as walls covered with brick, glassblock, concrete or tile, each 10 square feet (ca1m²) of said wall surface causes the cubicvolume of the sauna to increase by 42 Cu.Ft.(1.2 m 3 ). The heater output is then selectedaccording to the values given in the table.Because log walls are heated slowly, the cubicvolume of a log sauna should be multiplied by1.5, and the heater output should then be selectedon the basis of this information.2.4. Ventilation of the <strong>Sauna</strong> RoomSufficient ventilation is extremely important forthe sauna. The air in the sauna room should bechanged six times per hour. The fresh air pipeshould come directly from outside.Inlet ventilation openings shall be located atthe bottom of the wall, as close to the floorlevel as possible.Outlet ventilation openings shall be locatedat the top of the wall, as close to the ceiling asbossible, and shall comply with the minimumsize requirements for inlet ventilations openings.See fig. 4.2.5. Hygienic Conditions of the<strong>Sauna</strong> RoomGood hygienic standards of the sauna roomwill make bathing a pleasant experience.The use of sauna seat towels is recommendedto prevent sweat from flowing onto theplatforms. The towels should be washed aftereach use. Separate towels should be providedfor guests.It is advisable to vacuum or sweep the floorof the sauna room in connection withcleaning. In addition, the floor may be wipedwith a damp cloth.The sauna room should be thoroughly washedat least every six months. Brush the walls,platforms and floor by using a scrubbing-brushand sauna cleanser.Wipe dust and dirt from the heater with adamp cloth.Figure 5.3. INSTRUCTIONS FOR INSTALLATION3.1. Prior to InstallationPrior to installing the heater, study the instructionsfor installation, as well as checking the following points:• Is the output and type of the heater suitable forthe sauna room?The cubic volumes given in table 1 should befollowed.• Are there a sufficient number of high qualitysauna rocks?• Is the supply voltage suitable for the heater?• The location of the heater fulfils the minimumrequirements concerning safety distances givenin fig. 5 and table 1.It is absolutely necessary to ensure that the installationis carried out according to these values.Neglecting them can cause a risk of fire.Only one electrical heater may be installed in the saunaroom.HEATERinch m mWidth 17 11/16 <strong>45</strong>0Depth 11 13/16 300Height 24 11/16 650MODEL kW<strong>KV</strong>-<strong>45</strong><strong>KV</strong>-<strong>60</strong><strong>KV</strong>-<strong>80</strong>4,56,08,0Min. heightinchmm74 13/161900SAUNA ROOMTable 1. Installation details of a <strong>KV</strong> heater. See fig. 4and item 2.3. "Heater output"HeaterModel<strong>KV</strong>-<strong>45</strong><strong>KV</strong>-<strong>60</strong><strong>KV</strong>-<strong>80</strong>Min. distances to combustible materialsFloor areaMin.161,5282,6403,7Sq.Ft.m²Max.333,1<strong>45</strong>4,2676,3VolumeMin.105317552<strong>45</strong>7Cu.Ft.m³Max.21062<strong>80</strong>842012A min.inch1 3/81 15/163 15/16 mm3550100B. min.inch mm3 1/8 <strong>80</strong>4 3/4 1205 7/8 1507.
3.2. Fastening the Heater on a Wall1. Fasten the wall-mounting rack on the wall by usingthe screws which come with the rack. Observe theminimum safety distances given in table 1 and fig. 5.The fastening of the mounting rack is shown in figure 6.NOTE! There should be a support, e.g. a board, behindthe panel, so that the fastening screws can be screwedinto a thicker wooden material than the panel. If thereare no boards behind the panel, the boards can also befastened on the panel. See figure 4.2. Lift the heater onto the rack on the wall so that theends of the fastening bars go into the holes in thebottom of the heater and the connecting box switchesare easily accessible.3. Fasten the upper part of the heater to thewallmounting rack by using the fastening clamp.4. The steam distributor must always be fastened onthe wall side of the heater. To turn the distributor,loosen the fastening screws and then turn it. Seefigure 9.Model D min D* mininch inch<strong>KV</strong>-<strong>45</strong> 4 5/16<strong>KV</strong>-<strong>60</strong> 4 15/16 7 11/16<strong>KV</strong>-<strong>80</strong> 4 7/8Model D min D* minmm mm<strong>KV</strong>-<strong>45</strong> 110<strong>KV</strong>-<strong>60</strong> 125 195<strong>KV</strong>-<strong>80</strong> 175D* Connection box againstthe wall3.3. Installation capillary tubing and bulbBefore hooking up electrical wires to junction boxof heater, remove capillary tubing and bulb fromjunction box and bring up wall to left or right side ofheater. Cover tubing with wooden molding provided,coil up excess tubing, and place under heater closeto floor.Be sure to cover thermostat bulb with protectivemetal cover by threading bulb through holes in cover,and fasten bulb cover to wall with screws provided.Also, take care when nailing protective wood stripsover capillary tubing, so that nails do not puncturetubing. If punctured, entire thermostat must be replaced.See figure 7.3.4. Safety RailingIf a safety railing is built around the heater, the minimumdistances given in fig. 8 must be observed.Figure 6.Figure 8.Location of the mountingrack of the heaterSafety railing of the heaterFigure 9.Connections and partsof the heaterFigure 7.Installation of the thermostat sensor8.
3.5. Electrical ConnectionsThe heater may only be connected to the electricalnetwork in accordance with the current regulations byan authorised, professional electrician.Refer to the chart in table 2 to determine the wiresize and circuit protection required. The complete saunasystem should be properly grounded as per NEC or asrequired by local codes. A grounding terminal is providedin the wiring compartment of each heater, complatethe wiring according to the appropriate wiring figure 10.See table 1 for required clearances. Any wiring withininternal <strong>Sauna</strong> walls must be rated for 90°C (194°F)and copper wire must be used. Run wire through sealtight flex conduit from wall to heater and connect tojunction box.Note! If connection to heater will be made at a latertime, bring flex into <strong>Sauna</strong> room 4–6" (100–150 mm)from floor, and leave 3' (900 mm) of flex for hookup(can be cut to right lenght later).Further instructions concerning exceptional installationscan be obtained from local electrical authorities.3.6. Electric heater insulation resistanceWhen performing the final inspection of the electricalinstallations, a “leakage” may be detected whenmeasuring the heater’s insulation resistance. Thereason for this is that the insulating material of theheating resistors has absorbed moisture from the air(storage transport). After operating the heater for afew times, the moisture will be removed from theresistors.Note! A ground fault interrupter (GFI) shoud not beinstalled in and does not belong in a <strong>Sauna</strong>.3.7. Testing of <strong>Sauna</strong> heaterBefore testing heater, fill rock cavity with igneous stonesprovided with heater and fasten rock guard at top ofheater. See item 1.1." Piling of the <strong>Sauna</strong> rocks".1. After <strong>Sauna</strong> heater has been properly wired, accordingto appropriate wiring diagram and local codes, turn <strong>Sauna</strong>breaker on in the main breaker panel. (Note! Electricianmust label "<strong>Sauna</strong>" breaker.)2. Turn thermostatic (heat) control to on position (this islocated on your heater). Set timer to 10 or 15 minutes.3. Within 5 minutes, you should be able to feel heat fromheater elements when holding your hand over heater.4. if <strong>Sauna</strong> does not heat, refer to troubleshootinginformation.5. It is normal for smoke to appear during the firstheating, as protective element coating needs to burnoff. TURN SAUNA ON FOR 1 HOURBEFORE USING THE FIRST TIME,TO ELIMINATE SMOKING.Figure 10. Electrical connections of the heaters<strong>KV</strong>-<strong>45</strong>, <strong>KV</strong>-<strong>60</strong> and <strong>KV</strong>-<strong>80</strong>240V 1 phase <strong>KV</strong>- sauna heater with built in controlsHeater Input Voltage Phase Amperage Min. 90°C Copper supplyModel kW wire A.W.G. No.<strong>KV</strong>-<strong>45</strong>-1 4,5 240 1 18,8 10<strong>KV</strong>-<strong>60</strong>-1 6,0 240 1 25,0 10<strong>KV</strong>-<strong>80</strong>-1 8,0 240 1 33,3 8208V 3 phase <strong>KV</strong>- sauna heater with built in controlsHeater Input Voltage Phase Amperage Min. 90°C Copper supplyModel kW wire A.W.G. No.<strong>KV</strong>-<strong>45</strong>-3 4,5 208 3 12,5 14<strong>KV</strong>-<strong>60</strong>-3 6,0 208 3 16,7 12<strong>KV</strong>-<strong>80</strong>-3 8,0 208 3 22,2 10Tables 2.Supply wires.9.
3.8. TroubleshootingA. If sauna does not operate after initial installationand wiring:1. Check breaker to be sure that it is on.Also, breaker should be correct size.2. Make sure that a neutral wire has beenincluded3. Check circuit breaker in contactor to be surethat it has not been shorted out.4. Be sure that thermostat and timer are both inon position.5. Be sure that timer winds down. If timer hasbeen shorted out, heater will not operate.B. If sauna has been in operation, but heater ceasesto operate:1. Check breaker to make sure it is on.2. Check timer to see if it winds down.3. Check high limit reset button in heater (resetis under the heater to see if it has been release).4. Call your electrician or service person forfurther help.C. If <strong>Sauna</strong> heater operates, but room does not comeup to <strong>Sauna</strong> temperature (1<strong>60</strong>–185°F (70 – 85°C)normal <strong>Sauna</strong> temperature):1. You must allow at least 30 minutes for <strong>Sauna</strong>heat-up time.2. Is <strong>Sauna</strong> thermometer located 6” (150 mm)from ceiling, and is it above or close to <strong>Sauna</strong>heater? (This is proper location for <strong>Sauna</strong>temperature reading.) Thermometer readingsvary with room heights and location. Eg. 1<strong>80</strong>°F(82°C) above <strong>Sauna</strong> heater = 165°F (74°C)on opposite wall = 140°F (<strong>60</strong>°C) on upperbench level = 120°F (49°C) on lower benchlevel 100°F (38°C)at floor level.3. Check for proper wire size, amp size andproper wiring (according to diagrams andinformation) also necessary copper wiring.4. Check for placement of stones to make surethey are loosely spaced around elements, toinsure good air flow. Stones packed too tightlywill restrict air flow and reduce heating capacity.5. Check for heat loss (around or under door,around ceiling light or fan – we do not recommendceiling light and a fan does not belong in the<strong>Sauna</strong>.6. Is room properly insulated?7. Is ceiling higher than in figure 4?8. After checking all of the above, remove rocksand check heater elements for holes or burnedareas. (Only if heater has been in use for sometime.)3.9. Caution! Electrician or service person!1. Before servicing heater, control, or contactor,turn power off at breaker!2. Open junction box to make sure wires aretightly secured with no loose connections. Heaterwire and all connecting wires should be copper.3. Check for burned spots or short in wiring oftimer or thermostat.3.10. Maintenance instructions1. Use only clean water on <strong>Sauna</strong> stones. Donot use spa or pool water as it will destroy yourheater.2. Clean water should always be used in <strong>Sauna</strong>buckets and water should be dumped out afterevery use. Scour buckets and dippersoccasionally when film collects from usage. Useplastic bucket liner in bucket to prevent waterleakage.3. Scrub benches with a soft brush, using soapand water or a mild disinfectant, when needed –about once a week in commercial <strong>Sauna</strong>s, ordepending upon sauna usage. For sanitation,each bather should sit or lie on a towel (this willprolong bench life).4. Remove Super Dek and wash waterproof floor withdisinfectant (e.g. Pine Sol) about once a week oras often as needed. Hose off Super Dek to clean.5. To maintain beautiful appearance of <strong>Sauna</strong>heater, remove water stains by wiping a dampcloth occasionally.6. Harvia <strong>Sauna</strong> Heaters require no specialmaintenance when properly installed by a qualifiedelectrical contractor. After 1 years of usage, therocks may need replacing if they have crumbled orpowered.7. Harvia <strong>Sauna</strong> strongly recommends a floor that canbe easily cleaned (concrete, ceramic tile, or apoured type of flooring). When this is provided, the<strong>Sauna</strong> can be easily cleaned and kept in a sanitarycondition with little effort. A carpet is NOTrecommended for a <strong>Sauna</strong>! A carpet becomes aperfect breeding ground for bacteria in the moistconditions of a <strong>Sauna</strong>; and a carpetpromotes the spread of foot diseases such asathlete‘s foot. For same reasons, woodenduckboard should not be used for flooring.8. In new construction, a floor drain should alsobe provided, especially in commersial <strong>Sauna</strong>s forsanitary cleaning and maintenance.9. Seal wood around glass in door – inside andoutside – with Thompson‘s Water Seal to preventwarpage.10. When <strong>Sauna</strong> wood becomes stained fromperspiration, the wood may lightly sanded withfine sandpaper to restore beautiful appearance.We do not recommend stains or sealers as toxicvapors may appear when heated. However, 2coats of Thompson‘s Water Seal may be usedon the wood benches in a commersial <strong>Sauna</strong>,so that the wood may be more easily cleanedand kept sanitary – the wood will not absorbperspiration.11. The <strong>Sauna</strong> room will heat faster if the highervent is kept in a closed position when heating.The lower vent may always be kept in an openposition.12. Required warning signs should be postedaccording to the instructions.10.
3.11. GuaranteeThis HARVIA SAUNA heater is guaranteed for one yeardate of purchase, and includes all heater parts suchas heating elements, controls, contactors, etc.This guarantee covers faults in manufacture andmaterial only, and includes the exchange of new partssupplied by the manufacturer or manufacturer‘s agent,after the faulty parts have been returned to same. Thereplacement of parts under warranty does not extendthe warranty period beyond the original one year.The guarantee does not cover defects caused bynormal wear and tear, defects caused by improperinstallation, poor maintenance, or failure to follow themanufacturer‘s instructions for installation, use andcare, or alterations made to the <strong>Sauna</strong> product.This guarantee is void if the heater is usedimproperly. Pool or spa water should not be pouredover the <strong>Sauna</strong> stones, as chemicals are harmful tothe heater; the <strong>Sauna</strong> room must be heated for at least30 minutes before water is poured over the stones; onlyone or two dippers ful of water should be poured overthe hot stones at one time. This guarantee will be void ifa shower has been installed in the <strong>Sauna</strong> room.The guarantee does not cover delivery costs of thefaulty part or costs of the person carrying out the repairin the field. If the <strong>Sauna</strong> heater is returned to themanufacturer or manufacturer‘s agent within five yearsafter date of purchase, the agent will provide free laborfor repair, but will charge for parts if date of purchase ispast one year.This guarantee will be void if installation and wiring isnot carried out by a certified electrician or authorizedand qualified service representative, who must sign below.This guarantee will be void if information below is notfilled out and returned within 15 days of purchase, and itapplies only to original installation of product and tooriginal purchaser.SAUNA HEATERMODEL NUMBER____________________________________________________________________________________________DATE OF PURCHASEORIGINAL OWNERADDRESS________________________________________________________________________________________________________________________________________________________________________________________PURCHASED FROM____________________________________________________________________________________________ELECTRICAL CONTRACTORMUST SIGN HERE______________________________________________DATE OF ELECTRICALWIRING & HOOKUP______________________________________________11.
4. SPARE PARTS0. Heating elements 240V1. Heating elements 208V ZSV-2L2. Overheating limiter ZSV-3303. Contactor ZSK-7784. Thermostat ZSK-7625. Timer ZSK-7666. Supply terminal block ZSK-7797. Fitting ZSK-5558. Axlelock ø6 ZSA5<strong>80</strong>9. Knob + Cap ZSA-6<strong>60</strong>10. Control box plastic part ZSA-4<strong>80</strong>11. Scale plate ZSJ-312. AV Lamp ZSA-53013. Control compartment cover ZSV-15014. Mounting rakk ZSV-10115. Fastening clamp ZSV-12016. Steam distributor ZSV-<strong>60</strong>17. Rock guard ZSV-32018. Bulb cover ZSV-2F12.