The Juice & Blend - Breville
The Juice & Blend - Breville
The Juice & Blend - Breville
Create successful ePaper yourself
Turn your PDF publications into a flip-book with our unique Google optimized e-Paper software.
OPERATING THE BLENDER<br />
Operating the BLENDER<br />
1. Ensure the <strong>Blend</strong>er is correctly<br />
assembled with the Safety Locking<br />
Arm securely locked into the vertical<br />
position.<br />
NOTE<br />
As a safety precaution, the <strong>Blend</strong>er<br />
will not operate if the Safety Locking<br />
Arm is not securely locked into the<br />
vertical position.<br />
3. Place the Lid firmly into position on top<br />
of the <strong>Blend</strong>er Jug and insert the Inner<br />
Lid by turning clockwise until securely<br />
locked into position.<br />
NOTE<br />
<strong>The</strong> Lid features a patented ringpull<br />
removal. <strong>The</strong> ring-pull design<br />
allows the Lid to be easily removed<br />
with a simple leverage action, yet fit<br />
tightly onto the <strong>Blend</strong>er Jug to avoid<br />
displacement during operation.<br />
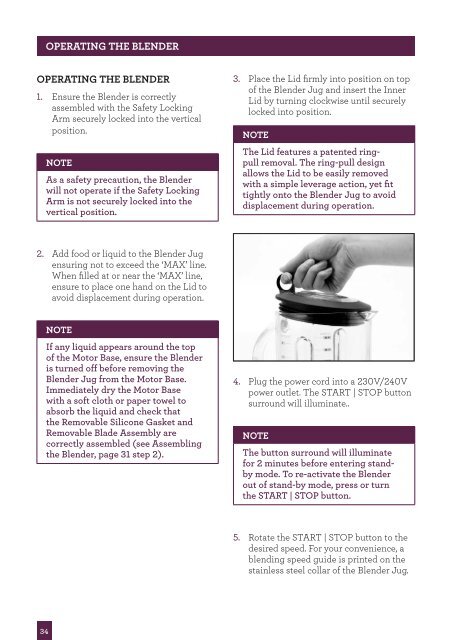
2. Add food or liquid to the <strong>Blend</strong>er Jug<br />
ensuring not to exceed the ‘MAX’ line.<br />
When filled at or near the ‘MAX’ line,<br />
ensure to place one hand on the Lid to<br />
avoid displacement during operation.<br />
NOTE<br />
If any liquid appears around the top<br />
of the Motor Base, ensure the <strong>Blend</strong>er<br />
is turned off before removing the<br />
<strong>Blend</strong>er Jug from the Motor Base.<br />
Immediately dry the Motor Base<br />
with a soft cloth or paper towel to<br />
absorb the liquid and check that<br />
the Removable Silicone Gasket and<br />
Removable Blade Assembly are<br />
correctly assembled (see Assembling<br />
the <strong>Blend</strong>er, page 31 step 2).<br />
4. Plug the power cord into a 230V/240V<br />
power outlet. <strong>The</strong> START | STOP button<br />
surround will illuminate..<br />
NOTE<br />
<strong>The</strong> button surround will illuminate<br />
for 2 minutes before entering standby<br />
mode. To re-activate the <strong>Blend</strong>er<br />
out of stand-by mode, press or turn<br />
the START | STOP button.<br />
5. Rotate the START | STOP button to the<br />
desired speed. For your convenience, a<br />
blending speed guide is printed on the<br />
stainless steel collar of the <strong>Blend</strong>er Jug.<br />
34


