DigiKeyer II and WSJT Setup - microHAM
DigiKeyer II and WSJT Setup - microHAM
DigiKeyer II and WSJT Setup - microHAM

You also want an ePaper? Increase the reach of your titles
YUMPU automatically turns print PDFs into web optimized ePapers that Google loves.
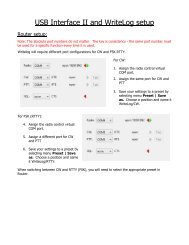
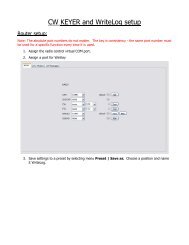
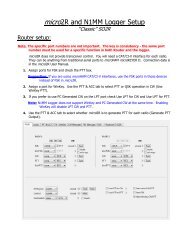
Router setup:<br />
<strong>DigiKeyer</strong> <strong>II</strong> <strong>and</strong> <strong>WSJT</strong> <strong>Setup</strong><br />
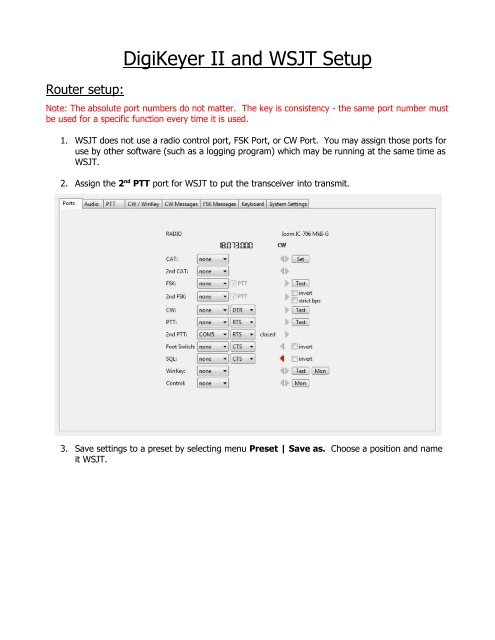
Note: The absolute port numbers do not matter. The key is consistency - the same port number must<br />
be used for a specific function every time it is used.<br />
1. <strong>WSJT</strong> does not use a radio control port, FSK Port, or CW Port. You may assign those ports for<br />
use by other software (such as a logging program) which may be running at the same time as<br />
<strong>WSJT</strong>.<br />
2. Assign the 2 nd PTT port for <strong>WSJT</strong> to put the transceiver into transmit.<br />
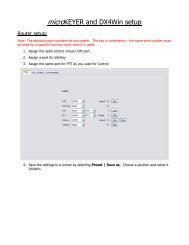
3. Save settings to a preset by selecting menu Preset | Save as. Choose a position <strong>and</strong> name<br />
it <strong>WSJT</strong>.
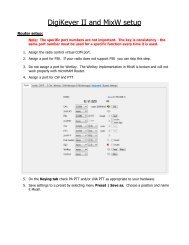
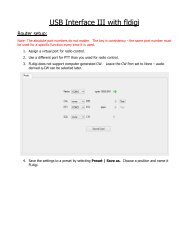
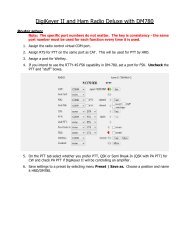
<strong>WSJT</strong> setup:<br />
1. Select the <strong>WSJT</strong> Console Window <strong>and</strong> make note of the “Audio Device” numbers for “Line<br />
(<strong>microHAM</strong> CODEC)” <strong>and</strong> “Headset Earphone (<strong>microHAM</strong> CODEC)”.<br />
2. Select <strong>Setup</strong> | Options or press F2 to open the <strong>WSJT</strong> Options dialog.<br />
3. Set Audio In: <strong>and</strong> Audio Out: to the audio device numbers from the Console screen.<br />
4. Set PTT Port to the virtual serial port you assigned for 2 nd PTT in Router.