Reference Manual - LYNX Technik AG
Reference Manual - LYNX Technik AG
Reference Manual - LYNX Technik AG

Create successful ePaper yourself
Turn your PDF publications into a flip-book with our unique Google optimized e-Paper software.
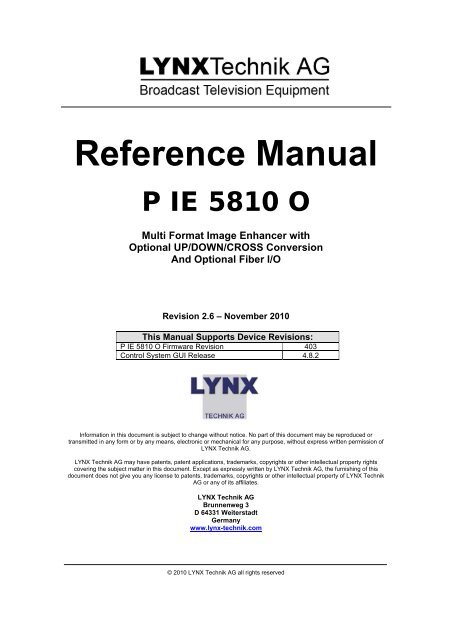
<strong>Reference</strong> <strong>Manual</strong><br />
P IE 5810 O<br />
Multi Format Image Enhancer with<br />
Optional UP/DOWN/CROSS Conversion<br />
And Optional Fiber I/O<br />
Revision 2.6 – November 2010<br />
This <strong>Manual</strong> Supports Device Revisions:<br />
P IE 5810 O Firmware Revision 403<br />
Control System GUI Release 4.8.2<br />
Information in this document is subject to change without notice. No part of this document may be reproduced or<br />
transmitted in any form or by any means, electronic or mechanical for any purpose, without express written permission of<br />
<strong>LYNX</strong> <strong>Technik</strong> <strong>AG</strong>.<br />
<strong>LYNX</strong> <strong>Technik</strong> <strong>AG</strong> may have patents, patent applications, trademarks, copyrights or other intellectual property rights<br />
covering the subject matter in this document. Except as expressly written by <strong>LYNX</strong> <strong>Technik</strong> <strong>AG</strong>, the furnishing of this<br />
document does not give you any license to patents, trademarks, copyrights or other intellectual property of <strong>LYNX</strong> <strong>Technik</strong><br />
<strong>AG</strong> or any of its affiliates.<br />
<strong>LYNX</strong> <strong>Technik</strong> <strong>AG</strong><br />
Brunnenweg 3<br />
D 64331 Weiterstadt<br />
Germany<br />
www.lynx-technik.com<br />
© 2010 <strong>LYNX</strong> <strong>Technik</strong> <strong>AG</strong> all rights reserved
Contents<br />
Page 2 of 52<br />
P IE 5810 <strong>Reference</strong> <strong>Manual</strong>. Rev 2.6<br />
Contents ......................................................................................................................................... 2<br />
Warranty ......................................................................................................................................... 5<br />
Regulatory information ................................................................................................................. 6<br />
Europe ......................................................................................................................................... 6<br />
Declaration of Conformity ....................................................................................................... 6<br />
USA ............................................................................................................................................. 6<br />
FCC 47 Part 15 ....................................................................................................................... 6<br />
Getting Started ............................................................................................................................... 7<br />
Packaging .................................................................................................................................... 7<br />
ESD Warning ............................................................................................................................... 7<br />
Preventing ESD Damage ........................................................................................................ 7<br />
Product Description ...................................................................................................................... 8<br />
Input Video Formats .................................................................................................................... 9<br />
Output Video Formats ................................................................................................................. 9<br />
Audio Processing ...................................................................................................................... 10<br />
Video Processing ...................................................................................................................... 10<br />
Proc Amp Functions .............................................................................................................. 10<br />
Aperture Correction ............................................................................................................... 10<br />
Test Patterns ......................................................................................................................... 10<br />
Programmable Video Output Delay ...................................................................................... 10<br />
Fixed Processing Delays ...................................................................................................... 11<br />
GPI Function ............................................................................................................................. 13<br />
Freeze input with GPI ........................................................................................................... 13<br />
User Presets – GPI Switch ................................................................................................... 13<br />
Functional Diagram ................................................................................................................... 14<br />
Module Layout ............................................................................................................................. 15<br />
Connections .............................................................................................................................. 16<br />
Installation .................................................................................................................................... 17<br />
Firmware Options ........................................................................................................................ 18<br />
Aspect Ratio Conversion (optional: OC-5810-ARC) ................................................................. 18<br />
Conversion from 16:9 to 4:3 Aspect Ratios .......................................................................... 18<br />
Conversions from 4:3 to 16:9 Aspect Ratio .......................................................................... 19<br />
ARC Image Size and Positioning .......................................................................................... 19<br />
Programmable Video Delay (optional: OC-5810-VDLY) ........................................................... 19<br />
Up/Down/Cross Conv. (optional: OC-5810-UPXD) ................................................................... 20<br />
Down conversion .................................................................................................................. 20<br />
4:3 Letterbox ..................................................................................................................... 20<br />
4:3 Center Cut .................................................................................................................. 20<br />
4:3 Stretch to Fill ............................................................................................................... 20<br />
Up Conversion ...................................................................................................................... 21<br />
16:9 Center Cut ................................................................................................................ 21<br />
16:9 PillarBox.................................................................................................................... 21<br />
16:9 Stretch to Fill ............................................................................................................. 21
Page 3 of 52<br />
P IE 5810 <strong>Reference</strong> <strong>Manual</strong>. Rev 2.6<br />
Cross Conversion ................................................................................................................. 21<br />
Image size and Positioning ................................................................................................... 21<br />
Color Space Conversion ....................................................................................................... 22<br />
Noise Reduction (optional: OC-5810-NR) ................................................................................. 22<br />
Color Correction (optional: OC-5810-COCO) ........................................................................... 23<br />
3GBit/s processing (optional: OC-5810-3G) ............................................................................. 23<br />
Settings and Control ................................................................................................................... 24<br />
Multi Function Switch ................................................................................................................ 24<br />
Using the Local Display Menus ................................................................................................. 24<br />
Menu Structure .......................................................................................................................... 25<br />
LED Status Indicators ................................................................................................................. 26<br />
SDI in Status LED 1 .................................................................................................................. 26<br />
ALARM LED .............................................................................................................................. 26<br />
Control System GUI ..................................................................................................................... 27<br />
Main Tab ................................................................................................................................... 28<br />
Signal Routing ....................................................................................................................... 28<br />
Video Proc Tab .......................................................................................................................... 29<br />
DVITC Input Line Selection................................................................................................... 29<br />
Teletext Decoder ................................................................................................................... 29<br />
High Quality Up and Cross Conversion (OC-5810_XUPD) and Aspect Ration Conversion (OC-<br />
5810_ARC) ................................................................................................................................ 30<br />
SDTV Aspect Ratio Converter Mode .................................................................................... 30<br />
Output Format ....................................................................................................................... 31<br />
Conversion Mode .................................................................................................................. 31<br />
Input Cropping ...................................................................................................................... 31<br />
Output Insertion .................................................................................................................... 31<br />
Control Mode ........................................................................................................................ 32<br />
Inserted Format Description .................................................................................................. 32<br />
Advanced Metadata Settings ................................................................................................ 33<br />
Closed Captions: .............................................................................................................. 33<br />
Time Code: ....................................................................................................................... 34<br />
Teletext ............................................................................................................................. 36<br />
Noise Reduction Tab ................................................................................................................. 39<br />
General Noise Reduction ...................................................................................................... 39<br />
Block Artifact Reduction ........................................................................................................ 39<br />
Mosquito Noise Reduction .................................................................................................... 39<br />
Detail Enhancement (Sharpness and Texture)..................................................................... 39<br />
Color Correction Tab ................................................................................................................. 41<br />
Mode Gain & Offset .............................................................................................................. 41<br />
Mode Peak & Black ............................................................................................................... 42<br />
Output Proc Tabs ...................................................................................................................... 43<br />
Aperture Correction ............................................................................................................... 43<br />
Clip CR/Cb Headroom .......................................................................................................... 44<br />
H and V Blanking .................................................................................................................. 44<br />
Video Output Delay Adjustment ............................................................................................ 44<br />
Settings ................................................................................................................................. 44<br />
Output if no input .............................................................................................................. 44<br />
Freeze Mode..................................................................................................................... 44
Page 4 of 52<br />
P IE 5810 <strong>Reference</strong> <strong>Manual</strong>. Rev 2.6<br />
Test Pattern Pre-select ..................................................................................................... 45<br />
Test Pattern Standard ...................................................................................................... 45<br />
Test Pattern Enable .......................................................................................................... 45<br />
Video Adjustments ............................................................................................................ 45<br />
User Presets Tab ...................................................................................................................... 46<br />
To save a preset ................................................................................................................... 46<br />
To load a saved preset ......................................................................................................... 46<br />
Setting GPI control of Preset selections ............................................................................... 47<br />
GPI Influence ........................................................................................................................ 47<br />
Options Tab ............................................................................................................................... 48<br />
Events Tab ................................................................................................................................ 49<br />
Log in GUI Function .............................................................................................................. 49<br />
Alarm Activation .................................................................................................................... 49<br />
SNMP Support ...................................................................................................................... 49<br />
Specifications .............................................................................................................................. 50<br />
Service .......................................................................................................................................... 52<br />
Parts List ................................................................................................................................... 52<br />
Technical Support ..................................................................................................................... 52<br />
Contact Information .................................................................................................................... 52
Warranty<br />
Page 5 of 52<br />
P IE 5810 <strong>Reference</strong> <strong>Manual</strong>. Rev 2.6<br />
<strong>LYNX</strong> <strong>Technik</strong> <strong>AG</strong> warrants that the product will be free from defects in materials<br />
and workmanship for a period of two (2) year from the date of shipment. If this<br />
product proves defective during the warranty period, <strong>LYNX</strong> <strong>Technik</strong> <strong>AG</strong> at its<br />
option will either repair the defective product without charge for parts and labor,<br />
or will provide a replacement in exchange for the defective product.<br />
In order to obtain service under this warranty, customer must notify <strong>LYNX</strong><br />
<strong>Technik</strong> of the defect before expiration of the warranty period and make suitable<br />
arrangements for the performance of service. Customer shall be responsible for<br />
packaging and shipping the defective product to the service center designated by<br />
<strong>LYNX</strong> <strong>Technik</strong>, with shipping charges prepaid. <strong>LYNX</strong> <strong>Technik</strong> shall pay for the<br />
return of the product to the customer if the shipment is within the country which<br />
the <strong>LYNX</strong> <strong>Technik</strong> service center is located. Customer shall be responsible for<br />
payment of all shipping charges, duties, taxes and any other charges for<br />
products returned to any other locations.<br />
This warranty shall not apply to any defect, failure, or damage caused by<br />
improper use or improper or inadequate maintenance and care. <strong>LYNX</strong> <strong>Technik</strong><br />
shall not be obligated to furnish service under this warranty a) to repair damage<br />
resulting from attempts by personnel other than <strong>LYNX</strong> <strong>Technik</strong> representatives to<br />
install, repair or service the product; b) to repair damage resulting from improper<br />
use or connection to incompatible equipment; c) to repair any damage or<br />
malfunction caused by the use of non <strong>LYNX</strong> <strong>Technik</strong> supplies; or d) to service a<br />
product which has been modified or integrated with other products when the<br />
effect of such modification or integration increases the time or difficulty servicing<br />
the product.<br />
THIS WARRANTY IS GIVEN BY <strong>LYNX</strong> TECHNIK WITH RESPECT TO THIS<br />
PRODUCT IN LIEU OF ANY OTHER WARRANTIES, EXPRESS OR IMPLIED.<br />
<strong>LYNX</strong> TECHNIK AND ITS VENDORS DISCLAIM ANY IMPLIED WARRANTIES<br />
OF MERCHANTABILITY OR FITNESS FOR A PARTICULAR PURPOSE. <strong>LYNX</strong><br />
TECHNIK`S RESPONISIBILITY TO REPAIR AND REPLACE DEFECTIVE<br />
PRODUCTS IS THE SOLE AND EXCLUSIVE REMEDY PROVIDED TO THE<br />
CUSTOMER FOR BREACH OF THIS WARRANTY. <strong>LYNX</strong> TECHNIK AND ITS<br />
VENDORS WILL NOT BE LIABLE FOR ANY INDIRECT, SPECIAL,<br />
INCIDENTIAL, OR CONSEQUENTIAL DAM<strong>AG</strong>ES IRRESPECTIVE OF<br />
WHETHER <strong>LYNX</strong> TECHNIK OR THE VENDOR HAS ADVANCE NOTICE OF<br />
THE POSSIBILITY OF SUCH DAM<strong>AG</strong>ES.
Regulatory information<br />
Europe<br />
Declaration of Conformity<br />
USA<br />
We <strong>LYNX</strong> <strong>Technik</strong> <strong>AG</strong><br />
Brunnenweg 3<br />
D-64331 Weiterstadt<br />
Germany<br />
Declare under our sole responsibility that the product<br />
FCC 47 Part 15<br />
TYPE: P IE 5810 O<br />
To which this declaration relates is in conformity with the following<br />
standards (environments E1-E3):<br />
EN 55103-1 /1996<br />
EN 55103-2 /1996<br />
EN 60950-1 /2006<br />
Following the provisions of 89/336/EEC and 73/23/EEC directives.<br />
Weiterstadt, November 2010<br />
Winfried Deckelmann<br />
Place and date of issue Legal Signature<br />
Page 6 of 52<br />
P IE 5810 <strong>Reference</strong> <strong>Manual</strong>. Rev 2.6<br />
This device complies with part 15 of the FCC Rules. Operation is subject to the following<br />
two conditions: (1) This device may not cause harmful interference, and (2) this device<br />
must accept any interference received, including interference that may cause undesired<br />
operation.<br />
Note: This equipment has been tested and found to comply with the limits for a Class A<br />
digital device, pursuant to the part 15 of the FCC Rules. These limits are designed to<br />
provide reasonable protection against harmful interference when the equipment is<br />
operated in a commercial environment. This equipment generates, uses, and can radiate<br />
radio frequency energy and, if not installed and used in accordance with the instruction<br />
manual, may cause harmful interference to radio communications. Operation of this<br />
equipment in a residential area is likely to cause harmful interference in which case the<br />
user will be required to correct the interference at his own expense.
Getting Started<br />
Page 7 of 52<br />
P IE 5810 <strong>Reference</strong> <strong>Manual</strong>. Rev 2.6<br />
Most CardModules are installed into the rack frames and system tested in the factory. If<br />
this is an upgrade part or service exchange item then the module is supplied in a padded<br />
cardboard carton which includes the CardModule, rear connection plate and mounting<br />
screws.<br />
Packaging<br />
The shipping carton and packaging materials provide protection for the module during<br />
transit. Please retain the shipping cartons in case subsequent shipping of the product<br />
becomes necessary. Do not remove the module from its protective static bag unless<br />
observing adequate ESD precautions. Please see below.<br />
ESD Warning<br />
This product is static sensitive. Please use caution and use preventative measures to<br />
prevent static discharge or damage could result to module.<br />
Preventing ESD Damage<br />
Electrostatic discharge (ESD) damage occurs when electronic assemblies or the<br />
components are improperly handled and can result in complete or intermittent failure.<br />
Do not handle the module unless using an ESD-preventative wrist strap and ensure that<br />
it makes good skin contact. Connect the strap to any solid grounding source such as any<br />
exposed metal on the rack chassis or any other unpainted metal surface.<br />
Caution<br />
Periodically check the resistance value of the antistatic strap. The measurement should<br />
be between 1 and 10 Megohms.
Product Description<br />
Page 8 of 52<br />
P IE 5810 <strong>Reference</strong> <strong>Manual</strong>. Rev 2.6<br />
The P IE 5810 O module is a high performance Multi-Format Image Enhancer with<br />
several options for video processing, a.o. Up-/Down- and Cross Conversion.<br />
The module supports SDTV, HDTV and 3GBit/s SDI applications.<br />
The P IE 5810 O module provides an optional Fiber input and output.<br />
Firmware options provide the ability to easily add additional options which includes:<br />
• 12 frames video delay (option code OC-5810-VDLY)<br />
• HQ Up/Down/Cross Conversion (option code OC-5810-UPXD)<br />
• SDTV Aspect Ratio Converter (option code OC-5810-ARC)<br />
• Advanced Noise Reduction (option code OC-5810-NR)<br />
• Color Correction (RGB Gain & Lift) (option code OC-5810-COCO)<br />
Firmware options can be added at any time with a license code. No hardware or<br />
Firmware modifications are required.<br />
The basic module has no options installed, without any option the module just performs<br />
basic video proc amp functions.
Input Video Formats<br />
Page 9 of 52<br />
P IE 5810 <strong>Reference</strong> <strong>Manual</strong>. Rev 2.6<br />
The module has one multi-format serial digital input with automatic input detection. The<br />
module will detect the following input standards and configure the input stage<br />
automatically for operation in the connected format.<br />
SDTV Formats HDTV Formats<br />
525 / 59.94Hz 1080i / 50Hz<br />
625 / 50Hz 1080i / 59.94Hz<br />
1080i / 60Hz<br />
1080p / 23.98Hz<br />
1080p / 24Hz<br />
1080p / 25Hz<br />
1080p / 29.97Hz<br />
1080p / 30Hz<br />
1080psf / 23.98Hz<br />
1080psf / 24Hz<br />
1080psf / 25Hz<br />
720p / 23.98Hz<br />
3GBit/s Formats 720p / 24Hz<br />
1080p / 50Hz 720p / 25Hz<br />
1080p / 59.94Hz 720p / 29.97Hz<br />
1080p / 60Hz 720p / 30Hz<br />
720p / 50Hz<br />
720p / 59.94Hz<br />
720p / 60Hz<br />
Output Video Formats<br />
The module provides four SDI outputs, user assignable in four sets of two outputs; these<br />
sets can be mapped independently to any of the two input channels. Supported output<br />
video formats are:<br />
SDTV Formats HDTV Formats<br />
525 / 59.94Hz 1080i / 50Hz<br />
625 / 50Hz 1080i / 59.94Hz<br />
1080i / 60Hz<br />
1080p / 23.98Hz<br />
1080p / 24Hz<br />
1080p / 25Hz<br />
1080p / 29.97Hz<br />
1080p / 30Hz<br />
1080psf / 23.98Hz<br />
1080psf / 24Hz<br />
1080psf / 25Hz<br />
720p / 23.98Hz<br />
3GBit/s Formats 720p / 24Hz<br />
1080p / 50Hz 720p / 25Hz<br />
1080p / 59.94Hz 720p / 29.97Hz<br />
1080p / 60Hz 720p / 30Hz<br />
720p / 50Hz<br />
720p / 59.94Hz<br />
720p / 60Hz<br />
The output format frequency (or frame rate) is determined by the frame rate of the input<br />
signal
Audio Processing<br />
Page 10 of 52<br />
P IE 5810 <strong>Reference</strong> <strong>Manual</strong>. Rev 2.6<br />
The module will de-embed the complete audio payload from the incoming SDI stream (4<br />
AES groups = 8 AES = 16 audio channels) and re-embed the audio with a matching<br />
delay, which compensates for the video delay in this module.<br />
Video Processing<br />
Proc Amp Functions<br />
Each of the two output channels has an associated video processing amp which provides<br />
user adjustable Gain / Saturation / Black Level and Hue using on screen sliders.<br />
Aperture Correction<br />
An adjustable horizontal aperture corrector is provided for each of the two output<br />
channels. This can be used to add (or remove) image sharpness as required.<br />
Note. When using the down converter the filtering process results in a very slight<br />
loss of high frequency information (which is normal), the aperture corrector can<br />
be used to compensate for this slight loss.<br />
Test Patterns<br />
Each of the two output channels has its own independent test pattern generator which<br />
provides a wide selection of test patterns which can be switched into each output.<br />
• Freeze Field 1<br />
• Freeze Field 2<br />
• Freeze Frame<br />
• Selected Test Pattern<br />
• Black<br />
Programmable Video Output Delay<br />
Each of the two SDI outputs has separate programmable video output delay which can<br />
be set (independently) between 0 and 3 frames (max). The adjustment is available in<br />
pixel, line and full frame increments.<br />
Note The Module (including the OC-5610-UPXD option, if installed) has fixed<br />
frame delays depending on the signal path and selected function (see below).<br />
The 0 > 3 frame user adjustment is additional delay relative to the fixed delays.<br />
Note With the option OC-5610-VDLY the manual delay range will be extended<br />
to 12 frames per output<br />
This adjustment will delay the SDI video output relative to the connected reference by the<br />
delay setting specified. (+ fixed delay)
Fixed Processing Delays<br />
Page 11 of 52<br />
P IE 5810 <strong>Reference</strong> <strong>Manual</strong>. Rev 2.6<br />
The module (including the OC-5610_VDLY, OC-5610_ARC and OC-5610_UPXD<br />
options, if installed) has fixed frame delays depending on the signal path and selected<br />
function - see below :<br />
Input Standard Output Standard Delay (ms) Delay (Frames - rounded to ½ frame)<br />
1080i 50 1080i 50 120 3<br />
1080i 50 720p 50 80 4<br />
1080i 50 1080p 25 120 3<br />
1080i 50 720p 25 120 3<br />
720p 50 1080i 50 80 2<br />
720p 50 720p 50 60 3<br />
720p 50 1080p 25 60 1.5<br />
720p 50 720p 25 80 2<br />
1080p 25 1080i 50 99 2.5<br />
1080p 25 720p 50 60 3<br />
1080p 25 1080p 25 120 3<br />
1080p 25 720p 25 120 3<br />
1080i 59.94 1080i 59.94 99 3<br />
1080i 59.94 720p 59.94 66 4<br />
1080i 59.94 1080p 29.97 99 3<br />
1080i 59.94 720p 29.97 99 3<br />
720p 59.94 1080i 59.94 66 2<br />
720p 59.94 720p 59.94 49 3<br />
720p 59.94 1080p 29.97 66 2<br />
720p 59.94 720p 29.97 66 2<br />
1080p 29.97 1080i 59.94 66 2<br />
1080p 29.97 720p 59.94 49 3<br />
1080p 29.97 1080p 29.97 99 3<br />
1080p 29.97 720p 29.97 99 3<br />
1080i 60 1080i 60 99 3<br />
1080i 60 720p 60 66 4<br />
1080i 60 1080p 30 99 3<br />
1080i 60 720p 30 99 3<br />
720p 60 1080i 60 49 1.5<br />
720p 60 720p 60 49 3<br />
720p 60 1080p 30 66 2<br />
720p 60 720p 30 83 2<br />
1080p 30 1080i 60 82 2.5<br />
1080p 30 720p 60 49 3<br />
1080p 30 1080p 30 99 3<br />
1080p 30 720p 30 99 3<br />
1080p 24 1080p 24 125 3<br />
1080p 24 720p 24 125 3<br />
1080p 24 1080psF 24 83 1<br />
1080psF 24 1080p 24 125 3<br />
1080psF 24 720p 24 125 3<br />
1080psF 24 1080psF 24 125 1.5<br />
1080p 23.97 1080p 23.97 103 2.5<br />
1080p 23.97 720p 23.97 125 3<br />
1080p 23.97 1080psF 23.97 83 1<br />
1080psF 23.97 1080p 23.97 125 3<br />
1080psF 23.97 720p 23.97 125 3<br />
1080psF 23.97 1080psF 23.97 125 1.5<br />
1080i 50 625 118 3<br />
720p 50 625 80 2<br />
1080p 25 625 80 2<br />
1080i 59.94 525 99 3<br />
720p 59.94 525 83 2.5<br />
1080p 29.97 525 83 2.5<br />
625 625 120 3<br />
525 525 66 2<br />
625 1080i 50 80 2
625 720p 50 80 4<br />
625 1080p 25 120 3<br />
625 720p 25 120 3<br />
525 1080i 59.94 66 2<br />
525 720p 59.94 49 3<br />
525 1080p 29.97 66 2<br />
525 720p 29.97 99 3<br />
1080i 50 1080p 50 60 3<br />
720p 50 1080p 50 40 2<br />
1080p 25 1080p 50 60 3<br />
1080i 59.94 1080p 59.94 49 3<br />
720p 59.94 1080p 59.94 33 2<br />
1080p 29.97 1080p 59.94 49 3<br />
1080i 60 1080p 60 50 3<br />
720p 60 1080p 60 34 2<br />
1080p 30 1080p 60 50 3<br />
1080p 50 1080i 50 100 2.5<br />
1080p 50 720p 50 60 3<br />
1080p 50 1080p 50 60 3<br />
1080p 50 1080p 25 80 2<br />
1080p 50 720p 25 80 2<br />
1080p 50 625 80 2<br />
1080p 59.94 1080i 59.94 66 2<br />
1080p 59.94 720p 59.94 49 3<br />
1080p 59.94 1080p 59.94 49 3<br />
1080p 59.94 1080p 29.97 66 2<br />
1080p 59.94 720p 29.97 66 2<br />
1080p 59.94 525 99 3<br />
1080p 60 1080i 60 66 2<br />
1080p 60 720p 60 49 3<br />
1080p 60 1080p 60 49 3<br />
1080p 60 1080p 30 66 2<br />
1080p 60 720p 30 66 2<br />
Page 12 of 52<br />
P IE 5810 <strong>Reference</strong> <strong>Manual</strong>. Rev 2.6
GPI Function<br />
Page 13 of 52<br />
P IE 5810 <strong>Reference</strong> <strong>Manual</strong>. Rev 2.6<br />
The GPI input (General Purpose Interface) which is a switch input function (contact<br />
closure) can be used to perform a number of functions. The influence of this input can be<br />
set by the user using the control system on the Video Proc Tab or User Preset Tab..<br />
Freeze input with GPI<br />
If this mode of the GPI influence is selected then the following functions will be<br />
performed:<br />
• With GPI open the module processes all input signals as usual<br />
• With GPI closed the inputs will be frozen (volatile freeze, i.e. frozen frame is not<br />
retained through power cycle)<br />
In the case of an activated freeze the module processing performs all functions on the<br />
frozen frame(s).<br />
User Presets – GPI Switch<br />
User Presets allow the user to store 7 additional sets of module settings (snapshots) in<br />
addition to the current settings in module flash RAM. The GPI can then be configured to<br />
toggle between any 2 of the 8 stored presets by selecting “switch user presets” as the<br />
GPI influence setting. (Refer to the User Settings section in the GUI part of this manual<br />
for more details)
Functional Diagram<br />
Page 14 of 52<br />
P IE 5810 <strong>Reference</strong> <strong>Manual</strong>. Rev 2.6
Module Layout<br />
Page 15 of 52<br />
P IE 5810 <strong>Reference</strong> <strong>Manual</strong>. Rev 2.6<br />
Module Front Panel Module Rear Termination Panel<br />
Cooling Fans<br />
Note. Cooling fan operation is monitored and alarmed with the module alarm<br />
LED and also within the <strong>LYNX</strong> control system.
Connections<br />
!<br />
Page 16 of 52<br />
P IE 5810 <strong>Reference</strong> <strong>Manual</strong>. Rev 2.6<br />
Video<br />
The P IE 5810 uses standard 75 Ohm BNC connectors. We recommend the use of high<br />
quality video cable for digital video connections to reduce the risk of errors due to<br />
excessive cable attenuation. Max cable lengths the module will support are shown below.<br />
SDTV = 250m Belden 8281 (270Mbits/s)<br />
HDTV = 120m Belden 1694A (1.4Gbits/s)<br />
3GBit/s = 80m Belden 1694A (1.4Gbits/s)<br />
Note. Due to the compact design of the connection plate it will be necessary to<br />
use a connection tool to secure the BNC video connectors.<br />
Optical Fiber<br />
The P IE 5810 provides LC/PC connectors for single mode fiber cables (option).<br />
Multimode fiber cables can be used also, but this will limit the max. fiber length to approx.<br />
1km.<br />
NOTE: Please take care that surfaces of fiber cables and LC connectors are always<br />
protected against scratching and dust if not fiber cables are connected. Dust and/or<br />
scratches will lead to high attenuation of the optical power transmitted.
Installation<br />
Page 17 of 52<br />
P IE 5810 <strong>Reference</strong> <strong>Manual</strong>. Rev 2.6<br />
If this module was supplied as part of a system it is already installed in the rack<br />
enclosure. If the module was supplied as a field upgrade please follow the installation<br />
procedure below.<br />
NOTE Observe static precautions when handling card. Please see ESD<br />
warnings on Page 7.<br />
This module has a double width rear connection panel, meaning it will occupy two slots of<br />
a standard Series 5000 Card Rack. This is to accommodate the additional connections<br />
needed for this module and to also provide adequate space for cooling in the rack. Up to<br />
five P IE 5810 modules can be accommodated in a single Series 5000 rack frame.<br />
NOTE. When using this module the R FR 5011 or R FR 5012 Fan Front Rack<br />
Frame should be used which provides additional airflow into the rack. If you plan<br />
to install this module into empty slots in an existing rack with no fan front cover -<br />
then please purchase the R FR 5001 Fan Front update kit.<br />
Each Card Module is supplied with a rear connection panel and mounting screws. Please<br />
follow the procedure below for the installation of the card module into the Series 5000<br />
Card Frame.<br />
We recommend you power the rack down before installing any additional modules into an<br />
existing card frame.<br />
1. Select a free two slot space in the card frame where the CardModule will be<br />
located.<br />
2. Remove the blank connection panels from the rear of the rack (if fitted)<br />
3. Install the rear connection panel using the screws supplied. Do not tighten the<br />
screws fully<br />
4. Slide the card module into the card frame and carefully check the CardModule<br />
connects to the rear connection plate. The card should fit easily and should not<br />
require excessive force to insert - if you feel any resistance, there could be<br />
something wrong with the rear connection panel location. Do not try and force<br />
the connection this may damage the connectors. Remove the rear connection<br />
panel and check alignment with the CardModule.<br />
5. Insert and remove the CardModule a few times to ensure correct alignment and<br />
then tighten the two screws to secure the rear connection plate.<br />
6. Power up the rack and check the module LED’s and matrix display illuminate.<br />
Check the module is automatically logged into the control system device tree.<br />
(It may take a few seconds for the control system to “discover” the new module)<br />
NOTE. The use of the optional control system is mandatory for the<br />
control and setup of this module. If you do not have the control system,<br />
then please contact your <strong>LYNX</strong> representative for details on how to<br />
upgrade your installation with the <strong>LYNX</strong> control system.
Firmware Options<br />
Page 18 of 52<br />
P IE 5810 <strong>Reference</strong> <strong>Manual</strong>. Rev 2.6<br />
The basic module just performs basic video proc amp functions. With the addition of the<br />
following firmware options the performance and features of the module can be greatly<br />
enhanced and tailored to meet a specific application.<br />
Note. Firmware options can be added at any time by simply purchasing and<br />
installing a license code string. No hardware or firmware modifications are<br />
needed.<br />
For information on how to install a licensed option please refer to the GUI section of this manual.<br />
Aspect Ratio Conversion (optional: OC-5810-<br />
ARC)<br />
The module provides one optional High Quality ARC (Aspect Ratio Converter) which can<br />
be used to convert SDTV signals between 4:3 or 16:9 aspect ratios. This ARC is a high<br />
quality image processor which has extended functionality including manually adjustable<br />
image size and position.<br />
Modes supported are as follows:<br />
Conversion from 16:9 to 4:3 Aspect Ratios<br />
4:3 Letterbox<br />
This takes the 16:9 aspect ratio of the input signal and fits it horizontally into the 4:3 SD<br />
image area with black bars at the top and bottom of the image.<br />
4:3 Center Cut<br />
This mode cuts the center portion of the 16:9 input signal and fills the 4:3 SD image area<br />
4:3 Stretch to Fill<br />
This mode takes the 16:9 input signal and distorts (vertically stretches) the image to fit<br />
the available 4:3 SD image area.
Conversions from 4:3 to 16:9 Aspect Ratio<br />
Page 19 of 52<br />
P IE 5810 <strong>Reference</strong> <strong>Manual</strong>. Rev 2.6<br />
16:9 PillarBox<br />
This takes the 4:3 aspect ratio of the input signal and fits it vertically into the 16:9 SD<br />
image area with black bars at the left and right of the image.<br />
16:9 Center Cut<br />
This mode cuts the horizontal center portion of the 4:3 input signal and fills the 16:9 SD<br />
image area (cropping the top and bottom of the image)<br />
16:9 Stretch to Fill<br />
This mode takes the 4:3 input signal and distorts (horizontally stretches) the image to fit<br />
the available 16:9 SD image area<br />
ARC Image Size and Positioning<br />
The single high quality ARC provides the ability to manually adjust image position and<br />
size during the conversion process. Please refer to the GUI section of this manual for<br />
more information of the controls provided and how to use them.<br />
Programmable Video Delay (optional: OC-5810-VDLY)<br />
Each of the two SDI outputs has separate programmable video delays which can be set<br />
(independently) between 0 and 12 frames (max). The adjustment is available in pixel, line<br />
and full frame increments.<br />
Note The P IE 5810 (including the OC-5810-UPXD and OC-5810_ARC option, if<br />
installed) has fixed frame delays depending on the signal path and selected<br />
function (see below). The 0 > 12 frame user adjustment is additional delay<br />
relative to the fixed delays.<br />
This adjustment will delay the video output relative to the connected reference by the<br />
delay setting specified. (+ fixed delay)
Page 20 of 52<br />
P IE 5810 <strong>Reference</strong> <strong>Manual</strong>. Rev 2.6<br />
Up/Down/Cross Conv. (optional: OC-5810-UPXD)<br />
The addition of this option provides a single channel of high quality up, down and cross<br />
conversion to the module. Modes of operation are described below.<br />
Down conversion<br />
Note : Operation mode is switchable i.e. Up Conversion OR Down Conversion<br />
OR Cross Conversion OR Aspect Ratio Conversion<br />
Modes of operation are described below.<br />
4:3 Letterbox<br />
This takes the 16:9 aspect ratio of the input HD or 3GBIt/s signal and fits it into the 4:3<br />
SD aspect ratio screen with black bars at the top and bottom of the image.<br />
4:3 Center Cut<br />
This mode cuts the center portion of the 16:9 input signal and fills the 4:3 SD aspect ratio<br />
screen.<br />
4:3 Stretch to Fill<br />
This mode takes the 16:9 input signal and distorts (vertically stretches) the image to fit<br />
the available 4:3 SD aspect ratio space.
Up Conversion<br />
Page 21 of 52<br />
P IE 5810 <strong>Reference</strong> <strong>Manual</strong>. Rev 2.6<br />
The UP converter will convert the connected SDTV input standard to the selected<br />
HD/3GBit/s Standard within the same frame rate. See below<br />
525 / 59.94Hz Input Signal Converted to 1080p / 59.94Hz, 1080i / 59.94Hz or 720P /<br />
59.94Hz<br />
625 / 50Hz Input Signal Converted to 1080p / 50Hz, 1080i / 50Hz or 720P / 50Hz<br />
Modes of operation are as follows:<br />
16:9 Center Cut<br />
This mode cuts the horizontal center portion of the 4:3 SD input signal and fills the 16:9<br />
aspect ratio image area. (top and bottom of image are cropped)<br />
16:9 PillarBox<br />
This takes the 4:3 SD aspect ratio of the input signal and fits it vertically into the 16:9<br />
image area with black bars at the left and right of the image.<br />
16:9 Stretch to Fill<br />
This mode takes the 4:3 SD input signal and distorts (horizontally stretches) the image to<br />
fit the available 16:9 image area.<br />
Cross Conversion<br />
When used in cross conversion mode the module will cross convert the video signal<br />
between 1080i, 1080p and 720P formats within the same frame rate.<br />
Image size and Positioning<br />
This option also provides the ability to manually adjust the image size and position of the<br />
converted output. For more information on the controls and use of this feature please<br />
refer to the GUI section of this manual for more details.
Color Space Conversion<br />
Page 22 of 52<br />
P IE 5810 <strong>Reference</strong> <strong>Manual</strong>. Rev 2.6<br />
The conversion options also provide integrated color space conversion capability which<br />
will automatically compensate for the conversion of the wider 709 HD color space into the<br />
more narrow 601 SDTV color space or vice versa ensuring legal color reproduction.<br />
NOTE. Color space conversion can be bypassed or set to only process<br />
chrominance if desired.<br />
Noise Reduction (optional: OC-5810-NR)<br />
The module provides optional Noise Reduction functionality:<br />
The adaptive noise reduction function processes the input data in either progressive or<br />
interlaced format. Application of noise reduction to noisy interlaced signals can optimize<br />
the de-interlacer performance.<br />
General Noise Reduction<br />
General noise reduction comprises of both adaptive 2D and 3D noise reduction. 3D noise<br />
reduction corrects for temporal and spatial noise; and 2D noise reduction corrects spatial.<br />
3D noise reduction is applied to any interlaced or progressive signal with a pixel rate less<br />
than or equal to 75Mp/s. 2D noise reduction is applied to any interlaced or progressive<br />
signal. The selection of 2D or 3D noise reduction processing is automatically controlled<br />
by the firmware in accordance with the video signal being processed.<br />
Block Artifact Reduction<br />
Block Artifact Reduction (BAR) locates and reduces block edges produced by DCT based<br />
compression processing. BAR can be applied to any interlaced or progressive input<br />
signal.<br />
Mosquito Noise Reduction<br />
Mosquito Noise Reduction (MNR) dynamically adapts to image content, effectively<br />
reducing mosquito artifacts around sharp edges in DCT based compression. It can be<br />
applied to any interlaced or progressive signal.<br />
Detail Enhancement (Sharpness and Texture)<br />
The detail enhancement function provides both sharpness and texture enhancement,<br />
realized by adaptive horizontal, vertical and diagonal large edge and small edge<br />
enhancement processes. Overshoot / undershoot control is provided to minimize ringing<br />
on the enhanced edges. In addition, noise rejection is provided to minimize the amount of<br />
enhancement applied to the noisy areas of the image.<br />
For ease of use the various controls are combined into two parameters: Level and<br />
Threshold<br />
Level: controls the level of the horizontal, vertical as well as the diagonal high<br />
pass filtered picture content, which will be added to the original signal again, i.e.<br />
the gain of the high frequencies in the signal<br />
Threshold: This parameter controls the level of signal which is passed through<br />
for level control, i.e. all amplitudes in the signal below this threshold will not be<br />
used for the detail enhancement
Page 23 of 52<br />
P IE 5810 <strong>Reference</strong> <strong>Manual</strong>. Rev 2.6<br />
Color Correction (optional: OC-5810-COCO)<br />
The module provides optional basic Color Correction functionality, which includes RGB<br />
Gain and RGB Lift.<br />
Two modes are provided to control the color correction: Gain & Offset and Peak & Black.<br />
For more information on the controls and use of this feature please refer to the GUI<br />
section of this manual for more details.<br />
3GBit/s processing (optional: OC-5810-3G)<br />
With this option active the module can process 3 GBit/s signals: 1080p50, 1080p59.94<br />
and 1080p60.<br />
These 3GBit/s formats will be automatically detected at the input and will be processed<br />
according to the selected functions, e.g. down conversion to SDTV.<br />
SDTV or HDTV signals can be unconverted to 3GBit/s signals.
Settings and Control<br />
Page 24 of 52<br />
P IE 5810 <strong>Reference</strong> <strong>Manual</strong>. Rev 2.6<br />
The P IE 5810 module has an integrated micro-controller, which enables the module to<br />
be configured and controlled locally using the multifunction switch and 4 character dot<br />
matrix display, or from remote using a GUI interface when using one of the optional<br />
controllers and control software.<br />
!<br />
NOTE. This module is extremely compact and flexible with hundreds of possible<br />
user settings. It is not practical to make all these settings available on the local<br />
dot matrix display. The use of the control system is mandatory to access the<br />
vast array of settings possible. Please refer to the GUI section of this manual for<br />
details on the control provided. Some basic module settings are possible via the<br />
local controls, which are detailed below.<br />
Once set, all settings are automatically saved in non-volatile internal memory. (Flash<br />
RAM) The module will always recall the last used settings.<br />
Multi Function Switch<br />
The CardModule is equipped with a multi-function switch located on the front bottom<br />
edge of the card. (See above)<br />
Using the Local Display Menus<br />
Multi-function Switch<br />
Side Front<br />
Switch Operations<br />
Up Down Enter<br />
Making local adjustments to the module is done using the multifunction switch and the<br />
integrated 4-character dot matrix display. The menu system is layered, and navigation<br />
through the system is done using the UP and DOWN functions of the switch. ENTER is<br />
used to move between menu levels and also enter a selection.<br />
Switch Function Operation<br />
UP Move UP within a level<br />
DOWN Move down within a level<br />
ENTER Change levels / Make selection
Menu Structure<br />
Page 25 of 52<br />
P IE 5810 <strong>Reference</strong> <strong>Manual</strong>. Rev 2.6<br />
The Menu structure is defined in the next table, and can be used to help navigating<br />
through the menu system.<br />
ENTER moves between levels<br />
UP/DOWN moves between items within the level<br />
When a new setting is entered the system will jump back one level in the menu system.<br />
• The “back” selection in the menu structure will take you back one level when<br />
selected.<br />
• When an item is selected which has several setting possibilities the first value<br />
displayed will be the value currently stored in the system. The order of the<br />
available settings for any menu item in the table supplied does not represent the<br />
order the settings will actually be displayed.<br />
• If left unattended, the menu will default to the root display after a short timeout.<br />
Layer 1 Layer 2 Layer 3 Layer 4 Layer 5 Description<br />
P IE 5810 Root Display<br />
GPI NONE GPI Influence<br />
FRZE Freeze Input<br />
SwPR<br />
back<br />
Switch User Presets<br />
USET User Preset Settings<br />
LOAD Load User Preset to Current<br />
PRE1 Preset 1<br />
… …<br />
PRE7<br />
back<br />
Preset 7<br />
Gon GPI on settings<br />
CURR Current<br />
PRE1 Preset 1<br />
… …<br />
PRE3<br />
back<br />
Preset 7<br />
Goff GPI off settings<br />
CURR Current<br />
PRE1 Preset 1<br />
… …<br />
back<br />
PRE7<br />
back<br />
Preset 7<br />
RSET<br />
back<br />
NO<br />
YES<br />
back<br />
Factory Reset
LED Status Indicators<br />
Page 26 of 52<br />
P IE 5810 <strong>Reference</strong> <strong>Manual</strong>. Rev 2.6<br />
The P IE 5810 module has LED indicators that serve as alarm and status indication for<br />
the module. Function is described below.<br />
SDI in Status LED 1<br />
LED Color Indication<br />
Green SDI 1 Present and OK<br />
Red No SDI 1 Signal Connected<br />
ALARM LED<br />
LED Color Indication<br />
Green Normal Operation<br />
Red Problem with SDI input<br />
Red Flashing Cooling Fan Failure<br />
Note. The Alarm LED can be seen with the rack front cover fitted
Control System GUI<br />
Page 27 of 52<br />
P IE 5810 <strong>Reference</strong> <strong>Manual</strong>. Rev 2.6<br />
All <strong>LYNX</strong> CardModules support a computer interface which allows setting the modules<br />
parameters using an intuitive GUI interface. Access to all standard features and in some<br />
cases extended features is possible using this interface. The complex nature and<br />
extensive user settings provided on the P IE 5810 requires the use of the control system.<br />
Note. Any settings made using the control system overrides any local settings<br />
made on the module. All settings are stored in internal flash ram and will survive<br />
power cycles and long term storage.<br />
The following GUI screenshots and descriptions shown below describe the settings and<br />
adjustments possible for the P IE 5810 CardModule.<br />
The above screenshot shows the complete module GUI. The Device info area contains<br />
information about the module including name and firmware revision. If used as part of a<br />
larger system (using the <strong>LYNX</strong> central control system) the modules position and physical<br />
location is displayed above the “locate” button.<br />
Note. The Locate function is a tool used to quickly identify a module in larger<br />
systems. Selecting “locate” will flash the module alarm LED yellow. (This does<br />
not effect module operation)<br />
The first screen displayed when the module is selected is the Main Tab this is a graphical<br />
representation of the modules overall function and signal flow (left to right). Clicking on<br />
the processing boxes will link to other GUI screens with more controls for these specific<br />
functions.<br />
The area at the bottom of the screen is the error log. Any fault condition (or event) will be<br />
time stamped and entered into the log.
Page 28 of 52<br />
P IE 5810 <strong>Reference</strong> <strong>Manual</strong>. Rev 2.6<br />
There are a number of “Tabs” along the top of the screen which splits up the module<br />
settings into a number of logical displays. The various GUI screens and primary functions<br />
are described below.<br />
Main Tab<br />
This screen is the main interface and is presented first when the module is displayed in<br />
the GUI. The layout replicates module “block” functions and signal flow from left to right.<br />
The primary purpose of this screen is to show the overall signal flow through the module<br />
and allow easy navigation to other areas. Input standards and formats are auto detected<br />
and displayed in the GUI. Parameters will be annunciated in different colors to show<br />
status (green = good, red = problem, yellow = caution etc).<br />
Signal Routing<br />
In the center of the screen there is an area where the internal signal routing can be<br />
changed. Here the internal video signals can be routed through (or bypassing) the<br />
internal resources (Up/down/cross conversion option / ARCs etc). Selecting a cross point<br />
via the radio button closes the connection (operation is self explanatory)
Video Proc Tab<br />
Page 29 of 52<br />
P IE 5810 <strong>Reference</strong> <strong>Manual</strong>. Rev 2.6<br />
This tab will display the configuration screen for the GPI functions (GPI influence) and<br />
control for Metadata (DVITC Line Selection and preselection for the Teletext Decoder)<br />
DVITC Input Line Selection<br />
DVITC Line Selection for the two DVITC Readers is provided. If a specific line is<br />
selected the presence detection will indicate a DVITC signal only if present in the<br />
selected line.<br />
Selecting AUTO will enable a search for DVITC signals in any line.<br />
NOTE: An AUTO search can take longer (up to 15 seconds)<br />
See also Advanced Meta Data Settings (Page 34)<br />
Teletext Decoder<br />
A pre-selection for the Teletext decoder can be set. It is recommended to use the<br />
auto-select mode
Page 30 of 52<br />
P IE 5810 <strong>Reference</strong> <strong>Manual</strong>. Rev 2.6<br />
High Quality Up and Cross Conversion (OC-<br />
5810_XUPD) and Aspect Ration Conversion (OC-<br />
5810_ARC)<br />
The OC-5810-UPXD and OC-5810-ARC options are required for the HQ up, down and<br />
cross and ARC conversion functionality.<br />
The screen below shows the controls provided for the HQ Up, Down, Cross and Aspect<br />
Ratio Conversion.<br />
SDTV Aspect Ratio Converter Mode<br />
The Aspect Ratio Converter provides three modes for 16:9 to 4:3 conversion and three<br />
modes for 4.3 to 16:9 conversions, which can be selected using the radio buttons<br />
provided:<br />
16:9 to 4:3 Conversion<br />
• Letterbox<br />
• Center cut<br />
• Stretch to Fill (vertical)<br />
4:3 to 16:9 Conversion<br />
• Pillar Box<br />
• Center cut<br />
• Stretch to Fill (horizontal)<br />
The “Input format” and the “signal used on” indicate which input format is routed to the<br />
specific conversion channel, and also indicates which of the four outputs the converter<br />
output is routed to (these will change if the internal signal routing is changed).
Output Format<br />
Page 31 of 52<br />
P IE 5810 <strong>Reference</strong> <strong>Manual</strong>. Rev 2.6<br />
With the selection of the output format the type of conversion is configured which is<br />
based on the connected input format;<br />
for example, with a SDTV input signal and 1080i output format selected, then the<br />
converter will perform an Up conversion from SDTV to 1080i. The conversion is always<br />
performed in the same frame rate, e.g. SDTV 525/59.94Hz to 1080i/59.94Hz.<br />
Conversion Mode<br />
With the selection box in the middle of the screen the conversion mode can be selected.<br />
The check box “motion adaptive” filtering is used to improve picture quality for moving<br />
images to reduce motion blur, and should be selected for normal use. For still images the<br />
checkbox should be switched off.<br />
Input Cropping<br />
With these controls it’s possible to crop the input image which will be used for conversion<br />
(cropping will appear on the converted image output).<br />
Values can be set with the numerical entry fields or with the markers on the input picture<br />
representative.<br />
Output Insertion<br />
With these controls the size and positioning of the output image can be set. Any parts of<br />
the image which has no content (cropped on the input or outside the image extents if<br />
shifted or made smaller) will be filled with black. To use this function the “advanced<br />
settings” checkbox has to be activated.<br />
Note. It is also possible to manually drag the input and output cropping extremities using<br />
the mouse pointer on the GUI. Simply position the mouse over the green line you wish to<br />
move, click and drag the line to the desired point on the image.<br />
Drag Green Lines with<br />
mouse<br />
Note. If a non-standard setting is used, the Conversion setting will jump to “custom”
Control Mode<br />
Page 32 of 52<br />
P IE 5810 <strong>Reference</strong> <strong>Manual</strong>. Rev 2.6<br />
The converter can be automatically controlled by AFD, WSS or VI. Selection is made<br />
from the drop down box. Depending on what codes are detected in the input signal and<br />
the converted output format; the down converters are automatically preset for this mode<br />
of operation.<br />
Inserted Format Description<br />
With the three checkboxes you can select what type of format description will be inserted<br />
into the video signal as metadata. This information is derived from the settings made to<br />
the converter. If there was already metadata of this type inserted in the input signal they<br />
will be overwritten (if the related checkbox is selected).<br />
NOTE: If the checkbox is not selected then no data will be inserted and any existing data<br />
will be blanked
Advanced Metadata Settings<br />
Page 33 of 52<br />
P IE 5810 <strong>Reference</strong> <strong>Manual</strong>. Rev 2.6<br />
On the left side all detected Meta Data is displayed, on the right side all (re-) inserted<br />
Meta Data is displayed.<br />
Note: The P IE 5810 is transparent for Dolby Metadata (S2020), if Dolby Metadata is<br />
detected it will be displayed only in the input part of this window (left side).<br />
To configure the insertion of Meta Data please activate the Checkbox “Advanced Meta<br />
Data Settings” in the center.<br />
The following screen will be shown, with the Meta Data Handling in the middle.<br />
Closed Captions:<br />
Detected Closed Captions:<br />
• S334CDP: Closed Captions in S334 CDP transport packet (containing CEA-708<br />
and/or CEA-608 data)<br />
• S334RAW: Closed Captions in S334 RAW transport packet (containing CEA-<br />
608 data)<br />
• Line21: Closed Captions in Line 21 (containing CEA-608 data, in 525 video<br />
standard only)<br />
Detected Closed Captions transport packets are indicated with “present” with green<br />
background.<br />
Closed Captions Re- Insertion:<br />
Activating the respective checkboxes will enable the re-insertion of the different transport<br />
packets into the converter output. Transport packets can be generated from different<br />
incoming types.<br />
A source priority selection with three levels for the three possible transport packets is<br />
provided. If the “Primary Source” is not present, “Fallback 1” will be used, if this is also<br />
missing as a source, “Fallback 2” will be used.<br />
Note: If “Default Priority”<br />
is active, the Source<br />
Priorities are set as<br />
shown in the left picture,<br />
i.e. the “Primary Source”<br />
is set to provide standard<br />
transparency
Time Code:<br />
DVITC<br />
Digital Interval Time Code (SMPTE 266M 2008)<br />
Page 34 of 52<br />
P IE 5810 <strong>Reference</strong> <strong>Manual</strong>. Rev 2.6<br />
Description<br />
D-VITC is an 8-bit digital data representation of the band-limited analog signal<br />
corresponding to the vertical interval time code (VITC) of SMPTE 12M and IEC 60461.<br />
The 8 bits of D-VITC shall be carried in the 8 most significant bits of the 10 bits of the<br />
ANSI/SMPTE 125M or ITU-R BT.601 coding. Since some equipment may be built using<br />
only 8 of the 10 bits, both 10- and 8-bit interpretations of the values are given in this<br />
standard, with 10 bits the preferred expression. DVITC is only present in SDTV<br />
(525/625).<br />
ATC<br />
Ancillary Time Code (SMPTE 291M 2008)<br />
Description<br />
The acronym ATC refers to ancillary packets carried in the Ancillary space (VANC or<br />
HANC) of a digital television data stream, as described in SMPTE 12M-2 (formerly<br />
SMPTE RP 188), and payloads of these packets convey LTC or VITC codeword data.<br />
Detected Time Code:<br />
ATC-LTC, ATC-VITC and DVITC will be detected if present in the incoming<br />
video signal<br />
Detected Time Codes are indicated with “present” with green background. For DVITC<br />
also the insertion lines are indicated. For DVITC two insertions per video signals are<br />
possible, normally the second insertion is a duplicate of the first one.<br />
For ATC-VITC a DVITC Index is shown, indicating the original insertion line of the VITC<br />
signal, which will be used if converted back to DVITC<br />
In the Video Proc Tab a DVITC Line Selection for the two DVITC Readers per input<br />
signal is provided. If a specific line is selected the presence detection will indicate a<br />
DVITC signal only if present in the selected line.<br />
Selecting AUTO will enable a search for DVITC signals in any line.<br />
NOTE: An AUTO search can<br />
take longer (up to 15<br />
seconds)
Page 35 of 52<br />
P IE 5810 <strong>Reference</strong> <strong>Manual</strong>. Rev 2.6<br />
Time Code Insertion:<br />
Activating the respective checkboxes will enable the insertion of the different time codes<br />
into the converter output. The three time codes can be generated from different incoming<br />
types.<br />
A source priority selection with three levels for the three possible time code types is<br />
provided. If the primary source is not present, Fallback1 will be used, if this is also<br />
missing as a source Fallback 2 will be used.<br />
Note: If “Default Priority” is<br />
active, the Source Priorities<br />
are set as shown in the<br />
picture above, i.e. the<br />
“Primary Source” is set to<br />
provide standard<br />
transparency<br />
DVITC Line Select:<br />
DVITC can be inserted twice<br />
(Inserter A and B) into the output<br />
signal with selectable line<br />
numbers (line 6..22). See table<br />
below.<br />
Note: DVITC is only<br />
present in SDTV
Teletext<br />
WST<br />
World System Teletext<br />
Page 36 of 52<br />
P IE 5810 <strong>Reference</strong> <strong>Manual</strong>. Rev 2.6<br />
Description<br />
Normally analog information designed mainly for PAL TV. In the context of the P IE 5810<br />
it is an emulation of analogue teletext for digital TV.<br />
S2031 WST<br />
SMPTE 2031: Carriage of DVB/SCTE VBI Data in VANC<br />
Description<br />
This Standard specifies how to carry the digital values resulting from defined<br />
standardized data streams carried in MPEG-2 Transport Streams (TS) as specified by<br />
either DVB/ETSI EN 301 775 or SCTE 127 (or both) as ancillary data packets in the<br />
vertical ancillary data space (VANC).<br />
Note: In the P IE 5810 only teletext data (digital teletext data derived from WST) in the<br />
data packets will be detected and processed<br />
OP47 SDP<br />
Free TV Australia Operational Practice OP- 47<br />
STOR<strong>AG</strong>E AND DISTRIBUTION OF TELETEXT SUBTITLES and VBI DATA FOR HIGH<br />
DEFINITION TELEVISION<br />
Description<br />
Free TV Operational Practice OP-47 describes the technical/operational practices<br />
associated with the storage and distribution of Closed Caption/Subtitling data in the<br />
vertical ancillary space of the 10 bit serial HD-SDI signal complying with<br />
ITU-R BT.1120-7.<br />
Note: In the P IE 5810 only teletext data (digital teletext data derived from WST) in the<br />
data packets will be detected and processed.<br />
Teletext Decoder<br />
Selecting the teletext tab will show the control window below:<br />
The teletext decoder indicates what type of teletext is detected. A valid teletext is<br />
indicated with a green background.
A pre-selection can be set by clicking on the<br />
text at the bottom of the decoder window.<br />
This will open the Video Proc tab, where the<br />
pre-selection can be set for the two inputs.<br />
Teletext Encoder<br />
The encoder is used for the insertion of<br />
the teletext data into the respective<br />
converter.<br />
Page 37 of 52<br />
P IE 5810 <strong>Reference</strong> <strong>Manual</strong>. Rev 2.6<br />
If WST teletext data is present / selected then the line numbers containing teletext data<br />
on both the input and output are shown. The green designation indicates valid teletext<br />
data is present.<br />
Note: If S2031 or OP47 SDP Teletext is detected / selected then no line numbers will be<br />
shown
Page 38 of 52<br />
P IE 5810 <strong>Reference</strong> <strong>Manual</strong>. Rev 2.6<br />
In automatic mode the output line numbers equal the input line numbers. <strong>Manual</strong> mode<br />
has to be selected to change the output line numbers.<br />
<strong>Manual</strong> Input to output line mapping can be changed by clicking on the respective line<br />
number<br />
The encoder always tries to map the same input line to output line, in our example above<br />
line 17 and 19 are not used on the output as they were not used in the input. Clicking on<br />
these line numbers would activate their use in the output.<br />
Line numbers in light grey are already occupied by other metadata with analog origin<br />
(e.g. DVITC).<br />
If there is a conflict or problem, (e.g. one line gets lost), a warning in red will be shown as<br />
indicated above.
Page 39 of 52<br />
P IE 5810 <strong>Reference</strong> <strong>Manual</strong>. Rev 2.6<br />
Noise Reduction Tab<br />
High Quality Noise Reduction (OC-5610-NR option)<br />
The OC-5610-NR option is required for the HQ Noise Reduction functionality.<br />
The screen below shows the controls provided for this function..<br />
The adaptive noise reduction function processes the input data in either progressive or<br />
interlaced format. Application of noise reduction to noisy interlaced signals can optimize<br />
de-interlacer performance.<br />
General Noise Reduction<br />
General noise reduction comprises of both adaptive 2D and 3D noise reduction. 3D noise<br />
reduction corrects for temporal and spatial noise; and 2D noise reduction corrects spatial.<br />
3D noise reduction is applied to any interlaced or progressive signal with a pixel rate less<br />
than or equal to 75Mp/s. 2D noise reduction is applied to any interlaced or progressive<br />
signal. The selection of 2D or 3D noise reduction processing is automatically controlled<br />
by the firmware in accordance with the video signal being processed.<br />
Block Artifact Reduction<br />
Block Artifact Reduction (BAR) locates and reduces block edges produced by DCT based<br />
compression processing. BAR can be applied to any interlaced or progressive input<br />
signal.<br />
Mosquito Noise Reduction<br />
Mosquito Noise Reduction (MNR) dynamically adapts to image content, effectively<br />
reducing mosquito artifacts around sharp edges in DCT based compression. It can be<br />
applied to any interlaced or progressive signal.<br />
Detail Enhancement (Sharpness and Texture)<br />
The detail enhancement function provides both sharpness and texture enhancement,<br />
realized by adaptive horizontal, vertical and diagonal large edge and small edge<br />
enhancement processes. Overshoot / undershoot control is provided to minimize ringing<br />
on the enhanced edges. In addition, noise rejection is provided to minimize the amount of<br />
enhancement applied to the noisy areas of the image.
Page 40 of 52<br />
P IE 5810 <strong>Reference</strong> <strong>Manual</strong>. Rev 2.6<br />
For ease of use the various controls are combined into two parameters: Level and<br />
Threshold<br />
• Level: controls the level of the horizontal, vertical as well as the diagonal high<br />
pass filtered picture content, which will be added to the original signal again, i.e.<br />
the gain of the high frequency content in the signal.<br />
• Threshold: This parameter controls the level of signal which is passed through<br />
for level control, i.e. all amplitudes in the signal below this threshold will not be<br />
used for the detail enhancement.
Page 41 of 52<br />
P IE 5810 <strong>Reference</strong> <strong>Manual</strong>. Rev 2.6<br />
Color Correction Tab<br />
Color Correction (OC-5810-COCO option)<br />
The OC-5610-COCO option is required for the basic Color Correction functionality.<br />
Two Modes of operation are provided: RGB Gain&Offset and RGB Peak&Black. The<br />
mode of operation is selected via the drop down menu “Mode” in the upper left corner of<br />
the Col or Correction Tab.<br />
Mode Gain & Offset<br />
The screen below shows the controls provided for this function.<br />
Gain amplifies the signal until it is clipped. Offset lifts the black level of the complete<br />
signal without impact on the gain.
Mode Peak & Black<br />
The screen below shows the controls provided for this function.<br />
Page 42 of 52<br />
P IE 5810 <strong>Reference</strong> <strong>Manual</strong>. Rev 2.6<br />
Peak sets the white level of the signal without changing the black level. Black sets the<br />
black level of the signal without changing the white (peak) level.
Page 43 of 52<br />
P IE 5810 <strong>Reference</strong> <strong>Manual</strong>. Rev 2.6<br />
Output Proc Tabs<br />
There are two “Out Proc” tabs provided, one for each of the four outputs provided. This is<br />
where the individual video processing functions are set for each channel. The two tabs<br />
have identical adjustments.<br />
Color Space Conversion<br />
Note. This is only active when the conversion option(s) are installed (OC-5610-<br />
ARC and/or OC-5610-XUPD)<br />
This is where the color space conversion functionality is configured. This is used to<br />
ensure correct color reproduction on the outputs. HD color space is wider than SDTV<br />
color space so there is the possibility of some illegal colors being reproduced if the color<br />
space is not converted. Possible selections (only for the two down converts, automatic for<br />
HD Converter) are:<br />
• Convert (convert the video signal)<br />
• Bypass (perform no conversion)<br />
• Luma in Bypass (only convert Chroma portion of signal)<br />
Aperture Correction<br />
Horizontal aperture correction is provided for each output channel, which can be used to<br />
sharpen or soften the video signal. (This is sometimes required for down converted video<br />
signals as the filtering process rolls off the high frequency very slightly). If adjusted in the<br />
positive direction this will increase sharpness, if adjusted in the negative direction this will<br />
soften the image.<br />
There is a check box to switch aperture correction ON and OFF and an adjustment range<br />
The numerical adjustment range provided is + 80 to -30, and is changed by clicking on<br />
the “+” or “-“ Buttons.<br />
Note. Aperture correction OFF is the same as a Zero setting in the adjustment<br />
range
Clip CR/Cb Headroom<br />
Page 44 of 52<br />
P IE 5810 <strong>Reference</strong> <strong>Manual</strong>. Rev 2.6<br />
If activated all Luminance (Y) values below 64 and above 940, and all Chrominance<br />
(Cr,CB) values below 64 and above 864 will be clipped.<br />
H and V Blanking<br />
A checkbox selection is provided for H (Horizontal) and V (Vertical) blanking. When<br />
selected the video output will have new blanking applied in both of these areas (which will<br />
overwrite any information in the vertical and horizontal blanking intervals).<br />
Video Output Delay Adjustment<br />
Each video output can be delayed relative to the reference sync up to a maximum of 3<br />
frames. This is usually used for downstream system timing applications. The delay is<br />
adjustable in the following increments:<br />
• Frames<br />
• Lines<br />
• Pixels or<br />
• Total Delay in ms<br />
Depending on preferences you can use one or all of the adjustments provided to set the<br />
total video delay.<br />
If the option<br />
Note. The adjustable delay applied is in addition to the fixed processing delay of<br />
the module. Please refer to the tables provided in the “Fixed Video Processing<br />
Delays” section for more information on processing delays.<br />
Note With the option OC-5610-VDLY the manual delay range will be extended<br />
to 12 frames per output<br />
Note: Using the “Fixed Processing Time Time” makes sure the processing delay is<br />
always the same (max.delay). This function can be activated in the “OutProc” Tab of the<br />
respective output or on the “Timing” Tab.<br />
Settings<br />
This area is where the freeze function is defined and also the action (and settings) of the<br />
integrated test pattern generator. (Each channel has its own independent test pattern<br />
generator)<br />
Output if no input<br />
Here the behavior of the P IE 5810 can be selected if no input is present<br />
• Freeze<br />
• Black<br />
• Test Pattern<br />
Freeze Mode<br />
When the synchronizer encounters excessive TRS errors it can be set to freeze or pass<br />
the video transparently (selected on the Video Proc tab). If Freeze is selected then the<br />
behavior of the freeze function is selected using the drop down selections. These are:
• Freeze Field 1<br />
• Freeze Field 2<br />
• Freeze Frame<br />
Test Pattern Pre-select<br />
Page 45 of 52<br />
P IE 5810 <strong>Reference</strong> <strong>Manual</strong>. Rev 2.6<br />
A wide range of patterns is provided which can be selected using the drop down selection<br />
provided. The pre-selected pattern will be used if the freeze mode is set to “test pattern”<br />
and will also the pattern used if “test pattern on” is selected. Patterns provided are:<br />
• Full field Black<br />
• Full field White<br />
• Full field Yellow<br />
• Full field Cyan<br />
• Full field Green<br />
• Full field Magenta<br />
• Full field Red<br />
• Full field Blue<br />
• 15% Grey (full field)<br />
• 75% Color bars<br />
• 75% Color bars over Red<br />
• Pathological PLL/EQ<br />
Test Pattern Standard<br />
With no input signal connected the module can be used a stand alone test generator<br />
using this selection is possible to configure the test pattern into any of the supported<br />
standards, or it can be set to follow the last input standard. Settings provided are:<br />
• Follow last input (default)<br />
• Fixed standards (half, same or double or current reference frame rate)<br />
Test Pattern Enable<br />
This checkbox simply switches on the pre-selected test Pattern. Activated test pattern will<br />
be indicated on the Main Tab.<br />
Video Adjustments<br />
Four on screen sliders are provided to allow for the adjustment of individual video<br />
parameters. Separate sliders are provided for video Brightness (gain), Saturation,<br />
Pedestal (Black level) and Hue.<br />
Default (null) settings are 0% (this is the default). Sliders can be quickly returned to the<br />
factory null (or transparent) settings using the buttons provided at the bottom of each<br />
slider.
User Presets Tab<br />
Page 46 of 52<br />
P IE 5810 <strong>Reference</strong> <strong>Manual</strong>. Rev 2.6<br />
This Tab allows the user to store and recall 7 sets of additional module presets (settings),<br />
and also configure GPI switching between any two of the 3 stored presets and / or the<br />
current module settings (8 total). The presets are stored in module flash ram and will<br />
survive power cycles.<br />
To save a preset<br />
1. First make all the module settings required using the various settings provided for<br />
the module.<br />
2. Click the button “Save To” to switch up the dialog box:<br />
3. Using the radio button to select the preset location you<br />
wish to save the settings to and type in a name.<br />
4. Click “Save” and the all the current module settings are<br />
stored in the named preset.<br />
5. Use the “rename” button to rename any stored preset<br />
To load a saved preset<br />
To load a saved preset into the module simply click on the “load” button adjacent to the<br />
preset, this will show the dialog shown below asking you to confirm your selection (as this<br />
will overwrite any current stored module settings)
Setting GPI control of Preset selections<br />
Page 47 of 52<br />
P IE 5810 <strong>Reference</strong> <strong>Manual</strong>. Rev 2.6<br />
In some cases its desirable to switch quickly between two sets of stored presets, this can<br />
be achieved using the external GPI trigger<br />
1. Next to each preset there are two radio buttons which allow for the selection of<br />
GPI switching<br />
2. Simple select any two of the stored presets and the required GPI polarity.<br />
3. Set the GPI influence to “switch user presets” the presets are now toggled based<br />
upon the polarity external GPI input signal.<br />
4. The active Preset is indicated by the grey bar behind the Preset (in the picture<br />
above behind the “Current” preset)<br />
Note: If a Preset (except “Current”) is active, all control parameters for the P IE 5810 are<br />
greyed out.<br />
GPI Influence<br />
The drop down box for GPI influence is used to set the function of the GPI input, in this<br />
case we have configured the GPI to switch between 2 stored presets. Other settings<br />
include:<br />
• None<br />
• Freeze input 1<br />
• Switch user presets<br />
• Switch Private ARC
Options Tab<br />
Page 48 of 52<br />
P IE 5810 <strong>Reference</strong> <strong>Manual</strong>. Rev 2.6<br />
One tab on the GUI is reserved for “Options“. This is where the option license codes are<br />
entered to unlock the embedded firmware options.<br />
If the module was purchased with options pre-installed then you will see the option status<br />
as green (Active).<br />
If you would like to add any option after delivery, then you will need to purchase the<br />
specific license codes from <strong>LYNX</strong> <strong>Technik</strong>.<br />
Click the “request code” button next to the channel you wish to activate. A number will be<br />
displayed, Please forward this number with your purchase order to your authorized <strong>LYNX</strong><br />
dealer or representative. When you receive the license string simply type it (or paste it<br />
using the windows clipboard) into the area provided and press “activate”.<br />
Activation is confirmed when the option status turns green.
Events Tab<br />
Page 49 of 52<br />
P IE 5810 <strong>Reference</strong> <strong>Manual</strong>. Rev 2.6<br />
The Events Tab is where the module alarming and error notifications are configured for<br />
the module.<br />
The GUI has an integrated error log, which is a simple text log file stored in the controller<br />
PC. This will record an event and timestamp it. The log can be seen at the bottom of the<br />
GUI screen and can be scrolled through using the scrolling bar.<br />
Log in GUI Function<br />
Events are selectable, you can chose if you want to record a particular event in the log<br />
(or not) or configure it to only record one side of the event. (For example you might want<br />
to log when a SDI input was removed but do not want to log when it came back). The<br />
ON/OFF trigger can be configured for each of the available events shown in the list and is<br />
setup using the checkboxes provided.<br />
Alarm Activation<br />
By default all alarm conditions are activated (checked), by de-selecting a specific alarm<br />
condition I this column you are telling the module to ignore this condition completely. It<br />
will not color the alarm LED, log and event in the GUI or send a SNMP trap. This is useful<br />
if for example you never have anything connected to input 2 and want the card to ignore<br />
this input condition completely you would simply de-select “SDI Input 2 No Input” and it<br />
will be ignored.<br />
SNMP Support<br />
If the system is using a RCT 5031 Master Controller and the SNMP option is installed<br />
then the “SNMP Trap” columns become available.<br />
Here you can configure what events you would like to transmit a “SNMP trap” for over the<br />
network. (This has no impact or influence over the internally error log maintained by the<br />
<strong>LYNX</strong> control system)<br />
(Internal <strong>LYNX</strong> error logging and external SNMP traps can be configured independently).<br />
Note. The simulated event is part of the GUI simulator and allows us to force a<br />
particular error condition for testing and demonstration purposes.
Specifications<br />
Video Inputs(BNC)<br />
Signal Type Serial digital video SMPTE 292M, 344M, 259M-C, 424 M (option)<br />
Input standards See table on page 9<br />
No. of inputs 1<br />
Connector BNC<br />
Impedance 75 Ohm<br />
Cable Equalization Up to 250m Belden 8281 (270MHz)<br />
Up to 140m Belden 1694A (1.485GHz)<br />
Up to 80m Belden 1694A (2.97GHz)<br />
Return Loss > 15 dB (270MHz)<br />
> 10dB (1.485GHz)<br />
OPTIONAL: Video Input (Fiber)<br />
Signal Type SMPTE 297M-2006<br />
No. of inputs 1<br />
Connector LC/PC (single mode transmit/receive – duplex connection)<br />
Wavelength 1260nm – 1620nm (-19dBm sensitivity)<br />
Video Outputs (BNC)<br />
Signal Type Serial digital video SMPTE 292M, 344M, 259M-C, 424 M (option)<br />
Output standards See table on page 9<br />
No. Of outputs 2 separate outputs with 2 x SDI out of each output (4 total)<br />
(mapped to any available internal resource)<br />
Connector BNC<br />
Impedance 75 Ohms<br />
Jitter < 0.2 UI (Timing Jitter); (270MHz)<br />
< 0.2 UI (Alignment Jitter); < 1.0 UI (Timing Jitter); (1.485GHz)<br />
< 0.3 UI (Alignment Jitter); < 2.0 UI (Timing Jitter); (2.97GHz)<br />
Return Loss > 15 dB (1.5GHz)<br />
OPTIONAL: Video Outputs (Fiber)<br />
Page 50 of 52<br />
P IE 5810 <strong>Reference</strong> <strong>Manual</strong>. Rev 2.6<br />
Signal Type SMPTE 297M-2006<br />
No. of outputs 1<br />
Connector LC/PC (single mode transmit/receive – duplex connection)<br />
Wavelength Standard: 1310nm (non-CWDM), other wavelengtsh for CWDM as option<br />
Transmission power Standard: 1310nm (non-CWDM):-5dBm, other wavelengths for CWDM as option: -1dBm<br />
Video Processing<br />
Delay adjustment range Up to 12 frames of programmable delay in pixel / line / frame increments. Independent for all 2<br />
outputs (optional)<br />
Minimum delay Variable, depending on selected functionality and installed options. Please refer to “Fixed<br />
Video Delays” table in this manual<br />
Video adjustments Gain / Saturation / Hue / Black Level<br />
Aperture correction Horizontal only, adjustable for each output channel (3)<br />
Color space conversion 601 > 709 or 709 > 601 or transparent (selectable) Note. Requires conversion option(s)<br />
Control<br />
Local Controls Local alphanumeric display with integrated menu system for setting “basic” module<br />
parameters.<br />
Remote Control Comprehensive remote control and status monitoring supported when used with a <strong>LYNX</strong><br />
Controller option. The use of the control system is mandated for this module<br />
External GPI Single GPI input on BNC connector. GPI influence configured in control system.<br />
Electrical Specifications<br />
Operating Voltage 12 VDC<br />
Power Consumption 18 W
Safety IEC 60950/ EN 60950/ VDE 0805<br />
Mechanical<br />
Size 283mm x 78mm<br />
Weight CardModule 160g, connector plate 100g<br />
Rack space Requires 2 slots in rack frame (max 5 modules per frame)<br />
Ambient<br />
Temperature 5°C to 40°C Maintaining specifications<br />
Humidity 90% Max non condensing<br />
Page 51 of 52<br />
P IE 5810 <strong>Reference</strong> <strong>Manual</strong>. Rev 2.6
Service<br />
Parts List<br />
Page 52 of 52<br />
P IE 5810 <strong>Reference</strong> <strong>Manual</strong>. Rev 2.6<br />
Due to the very dense design and high level of integration there the module is not user<br />
serviceable. Please contact <strong>LYNX</strong> for repairs or to request an exchange unit.<br />
There is one consumable part used on this module which is the cooling fan. A service kit<br />
is available to exchange the fan. Ordering information below.<br />
Part type: Cooling Fan Service Kit Series 5000 CardModules<br />
Technical Support<br />
If you are experiencing problems, or have questions please contact your local distributor<br />
for further assistance.<br />
Technical support is also available from our website.<br />
Please do not return products to <strong>LYNX</strong> without an RMA. Please contact your authorized<br />
dealer or reseller for more details.<br />
More detailed product information and product updates may be available on our web site:<br />
Contact Information<br />
www.lynx-technik.com<br />
Please contact your local distributor; this is your local and fastest method for obtaining<br />
support and sales information.<br />
<strong>LYNX</strong> <strong>Technik</strong> can be contacted directly using the information below.<br />
Address <strong>LYNX</strong> <strong>Technik</strong> <strong>AG</strong><br />
Brunnenweg 3<br />
D-64331 Weiterstadt<br />
Germany<br />
Website www.lynx-technik.com<br />
E-Mail info@lynx-technik.com<br />
<strong>LYNX</strong> <strong>Technik</strong> manufactures a complete range of high quality modular products for<br />
broadcast and Professional markets, please contact your local representative or visit our<br />
web site for more product information.