

MAINTENANCE MANUAL - Meritor
MAINTENANCE MANUAL - Meritor
MAINTENANCE MANUAL - Meritor

Create successful ePaper yourself
Turn your PDF publications into a flip-book with our unique Google optimized e-Paper software.
Preparation for assembly<br />
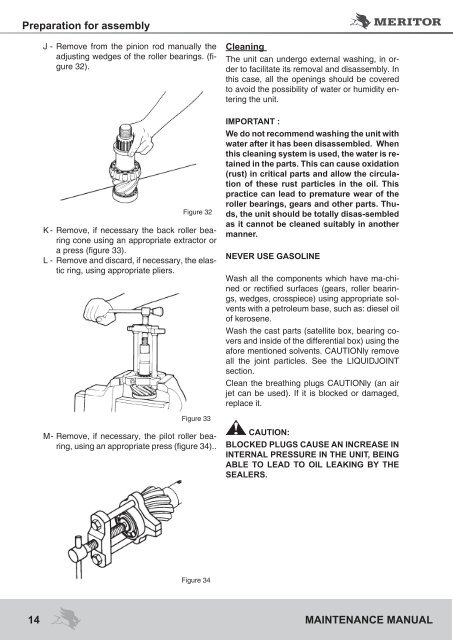
J - Remove from the pinion rod manually the<br />
adjusting wedges of the roller bearings. (figure<br />
32).<br />
Cleaning<br />
The unit can undergo external washing, in order<br />
to facilitate its removal and disassembly. In<br />
this case, all the openings should be covered<br />
to avoid the possibility of water or humidity entering<br />
the unit.<br />
Figure 32<br />
K - Remove, if necessary the back roller bearing<br />
cone using an appropriate extractor or<br />
a press (figure 33).<br />
L - Remove and discard, if necessary, the elastic<br />
ring, using appropriate pliers.<br />
IMPORTANT :<br />
We do not recommend washing the unit with<br />
water after it has been disassembled. When<br />
this cleaning system is used, the water is retained<br />
in the parts. This can cause oxidation<br />
(rust) in critical parts and allow the circulation<br />
of these rust particles in the oil. This<br />
practice can lead to premature wear of the<br />
roller bearings, gears and other parts. Thuds,<br />
the unit should be totally disas-sembled<br />
as it cannot be cleaned suitably in another<br />
manner.<br />
NEVER USE GASOLINE<br />
Wash all the components which have ma-chined<br />
or rectified surfaces (gears, roller bearings,<br />
wedges, crosspiece) using appropriate solvents<br />
with a petroleum base, such as: diesel oil<br />
of kerosene.<br />
Wash the cast parts (satellite box, bearing covers<br />
and inside of the differential box) using the<br />
afore mentioned solvents. CAUTIONly remove<br />
all the joint particles. See the LIQUIDJOINT<br />
section.<br />
Clean the breathing plugs CAUTIONly (an air<br />
jet can be used). If it is blocked or damaged,<br />
replace it.<br />
Figure 33<br />
M - Remove, if necessary, the pilot roller bearing,<br />
using an appropriate press (figure 34)..<br />
CAUTION:<br />
Blocked plugs cause an increase in<br />
internal pressure in the unit, being<br />
able to lead to oil leaking by the<br />
sealers.<br />
Figure 34<br />
14 <strong>MAINTENANCE</strong> <strong>MANUAL</strong>


