

Standard (22-132) 1. Read through installation ... - Classic Auto Air
Standard (22-132) 1. Read through installation ... - Classic Auto Air
Standard (22-132) 1. Read through installation ... - Classic Auto Air

You also want an ePaper? Increase the reach of your titles
YUMPU automatically turns print PDFs into web optimized ePapers that Google loves.
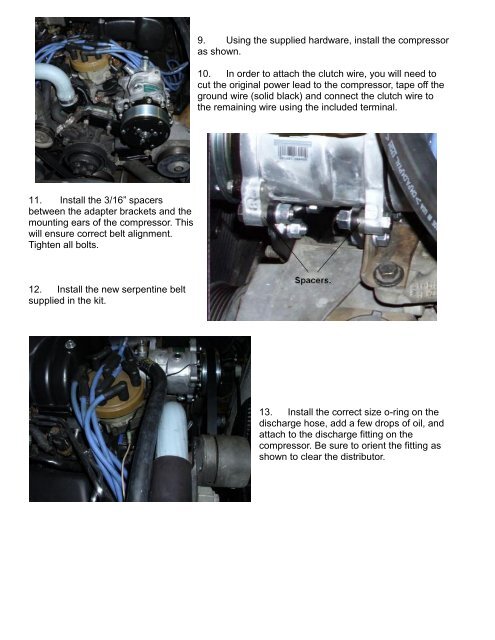
9. Using the supplied hardware, install the compressor<br />
as shown.<br />
10. In order to attach the clutch wire, you will need to<br />
cut the original power lead to the compressor, tape off the<br />
ground wire (solid black) and connect the clutch wire to<br />
the remaining wire using the included terminal.<br />
1<strong>1.</strong> Install the 3/16” spacers<br />
between the adapter brackets and the<br />
mounting ears of the compressor. This<br />
will ensure correct belt alignment.<br />
Tighten all bolts.<br />
12. Install the new serpentine belt<br />
supplied in the kit.<br />
13. Install the correct size o-ring on the<br />
discharge hose, add a few drops of oil, and<br />
attach to the discharge fitting on the<br />
compressor. Be sure to orient the fitting as<br />
shown to clear the distributor.


