60-2104-10 - L4006,7,8; L6006,7,8 Aquastat ... - PexSupply.com
60-2104-10 - L4006,7,8; L6006,7,8 Aquastat ... - PexSupply.com
60-2104-10 - L4006,7,8; L6006,7,8 Aquastat ... - PexSupply.com

You also want an ePaper? Increase the reach of your titles
YUMPU automatically turns print PDFs into web optimized ePapers that Google loves.
<strong>L4006</strong>,7,8; L<strong>60</strong>06,7,8 AQUASTAT ® CONTROLLERS<br />
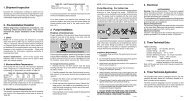
INSTALLATION<br />
When Installing This Product…<br />
1. Read these instructions carefully. Failure to follow them<br />
could damage the product or cause a hazardous<br />
condition.<br />
2. Check the ratings given in the instructions and on the<br />
product to make sure the product is suitable for your<br />
application.<br />
3. Installer must be a trained, experienced service<br />
technician.<br />
4. After installation is <strong>com</strong>plete, check product operation as<br />
provided in these instructions.<br />
WARNING<br />
Explosion Hazard.<br />
Can cause serious injury, death or property<br />
damage.<br />
This product is intended for use only in systems with a<br />
pressure relief valve.<br />
WARNING<br />
Electrical Shock Hazard.<br />
Can cause serious injury or death.<br />
Disconnect power supply before beginning installation<br />
to prevent electrical shock or equipment damage.<br />
CAUTION<br />
Equipment Damage Hazard.<br />
Use of incorrect device or improper installation can<br />
damage the system.<br />
1. Do not replace immersion-type <strong>Aquastat</strong> Controller<br />
with strap-on <strong>Aquastat</strong> Controller.<br />
2. Do not secure draw nut so tightly that retainer clamp<br />
can collapse tubing.<br />
IMPORTANT<br />
1. Terminals on these <strong>Aquastat</strong> relays are approved for<br />
copper wire only.<br />
2. Controller may be used with or without immersion<br />
well. If used, well must snugly fit sensing bulb for best<br />
thermal response. Insert bulb until it rests against the<br />
bottom of the well. Use well of correct length and<br />
bend the tubing, if necessary, to provide enough force<br />
to hold the bulb against the bottom of the well. Avoid<br />
making a sharp bend in the tubing as it can produce a<br />
break in the tubing and cause loss of fill. This<br />
condition causes the High and Low Limit controls to<br />
be made continuously.<br />
3. If well does not snugly fit on bulb, use the heatconductive<br />
<strong>com</strong>pound, included with Super Tradeline<br />
and Tradeline models, as follows: Fold the plastic bag<br />
of <strong>com</strong>pound lengthwise and twist gently. Snip the<br />
end of the bag and insert into the well. Slowly pull out<br />
the bag while squeezing firmly to distribute <strong>com</strong>pound<br />
evenly in the well. Insert the bulb into the well. Bend<br />
the tubing, if necessary, to provide force to hold the<br />
bulb against the bottom of the well and to hold the<br />
outer end of the bulb firmly in contact with the side of<br />
the well. Wipe off excess <strong>com</strong>pound.<br />
The manufacturer usually provides a tapping for insertion of<br />
the controller sensing element. This tapping is located at a<br />
point where typical water temperature can be measured.<br />
Depending on the model, the element is inserted in an<br />
immersion well, through a boiler fitting, or directly immersed.<br />
Installation should be made by a qualified service technician.<br />
Follow the instructions furnished by the system manufacturer, if<br />
available. Otherwise, refer to appropriate procedure listed<br />
below.<br />
Mounting Immersion Well and Direct<br />
Immersion Models (<strong>L4006</strong>A,B,C,E,G;<br />
L4007A,B; L<strong>60</strong>06A,B; L<strong>60</strong>07A)<br />
Installing Immersion Well Models<br />
(<strong>L4006</strong>A,B,E,G; L4007A,B; L<strong>60</strong>06A; L<strong>60</strong>07A)<br />
On an existing installation, shut off the power and remove the<br />
old control. If the old immersion well appears suitable, and if<br />
the adapter clamp on the <strong>Aquastat</strong> Controller fits the old well<br />
spud, this well does not need to be replaced.<br />
To replace the well:<br />
1. If the system is filled, drain the system to a point below<br />
the boiler tapping.<br />
2. Remove the old well from the boiler tapping.<br />
3. Install the immersion well included with the controller. If<br />
the boiler tapping is greater than 1/2 in. (13 mm), use a<br />
reduction fitting to adapt the boiler opening to the 1/2 in.<br />
(13 mm) threads that are standard with the well or fitting.<br />
Fittings with 3/4 in. (19 mm) threads are also available.<br />
4. Fill the system. Make sure that the well is screwed in<br />
tightly enough to prevent leakage. Do not use the case<br />
as a handle to tighten the well after the controller is<br />
secured to the well.<br />
To install the controller:<br />
1. Loosen the screw (at the top of the case, above the<br />
scale setting), and remove the cover. Loosen the two<br />
screws that secure the adapter clamp. (See Fig. 6).<br />
2. Insert the sensing element into the immersion well.<br />
3. Fasten the case of the <strong>Aquastat</strong> Controller to the well<br />
with the adapter clamp. Make certain that the clamp is<br />
properly positioned over the groove of the well spud.<br />
Also, be sure the flange at the opening of the well fits<br />
snugly into the opening of the case. The sensing bulb<br />
must bottom in the well.<br />
NOTE:<br />
Some models include up to 3 in. (76 mm) extra capillary<br />
tubing inside the case. In these models, pull out<br />
the extra tubing, if needed.<br />
<strong>60</strong>-<strong>2<strong>10</strong>4</strong>—<strong>10</strong> 8