Reference Manual - clv490.pdf - Machine Vision Components
Reference Manual - clv490.pdf - Machine Vision Components
Reference Manual - clv490.pdf - Machine Vision Components
Create successful ePaper yourself
Turn your PDF publications into a flip-book with our unique Google optimized e-Paper software.
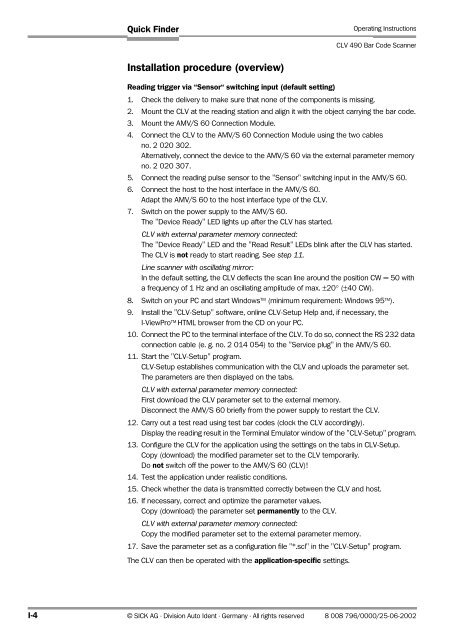
Quick Finder<br />
Operating Instructions<br />
CLV 490 Bar Code Scanner<br />
Installation procedure (overview)<br />
Reading trigger via “Sensor“ switching input (default setting)<br />
1. Check the delivery to make sure that none of the components is missing.<br />
2. Mount the CLV at the reading station and align it with the object carrying the bar code.<br />
3. Mount the AMV/S 60 Connection Module.<br />
4. Connect the CLV to the AMV/S 60 Connection Module using the two cables<br />
no. 2 020 302.<br />
Alternatively, connect the device to the AMV/S 60 via the external parameter memory<br />
no. 2 020 307.<br />
5. Connect the reading pulse sensor to the "Sensor" switching input in the AMV/S 60.<br />
6. Connect the host to the host interface in the AMV/S 60.<br />
Adapt the AMV/S 60 to the host interface type of the CLV.<br />
7. Switch on the power supply to the AMV/S 60.<br />
The "Device Ready" LED lights up after the CLV has started.<br />
CLV with external parameter memory connected:<br />
The "Device Ready" LED and the "Read Result" LEDs blink after the CLV has started.<br />
The CLV is not ready to start reading. See step 11.<br />
Line scanner with oscillating mirror:<br />
In the default setting, the CLV deflects the scan line around the position CW = 50 with<br />
a frequency of 1 Hz and an oscillating amplitude of max. ±20° (±40 CW).<br />
8. Switch on your PC and start Windows TM (minimum requirement: Windows 95 TM ).<br />
9. Install the "CLV-Setup" software, online CLV-Setup Help and, if necessary, the<br />
I-ViewPro TM HTML browser from the CD on your PC.<br />
10. Connect the PC to the terminal interface of the CLV. To do so, connect the RS 232 data<br />
connection cable (e. g. no. 2 014 054) to the "Service plug" in the AMV/S 60.<br />
11. Start the "CLV-Setup" program.<br />
CLV-Setup establishes communication with the CLV and uploads the parameter set.<br />
The parameters are then displayed on the tabs.<br />
CLV with external parameter memory connected:<br />
First download the CLV parameter set to the external memory.<br />
Disconnect the AMV/S 60 briefly from the power supply to restart the CLV.<br />
12. Carry out a test read using test bar codes (clock the CLV accordingly).<br />
Display the reading result in the Terminal Emulator window of the "CLV-Setup" program.<br />
13. Configure the CLV for the application using the settings on the tabs in CLV-Setup.<br />
Copy (download) the modified parameter set to the CLV temporarily.<br />
Do not switch off the power to the AMV/S 60 (CLV)!<br />
14. Test the application under realistic conditions.<br />
15. Check whether the data is transmitted correctly between the CLV and host.<br />
16. If necessary, correct and optimize the parameter values.<br />
Copy (download) the parameter set permanently to the CLV.<br />
CLV with external parameter memory connected:<br />
Copy the modified parameter set to the external parameter memory.<br />
17. Save the parameter set as a configuration file "*.scl" in the "CLV-Setup" program.<br />
The CLV can then be operated with the application-specific settings.<br />
I-4 © SICK AG · Division Auto Ident · Germany · All rights reserved 8 008 796/0000/25-06-2002


