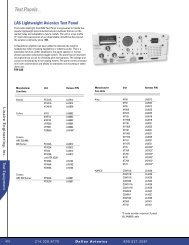
TSC-4100/4200/4300 - Dallas Avionics, Inc.
TSC-4100/4200/4300 - Dallas Avionics, Inc.
TSC-4100/4200/4300 - Dallas Avionics, Inc.

You also want an ePaper? Increase the reach of your titles
YUMPU automatically turns print PDFs into web optimized ePapers that Google loves.
2.5 OPTIONAL LOUDSPEAKER, HEADPHONE INSTALLATION<br />
Provision is made for connection of an external loudspeaker or headphone to the<br />
jack of the transceiver, as shown in Figure 3-1.<br />
SPEAKER/PHONE<br />
2.5.1 External Loudspeaker<br />
When an external loudspeaker is to be installed, an 8-ohm nominal impedance loudspeaker should<br />
be used. The loudspeaker cable should be terminated by a 1/4 in., 3-pole telephone plug (male), with<br />
the loudspeaker connected between tip and sleeve (ground). Insert the external loudspeaker<br />
connector into the SPEAKER/PHONE jack located on the front panel of the transceiver. When the<br />
external loudspeaker is connected to the transceiver SPEAKER/PHONE jack, the internal<br />
loudspeaker is automatically disconnected.<br />
2.5.2 Headset<br />
Headset impedance should be 150 to 600 ohms. The headset cable must terminate in a 1/4<br />
in. 3-pole telephone plug (male), to mate with the SPEAKER/PHONE jack located on the front<br />
panel of the transceiver. The internal loudspeaker is automatically disconnected. Connect the<br />
headset as indicated below for receiver audio with or without transmit audio.<br />
(1) HEADSET WITHOUT TRANSMIT AUDIO - When receiver audio only without transmit<br />
audio is required, the headset should be connected between the tip and sleeve (ground)<br />
of the telephone plug.<br />
(2) HEADSET WITH TRANSMIT AUDIO - When receiver audio with transmit audio is<br />
required, the headset should be connected between the ring and sleeve (ground).<br />
2.6 TRANSCEIVER ADJUSTMENTS AND SETTINGS<br />
The locations at which certain transceiver settings and adjustments can be performed are shown in<br />
Figure 2-5. The top dust cover of the transceiver must be removed as described in paragraph 2.2.1<br />
to access the AGC, Squelch and Modulation settings. The plastic plugs must be removed prior to<br />
adjustment of the remaining settings which are accessed from the bottom of the transceiver chassis.<br />
If alignment procedures for these settings are required please consult the manufacturer or the<br />
appropriate service manual.<br />
2.7 OPERATIONAL CHECK<br />
Perform an operational check of the transceiver after all adjustments. Ensure that the transceiver<br />
operates in both the transmit and receive modes of operation, using the Operating Instructions given<br />
in Section 3 of this document and the appropriate specified operating procedures for use with the<br />
Remote Control Unit.<br />
2.8 STORAGE<br />
To store for an extended period, store unit in a dry place, in the original shipping container.<br />
2-14