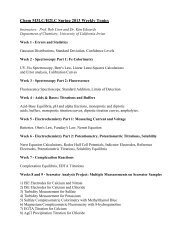
COMPLEXATION REACTIONS AND EDTA TITRATIONS
COMPLEXATION REACTIONS AND EDTA TITRATIONS
COMPLEXATION REACTIONS AND EDTA TITRATIONS

You also want an ePaper? Increase the reach of your titles
YUMPU automatically turns print PDFs into web optimized ePapers that Google loves.
Complexation Revised: 11/11/13<br />
<strong>COMPLEXATION</strong> <strong>REACTIONS</strong> <strong>AND</strong> <strong>EDTA</strong> <strong>TITRATIONS</strong><br />
BACKGROUND<br />
Students must read the following before coming to lab for more details of the experiment. This<br />
information will also help with writing a detailed introduction for the lab report.<br />
1. Yappert, M.C.; DuPré, D.B. J. Chem. Educ. “Complexometric Titrations: Competition of<br />
Complexing Agents in the Determination of Water Hardness with <strong>EDTA</strong>.” 1997, 74, No. 12,<br />
1422 – 1423. (http://unicorn.ps.uci.edu/M3LC/handouts/calmagite.pdf).<br />
2. Dahm, C.E.; Hall, J. W. J. Chem. Educ. “A Laser-Pointer-Based Spectrometer for Endpoint<br />
Detection of <strong>EDTA</strong> Titrations.” 2004, 81, No. 12, 1787 – 1789.<br />
3. Soroka, K.; Vithanage, R.S.; Phillops, D.A.; Walker, B.; Dasgupta, P.K. Anal. Chem.<br />
“Fluorescence Properties of Metal Complexes of 8-Hydroxyquinoline-5-sulfonic Acid and<br />
Chromatographic Applications.” 1967, 59, 629 – 636.<br />
(http://unicorn.ps.uci.edu/M3LC/handouts/HQFluorometry.pdf).<br />
4. Skoog, West, Holler, Crouch. “Chapter 17: Complexation Reactions and Titrations.”<br />
Fundamentals of Analytical Chemistry. 8th ed. 458 – 482.<br />
SAFETY<br />
Safety goggles and aprons must be worn in lab at all times. Store all the waste in correct labeled<br />
waste container.<br />
PROCEDURE<br />
Work in pairs.<br />
Part A: <strong>EDTA</strong> TITRATION OF 0.01 M MgCl 2<br />
1. Pour 25 mL of 0.01M MgCl 2 solution, 1 mL of NH 4 OH buffer, 10 drops of Calmagite into a<br />
150 mL beaker with a small magnetic stir bar. Put the beaker on a stir plate.<br />
2. Turn the stir plate on to a medium stirring speed (3-5).<br />
3. Clamp a burette filled with 0.0100 M <strong>EDTA</strong> above the beaker.<br />
4. Plug the spectrometer into your computer and calibrate with DI water.<br />
5. Use plastic pipet to transfer 1.5 mL of the solution in the beaker to a prerinsed cuvette.<br />
6. Place cuvette in spectrometer holder and take the absorbance spectrum.<br />
1
Complexation Revised: 11/11/13<br />
7. Carefully pour the solution in the cuvette back into the beaker, use the pipet to take up all the<br />
solution still left inside.<br />
8. Titrate slowly. Repeat step 5-7 after 10 mL and 20 mL of <strong>EDTA</strong> titrant is added and until<br />
the first color change happens. Record the color change.<br />
9. Slowly add more titrant until the 2 nd color change happens. This is the end point. Record the<br />
volume of <strong>EDTA</strong>. Take absorbance spectrum.<br />
10. Add another 5 mL of <strong>EDTA</strong> titrant. Repeat steps 5-7.<br />
11. Repeat this titration one more time. When approaching the 2 nd change of color, slowly add<br />
<strong>EDTA</strong> titrant (0.5 mL/min) to get precise value for volume. (Repeat steps 5-7 every 0.5 mL<br />
when approaching the equivalence point.)<br />
Part B: <strong>EDTA</strong> TITRATION OF UNKNOWN MgCl 2<br />
The stockroom will provide a solution of with an unknown concentration of MgCl 2 . Repeat the<br />
procedures in Part A with this solution.<br />
Part C: HQS FLOURESCENCE<br />
1. Prepare solution for fluorescence measurement:<br />
Use syringe to transfer 500 µL of unknown solution in part B to a flask with 25 mL of 1 mM<br />
HQS solution. Mix the solution thoroughly. Use a plastic pipet to place a few drops of the<br />
solution above onto pH paper. Record the color and pH of solution.<br />
2. Absorbance Spectrum:<br />
a) Open Logger Pro. If the program doesn’t automatically recognize the spectrometer,<br />
unplug it and plug it back in. Go to Experiment and choose Calibrate. Let the lamp<br />
warm up for at least 90 seconds. When the spectrometer is ready, fill a clean cuvette with<br />
water to use as a blank.<br />
b) Transfer 1.5 mL of the solution made in step 1 in a prerinsed cuvette. Press the Collect.<br />
Once the spectrum is acquired, press Stop. Rinse the cuvette. Save the spectrum. By<br />
examining the spectrum, chose the best excitation wavelength. The best wavelength is<br />
where the absorption is reasonably strong but the emission is weak. With only two<br />
excitation wavelengths at your disposal (405 nm and 500 nm), the choice should be quite<br />
obvious.<br />
2
Complexation Revised: 11/11/13<br />
3. Fluorescence Spectrum:<br />
a) Go to Experiment and choose Calibrate. Let the lamp warm up for at least 90 seconds.<br />
When the spectrometer is ready, fill a clean cuvette with 1mM HQS solution to use as a<br />
blank.<br />
b) Go to Experiment and choose Change Units. Change the units to fluorescence, selecting<br />
the appropriate fluorescence wavelength.<br />
c) Transfer 1.5 mL of the solution made in step 1 in a prerinsed cuvette. Press Start. Wait a<br />
few seconds then record the wavelength of maximum fluorescence and fluorescence<br />
intensity. Save the spectrum. Remove the cuvette, rinse well. Save all spectra, the data is<br />
needed for your report.<br />
d) Plot the fluorescence intensity vs. the concentration based on the data below, determine<br />
the concentration of the unknown solution.<br />
e) Does the unknown signal fall within the calibration range If not dilute the unknown by<br />
an appropriate factor (e.g., by 2), and collect another spectrum.<br />
Fluorescence<br />
Intensity<br />
Volume of 0.01 M<br />
MgCl 2 (mL)<br />
Volume of 1 mM<br />
HQS (mL)<br />
0.031250902 0.8 100<br />
0.049490754 0.8 50<br />
0.059803507 2 100<br />
0.085834029 3.6 100<br />
Part E: Shutting Down<br />
The solutions produced during this lab should be poured into the waste container in fume hood.<br />
Please turn off the program and disconnect the spectrometer from the computer (following<br />
proper steps for disconnecting USB powered hardware). Give the spectrometer to the TA.<br />
Return kits to the stockroom with clean glassware.<br />
3