Model 1001 - Bulldog Security
Model 1001 - Bulldog Security
Model 1001 - Bulldog Security

You also want an ePaper? Increase the reach of your titles
YUMPU automatically turns print PDFs into web optimized ePapers that Google loves.
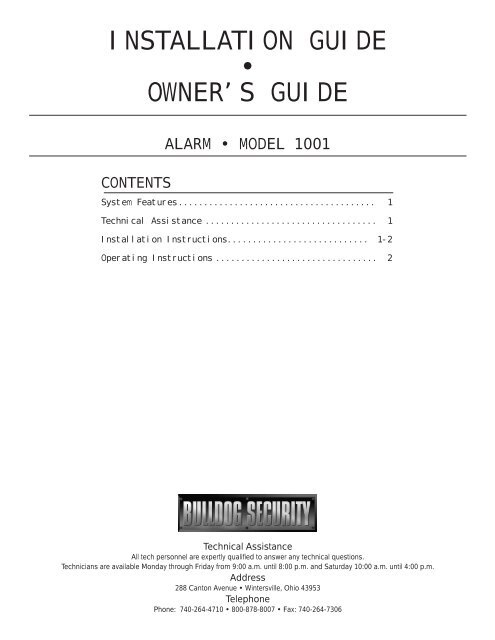
INSTALLATION GUIDE<br />
•<br />
OWNER’S GUIDE<br />
ALARM • MODEL <strong>1001</strong><br />
CONTENTS<br />
System Features ....................................... 1<br />
Technical Assistance .................................. 1<br />
Installation Instructions............................ 1-2<br />
Operating Instructions ................................ 2<br />
Technical Assistance<br />
All tech personnel are expertly qualified to answer any technical questions.<br />
Technicians are available Monday through Friday from 9:00 a.m. until 8:00 p.m. and Saturday 10:00 a.m. until 4:00 p.m.<br />
Address<br />
288 Canton Avenue • Wintersville, Ohio 43953<br />
Telephone<br />
Phone: 740-264-4710 • 800-878-8007 • Fax: 740-264-7306
SYSTEM FEATURES<br />
One-Piece Self-Contained<br />
Only One Wire<br />
Four Button Remote Transmitter<br />
with Slide Protector<br />
Extra Loud Siren<br />
Current Sensing<br />
State-of-the-Art Electronic<br />
Dual Stage Shock Sensor<br />
Instant Panic Mode<br />
Remote Car Finder<br />
Automatic Alarm Reset<br />
Special Situations<br />
Scan Deterrent<br />
Limited Lifetime Warranty<br />
Fast and easy to install, usually 5 to 10 minutes with no experience. Fits virtually any<br />
vehicle.<br />
Remotely activates your alarm, car finder and instant panic.<br />
Slide protection stops accidental alarm activation.<br />
Deters thieves from further tampering.<br />
The alarm will sound with changes in current. Example: Dome light or ignition switch.<br />
Not sensitive to temperature or age, extremely sensitive to shock or glass breakage. Example:<br />
A light tap and the alarm will chirp once, a harder shock and the alarm will sound.<br />
Should you feel threatened, you can remotely activate the siren with the press of a button.<br />
Helps you locate your vehicle in a crowded parking lot by chirping the siren eight times.<br />
If the alarm is violated, it will stop and rearm itself after 35 seconds.<br />
Allows you to lower or shut off the sensitivity of your shock sensor for special situation.<br />
Example: when parked near a construction zone or in heavy rain. (Remotely programmable)<br />
Protects your car from scanning devices often used by thieves to disarm alarm systems.<br />
Guarantees life-long protection.<br />
TECHNICAL ASSISTANCE<br />
Should you need help. First check our website at www.bulldogsecurity.com/wires.htm or call our toll-free<br />
Tech Support Hotline Monday through Friday 9AM-8PM and Saturday 10AM-4PM EST at 800-878-8007.<br />
You must give the following information:<br />
•Name<br />
•Telephone Number with Area Code (Fax number if applicable)<br />
•Year, Make, and <strong>Model</strong> of the vehicle<br />
•The model number of the system you are installing<br />
•The type of assistance you are requesting<br />
If you give the above information you will be called back as soon as possible, usually within 10 minutes.<br />
INSTALLATION INSTRUCTIONS<br />
1. Locate a solid, well grounded metal surface under the hood as high as possible behind the engine<br />
compartment. Any metal fender, firewall or metal plate will do. For the loudest sound, the siren should<br />
point down. CAUTION: Do not mount close to exhaust or other high temperature areas. Make sure the alarm<br />
as well as the metal it is mounted to is solid with no moving parts nearby. The siren should not point<br />
up, as moisture could collect in the siren horn and damage the system (See figure #1.)<br />
2. Use three self-tapping screws (included) to secure the alarm. Screw into a well grounded metal surface.<br />
CAUTION: You must use all three screws. (See figure #2.)<br />
3. Connect the RED power wire with the supplied alligator clip and clip it to any constant +12 volt supply<br />
such as the battery. If installation is correct, the alarm will chirp twice. (See figure #3.)<br />
4. For maximum range, keep the YELLOW antenna wire straight and as far away from metal as possible.<br />
Figure 1<br />
Possible<br />
Locations<br />
Figure 2<br />
Antenna<br />
Alarm<br />
Self-tapping<br />
screws<br />
Figure 3<br />
- +<br />
To Alarm<br />
Red<br />
Positive<br />
Cable<br />
1
ATTNETION: The model <strong>1001</strong> also has a negative output and a negative input wire. These additions can only<br />
be done by an experienced technician.<br />
BLUE - Negative output wire. This wire can be used with an optional module to operate power door locks,<br />
starter input and flashing lights.<br />
GRAY - Negative input wire. This wire is used to trigger the alarm by using an additional shock sensor,<br />
pin switch, etc.<br />
OPERATING INSTRUCTIONS<br />
NOTE: Before operating your alarm, slide the protector down<br />
(attached to the back of your remote transmitter) snap off the back and snap to the front.<br />
Arming<br />
Press transmitter Button #1. The system will chirp once and arm.<br />
Disarming<br />
Press transmitter Button #2. The alarm will chirp twice and disarmed. EXCEPTION: If the vehicle is tampered<br />
with while the alarm is set, the alarm will have sounded for 35 seconds, shut off and the rearm itself.<br />
When disarmed the alarm will chirp three times. This is a good time to inspect the vehicle for forced entry<br />
marks, paint dings or scratches, and check to be sure a wheel isn't partially removed, etc.<br />
Adjusting the Shock Sensor Sensitivity<br />
Disarm the system, press and hold the transmitter Button #3 (finder) for approximately five seconds or until<br />
the alarm chirps four times, immediately release the button. Slap your hood directly over the alarm at the<br />
sensitivity level you wish. The harder you hit the car the less sensitive the alarm will be. The alarm will<br />
then chirp three times. The shock sensor is now set at this sensitivity. Any shock at this level or greater<br />
will sound the alarm. Set the shock sensor as often as you wish, however, the sensitivity level will remain<br />
set until the battery is disconnected or you reset it. If you don’t slap the car it will automatically go to<br />
maximum sensitivity. This setting is only acceptable if the car is parked inside a garage.<br />
Dual Stage Shock Sensor<br />
The dual stage shock sensor is used to protect your car from slight shocks, such as other car doors hitting<br />
your car, etc. A single shock will case the alarm to chirp once; continual tampering will cause the alarm<br />
to sound. Should you set your alarm near maximum sensitivity, the dual stage will not work.<br />
Special Situations<br />
Sometimes when you park your car in heavy rain, near a construction zone, near trucks, etc. you may wish to<br />
lower the sensitivity of your alarm FOR THIS ARMING ONLY. To lower the sensitivity by 50%, press transmitter<br />
Button #1 to arm and then again within two seconds after arming. To shut the shock sensor off completely,<br />
press transmitter Button #1 twice within two seconds after arming. The next time the alarm is set it will<br />
go back to the original setting.<br />
If the vehicle is violated, the siren sounds. After 35 seconds if the violation stops, the alarm will stop and<br />
rearm itself.<br />
Your alarm will ignore all violations, current and shock, for approximately 45 seconds after you arm it.<br />
Car Finder<br />
While the system is armed, press and release transmitter Button #3 (finder). The alarm will chirp eight times.<br />
This is used to locate your vehicle in a crowded parking lot.<br />
Instant Panic<br />
Press and release transmitter Button #4 (panic) to sound the instant panic siren. The siren will activate<br />
for 30 seconds and then shut off. To stop the siren before the 30 seconds, press any of the four transmitter<br />
buttons. This feature functions at all times; whether the alarm is armed or disarmed, or the engine is off<br />
or running.<br />
SPECIAL NOTE: If you have a cellular phone or other mobile radio equipment, turn it off before you leave your<br />
vehicle. Otherwise, your alarm can detect the power drain and sound the alarm. The transmitter has a maximum<br />
range of about 200 feet or 60 meters. The actual range depends on your installation, the location of nearby<br />
metal objects and the strength of the remote transmitter battery.<br />
2