ThaiEasyElec - 2.8 inch TFT Touch Shield User ... - ThaiEasyElec.net
ThaiEasyElec - 2.8 inch TFT Touch Shield User ... - ThaiEasyElec.net
ThaiEasyElec - 2.8 inch TFT Touch Shield User ... - ThaiEasyElec.net

You also want an ePaper? Increase the reach of your titles
YUMPU automatically turns print PDFs into web optimized ePapers that Google loves.
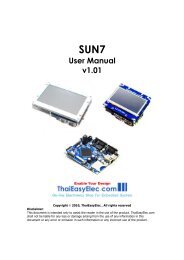
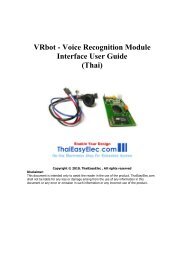
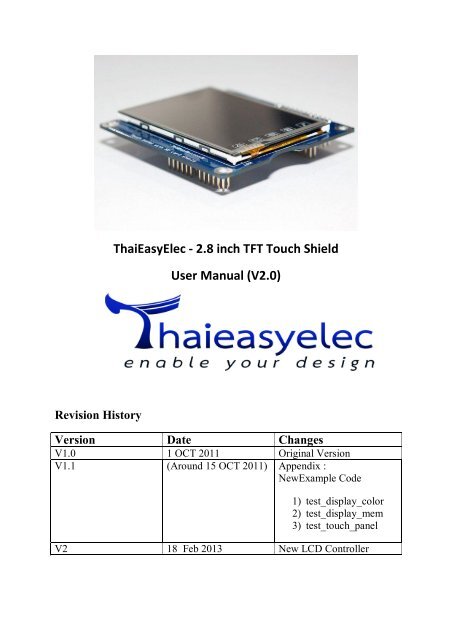
<strong>ThaiEasyElec</strong> - <strong>2.8</strong> <strong>inch</strong> <strong>TFT</strong> <strong>Touch</strong> <strong>Shield</strong><br />
<strong>User</strong> Manual (V2.0)<br />
Revision History<br />
Version Date Changes<br />
V1.0 1 OCT 2011 Original Version<br />
V1.1 (Around 15 OCT 2011) Appendix :<br />
NewExample Code<br />
1) test_display_color<br />
2) test_display_mem<br />
3) test_touch_panel<br />
V2 18 Feb 2013 New LCD Controller
Content<br />
เนือหา<br />
1) คุณสมบัติของบอร์ด <strong>2.8</strong> <strong>inch</strong> <strong>TFT</strong> <strong>Touch</strong> <strong>Shield</strong> ................................................................................... 2<br />
2) รายละเอียดขาของ <strong>2.8</strong> <strong>inch</strong> <strong>TFT</strong> <strong>Touch</strong> <strong>Shield</strong> ..................................................................................... 3<br />
3) ขาสัญญาณต่างๆของบอร์ด <strong>2.8</strong> <strong>inch</strong> <strong>TFT</strong> <strong>Touch</strong> <strong>Shield</strong>.......................................................................... 4<br />
4) การเชือมต่อ <strong>2.8</strong> <strong>inch</strong> <strong>TFT</strong> <strong>Touch</strong> <strong>Shield</strong> กับ Arduino............................................................................. 5<br />
5) การเขียนโปรแกรมบน Arduino เพือใช้งานบอร์ด <strong>2.8</strong> <strong>inch</strong> <strong>TFT</strong> <strong>Touch</strong> <strong>Shield</strong> ............................................. 5<br />
ชุดคําสังใช้งาน แสดงผล LCD ............................................................................................................... 7<br />
ชุดคําสังใช้งาน SD Card ................................................................................................................... 14<br />
ชุดคําสังใช้งาน <strong>Touch</strong> Screen .......................................................................................................... 17<br />
วิธีแปลง File รูปภาพเป็ น Binary File .................................................................................................. 19<br />
1 <strong>ThaiEasyElec</strong> - <strong>2.8</strong> <strong>inch</strong> <strong>TFT</strong> <strong>Touch</strong> <strong>Shield</strong> user manual V1.0| Venus Supply Co.,ltd - Contact : Sales@thaieasyelec.com
Introduction<br />
<strong>2.8</strong> <strong>inch</strong> <strong>TFT</strong> <strong>Touch</strong> <strong>Shield</strong> คือ บอร์ด <strong>Shield</strong> สําหรับ Arduino ทีมีจอ LCD ขนาด <strong>2.8</strong> นิ ว พร้อม touch<br />
screen แบบ resistive และช่องใส่ SD Card ทําให้สามารถอ่านไฟล์ภาพจาก SD Card มาแสดงบนจอได้โดยใช้<br />
<strong>Shield</strong> เสียบบน Arduino เพียงแค่บอร์ดเดียว<br />
LCD <strong>TFT</strong> <strong>2.8</strong> นิ วนั นควบคุมการทํางาน ผ่าน 8-bit parallel interface พร้อมด้วย touch controller<br />
(ads7843) ทีควบคุมการทํางานด้วย SPI interface โดยที LCD และ touch screen ได้มีการต่อขาออกมาเพือใช้งาน<br />
เรียบร้อยแล้ว ซึงทําให้สะดวกต่อการนําไปใช้งานในด้านต่างๆ<br />
1) คุณสมบัติของบอรด <strong>2.8</strong> <strong>inch</strong> <strong>TFT</strong> <strong>Touch</strong> <strong>Shield</strong><br />
<br />
<br />
<br />
<br />
<br />
<br />
<br />
หน้าจอขนาด <strong>2.8</strong> นิ ว แบบ <strong>TFT</strong> มีความละเอียด 320x240 pixel (65K color)<br />
มี <strong>Touch</strong>-screen บนหน้าจอ พร้อมกับชุด <strong>Touch</strong> Screen Controller AD7843<br />
ใช้ 8 bit data เป็ นแบบ Parallel Interface โดยใช้ขา Control จํานวน 4 PINs<br />
4-wire Resistive <strong>Touch</strong> Screen<br />
มี IC 74LVC245 สําหรับทํา Logic Level<br />
On board 3.3 Volt regulator โดยใช้ NCP1117-3.3<br />
<strong>2.8</strong> <strong>inch</strong> <strong>TFT</strong> <strong>Touch</strong> <strong>Shield</strong> ใช้ขาบน Arduino UNO เป็ นกลุ ่ม Digital I/O เริมทีขา 0-7 , 10-13 (เหลือ<br />
Digital I/O อยู ่ 2 ขาคือ ขา 8 , 9 ) และกลุ ่ม Analog IN เริมทีขา 0 , 1, 2, 4 (เหลือ Analog IN อยู ่ 2 ขา คือ<br />
ขา 3, 5 )<br />
<br />
<br />
5 Volt Supply ต่อตรงมาจาก PIN บนบอร์ด Arduino UNO<br />
SD card interface แบบ SPI mode, สําหรับเก็บภาพจากความจุภายนอกตัว Arduino เช่น ภาพ<br />
Background หรือ Icon<br />
2 <strong>ThaiEasyElec</strong> - <strong>2.8</strong> <strong>inch</strong> <strong>TFT</strong> <strong>Touch</strong> <strong>Shield</strong> user manual V1.0| Venus Supply Co.,ltd - Contact : Sales@thaieasyelec.com
2) รายละเอียดขาของ <strong>2.8</strong> <strong>inch</strong> <strong>TFT</strong> <strong>Touch</strong> <strong>Shield</strong><br />
<strong>2.8</strong> <strong>inch</strong> <strong>TFT</strong> <strong>Touch</strong> <strong>Shield</strong> ได้ออกแบบให้มีขาใช้งานทั งหมด 24 ขา แบ่งออกเป็ น สัญญาณควบคุมในส่วน<br />
<strong>TFT</strong> LCD จํานวน 18 ขา และ สัญญาณควบคุมในส่วน <strong>Touch</strong> Controller จํานวน 6 ขา<br />
สัญญาณควบคุมในส่วน <strong>TFT</strong> LCD จํานวน 18 ขา<br />
Index Pin Name Description Control Signal<br />
1, 24 GND Ground -<br />
2, 23 5V Main voltage supply (+5V) -<br />
3 BL Back light control signal “0” : Turn Off Back Light<br />
“1” : Turn On Back Light<br />
4 RST Reset signal “0” : Reset LCD<br />
“1” : No Reset<br />
5 LCD_CS LCD Chip Select signal “0” : Enable LCD<br />
“1” : Disable LCD<br />
6 RS Register Select signal “0” : Data register<br />
“1” : Control register<br />
7 WR Write Strobe signal “0” : Write Enable<br />
“1” : Write Disable<br />
8 RD Read Strobe signal “0” : Read Enable<br />
“1” : Read Disable<br />
15-22 D0-D7 Data Bus 8-bit “0” : Low<br />
“1” : High<br />
3 <strong>ThaiEasyElec</strong> - <strong>2.8</strong> <strong>inch</strong> <strong>TFT</strong> <strong>Touch</strong> <strong>Shield</strong> user manual V1.0| Venus Supply Co.,ltd - Contact : Sales@thaieasyelec.com
สัญญาณควบคุมในส่วน <strong>Touch</strong> Controller จํานวน 6 ขา<br />
Index Pin Name Description Control Signal<br />
9 TC_CS <strong>Touch</strong> Controller Chip Select “0” : Enable <strong>Touch</strong> Controller<br />
“1” : Disable <strong>Touch</strong> Controller<br />
10 SCLK Serial Clock -<br />
11 MISO Data Out of ADS7843 -<br />
12 MOSI Data In of ADS7843 -<br />
13 BUSY Busy Pin of ADS7843 Output “0” : with Busy<br />
14 PEN Pen IRQ of ADS7843 Output “0” : with <strong>Touch</strong><br />
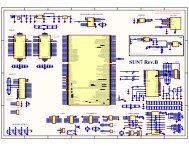
3) ขาสัญญาณตางๆของบอรด <strong>2.8</strong> <strong>inch</strong> <strong>TFT</strong> <strong>Touch</strong> <strong>Shield</strong><br />
สัญญาณถูกแบ่งเป็ น 2 กลุ ่มใหญ่ๆ กลุ ่มแรกคือ สัญญาณของ LCD กลุ ่มที 2 คือ สัญญาณของ touch screen<br />
และ SD card โดยบอร์ดได้ออกแบบให้สามารถเชือมต่อกับบอร์ด Arduino UNO ได้เลย ซึงจะใช้งาน 18 ขา แต่บอร์ด<br />
ได้ออกแบบให้ขาสัญญาณ LCD และ touch screen ออกมาทั งหมด 24 ขา เพือการใช้งานในรูปแบบอืน เช่น การต่อกับ<br />
Microcontroller ชนิดอืน ขาสัญญาณทั ง 24 ขา และตําแหน่ง ดังรูปที 7<br />
4 <strong>ThaiEasyElec</strong> - <strong>2.8</strong> <strong>inch</strong> <strong>TFT</strong> <strong>Touch</strong> <strong>Shield</strong> user manual V1.0| Venus Supply Co.,ltd - Contact : Sales@thaieasyelec.com
รูปที 7<br />
4) การเชื่อมตอ <strong>2.8</strong> <strong>inch</strong> <strong>TFT</strong> <strong>Touch</strong> <strong>Shield</strong> กับ Arduino<br />
ขาสัญญาณของ <strong>2.8</strong> <strong>inch</strong> <strong>TFT</strong> <strong>Touch</strong> <strong>Shield</strong> เมือเชือมต่อกับ Arduino จะใช้งาน 18 ขา (จากทีมีทั งหมด 24<br />
ขา) แสดงดังรูปที 8 โดยผู ้ใช้งานสามารถเสียบเข้าไปบนบอร์ด Arduino ได้เลย<br />
รูปที 8 สัญญาณต่างๆทีเชือมต่อเข้ากับ Arduino<br />
5) การเขียนโปรแกรมบน Arduino เพื่อใชงานบอรด <strong>2.8</strong> <strong>inch</strong> <strong>TFT</strong> <strong>Touch</strong> <strong>Shield</strong><br />
ทาง <strong>ThaiEasyElec</strong>.com ได้ทดลองเขียน library สําหรับใช้งาน LCD touch screen และ SD card เบื องต้น<br />
โดย Library จะอยู ่ใน Folder ชือ “TEE_<strong>TFT</strong>_<strong>Touch</strong><strong>Shield</strong>”<br />
การนํา library มาใช้งานกับ Arduino สามารถทําได้โดย การ copy folder “TEE_<strong>TFT</strong>_<strong>Touch</strong><strong>Shield</strong>” และ<br />
Folder “digitalWriteFast” ไปยัง folder ทีชือ libraries ใน folder ของโปรแกรม Arduino IDE เพียงเท่านี ก็จะ<br />
สามารถใช้งาน library บน Arduino ได้<br />
5 <strong>ThaiEasyElec</strong> - <strong>2.8</strong> <strong>inch</strong> <strong>TFT</strong> <strong>Touch</strong> <strong>Shield</strong> user manual V1.0| Venus Supply Co.,ltd - Contact : Sales@thaieasyelec.com
รูปที 9 ตําแหน่ง Folder “libraries” ของโปรแกรม Arduino IDE<br />
ภายใน Folder จะเก็บไฟล์ Resource ต่างๆ เช่น header file, source file รวมทั ง font ทั งภาษาไทยและ<br />
อังกฤษทีเราแปลงเป็ นโค้ดภาษา C แล้ว เพือให้นําไป include ใช้ในโค้ดโปรแกรมได้ทันที สําหรับไฟล์ทีน่าสนใจใน<br />
library มีดังนี <br />
- <strong>TFT</strong>_LCD_driver.cpp เป็ นไฟล์ทีเกียวกับการแสดงผลบน จอ LCD ทั งหมด<br />
- <strong>TFT</strong>_touch.cpp รวมฟังก์ชันทีเกียวกับการใช้งาน touch screen รายละเอียดของแต่ละฟังก์ชันจะขอ<br />
อธิบายในหัวข้อถัดไป<br />
- mmc.c เป็ นไฟล์ทีเขียนขึ นสําหรับการสือสารกับ SD card แบบ SPI<br />
- pff.c เป็ นส่วนทีรวมฟังก์ชันสําหรับการอ่าน/เขียนไฟล์ในรูปแบบของ FAT file system<br />
เมือ Copy Folder “TEE_<strong>TFT</strong>_<strong>Touch</strong><strong>Shield</strong>” เรียบร้อยแล้ว ลองเปิ ดโปรแกรม Arduino ขึ นมาใหม่จะพบว่าที<br />
Menu File -> Example จะพบตัวอย่างโปรเจคการใช้งานอยู ่ที TEE_<strong>TFT</strong>_<strong>Touch</strong><strong>Shield</strong><br />
6 <strong>ThaiEasyElec</strong> - <strong>2.8</strong> <strong>inch</strong> <strong>TFT</strong> <strong>Touch</strong> <strong>Shield</strong> user manual V1.0| Venus Supply Co.,ltd - Contact : Sales@thaieasyelec.com
ชุดคําสั งใช้งาน แสดงผล LCD<br />
การเรียกใช้งาน Library <strong>TFT</strong>_LCD<br />
- เรียกใช้งาน Library <strong>TFT</strong> LCD โดยประกาศ #include <br />
- กําหนดตัวแปร Class เช่น <strong>TFT</strong>_LCD lcd;<br />
; หมายเหตุ ในการยกตัวอย่างการใช้งานใน ฟังก์ชัน ต่างๆจะสมมติให้ใช้ ตัวแปร Class คือ lcd<br />
ฟังก์ชั น การตังค่าการแสดงผลหน้าจอ<br />
void <strong>TFT</strong>_LCD::init(hor_ver mode)<br />
ฟังก์ชัน นี ใช้สําหรับ กําหนดการแสดงผลหน้าจอในรูปแบบ แนวตั ง หรือ แนวนอน โดยสามารถกําหนดได้ 2 แนวคือ<br />
VERTICAL และ HORIZONTAL<br />
ตัวอย่างการใช้งาน<br />
lcd.init(HORIZONTAL); // กําหนดให้แสดงผลทีหน้าจอในแนวนอน<br />
lcd.init(VERTICAL); // กําหนดให้แสดงผลทีหน้าจอในแนวตั ง<br />
ฟังก์ชั น เคลียร์หน้าจอ<br />
void <strong>TFT</strong>_LCD:: ClearScreen(unsigned short color)<br />
ฟังก์ชัน นี ใช้สําหรับ เคลียหน้าจอ โดยสามารถกําหนดสีให้กับหน้าจอได้ โดย Library ได้ Define ค่าสีพื นฐานเอาไว้ให้<br />
เช่น<br />
#define TS_COL_RED<br />
#define TS_COL_GREEN<br />
#define TS_COL_BLUE<br />
#define TS_COL_YELLOW<br />
#define TS_COL_PURPLE<br />
0x001F<br />
0x07E0<br />
0xF800<br />
0x07FF<br />
0xF81F<br />
7 <strong>ThaiEasyElec</strong> - <strong>2.8</strong> <strong>inch</strong> <strong>TFT</strong> <strong>Touch</strong> <strong>Shield</strong> user manual V1.0| Venus Supply Co.,ltd - Contact : Sales@thaieasyelec.com
#define TS_COL_BLACK<br />
#define TS_COL_WHITE<br />
0x0000<br />
0xFFFF<br />
และผู ้ใช้สามารถกําหนดสีลงไปเป็ น Code สี RGB ขนาด 16Bit ลงไปเองได้<br />
ตัวอย่างการใช้งาน<br />
lcd.ClearScreen(TS_COL_BLUE);<br />
lcd.ClearScreen(TS_COL_RED);<br />
lcd.ClearScreen(0xFFFF);<br />
// เคลียร์หน้าจอให้เป็ นสีนํ าเงิน<br />
// เคลียร์หน้าจอให้เป็ นสีแดง<br />
// เคลียร์หน้าจอให้เป็ นสีขาว<br />
ฟังก์ชั น การสร้างรูปสี เหลี ยม บนหน้าจอ<br />
void <strong>TFT</strong>_LCD::TSLCDFillRect(ts_pos_t sx,ts_pos_t ex,ts_pos_t sy,ts_pos_t ey,unsigned short<br />
color,ts_mode_t mode)<br />
ฟังก์ชัน นี ใช้สําหรับ สร้างรูปสีเหลียมบนหน้าจอ โดยมี Arguments ต่างๆดังนี <br />
ts_pos_t sx คือ พิกัดเริมต้นในแกน x ของรูปสีเหลียม<br />
ts_pos_t ex คือ พิกัดสุดท้ายในแกน x ของรูปสีเหลียม<br />
ts_pos_t sy คือ พิกัดเริมต้นในแกน y ของรูปสีเหลียม<br />
ts_pos_t ey คือ พิกัดเริมต้นในแกน y ของรูปสีเหลียม<br />
unsigned short color คือ สีของรูปสีเหลียม<br />
ตัวอย่างการใช้งาน<br />
lcd.TSLCDFillRect(0,320-1 ,0,70-1,TS_COL_RED); // สร้างสีเหลียมผืนผ้าขนาด 320x70 pixel<br />
8 <strong>ThaiEasyElec</strong> - <strong>2.8</strong> <strong>inch</strong> <strong>TFT</strong> <strong>Touch</strong> <strong>Shield</strong> user manual V1.0| Venus Supply Co.,ltd - Contact : Sales@thaieasyelec.com
ฟังก์ชั น การสร้างรูปวงกลม บนหน้าจอ<br />
void <strong>TFT</strong>_LCD::TSLCDFillCirc(ts_pos_t cx,ts_pos_t cy,ts_pos_t rad,unsigned short color)<br />
ฟังก์ชัน นี ใช้สําหรับ สร้างรูปวงกลมบนหน้าจอ โดยมี Arguments ต่างๆดังนี <br />
ts_pos_t cx<br />
ts_pos_t cy<br />
ts_pos_t rad<br />
คือ ตัวแปรกําหนดพิกัด X จุดศูนย์กลางวงกลม<br />
คือ ตัวแปรกําหนดพิกัด Y จุดศูนย์กลางวงกลม<br />
คือ ตัวแปรกําหนด รัศมีให้กับวงกลม<br />
unsigned short color<br />
คือ ตัวแปรกําหนดสีให้กับวงกลม<br />
ตัวอย่างการใช้งาน<br />
lcd.TSLCDFillCirc(20,20 ,30,TS_COL_YELLOW); // สร้างวงกลมสีเหลือง รัศมี 30 pixel ทีจุด X 20 , Y 20<br />
ฟังก์ชั น กําหนดสีให้กับตัวอักษร<br />
void <strong>TFT</strong>_LCD::TSLCDSetFontColor(unsigned short color)<br />
ฟังก์ชัน นี ใช้สําหรับ กําหนดสีให้กับตัวอักษร<br />
ตัวอย่างการใช้งาน<br />
lcd.TSLCDSetFontColor(TS_COL_BLUE);<br />
ฟังก์ชั น กําหนดให้แสดงตัวอักษรแบบหนา<br />
void <strong>TFT</strong>_LCD::TSLCDSetBold(unsigned char on)<br />
ฟังก์ชัน นี ใช้สําหรับ กําหนดให้แสดงตัวอักษรแบบหนา<br />
ตัวอย่างการใช้งาน<br />
lcd.TSLCDSetBold(1); //กําหนดให้แสดงผลตัวอักษรแบบหนา<br />
lcd.TSLCDSetBold(0); //กําหนดให้แสดงผลตัวอักษรแบบธรรมดา<br />
9 <strong>ThaiEasyElec</strong> - <strong>2.8</strong> <strong>inch</strong> <strong>TFT</strong> <strong>Touch</strong> <strong>Shield</strong> user manual V1.0| Venus Supply Co.,ltd - Contact : Sales@thaieasyelec.com
ฟังก์ชั น กําหนดFont ภาษาอังกฤษ<br />
เรียกใช้งาน Font โดยประกาศ include Font ทีต้องการใช้เข้ามาในโปรเจค โดย Font ทีจัดเตรียมไว้ให้จะอยู ่ใน Folder<br />
Fonts ภายใน Folder Library เช่น<br />
#include "Fonts/font_arial_eng16x16.h"<br />
#include "Fonts/font_vrinda18x16.h"<br />
กําหนดค่า Config ให้กับ Font ทีใช้โดยใช้ ฟังก์ชัน<br />
void <strong>TFT</strong>_LCD::TSLCDCfgFont(const unsigned char *_font, unsigned char width, unsigned<br />
char height_div_8, unsigned char gap)<br />
โดยมี Arguments ต่างๆดังนี <br />
const unsigned char *_font ชือตัวแปร Fontทีต้องการใช้<br />
unsigned char width<br />
ความกว้างของ Font<br />
unsigned char height_div_8 ความสูงของ Font หารด้วย 8<br />
unsigned char gap<br />
ระยะห่างระหว่างตัวอักษร<br />
ตัวอย่างการใช้งาน<br />
lcd.TSLCDCfgFont(font_vrinda18x16,18,2,2); //กําหนดใช้ Font ชือ font_vrinda18x16 มีความกว้าง 18 Pixel<br />
สูง 16หารด้วย 8 Pixel และกําหนดให้มีระยะห่างระหว่างตัวอักษร 2 Pixel<br />
ฟังก์ชั น กําหนดFont ภาษาไทย<br />
เรียกใช้งาน Font โดยประกาศ include Font ทีต้องการใช้เข้ามาในโปรเจค โดย Font ทีจัดเตรียมไว้ให้จะอยู ่ใน Folder<br />
Fonts ภายใน Folder Library เช่น<br />
#include "Fonts/font_angsana14x32.h"<br />
กําหนดค่า Config ให้กับ Font ทีใช้โดยใช้ ฟังก์ชัน<br />
10 <strong>ThaiEasyElec</strong> - <strong>2.8</strong> <strong>inch</strong> <strong>TFT</strong> <strong>Touch</strong> <strong>Shield</strong> user manual V1.0| Venus Supply Co.,ltd - Contact : Sales@thaieasyelec.com
void <strong>TFT</strong>_LCD::TSLCDCfgExtFont(const unsigned char *_font, unsigned char width, unsigned<br />
char height_div_8, unsigned char _tone_shift, unsigned char _font_ext_adj)<br />
โดยมี Arguments ต่างๆดังนี <br />
const unsigned char *_font ชือตัวแปร Fontทีต้องการใช้<br />
unsigned char width<br />
ความกว้างของ Font<br />
unsigned char height_div_8 ความสูงของ Font หารด้วย 8<br />
unsigned char _tone_shift กําหนดระยะห่างระหว่างตัวอักษรกับสระทีอยู ่ด้านบน<br />
unsigned char _font_ext_adj<br />
ใช้ปรับฐานของตัวอักษรไทย และ อังกฤษ ให้สมดุลกัน<br />
ตัวอย่างการใช้งาน<br />
lcd.TSLCDCfgExtFont(font_angsana14x32,14,4,5,11); //กําหนดใช้ Font ชือ font_angsana14x32 มีความ<br />
กว้าง 14 Pixel สูง 32หารด้วย 8 Pixel แสดงผลสระตัวบนห่างจากตัวอักษร 5 Pixel ปรับชดเชยสมดุลของตัวอักษรไทย<br />
และอังกฤษ 11 Pixel<br />
ฟังก์ชั น แสดงข้อความเป็ นบรรทัด<br />
void <strong>TFT</strong>_LCD::TSLCDPrintString(unsigned char line,unsigned char column,char *str)<br />
โดยมี Arguments ต่างๆดังนี <br />
unsigned char line กําหนดบรรทัดทีต้องการแสดงข้อความ<br />
unsigned char column กําหนดคอลัมเริมต้นทีต้องการแสดงข้อความ<br />
char *str ข้อความทีต้องการแสดง<br />
11 <strong>ThaiEasyElec</strong> - <strong>2.8</strong> <strong>inch</strong> <strong>TFT</strong> <strong>Touch</strong> <strong>Shield</strong> user manual V1.0| Venus Supply Co.,ltd - Contact : Sales@thaieasyelec.com
ตัวอย่างการใช้งาน<br />
lcd.TSLCDPrintString(2,0,"Test <strong>2.8</strong> <strong>inch</strong> <strong>TFT</strong> <strong>Touch</strong> <strong>Shield</strong>");<br />
ฟังก์ชัน แสดงข้อความทีตําแหน่ง X,Y<br />
void <strong>TFT</strong>_LCD::TSLCDPrintStringXY(int x,int y,char *str)<br />
<br />
โดยมี Arguments ต่างๆดังนี<br />
int x กําหนดตําแหน่ง X ทีต้องการแสดงข้อความ<br />
int y กําหนดตําแหน่ง Y ทีต้องการแสดงข้อความ<br />
char *str ข้อความทีต้องการแสดง<br />
ฟังก์ชั น แสดงภาพ จาก Flash memory<br />
void TSLCDShowPic(ts_pos_t sx,ts_pos_t ex,ts_pos_t sy,ts_pos_t ey, unsigned short *pic,ts_mode_t<br />
mode);<br />
โดยมี Arguments ต่างๆดังนี <br />
ts_pos_t sx คือ พิกัดเริมต้นในแกน x ของรูป<br />
ts_pos_t ex<br />
พิกัดสุดท้ายในแกน x ของรูป<br />
ts_pos_t sy พิกัดเริมต้นในแกน y ของรูป<br />
ts_pos_t ey พิกัดเริมต้นในแกน y ของรูป<br />
unsigned short *pic ตําแหน่งของรูปทีใช้แสดง<br />
ts_mode_t mode<br />
โหมดการแสดงภาพ แบ่งเป็ น 2 โหมดคือ<br />
- TS_MODE_NORMAL = ไม่แสดงจุดสีทีเป็ นสีขาว หรือ 0xFFFF (Transparent Mode)<br />
- TS_MODE_FULL = แสดงภาพทั งหมด<br />
ตัวอย่างการใช้งาน<br />
#include "linux.h"<br />
12 <strong>ThaiEasyElec</strong> - <strong>2.8</strong> <strong>inch</strong> <strong>TFT</strong> <strong>Touch</strong> <strong>Shield</strong> user manual V1.0| Venus Supply Co.,ltd - Contact : Sales@thaieasyelec.com
unsigned int origin_x,origin_y,pic_width,pic_height;<br />
origin_x = 0;<br />
origin_y = 0;<br />
pic_width = 94;<br />
pic_height = 96;<br />
lcd.TSLCDShowPic(origin_x,origin_x+(pic_width-1),origin_y,origin_y+(pic_height-<br />
1),linux,TS_MODE_FULL);<br />
lcd.TSLCDShowPic(origin_x,origin_x+(pic_width-1),origin_y,origin_y+(pic_height-<br />
1),linux,TS_MODE_NORMAL);<br />
ฟังก์ชั น แสดงภาพ จาก SD Card<br />
void SD_Show_Pic(ts_pos_t sx,ts_pos_t ex,ts_pos_t sy,ts_pos_t ey,char *pFile,ts_mode_t mode);<br />
โดยมี Arguments ต่างๆดังนี <br />
ts_pos_t sx คือ พิกัดเริมต้นในแกน x ของรูป<br />
ts_pos_t ex<br />
พิกัดสุดท้ายในแกน x ของรูป<br />
ts_pos_t sy พิกัดเริมต้นในแกน y ของรูป<br />
ts_pos_t ey พิกัดเริมต้นในแกน y ของรูป<br />
char *pFile Path ของรูปทีต้องการแสดง<br />
ts_mode_t mode<br />
โหมดการแสดงภาพ แบ่งเป็ น 2 โหมดคือ<br />
- TS_MODE_NORMAL = ไม่แสดงจุดสีทีเป็ นสีขาว หรือ 0xFFFF (Transparent Mode)<br />
- TS_MODE_FULL = แสดงภาพทั งหมด<br />
ตัวอย่างการใช้งาน<br />
lcd.SD_Show_Pic(0,319,0,239 ,” picture/pic1.bin” ,TS_MODE_FULL);<br />
13 <strong>ThaiEasyElec</strong> - <strong>2.8</strong> <strong>inch</strong> <strong>TFT</strong> <strong>Touch</strong> <strong>Shield</strong> user manual V1.0| Venus Supply Co.,ltd - Contact : Sales@thaieasyelec.com
ชุดคําสั งใช้งาน SD Card<br />
Library ทีทาง <strong>ThaiEasyElec</strong> ได้จัดเตรียมไว้ให้ใช้กับ <strong>TFT</strong> <strong>Touch</strong> shield เพือใช้งานกับ SD Card คือ File Fat<br />
system ของ Petit FAT File System Module ซึงสามารถอ่านข้อมูลเพิมเติมได้จาก เว็บไซต์ ของผู ้พัฒนา<br />
http://elm-chan.org/fsw/ff/00index_p.html<br />
การเรียกใช้งาน Library SD Card<br />
- เรียกใช้งาน Library SD Card โดยประกาศ #include <br />
- กําหนดตัวแปร Class เช่น <strong>TFT</strong>_PFF pff;<br />
; หมายเหตุ ในการยกตัวอย่างการใช้งานใน ฟังก์ชัน ต่างๆจะสมมติให้ใช้ ตัวแปร Class คือ pff<br />
ฟังก์ชั น Initial SD Card<br />
DSTATUS disk_initialize (void)<br />
ใช้สําหรับ initial เพือเริมต้นใช้งาน SD Card โดยถ้าหากสามารถ Initial ได้สําเร็จจะ Return ค่า เป็ น 0 ออกมา<br />
ตัวอย่างการใช้งาน<br />
uint8_t res;<br />
res = disk_initialize ();<br />
if(res==0)<br />
{<br />
// initial OK<br />
}<br />
else<br />
// initial Fail<br />
14 <strong>ThaiEasyElec</strong> - <strong>2.8</strong> <strong>inch</strong> <strong>TFT</strong> <strong>Touch</strong> <strong>Shield</strong> user manual V1.0| Venus Supply Co.,ltd - Contact : Sales@thaieasyelec.com
ฟังก์ชั น Mount SD Card<br />
FRESULT pf_mount (FATFS* FileSystemObject /* Pointer to the work area */);<br />
เป็ น Function ทีใช้จองตําแหน่งพื นทีในการใช้งาน SD Card หาก Mount ได้สําเร็จจะ Return ค่าเป็ น 0<br />
ตัวอย่างการใช้งาน<br />
uint8_t res;<br />
res = pf_mount (&pff.fs);<br />
ฟังก์ชั น เปิ ด File<br />
FRESULT pf_open (const char* FileName /* Pointer to the file neme */);<br />
เป็ น Function ทีใช้สําหรับเปิ ดใช้งาน File ทีต้องการ เขียน และ อ่าน โดยใส่ String ของ Path ทีต้องการเข้าใช้งานที<br />
const char* FileName หากสามารถเปิ ดไฟล์ได้สําเร็จจะ Return ค่าออกมาเป็ น 0<br />
ตัวอย่างการใช้งาน<br />
uint8_t res;<br />
res = pf_open(“test.txt”);<br />
ฟังก์ชั น Read File<br />
FRESULT pf_read (void* Buffer, WORD ByteToRead, WORD* BytesRead);<br />
เป็ น Function ทีใช้อ่าน Data ออกมาจาก File โดยมี Arguments ต่างๆดังนี <br />
void* Buffer pointer ของ Buffer ทีเก็บข้อมูลทีอ่านจาก File<br />
WORD ByteToRead จํานวน Byte ทีต้องการอ่านจาก File<br />
WORD* BytesRead จํานวน Byte ทีอ่านได้จาก File<br />
ตัวอย่างการใช้งาน<br />
15 <strong>ThaiEasyElec</strong> - <strong>2.8</strong> <strong>inch</strong> <strong>TFT</strong> <strong>Touch</strong> <strong>Shield</strong> user manual V1.0| Venus Supply Co.,ltd - Contact : Sales@thaieasyelec.com
uint8_t res;<br />
unsigned short br;<br />
char data[1000];<br />
res = pf_read (data,1000, &br);<br />
ในกรณีที File มีขนาดใหญ่และไม่สามารถอ่านได้หมดในครั งเดียว เราสามารถทยอยแบ่งอ่าน Data ออกมาได้ เช่น<br />
while(1)<br />
{<br />
}<br />
res = pf_read (data,1000, &br);<br />
{<br />
}<br />
if(br==0)<br />
break;<br />
// To do<br />
คําสัง pf_read จะอ่าน Data ต่อจากตําแหน่งทีแล้ว จนจบไฟล์ หรือ มีการสัง Open File ใหม่<br />
เนืองจาก Petit FAT File System Module เป็ น FatFile System ขนาดเล็ก จึงไม่ได้รวมเอาคําสังเขียน File<br />
ทีสมบูรณ์เข้ามาไว้ ทําให้มีข้อจํากัดหลายประการในการเขียน File จึงไม่ขอกล่าวถึง ท่านสามารถอ่านข้อมูลเพิมเติมได้<br />
จากเว็บไซต์ของผู ้พัฒนา หรือ ใช้ FatFile System ตัวเต็ม หากมี Memory มากเพียงพอ<br />
16 <strong>ThaiEasyElec</strong> - <strong>2.8</strong> <strong>inch</strong> <strong>TFT</strong> <strong>Touch</strong> <strong>Shield</strong> user manual V1.0| Venus Supply Co.,ltd - Contact : Sales@thaieasyelec.com
ชุดคําสั งใช้งาน <strong>Touch</strong> Screen<br />
การเรียกใช้งาน Library <strong>Touch</strong> Screen<br />
- เรียกใช้งาน Library <strong>Touch</strong> Screen โดยประกาศ #include <br />
- กําหนดตัวแปร Class เช่น touchpanel tp;<br />
; หมายเหตุ ในการยกตัวอย่างการใช้งานใน ฟังก์ชัน ต่างๆจะสมมติให้ใช้ ตัวแปร Class คือ tp<br />
ฟังก์ชั น Initial <strong>Touch</strong> Screen<br />
void init(void);<br />
ใช้ Initial การเชือมต่อกับ <strong>Touch</strong>screen<br />
ตัวอย่างการใช้งาน<br />
#include <br />
touchpanel tp;<br />
void setup()<br />
{<br />
}<br />
tp.init();<br />
ฟังก์ชั น Calibrate <strong>Touch</strong> Screen<br />
void tp_calibrate();<br />
เป็ น Function ทีใช้ Calibrate <strong>Touch</strong> Screen ในกรณีที <strong>Touch</strong> แล้วไม่ตรงจุด หรือ ใช้ตั งค่าการ <strong>Touch</strong> ในครั งแรก<br />
เมือ Calibrate สําเร็จแล้ว จําเก็บค่าการ Calibrate เอาไว้ใน EEProm โดย ทําให้ผู ้ใช้ไม่ต้อง Calibrate ทุกครั งทีเปิ ดใช้<br />
งาน<br />
ตัวอย่างการใช้งาน<br />
17 <strong>ThaiEasyElec</strong> - <strong>2.8</strong> <strong>inch</strong> <strong>TFT</strong> <strong>Touch</strong> <strong>Shield</strong> user manual V1.0| Venus Supply Co.,ltd - Contact : Sales@thaieasyelec.com
void setup()<br />
{<br />
tp.init();<br />
tp.tp_calibrate();<br />
}<br />
ฟังก์ชั น อ่านค่า Calibrate <strong>Touch</strong> Screen<br />
void get_matrix(void);<br />
Function นี ใช้เพืออ่านค่าจาก EEProm ทีใช้คําสัง tp_calibrate(); Calibrate <strong>Touch</strong> Screen เอาไว้แล้วมาใช้งาน<br />
ตัวอย่างการใช้งาน<br />
void setup()<br />
{<br />
}<br />
tp.init();<br />
tp.get_matrix();<br />
ฟังก์ชั น อ่านค่าตําแหน่งการ <strong>Touch</strong><br />
POINT* read_lcd_point(void);<br />
เป็ น Function การอ่านค่าตําแหน่งการ <strong>Touch</strong><br />
ตัวอย่างการใช้งาน<br />
POINT *tp_dat;<br />
tp_dat = tp.read_lcd_point();<br />
ฟังก์ชั น Debounce <strong>Touch</strong><br />
uint8_t get_stable_tp(POINT* tp);<br />
18 <strong>ThaiEasyElec</strong> - <strong>2.8</strong> <strong>inch</strong> <strong>TFT</strong> <strong>Touch</strong> <strong>Shield</strong> user manual V1.0| Venus Supply Co.,ltd - Contact : Sales@thaieasyelec.com
เป็ น Function ทีใช้เช็คเพือให้มันใจว่ามีการ touch หน้าจอทีตําแหน่งนั นจริงหรือไม่<br />
ตัวอย่างการใช้งาน<br />
void loop()<br />
{<br />
}<br />
POINT *tp_dat;<br />
tp_dat = tp.read_lcd_point();<br />
if (tp.get_stable_tp(tp_dat) )<br />
{<br />
}<br />
// To Do<br />
วิธีแปลง File รูปภาพเป็ น Binary File<br />
เนืองจาก Arduino เป็ น Microcontroller ขนาดเล็ก และมีพื นทีการใช้งานน้อย จึงไม่เหมาะกับการถอดรหัส<br />
File รูปทีถูกบีบอัดมาเท่าไหร่นัก เราจึงจําเป็ นต้องมีการแปลง File รูปภาพให้อยู ่ในรูปแบบทีสามารถนําไปประมวลผลได้<br />
ทันที โดยใช้ Software ทีชือว่า “bmp2h_conv”<br />
ขันตอนการเปิ ด File ภาพเข้ามาใช้ใน โปรแกรม<br />
-ไปที Menu Load<br />
- จะปรากฏหน้าต่างให้เราเข้าไปเลือกเปิ ด File รูปภาพทีเราต้องการใช้ รูปทีเราเลือกจะมาปรากฎอยู ่ใน<br />
หน้าต่างของโปรแกรม<br />
19 <strong>ThaiEasyElec</strong> - <strong>2.8</strong> <strong>inch</strong> <strong>TFT</strong> <strong>Touch</strong> <strong>Shield</strong> user manual V1.0| Venus Supply Co.,ltd - Contact : Sales@thaieasyelec.com
ขันตอนการตังค่าก่อนแปลงไฟล์<br />
- 1 เลือกจอ LCD เป็ น รุ่นดังกรอบที 1<br />
- 2 เลือกรูปแบบ Format เป็ น RGB 565 ดังกรอบที2<br />
- 3เลือก Output ในรูปแบบ File ทีต้องการโดย<br />
o ในกรอบที 3 เป็ นการ Generate File เป็ น Header File หรือ C File เพือนําเอา File รูปไปเก็บ<br />
ไว้ใน Flash Memory ของ Arduino<br />
o ในกรอบที 4 เป็ นการ Generate File เป็ น .bin file เพือนํารูปไปเก็บลงใน SD card<br />
20 <strong>ThaiEasyElec</strong> - <strong>2.8</strong> <strong>inch</strong> <strong>TFT</strong> <strong>Touch</strong> <strong>Shield</strong> user manual V1.0| Venus Supply Co.,ltd - Contact : Sales@thaieasyelec.com
ขันตอนการแปลงไฟล์<br />
- เลือกที Menu Generate และ เลือก Path เพือเก็บ File<br />
วิธีการนําข้อมูลใน File .c และ .h เข้าไปเก็บใน Flash Memory<br />
เมือเราใช้ โปรแกรม “bmp2h_conv” แปลง File เป็ น .c หรือ .h แล้วนั น หากลองเปิ ด File เหล่านั นดูจะพบว่า<br />
มีการแปลง File รูปเป็ นเลขฐาน 16 ขนาด 16Bit ซึงเก็บอยู ่ในตัวแปร const unsigned short ดังรูป<br />
ให้เปลียนตัวแปรเป็ น unsigned short และ เพิมคําสัง PROGMEM เข้าไปดังรูป<br />
21 <strong>ThaiEasyElec</strong> - <strong>2.8</strong> <strong>inch</strong> <strong>TFT</strong> <strong>Touch</strong> <strong>Shield</strong> user manual V1.0| Venus Supply Co.,ltd - Contact : Sales@thaieasyelec.com