Installation Guide - Casewise
Installation Guide - Casewise
Installation Guide - Casewise

You also want an ePaper? Increase the reach of your titles
YUMPU automatically turns print PDFs into web optimized ePapers that Google loves.
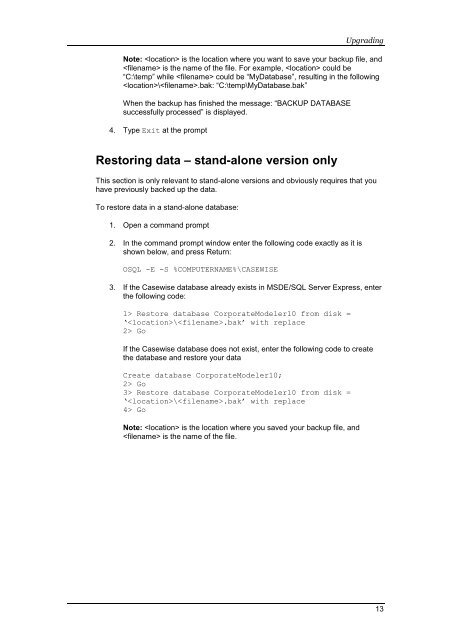
Upgrading<br />
Note: is the location where you want to save your backup file, and<br />
is the name of the file. For example, could be<br />
“C:\temp” while could be “MyDatabase”, resulting in the following<br />
\.bak: “C:\temp\MyDatabase.bak”<br />
When the backup has finished the message: “BACKUP DATABASE<br />
successfully processed” is displayed.<br />
4. Type Exit at the prompt<br />
Restoring data – stand-alone version only<br />
This section is only relevant to stand-alone versions and obviously requires that you<br />
have previously backed up the data.<br />
To restore data in a stand-alone database:<br />
1. Open a command prompt<br />
2. In the command prompt window enter the following code exactly as it is<br />
shown below, and press Return:<br />
OSQL -E -S %COMPUTERNAME%\CASEWISE<br />
3. If the <strong>Casewise</strong> database already exists in MSDE/SQL Server Express, enter<br />
the following code:<br />
1> Restore database CorporateModeler10 from disk =<br />
‘\.bak’ with replace<br />
2> Go<br />
If the <strong>Casewise</strong> database does not exist, enter the following code to create<br />
the database and restore your data<br />
Create database CorporateModeler10;<br />
2> Go<br />
3> Restore database CorporateModeler10 from disk =<br />
‘\.bak’ with replace<br />
4> Go<br />
Note: is the location where you saved your backup file, and<br />
is the name of the file.<br />
13