Installation Guide - Casewise
Installation Guide - Casewise
Installation Guide - Casewise

You also want an ePaper? Increase the reach of your titles
YUMPU automatically turns print PDFs into web optimized ePapers that Google loves.
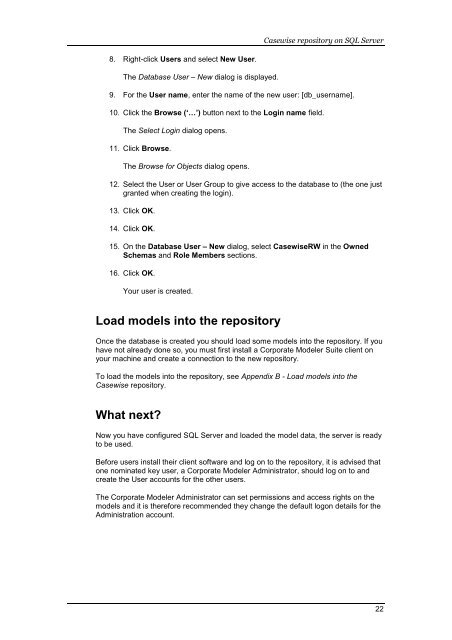
<strong>Casewise</strong> repository on SQL Server<br />
8. Right-click Users and select New User.<br />
The Database User – New dialog is displayed.<br />
9. For the User name, enter the name of the new user: [db_username].<br />
10. Click the Browse (‘…’) button next to the Login name field.<br />
The Select Login dialog opens.<br />
11. Click Browse.<br />
The Browse for Objects dialog opens.<br />
12. Select the User or User Group to give access to the database to (the one just<br />
granted when creating the login).<br />
13. Click OK.<br />
14. Click OK.<br />
15. On the Database User – New dialog, select <strong>Casewise</strong>RW in the Owned<br />
Schemas and Role Members sections.<br />
16. Click OK.<br />
Your user is created.<br />
Load models into the repository<br />
Once the database is created you should load some models into the repository. If you<br />
have not already done so, you must first install a Corporate Modeler Suite client on<br />
your machine and create a connection to the new repository.<br />
To load the models into the repository, see Appendix B - Load models into the<br />
<strong>Casewise</strong> repository.<br />
What next<br />
Now you have configured SQL Server and loaded the model data, the server is ready<br />
to be used.<br />
Before users install their client software and log on to the repository, it is advised that<br />
one nominated key user, a Corporate Modeler Administrator, should log on to and<br />
create the User accounts for the other users.<br />
The Corporate Modeler Administrator can set permissions and access rights on the<br />
models and it is therefore recommended they change the default logon details for the<br />
Administration account.<br />
22