Studio PMC - Rio Grande
Studio PMC - Rio Grande
Studio PMC - Rio Grande
- No tags were found...

Create successful ePaper yourself
Turn your PDF publications into a flip-book with our unique Google optimized e-Paper software.
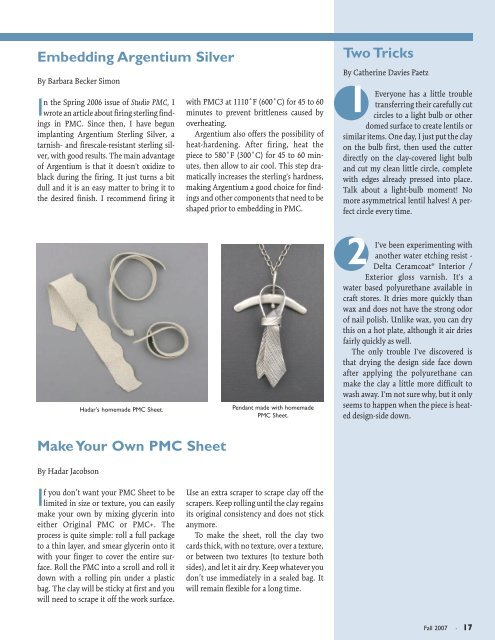
Embedding Argentium Silver<br />
By Barbara Becker Simon<br />
In the Spring 2006 issue of <strong>Studio</strong> <strong>PMC</strong>, I<br />
wrote an article about firing sterling findings<br />
in <strong>PMC</strong>. Since then, I have begun<br />
implanting Argentium Sterling Silver, a<br />
tarnish- and firescale-resistant sterling silver,<br />
with good results. The main advantage<br />
of Argentium is that it doesn't oxidize to<br />
black during the firing. It just turns a bit<br />
dull and it is an easy matter to bring it to<br />
the desired finish. I recommend firing it<br />
with <strong>PMC</strong>3 at 1110˚F (600˚C) for 45 to 60<br />
minutes to prevent brittleness caused by<br />
overheating.<br />
Argentium also offers the possibility of<br />
heat-hardening. After firing, heat the<br />
piece to 580˚F (300˚C) for 45 to 60 minutes,<br />
then allow to air cool. This step dramatically<br />
increases the sterling's hardness,<br />
making Argentium a good choice for findings<br />
and other components that need to be<br />
shaped prior to embedding in <strong>PMC</strong>.<br />
Two Tricks<br />
By Catherine Davies Paetz<br />
1<br />
Everyone has a little trouble<br />
transferring their carefully cut<br />
circles to a light bulb or other<br />
domed surface to create lentils or<br />
similar items. One day, I just put the clay<br />
on the bulb first, then used the cutter<br />
directly on the clay-covered light bulb<br />
and cut my clean little circle, complete<br />
with edges already pressed into place.<br />
Talk about a light-bulb moment! No<br />
more asymmetrical lentil halves! A perfect<br />
circle every time.<br />
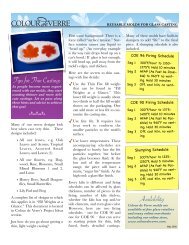
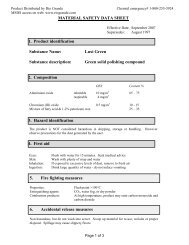
Hadar's homemade <strong>PMC</strong> Sheet.<br />
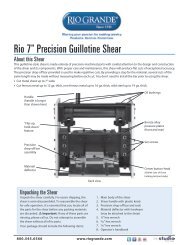
Pendant made with homemade<br />
<strong>PMC</strong> Sheet.<br />
2<br />
I've been experimenting with<br />
another water etching resist -<br />
Delta Ceramcoat® Interior /<br />
Exterior gloss varnish. It's a<br />
water based polyurethane available in<br />
craft stores. It dries more quickly than<br />
wax and does not have the strong odor<br />
of nail polish. Unlike wax, you can dry<br />
this on a hot plate, although it air dries<br />
fairly quickly as well.<br />
The only trouble I've discovered is<br />
that drying the design side face down<br />
after applying the polyurethane can<br />
make the clay a little more difficult to<br />
wash away. I'm not sure why, but it only<br />
seems to happen when the piece is heated<br />
design-side down.<br />
Make Your Own <strong>PMC</strong> Sheet<br />
By Hadar Jacobson<br />
If you don’t want your <strong>PMC</strong> Sheet to be<br />
limited in size or texture, you can easily<br />
make your own by mixing glycerin into<br />
either Original <strong>PMC</strong> or <strong>PMC</strong>+. The<br />
process is quite simple: roll a full package<br />
to a thin layer, and smear glycerin onto it<br />
with your finger to cover the entire surface.<br />
Roll the <strong>PMC</strong> into a scroll and roll it<br />
down with a rolling pin under a plastic<br />
bag. The clay will be sticky at first and you<br />
will need to scrape it off the work surface.<br />
Use an extra scraper to scrape clay off the<br />
scrapers. Keep rolling until the clay regains<br />
its original consistency and does not stick<br />
anymore.<br />
To make the sheet, roll the clay two<br />
cards thick, with no texture, over a texture,<br />
or between two textures (to texture both<br />
sides), and let it air dry. Keep whatever you<br />
don’t use immediately in a sealed bag. It<br />
will remain flexible for a long time.<br />
Fall 2007 · 17