
Create successful ePaper yourself
Turn your PDF publications into a flip-book with our unique Google optimized e-Paper software.
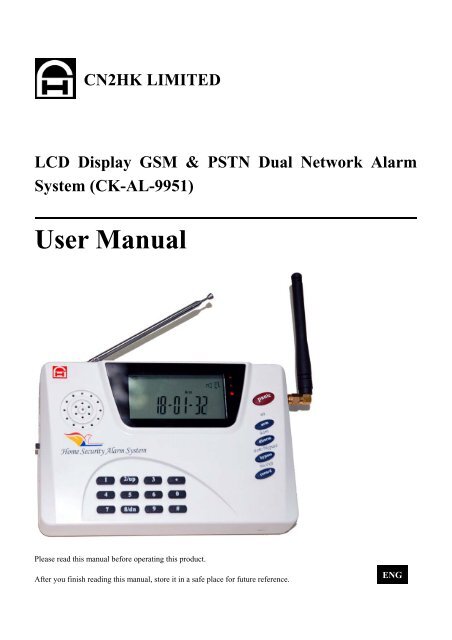
<strong>CN2HK</strong> LIMITED<br />
LCD Display GSM & PSTN Dual Network Alarm<br />
System (<strong>CK</strong>-<strong>AL</strong>-<strong>9951</strong>)<br />
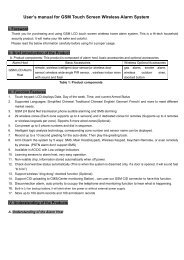
<strong>User</strong> <strong>Manual</strong><br />
Please read this manual before operating this product.<br />
After you finish reading this manual, store it in a safe place for future reference. ENG
Index<br />
A main features ............................................................................................................................................................. 2<br />
B configurations ............................................................................................................................................................ 2<br />
C use method ................................................................................................................................................................. 3<br />
D operation method ...................................................................................................................................................... 4<br />
Arm and disarm ............................................................................................................................................................... 5<br />
Arm and disarm on main unit keypad:.......................................................................................................................... 5<br />
Store telephone numbers for receiving alarm messages ............................................................................................... 5<br />
Setting ten seconds recording messages ......................................................................................................................... 6<br />
Look up alarm history event........................................................................................................................................... 6<br />
Receiving alarm................................................................................................................................................................ 6<br />
Remote operation............................................................................................................................................................. 7<br />
Short message SMS control function.............................................................................................................................. 7<br />
Other Special Functions .................................................................................................................................................. 7<br />
Setting wireless and wired accessories ........................................................................................................................... 9<br />
*****Brief Command Table*****.................................................................................................................................11
A main features<br />
Welcome you use the LCD display GSM&PSTN alarm system, its main features as<br />
follows,<br />
1.99 alarm zones,99 wireless zones and 6 wired zones<br />
2.Dual network working mode, be adapt to GSM cell network and PSTN landline<br />
telephone system at the same time<br />
3.GSM frequency: four band 900/1800/1900/850MHz<br />
4.LCD time and date display, automatic arming and disarming by setting time and<br />
date<br />
5.Two way talking ability via GSM network in alarm and remote distance operation<br />
mode<br />
6.Six autodial alarm phone numbers plus extra six SMS alarm phone numbers<br />
7.Ten alarm messages can be recorded by user himself<br />
8.Two relay output terminals can be operated by user to control alarm related<br />
devices<br />
9.Learning code accessories can be easily added or deleted by user<br />
10.Four bit password for keypad protection<br />
11. backup built-in battery for electricity power down use<br />
12 size: 120mm(W)*180mm(L)*42mm(H), main unit weight: 0.30kg<br />
B configurations<br />
1. Each standard main unit matched with two remote controllers, one PIR<br />
detector ,one door sensor, one siren and one power adaptor, the built-in battery<br />
can work for 20 hours when external electricity power down, please do not turn<br />
on the battery switch before the main unit normal working to protect the battery<br />
life time., when the external power adaptor working on, turn on the battery switch<br />
to charge the battery at the same time.<br />
2. The main unit initial user password is 1234, which is used for keypad setting and<br />
remote distance operation, user can modify the password by himself but should<br />
keep in mind the new ones.<br />
3. Main unit working voltage: DC9V~12V, working current: idle 30mA, alarm<br />
300mA, external power adaptor input AC voltage: 220V/AC or 110V/AC<br />
4. All the accessories are matched well for the main unit use, the PIR detector<br />
should turn on the battery switch, the door sensor should install the battery before<br />
use.<br />
2
C use method<br />
1.Prepare a SIM card which must be sure of valid use period, insert the SIM card into<br />
the proper position of the main unit , the card’s metal side should be in the down<br />
direction<br />
2.After inserting the SIM card, plug in the external power adaptor, the main unit<br />
begin initialization, LCD display “INIT--00 00”, the GSM signal LED blinking<br />
rapid at first, then the GSM signal LED blinking slower after the main unit<br />
received the GSM signal, the main unit give out one “beep” sound, and if three<br />
“beep” sound means not received the GSM sound<br />
Plug in the PSTN landline if available. The main unit will dial the PSTN<br />
landline at first when alarm taking place, and send SMS out at the same time. If<br />
no landline connected with the main unit, it will dial the alarm phone number by<br />
GSM cell network and send SMS at the same time<br />
3. LED display<br />
The top LED is power indicator, the middle LED is GSM signal indicator, the<br />
third is status indicator, which lighting up means arming, lighting off means disarming,<br />
rapid blinking means alarm<br />
Press the “lock ” button of remote controller to arm the main unit , the status LED<br />
light up, Press the “unlock ” button disarming the unit , the status LED light off.<br />
4.Store one group or several group telephone numbers to receive alarm message, and<br />
record alarm memo messages, you can start to test the unit function( detailed<br />
operation method showed later)<br />
5.Use remote controller to arm the unit, turn on the PIR detector battery switch,<br />
install the battery for door sensor, test the main unit alarm process effect before<br />
installation<br />
6.PIR detector is installed on indoor wall with height 2.2m or so, adjust the direction<br />
angle to make it perpendicular to people walking direction, maximum response<br />
coverage range is 10m. the wireless door sensor ’ s emitter part (with antenna) would<br />
be installed on door, and the magnetic bar should be installed on door frame, the two<br />
parts should be closed when door closed , and departed to emit signal (LED light up)<br />
when door opened.<br />
3
D operation method<br />
4
Arm and disarm<br />
Arm by using remote controller press arm key lock<br />
Disarm by using remote controller: press disarm key unlock<br />
Bypass alarm by using remote controller: press bypass key bell or speaker<br />
Panic Alarm by using remote controller press panic key lightning<br />
Remote controller function description:<br />
Arm: press key “lock”, all detectors will trig alarm when received alarm signal<br />
Bypass arm: fast press key bypass two times, all other detectors will trig alarm<br />
when received alarm signal apart from detectors which is set as<br />
bypass type, for example, bypass PIR detectors is installed in indoor<br />
use, when there are peoples at home, the bypass PIR detector will be<br />
in disarm state, and other detectors installed outside of activity room<br />
will in arm state.<br />
Disarm: press disarm key “unlock”, all detectors will not trigger alarm when<br />
received alarm signal, except panic alarm signal<br />
Panic button: panic button on remote controller and main unit keypad will trig alarm<br />
in any status<br />
Arm and disarm on main unit keypad:<br />
Arm: Press arm key on main unit for more than 3 seconds and input password and<br />
# and release<br />
Disarm: Press disarm key on main unit for more than 3 seconds and input password<br />
and #and release<br />
Bypass arm: press bypass key on main unit for more than 3 seconds and input<br />
password and # and release<br />
Note : no need input password again when input password ten only seconds time and<br />
exit setting<br />
Store telephone numbers for receiving alarm messages<br />
Press key “store” on main unit, input four digit password(initial value is 1234)<br />
and #, press key “up” or “dn” to select the telephone number group number(value<br />
from 1 to 6 total six group number is for auto dial , value from 7 to 12 is total six<br />
group is for receiving short message SMS), press key “# ” to confirm, press key<br />
“backspace” to clear old values, input new numbers as you expected, press key<br />
“#” to confirm, press key “ exit ” can exit the process.<br />
If you need to store another group telephone numbers ,then repeated the above<br />
5
process.<br />
You can store maximum 12 groups of numbers, and you also can left any<br />
group numbers t blank. The alarm process will dial the first six alarm numbers<br />
and send short messages SMS to last six group numbers one by one consecutively,<br />
if any group numbers is void, it will skip the blank group numbers and report<br />
to the next group, the whole alarm process will repeat three times to dial the<br />
alarm phone numbers from first to six if no one answer the alarm.<br />
The last six numbers can be same or not same as first six groups numbers.<br />
At least one group alarm telephone numbers must be stored into the main unit.<br />
Setting ten seconds recording messages<br />
Press key “record ” for more than three seconds, input four bit password,<br />
Select “1” to record voice: start speaking for less than ten seconds ,press<br />
“exit ” key to stop recording<br />
Select “2” to playback voice: listen voice from the speaker to confirm if it is<br />
correct<br />
Recording content can be as follows:“alarm event from xxx<br />
room ,xxx floor,xxx building..please handle it immediately…”<br />
Look up alarm history event<br />
Press key “his”, input four bit password, press key “up” or “dn” to check<br />
most new alarm event records, maximum 99 records. Press key “bkspace” +four bit<br />
password +# can delete records.<br />
Receiving alarm<br />
when your telephone machine or mobile phone receiving the alarm phone, just<br />
connecting the alarm phone and press key on your phone to control the alarm unit<br />
as follows:<br />
press “1” to monitor voice press “2” to open siren sound<br />
press “3” to close siren sound press “4” to arm<br />
press “5” to disarm<br />
press “6” to talk (in GSM mode) or speak (in landline mode )<br />
press “7” close talking or speaking<br />
press “0” playback recording voice press “#” to exit<br />
press “8” to close relay output<br />
press “9” to open relay output(relay output current must less than 300mA)<br />
6
Remote operation<br />
while you are far away from the alarm machine, you can also control the<br />
alarm machine by following method: dial the alarm unit phone number , you<br />
will hear two “beep” sound from your phone after six ringback sound<br />
auto-connecting on, then input four bit password(default value is 1234), if<br />
password input wrong, you will hear three “beep” sound, if password input<br />
correct, you will hear two “beep” sound, then input command code on your<br />
phone as follows (same command format as receiving alarm),<br />
press “1” to monitor voice press “2” to open siren sound<br />
press “3” to close siren sound press “4” to arm<br />
press “5” to disarm<br />
press “6” to talk (in GSM mode) or speak (in landline mode )<br />
press “7” close talking or speaking<br />
press “0” playback recording voice press “#” to exit<br />
press “8” to close relay output<br />
press “9” to open relay output(relay output current must less than 300mA)<br />
Short message SMS control function<br />
Send SMS “password+ARM” to main unit to arm the unit, for example:<br />
1234ARM<br />
Send SMS “password+DISARM” to main unit to disarm the unit<br />
send SMS “password+BYPASS” to main unit to bypass arm the unit<br />
Send SMS “password+ONSIREN” to main unit to start siren<br />
Send SMS “password+OFFSIREN” to main unit to stop siren<br />
Other Special Functions<br />
Below is more special function setting, it is optional setting for user.<br />
Press key “set”, input four bit password ,default value is 1234 , then press “#”<br />
to confirm,(please note press key “exit” can exit setting process<br />
from all below process):<br />
Then<br />
Press “1” then press key “up” “dn” to select below function<br />
select “1” then press key “bkspace” to set telephone line cutoff<br />
alarm. Press key “up” “dn” to select “ON” ,then press “#” to save<br />
line cutoff alarm function. Press key “up” “dn” to select “OFF” ,then<br />
press “#” to save closing line cut-off alarm function. For pure GSM<br />
network, this function is no use<br />
7
select “2” then press key “bkspace” , then press key “up” “dn” to<br />
select “ON” , press “#” to save . Press key “up” “dn” to select “OFF” ,<br />
press “#” to save closing GSM no signal alarm function.<br />
Select “3” to check GSM signal value<br />
Press “2” to set siren sound alert when using remote controller arm &disarm,<br />
use key “up” “dn” to select “ON” “OFF” ,press “#” to save it. Default<br />
is “ON”<br />
Press “3” to set password protection for arm or disarm by keypad, press “up”<br />
“dn”to select password protection “ON” “OFF”, press “#” to save<br />
settings. Default is “ON”.<br />
Press “4” to set siren acting time, press key “bkspace” ,then input 2 bit time<br />
value, range from 00,01,02,…99 minutes), then press “#” to save the<br />
value, default is 02 minutes.<br />
If user need to close the siren sound, please set the above siren time<br />
as zero “00”<br />
Press “5” to set new password, press key “bkspace”, then input four bit new<br />
password, press “ # ” to save , (note: if user forgot old password, please<br />
use super-password “0755” to enter into setting process, then setting<br />
your new password<br />
Press “7” the press “up” “dn” to select function<br />
Select “1” to set remote distance dial ringback times, press key<br />
“bkspace” then input ringback times,press “#” to confirm,<br />
value range from 0~ 9, default is 6 times.<br />
Select “2” then press “bkspace”, press “up” “dn” key to select “ON”<br />
or “OFF”, press “#” to save it. “ON” means open external<br />
power down alarm, “OFF” means close external power down<br />
alarm.<br />
Select “3” then press “bkspace” , press “up” “dn” key to select “ON” or<br />
“OFF”, press “#” to save it. “ON” means open low battery alarm,<br />
“OFF” means close low battery alarm<br />
Press “8” setting alarm delay time and arm delay time<br />
Press “up” or “dn” to select alarm delay time( “alarm”) or arm delay time<br />
(“arm”)<br />
Press key “bkspace ” then input time value , time range from 00 to 99<br />
seconds, press “#” to confirm, press “exit ” to exit the process. Only the<br />
accessories be set as delay type then the alarm delay time is effective.<br />
Press “9” to set automatic arm or disarm time. There are three group time can be<br />
set for each day.<br />
Press key “up” or “dn” to select one group time “arm” or “disarm”,<br />
use key “set” to select open or close the action, when select “open ” the<br />
action ,press key “bkspace ” to clear old value, then input new time value<br />
( input activated day range : “x” day to “x” day , hour, minute, for<br />
8
example: input: “ 1 7 18:30” means from Monday to Sunday 18:30 to start<br />
arm or disarm ),press “#” to save the time value. Press “exit” to exit to<br />
upon layer menu. Setting content including: start time, end time, etc.<br />
Press “0” to set date , press key “bkspace” then input new year ,month, day ,<br />
hour, minute, etc,<br />
press “#” to confirm, press “exit” to exit setting<br />
Press “*” to reset , then press “#” , input four bit password again , press “#” to<br />
reset the main unit. The “reset” command will restore all<br />
the settings to default value.<br />
Setting wireless and wired accessories<br />
The wireless accessories like remote controllers, PIR detectors, door sensors<br />
in the standard DIY kit are already learned to the main unit and can be used<br />
directly. If user need to add extra accessories to the main unit, the extra wireless<br />
parts must be learned to the main unit before it can be used normally according to<br />
follows steps,<br />
Press “learn” , then input four bit password<br />
Input “1” to learn remote controller, input two bit zone number, press “# ” to<br />
confirm, press a button on the remote controller to trig wireless signal<br />
emitting to finish the learning process<br />
Note :zone number distribution as follows:<br />
Remote controllers: zone from 01 to 06<br />
Wireless detectors: zone from 07 to 99<br />
Wired detectors: zone from 01 to 06<br />
Input “2” to learn PIR detector, input two bit zone number, press “# ” to<br />
confirm, turn on the battery switch to trig wireless signal emitting to<br />
finish the learning<br />
Input “3” to learn door sensor detector, input two bit zone number, press “# ” to<br />
confirm, use the magnetic bar close to the door sensor emitter then<br />
departed away to trig door sensor to emit wireless signal to main unit<br />
Input “4” to learn active wireless IR beam alarm , input two bit zone number,<br />
press “# ” to confirm, power on the wireless IR beam and trig its<br />
wireless signal to main unit to finish the learning process(note: the<br />
IR beam is the detectors to detect people walking passing across the<br />
IR beams to trig alarm )<br />
Input “5” to learn wireless gas detector, input two bit zone number, press “# ” to<br />
9
:<br />
confirm, power on the gas detector and trig the gas detector to emit<br />
wireless signal to the main unit to finish the learning<br />
Input “6” to learn wireless smoke detector , input two bit zone number, press<br />
“# ” to confirm, power on the wireless smoke detector and trig the<br />
smoke detector to emit wireless signal to main unit to finish the<br />
learning<br />
Input “7” setting wireless detectors alarm delay time or delete detectors<br />
Input “up” or “dn” to select the wireless detector, press “set” to select<br />
the detectors alarm mode: delay alarm / arm / emergency(panic)<br />
alarm/arm bypass/disarm<br />
The “delay alarm” means when main unit received the alarm<br />
signal, it will report alarm by a delayed time<br />
The “arm” setting means the detector’s alarm signal is<br />
immediately reported by main unit when the main unit is set as<br />
effective arm<br />
The “emergency” setting means the detector will trig immediate<br />
alarm when received alarm signal under arm or disarm state<br />
The “arm bypass” means the detector ’ s alarm signal will not<br />
report to user by main unit under bypass arm state, but only report to<br />
user under arm state.<br />
The “disarm ” means the detector will be deactivated under any<br />
state.<br />
delete wireless detectors:<br />
Input “up” or “dn” to select the wireless detector, press “bkspace”<br />
then input password to delete the detector, press “exit” to exit the process<br />
Input “8” setting remote controller emergency alarm sound or delete remote<br />
controller<br />
Input “up” or “dn” to select the remote controller, press “set” to set panic<br />
with sound or panic without sound alarm,<br />
delete remote controller:<br />
Press “bkspace” and password to delete the remote controller<br />
Input “9” set wired accessories function<br />
Input “up” or “dn” to select the wired detectors, press “bkspace” to set<br />
“ON” or “OFF”, ON means normally open, OFF means normally closed<br />
Press “set” to set the wired detector’s trig mode: delay alarm / arm<br />
delay / emergency(panic) alarm/arm bypass/disarm, this function is<br />
same as wireless detectors<br />
10
*****Brief Command Table*****<br />
Store alarm telephone number: sto+password+#+ up/dn+bkspace+phone number+#<br />
Record ten seconds alarm voice: record 3s +password+#+1+speaking<br />
Playback ten seconds voice: recoed 3s +password+#+2<br />
Lockup history event: his+password+#+up/dn<br />
Delete history event: his+password+#+up/dn+bkspace+password<br />
open line cutoff alarm: set+password+#+1+up/dn+1+bkspace+up/dn( “ON”)<br />
close line cutoff alarm: set+password+#+1+up/dn+1+bkspace+up/dn( “OFF”)<br />
open arm/disarm siren sound: set+password+#+2+up/dn( “ON”)+#<br />
close arm/disarm siren sound: set+password+#+2+up/dn( “OFF”)+#<br />
open arm/disarm password protection: set+password+#+3+ up/dn(“ON”)+#<br />
close arm/disarm password protection: set+password+#+3+ up/dn(“OFF”)+#<br />
set siren active time length: set+password+#+4+bkspace+time(0~99s)+#<br />
set new password: set+old password+#+5+bkspace+new password+#<br />
set ringback times: set+password+#+7+up/dn(“1”)+bkspace+ringback times(0~12)+#<br />
open external power cutoff alarm: set+password+#+7+up/dn(“2”)+bkspace+ “ON”+#<br />
close external power cutoff alarm: set+password+#+7+up/dn(“2”)+bkspace+ “OFF”+#<br />
open battery low alarm: set+password+#+7+up/dn (“3”)+bkspace+ “ON”+#<br />
close battery low alarm: set+password+#+7+ up/dn (“3”)+bkspace+ “OFF”+#<br />
set arm delay time: set+password+8+up/dn(“arm”)+bkspace+time(0~99s)+#<br />
set alarm delay time: set+password+8+up/dn(“alarm”)+bkspace+time(0~99s)+#<br />
set automatic arm: set+password+#+9+up/dn(“arm”)+set( “open” or “close”)+bkspace<br />
+time+#<br />
set automatic disarm: set+password+#+9+up/dn(“disarm”)+set( “open” or “close”)+bkspace<br />
+time+#<br />
set date and time: set+password+#+0+bkspace+time+#<br />
main unit reset: set+password+#+password+#<br />
learn remote controller: learn+password+#+1+two bit zone number +#+(signal)<br />
learn PIR detector: learn+password+#+2+two bit zone number +#+(signal)<br />
learn door sensor: learn+password+#+3+two bit zone number +#+(signal)<br />
learn IR beam: learn+password+#+4+two bit zone number +#+(signal)<br />
learn gas detector: learn+password+#+5+two bit zone number +#+(signal)<br />
11
learn smoke detector: learn+password+#+6+two bit zone number +#+(signal)<br />
set wireless detector with arm delay time: learn+password+#+7+up/dn+set+delay +#<br />
press key “set” again to set: delay/arm/bypass/emc/disarm<br />
delete wireless detector: learn+password+#+7+up/dn+bkspace+password+#<br />
set remote controller as panic with sound: learn+password+#+8+up/dn+set<br />
+panic with sound+#<br />
set remote controller as panic without sound: learn+password+#+8+up/dn+set<br />
+panic without sound+#<br />
Delete remote controller: learn+password+#+8+up/dn+bkspacet+password+#<br />
Set wired detector as open type: learn+password+#+9+up/dn+bkspacet+ON+#<br />
Set wired detector as close type: learn+password+#+9+up/dn+bkspacet+OFF+#<br />
Set wired detector as arm delay type: learn+password+#+9+up/dn+set+arm delay+#<br />
press key “set” again to set: delay/arm/bypass/emc/disarm<br />
12