aoyue ® - The Allendale Stores
aoyue ® - The Allendale Stores
aoyue ® - The Allendale Stores

You also want an ePaper? Increase the reach of your titles
YUMPU automatically turns print PDFs into web optimized ePapers that Google loves.
<strong>®</strong><br />
<strong>aoyue</strong> Boundless Technology. Continuous Advancement.<br />
<strong>®</strong><br />
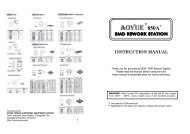
9000A<br />
BGA 9000A<br />
Bench Bench Top Top BGA Rework System<br />
INSTRUCTION MANUAL<br />
Thank you for purchasing Aoyue BGA9000A BenchTop Rework System.<br />
It is important to read the manual before using the equipment.<br />
Please keep manual in accessible place for future reference.
TABLE OF CONTENTS<br />
Product Description ………………………………………………………………… 3<br />
Advantages of Infrared Reworking …………………………………………… 3<br />
Package Inclusion ………………………………………………………………….. 4<br />
Functions & Features ……………………………………………………………… 5<br />
Product Specifications …………………………………………………………….. 5<br />
Care and Safety Precaution ……………………………………………………… 6<br />
System Parts Guide ………………………………………………………………… 7<br />
Parts Diagram ………………………………………………………………………. 89<br />
Control Panel Guide (Front) …………………………………………………….. 10<br />
Back Panel Guide …………………………………………………………………… 11<br />
Optimizer System Panel Guide (Back) ………………………………………. 11<br />
Operating Guidelines<br />
Initial SetUp / Installation ………………………………………………… 12<br />
Removing a Component ……………………………………………………. 13<br />
Cleaning LeftOver Solder from Desoldered BGA …………………. 15<br />
ReBalling BGA …………………………………………………………………. 15<br />
Replacing a BGA ………………………………………………………………. 1517<br />
Profiling ………………………………………………………………………………… 1819<br />
Reworking Tips ………………………………………………………………………. 20<br />
Glossary ………………………………………………………………………………… 21<br />
This manual is designed to familiarize the technician with the<br />
proper operation and maintenance of the equipment. <strong>The</strong> “Care and<br />
Safety Precautions” section explains the hazards of using any type of<br />
electronic device. Please read carefully and observe the guidelines in<br />
order to maximize usage and minimize the risk of injury or accidents.<br />
2
PRODUCT DESCRIPTION<br />
BGA9000A is a highend rework and repairing system that integrates the functionalities of<br />
infrared (IR) technology, splitvision control technology, soldering iron, preheater, and efficient<br />
desoldering in one sophisticatedly designed electronic repairing system. <strong>The</strong> unique and innovative<br />
mechanical design with inpackage LCD monitor ensures accurate and precise reworking to match<br />
even the most demanding rework<br />
BGA9000A<br />
BenchTop Rework System<br />
ADVANTAGES OF INFRARED REWORKING<br />
● Cost Efficiency — Expensive devices and those that are hard to find replacements can be safely and<br />
easily repaired or reworked in just a few minutes using the focused infrared beam.<br />
● Reliability — Heat is generated by an infrared light source and remain focused on the target device.<br />
Disruption, displacement, and damage to adjacent components due to limitations of some traditional<br />
repair and rework equipments are eliminated.<br />
● Versatility — <strong>The</strong> soldering capabilities of a simple soldering iron or hot air gun and reflow delivery<br />
can be achieved in a safer and more efficient way using the heat radiated from the infrared source.<br />
3
PACKAGE INCLUSION<br />
Main Unit<br />
Infrared Tool<br />
Power Cord<br />
Soldering Iron<br />
Soldering Unit<br />
Tip with Heater Cartridge<br />
Soldering Iron Holder<br />
Heat Resistant Pad<br />
Connecting Cord<br />
LCD Monitor<br />
Optimizer System<br />
LCD Monitor Holder<br />
Monitor Connecting Wires<br />
Light Optimizer Connecting Wires<br />
Replacement Suction Nozzles<br />
External IR Sensor<br />
Welding Goggles<br />
Connecting Cord<br />
Air Tube for Pump<br />
Vacuum Pencil<br />
Infrared Unit<br />
Vacuum Module<br />
Suction Caps (L, M, S)<br />
Solder Paste<br />
Solder Flux<br />
Others<br />
Lubricant for Adjust Ladder<br />
Tools for Micro Adjust System<br />
Replacement Fuse<br />
IC Popper<br />
Instruction CD<br />
Product Manual<br />
4
FUNCTIONS & FEATURES<br />
● Microprocessorcontrolled ESD safe rework system.<br />
● Noncontact rework station featuring SplitVision Control technology.<br />
● Standalone XYaxis adjustment placement method using micro controls to position component.<br />
● Designed for both leadfree and standard solder applications.<br />
● Utilizes infrared (IR) wave technology to generate heat.<br />
● Equipped with high precision optimizer that has dependable accuracy.<br />
● Highly scalable system which can handle complex components like BGAs, QFPs and Micro SMDs.<br />
● High capacity PCB support beams that can hold up to 280 X 430mm of PCB.<br />
● Precision solder. Minimizes the distortion of PCB due to excessive heat.<br />
● Builtin temperature sensor for monitoring system or rework temperature.<br />
● All digital readout and control of time, temperature, and airflow levels for monitoring and easeofuse.<br />
● Suitable for conducting various SMD and BGA reworking tasks.<br />
PRODUCT SPECIFICATIONS<br />
MAIN UNIT<br />
Power Input 220V / 110V<br />
Frequency<br />
50 Hz ~ 60 Hz<br />
Dimension 530 (w) x 480 (h) x 550 (d) mm<br />
Weight 65 Kgs.<br />
SOLDERING IRON<br />
Power Consumption 75W<br />
Temperature Range<br />
200°C ~ 480°C<br />
Heating Element Ceramic Heater<br />
Output Voltage 24V<br />
PREHEATER<br />
Power Consumption 450W<br />
Temperature Range<br />
100°C ~ 350°C<br />
Heating Element Quartz Infrared<br />
Output Voltage 220V / 110V<br />
INFRARED SOLDERLIGHT GUN<br />
Power Consumption 150W<br />
Temperature Range<br />
200°C ~ 480°C<br />
Heating Element Halogen Light Source<br />
Output Voltage 15V<br />
5
CARE & SAFETY PRECAUTIONS<br />
● Check all wires and connections before plugging in the unit.<br />
Some connecting points carry high voltage that may cause serious electric shock or extensive dam<br />
age when handled improperly.<br />
● Make sure the equipment is completely isolated from the main power source and all moving parts<br />
locked (by locking knobs) before moving the unit from one location to another.<br />
● Temperature may reach as high as 500°C when the equipment is switched ON.<br />
Do not use near flammable gases, paper, and other flammable materials.<br />
Do not touch heated parts, which can cause severe burns.<br />
● Handle with care.<br />
Do not spill any form of liquid to the system.<br />
Unit contains delicate parts, which can break if the unit is dropped or hit hard.<br />
● <strong>The</strong>rmal Protector<br />
WARNING: Improper usage can cause serious injury to personnel and/or damage to<br />
property and workplace. For your own safety, please observe the following precautions.<br />
If the thermal protector trips, reduce the temperature setting.<br />
<strong>The</strong> unit is equipped with auto shutoff feature when the temperature gets too high. It will automati<br />
cally switch back ON when the temperature reaches a safe level.<br />
● Do not tamper the electrical control unit or internal wiring in any manner. This may cause severe<br />
electric shock or extensive damage when handled improperly.<br />
● Disconnect the unit from the main power source if the system will not to be used for a long period.<br />
Turn off power during breaks, if possible.<br />
● To avoid the possibility of getting burns, allow sufficient time for the equipment to cool down before<br />
commencing maintenance.<br />
● Use only genuine replacement parts.<br />
● Turnoff power and let unit cool before replacing parts.<br />
6
SYSTEM PARTS GUIDE<br />
LCD Monitor<br />
Vision Shield<br />
PreHeater<br />
Digital Displays<br />
Infrared Tool<br />
Main Controls<br />
Adjust Ladder<br />
X Axis<br />
Y Axis<br />
Vision Tray<br />
PCB Holder<br />
Main Power Switch<br />
Soldering Iron Receptacle<br />
7
PARTS DIAGRAM<br />
Optimizing System<br />
(X Axis)<br />
Locking Knob<br />
LEFT / RIGHT Adjustment<br />
Adjustment Ladder<br />
Micro Adjust System<br />
Optimizing Scale<br />
UP / DOWN Adjustment<br />
Scale Indicator<br />
Adjust Ladder<br />
Control Knobs<br />
MicroAdjust System<br />
Rotation Adjustment<br />
8
PARTS DIAGRAM<br />
Vision Shield<br />
Locking Knob<br />
Welding System<br />
Infrared Tool<br />
Handle<br />
Temperature<br />
Sensor<br />
Welding<br />
System Lock<br />
Focus Scale<br />
Focus Lock<br />
Infrared Lamp<br />
9
CONTROL PANEL GUIDE (FRONT)<br />
15<br />
16<br />
13<br />
14<br />
9 9a 9b<br />
10 10a 10b<br />
11 11a 11b<br />
12 12a 12b<br />
BUTTON DESCRIPTION<br />
1 Main Power Switch<br />
2 Soldering Iron Receptacle<br />
3 Main Vacuum Control<br />
Vacuum Switch<br />
4<br />
Vacuum Nozzle<br />
Vacuum Pen<br />
5 Temperature Reset Button<br />
6 Optimizer System Power Switch<br />
7 PCB Optimizer (Upper Light)<br />
8 IC Optimizer (Lower Light)<br />
9 Infrared Tool Power Switch<br />
(9a) Increase Temperature<br />
(9b) Decrease Temperature<br />
10 Automate IR Tool Switch<br />
(10a) Increase Time<br />
(10b) Decrease Time<br />
11 Preheater Power Switch<br />
(11a) Increase Preheater Temperature<br />
(11b) Decrease Preheater Temperature<br />
12 Soldering Iron Power Switch<br />
(12a) Increase Soldering Temperature<br />
(12b) Decrease Soldering Temperature<br />
13 Welding Time Display<br />
14 Soldering Temperature Display<br />
Upper Panel Set Infrared Temperature Display<br />
15<br />
Lower Panel Actual Component Temperature Display<br />
16 Preheater Temperature Display<br />
5<br />
6<br />
8<br />
3<br />
4<br />
7<br />
1<br />
2<br />
10
BACK PANEL GUIDE<br />
PC B1 B2 A1 A2 A3 A4<br />
CONNECTING POINT DESCRIPTION<br />
PC Power cord for main Power Supply<br />
B1 Connecting tube for the Vacuum Suction Pen<br />
B2 Connecting tube for the Diaphragm Pump<br />
A1 Connecting cord for the Diaphragm Pump (8 Pins)<br />
A2 Connecting cord for the Infrared Tool (6 Pins)<br />
A3 Connecting cord for Light Optimizer (5 Pins)<br />
A4 Connecting cord for Monitor (3 Pins)<br />
OPTIMIZER SYSTEM PANEL GUIDE (BACK)<br />
VP A1 B1<br />
CONNECTING POINT DESCRIPTION<br />
VP Connects to the Vacuum Pen<br />
A1 Connecting cord to back panel of main unit<br />
B1 Connecting tube to back panel of main unit<br />
11
OPERATING GUIDELINES<br />
A. INITIAL SETUP / INSTALLATION<br />
WORK AREA<br />
● <strong>The</strong> equipment must be placed on a flat stable surface of at least one square meter and at a height<br />
that suits the user.<br />
● RECOMMENDATION: <strong>The</strong> electricity supply must be dedicated and free from interference of<br />
other devices.<br />
SYSTEM SETUP<br />
NOTE: Lock all moving parts of the system before moving the equipment<br />
from one location to another to avoid misalignment and possible damage.<br />
WARNING: For the operator or user safety, make sure the system<br />
is completely isolated from the main power source (i.e., unplugged).<br />
● Connect and secure the tubes, lines, and cords to their respective receptacles.<br />
● Make sure all function switches are OFF.<br />
SOLDERING IRON HOLDER<br />
1. Install the solder wire to the soldering iron holder as in the figure below.<br />
2. Attach and secure the soldering iron cord assembly to the 6pin receptacle located at the lower right<br />
area of the main unit.<br />
3. Place the soldering iron to the soldering iron stand as shown below.<br />
STARTUP & INITIAL CHECKUP<br />
Soldering Iron and Holder SetUp<br />
● Turn Main Power Switch ON (button “1”) and check if the digital display panel lights up.<br />
● Turn on the Optimizer (button “6”) and check the LCD monitor.<br />
● Turn the Main Vacuum Switch ON (button “3”) and check if the pump is working.<br />
ATTENTION<br />
<strong>The</strong> temperature settings used in this manual are provided for reference purpose. Actual<br />
temperature settings for soldering and reworking are dependent on several factors such as the<br />
size of device to be soldered and solder paste temperature characteristics. In addition, very<br />
high reworking temperatures can damage sensitive SMT materials if not properly handled.<br />
Please refer to the manufacturer’s data/datasheet for the appropriate parameters of the device<br />
before proceeding with the soldering or rework process.<br />
12
OPERATING GUIDELINES<br />
B. REMOVING A COMPONENT<br />
1. Position the PCB in the PCB holder such that the portion or component to be reworked is directly<br />
above the Preheater.<br />
2. Lock the PCB holder to keep the PCB in place.<br />
3. Adjust the Y axis and the Welding System (X axis) to position the Infrared tool perpendicular to the<br />
broken component.<br />
4. Secure or lock when properly adjusted.<br />
5. Press the Preheater switch (button“11”) to begin preheating.<br />
6. Set the desired temperature using buttons “11a” and “11b”.<br />
7. Allow sufficient time for Preheater to heat up PCB to desired working temperature. Preheater set<br />
tings may be set to 350 to 450 degrees, which in turn radiates a relative temperature of 120 to 170<br />
degrees to the PCB.<br />
8. To check for the actual board temperature, place the temperature sensor tip near the edge of the<br />
component to be removed. (See figure below.) When the board temperature rises above 100°C the<br />
lower display (item 15 from the front panel guide) would show the actual PCB temperature.<br />
Temperature<br />
Sensor<br />
9. Put on the welding goggles or flip down the vision shield before switching on the infrared tool. This<br />
can be done after the temperature of the PCB has increased to the desired working temperature<br />
(normally around 120°C to 170°C).<br />
10. Turn on the Infrared tool (button “9”) and adjust the Infrared focus light (by moving the Infrared<br />
tool up and down) depending on the size of your component. It is best to have the infrared light<br />
beam cover the whole area of the IC to be removed or even slightly larger to accommodate reflow.<br />
11. Lock the infrared tool using the knobs found on both sides of the Welding System.<br />
12. Once the Infrared tool with the proper focus light size is locked, you may list down the distance<br />
using the focus scale for future reference.<br />
13
OPERATING GUIDELINES<br />
NOTE: <strong>The</strong> Infrared focus light must be slightly larger<br />
than the component size. (Smaller focus light<br />
has a more concentrated heat which can dam<br />
age sensitive ICs.)<br />
To use the AUTOMATE function follow steps 13 to 18;<br />
for manual desoldering proceed to step 19.<br />
13. Turn off the Infrared tool (button “9”).<br />
14. Turn on the Automate IR Tool Switch (button “10”).<br />
15. Set the desired time of welding using buttons “10a” and “10b”. Normal setting would be 30 to 90<br />
seconds. Countdown will start as soon as the set infrared temperature is reached.<br />
16. Turn on the Infrared tool (button “9”) and set to the desired temperature. Normal desoldering<br />
temperature setting would be within 180°C to 220°C .<br />
17. Put on the welding goggles or flip down the vision shield.<br />
18. Infrared welding automatically switches off when the time has elapsed. <strong>The</strong> display will show the<br />
19. Unlock the X axis and push Welding System to the left side.<br />
20. Turn on Main Vacuum by pressing the Main Vacuum Control (button “3”). Use the Vacuum Suction<br />
Pen to remove the component. See image below.<br />
21. After dewelding switch OFF the infrared tool (button “9”), PreHeater Power Switch (button<br />
“11”), as well as the Automate IR Tool Switch (button “10”), if applicable.<br />
NOTE: When the vacuum switch is<br />
pressed, the vacuum nozzle is ON.<br />
When the vacuum switch is not pressed,<br />
the suction pen is ON.<br />
Suction Pen<br />
Vacuum Nozzle<br />
14
OPERATING GUIDELINES<br />
C. CLEANING LEFTOVER SOLDER FROM DESOLDERED BGA<br />
1. Insert a wide edge tip to the soldering iron handle.<br />
2. Turn on the Soldering Iron Power Switch (button “12”),.<br />
3. Set to the desired temperature (normally between 280°C and 320°C).<br />
4. Apply solder flux to the area to be cleaned.<br />
5. Pass the soldering iron tip over the area with leftover solders. <strong>The</strong> tip would pick up these solders.<br />
Gently wipe off the picked up solders on a damp sponge.<br />
6. Repeat the process until thoroughly cleaned.<br />
D. REBALLING BGA<br />
1. Clean up the BGA component.<br />
2. Attach the BGA to its corresponding BGA stencil. Use high temperature tape to properly secure the<br />
underside of the BGA .<br />
3. Apply a thin layer of solder paste to the BGA stencil.<br />
4. Wipe clean the excess solder paste.<br />
5. Place the BGA stencil with the BGA still attached to the PCB holder, with the stencil side facing up.<br />
6. Align the infrared tool with the component.<br />
7. Place the temperature sensor on top of the stencil.<br />
8. Turn on the preheater and set the temperature to 350°C. Allow sufficient time for the preheater<br />
to heat up.<br />
9. Turnon the infrared tool and set the temperature to approximately 180°C.<br />
10. Wait for all the solder paste to melt and turn into solder balls.<br />
11. Turn off the preheater and the infrared tool.<br />
E. REPLACING A BGA<br />
1. Place the PCB on top of the PCB holder such that the portion to be reworked is directly above the<br />
preheater. Use the inner beam edges as a placement guide.<br />
2. Lock the PCB holder to prevent the PCB from moving.<br />
3. Press the PreHeater switch (button “11”) to begin preheating.<br />
4. Roll down the adjustment ladder and move the Y axis and Optimizer System (X axis) such that the<br />
Suction Nozzle is right above the component of concern.<br />
5. Lock the X and Y axis.<br />
6. Place the BGA on top of its footprint.<br />
7. Switch the Main Vacuum Control (button “3”) ON.<br />
Suction Nozzle<br />
8. Press the vacuum switch (button “4”) to activate the suction nozzle and pick up the BGA/<br />
component. Make sure the IC is completely level and not slanted as seen in the picture below. If<br />
the IC is slanted adjust the Suction Nozzle until perfect level is achieved.<br />
15
OPERATING GUIDELINES<br />
9. Roll up the adjust ladder. Make sure the IC is completely level and not slanted as in the picture<br />
below. If the IC is slanted adjust the Suction Nozzle until perfect level is achieved.<br />
10. Make sure the red arrows meet each other at the tip after rolling up the adjustment ladder. This<br />
corresponds to the 1:1 split vision of the component and the PCB.<br />
11. Turn the Optimizer System (button “6”) ON.<br />
12. Pull forward the Vision Tray just beneath the Suction Nozzle.<br />
13. Look into the LCD monitor and use the MicroAdjust System to position the BGA/components. Move<br />
the Adjustment Ladder for more precise placement. Lights can be adjusted for better visibility. Use<br />
button “7” for better view of the print on the PCB and button “8” for better view of the component.<br />
14. After the BGA/component has been centered and positioned properly, push the Vision Tray entirely<br />
and slowly roll down the Adjustment Ladder. Release the Vacuum Switch (button “4”) to let BGA/<br />
component fall down to its place on the PCB.<br />
IMPORTANT: DO NOT let the BGA component come into full contact with the<br />
PCB while rolling the adjustment ladder. Leave at least 12mm of space to let the<br />
BGA naturally fall into place when you release the vacuum. See illustrations below.<br />
Figure 1.<br />
Clearance height of 12mm before<br />
releasing the vacuum and let the<br />
BGA/component fall into place.<br />
NOTE: <strong>The</strong> 1:1 optimizer scale’s red arrow is applicable to<br />
BGA ICs of 2 mm in thickness. Varying thickness of BGA<br />
ICs may require the user to adjust the ladder to get the<br />
best possible 1:1 split vision of the component. In this<br />
case, users would be required to determine the applicable<br />
scale when reworking different types of components.<br />
Figure 2.<br />
Vacuum is released leaving 1.5<br />
2mm of space between suction<br />
nozzle and BGA/component.<br />
16
OPERATING GUIDELINES<br />
(Continuation… “Replacing a BGA”)<br />
15. Roll up the Adjustment Ladder entirely after releasing the vacuum and letting BGA/component fall<br />
to its place on the PCB.<br />
16. Adjust the PreHeater temperature using buttons “11a” and “11b”.<br />
17. Release the lock of the Optimizer System and slowly push it to the right.<br />
18. Adjust Y axis and Welding System (X axis) to position the Infrared Tool right above the BGA/<br />
component.<br />
13. Turn on the Infrared tool (button “9”).<br />
14. Adjust the Infrared focus light (by moving Infrared tool up and down) depending on the size of<br />
your component.<br />
15. Secure the position using the locks/knobs found on both sides of the Welding System.<br />
16. Turn off the Infrared tool (button “9”).<br />
17. To check for the actual board temperature, place the temperature sensor tip near the edge of the<br />
component. (See figure below.) When the board temperature rises above 100°C the lower display<br />
(item 15 from the front panel guide) would show the actual PCB temperature.<br />
18. Turn ON the Infrared Tool (button “9”).<br />
19. Adjust the infrared temperature using buttons “9a” and “9b”. Normal welding settings would be<br />
around 180°C to 220°C.<br />
Temperature<br />
Sensor<br />
To use the AUTOMATE function follow steps 20 to 22;<br />
for manual soldering proceed to step 23.<br />
20. Turn off the Infrared tool (button “9”).<br />
21. Turn on the Automate IR Tool Switch (button “10”).<br />
22. Set the desired time of welding using buttons “10a” and “10b”. Normal setting would be 30 to 90<br />
seconds. Countdown will start as soon as the set infrared temperature is reached. Likewise, welding<br />
automatically stops when the countdown time has elapsed.<br />
NOTE: Welding time depends on the size of the BGA/component and the type of flux being used.<br />
Make sure to check the suggested welding time of components before starting the rework process.<br />
23. When welding is complete, switch OFF the infrared tool (button “9”).<br />
24. Remove the welding goggles or lift the vision shield.<br />
25. Unlock the X axis and push the Welding System (assembly) to the left side.<br />
26. Switch OFF the Infrared Tool, PreHeater Switch, and Automate button (if applicable).<br />
27. Unlock the PCB holder and remove the reworked PCB.<br />
17
PROFILING<br />
Recommended settings and profiling procedure:<br />
1. Follow steps 115 of Replacing a BGA guide.<br />
2. After the BGA IC has been properly placed on top of the target area slide the infrared module di<br />
rectly on top of the target device.<br />
3. Turn on the infrared sensor and set the infrared temperature to around 150180 degrees. <strong>The</strong> in<br />
frared tool would slowly light up.<br />
4. Place the tip of the thermal sensor in direct line of sight to the infrared beam. Placing the tip 1 or 2<br />
inches from the mouth of the infrared module is recommended.<br />
5. When the infrared beam has lit up to a high intensity, focus its beam such that the main beam (the<br />
brightest circle) slightly encompasses the entire target BGA. Mark this height on the scale as our<br />
optimum height for this size of BGA. A recommended height for starters is between 2528 mm.<br />
6. Carefully place the tip of the thermal sensor on one corner of the BGA. <strong>The</strong> tip of the sensor should<br />
be touching the BGA IC, or the PCB Board. For best results it is recommended that the thermal<br />
sensor be placed directly on center top area of the IC to be soldered.<br />
7. Turn off the infrared module.<br />
8. Turn on the preheater and set the preheat temperature to around 300 to 350 degrees. This, in<br />
turn, radiates an effective temperature of 150 to 180 degrees on the target PCB.<br />
9. turn on the infrared module when the preheater has reached the target temperature and the PCB<br />
has heat up to around 150180 degrees.<br />
10. Place the thermal sensor’s tip carefully at one corner of the BGA. Make sure the thermal sensor is<br />
within the main beam of the infrared and directly touches the BGA or the PCB.<br />
11. Set the infrared temperature to around 180°C. <strong>The</strong> infrared beam would slowly brighten until it<br />
reaches the set temperature.<br />
12. When the actual temperature display has reached the set temperature use a timer to record the<br />
time it takes for proper reflow to occur. If the temperature is not enough to allow reflow increase<br />
the set temperature by one step and restart the timer. Continue this procedure until complete re<br />
flow has occurred. Record the temperature setting and the time it took for complete reflow to oc<br />
cur. This could be recorded as the optimum temperature and timer setting.<br />
13. Turn off the infrared module and preheater.<br />
14. Wait for the BGA and PCB to cool down before removing from the system.<br />
After the profiling procedure has been completed the following data will be obtained.<br />
Profile Data<br />
PARAMETERS SETTINGS<br />
PreHeating Temperature 370°C<br />
Infrared Module Height 26 mm from PCB<br />
Infrared Set Temperature 200°C<br />
Timer Settings 40 seconds<br />
<strong>The</strong>rmal Sensor Placement Corner of IC<br />
Further reworking can be done based on these data.<br />
18
PROFILING<br />
Profile Adjustment<br />
1. <strong>The</strong> timer may need to be increased if only partial reflow occurs and some balls at the edges are not<br />
fully melded with the PCB.<br />
2. If timer has been increased up to 90 seconds and still no complete reflow occurs reset timer to the<br />
original and increase infrared temperature this time.<br />
3. If the infrared temperature has been increased to nearly equal the maximum reflow temperature<br />
before complete reflow occurs, this may post harm to the components. Decrease the infrared tem<br />
perature and increase the preheating temperature.<br />
4. If the components appear to be getting damaged, decrease the infrared temperature setting. <strong>The</strong><br />
preheating temperature can be increased to compensate.<br />
5. If the BGA ICs keeps getting exposed without any result, it may be that the height of the infrared<br />
module is too low causing the main beam to be too focused on the center of the target object. In<br />
crease the height of the infrared module if this occurs.<br />
Timer Settings<br />
After profile adjustments the new profile may be within the following range.<br />
Temperature in Celsius<br />
250<br />
200<br />
150<br />
100<br />
50<br />
0<br />
NOTE: In case reworking does not work on the gathered<br />
profile the following adjustments may be done to the profile.<br />
Adjusted Profile Data<br />
PARAMETERS SETTINGS<br />
PreHeat Temperature 370±15°C<br />
Infrared Module Height 26±3mm<br />
Infrared Set Temperature 200±6°C<br />
Timer Settings 40±20 seconds<br />
<strong>The</strong>rmal Sensor Placement Corner of IC or Center of IC<br />
<strong>The</strong> timer only counts down when the set temperature has been reached, the setting for the timer<br />
would now be for the actual reflow time not including the preheating and soaking time. Recommended<br />
settings for timer are 30 to 90 seconds. See illustration below.<br />
Set Timer<br />
0 50 100 150 200 250 300<br />
Time in seconds<br />
Timer configuration: Timer starts counting down only when the set<br />
temperature has been reached; the temperature is then maintained at this<br />
set amount of time. When the timer reaches zero the infrared is shutdown.<br />
19
REWORKING TIPS<br />
● Always apply flux to joints before reflow.<br />
● Before replacing a component, check if there is enough solder on the pads to solder new compo<br />
nent.<br />
● Before replacing a component, make sure the new component has no bent leads.<br />
● Use Flux Gel. When the gel turns into a fluid/liquid, this means the PCB is already preheated and<br />
may now be applied heat using the infrared tool. Flux Gel also helps in proper placement of the<br />
component.<br />
● If the preheat temperature is too low or the preheating time is too short when you apply the infra<br />
red tool, the heat will be absorbed by the PCB's ground plane and will increase the time to reflow.<br />
● <strong>The</strong> longer the PCB is preheated, the less infrared for top heat is required.<br />
● When the solder is fully molten, tap the PCB and watch the surface tension of the solder draw the<br />
component into exact alignment.<br />
● Never use temperature settings higher than maximum allowable reflow temperature.<br />
● <strong>The</strong> height of the infrared tool may be raised or lowered depending on the type of solder paste used,<br />
and target device size.<br />
● Lead free solder paste tend to need a higher temperature to reflow .<br />
● Larger IC packaging may need a longer time before reflow occurs.<br />
20
GLOSSARY<br />
PREHEATER<br />
<strong>The</strong> device or mechanism that provides heat to PCB and attached component prior to actual rework<br />
process. This prepares and protects the PCB from delaminating and the component from thermal<br />
shock. <strong>The</strong> preheater is also responsible for equalizing the conductive effect (heat) to the ground<br />
plane of the PCB and supplying 75% of heat energy during the entire rework process.<br />
OPTIMIZER SYSTEM<br />
A visual inspection system that uses split vision technology to create optic illusions. This projects the<br />
view of the bottom part of a BGA/component and the top of a PCB using two light sources such that<br />
the balls and holes are drawn into perfect alignment. <strong>The</strong> lights can be adjusted to be brighter or<br />
dimmer in order to achieve an optimized view.<br />
GOGGLES and VISION SHIELD<br />
<strong>The</strong> devices that protect the eyes from the harmful effects of direct exposure to infrared radiation.<br />
In addition, it allows the user to see the focused infrared light for precise soldering and reworking.<br />
SET TEMPERATURE<br />
<strong>The</strong> temperature that is being inputted to the BGA rework system. This can be slightly lower or<br />
higher than the recommended solder paste reflow temperature or equal to or lower than the maxi<br />
mum allowable reflow temperature.<br />
REFLOW TEMPERATURE<br />
<strong>The</strong> temperature in which the solder melts and melds completely with the PCB.<br />
MAXIMUM ALLOWABLE REFLOW TEMPERATURE<br />
<strong>The</strong> maximum temperature that devices or components can be subjected to in order to achieve a<br />
perfect reflow. Manufacturers of ICs, PCBs, solder paste, and solder flux oftentimes incorporate this<br />
information from the component datasheet or technical manual to serve as reference during rework.<br />
THERMAL or TEMPERATURE SENSOR<br />
<strong>The</strong> armlike device that is protruding from the side of the infrared module and provides the most<br />
approximate temperature reading being delivered to the component during rework. <strong>The</strong> suggested<br />
usage is to place the tip at the edge or center of the component of concern and must be physically<br />
in contact with the said object.<br />
21
AOYUE TONGYI ELECTRONIC EQUIPMENT FACTORY<br />
Jishui Industrial Zone, Nantou, Zhongshan City, Guangdong Province, P.R.China<br />
www.<strong>aoyue</strong>.com<br />
Copyright © 2007 Aoyue Tongyi International Ltd.<br />
22