Int909 - The Allendale Stores
Int909 - The Allendale Stores
Int909 - The Allendale Stores

Create successful ePaper yourself
Turn your PDF publications into a flip-book with our unique Google optimized e-Paper software.
Manufacturer:<br />
AOYUE TONGYI ELECTRONIC EQUIPMENT FACTORY<br />
Jishui Industrial Zone, Nantou, Zhongshan City,<br />
Guangdong Province, P.R.China<br />
http://www.aoyue.com<br />
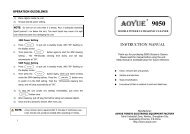
<strong>Int909</strong><br />
REPAIRING SYSTEM<br />
INSTRUCTION MANUAL<br />
Thank you for purchasing Aoyue 909 Repairing System.<br />
It is important to read the manual before using the unit.<br />
Please keep manual in accessible place for future reference.<br />
CAUTION<br />
<strong>The</strong> temperature of the soldering iron, hot air gun and the nozzle ranges from 200 o ~ 480 o C<br />
(400 o ~ 850 o F) when the unit is switched ON. Injury to personnel or damage to items in the<br />
workplace may result if not carefully used. Please read the contents on how to use the<br />
equipment and observe the following in order to maximize usage:<br />
● After opening the package, check if each component is in good working condition. If<br />
there are any suspected damages, do not use the item and report this to the dealer.<br />
● Turn OFF the power switch and unplug the unit from the main power source when<br />
moving the equipment to another location.<br />
● Do not strike or subject the main unit to any physical shock, including the hot air gun,<br />
soldering iron or any parts of the system. Use carefully to avoid damage in any parts.<br />
● Make sure the unit is grounded. Always connect power to a grounded receptacle.
BASIC TROUBLESHOOTING GUIDE<br />
PROBLEM 1: THE UNIT HAS NO POWER<br />
1. Check if the unit is switched ON.<br />
2. Check the fuse. Replace with the same type if fuse is blown.<br />
3. Check the power cord and make sure there are no disconnections.<br />
4. Verify that the unit is properly connected to the power source.<br />
PROBLEM 2: ACTUAL AIR TEMPERATURE IS NOT INCREASING<br />
Description: Actual temperature reading is not increasing or decreasing<br />
based on desired level.<br />
SOLUTION:<br />
<strong>The</strong> heating element may be broken and needs to be replaced.<br />
PROBLEM 3: AIR PRESSURE LEVEL IS SIGNIFICANTLY LOW NO<br />
MATTER HOW HIGH THE AIRFLOW LEVEL IS CALIBRATED<br />
Check the mains voltage (AC power source). If the voltage level falls<br />
significantly low, about 1520% lower than the standard, there will also be a<br />
noticeable drop in the air pressure level.<br />
SOLUTION: Please refer to your local power service provider.<br />
PROBLEM 4: THE UNIT IS VIBRATING TOO MUCH<br />
Check if the 4 screws that hold the pump in place are properly and tightly<br />
connected. Unplug the system from the main power source before opening the<br />
case to check the internal settings.<br />
PROBLEM 5: THE UNIT IS VERY NOISY<br />
SOLUTION: Make sure the screw at the center of the base of the main unit<br />
has been removed. This holds the pump in place during transportation and<br />
needs to be removed before using the equipment.<br />
OTHER PROBLEMS NOT MENTIONED:<br />
Contact the vendor.
MAINTENANCE<br />
IMPORTANT: Unless otherwise directed, carry out these procedures<br />
with the power switched OFF and the power cord UNPLUGGED.<br />
REPLACING THE HEATING ELEMENT<br />
1. Loosen the 3 screws that secure the hot air gun handle. <strong>The</strong> heating<br />
element is located in the middle part of the hot air gun.<br />
2. Slide off the plastic tube. Disconnect the ground wire sleeve.<br />
3. <strong>The</strong> Quartz glass and heat insulation are installed inside the pipe.<br />
Loosen the cable and remove the heating element.<br />
4. Insert the new heating element and reconnect the terminal. Be careful<br />
not to rub or touch together the heating element wire.<br />
5. Reconnect the ground wire after replacing the heating element.<br />
6. Reassemble the handle.<br />
NOTE: <strong>The</strong> life expectancy of a heating element is 1 year under normal<br />
operating conditions.<br />
SPARE PARTS LIST<br />
NOTE:<br />
PART# NAME & SPECIFICATION<br />
10093 Hot air gun heating element<br />
30105S Plastic handle of hot air gun<br />
S010 Hot air gun complete handle<br />
20932 Hot air gun metal pipe<br />
P001 Diaphragm pump<br />
C001 Soldering iron heating element<br />
3098S Plastic handle of soldering iron<br />
B001 Soldering iron complete handle<br />
201701 Tip enclosure<br />
To ensure safety and quality, use only genuine parts for replacement.<br />
TABLE OF CONTENTS<br />
Package Inclusion ………………...……………………….. 4<br />
Functions and Features ………………..………….......... 4<br />
Product Specifications …….…………………...……….. 5<br />
Care and Safety Precautions ……………………..………. 6<br />
Preparation …………………………………………………… 7<br />
Operating Guidelines ...……………………………….. 8<br />
Care and Use of the Tip ……………………….…...……… 9<br />
Maintenance ……………………..…………………………. 10<br />
Basic Troubleshooting Guide ……………………..……… 11
PACKAGE INCLUSION<br />
Aoyue 909 Main Station with Hot Air Gun<br />
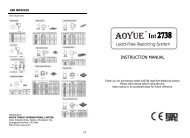
Air Nozzles<br />
B001 Soldering Iron with Tip<br />
Soldering Ion Holder with Solder Wire Stand<br />
Z003 Hot Air Gun Holder<br />
G001 IC Popper<br />
DC Connecting Wires<br />
Power Cord<br />
FUNCTIONS and FEATURES<br />
● Electrostatic discharge (ESD) safe unit.<br />
● Two in one repairing system that combines the function of a Hot Air<br />
Gun and a Soldering iron.<br />
● Hot air gun temperature control via voltage pulse signal.<br />
● Soldering iron with 24V output voltage for safety of user and protect<br />
welded components.<br />
● Programmed with an autocool off process upon turning off the unit, to<br />
ensure safety and to prolong usage life of the heating element.<br />
● Power supply provides accurate and constant voltage output of 0<br />
15V.Used as power source to mobile phones during repair.<br />
● Knob type temperature control for simple yet efficient working temperature<br />
selection.<br />
● Compatibility with various types of air nozzles.<br />
● Compatibility with different kinds of soldering tips.<br />
CARE AND USE OF THE TIP<br />
1. Tip Temperature — High temperature shortens tip life and may cause<br />
thermal shock to other components. Always use the most appropriate tem<br />
perature when soldering.<br />
2. Cleaning — Always clean the soldering tip before using. Remove any<br />
residual solder or flux that are still adhering. Use a clean and moist cleaning<br />
sponge to remove unwanted residues. Contaminants on the tip have many<br />
detrimental effects which may impact soldering performance — one being<br />
reduced heat conductivity.<br />
3. After Use — Always clean the tip. Coat it with fresh solder after use.<br />
This protects the tip against oxidation.<br />
4. Never allow the unit to stay idle at high temperature for long periods.<br />
This makes the tip prone to oxidation. Turn OFF the power switch if it will<br />
not be used for several hours. Unplug the main unit from the power source<br />
if possible.<br />
CLEANING THE TIP<br />
IMPORTANT: Performing this procedure extends life of the soldering tip.<br />
1. Set the temperature to 250 o C.<br />
2. When the temperature has stabilized, clean the tip and check its condi<br />
tion. Replace the tip if it is badly worn or appears to be deformed.<br />
3. If the solder plated part of the tip is covered with black oxide, apply<br />
fresh solder containing flux and clean the tip again. Repeat until all the<br />
oxide is removed. Coat the tip with fresh solder afterwards.<br />
4. Remaining oxides such as the yellow discoloration on the tip shaft can<br />
be removed with isopropyl alcohol.<br />
CAUTION: Never use file to remove residue from the tip.
OPERATING GUIDELINES<br />
SMD REWORKING<br />
1 Plug to the main power source and turned on station.<br />
2. It is advised to adjust the airflow level first before increasing the<br />
temperature to avoid building of too much heat on the hot air gun thus<br />
burning the heating element.<br />
3. It is recommended to keep the knob setting at 3 or above.<br />
4. After setting the desired air pressure and working temperature, you may<br />
start reworking.<br />
5. When reworking is completed, turn off the “SMD Rework” power<br />
switch.<br />
SOLDERING<br />
1. With the unit plugged to the main power source, and the soldering iron<br />
properly connected to the receptacle.<br />
2. Turn ON the “Soldering” power switch.<br />
3. Use regulating knob, A2, to set the desired soldering temperature.<br />
4. Start soldering when the indicator light above the “Soldering” power<br />
switch starts blinking. This means the temperature of the solder iron has<br />
reached the desired temperature.<br />
E. DC POWER SUPPLY<br />
1. Turn on the power switch. Make sure that the connectors are properly<br />
attached.<br />
2. Press the voltage supply function button. (20) from the panel. It will then<br />
display the voltage and current supply.<br />
3. Adjust DC voltage regulator knob for desired output voltage. DC<br />
voltage output ranges from 115 V.<br />
PRODUCT SPECIFICATION<br />
Power Input : available in 110V & 220V<br />
Main Station Dimensions: 188(w) x 126(h) x 250(d) mm<br />
Weight: 4.80Kg<br />
SOLDERING IRON<br />
Power Consumption: 35W<br />
Temperature Range: 200°C 480°C<br />
Heating Element with Tip: Ceramic Heater<br />
Output Voltage: 24V<br />
Tip to Ground Resistance: Below 2 Ω<br />
Tip to Ground Potential: Below 2mV<br />
HOT AIR<br />
Power Consumption: 450W<br />
Temperature Range: 100°C 480°C<br />
Heating Element Metal Heating Core<br />
Nozzle to Ground Resistance: Below 2 Ω<br />
Pump/Motor Type: Diaphragm Pump<br />
Air Capacity: 23 l /min (max)<br />
POWER SUPPLY<br />
Total Current 1.5A<br />
DC Output Voltage 015V
CARE and SAFETY PRECAUTIONS PREPARATION<br />
CAUTION: Misuse can cause injury and other physical damage.<br />
For your own safety, be sure to observe the following precautions.<br />
● Temperature may reach as high as 480°C when unit is turned ON.<br />
Do not use near paper, plastic, and flammable gases and materials.<br />
Do not touch heated parts.<br />
Do not touch metallic parts near the tip.<br />
● <strong>The</strong>rmal Protector<br />
<strong>The</strong> unit is equipped with auto shutoff ability when temperature<br />
gets too high. <strong>The</strong> unit will automatically switch back ON when the<br />
temperature has dropped to a safe level.<br />
● Handle with Care<br />
Never drop or sharply jolt the unit.<br />
Contains delicate parts that may break if unit is dropped.<br />
● Unplug the unit from the main power source if it will not be used for<br />
a long period.<br />
Turn off power during breaks, if possible.<br />
● Use only genuine replacement parts.<br />
Turnoff power and let unit cool down before replacing any parts.<br />
● Soldering process produces smoke; use the equipment on well<br />
ventilated place.<br />
● Do not modify or alter the unit in any manner, particularly the<br />
internal circuitry.<br />
A. Soldering Iron<br />
1. Install solder wire to the solder iron holder (see Figure 1).<br />
2. Attach the soldering iron to the main unit via the 5pin output terminal,<br />
D1, found at the left side of the control panel.<br />
3. Place the soldering iron to the soldering iron stand as shown in Figure 1.<br />
B. Hot Air Gun<br />
Place the hot air gun in the stand to prepare for usage.<br />
Note: Make sure the screw at the center of the base of the main<br />
unit has been removed. This holds the pump in place during<br />
transportation and needs to be removed before using the<br />
equipment.<br />
Figure 1. Soldering Iron stand with solder wire holder<br />
C. DC Power Supply<br />
Connect the mobile phone power supply to the DC output terminal<br />
using the connecting wires provided with the package. Observe proper<br />
polarity of connections.