OWNERS MANUAL: Handling & SafeTy inSTrucTionS - Sig Sauer
OWNERS MANUAL: Handling & SafeTy inSTrucTionS - Sig Sauer
OWNERS MANUAL: Handling & SafeTy inSTrucTionS - Sig Sauer
Create successful ePaper yourself
Turn your PDF publications into a flip-book with our unique Google optimized e-Paper software.
when it counts <br />
®<br />
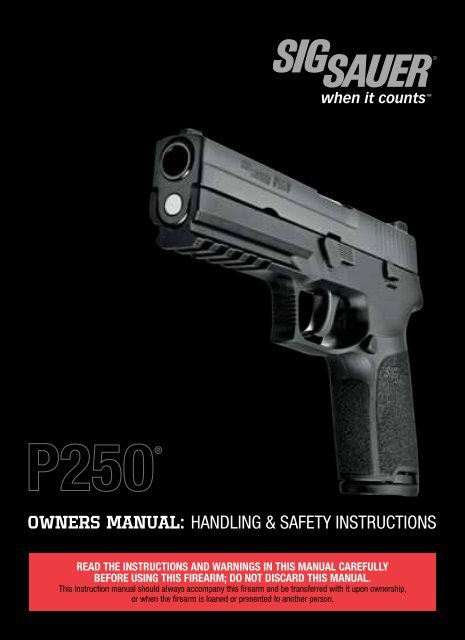
<strong>OWNERS</strong> <strong>MANUAL</strong>: <strong>Handling</strong> & Safety Instructions<br />
Read the instructions and warnings in this manual carefully<br />
before using this firearm; do not discard this manual.<br />
This instruction manual should always accompany this firearm and be transferred with it upon ownership,<br />
or when the firearm is loaned or presented to another person.
State-By-State Warnings<br />
Certain states require, by law, that their own specified warning notices, in larger-than-normal<br />
type be conspicuously included by the manufacturer, distributor, or retail dealer with firearms<br />
sold in that state. SIG SAUER sells its products in compliance with applicable laws and<br />
regulations. Because our products may be sold in these states, we include the following:<br />
CALIFORNIA:<br />
WARNING<br />
“Children are attracted to and can<br />
operate firearms that can cause severe<br />
injuries or death. Prevent child access by<br />
always keeping guns locked away and<br />
unloaded when not in use. If you keep a<br />
loaded firearm where a child obtains and<br />
improperly uses it, you may be fined or sent<br />
to prison.”<br />
ADVERTENCIA<br />
“A los niños atraen las amas de fuego y<br />
las pueden hacer funcionar. Ellos pueden<br />
causarse lesions graves y la muerte. Evite<br />
que los niños tengan accesso a las armas<br />
de fuego guardándolas siepre con llave y<br />
descargadas cuando no las esté utilizando.<br />
Si usted tiene una arma de fuego cargada<br />
en un lugar en que un niño tiene accesso a<br />
ella y la usa indebidamente, le pueden dar<br />
una multa o enviarlo a la carcel.”<br />
CONNECTICUT:<br />
“UNLAWFUL STORAGE OF A LOADED FIREARM MAY RESULT IN IMPRISONMENT OR FINE.”<br />
FLORIDA:<br />
“IT IS UNLAWFUL, AND PUNISHABLE BY IMPRISONMENT AND FINE, FOR ANY ADULT TO STORE<br />
OR LEAVE A FIREARM IN ANY PLACE WITHIN THE REACH OR EASY ACCESS OF A MINOR<br />
UNDER 18 YEARS OF AGE OR TO KNOWINGLY SELL OR OTHERWISE TRANSFER <strong>OWNERS</strong>HIP<br />
OR POSSESSION OF A FIREARM TO A MINOR OR A PERSON OF UNSOUND MIND.”<br />
2 www.sigsauer.com
when it counts <br />
MAINE:<br />
“ENDANGERING THE WELFARE OF A CHILD IS A CRIME. IF YOU LEAVE A FIREARM AND<br />
AMMUNITION WITHIN EASY ACCESS OF A CHILD, YOU MAY BE SUBJECT TO FINE,<br />
IMPRISONMENT OR BOTH. KEEP FIREARMS AND AMMUNITION SEPARATE. KEEP FIREARMS<br />
AND AMMUNITION LOCKED UP. USE TRIGGER LOCKS.”<br />
MARYLAND:<br />
“WARNING: Children can operate firearms which may cause death or serious injury. It is a<br />
crime to store or leave a loaded firearm in any location where an individual knew or should<br />
have known that an unsupervised minor would gain access to the firearm. Store your firearm<br />
responsibly!”<br />
MASSACHUSETTS:<br />
“WARNING FROM THE MASSACHUSETTS ATTORNEY GENERAL: This handgun is not equipped<br />
with a device that fully blocks use by unauthorized users. More than 200,000 firearms like<br />
this one are stolen from their owners every year in the United States. In addition, there<br />
are more than a thousand suicides each year by younger children and teenagers who get<br />
access to firearms. Hundreds more die from accidental discharge. It is likely that many more<br />
children sustain serious wounds, or inflict such wounds accidentally on others. In order to<br />
limit the chance of such misuse, it is imperative that you keep this weapon locked in a secure<br />
place and take other steps necessary to limit the possibility of theft or accident. Failure to<br />
take reasonable preventative steps may result in innocent lives being lost, and in some<br />
circumstances may result in your liability for these deaths.”<br />
“IT IS UNLAWFUL TO STORE OR KEEP A FIREARM, RIFLE, SHOTGUN OR MACHINE GUN IN ANY<br />
PLACE UNLESS THAT WEAPON IS EQUIPPED WITH A TAMPER RESISTANT SAFETY DEVICE OR<br />
IS STORED OR KEPT IN A SECURELY LOCKED CONTAINER.”<br />
www.sigsauer.com 3
NEW JERSEY:<br />
“IT IS A CRIMINAL OFFENSE TO LEAVE A LOADED FIREARM WITHIN EASY ACCESS OF A<br />
MINOR.”<br />
NEW YORK CITY, NY:<br />
“THE USE OF A LOCKING DEVICE OR SAFETY LOCK IS ONLY ONE ASPECT OF RESPONSIBLE<br />
FIREARMS STORAGE. FOR INCREASED SAFETY, FIREARMS SHOULD BE STORED UNLOADED<br />
AND LOCKED IN A LOCATION THAT IS BOTH SEPARATE FROM THEIR AMMUNITION AND<br />
INACCESSIBLE TO CHILDREN AND OTHER UNAUTHORIZED PERSONS.”<br />
NORTH CAROLINA:<br />
Any person who resides in the same premises as a minor, owns or possesses a firearm, and<br />
stores or leaves the firearm (i) in a condition that the firearm can be discharged and (ii) in a<br />
manner that the person knew or should have known that an unsupervised minor would be<br />
able to gain access to the firearm, is guilty of a Class 1 misdemeanor if a minor gains access<br />
to the firearm without the lawful permission of the minor’s parents or a person having charge<br />
of the minor and the minor:<br />
(1) Possesses it in violation of G.S. 14-269.2(b)<br />
(2) Exhibits it in a public place in a careless, angry, or threatening manner;<br />
(3) Causes personal injury or death with it not in self defense; or<br />
(4) Uses it in the commission of a crime.<br />
4 www.sigsauer.com
when it counts <br />
TEXAS:<br />
“IT IS UNLAWFUL TO STORE, TRANSPORT, OR ABANDON AN UNSECURED FIREARM IN A PLACE<br />
WHERE CHILDREN ARE LIKELY TO BE AND CAN OBTAIN ACCESS TO THE FIREARM.”<br />
WISCONSIN:<br />
“IF YOU LEAVE A LOADED FIREARM WITHIN THE REACH OR EASY ACCESS OF A CHILD<br />
YOU MAY BE FINED OR IMPRISONED OR BOTH IF THE CHILD IMPROPERLY DISCHARGES,<br />
POSSESSES, OR EXHIBITS THE FIREARM.”<br />
Please check with your licensed retailer, state police, or local police for additional warnings,<br />
which may be required by local law or regulation. Such regulations change constantly, and<br />
local authorities are in the best position to advise you on such legal matters.<br />
www.sigsauer.com 5
WARNING - LOCKING DEVICES<br />
This firearm was originally sold with a keyoperated<br />
locking device. While it can help provide<br />
secure storage for your unloaded firearm, any<br />
locking device can fail. All guns are designed to<br />
fire if they are loaded and the trigger is pulled.<br />
Therefore, never install the locking device inside the<br />
trigger guard or in any way that makes it possible to<br />
pull the trigger! Do not leave the keys in the lock.<br />
The ultimate responsibility for secure storage of any<br />
firearm must depend upon its owner and his or her<br />
individual circumstances. Firearms should be stored<br />
unloaded, in a secure location, separate from their<br />
ammunition.<br />
NEVER INSTALL THE<br />
LOCKING DEVICE INSIDE<br />
THE TRIGGER GUARD<br />
To maximize effectiveness and reduce the chances of malfunction or damage to a firearm,<br />
ALWAYS refer to the locking device’s manufacturer directions for installation and removal of<br />
the device.<br />
6 www.sigsauer.com
when it counts <br />
FIREARMS SAFETY IS YOUR RESPONSIBILITY<br />
This owner’s manual is designed to assist you in learning how to use and care for your<br />
SIG SAUER ® pistol properly.<br />
Only when you are certain that you fully understand this manual and can properly carry out its<br />
instructions, should you practice loading and firing your firearm with live ammunition. Having<br />
a gun in your possession is a full-time job; you cannot guess and you cannot forget. You must<br />
know how to use your firearm safely.<br />
If you have any doubts about your ability to handle or use this firearm safely, you should seek<br />
supervised instruction. The <strong>Sig</strong> <strong>Sauer</strong> Academy provides all levels of firearms safety and<br />
skill training, from beginner to expert.<br />
For more information contact:<br />
www.sigsaueracademy.com • (603) 679-2003<br />
Main campus:<br />
Satellite Facilities:<br />
Epping, New Hampshire<br />
Range 82, Midland, VA<br />
nra Whittington Center, Raton, NM<br />
SAFETY MUST BE THE FIRST AND CONSTANT CONSIDERATION OF EVERY PERSON WHO<br />
HANDLES FIREARMS AND AMMUNITION.<br />
For more information about safety, responsible firearms ownership, and shooting sports, contact:<br />
National Rifle Association (NRA) of America<br />
11250 Waples Mill Road, Fairfax, VA 22030-7400 • 1-800-672-3888<br />
www.nra.com<br />
www.sigsauer.com 7
Topic<br />
TABLE OF CONTENTS<br />
State-By-State Warnings 2<br />
Locking Devices 6<br />
Warnings of Great Importance 10<br />
1.0 Safety Rules 11<br />
1.1 Protect Your Eyes and Ears 11<br />
2.0 Mechanical Characteristics and Weapon Theory 12<br />
2.1 Weapon Description 12<br />
2.1.1 General 12<br />
2.1.2 Principal Features 12<br />
2.2 Main Parts 13<br />
3.0 Ammunition 14<br />
4.0 <strong>Handling</strong> 18<br />
4.1 Preparation Instructions 18<br />
4.2 Loading the Magazine 18<br />
4.3 Loading the Pistol (Ready to Fire) 19<br />
4.4 Reloading During Shooting 20<br />
5.0 Firing 22<br />
5.1 Clearing a Jam 23<br />
5.2 Firing the Pistol 24<br />
6.0 Unloading the Pistol 26<br />
6.1 Unloading the Pistol (Magazine Not Empty) 26<br />
6.2 Unloading the Pistol (Magazine Empty, Slide Open) 27<br />
7.0 Procedures in Case of Malfunction 29<br />
7.1 Troubleshooting Guide 30<br />
7.2 Minimize Malfunctions 31<br />
8.0 Maintenance 32<br />
8.1 Pistol Disassembly 33<br />
8.2 Magazine Disassembly 35<br />
Page<br />
8 www.sigsauer.com
when it counts <br />
Topic<br />
Page<br />
8.3 Cleaning the Pistol 36<br />
8.4 Pistol Assembly 37<br />
8.5 Magazine Assembly 39<br />
8.6 Function Verification 40<br />
9.0 Pistol Adjustments 44<br />
9.1 General Information 44<br />
9.2 Magazine Catch Removal and Reversal 45<br />
9.3 Changing the Grip Module 46<br />
9.3.1 Disassembly 46<br />
9.3.2 Assembly 48<br />
10.0 <strong>Sig</strong>hts 50<br />
10.1 General Information 50<br />
10.2 Windage Adjustment 50<br />
10.3 Elevation Adjustment 51<br />
11.0 Transportation and Storage 52<br />
12.0 Service and Parts Policy 53<br />
12.1 Parts Policy 53<br />
12.2 Service Policy 54<br />
12.3 Shipping Firearms for Repair 54<br />
12.4 Ordering Parts 56<br />
13.0 Parts List 58<br />
13.1 Parts Diagram 59<br />
14.0 Technical Specifications 60<br />
14.1 Full Size Specifications 61<br />
14.2 Compact Specifications 62<br />
14.3 Subcompact Specifications 63<br />
15.0 The Basic Rules of Safe Firearms <strong>Handling</strong> 64<br />
Warranty Information 65<br />
www.sigsauer.com 9
WARNINGS OF GREAT IMPORTANCE<br />
ARE FOUND WITHIN THIS <strong>MANUAL</strong><br />
Locking Devices 6<br />
Alterations 10<br />
Safety 11<br />
Ammunition 14, 17<br />
Lodged Bullet 16<br />
Lead Exposure 17<br />
Loaded Pistol 19, 21<br />
Trigger 22<br />
Malfunction 22<br />
<strong>Handling</strong> 23<br />
Dropped Pistol 23<br />
Unloading 25, 28, 44<br />
SELECT FOR FULL WARNING<br />
OTHER CAUTIONS AND WARNINGS APPEAR THROUGHOUT THE <strong>MANUAL</strong><br />
FIREARMS ARE DANGEROUS WEAPONS<br />
READ THE INSTRUCTIONS AND WARNINGS IN THIS<br />
<strong>MANUAL</strong> THOROUGHLY AND CAREFULLY BEFORE USING.<br />
WARNING - ALTERATIONS<br />
This product was designed to function properly in its original condition.<br />
Alterations can make it unsafe. Do not alter any part or add or substitute<br />
any parts or accessories not manufactured by SIG SAUER Inc.<br />
DO NOT ALTER ANY GUN<br />
Jam 29, 31<br />
Maintenance 32, 40<br />
Disassembly 33, 35, 47<br />
Cleaning 36<br />
Assembly 37,39<br />
Inspection 43<br />
Alterations 49<br />
<strong>Sig</strong>ht Adjustment 50, 51<br />
Storage 52<br />
Parts Purchasers 53<br />
Shipping 56<br />
10 www.sigsauer.com
when it counts <br />
1.0 Safety Rules<br />
The safety warnings in this manual are important. By understanding the dangers inherent in<br />
the use of any firearm, and by taking the precautions described herein, you can experience<br />
complete safety in the use of your pistol. Failure to heed any of these warnings may result in<br />
serious injury to you or others, as well as severe damage to the firearm or other property.<br />
PISTOLS are classified as FIREARMS and are sold by SIG SAUER with the specific<br />
understanding that we shall not be responsible in any manner whatsoever for malfunctioning<br />
of the firearm, physical injury or property damage resulting in whole or in part from:<br />
• criminal or negligent discharge;<br />
• improper or careless handling;<br />
• unauthorized modifications; defective, improper, hand-loaded,<br />
• or reloaded ammunition;<br />
• corrosion;<br />
• neglect; or<br />
• other influences beyond our direct and immediate control.<br />
This limitation applies regardless of whether liability is asserted on the basis of contract,<br />
negligence, or strict liability (including any failure to warn). Under no circumstance shall SIG<br />
SAUER, Inc. be liable for incidental or consequential damages, such as loss of use of property,<br />
commercial loss, and loss of earnings or profits.<br />
1.1 Protect Your Eyes and Ears<br />
Always wear safety glasses that meet the requirements of American National Standards<br />
Institute (ANSI) Z87.1 and ear plugs or “earmuff” type protectors whenever you are shooting.<br />
Always make certain that persons close to you are similarly protected. Unprotected eyes may<br />
be injured by powder, gas, carbon residue, lubricant, metallic particles, or similar debris that<br />
may emanate occasionally from any firearm in normal use. Without ear protection, repeated<br />
exposure to shooting noise may lead to cumulative, permanent hearing loss.<br />
www.sigsauer.com 11
2.0 Mechanical Characteristics and Weapon Theory<br />
2.1 Weapon Description<br />
2.1.1. General<br />
The SIG SAUER P250 pistol is a modern handgun incorporating the latest technical advances<br />
in weapon design for military, law enforcement and sporting use. The P250 is a mechanically<br />
locked, short recoil operated pistol with semi-automatic reloading. Firing takes place with<br />
each pull of the trigger until the magazine is empty. The slide remains open after the last<br />
round has been fired from the magazine.<br />
2.1.2 Principal Features<br />
The automatic firing pin lock and double-action trigger ensure safe carrying of the weapon<br />
and provide instant readiness without actuating a manual safety.<br />
Distinctive high-contrast sights, in conjunction with the ergonomically correct grip, ensure<br />
rapid target acquisition and engagement, even under poor lighting conditions.<br />
Interchangeable grip modules of different sizes allow for optimal adaptation of the weapon to<br />
the individual user.<br />
The magazine catch can easily be reconfigured for left or right-hand operation. All other<br />
operating controls are designed so they can be operated from either side.<br />
A Picatinny rail is integrated into the grip module, facilitating the easy attachment of industry<br />
standard tactical accessories.<br />
The closed design of the pistol helps keep dirt and other debris from entering the pistol,<br />
ensuring proper function in harsh environmental conditions.<br />
The P250 pistol is a double-action only (DAO) design.<br />
12 www.sigsauer.com
when it counts <br />
2.2 Main Parts<br />
25<br />
24<br />
21<br />
26<br />
14<br />
8<br />
5<br />
1<br />
13 2 38<br />
1 - Grip Module<br />
2 - Magazine Catch<br />
5 - Takedown Lever<br />
8 - Slide Catch Lever<br />
13 - Trigger<br />
14 - Hammer<br />
21 - Barrel<br />
24 - Slide<br />
Note: Refer to section 13 for a detailed parts list and diagram.<br />
25 - Front <strong>Sig</strong>ht<br />
26 - Rear <strong>Sig</strong>ht<br />
38 - Magazine Floor Plate<br />
www.sigsauer.com 13
3.0 Ammunition<br />
1. Use only high-quality, original, factory-manufactured ammunition. Do not use cartridges<br />
that are dirty, wet, corroded, bent, or damaged. Do not oil cartridges. Do not spray aerosoltype<br />
lubricants, preservatives, or cleaners directly onto cartridges or where excess spray may<br />
flow into contact with cartridges. Lubricant or other foreign matter on cartridges can cause<br />
potentially dangerous ammunition malfunctions. Only use ammunition of the caliber for which<br />
your firearm is chambered. The proper caliber is permanently engraved on your firearm; never<br />
attempt to use ammunition of any other caliber.<br />
2. The use of reloaded, “remanufactured” hand-loaded, or other non-standard ammunition<br />
voids all warranties. Reloading is a science and improperly loaded ammunition can be<br />
extremely dangerous. Severe damage to the firearm and serious injury to the shooter or<br />
to others may result. Always use ammunition that complies with the industry performance<br />
standards established by the Sporting Arms and Ammunition Manufacturers’ Institute, Inc.<br />
(SAAMI) of the United States or ammunition manufactured to military specifications.<br />
WARNING – AMMUNITION (CARTRIDGE) NOTICE<br />
SIG SAUER SPECIFICALLY DISCLAIMS RESPONSIBILITY FOR ANY DAMAGE OR INJURY<br />
WHATSOEVER OCCURRING IN CONNECTION WITH, OR AS A RESULT OF, THE USE IN ANY<br />
SIG SAUER FIREARM OF FAULTY, NON-STANDARD, “REMANUFACTURED” HAND-LOADED<br />
(RELOADED) AMMUNITION, OR CARTRIDGES OTHER THAN THOSE FOR WHICH THE FIREARM<br />
WAS ORIGINALLY CHAMBERED.<br />
14 www.sigsauer.com
when it counts <br />
3. Firearms may be severely damaged and serious injury to the shooter or to others may<br />
result from any condition causing excessive pressure inside the chamber or barrel during<br />
firing. Excessive pressure can be caused by obstructions in the barrel, propellant powder<br />
overloads, the use of incorrect cartridges, or defectively assembled cartridges. In addition,<br />
the use of a dirty, corroded, or damaged cartridge can lead to a burst cartridge case and<br />
consequent damage to the firearm and personal injury from the sudden escape of highpressure<br />
propellant gas within the firearm’s mechanism.<br />
4. Immediately stop shooting and check the barrel for a possible obstruction whenever:<br />
• You have difficulty in, or feel unusual resistance in, chambering a cartridge<br />
• A cartridge misfires (does not go off)<br />
• The mechanism fails to extract a fired cartridge case<br />
• Unburned grains of propellant powder are discovered spilled in the mechanism<br />
• A shot sounds weak or abnormal. In such cases it is possible that a bullet is lodged<br />
partway down the barrel. Firing a subsequent bullet into the obstructed barrel can<br />
wreck the firearm and cause serious injury to the shooter or to bystanders<br />
5. Bullets can become lodged in the barrel:<br />
• If the cartridge has been improperly loaded without propellant powder, or if the powder<br />
fails to ignite (ignition of the cartridge primer alone will push the bullet out of the<br />
cartridge case, but usually does not generate sufficient energy to expel the bullet<br />
completely from the barrel).<br />
• If the bullet is not properly seated in the cartridge case. When such a cartridge is<br />
extracted from the chamber without being fired, the bullet may be left behind in the<br />
bore at the point where the rifling begins. Subsequent chambering of another cartridge<br />
may push the first bullet further into the bore.<br />
www.sigsauer.com 15
6. If there is any reason to suspect that a bullet is obstructing the barrel, immediately unload<br />
the firearm and look through the bore. It is not sufficient to merely look in the chamber.<br />
A bullet may be lodged some distance down the barrel where it cannot easily be seen.<br />
WARNING – LODGED BULLET<br />
IF A BULLET IS IN THE BORE, DO NOT ATTEMPT TO SHOOT IT OUT BY USING ANOTHER<br />
CARTRIDGE OR BY BLOWING IT OUT WITH A BLANK OR ONE FROM WHICH THE BULLET HAS<br />
BEEN REMOVED. SUCH TECHNIQUES CAN GENERATE EXCESSIVE PRESSURE, DAMAGE THE<br />
FIREARM, AND CAUSE SERIOUS PERSONAL INJURY.<br />
If the bullet can be removed with a cleaning rod, clean any unburned powder grains from the<br />
bore, chamber, and mechanism before resuming shooting. If the bullet cannot be dislodged by<br />
tapping it with a cleaning rod, send the firearm to SIG SAUER.<br />
7. Dirt, corrosion, or other foreign matter on a cartridge can impede complete chambering<br />
and may cause the cartridge case to burst upon firing. The same is true of cartridges that are<br />
damaged or deformed.<br />
8. Do not oil cartridges, and be sure to wipe the chamber clean of any oil or preservative<br />
before commencing to shoot. Oil interferes with the friction between cartridge case and<br />
chamber wall that is necessary for safe functioning, and subjects the firearm to stress similar<br />
to that imposed by excessive pressure.<br />
9. Use lubricants sparingly on the moving parts of your firearm. Avoid excessive spraying of<br />
any aerosol gun care product, especially where it may get on ammunition. All lubricants and<br />
aerosol spray lubricants, in particular, can penetrate cartridge primers and cause misfires.<br />
Some highly penetrative lubricants can also migrate inside cartridge cases and cause<br />
deterioration of the propellant powder; on firing, the powder may not ignite. If only the primer<br />
ignites, there is danger that the bullet may become lodged in the barrel.<br />
16 www.sigsauer.com
when it counts <br />
WARNING - AMMUNITION<br />
Death, serious injury, and damage can result from the<br />
use of wrong ammunition, bore obstructions, powder<br />
overloads, or incorrect cartridge components. Always<br />
wear shooting glasses and hearing protectors.<br />
IMPROPER AMMUNITION DESTROYS GUNS<br />
WARNING - LEAD EXPOSURE<br />
Discharging firearms in poorly ventilated areas,<br />
cleaning firearms, or handling ammunition may result<br />
in exposure to lead and other substances known to the<br />
state of California to cause birth defects, reproductive<br />
harm, and other serious physical injury. Maintain<br />
adequate ventilation at all times. Wash hands<br />
thoroughly after exposure.<br />
SHOOTING OR CLEANING GUNS MAY EXPOSE YOU TO LEAD<br />
www.sigsauer.com 17
4.0 <strong>Handling</strong><br />
4.1 Preparation Instructions<br />
If you have the pistol and ammunition, and have read and understood all of the safety<br />
instructions, you are now ready to use the pistol.<br />
4.2 Loading the Magazine<br />
1. Ensure the magazine is the proper type and caliber for the pistol.<br />
2. Press down on the magazine follower with the cartridge case rim. Ensure the bullet is<br />
facing the front of the magazine.<br />
3. Push the cartridge to the rear and under the magazine lips.<br />
4. Repeat until the magazine holds the desired number of cartridges.<br />
Steps 2-3 Step 4<br />
18 www.sigsauer.com
when it counts <br />
4.3 Loading the pistol (ready to fire)<br />
1. Point the pistol in a safe direction.<br />
2. Insert a full magazine and ensure it is engaged.<br />
3. Pull the slide back fully and release, allowing the slide to fly forward.<br />
WARNING – LOADED PISTOL<br />
THE PISTOL IS NOW LOADED AND READY TO FIRE.<br />
Step 2<br />
Step 3<br />
www.sigsauer.com 19
4.4 Reloading During Shooting<br />
When the last round in the magazine is expended, the slide will be locked back in the open<br />
position by the slide catch lever.<br />
1. Depress the magazine catch.<br />
2. Remove the empty magazine.<br />
Step 1<br />
Step 2<br />
20 www.sigsauer.com
when it counts <br />
3. Insert a loaded magazine, making sure it is engaged.<br />
4. Release the slide by:<br />
a. Pressing down on the slide catch lever or,<br />
b. Pulling back on the slide and release<br />
Step 3 Step 4<br />
WARNING – LOADED PISTOL<br />
The pistol is now loaded and ready to fire.<br />
Always make sure the muzzle is pointed in a safe direction! Never attempt to load or unload<br />
any firearm inside a vehicle,building, or other confined space (except a properly constructed<br />
shooting range). Enclosed areas frequently offer no completely safe direction to point the<br />
firearm; if an accidental discharge occurs, there is great risk of bodily injury or property<br />
damage. Before loading, always clean all grease and oil from the bore and chamber, and<br />
check to be certain that no obstruction is in the barrel. Any foreign matter in the barrel could<br />
result in a bulged or burst barrel or other damage to the firearm, and could cause serious<br />
injury to the shooter or to others.<br />
www.sigsauer.com 21
5.0 Firing<br />
WARNING – TRIGGER<br />
DO NOT TOUCH THE TRIGGER UNTIL YOU ARE ACTUALLY READY TO FIRE THE PISTOL.<br />
Keep the muzzle pointed in a safe direction and your finger away from the trigger when<br />
cocking any firearm.<br />
Never fire any firearm with your finger, hand, face, or other part of your body over or adjacent<br />
to the ejection port, or in any position where you may be struck by reciprocating movement of<br />
the breech. Both the ejection of empty cartridge cases and the movement of the breech are<br />
part of the normal operating cycle of firearms, and pose no safety hazard to the shooter if the<br />
firearm is held in a normal grip and fired at arm’s length.<br />
Never allow other persons to stand beside you where they might be struck by an ejected<br />
cartridge case. The case is hot, and may be ejected with sufficient force to cause a burn,<br />
cut, or other injury. Wear safety glasses to protect eyes. Make certain there is a clear,<br />
unobstructed path for safe ejection of the fired case. Remember, the case may bounce off a<br />
hard object nearby and strike you or someone else.<br />
WARNING – MALFUNCTION<br />
If, while shooting, your firearm develops a mechanical malfunction or binding,<br />
or “spits” powder/gas, or if a cartridge primer is punctured, or a cartridge<br />
case is bulged or ruptured, or if the report on firing does not sound quite<br />
right, STOP SHOOTING IMMEDIATELY! It may be dangerous to continue. UNLOAD THE<br />
FIREARM – DO NOT try “one more shot.” Take the firearm and the ammunition to a<br />
gunsmith for examination.<br />
22 www.sigsauer.com
when it counts <br />
5.1 Clearing a Jam<br />
While shooting any firearm, an unfired cartridge or fired cartridge case may occasionally<br />
become jammed between the slide and the barrel. WHILE KEEPING THE MUZZLE<br />
POINTED IN A SAFE DIRECTION, clear the jam as follows:<br />
1. Remove the magazine, then<br />
2. Pull back the slide and lock it to the rear by pushing up the slide catch lever.<br />
3. The jammed cartridge or case now can be removed by shaking it out or by picking it out.<br />
WARNING – HANDLING<br />
The slide opens and shuts quickly while firing. Keep<br />
face and hands away from it. Hot brass and powder<br />
gas is ejected quickly and can burn you. Always wear<br />
safety glasses and hearing protectors.<br />
SLIDE OPENS FAST – HOT BRASS EJECTED<br />
WARNING – DROPPED PISTOL<br />
If dropped, the pistol may fire. Keep the chamber empty<br />
unless actually firing!<br />
ANY GUN MAY FIRE IF DROPPED<br />
www.sigsauer.com 23
5.2 Firing the Pistol<br />
1. Aim the pistol at a safe target<br />
2. Place finger on the trigger and pull back to discharge.<br />
Step 2<br />
3. Keep pistol aimed at the target and continue to fire as required or until the pistol is empty.<br />
5. Remove the magazine, unload and clear the pistol (see section 6.0 “Unloading the Pistol”).<br />
If the pistol is fired until the magazine is empty, the slide will remain locked to the rear. If<br />
firing is to continue, reload the pistol (see section 4.4 “Reloading During Shooting”).<br />
24 www.sigsauer.com
when it counts <br />
WARNING – UNLOADING<br />
Removing cartridges from the magazine does not prevent the pistol from being fired! When<br />
there is a cartridge in the chamber, the cartridge will discharge if the trigger is pulled. It is<br />
absolutely essential for the user to know how to completely unload the pistol. “Completely”<br />
means emptying the magazine and removing a chambered cartridge.<br />
PISTOL WILL FIRE WITH MAGAZINE EMPTY OR REMOVED<br />
www.sigsauer.com 25
6.0 Unloading the Pistol<br />
6.1 Unloading the Pistol (Magazine not Empty)<br />
1. Keep the muzzle pointed in a safe direction.<br />
2. Depress the magazine catch and remove the magazine.<br />
3. Pull the slide back to the stop and engage the slide catch lever. The round is ejected and<br />
the slide is locked open.<br />
4. Visually and manually check the chamber to ensure the pistol is completely free of<br />
ammunition.<br />
5. Depress the slide catch lever, causing the slide to close.<br />
6. Unload the magazine.<br />
Step 2 Step 3<br />
Step 4 Step 5<br />
Step 6<br />
26 www.sigsauer.com
when it counts <br />
6.2 Unloading the Pistol (Magazine Empty, Slide Open)<br />
1. Keep the muzzle pointed in a safe direction.<br />
2. Depress the magazine catch and remove the magazine.<br />
3. Visually and manually check the chamber to ensure the pistol is completely free of<br />
ammunition.<br />
4. Depress the slide catch lever, causing the slide to close.<br />
Step 2 Step 3<br />
Step 4<br />
www.sigsauer.com 27
Always make sure the muzzle is pointed in a safe direction! Remember to clear the chamber<br />
after the magazine has been removed.<br />
Never assume that any gun is unloaded until you have personally checked it, visually and<br />
physically!<br />
After every shooting practice, make a final check to be certain the firearm is unloaded before<br />
leaving the range.<br />
WARNING – UNLOADING<br />
Removing cartridges from the<br />
magazine does not prevent the<br />
pistol from being fired! When there<br />
is a cartridge in the chamber,<br />
the cartridge will discharge if the<br />
trigger is pulled. It is absolutely<br />
essential for the user to know how<br />
to completely unload the pistol.<br />
“Completely” means emptying<br />
the magazine and removing a<br />
chambered cartridge.<br />
PISTOL WILL FIRE<br />
WITH MAGAZINE EMPTY<br />
OR REMOVED<br />
28 www.sigsauer.com
when it counts <br />
7.0 Procedures in Case of Malfunction (“Jam”)<br />
Follow the malfunction mitigation procedures if:<br />
• You notice that a cartridge is difficult to chamber<br />
• A cartridge does not go off<br />
• The mechanism fails to extract a fired cartridge case<br />
• You discover unburned grains of propellant powder spilled in the mechanism<br />
• A shot sounds or feels weak or abnormal<br />
WARNING – JAM<br />
LIVE ROUND JAM MAY NOT EJECT.<br />
Firearms work reliably if properly maintained. If there is a malfunction during firing:<br />
1. Keep the pistol pointed in a safe direction with your finger off the trigger.<br />
2. Remove and secure the magazine.<br />
3. Move the slide rearward and forward to clear any cartridge case in or near the chamber.<br />
Visually and manually inspect the chamber.<br />
4. If you suspect that a bullet is lodged in the bore, field strip your pistol and check to see if<br />
the barrel is blocked. If there is a bullet lodged in the bore, return the pistol to SIG SAUER (see<br />
section 12.3 “Shipping Firearms for Repair”).<br />
WARNING – JAM<br />
IF A BULLET IS IN THE BORE, DO NOT ATTEMPT TO SHOOT IT OUT BY USING ANOTHER<br />
CARTRIDGE, OR BY BLOWING IT OUT WITH A BLANK OR A CARTRIDGE FROM WHICH THE<br />
BULLET HAS BEEN REMOVED. THIS CAN GENERATE EXCESSIVE PRESSURE, DAMAGE THE<br />
FIREARM AND CAUSE SERIOUS PERSONAL INJURY OR DEATH.<br />
www.sigsauer.com 29
7.1 Troubleshooting Guide<br />
Malfunction Cause Correction<br />
Feed<br />
No round fed into<br />
the chamber<br />
Slide does not close easily<br />
or completely<br />
Magazine not<br />
properly inserted<br />
or magazine is<br />
deformed or dirty<br />
Pistol or cartridge<br />
is fouled (dirty) or<br />
pistol is too heavily lubricated<br />
Incorrect ammunition<br />
Pistol requires service<br />
Extraction/Ejection<br />
After firing, the case Insufficient recoil due to dirt<br />
stays in the chamber or is<br />
jammed in the<br />
Light hold or limp wrist<br />
ejection port<br />
Low-powered ammunition<br />
Pistol requires service<br />
Ignition<br />
Hammer drops but Firing pin obstructed<br />
round does not fire<br />
Faulty ammunition<br />
Pistol requires service<br />
Insert magazine<br />
properly or change<br />
magazine<br />
Clean and lubricate<br />
pistol and/or replace<br />
the ammunition<br />
Replace ammunition<br />
Return to SIG SAUER<br />
Clean and lubricate<br />
the pistol<br />
Solid grip, rigid hold<br />
Change ammunition<br />
Return to SIG SAUER<br />
Inspect, clean and<br />
lubricate the pistol<br />
Manually cycle in<br />
next round<br />
Return to SIG SAUER<br />
30 www.sigsauer.com
when it counts <br />
WARNING – JAMS<br />
If your pistol stops firing with a live round in the chamber of a hot barrel (a misfire or jam),<br />
remove the round immediately. If you cannot remove the round within 10 seconds, remove<br />
the magazine and wait at least 15 minutes with the pistol pointing in a safe direction. This<br />
way, neither the user nor any other person would be injured by the possibility of a round<br />
“cooking-off” (a round detonating due to the heat of the barrel). Keep your face away from<br />
the ejection port while clearing a hot chamber.<br />
7.2 Minimizing Malfunctions (“Jams”)<br />
Malfunctions can largely be avoided by cleaning the pistol (see section 8.3 “Cleaning the<br />
Pistol”).<br />
• After each firing session<br />
• Whenever a buildup of firing residue is suspected<br />
• Whenever the pistol is exposed to extreme environmental conditions (rain, snow, freezing<br />
temperatures, etc.)<br />
www.sigsauer.com 31
8.0 Maintenance<br />
WARNING – MAINTENANCE<br />
Verify the magazine is removed – visually and physically confirm the pistol is unloaded before<br />
attempting disassembly or performing any maintenance steps. Failure to ensure the firearm is<br />
unloaded could result in unintentional discharge, causing injury or death.<br />
VERIFY THE FIREARM IS UNLOADED<br />
32 www.sigsauer.com
when it counts <br />
8.1 Pistol Disassembly<br />
1. Unload the pistol (see section 6.0 “Unloading the Pistol”).<br />
2. Retract the slide to the stop and lock open by engaging the slide catch lever.<br />
3. Verify visually and physically that there is no round in the chamber.<br />
4. Rotate the takedown lever clockwise until the takedown lever can no longer rotate (due to<br />
engaging the stop that is incorporated into the frame).<br />
5. Retract the slide slightly to disengage the slide catch lever. Allow the slide to move forward<br />
in a controlled fashion.<br />
WARNING<br />
Slide is under spring tension. Maintain positive control during slide removal to prevent<br />
damage or injury. Wear eye protection.<br />
6. Move the complete slide assembly (slide, barrel, recoil spring and guide) forward and off<br />
the frame.<br />
Step 2<br />
Step 5<br />
Step 4<br />
Step 6<br />
www.sigsauer.com 33
WARNING<br />
The recoil spring and guide are under spring tension and not firmly attached to the slide. Use<br />
caution to prevent injury or damage to the pistol. Wear eye protection.<br />
7. Push the recoil spring guide forward slightly and lift from rear to remove the recoil spring<br />
and guide from the slide.<br />
8. Remove the barrel from the slide by pulling upward slightly and to the rear. This level of<br />
disassembly is sufficient to allow a thorough cleaning after shooting.<br />
Step 7<br />
Step 8<br />
34 www.sigsauer.com
when it counts <br />
8.2 Magazine Disassembly<br />
1. Locate the bottom of the magazine floorplate.<br />
2. Using a punch, cleaning rod, or similar tool, depress the magazine insert and push the<br />
magazine floorplate forward until it is clear of the magazine tube.<br />
WARNING<br />
The magazine spring is compressed. Guard the magazine insert and magazine spring with<br />
your thumb to control the release of magazine spring tension. Uncontrolled release can cause<br />
injury. Wear eye protection.<br />
3. Remove the magazine follower and magazine spring from the magazine tube. This level of<br />
disassembly is sufficient to allow a thorough cleaning after shooting.<br />
Step 1 Step 2 Step 3<br />
www.sigsauer.com 35
8.3 Cleaning the Pistol<br />
WARNING<br />
Never clean the barrel from the muzzle end; do not use a steel wire brush as it can damage the<br />
smooth surface of the barrel. Use a suitable cleaning rod and a brush of the correct caliber.<br />
Solvents can be harmful to the surface finish of the pistol. Read and follow the manufacturer’s<br />
warnings before using solvents or cleaners. Wear eye protection.<br />
Avoid over-lubrication of components.<br />
1. Lubricate the cleaning brush with gun oil and<br />
insert it into the barrel via the chamber (opposite<br />
the muzzle end).<br />
2. Wipe powder residues and oil from the barrel<br />
bore and chamber with cleaning patches.<br />
3. Clean exterior surfaces of the barrel with a<br />
brush coated with gun oil.<br />
4. Remove dirt from guides of the frame, inside<br />
and outside of slide, recoil spring guide and recoil<br />
spring with a brush or cleaning patch. Lightly<br />
lubricate same surfaces with a cloth impregnated<br />
with gun oil or gun grease.<br />
5. Lightly oil bores of the barrel and chamber.<br />
Remove any excess lubricant.<br />
CAUTION: Avoid over<br />
lubrication of components.<br />
36 www.sigsauer.com
when it counts <br />
8.4 Pistol Assembly<br />
1. Verify the pistol is clear of all foreign matter.<br />
2. Insert the barrel into the slide.<br />
WARNING<br />
The recoil spring and guide are under spring tension and not firmly attached to the slide. Use<br />
caution to prevent injury or damage to the pistol. Wear eye protection.<br />
3. Insert recoil spring guide assembly into the slide.<br />
Step 2<br />
Step 3<br />
www.sigsauer.com 37
4. Ensure the takedown lever is rotated clockwise fully to the stop.<br />
5. Guide the slide onto the frame rails from the front.<br />
6. Retract the slide fully to the rear. Engage the slide catch lever to lock the slide in the open<br />
position.<br />
7. Rotate the takedown lever counter-clockwise until horizontal.<br />
8. Depress the slide catch lever to release the slide.<br />
Step 4<br />
Steps 5, 6, & 7<br />
Step 8<br />
38 www.sigsauer.com
when it counts <br />
8.5 Magazine Assembly<br />
1. Orient the magazine follower on the magazine spring and insert into the bottom of the<br />
magazine tube.<br />
WARNING<br />
The magazine spring is being compressed during assembly. Guard the magazine insert and<br />
magazine spring with your thumb to control magazine spring tension. Uncontrolled release<br />
can cause injury. Wear eye protection.<br />
2. Insert the magazine spring fully into the magazine tube until the magazine insert is flush<br />
with the magazine tube bottom.<br />
3. Holding the magazine insert in place, slide the magazine floorplate onto the magazine tube<br />
lips until the magazine floorplate is locked in place by the magazine insert.<br />
Step 2 Step 3<br />
www.sigsauer.com 39
8.6 Function Verification<br />
The function check is performed on the assembled pistol to verify functionality. It should be<br />
performed after the completion of repairs and after each cleaning and assembly of the pistol.<br />
WARNING – MAINTENANCE<br />
Verify the magazine is removed – visually and physically confirm the pistol is unloaded before<br />
attempting disassembly or performing any maintenance steps. Failure to ensure the firearm is<br />
unloaded could result in unintentional discharge, causing injury or death.<br />
VERIFY THE FIREARM IS UNLOADED<br />
40 www.sigsauer.com
when it counts <br />
1. Ensure the magazine is removed and the pistol is unloaded (see section 6.0 “Unloading the Pistol”).<br />
2. Check recoil spring function/slide travel.<br />
a. Retract the slide fully and release.<br />
b. Verify the slide locks fully in the closed position.<br />
c. Repeat the procedure.<br />
3. Check the trigger mechanism:<br />
a. Pull the trigger fully to the rear.<br />
b. As the trigger is pulled rearward, verify the hammer cocks. At the end of trigger travel,<br />
the hammer should fall forward firmly.<br />
Step 2a<br />
Step 3a - 3b<br />
www.sigsauer.com 41
4. Check slide catch lever.<br />
a. Insert an empty magazine.<br />
b. Retract the slide fully and release.<br />
c. Verify the slide is locked to the rear by the slide catch lever.<br />
d. Depress the slide catch lever.<br />
e. Verify the slide is released and closes in the locked position.<br />
f. Remove the magazine.<br />
5. Inspect the magazine.<br />
a. Check the condition of the magazine tube.<br />
b. Verify the magazine floorplate is secure.<br />
c. Check for free movement of the magazine follower and spring.<br />
d. Insert the magazine into the pistol and remove. Verify smooth insertion.<br />
check the magazine catch for clean engagement and smooth release.<br />
Step 4a, 4b & 4c<br />
Step 4d & 4e<br />
Step 4f<br />
Step 5d<br />
42 www.sigsauer.com
when it counts <br />
6. Inspect the pistol exterior.<br />
a. Inspect the general condition of the pistol.<br />
b. Check the sights, body, slide, and takedown lever for damage.<br />
c. Verify the front and rear sights are secure.<br />
WARNING – INSPECTION<br />
Never use a firearm or magazine that shows signs of damage or fails a function check. Verify<br />
the magazine is the correct model and caliber for the pistol. If the condition or function of the<br />
pistol or magazine is suspect, return the pistol or magazine to SIG SAUER for evaluation.<br />
VERIFY THE CONDITION AND FUNCTION<br />
www.sigsauer.com 43
9.0 Pistol Adjustments<br />
9.1 General Information<br />
The P250 pistol is designed for both right-hand and left-hand operation and a variety of hand<br />
sizes. The slide catch lever can be operated from either side. The magazine catch may be<br />
repositioned to either side based on shooter preference. The grip module may be replaced by<br />
the shooter, providing a range of ergonomically correct grip configurations.<br />
WARNING – UNLOADING<br />
Verify the magazine is removed<br />
and visually and physically<br />
confirm the pistol and chamber<br />
are unloaded before attempting<br />
disassembly or performing any<br />
maintenance steps. Failure to<br />
ensure the firearm is unloaded<br />
could result in unintentional<br />
discharge, causing injury or<br />
death.<br />
VERIFY THE FIREARM IS UNLOADED<br />
44 www.sigsauer.com
when it counts <br />
9.2 Magazine Catch Removal and Reversal<br />
1. Depress the magazine catch until the back protrudes slightly from the opposite side and hold.<br />
2. On the protruding side, press the straightened end of a paper clip into the hole on the back<br />
side of the magazine catch to release the magazine catch stop.<br />
3. Remove the magazine catch stop.<br />
4. Remove the magazine catch and magazine catch spring, keeping the two pieces together.<br />
5. Insert the magazine catch and magazine catch spring on the desired side of the pistol body.<br />
6. Insert the magazine catch stop from the opposite side until the magazine catch stop latch<br />
engages.<br />
Step 2<br />
Steps 3 & 4<br />
Steps 5 & 6<br />
www.sigsauer.com 45
9.3 Changing the Grip Module<br />
9.3.1 Disassembly<br />
1. Remove the slide but not the recoil spring and recoil spring guide (see section 8.1 “Pistol<br />
Disassembly”).<br />
2. Remove the takedown lever (turn and pull simultaneously).<br />
3. Push the frame assembly forward.<br />
4. Pull up on the frame rails while drawing the hammer back to rotate the frame assembly out<br />
from the grip module.<br />
Steps 3 & 4<br />
Step 2<br />
46 www.sigsauer.com
when it counts <br />
WARNING – DISASSEMBLY<br />
Do not attempt to disassemble your pistol beyond the point explained in this manual. Further disassembly<br />
should only be done at the factory. Some of the components require special skills, tools<br />
and fixtures for disassembly.<br />
DO NOT DISASSEMBLE BEYOND INSTRUCTIONS<br />
www.sigsauer.com 47
9.3.2 Assembly<br />
1. Insert the frame assembly locking tab into the mating slot inside the rear of the grip<br />
module.<br />
2. While drawing back on the hammer, press down on the frame rails, rotating the frame<br />
assembly into position.<br />
3. Insert the takedown lever (turn and push simultaneously) through the corresponding hole<br />
on the left side of the grip module/frame assembly, locking the frame assembly in place.<br />
4. Assemble the pistol (see section 8.4 “Pistol Assembly”).<br />
Step 1<br />
Step 2<br />
Step 3<br />
48 www.sigsauer.com
when it counts <br />
WARNING – ALTERATIONS<br />
This product was designed to function properly in its original condition. Alterations can make<br />
it unsafe. Do not alter any part or add or substitute any parts or accessories not manufactured<br />
by SIG SAUER for this pistol.<br />
DO NOT ALTER ANY GUN<br />
www.sigsauer.com 49
10.0 <strong>Sig</strong>hts<br />
10.1 General Information<br />
The P250 pistol is equipped with high contrast or SIGLITE Night <strong>Sig</strong>hts. The front sight is<br />
drift adjustable for windage. Both the front and rear sights are available in different heights,<br />
which allows for elevation adjustments.<br />
WARNING – SIGHT ADJUSTMENT<br />
<strong>Sig</strong>ht corrections should only be performed by someone with the necessary knowledge – the<br />
pistol could become damaged.<br />
10.2 Windage (Left/Right) Adjustment<br />
Adjust the point of impact left or right by moving the front sight in its dovetail. Move the<br />
front sight in the direction of the impact – if the rounds impact left of target, move the front<br />
sight left to correct. If the rounds impact right of target, move the front sight right to correct.<br />
Moving the sight 0.02” changes the point of impact approximately 3” at 25 yards.<br />
Note: SIG SAUER has a<br />
<strong>Sig</strong>ht Adjustment Tool available<br />
that makes it easier to adjust<br />
and change sights.<br />
Impact left of point of aim<br />
50 www.sigsauer.com<br />
Impact low of point of aim
when it counts <br />
10.3 Elevation (Up/Down) Adjustment<br />
There are different height combinations available for the front<br />
and rear sights. The sights are numbered according to their<br />
height. You can change elevation by changing either the front<br />
or rear sight. It is easier if you change the front first.<br />
There are six front sight heights available. Each front sight<br />
change will move the impact of the bullet approximately 1” at<br />
25 yards.<br />
Impact low of point of aim<br />
There are three rear sight heights available (S,M,L). Each rear sight change will move the<br />
impact of the bullet approximately 6” at 25 yards.<br />
When changing sights, remember this rule: NUMBERS UP,GROUPS UP; NUMBERS DOWN,<br />
GROUPS DOWN. This is true for both front and rear sights (S=1, M=2, L=3).<br />
WARNING – SIGHT ADJUSTMENT<br />
<strong>Sig</strong>ht corrections should ONLY be<br />
performed on an unloaded firearm.<br />
Manipulating the sights on a loaded firearm<br />
could result in unintentional discharge,<br />
causing injury or death. Visually and<br />
physically confirm the pistol is unloaded<br />
before making sight adjustments.<br />
DO NOT ADJUST THE SIGHTS ON A<br />
LOADED FIREARM<br />
www.sigsauer.com 51
11.0 Transportation and Storage<br />
When transporting your firearm to and from shooting activities, keep it unloaded for your<br />
safety and for the safety of others. When storing your firearm, keep it separated from<br />
ammunition, under lock and key if possible, and out of the reach of children and other<br />
inexperienced or unauthorized persons.<br />
WARNING – STORAGE<br />
Never place or store any firearm<br />
in such a manner that it may be<br />
dislodged. Firearms should always<br />
be stored securely and unloaded,<br />
away from children and other<br />
unauthorized users. Use the locking<br />
device originally supplied with this<br />
firearm for storage. The use of a<br />
locking device or safety lock is only<br />
one aspect of responsible firearms<br />
storage. For increased safety,<br />
firearms should be stored unloaded<br />
and locked in a location that is both<br />
separate from their ammunition and<br />
inaccessible to children and any<br />
other unauthorized person.<br />
STORE SECURELY AND UNLOADED<br />
52 www.sigsauer.com
when it counts <br />
12.0 Service and Parts Policy<br />
12.1 Parts Policy<br />
Our Service Department maintains a full complement of replacement parts. Even though most<br />
gunsmiths have the knowledge, training, and the ability to make necessary repairs to your<br />
firearm, the skill and workmanship of any particular gunsmith is totally beyond our control.<br />
Should your firearm ever require service, we strongly recommend that you return it to SIG SAUER<br />
(see section 12.3 “Shipping Firearms for Repair”). A firearm is a precision instrument and some<br />
replacement parts will require individual fitting to ensure correct operation. A wrong part, improper<br />
fitting, or incorrect mechanical adjustment may result in an unsafe condition or dangerous<br />
malfunction, damage to the firearm, or cause possible serious injury to the shooter or others.<br />
IF ANY PART IS ORDERED WITHOUT RETURNING THE FIREARM TO SIG SAUER, the customer<br />
bears full responsibility for ensuring that the part supplied is correct for their particular<br />
firearm and is properly installed and fitted by a qualified gunsmith.<br />
SIG SAUER CANNOT BE RESPONSIBLE FOR THE FUNCTIONING OF ANY FIREARM IN WHICH<br />
REPLACEMENT PARTS ARE INSTALLED BY OTHERS.<br />
WARNING – PARTS PURCHASERS<br />
It is the purchaser’s responsibility to be absolutely certain that any parts<br />
ordered from the factory are correctly fitted and installed. Firearms<br />
are complicated mechanisms and IMPROPER FITTING OF PARTS MAY<br />
RESULT IN A DANGEROUS MALFUNCTION, DAMAGE TO THE FIREARM,<br />
AND SERIOUS INJURY TO THE SHOOTER AND OTHER PERSONS. The<br />
purchaser and installer of parts must accept full responsibility for the correct adjustment and<br />
functioning of the firearm after such installation. PARTS MUST FIT CORRECTLY<br />
www.sigsauer.com 53
12.2 Service Policy<br />
If you have questions concerning the performance or servicing of your firearm, please write or call:<br />
SIG SAUER, Inc.<br />
Attention: Customer Service<br />
18 Industrial Drive Exeter, NH 03833<br />
Phone: (603) 772-2302<br />
Fax: (603) 772-9082<br />
IF YOU DO NOT UNDERSTAND THE INSTRUCTIONS FOR OPERATING YOUR PISTOL,<br />
IT IS YOUR RESPONSIBILITY TO CALL OUR CUSTOMER SERVICE DEPARTMENT AT<br />
(603) 772-2302 BEFORE USING YOUR FIREARM.<br />
12.3 Shipping Firearms for Repair<br />
In the event you need to return your firearm to the SIG SAUER Service Department,<br />
here’s what to do:<br />
1. First contact Customer Service at (603) 772-2302 for an RMA number, which will allow SIG<br />
SAUER to track the status of your return from its receipt at SIG SAUER through its return to<br />
you. Please do not send your firearm until you obtain an RMA number.<br />
2. Make sure that the chamber and magazine(s) are unloaded and that no ammunition is<br />
included with your returned firearm.<br />
3. Package the firearm securely to prevent damage. Enclose a letter that includes your name,<br />
street address, daytime phone number, model and serial number, and a detailed description<br />
of the problem you have experienced or the work you want performed. With the exception of<br />
extra magazines, do not include any other accessories such as scopes or mounts.<br />
54 www.sigsauer.com
when it counts <br />
4. Generally, an individual may ship firearms to the manufacturer for repair or service. Some<br />
states and localities, however, prohibit this. If you live in such an area, the firearms must be<br />
shipped by and returned to a federally licensed firearms dealer.<br />
5. Federal law prohibits persons who do not possess a Federal Firearms License from<br />
shipping a firearm via the U.S. Postal Service. (Note: any shipment of firearms outside U.S.<br />
borders is subject to the export laws of the United States and to the valid laws of the specific<br />
country, which you must strictly follow; prior to exporting any firearm you should seek legal<br />
counsel.)<br />
6. SIG SAUER is not responsible for any firearm until it is received, nor for damage incurred<br />
during shipment.<br />
7. Ship your firearms insured and prepaid (we do not accept collect shipments) to:<br />
SIG SAUER, Inc.<br />
Attention: Service Department<br />
18 Industrial Drive Exeter, NH 03833<br />
Don’t forget to write your RMA number on the package.<br />
A copy of this instruction manual should always accompany this pistol and be<br />
transferred with it upon change of ownership.<br />
www.sigsauer.com 55
12.4 Ordering Parts<br />
In the event you want to order parts for your firearm, contact<br />
Customer Service at (603) 772-2302.<br />
Have available the serial number of your firearm and the part<br />
diagram number for the part(s) you wish to order. A parts list and diagram of the pistol is<br />
provided in section 13.0.<br />
Please refer to the Service and Parts Policy.<br />
WARNING – SHIPPING<br />
Before shipping any firearm, be absolutely certain that the<br />
firearm and its magazines are unloaded.<br />
DO NOT ship ammunition with a firearm. Failure<br />
to follow this warning could result in unintentional<br />
discharge, causing injury or death.<br />
VERIFY THE FIREARM IS UNLOADED<br />
56 www.sigsauer.com
when it counts <br />
This page intentionally left blank.<br />
www.sigsauer.com 57
13.0 Parts List<br />
Item Description<br />
1 Grip Module (body)<br />
2 Magazine Catch<br />
3 Magazine Catch Stop<br />
4 Magazine Catch Spring<br />
5 Takedown Lever<br />
6 O-Ring<br />
7 Frame<br />
8 Slide Catch Lever<br />
9 Slide Catch Lever Spring<br />
10 Slide Catch Lever Pin<br />
11 Trigger Bar Spring<br />
12 Trigger Bar<br />
13 Trigger<br />
14 Hammer<br />
15 Hammer Pivot Pin<br />
16 Hammer Strut Pin<br />
18 Small Mainspring<br />
19 Large Mainspring<br />
20 Safety Lever<br />
21 Barrel<br />
22 Recoil Spring Guide<br />
23 Recoil Spring<br />
24 Slide<br />
25 Front <strong>Sig</strong>ht<br />
26 Rear <strong>Sig</strong>ht<br />
27 Safety Lock<br />
28 Rear Extractor Spring Guide<br />
29 Extractor<br />
30 Firing Pin<br />
31 Firing Pin Spring<br />
32 Safety Lock Spring<br />
33 Spring Pin<br />
34 Extractor Spring<br />
35 Front Extractor Spring Guide<br />
36 Magazine Tube<br />
37 Magazine Follower<br />
38 Magazine Spring<br />
39 Magazine Insert<br />
40 Magazine Floorplate<br />
58 www.sigsauer.com
when it counts <br />
13.0 Parts Diagram<br />
www.sigsauer.com 59
14.0 Technical Specifications<br />
The following information applies to the all three categories<br />
of the P250.<br />
• Double-action only (DAO) trigger system.<br />
• Left or right hand operation (magazine catch repositions to either side, slide catch lever<br />
functions from both sides).<br />
• Glass reinforced grip module with integral Picatinny rail.<br />
• Interchangeable grip modules available in different grip circumferences.<br />
• Two trigger lengths (standard & short).<br />
• Grip modules feature stippled gripping surface for positive control.<br />
• Solid slide of high-strength stainless steel with rear cocking serrations.<br />
• High contrast or SIGLITE Night <strong>Sig</strong>hts in different heights.<br />
*Specifications are approximate and subject to change without notice.<br />
60 www.sigsauer.com
when it counts <br />
14.1 Full Size Specifications<br />
Caliber 9mm .40 S&W .357 SIG .45ACP<br />
Length, overall 8.05” 8.05” 8.05” 8.05”<br />
Height, overall 5.51” 5.51” 5.51” 5.51”<br />
Width, overall 1.38” 1.38” 1.38” 1.38”<br />
Barrel length 4.69” 4.71” 4.71” 4.71”<br />
Rifling twist 1 in 10” 1 in 15” 1 in 16” 1 in 16”<br />
Rifling grooves 6 6 6 6<br />
<strong>Sig</strong>ht radius 6.64” 6.64” 6.64” 6.64”<br />
Weight incl. magazine 27.6 oz 29.4 oz 29.4 oz 29.6 oz<br />
Magazine weight, empty 3.09 oz 3.13 oz 3.13 oz 3.36 oz<br />
Trigger pull 5.5 - 6.5 lbs 5.5 - 6.5 lbs 5.5 - 6.5 lbs 5.5 - 6.5 lbs<br />
Magazine capacity 17 rds 14 rds 14 rds 10 rds<br />
*Specifications are subject to change without notice.<br />
www.sigsauer.com 61
14.2 Compact Specifications<br />
Caliber 9mm .40 S&W .357 SIG .45ACP<br />
Length, overall 7.20” 7.20” 7.20” 7.20”<br />
Height, overall 5.29” 5.29” 5.29” 5.29”<br />
Width, overall 1.38” 1.38” 1.38” 1.38”<br />
Barrel length 3.86” 3.86” 3.86” 3.86”<br />
Rifling twist 1 in 10” 1 in 15” 1 in 16” 1 in 16”<br />
Rifling grooves 6 6 6 6<br />
<strong>Sig</strong>ht radius 5.79” 5.79” 5.79” 5.79”<br />
Weight incl. magazine 25.1 oz 26.9 oz 27.0 oz 26.7 oz<br />
Magazine weight, empty 3.02 oz 3.00 oz 3.00 oz 3.08 oz<br />
Trigger pull 5.5 - 6.5 lbs 5.5 - 6.5 lbs 5.5 - 6.5 lbs 5.5 - 6.5 lbs<br />
Magazine capacity 15 rds 13 rds 13 rds 9 rds<br />
*Specifications are subject to change without notice.<br />
62 www.sigsauer.com
when it counts <br />
14.1 Subcompact Specifications<br />
Caliber 9mm .40 S&W .357 SIG .45ACP<br />
Length, overall 6.67” 6.67” 6.67” 6.67”<br />
Height, overall 4.67” 4.67” 4.67” 4.67”<br />
Width, overall 1.06” 1.06” 1.06” 1.06”<br />
Barrel length 3.55” 3.55” 3.55” 3.55”<br />
Rifling twist 1 in 10” 1 in 15” 1 in 16” 1 in 16”<br />
Rifling grooves 6 6 6 6<br />
<strong>Sig</strong>ht radius 5.45” 5.45” 5.45” 5.45”<br />
Weight incl. magazine 24.9 oz 24.9 oz 25.1 oz 24.8 oz<br />
Magazine weight, empty 2.38 oz 2.35 oz 2.35 oz 2.40 oz<br />
Trigger pull 5.5 - 6.5 lbs 5.5 - 6.5 lbs 5.5 - 6.5 lbs 5.5 - 6.5 lbs<br />
Magazine capacity 12 rds 10 rds 10 rds 6 rds<br />
*Specifications are subject to change without notice.<br />
www.sigsauer.com 63
15.0 THE BASIC RULES OF SAFE FIREARMS HANDLING<br />
1. ALWAYS treat every gun as if it were loaded.<br />
2. ALWAYS be sure the barrel is clear of any obstruction.<br />
3. ALWAYS be sure of your backstop, what lies beyond, and the safety of bystanders before<br />
you shoot.<br />
4. ALWAYS use clean, dry, original factory-made ammunition of the proper type and caliber<br />
for your gun.<br />
5. ALWAYS wear ear protection and safety glasses when<br />
shooting.<br />
6. ALWAYS carry your gun so that you can control the direction of the muzzle if you fall or<br />
stumble.<br />
7. NEVER shoot at a flat surface or water.<br />
8. DO NOT leave an unattended gun loaded. Guns and<br />
ammunition should be stored separately, locked if possible, beyond the reach of children,<br />
careless adults, and unauthorized users.<br />
9. NEVER allow your firearm to be used by anyone who has not read and understood this<br />
operator’s manual.<br />
10. DO NOT point any gun, loaded or unloaded, at any undesired target.<br />
11. NEVER fire your rifle near an animal unless it is trained to accept the noise: an animal’s<br />
startled reaction could injure it or cause an accident.<br />
12. NEVER drink alcoholic beverages or take drugs before or during shooting, as your vision<br />
and judgment could be seriously impaired, making your gun handling unsafe.<br />
64 www.sigsauer.com
when it counts <br />
SIG SAUER ® Limited Lifetime Firearms Warranty<br />
SIG SAUER ® warrants that the enclosed firearm was originally manufactured free of defects<br />
in material, workmanship and mechanical function. For the lifetime of the original purchaser,<br />
SIG SAUER agrees to correct any defect in the firearm for the original purchaser by repair,<br />
adjustment or replacement, at SIG SAUER’s option, with the same or comparable quality<br />
components (or by replacing the firearms at SIG SAUER’s option); provided, however, that the<br />
firearm is returned unloaded and freight prepaid to:<br />
SIG SAUER<br />
18 Industrial Drive<br />
Exeter, NH 03833<br />
This limited warranty is null and void if the firearm has been misused, damaged (by accident<br />
or otherwise), fired with handloaded, reloaded or improper ammunition, fired with an<br />
obstruction in the barrel, damaged through failure to provide reasonable and necessary<br />
maintenance as described in the manual accompanying the firearm, or if unauthorized<br />
repair or any alteration, including of a cosmetic nature, has been performed on the firearm.<br />
This limited warranty does not apply to normal wear and tear of any parts. Subject to the<br />
foregoing, this limited warranty confers the right to have the covered firearm or its parts<br />
repaired, adjusted or replaced exclusively upon the original purchaser, which right is not<br />
transferable to any other person. No implied warranties of any kind are made herein and this<br />
warranty does not apply to any accessory items attached or appurtenant to the firearm. In no<br />
event shall SIG SAUER be liable for any incidental or consequential damages arising from or in<br />
connection with this limited warranty.<br />
www.sigsauer.com 65
Notes:<br />
66 www.sigsauer.com
when it counts <br />
Notes:<br />
www.sigsauer.com 67
when it counts <br />
www.sigsauer.com<br />
For Product Service on this model,<br />
Please Call (603) 772-2302<br />
18 Industrial Drive, Exeter, NH 03833 USA<br />
P/N 1200901 REV 2.0


