A Control and Measurement System for an Elevation over Azimuth ...
A Control and Measurement System for an Elevation over Azimuth ...
A Control and Measurement System for an Elevation over Azimuth ...

You also want an ePaper? Increase the reach of your titles
YUMPU automatically turns print PDFs into web optimized ePapers that Google loves.
A <strong>Control</strong> <strong><strong>an</strong>d</strong> <strong>Measurement</strong> <strong>System</strong> <strong>for</strong><br />
<strong>an</strong> <strong>Elevation</strong> <strong>over</strong> <strong>Azimuth</strong> Antenna<br />
Pedestal<br />
Gregor Thomas George<br />
A dissertation submitted to the Department of Electrical Engineering,<br />
University of Cape Town, in fulfilment of the requirements<br />
<strong>for</strong> the degree of Bachelor of Science in Electrical Engineering.<br />
Cape Town, October 2007
Declaration<br />
I declare that this dissertation is my own, unaided work. It is being submitted to the<br />
Department of Electrical Engineering at the University of Cape Town in partial fulfillment<br />
of the requirements <strong>for</strong> the degree of Bachelor of Science in Engineering. It has not been<br />
submitted be<strong>for</strong>e <strong>for</strong> <strong>an</strong>y degree or examination in <strong>an</strong>y other university.<br />
Signature of Author . . . . . . . . . . . . . . . . . . . . . . . . . . . . . . . . . . . . . . . . . . . . . . . . . . . . . . . . . . . . . .<br />
Cape Town<br />
22 October 2007<br />
i
Abstract<br />
This project concerns the design <strong><strong>an</strong>d</strong> implementation of a control <strong><strong>an</strong>d</strong> measurement system<br />
<strong>for</strong> <strong>an</strong> elevation <strong>over</strong> azimuth <strong>an</strong>tenna on a Navy Jammer pedestal. The control system<br />
is run using LabVIEW from the parallel port of a PC, through the interfaced drive<br />
electronics. The measurement system involves acquiring data signals from the synchros<br />
on the pedestal <strong><strong>an</strong>d</strong> capturing the resulting data in a GUI based interface with a North<br />
Atl<strong>an</strong>tic Industries, 76CS1 PCI S/D data acquisition card.<br />
ii
Acknowledgements<br />
I would like to th<strong>an</strong>k my family <strong>for</strong> their continued support throughout my undergraduate<br />
degree at the University of Cape Town. I would also like to th<strong>an</strong>k my friend <strong><strong>an</strong>d</strong> colleague<br />
Arjun Radhakrishn<strong>an</strong> <strong>for</strong> his support throughout this project period.<br />
Finally, I would like to th<strong>an</strong>k Professor Inggs from the University of Cape Town <strong>for</strong><br />
having faith in me to embark on this project. His supervision <strong><strong>an</strong>d</strong> guid<strong>an</strong>ce throughout<br />
this project were invaluable to me.<br />
iii
Contents<br />
Declaration<br />
Abstract<br />
Acknowledgements<br />
Nomenclature<br />
i<br />
ii<br />
iii<br />
ix<br />
1 Introduction 1<br />
1.1 Subject of this report . . . . . . . . . . . . . . . . . . . . . . . . . . . . 1<br />
1.2 Background <strong><strong>an</strong>d</strong> Justification to Study . . . . . . . . . . . . . . . . . . . 2<br />
1.3 Project Requirements . . . . . . . . . . . . . . . . . . . . . . . . . . . . 2<br />
1.4 Objectives of this report . . . . . . . . . . . . . . . . . . . . . . . . . . . 2<br />
1.4.1 Methodology . . . . . . . . . . . . . . . . . . . . . . . . . . . . 3<br />
1.4.2 Deliverables . . . . . . . . . . . . . . . . . . . . . . . . . . . . 3<br />
1.4.3 Testing . . . . . . . . . . . . . . . . . . . . . . . . . . . . . . . 3<br />
1.5 Scope <strong><strong>an</strong>d</strong> Limitations . . . . . . . . . . . . . . . . . . . . . . . . . . . 4<br />
1.6 Report Outline . . . . . . . . . . . . . . . . . . . . . . . . . . . . . . . 4<br />
1.6.1 Chapter Two . . . . . . . . . . . . . . . . . . . . . . . . . . . . 4<br />
1.6.2 Chapter Three . . . . . . . . . . . . . . . . . . . . . . . . . . . . 6<br />
1.6.3 Chapter Four . . . . . . . . . . . . . . . . . . . . . . . . . . . . 7<br />
1.6.4 Chapter Five . . . . . . . . . . . . . . . . . . . . . . . . . . . . 8<br />
2 Background <strong><strong>an</strong>d</strong> Theory 9<br />
2.1 Background . . . . . . . . . . . . . . . . . . . . . . . . . . . . . . . . . 11<br />
2.1.1 <strong>Elevation</strong> <strong>over</strong> <strong>Azimuth</strong> Position <strong>Control</strong>ler . . . . . . . . . . . . 11<br />
2.1.2 Direct Current Brushed Motors . . . . . . . . . . . . . . . . . . 12<br />
2.1.3 Brake . . . . . . . . . . . . . . . . . . . . . . . . . . . . . . . . 12<br />
2.1.4 Synchros . . . . . . . . . . . . . . . . . . . . . . . . . . . . . . 12<br />
2.1.5 The Synchro/Resolver-to-Digital Card . . . . . . . . . . . . . . . 16<br />
iv
2.1.6 LabVIEW . . . . . . . . . . . . . . . . . . . . . . . . . . . . . . 19<br />
2.1.7 The PC Parallel Port . . . . . . . . . . . . . . . . . . . . . . . . 20<br />
2.2 Theory . . . . . . . . . . . . . . . . . . . . . . . . . . . . . . . . . . . . 22<br />
2.2.1 Power Supply Unit . . . . . . . . . . . . . . . . . . . . . . . . . 22<br />
2.2.2 Digital to Analogue Conversion . . . . . . . . . . . . . . . . . . 22<br />
2.2.3 <strong>Control</strong>ling Drive Speed . . . . . . . . . . . . . . . . . . . . . . 23<br />
2.2.4 Data Acquisition from the 76CS1 . . . . . . . . . . . . . . . . . 23<br />
2.2.5 Limit Switches . . . . . . . . . . . . . . . . . . . . . . . . . . . 24<br />
3 Design 26<br />
3.1 The Power Supply Unit . . . . . . . . . . . . . . . . . . . . . . . . . . . 28<br />
3.2 <strong>Control</strong>ling the parallel port from LabVIEW . . . . . . . . . . . . . . . . 30<br />
3.3 A 3-Bit Digital to Analogue Converter . . . . . . . . . . . . . . . . . . . 32<br />
3.4 Drive Speed <strong>Control</strong> . . . . . . . . . . . . . . . . . . . . . . . . . . . . 33<br />
3.5 Reading from Synchros . . . . . . . . . . . . . . . . . . . . . . . . . . . 35<br />
3.6 Limit Switches . . . . . . . . . . . . . . . . . . . . . . . . . . . . . . . 36<br />
4 Building <strong><strong>an</strong>d</strong> Testing 37<br />
4.1 A 28V Split Supply . . . . . . . . . . . . . . . . . . . . . . . . . . . . . 37<br />
4.2 The Parallel Port <strong><strong>an</strong>d</strong> LabVIEW . . . . . . . . . . . . . . . . . . . . . . 37<br />
4.3 Integrating the DAC with the PWM controller . . . . . . . . . . . . . . . 38<br />
4.4 Limitations Encountered in Testing . . . . . . . . . . . . . . . . . . . . . 40<br />
4.4.1 The <strong>Elevation</strong> Axis . . . . . . . . . . . . . . . . . . . . . . . . . 40<br />
4.4.2 Commissioning of a 78 pin D-type Male Connector <strong>for</strong> the S/D<br />
Card . . . . . . . . . . . . . . . . . . . . . . . . . . . . . . . . . 40<br />
4.5 Final <strong>System</strong> Design . . . . . . . . . . . . . . . . . . . . . . . . . . . . 41<br />
5 Conclusions <strong><strong>an</strong>d</strong> Further Recommendations 43<br />
5.1 Conclusions . . . . . . . . . . . . . . . . . . . . . . . . . . . . . . . . . 43<br />
5.2 Further Recommendations . . . . . . . . . . . . . . . . . . . . . . . . . 45<br />
5.2.1 Achieving the Initial Project Requirements . . . . . . . . . . . . 45<br />
5.2.2 Extensions to this Project . . . . . . . . . . . . . . . . . . . . . . 46<br />
A 76CS1 Datasheet 47<br />
B Component Listing 50<br />
B.1 Power Supply Unit (PSU) . . . . . . . . . . . . . . . . . . . . . . . . . . 50<br />
B.2 3-bit DAC with gain stage amplifier . . . . . . . . . . . . . . . . . . . . 50<br />
B.3 PWM controller . . . . . . . . . . . . . . . . . . . . . . . . . . . . . . . 50<br />
v
Bibliography 52<br />
vi
List of Figures<br />
1.1 A Navy EW Jammer Pedestal . . . . . . . . . . . . . . . . . . . . . . . . 1<br />
2.1 A Typical <strong>Elevation</strong> <strong>over</strong> <strong>Azimuth</strong> Tracking Antenna [5] . . . . . . . . . 11<br />
2.2 A Size 11 Synchro [2] . . . . . . . . . . . . . . . . . . . . . . . . . . . . 13<br />
2.3 The internal structure of a Synchro <strong>Control</strong> Tr<strong>an</strong>s<strong>for</strong>mer [1] . . . . . . . . 14<br />
2.4 Internal Structure of a Position Resolver Tr<strong>an</strong>smitter [2] . . . . . . . . . . 15<br />
2.5 Signals on Position resolver with Stator Excitation [1] . . . . . . . . . . . 16<br />
2.6 The North Atl<strong>an</strong>tic Industries 76CS1 PCI card [7] . . . . . . . . . . . . . 17<br />
2.7 GUI <strong>for</strong> Synchro/Resolver <strong>Measurement</strong> [8] . . . . . . . . . . . . . . . . 18<br />
2.8 GUI <strong>for</strong> Synchro/Resolver Simulation [8] . . . . . . . . . . . . . . . . . 18<br />
2.9 LabVIEW example showing Front P<strong>an</strong>el <strong><strong>an</strong>d</strong> Block Diagram [9] . . . . . 19<br />
2.10 Parallel Port Pin Connections [10] . . . . . . . . . . . . . . . . . . . . . 20<br />
2.11 An N-bit DAC [11] . . . . . . . . . . . . . . . . . . . . . . . . . . . . . 22<br />
3.1 Block Diagram of <strong>Control</strong> <strong><strong>an</strong>d</strong> <strong>Measurement</strong> <strong>System</strong> to be Designed . . . 27<br />
3.2 Block Diagram <strong>for</strong> PSU [6] . . . . . . . . . . . . . . . . . . . . . . . . . 28<br />
3.3 A 28V split power supply [6] . . . . . . . . . . . . . . . . . . . . . . . . 29<br />
3.4 Asserting Data-0 high . . . . . . . . . . . . . . . . . . . . . . . . . . . . 30<br />
3.5 Parallel port pin status with Data-0 high . . . . . . . . . . . . . . . . . . 30<br />
3.6 Asserting Data-4 high . . . . . . . . . . . . . . . . . . . . . . . . . . . . 31<br />
3.7 Parallel port pin status with Data-4 high . . . . . . . . . . . . . . . . . . 31<br />
3.8 An R-2R ladder DAC with gain . . . . . . . . . . . . . . . . . . . . . . . 32<br />
3.9 Varying duty cycles in a PWM scheme . . . . . . . . . . . . . . . . . . . 33<br />
3.10 A PWM generating op-amp circuit . . . . . . . . . . . . . . . . . . . . . 34<br />
3.11 How the PWM circuit works [12] . . . . . . . . . . . . . . . . . . . . . . 35<br />
4.1 Block Diagram of the Final <strong>System</strong> . . . . . . . . . . . . . . . . . . . . 42<br />
vii
List of Tables<br />
1.1 Final Antenna Speed <strong>Control</strong>-LabVIEW User Input <strong><strong>an</strong>d</strong> Corresponding<br />
Speed . . . . . . . . . . . . . . . . . . . . . . . . . . . . . . . . . . . . 7<br />
1.2 Final Project Status . . . . . . . . . . . . . . . . . . . . . . . . . . . . . 8<br />
2.1 Parallel Port Pin Attributes [10] . . . . . . . . . . . . . . . . . . . . . . . 21<br />
2.2 Pin connections <strong>for</strong> 76CS1 in Configuration 1: 8 S/D, 4D/S Ch<strong>an</strong>nels [7] . 24<br />
3.1 Parallel Port Bit Usage . . . . . . . . . . . . . . . . . . . . . . . . . . . 26<br />
4.1 Parallel Port Outputs - Expected vs Observed . . . . . . . . . . . . . . . 38<br />
4.2 Duty Cycles Observed <strong>for</strong> Varying Input Voltages . . . . . . . . . . . . . 38<br />
4.3 Integrating the DAC <strong><strong>an</strong>d</strong> PWM; Duty Cycles Observed <strong>for</strong> Varying Binary<br />
States . . . . . . . . . . . . . . . . . . . . . . . . . . . . . . . . . . 39<br />
4.4 Antenna Revolutions Along <strong>Azimuth</strong> Axis at Varying DAC Input Binary<br />
States . . . . . . . . . . . . . . . . . . . . . . . . . . . . . . . . . . . . 39<br />
4.5 Final Antenna Speed <strong>Control</strong>-DAC Input <strong><strong>an</strong>d</strong> Corresponding Speed . . . 39<br />
4.6 Parallel Port Bits - Final <strong>System</strong> Design . . . . . . . . . . . . . . . . . . 41<br />
5.1 Final Project Status . . . . . . . . . . . . . . . . . . . . . . . . . . . . . 44<br />
A.1 76CS1 <strong>Measurement</strong> Ch<strong>an</strong>nel Specifications [7] . . . . . . . . . . . . . . 48<br />
A.2 76CS1 Stimulus Ch<strong>an</strong>nel Specifications [7] . . . . . . . . . . . . . . . . 49<br />
viii
Nomenclature<br />
<strong>Azimuth</strong>—Angle in a horizontal pl<strong>an</strong>e, relative to a fixed reference, usually north or the<br />
longitudinal reference axis of the aircraft or satellite.<br />
Basic Input/Output <strong>System</strong> (BIOS)—The firmware code run by a personal computer<br />
when powered on. The BIOS identifies <strong><strong>an</strong>d</strong> initiates component hardware to prepare the<br />
computer <strong>for</strong> software control.<br />
Digital to Analogue Converter (DAC)—Electronic circuitry that converts a digital output<br />
(logic high or logic low) to <strong><strong>an</strong>d</strong> <strong>an</strong>alogue representation.<br />
<strong>Elevation</strong>—Angle in the vertical pl<strong>an</strong>e, relative to a fixed reference, usually the horizontal<br />
reference axis of the aircraft or satellite.<br />
Graphical User Interface (GUI)—A user interface that allows the user to communicate<br />
with the computer through the use of icons <strong><strong>an</strong>d</strong> visual indicators.<br />
National Instruments LabVIEW—A graphical development environment that helps<br />
create flexible <strong><strong>an</strong>d</strong> scalable deign, control <strong><strong>an</strong>d</strong> test applications.<br />
Pedestal—The structure that supports the <strong>an</strong>tenna.<br />
Peripheral Component Interconnect (PCI)—A computer bus <strong>for</strong> attaching peripheral<br />
devices to a computer motherboard.<br />
Pulse Width Modulation (PWM)—The modulation of the duty cycle of a signal or<br />
power source to control the amount of power sent to the load.<br />
Rotor—The rotating armature of a motor.<br />
Stator—The stationary part of a motor or generator in or around which the rotor revolves.<br />
Virtual Instrument (VI)—A LabVIEW GUI based instrument that controls hardware<br />
connected to the computer.<br />
Visual Basic (VB)—An event driven programming l<strong>an</strong>guage <strong><strong>an</strong>d</strong> associated development<br />
environment from Microsoft. Visual Basic enables the rapid application development of<br />
GUI applications [18].<br />
ix
Chapter 1<br />
Introduction<br />
1.1 Subject of this report<br />
This project describes the electrical engineering principles used in designing, testing <strong><strong>an</strong>d</strong><br />
implementing a control <strong><strong>an</strong>d</strong> measurement system used on <strong>an</strong> <strong>an</strong>tenna. Specifically, <strong>an</strong><br />
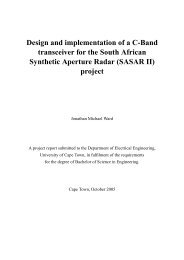
elevation <strong>over</strong> azimuth position controller on a Navy EW Jammer Pedestal as shown in<br />
Figure 1.1:<br />
Figure 1.1: A Navy EW Jammer Pedestal<br />
1
1.2 Background <strong><strong>an</strong>d</strong> Justification to Study<br />
The Department of Electrical Engineering at the University of Cape Town has a Navy<br />
Electronic Warfare jammer pedestal <strong>for</strong> research <strong><strong>an</strong>d</strong> experimentation purposes. The<br />
pedestal uses <strong>an</strong> elevation <strong>over</strong> azimuth position configuration <strong><strong>an</strong>d</strong> uses a 28V DC supply<br />
to drive two motors of the <strong>an</strong>tenna in both the vertical (elevation) <strong><strong>an</strong>d</strong> horizontal (azimuthal)<br />
axis. The pedestal has been out of commission <strong>for</strong> m<strong>an</strong>y years <strong><strong>an</strong>d</strong> this study<br />
proposes to investigate <strong><strong>an</strong>d</strong> refurbish the system to a working condition where the user<br />
c<strong>an</strong> control <strong><strong>an</strong>d</strong> measure the <strong>an</strong>tenna attributes through a computer based interface.<br />
1.3 Project Requirements<br />
The requirements of this project were presented as follows:<br />
• To familiarize myself with National Instrument’s LabVIEW graphical programming<br />
l<strong>an</strong>guage.<br />
• To write a program to control the parallel port of a st<strong><strong>an</strong>d</strong>ard computer using Lab-<br />
VIEW.<br />
• Investigate the <strong>an</strong>tenna <strong><strong>an</strong>d</strong> determine the steps required to refurbish the system to<br />
a working condition.<br />
• Commission a 28V split power supply to drive the motors of the <strong>an</strong>tenna.<br />
• Research, design <strong><strong>an</strong>d</strong> build drive electronics to drive the motors of the <strong>an</strong>tenna at<br />
different speeds from the parallel port, using LabVIEW.<br />
• Install <strong><strong>an</strong>d</strong> configure a North Atl<strong>an</strong>tic Instrument’s 76CS1 PCI Synchro/resolverto-digital<br />
(S/D) data acquisition card on a computer.<br />
• Commission a 78 pin male, D-type connector to interface the 76CS1 with the <strong>an</strong>tenna’s<br />
synchros.<br />
• Interface the 76CS1 with the synchros on the pedestal to acquire speed <strong><strong>an</strong>d</strong> <strong>an</strong>gle<br />
measurements of the <strong>an</strong>tenna.<br />
1.4 Objectives of this report<br />
The objectives of this project are three-fold. To investigate the electro-mech<strong>an</strong>ical setup of<br />
the <strong>an</strong>tenna <strong><strong>an</strong>d</strong> subsequently design, test <strong><strong>an</strong>d</strong> implement the drive electronics to control<br />
the <strong>an</strong>tenna; to interface the S/D card with a computer <strong><strong>an</strong>d</strong> to create a graphical user<br />
interface to show the <strong>an</strong>tenna attributes.<br />
2
1.4.1 Methodology<br />
In order to meet the project requirements, the following steps were taken:<br />
• Underst<strong><strong>an</strong>d</strong> the electro-mech<strong>an</strong>ical components of the elevation <strong>over</strong> azimuth position<br />
controller.<br />
• Refurbish the system to a working state<br />
• Design a control system <strong>for</strong> the drive electronics.<br />
• Drive the motor control system using the parallel port of a st<strong><strong>an</strong>d</strong>ard PC, using Lab-<br />
VIEW.<br />
• Interface the <strong>an</strong>tenna with a North Atl<strong>an</strong>tic Industries 76CS1 S/D card together<br />
with LabVIEW, to create a simple GUI to show the attributes of the <strong>an</strong>tenna (<strong>an</strong>gle,<br />
speed <strong><strong>an</strong>d</strong> velocity).<br />
• Finally to integrate the drive electronics with the S/D card GUI to control <strong><strong>an</strong>d</strong> measure<br />
the <strong>an</strong>tenna attributes.<br />
1.4.2 Deliverables<br />
The final deliverables <strong>for</strong> the project were:<br />
• The software used to control the bits of the parallel port.<br />
• The hardware of the drive electronics used to control the <strong>an</strong>tenna via parallel port.<br />
• A simple GUI to display the <strong>an</strong>tenna attributes once interfaced with the S/D card.<br />
• This report entailing the background <strong><strong>an</strong>d</strong> theory behind the control <strong><strong>an</strong>d</strong> measurement<br />
system; <strong><strong>an</strong>d</strong> the related issues in designing, testing <strong><strong>an</strong>d</strong> implementing this<br />
complete system.<br />
1.4.3 Testing<br />
The <strong>an</strong>tenna is to be controlled along the elevation <strong><strong>an</strong>d</strong> azimuth axes at different speeds,<br />
with the resulting attributes measured. The hardware <strong><strong>an</strong>d</strong> software that is designed <strong><strong>an</strong>d</strong><br />
implemented to do this will be tested <strong><strong>an</strong>d</strong> the results obtained will be compared with those<br />
acquired from theoretical calculations.<br />
3
1.5 Scope <strong><strong>an</strong>d</strong> Limitations<br />
This project pursues the design <strong><strong>an</strong>d</strong> implementation problem in the fields of electromech<strong>an</strong>ics<br />
<strong><strong>an</strong>d</strong> software. This project is to be undertaken <strong>over</strong> a period of twelve weeks,<br />
the pedestal itself has been out of service <strong>for</strong> m<strong>an</strong>y years <strong><strong>an</strong>d</strong> refurbishing it to a full<br />
working condition is presented as the major limitation.<br />
1.6 Report Outline<br />
An outline of the rest of the report is detailed as follows:<br />
1.6.1 Chapter Two<br />
Chapter two of this report discusses the background, theory <strong><strong>an</strong>d</strong> references used in completing<br />
the project. M<strong>an</strong>y electrical engineering concepts were used in the design of the<br />
necessary hardware. These concepts, as well as the software used to interface the system<br />
are described here.<br />
The background of the following key components of the project are discussed in detail in<br />
this chapter, each element described <strong>for</strong>ms a core part of the entire system to be designed<br />
<strong><strong>an</strong>d</strong> implemented:<br />
The <strong>Elevation</strong> <strong>over</strong> <strong>Azimuth</strong> Antenna Position <strong>Control</strong>ler The Navy EW Jammer<br />
pedestal uses <strong>an</strong> elevation <strong>over</strong> azimuth position controller. The hardware incorporated in<br />
the position controller, which ultimately needs to be controlled is discussed.<br />
Synchros Synchros <strong>for</strong>m the heart of the measurement system in the application of this<br />
project. An <strong>over</strong>view of synchro theory is discussed, as well as how the synchro is used<br />
<strong>for</strong> velocity <strong><strong>an</strong>d</strong> <strong>an</strong>gle measurement.<br />
S/D conversion The synchros output <strong>an</strong> <strong>an</strong>alogue voltage. It is the function of the<br />
Synchro/Resolver-to-Digital card to convert these <strong>an</strong>alogue voltages into the corresponding<br />
<strong>an</strong>gle <strong><strong>an</strong>d</strong> velocity measurements. A North Atl<strong>an</strong>tic Industries 76CS1 data acquisition<br />
card was used <strong>for</strong> the S/D conversion.<br />
LabVIEW LabVIEW is the software that was used to interface the computer with the<br />
pedestal. LabVIEW allows <strong>for</strong> easy interfacing <strong><strong>an</strong>d</strong> control because of the fundamental<br />
concept behind which it has been developed, that is, graphical programming.<br />
4
The Parallel Port<br />
The parallel port was used to interface the computer with the pedestal.<br />
The bits of the parallel port are to be controlled using LabVIEW.<br />
Once the background of the elements of the system have been presented, the electrical<br />
engineering concepts used to design <strong><strong>an</strong>d</strong> implement the final control <strong><strong>an</strong>d</strong> measurement<br />
system are then described. These concepts include:<br />
The Power Supply<br />
The pedestal requires a ±28V split power supply to operate. The<br />
theory behind the design of such a power supply is discussed.<br />
Digital-to-Analogue Conversion In order to use the parallel port to interface the computer<br />
with the pedestal, a DAC needs to be implemented. The DAC will convert the logic<br />
signals output from the parallel port to <strong>an</strong>alogue voltages that c<strong>an</strong> tell the <strong>an</strong>tenna what to<br />
do.<br />
Drive Speed <strong>Control</strong> The axes of the pedestal are to be controlled at varying speeds.<br />
The electrical engineering concepts available to control the voltage applied across the<br />
motor terminals are listed <strong><strong>an</strong>d</strong> evaluated.<br />
Safety Limits<br />
The elevation axis of the pedestal needs to have safety limits to prevent<br />
uncontrolled motion of the motor. The theory behind such a limit switch is described.<br />
Data acquisition Once the <strong>an</strong>tenna axes are moving as required, the motion needs to be<br />
measured in terms of <strong>an</strong>gle <strong><strong>an</strong>d</strong> speed. The theory behind data acquisition on the 76CS1<br />
S/D card is explained.<br />
A clear underst<strong><strong>an</strong>d</strong>ing of the core components of the system is now gained. This background<br />
<strong><strong>an</strong>d</strong> theory presented gives us a basis of the system that ultimately needs to be<br />
designed, as discussed in Chapter three.<br />
5
1.6.2 Chapter Three<br />
Chapter three focuses on the design of the hardware <strong><strong>an</strong>d</strong> software required to control<br />
the <strong>an</strong>tenna. The following hardware <strong><strong>an</strong>d</strong> software were designed with the theory <strong><strong>an</strong>d</strong><br />
references of chapter two to fulfill the requirements of the project:<br />
The Power Supply Unit The design of a ±28V power supply unit (PSU) involved the<br />
commissioning of a full bridge rectifier, a centre tapped tr<strong>an</strong>s<strong>for</strong>mer <strong><strong>an</strong>d</strong> positive <strong><strong>an</strong>d</strong><br />
negative rail voltage regulators. The PSU would be dedicated to the pedestal, running of<br />
230V mains.<br />
Software to control the parallel port through LabVIEW The “Parallel port read <strong><strong>an</strong>d</strong><br />
write loop” Virtual Instrument was used to control the bits of the parallel port. The TTL<br />
output from the ports were inputs to the DAC.<br />
Digital-to-Analogue Conversion A 3-bit DAC, with a gain stage amplifier was designed<br />
to tr<strong>an</strong>slate the parallel port logic outputs into <strong>an</strong>alogue voltages that would control<br />
the motion of the axes of the <strong>an</strong>tenna.<br />
Pulse Width Modulation A PWM based scheme was chosen to vary the voltage applied<br />
across the motor terminals. The PWM generator design was based on <strong>an</strong> operational<br />
amplifier model. The duty cycles of the output wave<strong>for</strong>m could be varied from 0% to 90%<br />
using this design.<br />
Safety Limit Switches The design of the safety limit switches involved circuitry that<br />
would prevent current flowing to the motor on the elevation axis once a limit had been<br />
reached. The motor would stay idle until a reverse polarity voltage was applied across it<br />
to drive it out of limit.<br />
GUI <strong>for</strong> Synchro <strong>Measurement</strong><br />
The 76CS1 VB S/D GUI was used to acquire the velocity<br />
<strong><strong>an</strong>d</strong> <strong>an</strong>gle attributes of the <strong>an</strong>tenna during motion.<br />
All eight bits of the parallel port were used in the design. A block diagram of the final<br />
system to be designed is presented.<br />
The design <strong>for</strong> the system as required is now complete. All the design specifications stated<br />
in Chapter three serve as a basis <strong>for</strong> the building <strong><strong>an</strong>d</strong> testing of the hardware <strong><strong>an</strong>d</strong> software<br />
as described in Chapter four.<br />
6
1.6.3 Chapter Four<br />
Chapter four discusses the building <strong><strong>an</strong>d</strong> testing of the hardware <strong><strong>an</strong>d</strong> software concepts<br />
as decided in chapter three. The hardware <strong><strong>an</strong>d</strong> software is tested, <strong><strong>an</strong>d</strong> the results from<br />
the associated tests are presented. The compromises made in tr<strong>an</strong>slating the theoretical<br />
designs into viable practical circuits are discussed. Limitations encountered during testing<br />
are discussed <strong><strong>an</strong>d</strong> the resulting final system to be designed is presented.<br />
Major limitations encountered included the failure of the motor on the elevation axis <strong><strong>an</strong>d</strong><br />
the commissioning of a 78 pin D-type male connector to interface the S/D card with the<br />
synchros. As a result, the final system design did not incorporate the elevation axis.<br />
Only four bits of the parallel port were now used to control the system. A block diagram<br />
of the final system designed is presented.<br />
Table 1.1 shows the final <strong>an</strong>tenna speed control measurements tabulated from testing the<br />
various user inputs from LabVIEW:<br />
Speed LabVIEW - DAC Input Binary State Antenna Speed (RPM) - <strong>Azimuth</strong><br />
Off 000 0<br />
Slow 001 10<br />
Fast 111 23<br />
Table 1.1: Final Antenna Speed <strong>Control</strong>-LabVIEW User Input <strong><strong>an</strong>d</strong> Corresponding Speed<br />
The results obtained from testing of the system described in Chapter four leads to conclusions<br />
<strong><strong>an</strong>d</strong> further recommendations <strong>for</strong> this study, as discussed in Chapter five.<br />
7
1.6.4 Chapter Five<br />
Chapter five discusses the conclusions that are drawn based on the results of the testing<br />
of the final system as described in chapter four. The final system is discussed with respect<br />
to the initial project requirements. At the end of the twelve week period allocated to this<br />
project, the system designed is open <strong>for</strong> further research <strong><strong>an</strong>d</strong> experimentation. Recommendations<br />
as to how the elements of this project could be used as a basis <strong>for</strong> continued<br />
research <strong><strong>an</strong>d</strong> experimentation are made.<br />
Table 1.2 shows the status in the phases of research, design <strong><strong>an</strong>d</strong> implementation reached<br />
at the end of the project period:<br />
Project Phase Task Status<br />
Research <strong>System</strong> to be Implemented Complete<br />
Research Background to Hardware Complete<br />
Research Background to Software Complete<br />
Design ±28V PSU Complete<br />
Design Parallel Port <strong>Control</strong> - LabVIEW Complete<br />
Design 3-Bit DAC Complete<br />
Design PWM Generation Complete<br />
Design Data Acquisition from Synchros Complete<br />
Design Limit Switches In Progress<br />
Implementation ±28V PSU Complete - Alternative Method Used<br />
Implementation Parallel Port <strong>Control</strong> - LabVIEW Complete<br />
Implementation 3-Bit DAC Complete<br />
Implementation PWM Generation Complete<br />
Implementation Data Acquisition from Synchros In Progress<br />
Implementation Limit Switches Not Implemented<br />
Table 1.2: Final Project Status<br />
By comparing the final system presented to that of which was the original requirement<br />
of this project, it c<strong>an</strong> be seen that the objectives have only been partially met. This is<br />
justified by the limitations of the project, stated in Chapter four.<br />
As a continuation of this study, one could implement a system that uses this project as a<br />
basis to design a system that c<strong>an</strong> be used <strong>for</strong> set-point tracking.<br />
In this system, the user would specify coordinates in LabVIEW. The <strong>an</strong>tenna would then<br />
move along the elevation <strong><strong>an</strong>d</strong> azimuth axes to this coordinate at a user defined speed.<br />
Implementing this system would serve as a culmination of all the elements of the current<br />
project together with the new requirements to produce a useful set-point tracking system.<br />
8
Chapter 2<br />
Background <strong><strong>an</strong>d</strong> Theory<br />
Chapter two of this report discusses the background, theory <strong><strong>an</strong>d</strong> references used in completing<br />
the project. M<strong>an</strong>y electrical engineering concepts were used in the design of the<br />
necessary hardware. These concepts, as well as the software used to interface the system<br />
are described here.<br />
The background of the following key components of the project are discussed in detail in<br />
this chapter, each element described <strong>for</strong>ms a core part of the entire system to be designed<br />
<strong><strong>an</strong>d</strong> implemented:<br />
The <strong>Elevation</strong> <strong>over</strong> <strong>Azimuth</strong> Antenna Position <strong>Control</strong>ler The Navy EW Jammer<br />
pedestal uses <strong>an</strong> elevation <strong>over</strong> azimuth position controller. The hardware incorporated in<br />
the position controller, which ultimately needs to be controlled is discussed.<br />
Synchros Synchros <strong>for</strong>m the heart of the measurement system in the application of this<br />
project. An <strong>over</strong>view of synchro theory is discussed, as well as how the synchro is used<br />
<strong>for</strong> velocity <strong><strong>an</strong>d</strong> <strong>an</strong>gle measurement.<br />
S/D conversion The synchros output <strong>an</strong> <strong>an</strong>alogue voltage. It is the function of the<br />
Synchro/Resolver-to-Digital card to convert these <strong>an</strong>alogue voltages into the corresponding<br />
<strong>an</strong>gle <strong><strong>an</strong>d</strong> velocity measurements. A North Atl<strong>an</strong>tic Industries 76CS1 data acquisition<br />
card was used <strong>for</strong> the S/D conversion.<br />
LabVIEW LabVIEW is the software that was used to interface the computer with the<br />
pedestal. LabVIEW allows <strong>for</strong> easy interfacing <strong><strong>an</strong>d</strong> control because of the fundamental<br />
concept behind which it has been developed, that is, graphical programming.<br />
The Parallel Port<br />
The parallel port was used to interface the computer with the pedestal.<br />
The bits of the parallel port are to be controlled using LabVIEW.<br />
9
Once the background of the elements of the system have been presented, the electrical<br />
engineering concepts used to design <strong><strong>an</strong>d</strong> implement the final control <strong><strong>an</strong>d</strong> measurement<br />
system are then described. These concepts include:<br />
The Power Supply<br />
The pedestal requires a ±28V split power supply to operate. The<br />
theory behind the design of such a power supply is discussed.<br />
Digital-to-Analogue Conversion In order to use the parallel port to interface the computer<br />
with the pedestal, a DAC needs to be implemented. The DAC will convert the logic<br />
signals output from the parallel port to <strong>an</strong>alogue voltages that c<strong>an</strong> tell the <strong>an</strong>tenna what to<br />
do.<br />
Drive Speed <strong>Control</strong> The axes of the pedestal are to be controlled at varying speeds.<br />
The electrical engineering concepts available to control the voltage applied across the<br />
motor terminals are listed <strong><strong>an</strong>d</strong> evaluated.<br />
Safety Limits<br />
The elevation axis of the pedestal needs to have safety limits to prevent<br />
uncontrolled motion of the motor. The theory behind such a limit switch is described.<br />
Data acquisition Once the <strong>an</strong>tenna axes are moving as required, the motion needs to be<br />
measured in terms of <strong>an</strong>gle <strong><strong>an</strong>d</strong> speed. The theory behind data acquisition on the 76CS1<br />
S/D card is explained.<br />
10
2.1 Background<br />
The background of the hardware <strong><strong>an</strong>d</strong> software used in this project are discussed in detail.<br />
2.1.1 <strong>Elevation</strong> <strong>over</strong> <strong>Azimuth</strong> Position <strong>Control</strong>ler<br />
Antennae have m<strong>an</strong>y different configurations. The two axis, elevation <strong>over</strong> azimuth configuration<br />
has however been the st<strong><strong>an</strong>d</strong>ard architecture <strong>for</strong> m<strong>an</strong>y decades. In this configuration,<br />
the elevation axis is closer to the <strong>an</strong>tenna th<strong>an</strong> the azimuth axis, hence the name:<br />
elevation <strong>over</strong> azimuth. This design is ideally suited to m<strong>an</strong>y target tracking applications<br />
because a two-axis design has a minimum number of moving parts, <strong><strong>an</strong>d</strong> hence fewer<br />
modes of failure <strong><strong>an</strong>d</strong> minimal mainten<strong>an</strong>ce concerns[5, page 1]. A typical example of <strong>an</strong><br />
elevation <strong>over</strong> azimuth tracking <strong>an</strong>tenna is shown in Figure 2.1:<br />
Figure 2.1: A Typical <strong>Elevation</strong> <strong>over</strong> <strong>Azimuth</strong> Tracking Antenna [5]<br />
The elevation <strong>over</strong> azimuth configuration does however have its limitations; namely, the<br />
situation whereby the target being tracked passes directly <strong>over</strong>head (90 degree Zenith<br />
pass). To address this limitation, several pedestal architectures have been investigated <strong><strong>an</strong>d</strong><br />
designed, some of these include:<br />
• <strong>Elevation</strong> <strong>over</strong> <strong>Azimuth</strong> <strong>over</strong> Tilt<br />
• <strong>Elevation</strong> <strong>over</strong> <strong>Azimuth</strong> <strong>over</strong> Train<br />
• Cross <strong>Elevation</strong> <strong>over</strong> <strong>Elevation</strong> <strong>over</strong> <strong>Azimuth</strong><br />
The discussion of these pedestal design configurations is beyond the scope of this project<br />
<strong><strong>an</strong>d</strong> will not be discussed <strong>an</strong>y further.<br />
11
The pedestal concerned with this report incorporates the elevation <strong>over</strong> azimuth configuration.<br />
The two axes are driven by separate motors running off a 28 volt split direct<br />
current (DC) supply.<br />
The azimuth axis allows <strong>for</strong> a full 360 o rotation of the <strong>an</strong>tenna. The elevation traverses<br />
through 90 o <strong><strong>an</strong>d</strong> has its mech<strong>an</strong>ical vertical limits at 0 o <strong><strong>an</strong>d</strong> 90 o .<br />
2.1.2 Direct Current Brushed Motors<br />
The pedestal is moved by two identical direct current (DC) brushed motors that operate<br />
across a voltage r<strong>an</strong>ge of -28 V to 28 V. The motors (Vactric 15P203) have a maximum<br />
current rating of 0.95 Amps. The rated maximum speed is 5000 revolutions per minute<br />
(RPM) with a torque of 220 grams per centimeter [1].<br />
2.1.3 Brake<br />
The <strong>Elevation</strong> axis has a brake to prevent uncontrolled motion of the system after reaching<br />
its vertical limits. The brake is disengaged at voltages greater th<strong>an</strong> 24V. The braking<br />
system was not implemented in the pedestal <strong>for</strong> the purposes of this project.<br />
2.1.4 Synchros<br />
A Synchro is in essence <strong>an</strong> instrument that c<strong>an</strong> be connected in various ways to <strong>for</strong>m<br />
shaft <strong>an</strong>gle measurement <strong><strong>an</strong>d</strong> positioning systems. All synchros work on the principle of<br />
a rotating tr<strong>an</strong>s<strong>for</strong>mer. Synchros have been widely available <strong>for</strong> about 40 years as part of<br />
electromech<strong>an</strong>ical servo <strong><strong>an</strong>d</strong> shaft <strong>an</strong>gle positioning systems.<br />
Synchros are cylindrical objects that resemble small AC motors with varying diameter.<br />
Synchros are classified according to their sizes. Thus, a synchro with <strong>an</strong> outer diameter<br />
of 1.051 inches would be referred to as a size 11 while a synchro with <strong>an</strong> outside diameter<br />
of 2.270 inches would be a size 23.<br />
12
Figure 2.2: A Size 11 Synchro [2]<br />
The Synchro c<strong>an</strong> <strong>for</strong>m the heart of a digital shaft <strong>an</strong>gle measurement <strong><strong>an</strong>d</strong> positioning<br />
system, which in terms of reliability <strong><strong>an</strong>d</strong> cost effectiveness is unsurpassed by <strong>an</strong>y other<br />
method [3].<br />
Synchros c<strong>an</strong> be divided into two types, Torque <strong><strong>an</strong>d</strong> <strong>Control</strong> Synchros.<br />
Torque Synchros are are required when it is necessary to tr<strong>an</strong>smit <strong>an</strong>gular in<strong>for</strong>mation<br />
from the shaft of a synchro to the shaft of <strong>an</strong>other without the need <strong>for</strong> <strong>an</strong>y <strong>for</strong>m of servo<br />
system. The synchros themselves h<strong><strong>an</strong>d</strong>le the necessary power requirements. Torque Synchros<br />
are beyond the scope of this project <strong><strong>an</strong>d</strong> will not be discussed <strong>an</strong>y further, more<br />
in<strong>for</strong>mation on them c<strong>an</strong> be found in North Atl<strong>an</strong>tic Industries Synchro Conversion H<strong><strong>an</strong>d</strong>book<br />
[2].<br />
Synchro <strong>Control</strong> Tr<strong>an</strong>s<strong>for</strong>mers<br />
A synchro control tr<strong>an</strong>s<strong>for</strong>mer (CT) is <strong>an</strong> <strong>an</strong>gular tr<strong>an</strong>sducer. CTs are rotating tr<strong>an</strong>s<strong>for</strong>mers<br />
that output <strong>an</strong> <strong>an</strong>alogue voltage respective of the input shaft <strong>an</strong>gle. A CT consists of<br />
a rotor with one winding which revolves around a stator with 3 windings in wye <strong>for</strong>mat,<br />
120 degrees apart . The internal structure of a CT is shown in Figure 2.3<br />
13
Figure 2.3: The internal structure of a Synchro <strong>Control</strong> Tr<strong>an</strong>s<strong>for</strong>mer [1]<br />
A CT accepts input voltage across the stator terminals (synchro <strong>for</strong>mat voltages) as described<br />
as follows [1, 2, 3, 4]:<br />
S1 to S3 = A sin ω t sin φ<br />
S3 to S2 = A sin ω t sin (φ + 120 o )<br />
S2 to S1 = A sin ω t sin (φ + 240 o )<br />
where φ is the synchro shaft <strong>an</strong>gle.<br />
The rotor windings will then only produce a voltage across their terminals if the shaft<br />
input on the CT is not at <strong>an</strong>gle φ. This output voltage is <strong>an</strong> error signal which c<strong>an</strong> be fed<br />
into a phase sensitive detector <strong><strong>an</strong>d</strong> <strong>an</strong> error amplifier to produce a signal that will drive a<br />
motor to the correct position, <strong><strong>an</strong>d</strong> thus provide a servo control system.<br />
Position Resolver Tr<strong>an</strong>smitters<br />
The position resolver tr<strong>an</strong>smitter (TX) is a <strong>for</strong>m of synchro (resolvers are often referred<br />
to as synchro resolvers) in which the windings on the stator <strong><strong>an</strong>d</strong> rotor are displaced mech<strong>an</strong>ically<br />
at 90 o to each other instead of 120 o as in the case of synchros. The resolver<br />
there<strong>for</strong>e exploits the sinusoidal relationship between the shaft <strong>an</strong>gle <strong><strong>an</strong>d</strong> the output voltage.<br />
In outward appear<strong>an</strong>ce, resolvers are very similar to synchros <strong><strong>an</strong>d</strong> are produced in<br />
the st<strong><strong>an</strong>d</strong>ard synchro frame diameters. Internally, resolvers come in m<strong>an</strong>y <strong>for</strong>ms with a<br />
wide variety of winding configurations <strong><strong>an</strong>d</strong> tr<strong>an</strong>s<strong>for</strong>mation ratios. The simplest resolver<br />
14
would have a rotor with a single winding <strong><strong>an</strong>d</strong> a stator with 2 windings at 90 o to each other.<br />
The internal structure of a TX with two rotor windings <strong><strong>an</strong>d</strong> two stator windings at 90 o to<br />
each other is shown in Figure 2.4<br />
Figure 2.4: Internal Structure of a Position Resolver Tr<strong>an</strong>smitter [2]<br />
The shaft <strong>an</strong>gle c<strong>an</strong> be calculated using a TX using two methods [1] :<br />
1. Excitation of the rotor windings<br />
If <strong>an</strong> alternating current is introduced across one of the rotor windings, a voltage is<br />
induced in the stator windings. Since the stator windings are at right <strong>an</strong>gles to each<br />
other, the amplitudes of the voltages induced are related by the sine of cosine of the<br />
shaft <strong>an</strong>gle [1, 2]. So if the rotor is excited by the AC reference voltage:<br />
Asinωt<br />
Then the voltage appearing on the stator terminals would be:<br />
S1 to S3 = Vsinωtsinθ <strong><strong>an</strong>d</strong><br />
S4 to S2 = Vsinωtcosθ<br />
where θ is the Resolver shaft <strong>an</strong>gle<br />
15
2. Excitation of the stator windings<br />
If the two stator windings are excited with two signals in phase quadrature to one<br />
<strong>an</strong>other, the voltage on the rotor winding will have a fixed amplitude <strong><strong>an</strong>d</strong> frequency,<br />
but will have a phase that varies according to shaft <strong>an</strong>gle θ<br />
V S1−S3 =V R sinωt<br />
V S2−S4 =V R sinωt + 90 o =V R cosωt<br />
The voltage induced across the rotor winding will now be:<br />
V R1−R2 =V R sinωt + θ<br />
As the phase of the signal across the rotor winding ch<strong>an</strong>ges from 0 o to 360 o relative<br />
to the reference signal, it c<strong>an</strong> be measured to determine the shaft <strong>an</strong>gle as shown in<br />
Figure 2.5. [1]<br />
Figure 2.5: Signals on Position resolver with Stator Excitation [1]<br />
2.1.5 The Synchro/Resolver-to-Digital Card<br />
The University of Cape Town has a Synchro/Resolver-to-Digital (S/D) PCI card, a North<br />
Atl<strong>an</strong>tic Industries PCI-76CS1 [7] as shown inf Figure 2.6. The card is in essence a data<br />
acquisition card that reads <strong><strong>an</strong>d</strong> <strong>an</strong>alogue voltage from synchros or resolvers <strong><strong>an</strong>d</strong> converts it<br />
to a digital signal representing the <strong>an</strong>gle <strong><strong>an</strong>d</strong> velocity measurement of the synchro/resolver<br />
(S/D function). The card also has the ability to do Digital-to-Synchro/Resolver operations<br />
whereby it writes out to the synchro/resolver (D/S function).<br />
16
Figure 2.6: The North Atl<strong>an</strong>tic Industries 76CS1 PCI card [7]<br />
The 76CS1 has 8 ch<strong>an</strong>nels <strong>for</strong> S/D conversion, <strong><strong>an</strong>d</strong> 6 ch<strong>an</strong>nels <strong>for</strong> D/S conversion. It<br />
interfaces its inputs <strong><strong>an</strong>d</strong> outputs through a 78 pin female d-type connector.<br />
Key features of the 76CS1 include:<br />
• 16 bit resolution<br />
• Power-On-Self-Test (POST)<br />
• Self-calibrating S/D ch<strong>an</strong>nels<br />
• Support <strong>for</strong> 3.3V or 5V PCI bus<br />
• Accurate digital velocity outputs<br />
• Latch feature (read all ch<strong>an</strong>nels simult<strong>an</strong>eously)<br />
For a full review of all the features of the 76CS1, please refer to Appendix A.<br />
The 76CS1 comes packaged with a Microsoft Windows support kit, as well as support<br />
<strong>for</strong> Linux distributions. This project involved measuring <strong><strong>an</strong>d</strong> simulating the synchros/resolvers<br />
in a Windows environment, as a result, the 76SC1 Linux support drivers<br />
<strong><strong>an</strong>d</strong> utilities are not discussed. The Windows support kit comes with a Visual Basic (VB)<br />
based graphical user interface (GUI) that provides a user friendly interface <strong>for</strong> measurement<br />
or simulation. Figure 2.7 shows the VB GUI <strong>for</strong> synchro/resolver measurement<br />
(S/D).<br />
17
Figure 2.7: GUI <strong>for</strong> Synchro/Resolver <strong>Measurement</strong> [8]<br />
The corresponding VB GUI <strong>for</strong> Synchro/Resolver simulation (D/S) is shown in Figure<br />
2.8:<br />
Figure 2.8: GUI <strong>for</strong> Synchro/Resolver Simulation [8]<br />
The 76SC1 comes with support <strong>for</strong> National Instrument’s LabVIEW graphical programming<br />
l<strong>an</strong>guage (discussed in detail in section 2.1.6). The dynamic link library (dll) file of<br />
the 76CS1 (file-name: as_PCI76cs1.dll) c<strong>an</strong> be examined by LabVIEW <strong><strong>an</strong>d</strong> the specific<br />
functions of the 76SC1 c<strong>an</strong> be called (eg: getAngle, setLatch, getVelocity).<br />
18
2.1.6 LabVIEW<br />
In order to interface the parallel port of the computer with the drive control hardware,<br />
<strong><strong>an</strong>d</strong> ultimately, the <strong>an</strong>tenna, National Instruments LabVIEW was used. LabVIEW is <strong>an</strong><br />
acronym <strong>for</strong>: Laboratory Virtual Instrumentation Engineering Workbench.<br />
LabVIEW is based on a graphical development environment that helps create flexible <strong><strong>an</strong>d</strong><br />
scalable deign, control <strong><strong>an</strong>d</strong> test applications. Its applicability lies in the fact that it is a<br />
data acquisition <strong><strong>an</strong>d</strong> instrument control utility that uses graphical programming.<br />
LabVIEW makes use of ‘Virtual Instruments’ or ‘VIs’ in which the user c<strong>an</strong> create on a<br />
block diagram level; data acquisition, testing, control <strong><strong>an</strong>d</strong> measurement, <strong>an</strong>alysis <strong><strong>an</strong>d</strong> output<br />
tools <strong>for</strong> both real-time <strong><strong>an</strong>d</strong> non real-time applications. LabVIEW was originally released<br />
<strong>for</strong> Apple Macintosh in 1986, after much development, National Instruments have<br />
released their latest version, version 8.5 in August 2007 with support <strong>for</strong> Unix, Linux,<br />
Mac OS <strong><strong>an</strong>d</strong> Microsoft Windows [19]. For this project, I worked with LabVIEW version<br />
7.21 on a Microsoft Windows XP based plat<strong>for</strong>m.<br />
Figure 2.9: LabVIEW example showing Front P<strong>an</strong>el <strong><strong>an</strong>d</strong> Block Diagram [9]<br />
The adv<strong>an</strong>tage of using graphical programming as in LabVIEW, is that it avoids the user<br />
having to go into the programming aspect of the required action. Users c<strong>an</strong> place graphical<br />
representations of hardware by examining their respective hardware drivers or dynamic<br />
19
link libraries (dll’s). Each VI has two components: a block diagram <strong><strong>an</strong>d</strong> a front p<strong>an</strong>el as<br />
shown in Figure 2.9. The front p<strong>an</strong>el c<strong>an</strong> be run either as a program, prompting the user<br />
<strong>for</strong> input, or as a function if it is implemented on <strong>an</strong>other block diagram.<br />
LabVIEW comes installed with m<strong>an</strong>y examples <strong><strong>an</strong>d</strong> on-line help is readily available with<br />
LabVIEW support groups such as LAVA – LabVIEW Adv<strong>an</strong>ced Virtual Architects [9].<br />
2.1.7 The PC Parallel Port<br />
Figure 2.10: Parallel Port Pin Connections [10]<br />
The bits of the parallel port of a st<strong><strong>an</strong>d</strong>ard PC are to be used to control the <strong>an</strong>tenna. The<br />
parallel port has 25 lines, however only eight of these lines are available to the user. These<br />
eight lines are called the data bits, the other pins are reserved status <strong><strong>an</strong>d</strong> control bits. The<br />
pin connections of the parallel port are shown in Figure 2.10, the pin attributes are shown<br />
in Table 2.1<br />
There are three locations in the I/O port address space at which parallel ports c<strong>an</strong> be<br />
configured on computers: 0x278, 0x378 <strong><strong>an</strong>d</strong> 0x3BC. The 0x3BC address space is traditionally<br />
used on monochrome displays or printer cards <strong><strong>an</strong>d</strong> is phased out. 0x278 <strong><strong>an</strong>d</strong><br />
0x378 are common on newer cards (usually marked LPT1 <strong><strong>an</strong>d</strong> LPT2).<br />
In order to write bits to the parallel port, the correct printer port must be selected first.<br />
The hexadecimal address of the local computer’s parallel port c<strong>an</strong> be set in the BIOS.<br />
There are 8 bits that are available <strong>for</strong> user input. These bits, marked as Data0 to Data7<br />
(pin2-pin9) c<strong>an</strong> be asserted to generate a logic high or low. The parallel port data pins are<br />
Tr<strong>an</strong>sistor-Tr<strong>an</strong>sistor-Logic (TTL) outputs <strong><strong>an</strong>d</strong> generate a typical logic high of 3V-5V DC<br />
<strong><strong>an</strong>d</strong> a logic low of 0V<br />
20
Pin Signal Direction Register Bit Inverted<br />
1 nStrobe Out <strong>Control</strong>-0 Yes<br />
2 Data0 In/Out Data-0 No<br />
3 Data1 In/Out Data-1 No<br />
4 Data2 In/Out Data-2 No<br />
5 Data3 In/Out Data-3 No<br />
6 Data4 In/Out Data-4 No<br />
7 Data5 In/Out Data-5 No<br />
8 Data6 In/Out Data-6 No<br />
9 Data7 In/Out Data-7 No<br />
10 nAck In Status-6 No<br />
11 Busy In Status-7 Yes<br />
12 Paper Out In Status-5 No<br />
13 Select In Status-4 No<br />
14 Linefeed Out <strong>Control</strong>-1 No<br />
15 nError In Status-3 No<br />
16 nInitialize Out <strong>Control</strong>-2 No<br />
17 nSelect Printer Out <strong>Control</strong>-3 Yes<br />
18-25 - - - -<br />
Table 2.1: Parallel Port Pin Attributes [10]<br />
21
2.2 Theory<br />
The electrical engineering theory used in the completion of this project is discussed in<br />
detail as follows.<br />
2.2.1 Power Supply Unit<br />
The two DC brushed Vactric 15P203 motors on the pedestal are controlled by a 28V<br />
split power supply. The power supply must there<strong>for</strong>e have output terminals at +28V,<br />
0V(ground) <strong><strong>an</strong>d</strong> -28V to meet the motor’s full speed (5000 rpm) <strong><strong>an</strong>d</strong> torque (220 g/cm)<br />
attributes.<br />
2.2.2 Digital to Analogue Conversion<br />
The output from the data pins of the parallel port of the PC will ultimately drive the<br />
<strong>an</strong>tenna. These outputs as explained in section 2.1.7 are TTL outputs r<strong>an</strong>ging from 3V-<br />
5V. This digital output must be converted to <strong>an</strong> <strong>an</strong>alogue voltage in order to drive the<br />
<strong>an</strong>tenna circuitry.<br />
A simple R-2R ladder network will be used as the digital to <strong>an</strong>alogue converter (DAC)<br />
[11]. A R-2R ladder network has the adv<strong>an</strong>tage that only two resistor values in a repeated<br />
cascade design are required in the circuit design. Figure 2.11 shows <strong>an</strong> N-bit DAC:<br />
Figure 2.11: An N-bit DAC [11]<br />
Digital in<strong>for</strong>mation is presented to the ladder as individual bits of a digital word switched<br />
between a reference voltage (V r ) (3V-5V from parallel port) <strong><strong>an</strong>d</strong> ground.<br />
Depending on the number <strong><strong>an</strong>d</strong> location of the bits switched to V r or ground, Vout will<br />
vary between 0V <strong><strong>an</strong>d</strong> V r . If all inputs are connected to ground, Vout = 0V. If all inputs<br />
are connected to V r , the output voltage approaches V r . If some inputs are connected to<br />
ground <strong><strong>an</strong>d</strong> some to V r then <strong>an</strong> output voltage between 0V <strong><strong>an</strong>d</strong> V r occurs. These inputs<br />
(bits) r<strong>an</strong>ge from the Most Signific<strong>an</strong>t Bit (MSB) to the Least Signific<strong>an</strong>t Bit (LSB). As<br />
the names indicate, the MSB, when activated, causes the greatest ch<strong>an</strong>ge in the output<br />
22
voltage <strong><strong>an</strong>d</strong> the LSB, when activated, will cause the smallest ch<strong>an</strong>ge in the output voltage<br />
[11].<br />
Since <strong>an</strong> R/2R ladder is a linear circuit, Vout c<strong>an</strong> be calculated by applying the principle<br />
of superposition. The expected output voltage is calculated by summing the effect of all<br />
bits connected to Vr. For example, if bits 0 <strong><strong>an</strong>d</strong> 2 are connected to V r with all other inputs<br />
grounded, the output voltage is calculated by:<br />
Vout = V r<br />
2 +V r<br />
8<br />
A general <strong>for</strong>mula <strong>for</strong> calculating Vout <strong>for</strong> <strong>an</strong> N-bit DAC is given below:<br />
Vout = V r<br />
2 N (S N−1 2 N−1 + S N−2 2 N−2 + ... + S 0 2 0 )<br />
Where the input S N to bit N is ’1’ if it is connected to a voltage V r <strong><strong>an</strong>d</strong> ’0’ if it is grounded.<br />
The R/2R ladder is a binary circuit. The effect of each successive bit approaching the<br />
LSB is 1/2 of the previous bit. If this sequence is extended to a ladder of infinite bits, the<br />
effect of the LSB on Vout approaches 0. Conversely, the full-scale output of the network<br />
(with all bits connected to Vr) approaches Vr [11].<br />
2.2.3 <strong>Control</strong>ling Drive Speed<br />
The drive speed is ultimately controlled by the torque ch<strong>an</strong>ges induced by varying voltage<br />
levels across the the motors. In order to control the voltage applied across the motors <strong>for</strong><br />
both elevation <strong><strong>an</strong>d</strong> azimuth, the following options were available:<br />
• Varying the amplitude<br />
Whereby the amplitude of the input voltage is varied to control the torque generated<br />
across the motor.<br />
• Varying the duty cycle<br />
By adjusting the duty cycle, the average output voltage would ch<strong>an</strong>ge, there<strong>for</strong>e<br />
varying torques would be applied across the motor of the <strong>an</strong>tenna subsequently<br />
causing the respective axes to move at different speeds.<br />
The chosen method <strong>for</strong> controlling the voltage across the motors was that of varying the<br />
duty cycle with a pulse width modulation (PWM) scheme. A PWM scheme would allow<br />
<strong>for</strong> simple interfacing with the DAC.<br />
2.2.4 Data Acquisition from the 76CS1<br />
The S/D card interfaces with the synchros/resolvers through a 78 pin D-type female configuration.<br />
There are two available configurations available to read <strong><strong>an</strong>d</strong> write to the S/D<br />
<strong><strong>an</strong>d</strong> D/S ch<strong>an</strong>nels:<br />
23
1. 8 S/D Ch<strong>an</strong>nels with up to 4 D/S Ch<strong>an</strong>nels<br />
2. 6 D/S Ch<strong>an</strong>nels with up to 4 S/D Ch<strong>an</strong>nels<br />
For the purposes of this project, Configuration 1 was adopted. The pin connections <strong>for</strong><br />
Configuration 1 are shown in Table 2.2 :<br />
S/D Ch<strong>an</strong>nels<br />
Pin Ch.1 S/D Pin Ch.2 S/D Pin Ch.3 S/D Pin Ch.4 S/D<br />
39 S1 18 S1 36 S1 15 S1<br />
58 S2 76 S2 55 S2 73 S2<br />
78 S3 57 S3 75 S3 54 S3<br />
19 S4 37 S4 16 S4 34 S4<br />
38 RHi 17 RHi 35 RHi 14 RHi<br />
77 RLo 56 RLo 74 RLo 53 RLo<br />
Pin Ch.5 S/D Pin Ch.6 S/D Pin Ch.7 S/D Pin Ch.8 S/D<br />
33 S1 12 S1 30 S1 9 S1<br />
52 S2 70 S2 49 S2 67 S2<br />
72 S3 51 S3 69 S3 48 S3<br />
13 S4 31 S4 10 S4 28 S4<br />
32 RHi 11 RHi 29 RHi 8 RHi<br />
71 RLo 50 RLo 68 RLo 47 RLo<br />
D/S Ch<strong>an</strong>nels<br />
Pin Ch.1 D/S Pin Ch.2 D/S Pin Ch.3 D/S Pin Ch.4 D/S<br />
27 S1 6 S1 24 S1 3 S1<br />
46 S2 64 S2 43 S2 61 S2<br />
66 S3 45 S3 63 S3 42 S3<br />
7 S4 25 S4 4 S4 22 S4<br />
26 RHi 5 RHi 23 RHi 2 RHi<br />
65 RLo 44 RLo 62 RLo 41 RLo<br />
Table 2.2: Pin connections <strong>for</strong> 76CS1 in Configuration 1: 8 S/D, 4D/S Ch<strong>an</strong>nels [7]<br />
With reference to Table 2.2, S1, S2, S3, S4 represent the stator connectors <strong><strong>an</strong>d</strong> RHi <strong><strong>an</strong>d</strong><br />
RLo represent the rotor connectors on the synchros.<br />
2.2.5 Limit Switches<br />
The elevation axis of the elevation <strong>over</strong> azimuth <strong>an</strong>tenna requires limit switches to prevent<br />
the motors from being continuously run after the <strong>an</strong>tenna has reached its vertical limits<br />
defined in section 2.1.1. These protective interlocks limit the <strong>an</strong>tenna movements to a safe<br />
working space. These limit switches must be designed in such a way that the current flow<br />
to the motor is stopped in the event of reaching the respective limit. The motor must then<br />
be able to drive the elevation axis in the opposite direction, out of limit, if the polarity of<br />
the supply is inverted.<br />
24
A clear underst<strong><strong>an</strong>d</strong>ing of the core components of the system is now gained. The background<br />
<strong><strong>an</strong>d</strong> theory presented here in Chapter two gives us a basis of the system that ultimately<br />
needs to be designed, as discussed in Chapter three.<br />
25
Chapter 3<br />
Design<br />
Chapter three focuses on the design of the hardware <strong><strong>an</strong>d</strong> software required to control<br />
the <strong>an</strong>tenna. The following hardware <strong><strong>an</strong>d</strong> software were designed with the theory <strong><strong>an</strong>d</strong><br />
references of chapter two to fulfill the requirements of the project:<br />
• The power supply unit<br />
• The software to control the parallel port through LabVIEW<br />
• The digital to <strong>an</strong>alogue converter<br />
• The pulse width modulation generating circuitry<br />
• The safety limit switches <strong>for</strong> motion along the elevation axis motion<br />
• The graphical user interface to measure the <strong>an</strong>gle <strong><strong>an</strong>d</strong> speed attributes of the synchros<br />
A block diagram of the entire system to be designed is shown in Figure 3.1.<br />
The system is controlled by the bits of the parallel port. All eight bits available to the user<br />
are used as shown in Table 3.1:<br />
Bit Function<br />
2 (Data-0) Direction<br />
3 (Data-1) <strong>Elevation</strong><br />
4 (Data-2) <strong>Azimuth</strong><br />
5 (Data-3) Speed<br />
6 (Data-4) Speed<br />
7 (Data-5) Speed<br />
8 (Data-6) Top Limit (<strong>Elevation</strong>)<br />
9 (Data-7) Bottom Limit (<strong>Elevation</strong>)<br />
Table 3.1: Parallel Port Bit Usage<br />
The specific component <strong><strong>an</strong>d</strong> part list <strong>for</strong> the hardware to be designed <strong>for</strong> the completion<br />
of the design is available in Appendix B.<br />
26
Figure 3.1: Block Diagram of <strong>Control</strong> <strong><strong>an</strong>d</strong> <strong>Measurement</strong> <strong>System</strong> to be Designed<br />
27
3.1 The Power Supply Unit<br />
The commissioning of a 28V split power supply unit (PSU) involved the commissioning<br />
of the following key components [6] :<br />
• A 60V/1A centre tapped tr<strong>an</strong>s<strong>for</strong>mer<br />
• Two 10000µF smoothing capacitors<br />
• A LM317 three terminal voltage regulator (+28V)<br />
• A LM337 three terminal voltage regulator (-28V)<br />
• Two 1N4001 diodes (100V/1A minimum rating)<br />
A block diagram <strong>for</strong> the PSU is shown in Figure 3.2:<br />
Figure 3.2: Block Diagram <strong>for</strong> PSU [6]<br />
The complete circuit diagram of the power supply is shown in Figure 3.3:<br />
28
Figure 3.3: A 28V split power supply [6]<br />
29
3.2 <strong>Control</strong>ling the parallel port from LabVIEW<br />
There is <strong>an</strong> existing LabVIEW virtual instrument (VI) called the ‘parallel port read <strong><strong>an</strong>d</strong><br />
write loop’. In order to control the parallel port, the port status must be set to the St<strong><strong>an</strong>d</strong>ard<br />
Parallel Port (SPP) mode. The other modes, Enh<strong>an</strong>ced Parallel Port (EPP) <strong><strong>an</strong>d</strong> Extended<br />
Capabilities Mode (ECP) are not compatible with this VI. The parallel port mode c<strong>an</strong> be<br />
set in the computer’s basic input/output system (BIOS).<br />
Once the base address of the local computer is determined, it c<strong>an</strong> be entered into the<br />
VI input. For my test cases, the parallel port was always configured to the hexadecimal<br />
address 0x378.<br />
Bits c<strong>an</strong> be written out to the data pins of the parallel port (pins 2-9) <strong><strong>an</strong>d</strong> the subsequent<br />
read-in is also displayed. The VI allows you to ch<strong>an</strong>ge the logic status of <strong>an</strong>y of the pins<br />
that have write access.<br />
The following example shown in Figure 3.4 creates a logic high output on pin 2(Data-0)<br />
only:<br />
Figure 3.4: Asserting Data-0 high<br />
The actual parallel port I/O connector status <strong>for</strong> the above example is shown in Figure 3.5.<br />
Note, in controlling the parallel port bits, we are only interested in the logic states of pin2-<br />
pin9. The logic states of the other pins are irrelev<strong>an</strong>t <strong>for</strong> the purpose of this application.<br />
Figure 3.5: Parallel port pin status with Data-0 high<br />
If instead, a data output is only written to pin 6 (Data-4), the necessary user input required<br />
is shown in Figure 3.6.<br />
30
Figure 3.6: Asserting Data-4 high<br />
The resulting parallel port pin status is shown in Figure3.7:<br />
Figure 3.7: Parallel port pin status with Data-4 high<br />
31
3.3 A 3-Bit Digital to Analogue Converter<br />
The 3-bit Digital to Analogue Converter (DAC) was designed using a simple R-2R ladder<br />
network as shown in Figure 3.8 [11]. A gain amplifier was added to ensure that a logic<br />
high TTL output triggered from the parallel port is indeed detected <strong><strong>an</strong>d</strong> asserted on the<br />
subsequent drive speed control circuitry operating at ±28V.<br />
The resistor values chosen in the R-2R ladder network were arbitrary <strong><strong>an</strong>d</strong> chosen as 1MΩ<br />
<strong><strong>an</strong>d</strong> 2.2MΩ respectively.<br />
Figure 3.8: An R-2R ladder DAC with gain<br />
The output voltage generated from this circuit is given by:<br />
V o<br />
= - R f<br />
R .V r(S 2 2 2 + S 1 2 1 + S 0 2 0 )<br />
Where the input S N to bit N is ’1’ if it is connected to a voltage V r <strong><strong>an</strong>d</strong> ’0’ if it is grounded.<br />
32
3.4 Drive Speed <strong>Control</strong><br />
A pulse width modulation (PWM) scheme was used to vary the voltage applied across the<br />
motors. In PWM, the power supply to the motor is switched on <strong><strong>an</strong>d</strong> off rapidly. The DC<br />
voltage is converted to a square-wave signal that alternates between 0V <strong><strong>an</strong>d</strong> the supply<br />
voltage. By adjusting the duty cycle of the signal, the average power c<strong>an</strong> be varied <strong><strong>an</strong>d</strong><br />
subsequently, the motor speed. An example of the varying duty cycles in a PWM scheme<br />
is shown in Figure 3.9 :<br />
Figure 3.9: Varying duty cycles in a PWM scheme<br />
The PWM wave<strong>for</strong>m was created using <strong>an</strong> operational amplifier (op-amp) circuit. A quad<br />
op-amp integrated circuit (IC), <strong>an</strong> LM324 was used. The schematic <strong>for</strong> the PWM circuit<br />
is shown in Figure 3.10[12]:<br />
33
Figure 3.10: A PWM generating op-amp circuit<br />
34
How the PWM circuit works [14][12]<br />
With reference to Figures 3.10 <strong><strong>an</strong>d</strong> 3.11, the PWM signal is generated as follows:<br />
Figure 3.11: How the PWM circuit works [12]<br />
• An oscillator is used to generate the sawtooth wave<strong>for</strong>m (Saw-green line). The<br />
sawtooth wave<strong>for</strong>m is generated by op-amps X1 <strong><strong>an</strong>d</strong> X2 configured as a Schmitt<br />
Trigger <strong><strong>an</strong>d</strong> Miller Integrator.<br />
• Op-amp X3 acts as a low gain amplifier that brings the trough of the sawtooth<br />
wave<strong>for</strong>m to just above 0V, <strong><strong>an</strong>d</strong> peaking at about 26V.<br />
• A potentiometer is used to set a steady reference voltage (Ref-blue line).<br />
• A comparator (op-amp X4) compares the sawtooth voltage with the reference voltage.<br />
When the sawtooth voltage rises above the reference voltage, the power tr<strong>an</strong>sistor<br />
(Q1) is switched on. As it falls below the reference, it is switched off. This<br />
gives a square wave output to the motor (Output-red line).<br />
• If the 10kΩ potentiometer is adjusted to give a higher reference voltage (thus raising<br />
the blue line), the sawtooth never reaches it, so the output is zero (0% duty cycle).<br />
With a low reference, the comparator is always on, giving full power (100% duty<br />
cycle)<br />
• Instead of using a potentiometer to vary the motor speed, the variable DAC output<br />
voltage is integrated as <strong>an</strong> input to the operational amplifier X4 which acts as a<br />
comparator circuit. As a result, varying user inputs in LabVIEW would be used to<br />
drive the motor at different speeds.<br />
3.5 Reading from Synchros<br />
The pedestal has two synchros, one on the elevation axis <strong><strong>an</strong>d</strong> the other on the azimuth<br />
axis. Acquiring velocity <strong><strong>an</strong>d</strong> <strong>an</strong>gle measurements from these synchros involves interfacing<br />
them with the 76CS1 card. With reference to Table 2.2, the ch<strong>an</strong>nels that will be used<br />
35
to read the data from each of the synchros are Ch<strong>an</strong>nel 1 S/D <strong><strong>an</strong>d</strong> Ch<strong>an</strong>nel 7 S/D <strong>for</strong> the<br />
elevation axis <strong><strong>an</strong>d</strong> the azimuth axis respectively. The choice of which ch<strong>an</strong>nels to use is<br />
arbitrary, Ch<strong>an</strong>nel 1 <strong><strong>an</strong>d</strong> Ch<strong>an</strong>nel 7 were chosen because of the fact that they are the most<br />
widely spaced ch<strong>an</strong>nels, there<strong>for</strong>e allowing easier interfacing with the 78 pin connector.<br />
Once the ch<strong>an</strong>nels are connected correctly, the synchro-to-digital operation takes place in<br />
the 76CS1 <strong><strong>an</strong>d</strong> the corresponding output is displayed in the 76CS1 S/D GUI (as in Figure<br />
2.7. Ch<strong>an</strong>nel 1 <strong><strong>an</strong>d</strong> ch<strong>an</strong>nel 7 are ticked as active <strong><strong>an</strong>d</strong> the resulting <strong>an</strong>gle <strong><strong>an</strong>d</strong> velocity<br />
readings are obtained.<br />
3.6 Limit Switches<br />
The limit switches are designed to prevent uncontrolled motion of the motors on the elevation<br />
axis. By using the limit switches, the elevation axis will moves between 0 o -90 o<br />
<strong>an</strong>gle, safely. When the motor reaches its upper or lower limitation, the limit-switch cutsoff<br />
the motor’s voltage supply. The elevation axis will then only move if a reverse polarity<br />
voltage is applied across it (to drive it out of limit) [17].<br />
The design <strong>for</strong> the system as required is now complete. All the design specifications<br />
stated here in Chapter three serve as a basis <strong>for</strong> the building <strong><strong>an</strong>d</strong> testing of the hardware<br />
<strong><strong>an</strong>d</strong> software as described in Chapter four.<br />
36
Chapter 4<br />
Building <strong><strong>an</strong>d</strong> Testing<br />
Chapter four discusses the building <strong><strong>an</strong>d</strong> testing of the hardware <strong><strong>an</strong>d</strong> software concepts<br />
as decided in chapter three. The hardware <strong><strong>an</strong>d</strong> software is tested, <strong><strong>an</strong>d</strong> the results from<br />
the associated tests are presented. The compromises made in tr<strong>an</strong>slating the theoretical<br />
designs into viable practical circuits are discussed. Limitations encountered during testing<br />
are discussed <strong><strong>an</strong>d</strong> the resulting final system to be designed is presented.<br />
4.1 A 28V Split Supply<br />
While taking into account the practical aspects of the hardware required <strong>for</strong> the PSU,<br />
the final deliverables from this project were re-evaluated <strong><strong>an</strong>d</strong> determined to be impractical<br />
given the twelve week time limit. Commissioning the 60V/1A tr<strong>an</strong>s<strong>for</strong>mer <strong><strong>an</strong>d</strong> the<br />
10000µF capacitors proved to be the major limitations as these components were not<br />
readily available in the department <strong><strong>an</strong>d</strong> commissioning them would require time beyond<br />
the twelve weeks allocated towards this project.<br />
As a result, a bench power supply that was readily available within the department was<br />
used. The supply used is <strong>an</strong> EZ Digital - GP1303DU Regulated DC Power Supply that<br />
c<strong>an</strong> output up to ±30V. The supply has a rated maximum power output of 270VA.<br />
The bench power supply was set to series mode <strong><strong>an</strong>d</strong> the output voltage was adjusted so as<br />
to output the required +28V, 0V <strong><strong>an</strong>d</strong> -28V leads.<br />
4.2 The Parallel Port <strong><strong>an</strong>d</strong> LabVIEW<br />
The parallel port bits are controlled by LabVIEW, as discussed in sections 2.1.7 <strong><strong>an</strong>d</strong> 3.2.<br />
The user has control of 8 bits of the parallel port (pin2 - pin9). Using the ’Parallel Port<br />
Read <strong><strong>an</strong>d</strong> Write Loop’ VI in LabVIEW, the data outputs were tested by physically connecting<br />
a digital oscilloscope to the pins of the parallel port. The expected results were<br />
that pins 2-9 would show a logic high (5V) once asserted in LabVIEW. The results obtained<br />
however showed that on the particular computer that I was using, pins 2-9 were<br />
37
not in fact asserted in the correct order. Table 4.1 shows the expected results compared to<br />
those observed.<br />
Data Pin Corresponding Pin (expected) Corresponding Pin (observed)<br />
Data-0 2 12<br />
Data-1 3 11<br />
Data-2 4 10<br />
Data-3 5 9<br />
Data-4 6 8<br />
Data-5 7 7<br />
Data-6 8 6<br />
Data-7 9 5<br />
Table 4.1: Parallel Port Outputs - Expected vs Observed<br />
The computer BIOS was checked to make sure that the parallel port was indeed set to<br />
St<strong><strong>an</strong>d</strong>ard Parallel Port (SPP) mode as required by LabVIEW <strong>for</strong> the functioning of this VI<br />
as stated in section 3.2. Although the pin numbers do not correspond to those expected,<br />
we still have control of eight bits of the parallel port which is what is required <strong>for</strong> this<br />
project. As a result, this problem was not investigated further <strong><strong>an</strong>d</strong> the pin outputs of the<br />
hardware interface were reconfigured to pins 5-12.<br />
The expected TTL output from the parallel port as stated in section 2.1.7 was 3V-5V. The<br />
amplitude of these outputs as measured with the digital oscilloscope was 3V DC.<br />
4.3 Integrating the DAC with the PWM controller<br />
The DAC outputs feed directly into the PWM controller. With reference to Figure 3.10,<br />
the PWM controller was initially tested with the 10kΩ potentiometer as the input to the<br />
inverting input of operational amplifier X4.<br />
By adjusting the potentiometer, the duty cycle also varied. Table 4.2 shows the observed<br />
duty cycles <strong>for</strong> the varying inputs to the inverting pin of operational amplifier X4.<br />
Input Voltage (V) % Duty Cycle Across Load<br />
0 0<br />
4.5 10<br />
9 20<br />
13.5 40<br />
18 60<br />
22.5 70<br />
27 90<br />
Table 4.2: Duty Cycles Observed <strong>for</strong> Varying Input Voltages<br />
By integrating the DAC with the PWM controller, the potentiometer is removed <strong><strong>an</strong>d</strong> the<br />
variable voltage is obtained from the TTL 3V outputs from the parallel port (amplified<br />
38
with a gain stage amplifier). For the designed 3-bit DAC, Table 4.3 shows the corresponding<br />
output voltage <strong><strong>an</strong>d</strong> duty cycle <strong>for</strong> the respective binary state:<br />
DAC Input Binary State Output Voltage (V) % Duty Cycle<br />
000 0 0<br />
001 9.4 20<br />
010 12 35<br />
011 15 52<br />
100 14 50<br />
101 17.2 56<br />
110 17.6 58<br />
111 19.2 65<br />
Table 4.3: Integrating the DAC <strong><strong>an</strong>d</strong> PWM; Duty Cycles Observed <strong>for</strong> Varying Binary<br />
States<br />
As seen from Table 4.3, the duty cycle varies between 0% <strong><strong>an</strong>d</strong> 65%, this gives us a good<br />
r<strong>an</strong>ge to work with in terms of speed control of the motor.<br />
The varying duty cycles<br />
result in a controllable torque across the <strong>an</strong>tenna motors <strong><strong>an</strong>d</strong> consequently, a speed control<br />
system.<br />
For the different binary states of the DAC input to the parallel port bits, the speed of<br />
rotation of the <strong>an</strong>tenna along the azimuth axis was measured in revolutions per minute<br />
(rpm). The results of which are tabulated in Table 4.4:<br />
DAC Input Binary State Antenna Speed (RPM) - <strong>Azimuth</strong><br />
000 0<br />
001 10<br />
010 13<br />
011 17<br />
100 16<br />
101 20<br />
110 21<br />
111 23<br />
Table 4.4: Antenna Revolutions Along <strong>Azimuth</strong> Axis at Varying DAC Input Binary States<br />
The objectives of this project included controlling the motion of the <strong>an</strong>tenna at different<br />
speeds. From Table 4.4, three DAC input states were chosen, tabulated in Table 4.5:<br />
Speed DAC Input Binary State Antenna Speed (RPM) - <strong>Azimuth</strong><br />
Off 000 0<br />
Slow 001 10<br />
Fast 111 23<br />
Table 4.5: Final Antenna Speed <strong>Control</strong>-DAC Input <strong><strong>an</strong>d</strong> Corresponding Speed<br />
These states c<strong>an</strong> be asserted through the LabVIEW GUI.<br />
39
4.4 Limitations Encountered in Testing<br />
As discussed in section 1.5, the pedestal itself is quite old <strong><strong>an</strong>d</strong> not all the hardware components<br />
were found to be in a working order. The major limitations encountered after<br />
testing of the system were:<br />
4.4.1 The <strong>Elevation</strong> Axis<br />
The elevation axis of the pedestal is not in a working condition. The Vactric 15P203<br />
motor that is used to drive the axis is burnt out. The following is a list of the hardware<br />
<strong><strong>an</strong>d</strong> software that could not be implemented as a result:<br />
• Limit Switches<br />
The limit switches were designed specifically <strong>for</strong> the elevation axis, the azimuth<br />
axis is allowed to move through 360 o <strong><strong>an</strong>d</strong> does not require positioning constraints.<br />
• S/D <strong>Measurement</strong><br />
The shaft of the synchro on the elevation axis would not be moving, as a result,<br />
when interfacing with the S/D card, Ch<strong>an</strong>nel 7 on the 76CS1 which was allocated<br />
to the second synchro of the system will be left inactive.<br />
4.4.2 Commissioning of a 78 pin D-type Male Connector <strong>for</strong> the S/D<br />
Card<br />
The S/D card has a 78 pin interface <strong><strong>an</strong>d</strong> it was necessary to obtain a suitable male D-type<br />
connector in order to interface the synchros with the card. After failing to find such a<br />
connector from m<strong>an</strong>y hardware <strong><strong>an</strong>d</strong> component stores across South Africa, the connector<br />
was finally obtained from North Atl<strong>an</strong>tic Industries in week eight of the project.<br />
The interfacing of the synchros with the S/D card as well as the testing of the S/D GUIs<br />
<strong><strong>an</strong>d</strong> the 76CS1 LabVIEW VI could only start after the connector was obtained.<br />
40
4.5 Final <strong>System</strong> Design<br />
As a result of the limitations encountered in Section 4.4, namely the elevation axis, the<br />
final circuit block diagram of the system designed was modified from that of Figure 3.1<br />
to the design shown in Figure 4.1:<br />
The system is now refined to control the speed <strong><strong>an</strong>d</strong> direction of the <strong>an</strong>tenna, along the<br />
azimuth axis. Table 4.6 shows how the data bits of the parallel port are used in this<br />
application:<br />
Bit Function<br />
12 (Data-0) Direction (azimuth)<br />
11 (Data-1) Speed<br />
10 (Data-2) Speed<br />
9 (Data-3) Speed<br />
8 (Data-4) Unused<br />
7 (Data-5) Unused<br />
6 (Data-6) Unused<br />
5 (Data-7) Unused<br />
Table 4.6: Parallel Port Bits - Final <strong>System</strong> Design<br />
41
Figure 4.1: Block Diagram of the Final <strong>System</strong><br />
42
Chapter 5<br />
Conclusions <strong><strong>an</strong>d</strong> Further<br />
Recommendations<br />
Chapter five discusses the conclusions that are drawn based on the results of the testing<br />
of the final system as described in chapter four. The final system is discussed with respect<br />
to the initial project requirements. At the end of the twelve week period allocated to this<br />
project, the system designed is open <strong>for</strong> further research <strong><strong>an</strong>d</strong> experimentation. Recommendations<br />
as how the elements of this project could be used as a basis <strong>for</strong> continued<br />
research <strong><strong>an</strong>d</strong> experimentation are made.<br />
5.1 Conclusions<br />
The project status, with regards to the phases of research, design <strong><strong>an</strong>d</strong> implementation<br />
at the end of the twelve week project period is presented in Table 5.1 <strong><strong>an</strong>d</strong> discussed as<br />
follows:<br />
<strong>System</strong> Design From the objectives presented in the user requirements, a control <strong><strong>an</strong>d</strong><br />
measurement system was designed.<br />
The system would ultimately control the direction, speed <strong><strong>an</strong>d</strong> axis of rotation of the <strong>an</strong>tenna<br />
from a variable user input. The motion attributes (<strong>an</strong>gle <strong><strong>an</strong>d</strong> velocity) would then<br />
be captured <strong><strong>an</strong>d</strong> displayed as <strong>an</strong> output to the user on a computer based interface.<br />
Background to Hardware The hardware used in this project, namely the pedestal housing<br />
the elevation <strong>over</strong> azimuth <strong>an</strong>tenna, the <strong>an</strong>tenna itself <strong><strong>an</strong>d</strong> the North Atl<strong>an</strong>tic Industries<br />
76CS1 S/D card have been researched thoroughly. The theory behind the functioning of<br />
the components of the <strong>an</strong>tenna hardware <strong><strong>an</strong>d</strong> the S/D card are discussed, a clear underst<strong><strong>an</strong>d</strong>ing<br />
of their roles in the core of the control <strong><strong>an</strong>d</strong> measurement system to be implemented<br />
has been obtained.<br />
43
Project Phase Task Status<br />
Research <strong>System</strong> to be Implemented Complete<br />
Research Background to Hardware Complete<br />
Research Background to Software Complete<br />
Design ±28V PSU Complete<br />
Design Parallel Port <strong>Control</strong> - LabVIEW Complete<br />
Design 3-Bit DAC Complete<br />
Design PWM Generation Complete<br />
Design Data Acquisition from Synchros Complete<br />
Design Limit Switches In Progress<br />
Implementation ±28V PSU Complete - Alternative Method Used<br />
Implementation Parallel Port <strong>Control</strong> - LabVIEW Complete<br />
Implementation 3-Bit DAC Complete<br />
Implementation PWM Generation Complete<br />
Implementation Data Acquisition from Synchros In Progress<br />
Implementation Limit Switches Not Implemented<br />
Table 5.1: Final Project Status<br />
Background to Software Research into how LabVIEW functions has been conducted<br />
<strong><strong>an</strong>d</strong> a clear underst<strong><strong>an</strong>d</strong>ing of programming with LabVIEW has been obtained. The tasks<br />
of creating VIs <strong><strong>an</strong>d</strong> utilising the existing LabVIEW VIs <strong>for</strong> the purpose of this project,<br />
have been accomplished.<br />
The S/D card’s VB GUI was examined <strong><strong>an</strong>d</strong> the functioning of it was understood <strong><strong>an</strong>d</strong> used<br />
successfully in obtaining the <strong>an</strong>gle <strong><strong>an</strong>d</strong> velocity measurements of the <strong>an</strong>tenna.<br />
The Power Supply Unit The ±28V PSU required <strong>for</strong> this system has been designed,<br />
with all the required hardware components noted. Due to the timing constraints of the<br />
project, this particular design was not implemented. Instead, a bench PSU that c<strong>an</strong> provide<br />
the required +28V, 0V <strong><strong>an</strong>d</strong> -28V leads was used. The use of the bench PSU instead of a<br />
compact <strong><strong>an</strong>d</strong> dedicated PSU does not in <strong>an</strong>yway affect the design or implementation of<br />
the subsequent components in the control <strong><strong>an</strong>d</strong> measurement system.<br />
The 3-Bit DAC A 3-Bit DAC <strong>for</strong> the purpose of converting the digital signal output<br />
from the parallel port (asserted by the user in LabVIEW) to <strong>an</strong> <strong>an</strong>alogue voltage to ultimately<br />
control the direction <strong><strong>an</strong>d</strong> motion of the <strong>an</strong>tenna has been designed <strong><strong>an</strong>d</strong> implemented.<br />
The DAC integrates with a gain stage operational amplifier <strong><strong>an</strong>d</strong> outputs to the<br />
PWM circuitry.<br />
The PWM Generator A PWM signal was generated <strong><strong>an</strong>d</strong> varied (from the user defined<br />
DAC input) in order to control the duty cycle of the voltage applied across the motor<br />
corresponding to the azimuth axis of the <strong>an</strong>tenna. The PWM scheme was implemented<br />
<strong><strong>an</strong>d</strong> configured to output duty cycles of 0%, 20% <strong><strong>an</strong>d</strong> 65% with corresponding <strong>an</strong>tenna<br />
rotation speeds of 0, 10 <strong><strong>an</strong>d</strong> 23 revolutions per minute respectively.<br />
44
Data Acquisition The motion attributes of the <strong>an</strong>tenna (<strong>an</strong>gle <strong><strong>an</strong>d</strong> velocity) were to be<br />
measured <strong><strong>an</strong>d</strong> displayed by use of the 76CS1 S/D card. The card was connected <strong><strong>an</strong>d</strong><br />
installed on a Microsoft Windows XP based plat<strong>for</strong>m. A 78 pin, D-type male connector<br />
was commissioned <strong><strong>an</strong>d</strong> used to interface the synchro on the azimuth axis with ch<strong>an</strong>nel 1<br />
of the S/D card to obtain the <strong>an</strong>tenna <strong>an</strong>gle <strong><strong>an</strong>d</strong> velocity.<br />
At the time of completion of this report, the task of interfacing the synchro with the S/D<br />
card successfully to display <strong>an</strong> output reading on the S/D VB GUI was incomplete.<br />
Limit Switches The limit switches were required to restrict the motion of the elevation<br />
axis to within a safe working space. Due to the damaged motor on the elevation axis of the<br />
pedestal, the limit switches could not be implemented <strong><strong>an</strong>d</strong> as a result, were not designed.<br />
The underlying theory was clearly understood.<br />
5.2 Further Recommendations<br />
5.2.1 Achieving the Initial Project Requirements<br />
By comparing the final system presented to that of which was the original requirement of<br />
this project, it c<strong>an</strong> be seen that the objectives have only been partially met. This is justified<br />
in sections 1.5 <strong><strong>an</strong>d</strong> 4.4 where the limitations of the project have been clearly stated.<br />
The required final system as described in the block diagram in Figure 3.1 would accomplish<br />
the following:<br />
• Prompt the user <strong>for</strong> <strong>an</strong> input speed <strong>for</strong> the specific axis of motion (from LabVIEW).<br />
• Move the <strong>an</strong>tenna at that speed, in the desired axis (with regulated motion <strong>for</strong> the<br />
elevation axis).<br />
• The velocity <strong><strong>an</strong>d</strong> <strong>an</strong>gle of motion of the <strong>an</strong>tenna would be captured by the synchro-<br />
S/D card interface <strong><strong>an</strong>d</strong> output to the screen (through the S/D card VB GUI).<br />
In order <strong>for</strong> the complete system, as described above to be implemented, additional steps<br />
need to be taken, namely:<br />
• The commission of a st<strong><strong>an</strong>d</strong>alone PSU (using the design presented in section 3.1),<br />
dedicated to the pedestal.<br />
• The commission <strong><strong>an</strong>d</strong> installation of a working Vactric 15P203 motor <strong>for</strong> the elevation<br />
axis.<br />
• The design <strong><strong>an</strong>d</strong> testing of the safety limit switches to keep the elevation axis motion<br />
to within a safe working space.<br />
• Interfacing the synchro on the elevation axis with a second S/D ch<strong>an</strong>nel on the<br />
76CS1 card.<br />
45
5.2.2 Extensions to this Project<br />
In addition to the work carried out to achieve the initial user requirements, further research<br />
<strong><strong>an</strong>d</strong> implementation could be carried out to extend the capabilities of the system.<br />
Driving the Antenna to a Set-point<br />
As <strong>an</strong> addition to the final system design, the project could be extended to drive the<br />
<strong>an</strong>tenna to a set-point from a LabVIEW based GUI. In this system, the user would be<br />
prompted <strong>for</strong> <strong>an</strong> input coordinate. Based on the user input coordinate, the <strong>an</strong>tenna would<br />
then move along firstly the azimuth axis, <strong><strong>an</strong>d</strong> then the elevation axis towards this coordinate.<br />
The final position of the <strong>an</strong>tenna will then be compared with the <strong>an</strong>gle <strong><strong>an</strong>d</strong> velocity<br />
readings attained from the S/D card to check <strong>for</strong> accuracy.<br />
Implementing this system would serve as a culmination of all the elements of the current<br />
project together with the new requirements to produce a useful set-point tracking system.<br />
46
Appendix A<br />
76CS1 Datasheet<br />
The detailed specifictations <strong>for</strong> the North Atl<strong>an</strong>tic Industries 76CS1 S/D PCI data acquisition<br />
card are given with reference to the hardware datasheet [7]:<br />
• 16 bit resolution<br />
• 1 arc minute accuracy <strong>for</strong> measurement ch<strong>an</strong>nels; 30 arc seconds accuracy <strong>for</strong> stimulus<br />
ch<strong>an</strong>nels<br />
• Continuous background bit testing with Reference <strong><strong>an</strong>d</strong> Signal loss detection<br />
• Power-On Self-Test (POST)<br />
• S/D ch<strong>an</strong>nels are self-calibrating<br />
• Automatically supports either 5V or 3.3V PCI bus<br />
• 47 Hz to 10 kHz Variations available<br />
• Encoder (A & B) plus Index Outputs with Programmable resolution-Optional<br />
• Synchro/Resolver Programmable-Optional (<strong>Measurement</strong> side S/D)<br />
• ON/OFF <strong>for</strong> D/S ch<strong>an</strong>nels<br />
• Tr<strong>an</strong>s<strong>for</strong>mer isolated<br />
• Accurate Digital Velocity outputs<br />
• Latch feature (read all ch<strong>an</strong>nels simult<strong>an</strong>eously)<br />
• Synthetic reference <strong>for</strong> S/D compensates <strong>for</strong> ±60° phase shift<br />
• No adjustments or trimming required<br />
• Part number, S/N, Date code, & Rev. in non-volatile memory<br />
47
SPECIFICATIONS<br />
Resolution 16 bit (Up to 24 bit <strong>for</strong> two-speed mode)<br />
Accuracy ±1 arc minute <strong>for</strong> single speed inputs (±1 arc minute divided by<br />
gear ratio <strong>for</strong> two-speed)<br />
Tracking Rate 18.5 RPS <strong>for</strong> 60 Hz version; 150 RPS <strong>for</strong> 360 Hz or greater<br />
versions. (Referred to the Fine input <strong>for</strong> two-speed configuration)<br />
B<strong><strong>an</strong>d</strong>width 10 Hz <strong>for</strong> 60 Hz versions; 40 Hz <strong>for</strong> 400 Hz versions, & 100 Hz<br />
<strong>for</strong> greater th<strong>an</strong> 1 kHz version. (also c<strong>an</strong> be factory customized)<br />
Input <strong>for</strong>mat Synchro or Resolver<br />
Input voltage Resolver : 2-28 V L-L Autor<strong>an</strong>ging, or 90 V L-L; Synchro : 11.8<br />
V L-L , or 90 V L-L Resolver <strong><strong>an</strong>d</strong> Synchro are tr<strong>an</strong>s<strong>for</strong>mer<br />
isolated<br />
Input Imped<strong>an</strong>ce 26 V L-L or less: 40 kΩ min. 90 V L-L: 100 kΩ min<br />
Reference/Input 2-115 Vrms, @ 5 mA max ; Tr<strong>an</strong>s<strong>for</strong>mer isolated.<br />
Frequency 47 Hz to 10 kHz<br />
Encoder outputs Either 12,13,14,15, or 16-bit resolution, (field programmable)<br />
with Index marker. 12-bit resolution is equivalent to 1,024 cycles<br />
(4,096 tr<strong>an</strong>sitions), 13-bit is 2,048 cycles (8,192 tr<strong>an</strong>sitions) etc.<br />
After the encoder resolution has been selected, (12-16 Bits), it<br />
will not ch<strong>an</strong>ge with varying input speeds. Differential outputs<br />
are complementary TTL (use TTL+ <strong><strong>an</strong>d</strong> dc gnd <strong>for</strong> short<br />
dist<strong>an</strong>ces or TTL(+) <strong><strong>an</strong>d</strong> (–) in the differential mode, into<br />
differential receivers <strong>for</strong> long dist<strong>an</strong>ce to avoid ground noise ).<br />
Optional, see P/N.<br />
Commutation outputs Equivalent to the A, B, C outputs from Hall Effect Sensors <strong>for</strong> 4,<br />
6 or 8 pole motors<br />
Phase shift The synthetic reference circuit automatically compensates <strong>for</strong><br />
phase shifts between the tr<strong>an</strong>sducer excitation <strong><strong>an</strong>d</strong> output up to<br />
±60°<br />
Velocity, Digital 16 bit resolution; Linearity: 0.1%<br />
Two-speed ratio Programmable from 2 to 255.<br />
Angle Ch<strong>an</strong>ge Alert<br />
Each ch<strong>an</strong>nel c<strong>an</strong> be set to a different <strong>an</strong>gle differential. When<br />
that differential is exceeded, <strong>an</strong> interrupt is generated. Default is<br />
disabled. Msb = 180°; Minimum differential is 0.05°. Max<br />
differential that c<strong>an</strong> be programmed is 179.9°.<br />
Table A.1: 76CS1 <strong>Measurement</strong> Ch<strong>an</strong>nel Specifications [7]<br />
48
SPECIFICATIONS<br />
Resolution 16 bits (.0055°)<br />
Accuracy 30 arc seconds (.008°) at 0.3 VA; ±1 arc minute (.017°) at 1.2<br />
VA. No load to full load<br />
Two-Speed ratio Programmable from 2 to 255<br />
Rotation Programmable Start <strong><strong>an</strong>d</strong> Stop <strong>an</strong>gles. 0 rps to ±13.5 rps with a<br />
resolution of 0.15°/sec. Stepping rate is 16 bits to 3.4 rps, then is<br />
automatically reduced to 14 bits up to 13.5 rps.<br />
Output <strong>for</strong>mat Synchro or Resolver, (See part number), tr<strong>an</strong>s<strong>for</strong>mer isolated<br />
Output voltage<br />
Output load<br />
Regulation<br />
Reference voltage<br />
Reference frequency<br />
Reference current<br />
Phase shift<br />
Settling time<br />
2-90 VL-L<br />
1.2 VA max./Ch<strong>an</strong>nel. Short circuit protected (5000Ω reactive at<br />
90 VL-L; Synchro, 90Ω reactive at 11.8 Synchro, 110 Ω reactive<br />
at 11.8 VL-L Resolver)<br />
5% max. No load to Full load<br />
2-26VAC, 115VAC (See part number), tr<strong>an</strong>s<strong>for</strong>mer isolated.<br />
47 Hz to 10 kHz (See part number). 47 Hz <strong>for</strong> use with external<br />
amplifiers<br />
1 ma max./Ch<strong>an</strong>nel<br />
5° max. between output <strong><strong>an</strong>d</strong> reference<br />
Less th<strong>an</strong> 100 microseconds<br />
Table A.2: 76CS1 Stimulus Ch<strong>an</strong>nel Specifications [7]<br />
49
Appendix B<br />
Component Listing<br />
The required components <strong>for</strong> all the hardware to be designed <strong>for</strong> this project is given<br />
below:<br />
B.1 Power Supply Unit (PSU)<br />
• 1 X 60V/1A centre tapped tr<strong>an</strong>s<strong>for</strong>mer<br />
• 2 X 10000µF smoothing capacitors<br />
• 1 X LM317 three terminal voltage regulator (+28V)<br />
• 1 X LM337 three terminal voltage regulator (-28V)<br />
• 2 X 1N4001 diodes (100V/1A minimum rating)<br />
B.2 3-bit DAC with gain stage amplifier<br />
• 4 X 2.2MΩ resistors<br />
• 2 X 1MΩ resistors<br />
• 1 X LM741 op-amp<br />
• 1 X 82kΩ resistor (feedback of op-amp)<br />
• 1 X 10kΩ resistor (inverting input of op-amp)<br />
B.3 PWM controller<br />
• 1 X LM324 14-pin quad op-amp<br />
• 4 X 10kΩ resistors<br />
50
• 2 X 1kΩ resistors<br />
• 1 X 20kΩ resistor<br />
• 1 X 22kΩ resistor<br />
• 1 X 47kΩ resistor<br />
• 2 X 100nF capacitors (de-coupling <strong><strong>an</strong>d</strong> feedback)<br />
• 1 X 100µF capacitor (de-coupling)<br />
• 1 X 10kΩ potentiometer (testing purposes only, replaced by DAC input)<br />
• 1 X 2N2222A NPN bipolar tr<strong>an</strong>sistor<br />
• 1 X 1N4001 diode<br />
51
Bibliography<br />
[1] T Davies. (2004) <strong>Elevation</strong> Over <strong>Azimuth</strong> Position <strong>Control</strong>ler<br />
[2] North Atl<strong>an</strong>tic Industries - J Gasking, R Agosti, D Dayton, A Freilich, W Gradner,<br />
F Haber, J Petry. (2005) Synchro <strong><strong>an</strong>d</strong> Resolver Conversion H<strong><strong>an</strong>d</strong>book<br />
[3] J. Gasking. (1992) Resolver-to-digital Conversion - A Simple <strong><strong>an</strong>d</strong> Cost Effective<br />
Alternative to Optical Shaft Encoders. Technical report, Analogue Devices, Massachusetts<br />
[4] R Bliss. (1992) Navy Electricity <strong><strong>an</strong>d</strong> Electronics Training Series.<br />
[5] ViaSat Satellite Ground <strong>System</strong>s. (2005) A Comparison of Tracking Pedestal Geometries.<br />
[6] N Moh<strong>an</strong>, T Undel<strong><strong>an</strong>d</strong>, W Robbins. (2003) Power Electronics-Converters, Applications<br />
<strong><strong>an</strong>d</strong> Design, Third Edition.<br />
[7] North Atl<strong>an</strong>tic Industries - Apex Signal Division. (2007) 76CS1 A001 Rev 5.2.<br />
[8] North Atl<strong>an</strong>tic Industries - Apex Signal Division. (2003) 76CS1 Quick-Start Software<br />
M<strong>an</strong>ual.<br />
[9] LAVA - LabVIEW Adv<strong>an</strong>ced Virtual Architects. [Online]. Available:<br />
http://<strong>for</strong>ums.lavag.org/home.html<br />
[10] J<strong>an</strong> Axelson. (1996) Parallel Port Complete; Programming, Interfacing <strong><strong>an</strong>d</strong> Using<br />
the PC’s Parallel Printer Port.<br />
[11] Jerry Seams, International Resistive Comp<strong>an</strong>y, Inc, Adv<strong>an</strong>ced Film Division. (1998)<br />
R/2R Ladder Networks.<br />
[12] PWM <strong>Control</strong> MkII, F<strong>an</strong> Noise Solutions. [Online]. Available:<br />
http://www.cpemma.co.uk/pwm_erg.html<br />
[13] Moog Components Group. (2004) Synchro <strong><strong>an</strong>d</strong> Resolver Engineering H<strong><strong>an</strong>d</strong>book.<br />
[14] D.I.T School of Electronics <strong><strong>an</strong>d</strong> Communications Engineering, Lecture<br />
Notes: Operational Amplifiers <strong><strong>an</strong>d</strong> Their Applications. [Online]. Available:<br />
http://www.electronics.dit.ie:80/staff/yp<strong>an</strong>arin/Lecture%20Notes/K235-<br />
1/5%20OpAmps%20Circuits.pdf<br />
52
[15] Orbit Technology Group AL-2717-1 EL/AZ Direct Drive High Dynamic Tracking<br />
Pedestal. [Online]. Available: http://www.orbit-tracking.com/content.aspxid=401<br />
[16] Orbit Technology Group, Antenna Tracking <strong>System</strong>s &<br />
Product Catalogue. [Online]. Available: http://www.orbittracking.com/objects/Tracking/pdf%5COrbitTrackingCatalog.pdf<br />
[17] Antenna Elevator system <strong>for</strong> Amateur Satellites. [Online]. Available:<br />
http://www.qsl.net/sv1bsx/actuator/actuator.html<br />
[18] Visual Basic - Wikipedia, the free encyclopedia. [Online]. Available:<br />
http://en.wikipedia.org/wiki/Visual_Basic<br />
[19] LabVIEW - Wikipedia, the free encyclopedia. [Online]. Available:<br />
http://en.wikipedia.org/wiki/LabVIEW<br />
53