How To Rebuild Your Small-Block Ford.pdf - Index of
How To Rebuild Your Small-Block Ford.pdf - Index of
How To Rebuild Your Small-Block Ford.pdf - Index of
Create successful ePaper yourself
Turn your PDF publications into a flip-book with our unique Google optimized e-Paper software.
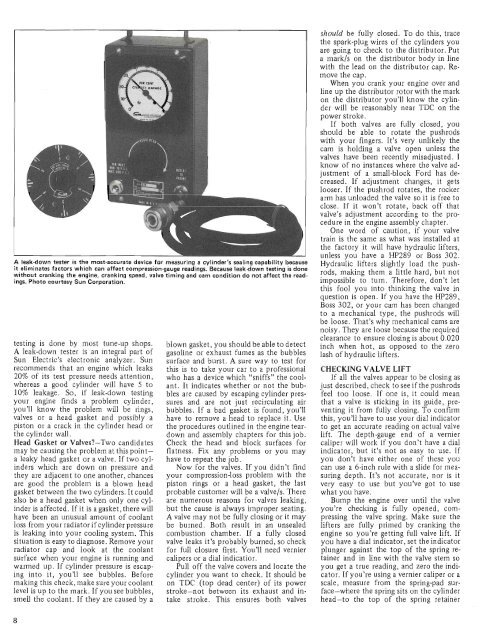
A leak-down tester is the most-accurate device for measuring a cylinder's sealing capability because<br />
it eliminates factors which can affect compression-gauge readings. Because leak-down testing is done<br />
without cranking the engine, cranking speed, valve timing and cam condition do not affect the readings.<br />
Photo courtesy Sun Corporation.<br />
testing is done by most tune-up shops.<br />
A leak-down tester is an integral part <strong>of</strong><br />
Sun Electric's electronic analyzer. Sun<br />
recommends that an engine which leaks<br />
20% <strong>of</strong> its test pressure needs attention,<br />
whereas a good cylinder will have 5 to<br />
10% leakage. So, if leak-down testing<br />
your engine finds a problem cylinder,<br />
you'll know the problem will be rings,<br />
valves or a head gasket and possibly a<br />
piston or a crack in the cylinder head or<br />
the cylinder wall.<br />
Head Gasket or Valves-Two candidates<br />
may be causing the problem at this pointa<br />
leaky head gasket or a valve. If two cylinders<br />
whlch are down on pressure and<br />
they are adjacent to one another, chances<br />
are good the problem is a blown head<br />
gasket between the two cylinders. It could<br />
also be a head gasket when only one cylinder<br />
is affected. If it is a gasket, there will<br />
have been an unusual amount <strong>of</strong>,coolant<br />
loss from your radiator if cylinder pressure<br />
is leaking into your cooling system. This<br />
situation is easy to diagnose. Remove your<br />
radiator cap and look at the coolant<br />
surface when your engine is running and<br />
warmed up. If cylinder pressure is escaping<br />
into it, you'll see bubbles. Before<br />
making this check, make sure your coolant<br />
level is up to the mark. If you see bubbles,<br />
smell the coolant. If they are caused by a<br />
blown gasket, you should be able to detect<br />
gasoline or exhaust fumes as the bubbles<br />
surface and burst. A sure way to test for<br />
this is to take your car to a pr<strong>of</strong>essional<br />
who has a device which "sniffs" the coolant.<br />
It indicates whether or not the bubbles<br />
are caused by escaping cylinder pressures<br />
and are not just recirculating air<br />
bubbles. If a bad gasket is found, you'll<br />
have to remove a head to replace it. Use<br />
the procedures outlined in the engine teardown<br />
and assembly chapters for this job.<br />
Check the head and block surfaces for<br />
flatness. Fix any problems or you may<br />
have to repeat the job.<br />
Now for the valves. If you didn't find<br />
your compression-loss problem with the<br />
piston rings or a head gasket, the last<br />
probable customer will be a valvels. There<br />
are numerous reasons for valves leaking,<br />
but the cause is always improper seating.<br />
A valve may not be fully closing or it may<br />
be burned. Both result in an unsealed<br />
combustion chamber. If a fully closed<br />
valve leaks it's probably burned, so check<br />
for full closure fi;st. You'll need vernier<br />
calipers or a dial indicatior.<br />
Pull <strong>of</strong>f the valve covers and locate the<br />
cylinder you want to check. It should be<br />
on TDC (top dead center) <strong>of</strong> its power<br />
stroke-not between its exhaust and intake<br />
stroke. This ensures both valves<br />
should be fully closed. <strong>To</strong> do this, trace<br />
the spark-plug wires <strong>of</strong> the cylinders you<br />
are going to check to the distributor. Put<br />
a mark/s on the distributor body in line<br />
with the lead on the distributor cap. Remove<br />
the cap.<br />
When you crank your engine over and<br />
line up the distributor rotor with the mark<br />
on the distributor you'll know the cylinder<br />
will be reasonably near TDC on the<br />
power stroke.<br />
If both valves are fully closed, you<br />
should be able to rotate the pushrods<br />
with your fingers. It's very unlikely the<br />
cam is holding a valve open unless the<br />
valves have been recently misadjusted. I<br />
know <strong>of</strong> no instances where the valve adjustment<br />
<strong>of</strong> a small-block <strong>Ford</strong> has decreased.<br />
If adjustment changes, it gets<br />
looser. If the pushrod rotates, the rocker<br />
arm has unloaded the valve so it is free to<br />
close. If it won't rotate, back <strong>of</strong>f that<br />
valve's adjustment according to the procedure<br />
in the engine assembly chapter.<br />
One word <strong>of</strong> caution, if your valve<br />
train is the same as what was installed at<br />
the factory it will have hydraulic lifters,<br />
unless you have a HP289 or Boss 302.<br />
Hydraulic lifters slightly load the pushrods,<br />
making them a little hard, but not<br />
impossible to turn. Therefore, don't let<br />
this fool you into thinking the valve in<br />
question is open. If you have the HP289,<br />
Boss 302, or your cam has been changed<br />
to a mechanical type, the pushrods will<br />
be loose. That's why mechanical cams are<br />
noisy. They are loose because the required<br />
clearance to ensure closing is about 0.020<br />
inch when hot, as opposed to the zero<br />
lash <strong>of</strong> hydraulic lifters.<br />
CHECKING VALVE LIFT<br />
If all the valves appear to be closing as<br />
just described, check to see if the pushrods<br />
feel too loose. If one is, it could mean<br />
that a valve is sticking in its guide, preventing<br />
it from fully closing. <strong>To</strong> confirm<br />
this, you'll have to use your dial indicator<br />
to get an accurate reading on actual valve<br />
lift. The depth-gauge end <strong>of</strong> a vernier<br />
caliper will work if you don't have a dial<br />
indicator, but it's not as easy to use. If<br />
you don't have either one <strong>of</strong> these you<br />
can use a 6-inch rule with a slide for measuring<br />
depth. It's not accurate, nor is it<br />
very easy to use but you've got to use<br />
what you have.<br />
Bump the engine over until the valve<br />
you're checking is fully opened, compressing<br />
the valve spring. Make sure the<br />
lifters are fully primed by cranking the<br />
engine so you're getting full valve lift. If<br />
you have a dial indicator, set the indicator<br />
plunger against the top <strong>of</strong> the spring retainer<br />
and in line with the valve stem so<br />
you get a true reading, and zero the indicator.<br />
If you're using a vernier caliper or a<br />
scale, measure from the spring-pad surface-where<br />
the spring sits on the cylinder<br />
head-to the top <strong>of</strong> the spring retainer


