OTR tyres product catalogue - Titan Distribution
OTR tyres product catalogue - Titan Distribution
OTR tyres product catalogue - Titan Distribution
Create successful ePaper yourself
Turn your PDF publications into a flip-book with our unique Google optimized e-Paper software.
800.USA.BEAR<br />
Safety Information<br />
Mounting Tires on <strong>Titan</strong> Assemblies<br />
5-Piece Rim Assemblies<br />
Tools Required: Rubber, lead, plastic or brasS:faced mallet;<br />
rubber lubricant, mounting machine to depress beads, if necessary<br />
and safety cage.<br />
The task of servicing tires and wheels can be extremely<br />
dangerous and should be performed by trained personnel<br />
only, using the correct tools and following specific procedures. If<br />
you have any doubt about the correct, safe method of performing<br />
any step in the demounting, mounting or inflating process<br />
STOP! Seek assistance from a qualified person.<br />
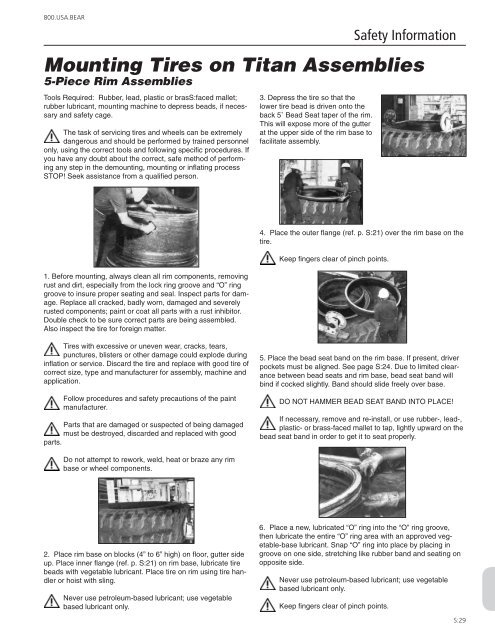
3. Depress the tire so that the<br />
lower tire bead is driven onto the<br />
back 5˚ Bead Seat taper of the rim.<br />
This will expose more of the gutter<br />
at the upper side of the rim base to<br />
facilitate assembly.<br />
1. Before mounting, always clean all rim components, removing<br />
rust and dirt, especially from the lock ring groove and “O” ring<br />
groove to insure proper seating and seal. Inspect parts for damage.<br />
Replace all cracked, badly worn, damaged and severely<br />
rusted components; paint or coat all parts with a rust inhibitor.<br />
Double check to be sure correct parts are being assembled.<br />
Also inspect the tire for foreign matter.<br />
4. Place the outer flange (ref. p. S:21) over the rim base on the<br />
tire.<br />
Keep fingers clear of pinch points.<br />
Tires with excessive or uneven wear, cracks, tears,<br />
punctures, blisters or other damage could explode during<br />
inflation or service. Discard the tire and replace with good tire of<br />
correct size, type and manufacturer for assembly, machine and<br />
application.<br />
Follow procedures and safety precautions of the paint<br />
manufacturer.<br />
Parts that are damaged or suspected of being damaged<br />
must be destroyed, discarded and replaced with good<br />
parts.<br />
5. Place the bead seat band on the rim base. If present, driver<br />
pockets must be aligned. See page S:24. Due to limited clearance<br />
between bead seats and rim base, bead seat band will<br />
bind if cocked slightly. Band should slide freely over base.<br />
DO NOT HAMMER BEAD SEAT BAND INTO PLACE!<br />
If necessary, remove and re-install, or use rubber-, lead-,<br />
plastic- or brass-faced mallet to tap, lightly upward on the<br />
bead seat band in order to get it to seat properly.<br />
Do not attempt to rework, weld, heat or braze any rim<br />
base or wheel components.<br />
2. Place rim base on blocks (4” to 6” high) on floor, gutter side<br />
up. Place inner flange (ref. p. S:21) on rim base, lubricate tire<br />
beads with vegetable lubricant. Place tire on rim using tire handler<br />
or hoist with sling.<br />
Never use petroleum-based lubricant; use vegetable<br />
based lubricant only.<br />
6. Place a new, lubricated “O” ring into the “O” ring groove,<br />
then lubricate the entire “O” ring area with an approved vegetable-base<br />
lubricant. Snap “O” ring into place by placing in<br />
groove on one side, stretching like rubber band and seating on<br />
opposite side.<br />
Never use petroleum-based lubricant; use vegetable<br />
based lubricant only.<br />
Keep fingers clear of pinch points.<br />
S:29


