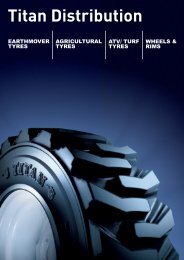
OTR tyres product catalogue - Titan Distribution
OTR tyres product catalogue - Titan Distribution
OTR tyres product catalogue - Titan Distribution

You also want an ePaper? Increase the reach of your titles
YUMPU automatically turns print PDFs into web optimized ePapers that Google loves.
800.USA.BEAR<br />
Safety Information<br />
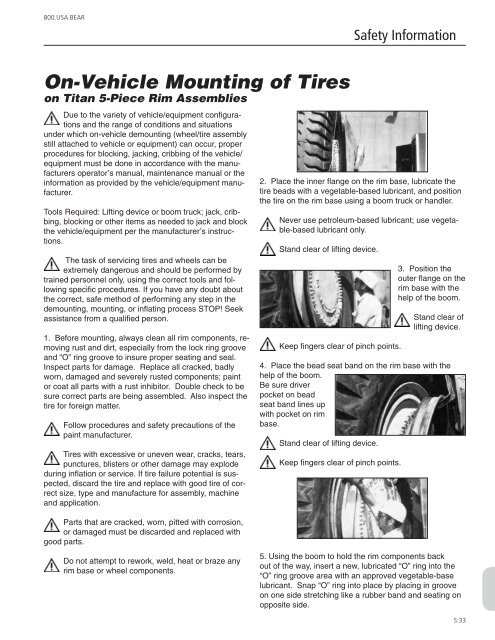
On-Vehicle Mounting of Tires<br />
on <strong>Titan</strong> 5-Piece Rim Assemblies<br />
Due to the variety of vehicle/equipment configurations<br />
and the range of conditions and situations<br />
under which on-vehicle demounting (wheel/tire assembly<br />
still attached to vehicle or equipment) can occur, proper<br />
procedures for blocking, jacking, cribbing of the vehicle/<br />
equipment must be done in accordance with the manufacturers<br />
operator’s manual, maintenance manual or the<br />
information as provided by the vehicle/equipment manufacturer.<br />
Tools Required: Lifting device or boom truck; jack, cribbing,<br />
blocking or other items as needed to jack and block<br />
the vehicle/equipment per the manufacturer’s instructions.<br />
The task of servicing tires and wheels can be<br />
extremely dangerous and should be performed by<br />
trained personnel only, using the correct tools and following<br />
specific procedures. If you have any doubt about<br />
the correct, safe method of performing any step in the<br />
demounting, mounting, or inflating process STOP! Seek<br />
assistance from a qualified person.<br />
1. Before mounting, always clean all rim components, removing<br />
rust and dirt, especially from the lock ring groove<br />
and “O” ring groove to insure proper seating and seal.<br />
Inspect parts for damage. Replace all cracked, badly<br />
worn, damaged and severely rusted components; paint<br />
or coat all parts with a rust inhibitor. Double check to be<br />
sure correct parts are being assembled. Also inspect the<br />
tire for foreign matter.<br />
Follow procedures and safety precautions of the<br />
paint manufacturer.<br />
Tires with excessive or uneven wear, cracks, tears,<br />
punctures, blisters or other damage may explode<br />
during inflation or service. If tire failure potential is suspected,<br />
discard the tire and replace with good tire of correct<br />
size, type and manufacture for assembly, machine<br />
and application.<br />
2. Place the inner flange on the rim base, lubricate the<br />
tire beads with a vegetable-based lubricant, and position<br />
the tire on the rim base using a boom truck or handler.<br />
Never use petroleum-based lubricant; use vegetable-based<br />
lubricant only.<br />
Stand clear of lifting device.<br />
Keep fingers clear of pinch points.<br />
3. Position the<br />
outer flange on the<br />
rim base with the<br />
help of the boom.<br />
Stand clear of<br />
lifting device.<br />
4. Place the bead seat band on the rim base with the<br />
help of the boom.<br />
Be sure driver<br />
pocket on bead<br />
seat band lines up<br />
with pocket on rim<br />
base.<br />
Stand clear of lifting device.<br />
Keep fingers clear of pinch points.<br />
Parts that are cracked, worn, pitted with corrosion,<br />
or damaged must be discarded and replaced with<br />
good parts.<br />
Do not attempt to rework, weld, heat or braze any<br />
rim base or wheel components.<br />
5. Using the boom to hold the rim components back<br />
out of the way, insert a new, lubricated “O” ring into the<br />
“O” ring groove area with an approved vegetable-base<br />
lubricant. Snap “O” ring into place by placing in groove<br />
on one side stretching like a rubber band and seating on<br />
opposite side.<br />
S:33