OTR tyres product catalogue - Titan Distribution
OTR tyres product catalogue - Titan Distribution
OTR tyres product catalogue - Titan Distribution

Create successful ePaper yourself
Turn your PDF publications into a flip-book with our unique Google optimized e-Paper software.
Safety Information<br />
www.titan-intl.com<br />
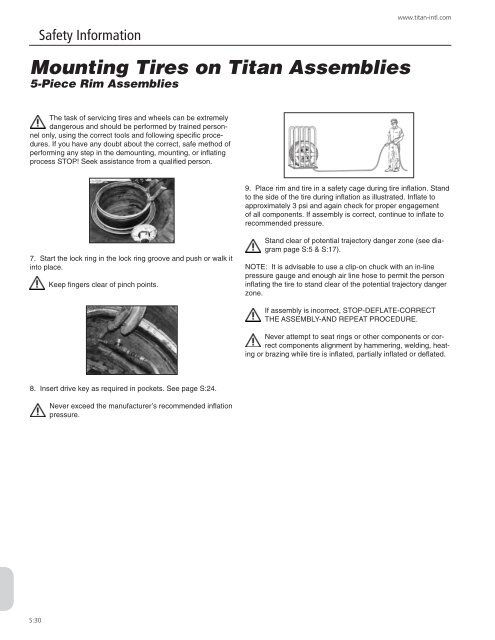
Mounting Tires on <strong>Titan</strong> Assemblies<br />
5-Piece Rim Assemblies<br />
The task of servicing tires and wheels can be extremely<br />
dangerous and should be performed by trained personnel<br />
only, using the correct tools and following specific procedures.<br />
If you have any doubt about the correct, safe method of<br />
performing any step in the demounting, mounting, or inflating<br />
process STOP! Seek assistance from a qualified person.<br />
9. Place rim and tire in a safety cage during tire inflation. Stand<br />
to the side of the tire during inflation as illustrated. Inflate to<br />
approximately 3 psi and again check for proper engagement<br />
of all components. If assembly is correct, continue to inflate to<br />
recommended pressure.<br />
7. Start the lock ring in the lock ring groove and push or walk it<br />
into place.<br />
Keep fingers clear of pinch points.<br />
Stand clear of potential trajectory danger zone (see diagram<br />
page S:5 & S:17).<br />
NOTE: It is advisable to use a clip-on chuck with an in-line<br />
pressure gauge and enough air line hose to permit the person<br />
inflating the tire to stand clear of the potential trajectory danger<br />
zone.<br />
If assembly is incorrect, STOP-DEFLATE-CORRECT<br />
THE ASSEMBLY-AND REPEAT PROCEDURE.<br />
Never attempt to seat rings or other components or correct<br />
components alignment by hammering, welding, heating<br />
or brazing while tire is inflated, partially inflated or deflated.<br />
8. Insert drive key as required in pockets. See page S:24.<br />
Never exceed the manufacturer’s recommended inflation<br />
pressure.<br />
S:30