

1 - A.O. Smith Water Heaters
1 - A.O. Smith Water Heaters
1 - A.O. Smith Water Heaters

Create successful ePaper yourself
Turn your PDF publications into a flip-book with our unique Google optimized e-Paper software.
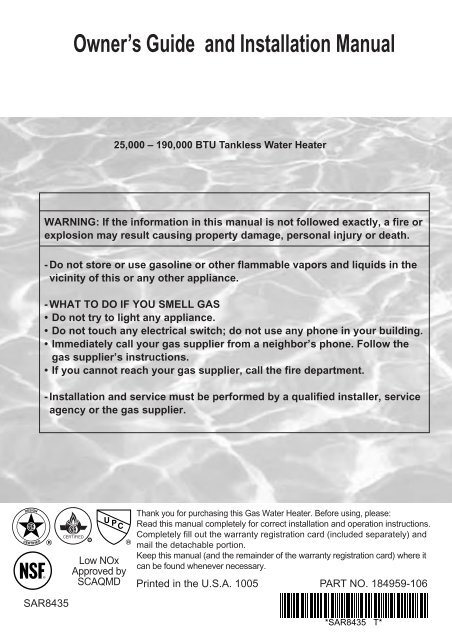
Owner’s Guide and Installation Manual<br />
25,000 – 190,000 BTU Tankless <strong>Water</strong> Heater<br />
WARNING: If the information in this manual is not followed exactly, a fire or<br />
explosion may result causing property damage, personal injury or death.<br />
- Do not store or use gasoline or other flammable vapors and liquids in the<br />
vicinity of this or any other appliance.<br />
- WHAT TO DO IF YOU SMELL GAS<br />
• Do not try to light any appliance.<br />
• Do not touch any electrical switch; do not use any phone in your building.<br />
•Immediately call your gas supplier from a neighbor’s phone. Follow the<br />
gas supplier’s instructions.<br />
• If you cannot reach your gas supplier, call the fire department.<br />
-Installation and service must be performed by a qualified installer, service<br />
agency or the gas supplier.<br />
SAR8435<br />
CERTIFIED<br />
R<br />
Low NOx<br />
Approved by<br />
SCAQMD<br />
Thank you for purchasing this Gas <strong>Water</strong> Heater. Before using, please:<br />
Read this manual completely for correct installation and operation instructions.<br />
Completely fill out the warranty registration card (included separately) and<br />
mail the detachable portion.<br />
Keep this manual (and the remainder of the warranty registration card) where it<br />
can be found whenever necessary.<br />
Printed in the U.S.A. 1005 PART NO. 184959-106<br />
*SAR8435 T*
Contents<br />
Contents ........................................................................................................ 2<br />
Owner's Guide<br />
Important Safety Information....................................................................... 3<br />
General Parts<br />
Main Unit.................................................................................................... 7<br />
Remote Controller .................................................................................... 8<br />
Initial Operation ........................................................................................... 10<br />
How to Use (Using the remote controller)<br />
Muting the Remote Controller ................................................................. 11<br />
Setting and Using the <strong>Water</strong> Heater........................................................ 12<br />
Flow Meter Alarm ...................................................................................... 14<br />
Preventing Damage from Freezing ............................................................ 16<br />
Regular Maintenance................................................................................... 18<br />
Troubleshooting .......................................................................................... 20<br />
Follow-up Service ........................................................................................ 24<br />
Specifications .............................................................................................. 25<br />
External outfitting ........................................................................................ 26<br />
Combustion unit and gas route.................................................................. 28<br />
Hot-water feed route .................................................................................... 30<br />
Electronic control unit................................................................................. 32<br />
Electronic control unit, Remote controller and Attached set .................. 33<br />
Installation Manual ...................................................................................... 34<br />
1. Included Accessories ............................................................................ 35<br />
2. Optional Accessories ............................................................................ 35<br />
3. Quick Connect Multi System Installaion ............................................. 36<br />
4. Before Installation ................................................................................. 37<br />
5. Choosing Installation Site .................................................................... 37<br />
6. Installation Clearances ......................................................................... 39<br />
7. Installation .............................................................................................. 42<br />
8. Vent Pipe Installation (Indoor Installation Only) ................................. 43<br />
9. Gas Piping .............................................................................................. 46<br />
10. <strong>Water</strong> Piping ........................................................................................... 48<br />
11. Plumbing Applications .......................................................................... 49<br />
12. Electrical Wiring .................................................................................... 50<br />
13. Maintenance ........................................................................................... 54<br />
14. Trial Operation ....................................................................................... 54<br />
15. Dimensions ............................................................................................ 56<br />
Remote Controller Installation Guide ....................................................... 59<br />
2
Important Safety Information-1<br />
To prevent damage to property and injury to the user, the icons shown below will be used to warn of<br />
varying levels of danger.<br />
Every indication is critical to the safe operation of the water heater and must be understood and<br />
observed.<br />
Potential dangers from accidents during installation and use are divided into the following three<br />
categories. Closely observe these warnings; they are critical to your safety.<br />
Icons warning of risk level<br />
Denotes content that may result in instantaneous fire, serious injury<br />
Danger and even death when ignored.<br />
Other icons<br />
Warning<br />
Caution<br />
Remarks<br />
Denotes content that may result in fire, serious injury and even<br />
death when ignored.<br />
Denotes content that may result in bodily injury and physical<br />
damage when ignored.<br />
The content following this icon is necessary to understand for safe<br />
and easy use of this water heater.<br />
Electric<br />
Shock.<br />
High<br />
Temperature.<br />
Be sure<br />
to do.<br />
Ground.<br />
Prohibited<br />
No flame.<br />
Don’t<br />
touch.<br />
Don’t<br />
disassemble<br />
the equipment.<br />
Don’t touch<br />
with a wet<br />
hand.<br />
Danger<br />
If you detect a gas leak:<br />
1. Do not try to light any appliance<br />
2. Do not touch any electrical switch;<br />
do not use any phone in your<br />
building.<br />
3. Immediately call your gas supplier<br />
from a neighbor’s phone. Follow<br />
the gas supplier’s instructions.<br />
4. If you cannot reach your gas<br />
supplier, call the fire department.<br />
Do not use the water heater if<br />
the exhaust pipe is displaced, has<br />
holes, or is corroded.<br />
If you detect abnormal combustion<br />
or abnormal odors, or during an<br />
earthquake, tornado or fire:<br />
1. Turn off the hot water supply<br />
2. Turn off the power to the water<br />
heater<br />
3. Turn off gas and water at the<br />
main<br />
4. Consult the nearest sales agent<br />
Warning<br />
Check the temperature<br />
of the running hot water<br />
before entering the<br />
shower.<br />
Check the temperature<br />
before stepping into<br />
the bath tub.<br />
(Continued)<br />
3
Important Safety Information-2<br />
(Continued)<br />
Do not turn off the water heater or<br />
change the water temperature while<br />
someone is bathing.<br />
Do not place combustibles such as<br />
laundry, newspapers, oils etc. near<br />
the heater or the exhaust vent<br />
terminal.<br />
Exhaust vent<br />
terminal (indoor<br />
installation)<br />
[When installing indoors]<br />
Check the air supply<br />
vent for dust or<br />
obstructions.<br />
Be sure the gas/power supplied<br />
matches the gas on the rating<br />
plate.<br />
Unit<br />
Do not use combustible chemicals<br />
such as oil, gasoline, benzene etc.<br />
in the vicinity of the heater or the<br />
exhaust vent terminal.<br />
Leave the proper clearance between<br />
the water heater and nearby objects<br />
(trees, timber, boxes with flammable<br />
materials etc.).<br />
Min. 3" from<br />
vent pipe<br />
Left side:<br />
Min. 2"<br />
Front:<br />
Sug. 24"*<br />
*<br />
Right side:<br />
Min. 2"<br />
Indicates suggested clearances for<br />
maintenance.<br />
Do not place or use a spray can<br />
near the heater or the exhaust vent<br />
terminal.<br />
Do not allow small children to play<br />
unsupervised in the bathroom.<br />
Do not allow small children to<br />
bathe unsupervised.<br />
Consult the nearest sales agent if<br />
the water heater location needs to<br />
be changed.<br />
Contact a qualified service<br />
technician for any necessary<br />
repairs, service or maintenance.<br />
Contact sales agent before using<br />
with a solar pre-heater.<br />
4
Caution<br />
Be sure to electrically ground the<br />
unit.<br />
Do not touch the exhaust vent pipe<br />
during or immediately after<br />
operation of the water heater.<br />
Do not touch the power cord with<br />
wet hands.<br />
Keep power cord free of dust.<br />
Do not use hair spray or spray<br />
detergent in the vicinity of the<br />
heater.<br />
Do not use a broken or modified<br />
power cord. Do not bind, bend or<br />
stretch power cords.<br />
Do not scratch, modify, or subject<br />
them to impact or force.<br />
Do not use the water heater for<br />
other than hot water supply,<br />
shower and bath.<br />
If this unit will be installed in a<br />
salon or other location where hair<br />
spray or aerosols will be used,<br />
locate the unit in a seperate area<br />
that is supplied with fresh air from<br />
outdoors.<br />
Do not install in locations where<br />
excessive dust or debris will be<br />
in the air.<br />
5
Important Safety Information-3<br />
Remark<br />
Do not drink water that has been inside the<br />
unit for an extended period of time. Do not<br />
drink the first use of hot water from the<br />
unit in the morning.<br />
This unit is only approved for installation<br />
up to 4500 ft. above sea level.<br />
For installations at higher elevations, contact sales<br />
agent for Instructions.<br />
Clean the filter on the water inlet as<br />
frequently as required by the quality of<br />
your local water.<br />
Keep the area around the unit clean.<br />
If boxes, weeds, cobwebs, cockroaches etc. are in<br />
the vicinity of the unit, damage or fire can result.<br />
Do not install the equipment where the<br />
exhaust will blow on walls or windows.<br />
Treat hard, acidic or otherwise impure<br />
supply water with approved methods to<br />
ensure full warranty coverage.<br />
Problems resulting from scale formation<br />
are not covered by the warranty.<br />
Check ignition during use and extinction<br />
after use.<br />
Do not run water through the unit when<br />
unit is not on.<br />
When discharging hot water, make sure the unit is<br />
ON.<br />
If water is run through the unit with the unit<br />
OFF, water may condense inside the unit and cause<br />
incomplete combustion or damage to the internal<br />
electrical components.<br />
For single-handle fixtures or valves, turn the fixture<br />
all the way to the hot side, and adjust the temperature<br />
from there.<br />
Do not disassemble the remote controller.<br />
Do not use benzene, oil or fat detergents<br />
to clean the remote controller.<br />
This may cause deformation.<br />
Do not get the remote controller wet.<br />
Although it is water resistant, too much water can<br />
cause damage.<br />
Do not splash water on the remote<br />
controller. Do not expose the remote<br />
controller to steam.<br />
Do not locate the remote controller near stoves or<br />
ovens, this may cause damage or failure.<br />
Preventing damage from freezing ( p.16)<br />
Damage can occur from frozen water within the<br />
device and pipes even in warm environments.<br />
Be sure to read below for appropriate measures.<br />
Repairs for damage caused by freezing are not<br />
covered by the warranty.<br />
Take necessary measures to prevent<br />
freezing of water and leakage of gas when<br />
leaving the unit unused for long periods of<br />
time. ( p.17)<br />
If it is snowing, check the air inlet, exhaust<br />
gas vent and exhaust vent terminal for<br />
blockage.<br />
Do not use parts other than those specified<br />
for this equipment.<br />
6
General Parts-1<br />
Main Unit<br />
Indoor/Outdoor Wall Mounted, Power Vented Model<br />
Flue Collar<br />
Front Cover<br />
Air Inlet<br />
<strong>Water</strong> Drain Valve (with <strong>Water</strong> Filter)<br />
(Inside <strong>Water</strong> Inlet) ( p.19)<br />
Pressure Relief Valve<br />
<strong>Water</strong> Supply Valve<br />
Gas Supply Valve<br />
* The above illustration shows an example of installation.<br />
The exact installation configuration may be slightly different.<br />
7
General Parts-2<br />
Remote Controller (9004223)<br />
Display<br />
Setting Buttons<br />
( next page) For setting the hot<br />
water temperature,<br />
the flow meter alarm,<br />
and other settings.<br />
Power On/Off Button<br />
For turning the<br />
heater on and off.<br />
Flow Meter Alarm Set Button<br />
For setting the flow<br />
meter alarm.<br />
( p.14 and 15)<br />
* Before use, remove the protective sheet from the remote controller surface.<br />
* The unit has been shipped from the factory with the remote control set at 110°F.<br />
8
General Parts-3<br />
Display<br />
The illustration below shows the remote controller display. What is actually displayed<br />
depends on how the water heater is set.<br />
Burner On Indicator<br />
Priority Indicator<br />
When this indicator<br />
is lit, the hot water<br />
temperature can be<br />
set. ( p.13)<br />
Temperature Setting<br />
(Ex.: 110°F)<br />
Flow Meter Setting<br />
The display will flash<br />
after hitting the flow<br />
meter alarm set button.<br />
( p.15)<br />
Error Code<br />
A number will flash if<br />
a failure occurs.<br />
( p.23)<br />
9
Initial Operation<br />
Before the first use of your water heater, make the following preparations.<br />
Follow steps 1 through 4.<br />
1<br />
Open<br />
the water supply valve.<br />
CLOSED<br />
OPEN<br />
2<br />
Open a hot water fixture to confirm that<br />
water is available, and then close the<br />
fixture again.<br />
Hot water fixture<br />
3<br />
Open<br />
the gas supply valve.<br />
4<br />
Turn on the power.<br />
10
How to Use (Using the remote controller)<br />
Muting the Remote Controller<br />
1<br />
The remote controller will emit a sound<br />
when any button is pushed. This sound<br />
can be muted if it is desired.<br />
* Initial factory setting is with sound<br />
1<br />
With<br />
the remote controller<br />
off, hold the Power On/Off<br />
Button for five seconds.<br />
Muted<br />
Sound<br />
No sound<br />
after 5 sec.<br />
Tone sounds<br />
after 5 sec.<br />
The flow meter alarm cannot be muted.<br />
11
How to Use (Using the remote controller)<br />
Setting and Using the <strong>Water</strong> Heater<br />
2<br />
(Starting with the Power Off)<br />
1 1<br />
Press the Power<br />
On/Off Button.<br />
On<br />
The temperature will be<br />
displayed on the remote<br />
control thermostat.<br />
On<br />
Previous set<br />
temperature<br />
(Ex.: 110°F)<br />
Caution<br />
High Temperature<br />
To prevent scalding:<br />
Temperatures above 125 °F can scald.<br />
• Check the water temperature by hand before bathing or<br />
showering.<br />
• When setting the unit to 125°F or higher, the<br />
temperature display will flash for 10 seconds as a high<br />
temperature warning.<br />
• Take caution when using the unit again after setting to<br />
125°F or higher. Always check the set temperature<br />
before use.<br />
Remote Controller Display<br />
Flashes for 10 sec<br />
• Do not allow anyone to change the water temperature<br />
while hot water is running.<br />
12
2<br />
Set temperature.<br />
3<br />
Turn on hot<br />
Turn off the hot<br />
temperature setting<br />
water.<br />
water.<br />
(<br />
Always check the<br />
)<br />
before use.<br />
4<br />
Hot<br />
Cold<br />
Check the indicator lights.<br />
On<br />
Off<br />
<strong>Water</strong> temperature<br />
The temperature settings below are examples. The temperature setting<br />
(°F:<br />
necessary depends on the usage, the length of piping and the time of year. )<br />
100 105 110 115 120 125 130 135 140 145 150 160 170 176<br />
Washing<br />
dishes, etc.<br />
Shower, hot water<br />
supply, etc.<br />
High temperature<br />
*Initial factory setting is 110°F<br />
If fixtures incorporate mixing<br />
valves, set the temperature<br />
higher than usual.<br />
* For most residential applications, the recommended setting temperature is 120°F or less.<br />
For applications that occasionally require a higher temperature setting, locate the remote controller<br />
in a convenient location ( p.59).<br />
* Consult local codes for minimum operating temperatures.<br />
13
How to Use (Using the remote controller)<br />
Flow Meter Alarm<br />
2,3<br />
1<br />
3<br />
Preparation<br />
1<br />
(Starting with the power off)<br />
Press the Power<br />
On/Off Button<br />
2Set temperature.<br />
(<br />
Always check<br />
temperature setting)<br />
before use.<br />
1. Plug the bath drain.<br />
On<br />
Hot<br />
Cold<br />
The temperature will be displayed<br />
on the remote control thermostat.<br />
On<br />
Check the indicator lights.<br />
Previous set temperature<br />
(example:110°F)<br />
<strong>Water</strong> temperature<br />
14
An alarm will sound for ten<br />
seconds when the flow<br />
reaches the set level.<br />
<strong>Water</strong> Temperature<br />
The temperatures settings below are only examples. The<br />
temperature setting necessary will depend on the usage,<br />
the length of piping and the time of year.<br />
(°F: )<br />
100 105 110 115 120<br />
Warm Warmer Hot<br />
The water will continue to run unless it is<br />
manually turned off. * Initial factory setting: 110°F<br />
To set the flow meter alarm:<br />
3<br />
Adjust<br />
flow meter<br />
alarm setting.<br />
4<br />
Turn<br />
on hot<br />
water.<br />
5<br />
Turn<br />
off the hot<br />
water when the<br />
alarm sounds.<br />
Press the flow meter alarm set button<br />
(the setting will flash on the display)<br />
and adjust with the setting buttons.<br />
The alarm will sound when<br />
the set level has been<br />
reached. Stop the water.<br />
Increase<br />
Decrease<br />
Choose the flow meter alarm setting<br />
from the following options: 10 - 60<br />
(In 5 gallon intervals), 70 - 100 (In<br />
10 gallon intervals), or 990 gallons.<br />
Note:<br />
The alarm will not sound if<br />
it is set for 990 gal.<br />
On<br />
Note:<br />
The alarm will not<br />
sound if it is set for<br />
990 gal.<br />
Off<br />
Flow meter setting will be flashing<br />
(ex. 45 gal.)<br />
* The level can only be adjusted<br />
while the indicator is flashing.<br />
* After ten seconds, the remote<br />
will again display the temperature.<br />
If the flow meter alarm is being used to indicate when a tub is full:<br />
• If any hot water is being used besides what is going into the tub, the alarm will sound before<br />
the tub is full.<br />
• If there was water in the tub before the fill began, or if the water is not shut off manually when<br />
the alarm sounds, the tub may overflow.<br />
• If there was water in the tub before the fill began, the temperature in the tub after it is full may<br />
be different from the temperature setting.<br />
15
Preventing Damage from Freezing-1<br />
Remarks<br />
* Damage can occur from frozen water within the device and pipes even<br />
in warm environments. Be sure to read below for appropriate measures.<br />
* Repairs for damage caused by freezing are not covered by the warranty.<br />
Freezing is prevented within the device automatically by the freeze-prevention heater<br />
Freezing cannot be prevented when the power plug is unplugged. Do not remove the power<br />
plug from the wall outlet.<br />
(Freezing will be prevented regardless of whether the operation switch is ON or OFF.)<br />
* The freeze prevention heaters will not prevent the plumbing external to the unit from freezing.<br />
Protect this plumbing with insulation, heat tape or electric heaters, solenoids, or pipe covers.<br />
If there remains a freezing danger, contact the nearest sales agent.<br />
Take the measures below for extremely cold temperatures*. <br />
(outside temperature including wind chill factor less than 5°F)<br />
Hot <strong>Water</strong> Fixture<br />
This method can protect not only to the heater, but also to the water supply,<br />
water piping and mixing valves.<br />
1. Turn off the power.<br />
2. Close the gas supply valve.<br />
.2" thick<br />
3. Open a hot water fixture, and keep a small stream of hot water<br />
running. (.1 gal./minute or about .2” thick).<br />
* If there is a mixing valve, set it to the highest level.<br />
* When linking multiple units, discharge water equivalent to<br />
.1 gal./minute per unit.<br />
4. The flow may become unstable from time to time. Check the flow<br />
30 minutes later.<br />
* In general, it is not advisable to run water through the unit when<br />
it is OFF (see p. 6), but in this case freeze prevention is more<br />
important.<br />
* Remember to set mixing valves and fixtures to their original levels before using the unit again<br />
to prevent scalding.<br />
* If there is still a chance that the unit will freeze, drain the unit as on the next page.<br />
If water will not flow because it is frozen<br />
1. Close the gas and water valves.<br />
2. Turn off the power button.<br />
3. Open the water supply valve from time to time to check whether water is running.<br />
4. When the water is flowing again, check for water leaks from the equipment and piping<br />
before using.<br />
16<br />
If the heater or the piping is frozen, do not use the heater or it may get damaged.
Preventing Damage from Freezing-2<br />
If the water heater will not be used for a long period of time,<br />
Drain the water.<br />
Drain the water as follows:<br />
Caution<br />
1. Close the gas valve.<br />
High Temperature<br />
Drain water into a bucket to prevent water damage.<br />
To avoid burns, wait until the equipment cools down<br />
before draining the water. The appliance will remain hot<br />
after it is turned off.<br />
2. (1) Turn the power on. <br />
(2) Turn and leave open the hot-water tap for more than 1 minute and close.<br />
* If multiple units are being used, drain one minute for each unit. Fixture<br />
* An 11 Error Code may appear on the remote controller.<br />
This is not a malfunction of the unit. Do not turn Power ON/OFF Button OFF.<br />
3. Close the water supply valve, disconnect<br />
the electrical power supplied to the unit.<br />
Do not touch with wet hands.<br />
4. Fully open all hot water fixtures.<br />
Fixture<br />
5. Open all drain plugs and drain the water out<br />
of the unit.<br />
6. When the water is completely drained, replace all drain<br />
plugs and close the hot water fixtures.<br />
Drain Plugs<br />
Turning the Unit Back On<br />
1. Check that all drain plugs are inserted.<br />
2. Check that all hot water fixtures are closed.<br />
3. Follow the procedure on p.10 “Initial operation”, steps 1 through 4.<br />
17
Regular Maintenance-1<br />
Periodic Inspection<br />
Caution<br />
High Temperature<br />
To avoid burns, wait until the equipment cools down<br />
before draining the water. The appliance will remain<br />
hot after it is turned off.<br />
Check<br />
For laundry, newspaper, timber,<br />
oil, spray cans and other<br />
combustible materials. ( p.4 )<br />
Check<br />
For dust and soot in<br />
the exhaust vent or<br />
exhaust vent terminal.<br />
Check<br />
For abnormal sounds<br />
during operation.<br />
Check<br />
For dust or debris in<br />
the air inlet.<br />
Check<br />
Check<br />
For abnormalities in<br />
external appearance,<br />
discoloration or flaws.<br />
For proper operation of<br />
pressure relief valve.<br />
Check<br />
For water leaks from the<br />
equipment and piping.<br />
Periodic Maintenance<br />
Equipment<br />
Wipe the outside surface with a wet cloth, then dry the surface. Use a neutral detergent to<br />
clean any stains.<br />
Remote Controller<br />
Wipe the surface with a wet cloth.<br />
• Do not use benzene, oil or fatty detergents to clean the remote controller;<br />
deformation may occur.<br />
• The remote controller is water resistant but not water proof. Keep it as dry as possible.<br />
18
Regular Maintenance-2<br />
Periodic Maintenance<br />
<strong>Water</strong> Drain Valve (with <strong>Water</strong> Filter)<br />
If the water drain valve (with water filter) is covered with debris, the hot water may not run<br />
smoothly, or the unit may put out cold water. Check and clean the filter as explained below.<br />
* To avoid burns, wait until the equipment cools down before draining the water.<br />
The appliance will remain hot after it is turned off.<br />
1. Close the water supply valve.<br />
2. Open all hot water fixtures.<br />
3. With a bucket ready, remove the inlet and outlet<br />
drain plugs (about 0.2 gal. will drain out)<br />
4. Take the water drain valve (with water filter) out<br />
of the inlet. (See illustration to right).<br />
5. Clean the water drain valve (with water filter) with<br />
a brush under running water.<br />
6. Replace the water drain valve (with water filter)<br />
and close the drain plugs.<br />
(Take care not to lose the packing.)<br />
7. Close all hot water fixtures.<br />
8. Open the water supply valve and check that<br />
water does not leak from the drain plugs or water<br />
drain valve (with water filter).<br />
Packing<br />
Drain Plug<br />
(with filter)<br />
<strong>Water</strong> Supply<br />
Valve<br />
Inlet<br />
Optional Maintenance<br />
<strong>Water</strong> Heater Service Valves<br />
Hot <strong>Water</strong><br />
Service Valve<br />
Pressure Relief Valve<br />
Cold <strong>Water</strong><br />
Service Valve<br />
* Isolator valve kits may be purchased as an<br />
accessory from sales agent (contact parts<br />
department for ordering information).<br />
They allow for full diagnostic testing and easy<br />
flushing of the system.<br />
*The kit includes two full port isolation valves<br />
and a pressure relief valve for the hot side.<br />
Contact sales agent for more information.<br />
Drain<br />
<strong>Water</strong> Outlet<br />
<strong>Water</strong> Intlet<br />
19
Troubleshooting-1<br />
Initial Operation<br />
Unit does not attempt to ignite<br />
when water is running.<br />
Unit attempts to ignite but fails<br />
• Is water running?<br />
• Check for reversed plumbing or crossed pipes.<br />
•Check the water drain valve filter. ( p.19 )<br />
• Reset unit and try again. There may be air in the gas line.<br />
• Have a professional check the gas supply pressure.<br />
Temperature<br />
20<br />
Hot water is not available<br />
when a fixture is opened.<br />
No water is available when<br />
a fixture is opened.<br />
The hot water is not the correct<br />
temperature.<br />
<strong>Water</strong> takes time to become hot<br />
when turning the hot water fixture.<br />
The water is too hot.<br />
The water is not hot enough.<br />
• Are the gas and water supply valves fully open?<br />
• Is the water supply cut off?<br />
• Is the hot water fixture sufficiently open?<br />
• Is the gas being cut off by the gas meter?<br />
(Can other gas devices such as stoves be used?)<br />
• (For LP) Is there enough gas in the tank?<br />
(Can other gas devices such as stoves be used?)<br />
• Is the water drain valve filter clogged? ( p.19)<br />
• Is the power button turned on?<br />
• Is the water supply cut off?<br />
• Is the heater frozen?<br />
• Is the hot water fixture sufficiently open?<br />
• Have you allowed enough time for the cold water in the<br />
pipes to drain out?<br />
• Are the gas and water supply valves fully open?<br />
• (Using the remote controller) Is the water temperature<br />
setting appropriate? ( p.12 and p.13)<br />
• If the water supply temperature is high, it is possible<br />
for the temperature to be higher than the temperature<br />
set on the remote controller.<br />
• If only a small amount of hot water is demanded, it is<br />
possible for the temperature to be higher than the<br />
temperature set on the remote controller.<br />
•Are the gas and water supply valves fully open?<br />
•(Using the remote controller) Is the water temperature<br />
setting appropriate? ( p.12 and p.13)<br />
• If the amount of hot water required is very high, it is<br />
possible for the temperature to be lower than the temperature<br />
set on the remote controller.<br />
Decrease the amount of hot water passing through the unit<br />
and the temperature should stabilize.
Troubleshooting-2<br />
Temperature<br />
The water is cold when only a<br />
single fixture is open.<br />
Fluctuations in hot water<br />
temperatures.<br />
• The unit will not heat the water if the flow rate is less than<br />
0.5 gallons per minute.<br />
Open the fixture more or open other fixtures so that a greater<br />
flow passes through the unit, and the unit should begin<br />
heating again.<br />
• Set water temperature at 115°F to 120°F. This will allow you<br />
to use a higher flow of hot water thus meeting the minimum<br />
flow requirement of 0.5 gpm.<br />
• Clean the water filter of any debris ( p.19)<br />
Amount of Hot <strong>Water</strong><br />
The amount of hot water at a<br />
certain fixture is not constant.<br />
• When hot water is demanded at other fixtures, the<br />
amount available may be reduced. The maximum flow<br />
available from this unit is 6.9 GPM at a 45°F temp. rise.<br />
• Pressure fluctuations and other plumbing conditions can<br />
cause the temperature and pressure at a fixture to be<br />
unstable, but it should stabilize after a short time.<br />
• There are some types of hot water taps that discharges large<br />
volumes of hot water at first but stabilize after time.<br />
• To keep the temperature stable, the heater limits the<br />
amount of water that can flow through it to a small<br />
amount initially, but the amount increases over time.<br />
The amount of hot water in the tub<br />
is less/more than the set amount.<br />
• When hot water is used for other fixtures while filling the<br />
bath tub, the tub will not fill as much.<br />
• If there is water in the tub already, or when filling is stopped<br />
and restarted, the tub will fill more.<br />
The flow meter alarm does not<br />
sound even when filled to the set<br />
amount.<br />
• The flow meter alarm is set to sound when hot water<br />
is continuously discharged for the set volume of water.<br />
If mixing valves are used, or if cold water is mixed with hot<br />
water at the fixture, the tub will fill more than the setting<br />
of the flow meter alarm.<br />
Amount of hot water available<br />
has decreased over time.<br />
• Is the water filter clogged? (<br />
p.19)<br />
21
Troubleshooting-3<br />
Remote Controller<br />
The light on the power button<br />
does not come on.<br />
The water temperature changes<br />
after a power failure or when the<br />
power is disconnected.<br />
• Has there been a power failure?<br />
• Is the power connected properly?<br />
• The temperature setting and the flow meter alarm setting<br />
may both need to be reset after a power outage.<br />
Sounds<br />
The fan can be heard after<br />
operation is stopped.<br />
A motor can be heard when turning<br />
the unit ON or OFF, when opening<br />
or closing a fixture, or after the unit<br />
has been running for a while.<br />
• These noises indicate the proper operation of devices<br />
which are designed to let the unit reignite more quickly,<br />
and ensure the water temperature is stable.<br />
Other<br />
The Heater stops burning during<br />
operation.<br />
White smoke comes out of the<br />
exhaust vent on a cold day.<br />
The hot water is turbid.<br />
The water appears blue<br />
The bath tub/wash-basin has turned<br />
blue<br />
• Are the gas and water supply valves fully open?<br />
• Is the water supply cut off?<br />
• Is the hot water fixture sufficiently open?<br />
• Is the gas being cut off by the gas meter?<br />
(Can other gas devices such as stoves be used?)<br />
• (For LP) Is there enough gas in the tank?<br />
(Can other gas devices such as stoves be used?)<br />
• This is normal. The white smoke is actually steam.<br />
• This is harmless. Small bubbles appear as the air in the<br />
water is heated and depressurized rapidly to<br />
atmospheric pressure.<br />
• Coloration to a blue color may be noticed from small<br />
traces of copper ion contained in the water and fat<br />
(furring). However, there are not problems concerning<br />
health. Coloration of the bath tub/wash-basin can be<br />
prevented by cleaning frequently.<br />
22
Troubleshooting-4<br />
Check for an Error Code or Flashing Light on the Unit<br />
åÃè·ï\éÇ<br />
Ç®í≤Ç◊Ç≠ÇæÇ≥Ç¢<br />
[Error displays on the remote controller]<br />
If there is a problem with the unit, a numerical error code will flash on the remote controller.<br />
If this occurs, take appropriate measures as listed below.<br />
Flashing<br />
When an error code appears, the display and the operation light will flash<br />
together.<br />
Error Code Cause Action<br />
Remote Controller<br />
Ignition error<br />
Abnormal combustion,<br />
low gas supply pressure<br />
Abnormal combustion<br />
Check whether the gas valve is open. Press the power<br />
button to turn the unit off, open a hot water fixture,<br />
and turn the unit back on. If the flashing number<br />
doesn't return the problem is solved.<br />
Have a professional check the gas supply pressure.<br />
Contact the nearest sales agent.<br />
Contact the nearest sales agent.<br />
Contact our sales agent if:<br />
• Any other error code appears.<br />
• An error code is indicated again after the above actions were followed.<br />
• There are any other questions.<br />
23
Follow-up Service<br />
Requesting Service<br />
First follow the instructions in the troubleshooting section (p.20 to p.23).<br />
If the error is not corrected, contact our sales agent.<br />
We will need to know:<br />
The Model ................ (check the rating plate)<br />
*See p.4 for the location of the label<br />
Date of purchase ..... (see the warranty)<br />
Details of problem ... (flashing error codes,<br />
etc., in much detail as possible)<br />
Your name, address, and telephone number<br />
Desired date of visit<br />
*A request for service may be rejected if the water heater is installed<br />
in a location where working on the unit may be dangerous. Contact a<br />
plumber.<br />
Warranty<br />
A warranty registration card is included separately.<br />
Be sure that the plumber, date of purchase and other necessary items are filled in.<br />
Read the content carefully, and keep the warranty card in a safe place.<br />
For repairs after the warranty period, there will be a charge on any service, and service will only<br />
be performed if the unit is deemed repairable.<br />
Period of Time for Stocking Repair Parts<br />
The manufacturer will stock repair and maintenance parts for this unit for a minimum of seven<br />
years after production has ceased.<br />
Reinstallation<br />
If you want to reinstall the appliance at a different location, confirm that the gas and power<br />
supply indicated on the rating plate are available at the new location. If you are not sure,<br />
consult the local utility company.<br />
If you move to a region that uses a different type of gas, conversion and adjustment of the<br />
appliance will be necessary. This work must be performed by a certified service agent and will<br />
be charged for even during the warranty period.<br />
24
Specifications<br />
•Specifications may be changed without prior notice.<br />
• The capacity may differ slightly, depending on the water<br />
pressure, water supply, piping conditions, and water temperature.<br />
Specifications<br />
Item<br />
Type<br />
Ignition<br />
Operating Pressure<br />
Minimum Flow Rate<br />
Dimensions<br />
Weight<br />
<strong>Water</strong> Holding Capacity<br />
Connection Sizes<br />
Power Supply<br />
Materials<br />
Safety Devices<br />
Accessories<br />
Installation<br />
Air Supply/Exhaust<br />
<strong>Water</strong> Inlet<br />
Hot <strong>Water</strong> Outlet<br />
Gas Inlet<br />
Supply<br />
Consumption<br />
Casing<br />
Flue Collar<br />
Heat Exchanger<br />
Specification<br />
Indoor/ Outdoor, Wall Hanging<br />
Power Vented<br />
Direct Ignition<br />
15-150 PSI<br />
0.5 GPM<br />
23.6"(Height) x 13.8"(Width) x 9.4"(Depth)<br />
46 lbs.<br />
0.2 Gallon<br />
3/4"<br />
3/4"<br />
3/4"<br />
120 VAC (60Hz)<br />
NG : 75W LP : 75W<br />
Freeze Prevention 125W<br />
Zincified Steel Plate/Polyester Coating<br />
Stainless Steel<br />
Copper Sheeting, Copper Tubing<br />
Flame Rod, Thermal Fuse, Lightning Protection<br />
Device (ZNR), Electric Leakage Prevention Device<br />
(GFCI), Overheat Prevention Device, Freezing<br />
Prevention Device, Fan Rotation Detector<br />
9004223 Remote Controller, Remote Controller Cord,<br />
Anchoring Screws<br />
Performance<br />
Item<br />
Gas Consumption<br />
Maximum Hot <strong>Water</strong> Capacity<br />
Capacity Range<br />
Temperature Settings<br />
Default Temperature Options<br />
Maximum Performance NG : 190,000 btuh, LP : 190,000 btuh<br />
Minimum Performance NG : 25,000 btuh, LP : 25,000 btuh<br />
45°F Rise 6.9 Gal./min.<br />
0.5-7.9 Gal./min.<br />
100-150°F (In 5°F intervals), 160, 170, 176°F<br />
(14 Options)<br />
120, 130, 140, 176°F (Original is 120°F)<br />
25
External outfitting<br />
072<br />
072<br />
011<br />
007<br />
012<br />
014<br />
013<br />
037<br />
001<br />
015<br />
002<br />
074<br />
034<br />
071<br />
016<br />
004<br />
035<br />
075<br />
020<br />
010<br />
003<br />
005<br />
015<br />
002<br />
26
External outfitting<br />
Part Nos. Part Names Order Nos. Q'ty/unit<br />
001 AOS Front SET-AS SKB7069 1<br />
STA Front SET-AS SKB7071 1<br />
002 Front packing 1 EAA EAAL002 2<br />
003 Caution label 1 EHU EHUK018 1<br />
004 Caution label 2 EAU EAUK004 1<br />
005 Connection diagram label for AOS EHV EHVK003 1<br />
007 Case for AOS EHU EHUA042 1<br />
010 Grommet CXP CXPA026 1<br />
011 Case top cover 2 for AOS EHV EHVA008 1<br />
012 Case top cover for AOS EHV EHVA007 1<br />
013 Case top packing EHU EHUL001 1<br />
014 Exhaust sylinder packing EDL EDLL002 1<br />
015 Front packing L AAP AAPL017 2<br />
016 Lamp seal plate DEC DECK008 1<br />
020 Wiring coupling BXK BXKA022 1<br />
034 Junction box set EHU EHUA008 1<br />
035 Junction box packing EHU EHUL002 1<br />
037 Air themistor-300 BWC BWCH003 1<br />
071 Cross recessed truss type3 EVERTIGHT tapping screw with PW 4X12<br />
072 Cross & straight recessed truss type3 S TIGHT tapping screw 4X10<br />
074 Cross recessed round-head collar N-tapping screw 4X8<br />
075 Cross recessed round-head collar type3 EVERTIGHT tapping screw 4X14<br />
27
Combustion unit and gas route<br />
162<br />
125<br />
110<br />
100<br />
101<br />
127<br />
126<br />
127<br />
074<br />
107<br />
165<br />
128<br />
106<br />
103<br />
104<br />
169<br />
167<br />
105<br />
102<br />
074<br />
167<br />
132<br />
074<br />
074<br />
133<br />
145<br />
115<br />
116<br />
163<br />
117<br />
166<br />
134<br />
111<br />
112<br />
138<br />
168<br />
134<br />
074<br />
074<br />
166 140<br />
168<br />
164<br />
118<br />
113<br />
074<br />
114<br />
28
Combustion unit and gas route<br />
Part Nos. Part Names Order Nos. Q'ty/unit<br />
100 Combustion tube set EHU-A SET-V SKA7365 1<br />
101 Suction air joint packing DTJ DTJL001 1<br />
102 Ignition plug CZL & packing DLK SET-V SBC7684 1<br />
103 Flame rod & packing DLK SET-V SBC7685 1<br />
104 Plug packing (for B) DLK SAB2715 1<br />
105 Plug mounting plate (for B) DLK DLKC029 1<br />
106 Burner sensor Q & packing DWD SET-V SBF7103 1<br />
107 Burner sensor packing DWD DWDL005 1<br />
110 Main damper11 DTJ DTJC041 1<br />
111 Fan packing Q DTJ DTJL004 1<br />
112 Fan flange DTJ DTJF035 1<br />
113 Fan motor EHU-A EHUF031 1<br />
114 Bell-mouth 40 DTJ DTJF043 1<br />
115 Mounting plate for igniter DTJ DTJA015 1<br />
116 Igniter CRP CRPJ002 1<br />
117 High-voltage cord L350 ALS ALSJ079 1<br />
118 Conduit guard packing DTJ DTJL010 1<br />
125 Manifold16 EHU SET-AS SKA7408 1<br />
Manifold24 EHU SET-AS SKA7409 1<br />
126 Manifold seal packing top DTJ DTJL005 1<br />
127 Manifold seal packing side DTJ DTJL007 2<br />
128 Manifold seal packing bottom DTJ DTJL006 1<br />
132 Gas mech. S16D EDN SET-V SBE7833 1<br />
133 O-ring P18 2110903 2<br />
134 O-ring P28 1648306 2<br />
138 Gas coupling EHU EHUE011 1<br />
140 Gas fitting 20A set EHU EHUE021 1<br />
145 Conduit R10 EHU EHUJ004 1<br />
162 Cross recessed round-head N-tapping screw 4X8<br />
163 Cross recessed round-head collar N-tapping screw 4X12<br />
164 Cross recessed truss machine screw with PW M4X12<br />
165 Cross recessed round-head type3 EVERTIGHT tapping screw 5X16<br />
166 Cross recessed hexagon head machine screw M4X8<br />
167 Cross recessed round-head collar N-tapping screw 4X10<br />
168 Cross recessed round-head machine screw M5X12<br />
169 Cross recessed round-head SPAKmachine screw with guide M4X14<br />
29
Hot-water feed route<br />
400<br />
401<br />
402<br />
423<br />
407<br />
402<br />
402<br />
074<br />
404<br />
409<br />
402<br />
162<br />
403<br />
425<br />
446<br />
465<br />
429<br />
427<br />
445<br />
464<br />
444<br />
442<br />
432<br />
426<br />
416<br />
419<br />
444<br />
443<br />
461<br />
419<br />
431<br />
418<br />
419<br />
417<br />
429<br />
415<br />
419<br />
416<br />
418<br />
435<br />
462<br />
410<br />
417<br />
448<br />
452<br />
451<br />
430<br />
415<br />
418<br />
436<br />
466<br />
437<br />
438<br />
467<br />
462<br />
410<br />
467<br />
(Thermal fuse rounding procedure)<br />
(Left side view)<br />
(Front side view)<br />
(Right side view)<br />
(Rear side view)<br />
401 Thermal fuse fastener<br />
402 Thermal fuse fastener<br />
402 Thermal fuse fastener<br />
402 Thermal fuse fastener<br />
407 Freeze preventive heater Heater fastener<br />
409<br />
Thermal fuse<br />
403<br />
30
Hot-water feed route<br />
Part Nos. Part Names Order Nos. Q'ty/unit<br />
400 Heat exchanger & Exhaust box EHU-A SET-AS SKB7072 1<br />
401 Thermal fuse fastener CZL CZLH005 1<br />
402 Thermal fuse fastener DTJ DTJH002 5<br />
403 Thermal fuse Q DTJ SET-V SBC7703 1<br />
404 Remaining flame safety device 96 EHU EHUH001 1<br />
407 Freeze preventive heater CRP SET-V SAQ7745 1<br />
409 Heater fastener EHK EHKH001 1<br />
410 Freeze preventive heater 3 BGD BGDH002 2<br />
415 Quick fastener 13-22 SAD6537 2<br />
416 Quick fastener 16-25 SAD6593 2<br />
417 Quick fastener 16A 6340300 2<br />
418 O-ring P12.5C 3359808 3<br />
419 O-ring P16C 3223302 4<br />
423 Thermostat BVU BVUH002 1<br />
425 <strong>Water</strong> flow sensor set 3 DUV DUVD019 1<br />
426 <strong>Water</strong> outlet magnetic sensor BWC BWCD090 1<br />
427 <strong>Water</strong> inlet thermistor -300 BWC BWCD097 1<br />
429 Thermistor holding plate ALS ALSD088 2<br />
430 Bypass pipe EHU EHUD005 1<br />
431 <strong>Water</strong> valve set EHU EHUD007 1<br />
432 Conduit 23 EHU EHUJ006 1<br />
435 <strong>Water</strong> inlet fitting 20A set EHU EHUD001 1<br />
436 <strong>Water</strong> filter DTJ DTJD006 1<br />
437 O-ring P16D FN7032 BRQL008 1<br />
438 <strong>Water</strong> filter (SUS) EGB EGBD032 1<br />
442 <strong>Water</strong> flow servo set 2 DZT DZTD011 1<br />
443 Heat exchanger thermister -300 BWC BWCD098 1<br />
444 O-ring P4C 1323709 2<br />
445 <strong>Water</strong>proof cover CZL CZLD041 1<br />
446 Conduit 86 DZT DZTJ008 1<br />
448 Hot-water outlet fitting 20A EHU EHUD004 1<br />
451 Drain cock CRU CRUD003 1<br />
452 Hot-water resistant O-ring P3 SAD6633 1<br />
461 Cross recessed round-head P TIGHT screw 4X14<br />
462 Cross & straight recessed truss type3 S TIGHT tapping screw 4X6<br />
464 Cross recessed truss P TIGHT screw 4X10<br />
465 Cross recessed round-head P TIGHT screw 4X14<br />
466 Cross recessed round-head machine screw M4X8<br />
467 Cross&straight recessed round-head collar type3 EVERTIGHT tapping screw 4X12<br />
31
Electronic control unit<br />
714<br />
704<br />
706<br />
716<br />
074<br />
708<br />
712<br />
074<br />
732<br />
707<br />
163<br />
731 731 074<br />
074<br />
711<br />
074<br />
703<br />
700<br />
163<br />
074<br />
705<br />
163<br />
Remote controller<br />
kitchen remote controller<br />
(9004223)<br />
751 753<br />
752<br />
754<br />
755<br />
Attached set<br />
801<br />
802<br />
<br />
Special part Special part no.<br />
Installation manual 888<br />
32
Electronic control unit, Remote controller and Attached set<br />
Part Nos. Part Names Order Nos. Q'ty/unit<br />
700 Relay case EHU-C SET-AS SHA7841 1<br />
703 Mounting plate for relay case EHU EHUA007 1<br />
704 Relay case cover EHU EHUA013 1<br />
705 Harness EHU EHUJ002 1<br />
706 Lamp cable conduit CRP CRPJ014 1<br />
707 Current leakage safety device DTJ DTJJ015 1<br />
708 Mounting plate for terminal block DZT DZTA006 1<br />
711 Transformer EDN EDNJ006 1<br />
712 Transformer cover DJP DJPA054 1<br />
714 Nylon clamp HP-4N (NK-4N) 7287909 1<br />
716 Terminal block CRP CRPJ017 1<br />
731 Cross recessed bind machine screw M3.5X6<br />
732 Cross recessed round-head N-tapping screw 4X12<br />
751 9004223 body AOS QME QMEJ006 1<br />
752 Dressed frame body QHU QHUA013 1<br />
753 Wall packing QHU QHUA115 1<br />
754 Oar plug 6X25<br />
755 Cross recessed round wood screw 4.1X25<br />
800 AOS packing SET V SBP7789 1<br />
STA packing SET V SBP7791 1<br />
801 Cross recessed round-head type 1 tapping screw 5X35<br />
802 Remote controller cord S set EAU (See P.35) 1<br />
888 Installation manual AOS (See P.35) 1<br />
33
Installation Manual<br />
GAS WATER HEATER<br />
WARNING: If the information in this manual is not followed exactly, a fire or explosion may result<br />
causing property damage, personal injury or death.<br />
Potential dangers from accidents during installation and use are divided into the following three<br />
categories. Closely observe these warnings, they are critical to your safety.<br />
Danger<br />
Warning<br />
Caution<br />
Danger of serious injury or even death as well as danger of fire when the<br />
product is misused by ignoring this symbol.<br />
Possibility of serious injury or even death as well as possibility of fire when<br />
the product is misused by ignoring this symbol.<br />
Possibility of bodily injury or damage to property when the product is<br />
misused by ignoring this symbol.<br />
Prohibited<br />
Disconnect<br />
Power<br />
Requests to Installers<br />
Caution<br />
Ground<br />
Be sure to do<br />
• In order to use the water heater safely, read this installation manual carefully,<br />
and follow the installation instructions.<br />
• Failures and damage caused by erroneous work or work not as instructed in this manual are not<br />
covered by the warranty.<br />
• Check that the installation was done properly in accordance with this Installation Manual upon<br />
completion.<br />
• After completion of installation, be sure to hand the Operation Manual (with warranty) to the<br />
customer upon filling in all of the required items.<br />
Installation must conform with local codes, or in the absence of local codes, the National Fuel Gas<br />
Code, ANSI Z223.1/NFPA 54.<br />
34
1. Included Accessories<br />
The following accessories are included with the unit.<br />
Check for any missing items before starting installation.<br />
Part Shape Q’ty<br />
Part<br />
Shape<br />
Tapping Screw 5<br />
184959-106<br />
Installation Manual<br />
1<br />
(this document)<br />
Q’ty<br />
9004223<br />
Remote Controller<br />
(See p. 51)<br />
1<br />
9005712<br />
Remote Controller<br />
Cord (10')<br />
1<br />
2. Optional Accessories<br />
The accessories listed below are not<br />
included with the units, but may be necessary<br />
for installation.<br />
Part Shape Q’ty<br />
Part<br />
Shape<br />
Q’ty<br />
9004226<br />
Outdoor Vent Cap<br />
1<br />
9005696<br />
Ouick Connect Cord<br />
1<br />
9005711<br />
Outdoor Remote<br />
Control<br />
Junction Box<br />
1<br />
9005694<br />
Remote Controller<br />
Cord (26')<br />
1<br />
IK-WV-1<br />
Isolator Valves<br />
(includes pressure<br />
relief valve)<br />
1<br />
9004304<br />
Pipe Cover<br />
1<br />
35
3. Quick Connect Multi System Installation<br />
• The Quick Connect Multi System allows the installation of two units together utilizing only the Quick<br />
Connect Cord.<br />
The Quick Connect Cord is 6 ft. long. Install the units 2-18" apart from each other to ensure the<br />
cord will be able to reach between the units. (See Typical Plumbing diagram).<br />
(If the distance between the two units is too great, not only will the cord not be able to reach,<br />
but the water temperature may also become unstable because of the difference in pipe length<br />
between the two units).<br />
System Diagram<br />
* When connecting two units, use only a<br />
single remote controller.<br />
Quick Connect<br />
Cord<br />
Cord<br />
Connector<br />
Cord<br />
Connector<br />
Terminal Block<br />
Remote Controller<br />
Note: Connect the remote<br />
controller to only one<br />
of the units.<br />
Remote Controller Cord<br />
Gas Supply Piping<br />
G<br />
Cold <strong>Water</strong> Supply<br />
Hot <strong>Water</strong><br />
Typical Plumbing<br />
Distance at center: 16-32 in.<br />
Distance on sides<br />
2-18 in.<br />
Union<br />
Union<br />
Quick Connect<br />
cord<br />
Make this distance as short as possible.<br />
* The hot water temperature will<br />
become unstable as the pipe<br />
length increases.<br />
Pressure<br />
Relief<br />
Valve<br />
Shutoff<br />
Valve<br />
Union<br />
Gas Valve<br />
Shutoff Valve<br />
Shutoff<br />
Valve<br />
Hot <strong>Water</strong><br />
Cold <strong>Water</strong><br />
36<br />
Leave enough clearance around the plumbing to<br />
apply insulation. It will be necessary to add<br />
bends to the piping to ensure that this clearance<br />
is available.<br />
Size the piping to allow for the maximum<br />
flow rates of the units.<br />
• Insulate the hot water piping to prevent heat loss. Insulate and apply heating materials to the cold<br />
water supply piping to prevent heat loss and freezing of pipes when exposed to excessively cold<br />
temperatures.
4. Before Installation Caution<br />
Check the Gas<br />
• Check that the rating plate indicates the correct type of gas.<br />
Check that the gas supply line is sized<br />
for 190,000 Btuh for this unit.<br />
Check the Power<br />
• The power supply required is 120V AC,<br />
at 60Hz. Using the incorrect voltage<br />
may result in fire or electric shock.<br />
Do Not Use Equipment for Purposes Other Than Those Specified<br />
• Do not use for other than increasing the temperature of the water supply,<br />
as unexpected accidents may occur as a result.<br />
Check <strong>Water</strong> Supply Quality<br />
• If the water supply is hard, acidic or otherwise impure, treat the water with approved methods in<br />
order to ensure full warranty coverage.<br />
Use Extreme Caution if Using With a Solar Pre-Heater<br />
• Using this unit with a solar pre-heater can lead to unpredictable output temperatures and<br />
possibly scalding. If absolutely necessary, use mixing valves to ensure output temperatures do<br />
not get to scalding levels. Do not use a solar pre-heater with the quick-connect multi-system.<br />
Checkup<br />
• Check the fixing brackets and vent pipe yearly for damage or wear. Replace if necessary.<br />
5. Choosing Installation Site<br />
* Locate the appliance in an area where leakage from the unit or connections will not result in damage<br />
to the area adjacent to the appliance or to the lower floors of the structure. When such locations<br />
cannot be avoided, it is recommended that a suitable drain pan, adequately drained, be installed<br />
under the appliance. The pan must not restrict combustion air flow.<br />
Caution<br />
• Install the water heater in a location where it is free from obstacles and<br />
stagnant air.<br />
• Consult with the customer concerning the location of installation.<br />
• Do not install the water heater near staircases or emergency exits.<br />
•Avoid places where fires are common, such as those where gasoline,<br />
benzene and adhesives are handled, or places in which corrosive<br />
gases (ammonia, chlorine, sulfur, ethylene compounds, acids) are<br />
present.<br />
Using the incorrect voltage may result in fire or cracking.<br />
37
Caution<br />
• Install the exhaust vent so that there are no obstacles around the<br />
termination and so that exhaust can't accumulate. Do not enclose<br />
the termination with corrugated metal or other materials.<br />
• Do not install the water heater where the exhaust will blow on<br />
outer walls or material not resistant to heat. Also consider the<br />
surrounding trees and animals.<br />
The heat and moisture from the water heater may cause discoloration<br />
of walls and resinous materials, or corrosion of aluminum<br />
materials.<br />
• Do not locate the vent termination directed towards a window<br />
or any other structure which has glass or wired glass<br />
facing the termination.<br />
• Avoid installation above gas ranges or stoves.<br />
• Avoid installation between the kitchen fan and stove. If oily<br />
fumes or a large amount of steam are present in the installation<br />
location, take measures to prevent the fumes and steam from<br />
entering in the equipment.<br />
• Avoid installation in places where dust or debris will accumulate.<br />
Dust may block the air-supply opening, causing the performance<br />
of the device fan to drop and incomplete combustion to<br />
occur as a result.<br />
• Install in a location where the exhaust gas flow will not be<br />
affected by fans or range hoods.<br />
• Take care that noise and exhaust gas will not affect neighbors.<br />
• Make sure that the location allows installation of the exhaust<br />
vent as specified.<br />
• Avoid installation in places where special chemical agents<br />
(e.g., hair spray or spray detergent) are used.<br />
Ignition failures and malfunction may occur as a result.<br />
• For outdoor installation, use the outdoor vent cap.<br />
If it is necessary to vent above the roof line in an outdoor installation,<br />
also use the base of the vent cap for rain protection.<br />
• Avoid installation where the unit will be exposed to excessive<br />
winds.<br />
• Before installing, make sure that the vent termination (or the vent<br />
cap in an outdoor installation) will have the proper clearances<br />
according to the National Fuel Gas Code (ANSI Z223.1).<br />
38
Securing of space for<br />
repair/inspection<br />
6. Installation Clearances<br />
Before installing, check for the following:<br />
Caution<br />
Install in accordance with relevant building and mechanical codes, as well as any local, state<br />
or national regulations.<br />
Item<br />
Check<br />
Illustration<br />
Required Clearances<br />
From Heater<br />
• Maintain the following clearance from<br />
both combustible and non-combustible<br />
materials.<br />
12" Indoor<br />
36" Outdoor<br />
24" Outdoor<br />
4" Indoor<br />
2" Indoor<br />
24" Outdoor<br />
Cooking Equipment<br />
• If the unit will be installed in the vicinity of a<br />
permanent kitchen range or stove that has<br />
the possibility of generating steam that<br />
contains fats or oils, use a dividing plate or<br />
other measure to ensure that the unit is not<br />
exposed to air containing such impurities.<br />
* The dividing plate should be of noncombustible<br />
material of a width greater than the<br />
water heater.<br />
Exhaust hood<br />
Dividing plate<br />
Range<br />
<strong>Water</strong><br />
heater<br />
• If possible, leave 8" or more on either<br />
side of the unit to facilitate inspection.<br />
• If possible, leave 24" or more in front of<br />
the unit to facilitate maintenance<br />
and service if necessary.<br />
8" or<br />
more<br />
Min: 3"<br />
Min: 3"<br />
24" or<br />
more<br />
8" or<br />
more<br />
(unit: inch)<br />
39
Clearance Requirements from Vent Terminations to Building Openings<br />
* All clearance requirements are in accordance with ANSI Z21.10.3a-2003 and the National Fuel Gas<br />
Code, ANSI Z223.1.<br />
A=<br />
Clearance<br />
Above grade, veranda, porch, deck,<br />
or balcony<br />
E= Unventilated soffit *<br />
F= Outside corner *<br />
G= Inside corner *<br />
H=<br />
Each side of center line extended<br />
above meter/regulator assembly<br />
Indoor Installation<br />
(See p.41)<br />
12" (12")<br />
3' within a height 15' above<br />
meter/regulator assembly<br />
Vent Terminal<br />
4' below or to the side of<br />
B= Window or door that may be opened opening, or 1' above opening<br />
(36")<br />
C= Permanently closed window<br />
*<br />
D=<br />
Vertical clearance to ventilated soffit<br />
located above the terminal within a<br />
horizontal distance of 2 feet from the<br />
center of the terminal<br />
*<br />
I= Service regulator vent outlet 3'<br />
J=<br />
Nonmechanical air supply inlet or<br />
combustion air inlet to any other<br />
appliance<br />
4' below or to the side of<br />
opening, or 1' above opening<br />
(36")<br />
K= Mechanical air supply inlet 3' above if within 10' (6')<br />
L=<br />
Above paved sidewalk or paved<br />
driveway located on public property<br />
(7' ***)<br />
M=<br />
Under veranda, porch, deck, or<br />
balcony<br />
* (12"- Canada Only****)<br />
Air Supply Inlet<br />
Area Where Terminal<br />
is Not Permitted<br />
Outdoor Installation<br />
(See p.41)<br />
12" (12")<br />
12" (36")<br />
()= indicates clearances required in Canada<br />
*Maintain clearances in accordance with local installation codes and the requirements of the gas supplier<br />
***A vent shall not terminate directly above a sidewalk or paved driveway that is located between two<br />
single family dwellings and serves both dwellings.<br />
****Permitted only if veranda,porch,deck,or balcony is fully open on a minimum of two sides beneath the floor.<br />
*<br />
*<br />
*<br />
*<br />
*<br />
3' within a height 15' above<br />
meter/regulator assembly<br />
3'<br />
12" (36")<br />
3' above if within 10' (6')<br />
(7' ***)<br />
* (12"- Canada Only****)<br />
40
Clearance Requirements from Vent Terminations to Building Openings<br />
* All clearance requirements are in accordance with ANSI Z21.10.3a-2003 and the National Fuel Gas<br />
Code, ANSI Z223.1.<br />
Maintain the following clearances to any<br />
opening in any building:<br />
Illustration<br />
Vent Clearances When Heater is Installed<br />
Indoors<br />
• 4' below, 4' horizontally from, or 1' above<br />
any door, operable window, or gravity air<br />
inlet into any building.<br />
3' above any forced air inlet within 10'.<br />
4'<br />
1'<br />
4'<br />
3'<br />
Vent Clearances When Heater is Installed<br />
Outdoors With a Vent Cap<br />
• 1' below, 1' horizontally from, or 1' above<br />
any door, operable window, or gravity air<br />
inlet into any building.<br />
3' above any forced air inlet within 10'.<br />
9004226<br />
Outdoor Vent Cap<br />
1'<br />
1'<br />
1'<br />
3'<br />
* For Installations in Canada, clearances are as follows: To windows, doors, & gravity air inlets: 36".<br />
To forced air inlets: 6'. These clearance requirements hold true for all of the above situations: Indoor,<br />
Outdoor w/vent cap.<br />
41
7. Installation<br />
Securing to the wall<br />
• The weight of the device will be applied to the wall. If the strength of the wall is not sufficient,<br />
reinforcement must be done to prevent the transfer of vibration.<br />
• Do not drop or apply unnecessary force to the device when installing. Internal parts may<br />
be damaged and may become highly dangerous.<br />
• Install the unit on a vertical wall and ensure that it is level.<br />
Item<br />
Locating Screw Holes<br />
Caution<br />
Check<br />
• When installing with bare hands,<br />
take caution to not inflict injury.<br />
• Be careful not to hit electrical<br />
wiring, gas, or water piping while<br />
drilling holes.<br />
1. Drill a single screw hole, making sure to hit a stud.<br />
2. Insert and tighten the screw and hang the unit by<br />
the upper wall mounting bracket.<br />
3. Determine the positions for the remaining four screws<br />
(two for the top bracket and two for the bottom), and<br />
remove the unit.<br />
Illustration<br />
Location of Screw Hole<br />
Mounting Bracket<br />
(upper)<br />
Locating Screw Holes<br />
Mounting<br />
4. Drill holes for the remaining four screws.<br />
5. Hang the unit again by the first screw, and then<br />
insert and tighten the remaining four screws.<br />
6. Take waterproofing measures so that water does<br />
not enter the building from screws mounting the<br />
device.<br />
Tapping Screw<br />
• Make sure the unit is installed securely so that it will<br />
not fall or move due to vibrations or earthquakes.<br />
Structure<br />
42
8. Vent Pipe Installation<br />
(Indoor Installation Only)<br />
Vent Piping<br />
• Use only listed category III vent materials.<br />
• Follow the vent pipe manufacturer's installation<br />
instructions.<br />
Pipe diameter 4"<br />
No. of Elbows Max. Straight Vent Length<br />
3 15'<br />
2 27'<br />
1 39'<br />
• Make the vertical section of the exhaust vent<br />
as short as possible.<br />
• Maintain the same vent pipe diameter from the<br />
heater flue to the vent termination.<br />
Clearances<br />
Manufacturer and Enclosed Unenclosed<br />
Product Hor. Vert. Hor. Vert.<br />
Noritz N-Vent<br />
10" (sides)<br />
15"(top)<br />
6"(bottom)<br />
4" 3" 3"<br />
Protech FasNSeal<br />
8" (sides)<br />
12"(top)<br />
4"(bottom)<br />
4" 3" 3"<br />
Protech FasNSeal W2 6" 4" 3" 3"<br />
HeatFab SafTVent 6" 6" 2" 2"<br />
Z-Flex Z-Vent 8" 4" 1" 1"<br />
Flex-L StaR-34 8" 4" 1" 1"<br />
These clearances are subject to change.<br />
Refer to the UL listing for the proper clearances.<br />
• The first vertical run from the top of the heater<br />
should be no longer than 3'.<br />
• Make sure vent pipe is gas tight and will not<br />
leak. Use silicon sealant wherever necessary.<br />
• Do not common vent or connect more than<br />
one appliance to this venting system.<br />
• The total vent length including horizontal &<br />
vertical vent runs should be no less than 3'.<br />
• Do not place any dangerous objects at the end<br />
of the exhaust vent.<br />
• Steam (smoke) or water drops may come out<br />
from the end of the exhaust pipe. Select the<br />
location for the end of the vent so that steam is<br />
not visible, and the vent is not wet with dripping<br />
water.<br />
• If snow is expected to accumulate, take care<br />
the end of the pipe is not covered with snow or<br />
hit by falling lumps of snow.<br />
• Consult the vent pipe manufacturer's installation<br />
instructions for chimney connections.<br />
Appliance Adapters<br />
• Use the following adapters to connect the<br />
unit to the venting system.<br />
Manufacturer and<br />
Product<br />
Part No.<br />
Protech FasNSeal<br />
FSAA4<br />
HeatFab SafTVent 9401RYPK<br />
Z-Flex Z-Vent<br />
2SVWA04<br />
Flex-L Star-34<br />
SRASPSA4<br />
Horizontal Vent Termination<br />
Elbow<br />
Appliance<br />
Adapter<br />
3'<br />
Max.<br />
Hanger<br />
Straps<br />
Slope vent<br />
Downwards<br />
Wall<br />
Thimble<br />
Termination<br />
• Terminate at least 12" above<br />
grade or above snow line.<br />
• Terminate at least 7' above a<br />
public walkway, 6' from the<br />
combustion air intake of any<br />
appliance, and 3' from any<br />
other building opening, gas<br />
utility meter, service regulator<br />
etc.<br />
• Terminate at least 3' above any<br />
forced air inlet within 10', 4'<br />
below, 4' horizontally from or<br />
1' above any door, window, or<br />
gravity air inlet into any building<br />
per National Fuel Gas Code<br />
ANSI Z223.1/NFPA 54.<br />
• Slope the horizontal vent 1/4"<br />
downwards for every 12".<br />
• Use a condensation drain if<br />
necessary.<br />
43
Vertical Vent Termination<br />
Rain<br />
Cap<br />
Elbow<br />
3'<br />
Max.<br />
Hanger<br />
Strap<br />
Condensation<br />
Drain (Install<br />
According to<br />
Local Codes)<br />
Firestop/<br />
Support<br />
Firestop<br />
Roof<br />
Flashing<br />
• Terminate at least 6' from the<br />
combustion air intake of any<br />
appliance, and 3' from any<br />
other building opening, gas<br />
utility meter, service regulator<br />
etc.<br />
• Enclose exterior vent systems<br />
below the roof line to limit<br />
condensation and protect<br />
against mechanical failure.<br />
• When the vent penetrates a<br />
floor or ceiling and is not<br />
running in a fire rated shaft, a<br />
firestop and support is required.<br />
• Terminate the vent system at<br />
least 3' above, but not more<br />
than 6' above the roof line, or<br />
according to the vent pipe<br />
manufacturer's instructions.<br />
• Provide vertical support every<br />
12' or as required by the vent<br />
pipe manufacturer's instructions.<br />
• Slope the horizontal vent 1/4"<br />
downwards for every 12".<br />
• Do not vent straight upwards.<br />
Always have a horizontal section<br />
of venting.<br />
• Install a condensation drain in<br />
the horizontal section of the<br />
venting.<br />
Appliance<br />
Adapter<br />
44
Combustion Air<br />
Supply combustion air to the units as per the National Fuel Gas Code, ANSI Z223.1.<br />
•Provide two permanent openings to allow<br />
circulation of combustion air.<br />
• Make each opening 194 square inches if they<br />
provide indoor air, and 100 square inches for<br />
outdoor air.<br />
• If the unit is installed in a mechanical closet,<br />
provide a 24" clearance in front of the unit to<br />
the door.<br />
• If combustion air will be provided through a<br />
duct, size the duct to provide 60 cubic feet of<br />
fresh air per minute.<br />
10"<br />
20"<br />
10"<br />
20"<br />
Openings supplying indoor air<br />
45
9. Gas Piping<br />
Follow the instructions from the gas supplier.<br />
The appliance and its individual shutoff valve must be disconnected from the gas supply piping system<br />
during any pressure testing of that system at test pressures in excess of 1 ⁄2 psig (3.5 kPa).<br />
The Appliance must be isolated from the gas supply piping system by closing its individual manual shutoff<br />
valve during any pressure testing of the gas supply piping system at test pressures equal to or less than 1 ⁄2<br />
psig (3.5 kPa).<br />
The appliance and its gas connections must be leak tested before placing the appliance in operation.<br />
The inlet gas pressure must be within the range specified. This is for the purposes of input adjustment.<br />
In order to choose the proper size for the gas line, consult local codes or the National Fuel Gas Code ANSI<br />
Z223.1.<br />
Gas Pressure<br />
Size the gas line according to total btuh demand<br />
of the building and length from the meter or<br />
regulator so that the following supply pressures<br />
are available even at maximum demand:<br />
Natural Gas Supply Pressure<br />
Min. 4" WC<br />
Max. 10.5" WC<br />
LP Gas Supply Pressure<br />
Min. 8" WC<br />
Max. 14" WC<br />
Gas Meter<br />
Select a gas meter capable of supplying the entire<br />
btuh demand of all gas appliances in the building.<br />
Gas Connection<br />
• Do not use piping with a diameter smaller than<br />
the inlet diameter of the water heater.<br />
• Gas flex lines are not recommended unless they<br />
are rated for 190,000 btuh.<br />
• Install a gas shutoff valve on the supply line.<br />
• Use only approved gas piping materials.<br />
Measuring Gas Pressure<br />
In order to check the gas supply pressure to the unit, a<br />
tap is provided on the gas inlet. Remove the hex head<br />
philips screw from the tap, and connect a manometer<br />
using a silicon tube.<br />
In order to check the gas manifold pressure, a pair of<br />
taps are provided on the gas valve inside the unit.<br />
The pressure can be checked either by removing the hex<br />
head philips screw and connecting a manometer with a<br />
silicon tube, or by removing the 1/8" NPT screw with an<br />
allen wrench and connecting the appropriate pressure<br />
gauge.<br />
46<br />
Natural Gas<br />
Meter<br />
Tankless <strong>Water</strong> Heater<br />
(190,000 Btuh)<br />
Outlet E<br />
Section 4<br />
5'<br />
10'<br />
Sample Gas Line<br />
Outlet A<br />
Clothes Dryer<br />
10'<br />
(35,000 Btuh)<br />
Outlet C<br />
Section 3 Section 2<br />
5'<br />
Section 1<br />
5' 5'<br />
10'<br />
5'<br />
Outlet D<br />
Gas Fireplace<br />
(25,000 Btuh)<br />
**See next page for the pipe capacity charts.<br />
Barbecue<br />
(50,000 Btuh)<br />
10'<br />
5'<br />
Outlet B<br />
Gas Range Stove<br />
(65,000 Btuh)<br />
Instructions<br />
1. Size each outlet branch starting from the furthest<br />
using the Btuh required and the length from the<br />
meter.<br />
2. Size each section of the main line using the<br />
length to the furthest outlet and the Btuh<br />
required by everything after that section.<br />
Sample Calculation<br />
Outlet A: 45' (Use 50'), 50,000 Btuh requires 1/2"<br />
Outlet B: 40', 65,000 Btuh requires 1/2"<br />
Section 1: 45' (Use 50'), 115,000 Btuh requires 3/4"<br />
Outlet C: 30', 35,000 Btuh requires 1/2"<br />
Section 2: 45' (Use 50'), 150,000 Btuh requires 3/4"<br />
Outlet D: 25' (Use 30'), 25,000 Btuh requires 1/2"<br />
Section 3: 45' (Use 50'), 175,000 Btuh requires 1"<br />
Outlet E: 25' (Use 30'), 190,000 Btuh requires 3/4"<br />
Section 4: 45' (Use 50'), 369,000 Btuh requires 1 1/4"
Gas Line Sizing<br />
Adapted from UPC 1997<br />
Maximum Natural al Gas Delivery Capacity in Cubic Feet per Hour (0.60 Specific Gravity, 0.5" WC Pressure Drop)<br />
Pipe<br />
Length in Feet<br />
Size 10' 20' 30' 40' 50' 60' 70' 80' 90' 100' 125'<br />
1/2" 174 119 96 82 73 66 61 56 53 50 44<br />
3/4" 363 249 200 171 152 138 127 118 111 104 93<br />
1" 684 470 377 323 286 259 239 222 208 197 174<br />
1 1/4" 1404 965 775 663 588 532 490 456 428 404 358<br />
1 1/2" 2103 1445 1161 993 880 798 734 683 641 605 536<br />
2" 4050 2784 2235 1913 1696 1536 1413 1315 1234 1165 1033<br />
2 1/2" 6455 4437 3563 3049 2703 2449 2253 2096 1966 1857 1646<br />
3" 11,412 7843 6299 5391 4778 4329 3983 3705 3476 3284 2910<br />
3 1/2" 16,709 11,484 9222 7893 6995 6338 5831 5425 5090 4808 4261<br />
4" 23,277 15,998 12,847 10,995 9745 8830 8123 7557 7091 6698 5936<br />
Contact the Gas Supplier for Btu/Cubic Ft. of the Supplied Gas. 1000 BTU/Cubic Ft. is a Typical Value<br />
Maximum Liquified Petroleum<br />
(Undiluted) Delivery Capacity in Thousands of Btuh (0.5" WC Pressure Drop)<br />
Pipe<br />
Length in Feet<br />
Size 10' 20' 30' 40' 50' 60' 70' 80' 90' 100' 125' 150' 200'<br />
1/2" 275 189 152 129 114 103 96 89 83 78 69 63 55<br />
3/4" 567 393 315 267 237 217 196 185 173 162 146 132 112<br />
1" 1071 732 590 504 448 409 378 346 322 307 275 252 213<br />
1 1/4" 2205 1496 1212 1039 913 834 771 724 677 630 567 511 440<br />
1 1/2" 3307 2299 1858 1559 1417 1275 1181 1086 1023 976 866 787 675<br />
2" 6221 4331 3465 2992 2646 2394 2205 2047 1921 1811 1606 1496 1260<br />
** For reference only. Please consult gas pipe manufacturer for actual pipe capacities.<br />
R<br />
Maximum Capacity of Flex TracPipe in Cubic Feet per Hour of Natural Gas (0.60 Specific Gravity, 0.5" WC Pressure Drop)<br />
Pipe<br />
Size<br />
3/4"<br />
1"<br />
1 1/4"<br />
1 1/2"<br />
2"<br />
Length in Feet<br />
10' 20' 30' 40' 50' 60' 70' 80' 90' 100' 150' 200'<br />
206 147 121 105 94 86 80 75 71 67 55 48<br />
383 269 218 188 168 153 141 132 125 118 94 82<br />
614 418 334 284 251 227 209 194 181 171 137 116<br />
1261 888 723 625 559 509 471 440 415 393 320 277<br />
2934 2078 1698 1472 1317 1203 1114 1042 983 933 762 661<br />
R<br />
Maximum Capacity of Flex TracPipe in Thousands of Btuh Liquified Petroleum ( 0.5" WC Pressure Drop)<br />
Pipe<br />
Size<br />
3/4"<br />
1"<br />
1 1/4"<br />
1 1/2"<br />
2"<br />
Length in Feet<br />
10' 20' 30' 40' 50' 60' 70' 80' 90' 100' 150' 200'<br />
325 232 191 166 149 136 126 118 112 106 87 76<br />
605 425 344 297 265 241 222 208 197 186 143 129<br />
971 661 528 449 397 359 330 307 286 270 217 183<br />
1993 1404 1143 988 884 805 745 696 656 621 506 438<br />
4638 3285 2684 2327 2082 1902 1761 1647 1554 1475 1205 1045<br />
** For reference only. Please consult gas pipe manufacturer for actual pipe capacities.<br />
TracPipe® is a registered trademark of Omega Flex.<br />
Maximum Capacity for Gas Flex Connectors in Cubic Feet per Hour of Natural Gas (0.60 Specific Gravity, 0.5" WC Pressure Drop)<br />
Pipe<br />
Length in Inches<br />
Size 12" 24" 36" 48" 60" 72"<br />
1/2"<br />
3/4"<br />
1"<br />
1 1/4"<br />
180 150<br />
290<br />
581<br />
1470<br />
125<br />
255<br />
512<br />
1200<br />
106<br />
215<br />
442<br />
1130<br />
93<br />
197<br />
397<br />
960<br />
86<br />
173<br />
347<br />
930<br />
Maximum Capacity for Gas Flex Connectors in Thousands of Btuh Liquified Petroleum ( 0.5" WC Pressure Drop)<br />
Pipe<br />
Size<br />
1/2"<br />
3/4"<br />
1"<br />
1 1/4"<br />
Length in Inches<br />
12" 24" 36" 48" 60" 72"<br />
288 240<br />
200<br />
169<br />
149<br />
137<br />
465<br />
409<br />
344<br />
315<br />
278<br />
930<br />
825<br />
708<br />
638<br />
556<br />
2352<br />
1920<br />
1808<br />
1536<br />
1488<br />
** For reference only. Please consult gas pipe manufacturer for actual pipe capacities.<br />
47
10. <strong>Water</strong> Piping<br />
Ask a qualified plumber to perform the installation<br />
of the plumbing. Observe all applicable codes.<br />
This appliance suitable for potable water and space heating applications. Do not use this appliance if any part has<br />
been underwater. Immediately call a qualified service technician to inspect the appliance and replace any part of the<br />
control system and gas control which has been under water.<br />
If the water heater is installed in a closed water supply system, such as one having a backflow preventer in the cold<br />
water supply line, means shall be provided to control thermal expansion. Contact the water supplier or a local plumbing<br />
inspector on how to control this situation.<br />
A pressure relief valve must be installed near the hot water outlet that is rated in accordance with and complying with<br />
either The Standard for Relief Valves and Automatic Shutoff Devices for Hot <strong>Water</strong> Supply Systems, ANSI Z21.22, or<br />
The ANSI/ASME Boiler and Pressure Vessel Code, Section IV ( Heating Boilers ). This pressure relief valve must<br />
be capable of an hourly Btu rated temperature steam discharge of 190,000 Btuh. Multiple valves may be used. The<br />
pressure relief capacity must not exceed 150 psig. No valve shall be placed between the relief valve and the water<br />
heater. The relief valve must be installed such that the discharge will be conducted to a suitable place for disposal<br />
when relief occurs. No reducing coupling or other restriction may be installed in the discharge line. The discharge line<br />
must be installed to allow complete drainage of both the valve and the line. If this unit is installed with a separate<br />
storage vessel, the separate vessel must have its own temperature and pressure relief valve. This valve must also<br />
comply with The Standard for Relief Valves and Automatic Gas Shutoff Devices for Hot <strong>Water</strong> Supply Systems, ANSI<br />
Z21.22. (in the U.S. only). A temperature relief valve is not required, but if one is used, do not install the valve with the<br />
probe directly in the flow of water. This may cause unwarranted discharge of the valve.<br />
Piping and components connected to the water heater shall be suitable for use with potable water.<br />
Toxic chemicals, such as those used for boiler treatment, shall not be introduced into the potable water.<br />
A water heater used to supply potable water may not be connected to any heating system or components previously<br />
used with a nonpotable water heating appliance.<br />
When water is required in one part of the system at a higher temperature than in the rest of the system, means such<br />
as a mixing valve shall be installed to temper the water to reduce the scald hazard.<br />
• Flush water through the pipe to clean out metal powder, sand and dirt before connecting it.<br />
• Take appropriate heat insulation measures (e.g., wrapping with heat insulation materials, using electric heaters)<br />
according to the climate of the region to prevent the pipe from freezing.<br />
• Use a union coupling or flexible pipe for connecting the pipes to reduce the force applied to the piping.<br />
• Do not use piping with a diameter smaller than the coupling.<br />
• When feed water pressure is too high, insert a depressurizing valve, or take water hammer prevention measure.<br />
• Avoid using joints as much as possible to keep the piping simple.<br />
• Avoid piping in which an air holdup can occur.<br />
• If installing the unit on a roof:<br />
• About lower-level hot water supply<br />
If the unit is installed on a roof to supply water to the levels below, make sure that the water pressure supplied to<br />
the unit does not drop below 29 psi. It may be necessary to install a pump system to ensure that the water pressure<br />
is maintained at this level.<br />
Check the pressure before putting the unit into operation.<br />
Failure to supply the proper pressure to the unit may result in noisy operation, shorter lifetime of the unit, and may<br />
cause the unit to shut down frequently.<br />
48<br />
Supply water piping<br />
• Do not use PVC piping.<br />
• Mount a check valve and a shut off valve (near<br />
the inlet).<br />
• In order for the client to use the water heater<br />
comfortably, 98.1 to 491 kPa (14 to 70 PSI) of<br />
pressure is needed from the water supply.<br />
Be sure to check the water pressure. If the water<br />
pressure is low, the water heater cannot perform<br />
to its full capability, and may become a source of<br />
trouble for the client.<br />
Drain piping<br />
• Expansion water may drop from the pressure<br />
prevention device and wet the floor. If necessary,<br />
provide drain piping or use a drain hose to<br />
remove the water.<br />
Hot water piping<br />
• Do not use lead or PVC piping.<br />
• The longer the piping, the greater the heat loss.<br />
Try to make the piping as short as possible.<br />
• Use mixing valves with low water resistance.<br />
Use shower heads with low pressure loss.<br />
• If necessary, use a pump or other means to ensure<br />
that the supply water pressure to the inlet<br />
of the heater does not fall below 29 PSI when<br />
the maximum amount of water is being demanded.<br />
Also install a pressure meter on the inlet.<br />
If this is not done, local boiling will occur inside<br />
the water heater causing abnormal sounds<br />
and decreasing the durability of the heat exchanger.
11. Plumbing Applications<br />
Cold <strong>Water</strong> Supply<br />
Recirculation System<br />
Hot <strong>Water</strong> Return<br />
Fixtures<br />
Aquastat Wiring<br />
Use Honeywell Aquastat<br />
(Model L6006A or L6006C)<br />
Pressure<br />
Relief<br />
Valve<br />
Drain<br />
Shutoff Valve<br />
Hot <strong>Water</strong><br />
(Relay for<br />
Pump<br />
> 85 W)<br />
(See p. 55)<br />
Cold <strong>Water</strong> Supply<br />
Check<br />
Valve<br />
Pump Control Signal<br />
(See p. 53)<br />
Check Valve<br />
Expansion Tank<br />
(Install According<br />
to Local Codes)<br />
Aquastat<br />
(Use Aquastat if Unit<br />
Isn't Controlling Pump)<br />
Pump<br />
(See notes for Sizing)<br />
8-10 Gal.<br />
Storage Tank<br />
(To Alleviate Cold<br />
<strong>Water</strong> Sandwich)<br />
Heating System<br />
Backflow<br />
Preventer<br />
(Optional)<br />
Pressure<br />
Reducing<br />
Valve<br />
(Optional)<br />
Pump<br />
AC120<br />
Neutral<br />
Ground<br />
Live<br />
Hot <strong>Water</strong> Return<br />
105<br />
R<br />
B 5<br />
* Size the pump to provide at least 1.58 GPM through the system at 10 Ft of Head plus<br />
piping losses. Check the maintenance monitors on the unit to make sure the pump<br />
is providing that much flow.<br />
** Adjust the flow using a gate valve and verify the flow rate with the maintenance monitors.<br />
W<br />
Pressure<br />
Relief Valve<br />
Drain<br />
Shutoff<br />
Valve<br />
(Relay for<br />
Pump Check<br />
Valve<br />
Pump<br />
> 85 W) (See notes for Sizing)<br />
(See p. 55)<br />
Pump Control signal<br />
(See p. 53)<br />
Air Scoop<br />
Check Valve (Optional)<br />
Shutoff Valve<br />
Expansion<br />
Tank<br />
(Install According<br />
to Local Codes)<br />
Hot <strong>Water</strong><br />
Boiler Drain Valve<br />
Aquastat<br />
(Use Aquastat if<br />
Unit Isn't Controlling<br />
Pump)<br />
Heating<br />
Controls<br />
Temp. &<br />
Press. Gauge<br />
(Optional)<br />
* Size the pump to provide at least 1.58 GPM through the system at 10 Ft of Head plus<br />
piping losses. Check the maintenance monitors on the unit to make sure the pump<br />
is providing that much flow.<br />
** Adjust the flow using a gate valve and verify the flow rate with the maintenance monitors.<br />
Hydronic Heat<br />
Exchanger or<br />
Radiant Heat<br />
Piping<br />
For Baseboard<br />
Applications:<br />
Please contact<br />
sales agent for<br />
compatibility.<br />
Mixing Valve<br />
Cold <strong>Water</strong> Supply<br />
Tempered Potable Hot <strong>Water</strong><br />
Hot <strong>Water</strong> for Heating<br />
For Space Heating Purposes:<br />
If the system requires water<br />
for space heating at a higher<br />
temperature than for other<br />
uses, means such as a mixing<br />
valve shall be provided to<br />
temper the water for the other<br />
uses to help prevent scalding.<br />
49
12. Electrical Wiring<br />
Consult a qualified electrician<br />
for the electrical work.<br />
Do not connect electrical power to the unit until all electrical wiring has been completed.<br />
This appliance must be electrically grounded in accordance with local codes, or in the absence of local codes,<br />
with the National Electrical Code, ANSI/NFPA 70. In Canada, the latest CSA C22.1 Electrical Code.<br />
Caution: Label all wires prior to disconnection when servicing controls. Wiring errors can cause improper<br />
and dangerous operation.<br />
Verify proper operation after servicing.<br />
Field wiring to be performed at time of appliance installation.<br />
Caution<br />
Do not turn on the power until the electrical wiring is finished.<br />
This may cause electrical shock or damage to the equipment to occur.<br />
• The electrical supply required by the water<br />
heater is 120V AC at 60 Hz.<br />
The power consumption may be up to 125W or<br />
higher if using optional accessories.<br />
Use an appropriate circuit.<br />
• Do not disconnect the power supply when not in<br />
use. When the power is off, the freeze prevention<br />
in the water heater will not activate,<br />
resulting in possible freezing damage.<br />
• Do not let the power cord contact the gas piping.<br />
Tie the redundant power cord outside the<br />
water heater. Putting the redundant length<br />
of cord inside the water heater may cause<br />
electrical interference and faulty operation.<br />
Ground<br />
• To prevent electrical shock, provide a ground<br />
with resistance less than 100 . An electrician<br />
should do this work.<br />
• A grounding screw is provided on the back of<br />
the junction box lid.<br />
Do not connect the ground to the city water<br />
or gas piping. Do not tie the ground to a telephone<br />
line.<br />
Breaker Installation<br />
• Mount a device which shuts off the electrical<br />
path automatically (leakage breaker) when<br />
electrical leakage is detected.<br />
Junction Box<br />
Power Cord<br />
Junction Box Lid<br />
(back)<br />
Ground<br />
1.Unscrew the junction box lid and open.<br />
2.Push the power cord through the bottom of the unit.<br />
3.Connecct the live and neutral wires to the black and<br />
white wire in the junction box.<br />
4.Screw the ground wire to the ground screw on the<br />
back of the junction box lid and close junction box.<br />
50
Remote Controller<br />
• Applicable Model<br />
Remote controller 9004223<br />
Install the remote controller according to the instructions in the Installation Guide (p. 59).<br />
• The unit can be programmed so that it will default to one of four temperatures if the remote controller<br />
is removed (176, 140, 130, 120°F). To change the default temperature, the remote controller must be<br />
initially installed, and removed after programming.<br />
* Changing the default temperature setting:<br />
1. Within the first ten minutes of connecting electrical power to the unit, but before pressing the<br />
Power On/Off button, hit the up [ ] or down [ ] button on the remote controller. This will put<br />
the unit into maintenance writer mode. If pressing either of these buttons does not put the unit<br />
into maintenance writer mode, unplug the unit for sixty seconds and try again.<br />
2. The maintenance monitor item number will flash on the display. (the initial item number will be “99”).<br />
3. The up [ ] and down [ ] buttons can be used to change the maintenance writer item number.<br />
4. Choose a temperature from the chart below and set the 14 and 15 maintenance writers according to<br />
the chart. Pressing the Flow Meter Alarm Set button for 0.5 seconds will switch the indicated item<br />
number from “OFF” to “ON” or “ON” to “OFF”. If the Priority lamp is flashing when an item number<br />
is displayed, this indicates an “ON” setting for that item number, and if the Priority lamp is off, the<br />
item number is off.<br />
*Do not change the other item numbers. This may cause a fault in the water heater.<br />
5. After setting the 14 and 15 item numbers for the desired temperature, press and hold the up [ ]<br />
and down [ ] buttons together for five seconds to confirm the new settings. The remote controller<br />
will emit a tone when the settings are confirmed. If this is not done, the unit will not put the<br />
setting changes into effect. After confirming the setting, remove the remote controller to initiate<br />
the default temperature setting.<br />
Note:The setting changes can be cancelled by pressing the Power On/Off button before confirming the<br />
settings, or if the unit is left alone for ten minutes without confirming the settings. If the default<br />
setting needs to be changed again, disconnect the electrical power to the unit, reconnect it and<br />
follow this procedure again.<br />
Item No.<br />
Temp. 14<br />
176°F ON<br />
140°F OFF<br />
130°F ON<br />
120°F* OFF<br />
15<br />
ON<br />
ON<br />
OFF<br />
OFF<br />
* Factory Default Setting<br />
51
Connecting Remote Controller Cord to Unit<br />
• Keep the remote controller cord away from the freeze prevention heaters in the unit.<br />
• Tie the redundant cord outside the water heater. Do not put the extra length inside the equipment.<br />
• The remote controller cord can be extended up to 300' with 18AWG wire.<br />
•Use a Y type terminal with a resin sleeve. (Without the sleeve, the copper wire may corrode and<br />
cause problems).<br />
• Be sure to hand tighten when screwing to the terminal block. Power tools may cause damage to the<br />
terminal block.<br />
Remote controller cord<br />
• For extensions, a 26' cord can be purchased (Part # 9005694) or use 18AWG wire.<br />
• Install according to the National Electrical Code and all applicable local codes.<br />
1. Leave enough slack so that the remote controller<br />
cord will not be damaged if the unit is removed from<br />
the wall.<br />
2. Remove the front cover of the heater (4 screws).<br />
3. Pass the remote controller cord through the wiring<br />
throughway and into the unit.<br />
4. Connect the Y terminals at the end of the remote<br />
controller cord to the terminal block.<br />
5. Secure the remote controller cord with a clamp.<br />
6. Replace the front cover.<br />
Wiring<br />
Throughways<br />
18AWG Wire<br />
Terminal<br />
Block<br />
Clamp<br />
52
Pump Wiring<br />
* This feature is not available when using<br />
the Quick Connect Multi System feature.<br />
Connecting the pump control wire<br />
1. Leave enough slack so that the pump control<br />
wires will stay connected if the unit is removed<br />
from the wall.<br />
2. Remove the front cover of the heater (4 screws).<br />
3. Cut off the connector at the end of the pump<br />
control wires.<br />
4. Wire the pump control wires through the wiring<br />
throughway and connect them to the wiring inside<br />
the pump (this will be the power supply for the pump,<br />
do not also connect 120 V to the pump).<br />
If a large pump is being used (greater than 85W)<br />
use the voltage from these wires as the signal to<br />
close a normally open relay through which 120 V will<br />
be supplied directly from a wall circuit to the pump.<br />
5. Replace the front cover.<br />
PUMP<br />
Wiring<br />
Throughway<br />
Pump Control<br />
Wire Tag<br />
Crimping Terminal<br />
Supplies Power for<br />
Circulating Pump<br />
(Use a Relay for<br />
Larger Pumps)<br />
Relay connection with larger pumps (>85 W)<br />
1. Locate and prepare the pump control wires as described above.<br />
2. Choose a suitable installation location for the relay where it will be protected from moisture.<br />
3. Connect the pump control wires from the heater to the signal input on the relay.<br />
4. Cut one of the electrical supply leads and wire it across the open terminals of the relay.<br />
5. Secure all connections and replace the front cover of the heater.<br />
AC120V<br />
Connect to Pump Control<br />
1<br />
Wires in Unit 0<br />
4<br />
2<br />
Relay (ex. Omron G7L2ABUBJCBAC120)<br />
Circulation Pump<br />
53
13. Maintenance<br />
Periodically check the following to ensure proper<br />
operation of the water heater.<br />
• The venting system must be examined periodically by a qualified service technician to check for<br />
any leaks or corrosion.<br />
• The burner flame must be checked periodically for a proper blue color and consistency.<br />
• If the flame does not appear normal, the burner may need to be cleaned.<br />
• If the burner needs to be cleaned, it must be performed by a qualified service technician.<br />
• Do not obstruct the flow of combustion and ventilation air.<br />
• The pressure relief valve must be operated once a year to ensure that it is functioning properly<br />
and there is no obstruction. Turn the power off to the unit before opening the relief valve, and<br />
make sure that water draining out of the valve will not cause any damage.<br />
• If the relief valve discharges periodically, it may be due to thermal expansion in a closed water<br />
system. Contact the water supplier or a local plumbing inspector on how to correct this situation.<br />
Do not plug the relief valve.<br />
• See Operation Manual for further maintenance.<br />
Warning: There is a scald potential if the output temperature is set too high.<br />
Should overheating occur, or the gas supply fail to shut off, turn off the manual gas control valve to the appliance.<br />
Do not use this appliance if any part has been under water. Immediately call a qualified service<br />
technician to inspect the appliance and to replace any part of the control system and any gas control<br />
which has been under water.<br />
Periodically check and clean the filter inside the cold water inlet of the unit.<br />
14. Trial Operation<br />
The installer should test operate the unit, explain to<br />
the customer how to use the unit, and give the owner<br />
this manual before leaving the installation.<br />
• Preparation ........... (1) Open a hot water fixture to confirm that water is available, and then close<br />
the fixture.<br />
(2) Open the gas supply valve.<br />
(3) Turn on the power supply. Using the remote controller, turn on the Power<br />
On/Off button (the Operation lamp will turn on).<br />
(1) Open a hot water fixture and confirm that the Burner On lamp comes on, and that hot water is<br />
being produced. (If necessary, repeat until the air in the gas piping is bled out).<br />
*White smoke may be noticed from the exhaust vent during cold weather. However, this is not a<br />
malfunction of the unit.<br />
* If an “11” error code appears or a Burner On indicator flashes on the remote controller, turn the<br />
unit off and then back on again, and then open a hot water fixture again.<br />
(2) Change the temperature setting on the remote controller and check that the water temperature changes.<br />
• If the water heater does not operate normally, refer to “Troubleshooting” in the Operation Manual.<br />
* After the trial operation, clean the filter in the cold water inlet.<br />
<br />
• Turn the system power ON with the remote controller.<br />
•Slowly open a hot water fixture and check that the units ignite sequentially. Check to see that the<br />
hot water temperature is the same as the temperature displayed on the remote controller (*1)<br />
* If both units do not ignite, switch which unit will ignite first by pressing the Max. or Min. Mani-fold<br />
Pressure Set Button on the circuit board (see p. 57). (*2)<br />
Unit A Ignites<br />
Unit B Doesn't Ignite<br />
Press Max. or Min. Manifold<br />
Pressure Set Button on Unit B<br />
Unit A Doesn't Ignite<br />
Unit B Ignites<br />
54<br />
* If an 11 or F11 error code flashes on the remote controller, hit the Power Button on the remote<br />
controller off and on 2 -3 times.<br />
* If (*1) and (*2) cannot be done, the Quick Connect Cord may not be properly connected.<br />
Check that the cord is properly connected.
Caution<br />
Handling after trial operation<br />
• If the unit will not be used immediately, close off all gas and water shutoff valves, drain all of<br />
the water out of the unit and the plumbing system to prevent the unit and system from freezing,<br />
and bleed the gas out of the gas line.<br />
Freezing is not covered by the warranty.<br />
Lighting Instructions<br />
This water heater does not have a pilot. It is equipped with an ignition device that automatically lights<br />
the burner.<br />
Do not try to light the burner by hand.<br />
1. Read the safety information in the installation manual or on the front of the water heater.<br />
2. Turn off all electrical power to the unit.<br />
3. Do not attempt to light the burner by hand.<br />
4. Turn the gas control manual valve (external to the unit) clockwise to the off position.<br />
5. Wait five minutes to clear out any gas. If the smell of gas remains, stop, and follow the instructions<br />
on page 3 of this manual.<br />
6. Turn the gas control manual valve counterclockwise to the on position.<br />
7. Turn on electric power to the unit.<br />
8. The unit will now operate whenever hot water is called for. If the unit will not operate, follow the<br />
shutdown instructions and call a service technician.<br />
Shutdown Instructions<br />
1. Stop any water demand.<br />
2. Turn off electric power.<br />
3. Turn the gas control manual valve clockwise to the off position.<br />
Should overheating occur, or the gas supply fail to shut off, turn off the manual control valve to the appliance.<br />
55
15. Dimensions<br />
1.8"<br />
(VIEW FROM TOP)<br />
10.8"<br />
10.5"<br />
7.7"<br />
7"<br />
1.5"<br />
4.3"<br />
6.1"<br />
1.8"<br />
6.3"<br />
13.3"<br />
HOT WATER OUTLET(3/4")<br />
GAS INLET (3/4")<br />
WIRING THROUGHWAYS<br />
COLD WATER INLET(3/4")<br />
4.7"<br />
13.8"<br />
0.4"<br />
9.5"<br />
13.1"<br />
0.4"<br />
3"<br />
4"<br />
FLUE COLLAR<br />
81.5<br />
3.2"<br />
UPPER WALL MOUNT BRACKETS<br />
24.5"<br />
1.2"<br />
22.3"<br />
23.6"<br />
LED<br />
AIR INLET<br />
4.7"<br />
2.4"<br />
BOTTOM OF CASE<br />
BOTTOM OF CASE<br />
AIR INLET<br />
LOWER WALL MOUNT BRACKETS<br />
0.4"<br />
3.3"<br />
0.4"<br />
COLD WATER INLET<br />
1.9"<br />
1.7"<br />
1.9"<br />
WIRING THROUGHWAYS<br />
WATER DRAIN VALVE<br />
(WATER FILTER)<br />
HOT WATER OUTLET<br />
GAS INLET<br />
WATER DRAIN VALVE<br />
56
WIRING DIAGRAM<br />
MAIN WATER<br />
FLOW CONTROL<br />
VALVE<br />
SM<br />
LS<br />
(VCC)<br />
(VCC)<br />
(Fully open)<br />
(GND)<br />
BK 8<br />
V 7<br />
W 6<br />
G 5<br />
O 4<br />
W 3<br />
BR 2<br />
BL 1<br />
BK<br />
V<br />
W<br />
G<br />
O<br />
W<br />
BR<br />
BL<br />
BL<br />
W<br />
BL<br />
1<br />
1<br />
THERMAL FUSE<br />
BL<br />
BL<br />
1<br />
THERMAL FUSE<br />
BL<br />
BL<br />
<br />
Other Unit in Quick Connect Multi System<br />
MAIN FLOW<br />
SENSOR<br />
AIR INLET<br />
THERMISTOR<br />
WATER INLET<br />
THERMISTOR<br />
WATER OUTLET<br />
THERMISTOR<br />
WATER OUTLET<br />
THERMISTOR<br />
QS<br />
<br />
<br />
<br />
(Pulse)<br />
(VCC)<br />
(GND)<br />
Y<br />
R<br />
BL<br />
BK<br />
BK<br />
W<br />
W<br />
W<br />
W<br />
W<br />
W<br />
3<br />
2<br />
1<br />
2<br />
1<br />
3<br />
2<br />
1<br />
4<br />
3<br />
2<br />
1<br />
2<br />
1<br />
Y<br />
R<br />
BL<br />
BK<br />
BK<br />
W<br />
W<br />
W<br />
W<br />
W<br />
W<br />
<br />
Y 12<br />
W 34BR<br />
56<br />
R 78<br />
9 10<br />
11 12 R<br />
13 14<br />
15 16<br />
17 18 W<br />
19 20<br />
8<br />
7<br />
6<br />
5<br />
4<br />
3<br />
2<br />
BK<br />
W<br />
1 W<br />
<br />
<br />
BL 1<br />
<br />
O 3 6 BK<br />
2 5 Y<br />
W 1 4 R<br />
MAIN CIRCUIT<br />
BOARD<br />
1<br />
2<br />
3 R<br />
4 W<br />
R 12<br />
34<br />
56<br />
78<br />
BL<br />
W<br />
O<br />
BK<br />
9 10 V<br />
11 12 G<br />
13 14 BL<br />
15 16<br />
17 18 BR<br />
W 19 20 Y<br />
BK 21 22 BL<br />
<br />
1 R<br />
2 BK<br />
3 W<br />
4 G<br />
5 BL<br />
6 BL<br />
7<br />
MAIN CIRCUIT<br />
BOARD<br />
BURNER THRMISTOR<br />
1 R<br />
R 1 R<br />
2 BK<br />
2<br />
184 3 W<br />
W 3 W<br />
4 G<br />
5 BL<br />
Manifold Gas Pressure<br />
6 BL<br />
Increase Button<br />
7<br />
<br />
Manifold Gas Pressure<br />
Decrease Button<br />
Minimum Manifold Pressure Set Button<br />
Maximum Manifold Pressure Set Button<br />
R 1<br />
BK 2<br />
W 3<br />
G 4<br />
BL 5<br />
BL 6<br />
1<br />
2<br />
3<br />
4<br />
5<br />
6<br />
R (W)<br />
BK (G)<br />
W (R)<br />
G (BK)<br />
BL<br />
BL<br />
(For Quick Connect Multi System Only)<br />
Quick Connect Cord(Optional)<br />
(R) W<br />
(BK) G<br />
(W) R<br />
(G) BK<br />
BL<br />
BL<br />
BK<br />
W<br />
2<br />
1<br />
BK<br />
W<br />
R<br />
BK<br />
W<br />
G<br />
BL<br />
BL<br />
1<br />
2<br />
3<br />
4<br />
5<br />
6<br />
1<br />
2<br />
3<br />
4<br />
5<br />
6<br />
BURNING LED<br />
140 F SETTING WIRE<br />
Y 1<br />
1 BR<br />
130 F SETTING WIRE 2<br />
2 Y<br />
<br />
R<br />
1<br />
2<br />
1<br />
2<br />
R<br />
R<br />
<br />
BL 3<br />
2<br />
BL 1<br />
W GW<br />
1 2 3 <br />
4 5 6<br />
BK WW<br />
<br />
1 2 BK<br />
R 3 4 BK<br />
5 6 W<br />
BL 7 8 GY<br />
BL<br />
GY<br />
BL<br />
R<br />
W<br />
BK<br />
6<br />
5<br />
4<br />
3<br />
2<br />
1<br />
BL<br />
GY<br />
BL<br />
R<br />
W<br />
BK<br />
BL<br />
R<br />
BK<br />
BK<br />
11<br />
DU<br />
SV<br />
Q1<br />
GAS VALVES<br />
FREEZE PREVENTION<br />
SWITCH<br />
or<br />
REMOTE CONTROLLER<br />
<br />
TRANSFORMER<br />
BK 2 BK BK<br />
W 1 W W<br />
COLOR CODING<br />
W : White BL : Blue<br />
R : Red GY : Gray<br />
BK : Black G : Green<br />
V : Violet BR : Brown<br />
O : Orange Y : Yellow<br />
W<br />
W<br />
BL<br />
BL<br />
2<br />
1<br />
BL<br />
BL<br />
G<br />
GROUND<br />
FLAME ROD<br />
GROUND<br />
CURRENT LEAKAGE<br />
SAFETY DEVICE<br />
(GFCI)<br />
BK<br />
W<br />
BK BK<br />
4 3<br />
2 1<br />
WW<br />
<br />
<br />
G<br />
FAN MOTOR<br />
FM<br />
W (Vs)<br />
BL(GND)<br />
R (Vcc)<br />
Y (FG)<br />
O (Vsp)<br />
POWER CIRCUIT<br />
BOARD<br />
W<br />
BL<br />
R<br />
Y<br />
O<br />
6<br />
5<br />
4<br />
3<br />
2<br />
1<br />
W<br />
BL<br />
R<br />
O Y<br />
<br />
6 5 4 3 2 1<br />
W RYO<br />
BL<br />
<br />
O 7<br />
6<br />
5<br />
Y 4<br />
3<br />
2<br />
W 1<br />
<br />
BK 1<br />
R 2<br />
W<br />
W<br />
BK<br />
W<br />
1<br />
2<br />
3<br />
W<br />
W<br />
W<br />
W<br />
W<br />
W<br />
W<br />
W<br />
BK<br />
W<br />
R<br />
R<br />
W<br />
W<br />
W<br />
W<br />
W<br />
W<br />
GY<br />
GY<br />
W<br />
W<br />
R<br />
R<br />
HIGH-LIMIT SWITCH<br />
1<br />
2<br />
1<br />
2<br />
1<br />
2<br />
1<br />
2<br />
3<br />
2<br />
1<br />
12<br />
10<br />
IG<br />
SV<br />
Q2<br />
SV<br />
0<br />
SV<br />
0<br />
W<br />
W<br />
<br />
WATER VALVE<br />
FOR BY-PASS<br />
<br />
CIRCULATION PUMP<br />
(OPTIONAL)<br />
1<br />
2<br />
W<br />
W<br />
ELECTRODE<br />
P<br />
FREEZE PROTECTION<br />
HEATERS<br />
HOT<br />
AC120V<br />
PRIMARY<br />
NEUTRAL<br />
RELAY 7<br />
SECONDARY<br />
AC100V<br />
(199 Model Only)<br />
CIRCULATION PUMP<br />
10A(FUSE)<br />
RELAY 8<br />
VARISTOR<br />
ANTI-FROST HEATER<br />
RELAY 9<br />
IG<br />
IGNITER<br />
ARRESTER VARISTOR<br />
RELAY 3<br />
SOLENOID VALVE 0<br />
SV0<br />
RELAY 2<br />
SOLENOID VALVE 1<br />
SV1<br />
HIGH LIMIT<br />
SWITCH<br />
GND<br />
DC90V<br />
RELAY 4<br />
SV2<br />
SOLENOID VALVE 2<br />
DC90V<br />
DC140V<br />
RELAY 5<br />
WATER VALVE FOR<br />
WV<br />
BY-PASS<br />
(199 Model Only)<br />
DC140V<br />
POWER<br />
CONTROLLER<br />
FAN<br />
COMBUTION FAN<br />
DC15V(2)<br />
PRIMARY<br />
A<br />
B<br />
C<br />
SECONDARY<br />
DC15V(1)<br />
A<br />
B<br />
15V POWER CIRCUIT<br />
WATER FLOW SENSOR<br />
WATER FLOW SERVO<br />
INPUT AND<br />
OUTPUT PULSE<br />
FAN<br />
PULSE<br />
CONTROL<br />
CIRCUIT<br />
C<br />
FREEZE PREVENTION SWITCH<br />
THERMAL FUSE<br />
RELAY 2<br />
WATER OUTLET THERMISTOR<br />
RELAY 3<br />
RELAY 4<br />
RELAY<br />
DRIVING<br />
CIRCUIT<br />
CPU<br />
WATER INLET THERMISTOR<br />
RELAY 5<br />
CENTRAL<br />
PROCESSING<br />
UNIT<br />
AIR INLET THERMISTOR<br />
RELAY 7<br />
RELAY 8<br />
BURNER SENSOR<br />
DU<br />
RELAY 9<br />
GAS PROPORTION VALVE<br />
POWER CONTROL CIRCUIT<br />
FLAME DETECTING CIRCUIT<br />
FR<br />
FLAME ROD<br />
GND<br />
5V POWER CIRCUIT<br />
57
Connecting Quick Connect Cord<br />
Caution<br />
For Quick Connect Multi System Installation<br />
usa a Quick Connect Cord (sold separately).<br />
The wire coloring on the Quick Connect Cord will<br />
not be the same as the wire coloring of the<br />
connection plug inside the unit.<br />
* The remote controller can be connected to either<br />
unit A or B.<br />
1.Red<br />
2.Black<br />
3.White<br />
4.Green<br />
5.Blue<br />
6.Blue<br />
1.Red<br />
2.Black<br />
3.White<br />
4.Green<br />
5.Blue<br />
6.Blue<br />
1.White<br />
2.Green<br />
3.Red<br />
4.Black<br />
5.Blue<br />
6.Blue<br />
1.Red<br />
2.Black<br />
3.White<br />
4.Green<br />
5.Blue<br />
6.Blue<br />
Quick Connect<br />
Cord<br />
A<br />
B<br />
"Quick Connect Cord" tag<br />
Connecting the Quick Connect Cord to the two<br />
units.<br />
1. Turn off the power.<br />
2. Remove the front cover of the heater (4 screws).<br />
3. Pass the Quick Connect Cord through the wiring<br />
throughway and into the unit.<br />
4. Plug the connector on the Quick Connect Cord to<br />
the receptacle inside the unit.<br />
5. Attach the ground wire of the Quick Connect<br />
Cord to the terminal block fixing plate.<br />
(If the ground wire is not attached, electrical nois<br />
may cause problems).<br />
6. Secure the Quick Connect Cord with a clamp.<br />
7. Replace the front cover.<br />
Wiring Throughway<br />
Ground wire<br />
Connector<br />
Connector<br />
Clamp<br />
Coupling Cord<br />
58
Remote Controller<br />
Installation Guide<br />
For Installers:<br />
Read this installation guide<br />
carefully before carrying out<br />
installation.<br />
Note<br />
Do not connect power to the water heater before the remote controller has been properly<br />
installed.<br />
Included Parts List<br />
Part Name Quantity<br />
Remote Controller<br />
1<br />
Wall Packing<br />
1<br />
Phillips Roundhead Wood Screw 2<br />
Wall Anchor<br />
2<br />
Wall Packing<br />
Connecting Wire<br />
Phillips Roundhead<br />
Wood Screw<br />
Do not disassemble the remote controller.<br />
9004223<br />
Remote Controller<br />
Wall Anchor<br />
Notes on the Installation Location<br />
• The remote should be installed in an easily<br />
accessible location.<br />
• Avoid installing in a place where water may<br />
splash on the controller.<br />
• Avoid locations where special chemical<br />
agents (e.g., benzene, fatty and oily detergents)<br />
are used.<br />
• Avoid outdoor installation, or installation in an<br />
indoor location where it will be exposed to<br />
direct sunlight.<br />
Connection of Remote Controller Cord<br />
White Connector<br />
To Remote controller<br />
Y-shaped terminals To <strong>Water</strong> heater<br />
(two-core)<br />
* Confirm the connection with the labels at<br />
both ends of the remote controller cord.<br />
• A 26' cord can be purchased separately<br />
(Part # 9005694).<br />
• The remote controller cord can be extended<br />
up to 300 ft. by splicing the cord<br />
and using 18 gauge wire to extend the<br />
cord to the appropriate length.<br />
59
Installation<br />
1. Apply Wall Packing to the rear side of the<br />
remote controller.<br />
2. Connect the remote controller wires to the<br />
separate remote controller cord.<br />
3. Remove the cover of the remote control,<br />
mark the location of the screw holes, and<br />
drill holes for the wall anchors.<br />
4. Insert the wall anchors, screw the remote<br />
control to the wall and replace the cover.<br />
Remote<br />
Control<br />
Wires<br />
Wall Packing<br />
(take off the paper)<br />
Wall Anchor<br />
Remote Controller Cord<br />
Rear Side of<br />
Remote Controller<br />
Phillips Roundhead<br />
Wood Screw<br />
60
Installing the Remote Controller Outdoor Junction Box<br />
1. Insert the remote controller wires through the<br />
wall pipe and secure the wall pipe to the<br />
remote controller. Locate the remote controller<br />
wall packing, slide it over the pipe and wires,<br />
and apply it to the rear side of the remote.<br />
Rear side of remote controller<br />
5. Slide the box nut over the remote controller<br />
wires and screw it onto the wall pipe.<br />
Wall Pipe<br />
Box Nut<br />
Secure the wall pipe<br />
firmly into the remote<br />
controller.<br />
Take off the<br />
paper.<br />
Wall Packing<br />
Remote<br />
Controller<br />
Wires<br />
2. Drill a 1-1/4" hole in the wall where the<br />
remote controller will be installed.<br />
* Do not install the remote controller in a<br />
location that is exposed to moisture, direct<br />
sunlight, or chemical agents. These can<br />
damage the remote controller.<br />
6. Connect the remote controller wires to the<br />
separate remote controller cord inside the box.<br />
Wind the excess remote controller wire on the<br />
provided hooks as illustrated below.<br />
(Wind the<br />
excess wire<br />
here.)<br />
Remote Controller<br />
Wires<br />
3. Insert the wall pipe containing the remote<br />
controller wires through the hole.<br />
4. Slide the junction box packing and the junction<br />
box over the remote controller wires and wall<br />
pipe protruding from the outside wall.<br />
Junction Box<br />
Remote Controller<br />
Cord<br />
Wall packing<br />
Take off the paper.<br />
Wall pipe<br />
Take out the pipe about<br />
3/4" from the wall.<br />
Junction Box<br />
Box Nut<br />
Remote<br />
Controller<br />
Wires<br />
Tie the redundant length of the remote<br />
controller cord outside the junction box.<br />
7. Close the junction box.<br />
Junction Box Packing<br />
61


