OPERATION MANUAL for DEWALD HYDRAULIC ... - Power Gear
OPERATION MANUAL for DEWALD HYDRAULIC ... - Power Gear
OPERATION MANUAL for DEWALD HYDRAULIC ... - Power Gear

Create successful ePaper yourself
Turn your PDF publications into a flip-book with our unique Google optimized e-Paper software.
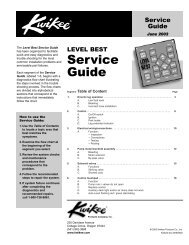
STEP 1:<br />
Turn the Leveling <strong>Power</strong> Panel On. (System <strong>Power</strong> Switch “A”)<br />
This should be turned on only when leveling operation is required and turned off when<br />
finished.<br />
Note: If your coach is equipped with air suspension, you may have an air dump switch on or near the<br />
control panel. Exhaust the air from the suspension per vehicle manufacture instructions and then<br />
proceed with leveling of coach. THIS MUST BE DONE BEFORE PROCEEDING TO STEP 2.<br />
STEP 2:<br />
Extend the Leveling Jacks (All Extend Switch “B”)<br />
Hold this switch “on” until you feel all the jacks contact the ground.<br />
STEP 3:<br />
Level The Coach (Leveling Switches “C-F”)<br />
Switches C through F are <strong>for</strong> leveling the coach only.<br />
1. Press switch “C” and lift the front of the coach at least 3 inches. This is important and necessary<br />
to allow the coach to pivot when leveling side to side. If there is insufficient jack stroke to lift the<br />
front of the coach at least 3 inches the coach will have to be moved to an area with less front to<br />
back slope.<br />
2. Extend front or rear jacks as necessary to level the coach from front to rear.<br />
3. Press switch “D” or “F” to level the coach from side to side.<br />
The front two jacks work together with switch “C” to raise the front of the coach. The back two jacks<br />
work together with switch “E” to raise the rear of the coach. The right rear works to raise the right<br />
side of the coach with switch “D”. The left rear works to raise the left side of the coach with switch<br />
“F”.<br />
Front Switch (C)<br />
Levels using the front jacks.<br />
Left Switch (F)<br />
Levels using the left rear jack.<br />
Right Switch (D)<br />
Levels using the right rear jack.<br />
Rear Switch (E)<br />
Levels using the rear jacks.<br />
STEP 4:<br />
Retract the Leveling Jacks (All Retract Switch “G”)<br />
Automatic Retract: just trip the switch momentarily and all jacks will automatically retract.<br />
This is the proper way to retract your jacks. This is the only retract switch that will give you a<br />
green light on the power board.<br />
Note: To stop jacks <strong>for</strong> any reason while system is in this automatic retract mode, press the<br />
System <strong>Power</strong> switch to “Off” and the jacks will stay in that position. Turn the System <strong>Power</strong><br />
back “On” if you want to extend them again.<br />
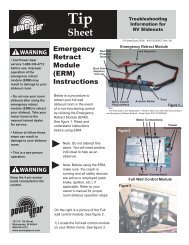
Emergency Retract Switch (H): This switch is engaged to retract jacks and is not automatic.<br />
Operator must maintain engagement on switch to retract the jacks. If jacks are retracted in<br />
this manner you will NOT receive a green “Jacks Fully Retracted” light on the panel.<br />
CAUTION<br />
Never lift the wheels off the ground when leveling the motor home.<br />
- 4 -