Training, Installation & Service Manual - Livewire Connections Ltd
Training, Installation & Service Manual - Livewire Connections Ltd
Training, Installation & Service Manual - Livewire Connections Ltd

Create successful ePaper yourself
Turn your PDF publications into a flip-book with our unique Google optimized e-Paper software.
TRAINING, INSTALLATION & SERVICE MANUAL<br />
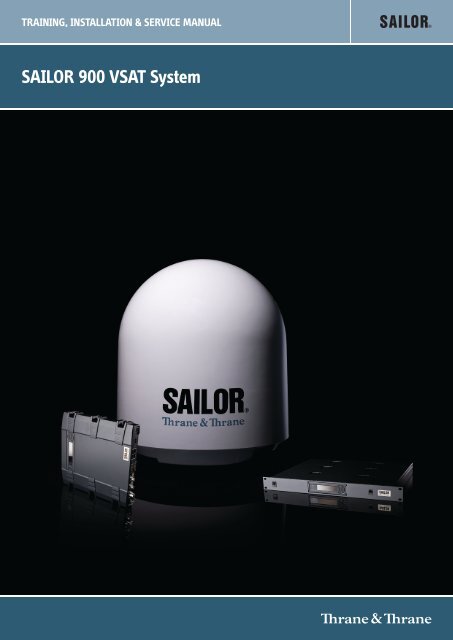
SAILOR 900 VSAT System
SAILOR 900 VSAT<br />
<strong>Training</strong>, installation and service manual<br />
Document number: 98-133966-E2<br />
Release date: 11 December 2012
Disclaimer<br />
Any responsibility or liability for loss or damage in connection with the use of this product and the<br />
accompanying documentation is disclaimed by Thrane & Thrane. The information in this manual is<br />
provided for information purposes only, is subject to change without notice and may contain errors<br />
or inaccuracies.<br />
<strong>Manual</strong>s issued by Thrane & Thrane are periodically revised and updated. Anyone relying on this<br />
information should acquire the most current version e.g. from http://www.thrane.com or from the<br />
distributor. Thrane & Thrane is not responsible for the content or accuracy of any translations or<br />
reproductions, in whole or in part, of this manual from any other source.<br />
Copyright © 2012 Thrane & Thrane A/S. All rights reserved.<br />
Trademark acknowledgements<br />
• Thrane & Thrane is a registered trademark of Thrane & Thrane A/S in the European Union and the<br />
United States.<br />
• SAILOR is a registered trademark of Thrane & Thrane A/S in the European Union and the United<br />
States.<br />
• Windows is a registered trademark of Microsoft Corporation in the United States and other<br />
countries.<br />
• Other product and company names mentioned in this manual may be trademarks or trade names<br />
of their respective owners.<br />
GPL notification<br />
The software included in this product contains copyrighted software that is licensed under the<br />
GPL/LGPL. The verbatim licenses can be found online at:<br />
http://www.gnu.org/licenses/old-licenses/gpl-2.0.html<br />
http://www.gnu.org/licenses/old-licenses/lgpl-2.1.html<br />
You may obtain the complete corresponding source code from us for a period of three years after<br />
our last shipment of this product, which will be no earlier than 2021, by sending a money order or<br />
check for DKK 50 to:<br />
SW Technology/GPL Compliance,<br />
Thrane & Thrane A/S,<br />
Lundtoftegaardsvej 93D<br />
2800 Lyngby<br />
DENMARK<br />
Please write "source for product SAILOR 900 VSAT" in the memo line of your payment. You may also<br />
find a copy of the source at http://www.thrane.com/foss. This offer is valid to anyone in receipt of<br />
this information.<br />
ii<br />
98-133966-E2
Safety summary<br />
The following general safety precautions must be observed during all phases of operation,<br />
service and repair of this equipment. Failure to comply with these precautions or with<br />
specific warnings elsewhere in this manual violates safety standards of design,<br />
manufacture and intended use of the equipment. Thrane & Thrane A/S assumes no liability<br />
for the customer's failure to comply with these requirements.<br />
Microwave radiation hazards<br />
During transmission the Above Deck Unit (antenna) in<br />
this system radiates Microwave Power.This radiation<br />
may be hazardous to humans close to the Above Deck<br />
Unit. During transmission, make sure that nobody gets<br />
closer than the recommended minimum safety distance.<br />
The minimum safety distance to the Above Deck Unit<br />
reflector on the focal line is 30 m, based on a radiation<br />
level of 10 W/m 2 . No hazard exists >25° below the Above Deck Unit’s mounting plane.<br />
Refer to the drawing below.<br />
MICROWAVE RADIATION<br />
No personnel within safety distance<br />
Safety distance:<br />
30 m, 10 W/m 2<br />
No-transmit zones<br />
In order to protect personnel no-transmit zones can be programmed. For further<br />
information see Blocking zones — azimuth and elevation on page 3-5.<br />
Distance to other equipment<br />
Do not move the Above Deck Unit closer to radars than the minimum safe distance<br />
specified in section Interference on page 3-13 — it may cause damage to the Above Deck<br />
Unit.<br />
98-133966-E2<br />
iii
Compass Safe Distance:<br />
SAILOR 900 VSAT antenna or ADU (Above Deck Unit): min. 130 cm (IEC 945).<br />
SAILOR 900 VSAT ACU (Antenna Control Unit): min. 10 cm (IEC 945)<br />
<strong>Service</strong><br />
User access to the interior of the ACU is prohibited. Only a technician authorized by Thrane<br />
& Thrane A/S may perform service - failure to comply with this rule will void the warranty.<br />
Access to the interior of the Above Deck Unit is allowed. Replacement of certain modules -<br />
as described in <strong>Service</strong> & maintenance on page 9-1 and general service may only be<br />
performed by a technician authorized by Thrane & Thrane A/S.<br />
Do not service or adjust alone<br />
Do not attempt internal service or adjustments unless another person, capable of<br />
rendering first aid resuscitation, is present.<br />
Grounding, cables and connections<br />
To minimize shock hazard and to protect against lightning, the equipment chassis and<br />
cabinet must be connected to an electrical ground. The ACU must be grounded to the ship.<br />
For further grounding information refer to the <strong>Installation</strong> manual.<br />
Do not extend the cables beyond the lengths specified for the equipment. The cable<br />
between the ACU and Above Deck Unit can be extended if it complies with the specified<br />
data concerning cable losses etc.<br />
Rx and Tx cables for the SAILOR 900 VSAT system are shielded and should not be affected<br />
by magnetic fields. However, try to avoid running cables parallel to high power and AC/RF<br />
wiring as it might cause malfunction of the equipment.<br />
Power supply<br />
The voltage range for the SAILOR 900 VSAT is 20 — 32 VDC. Note that the Above Deck Unit<br />
is powered by the ACU.<br />
If a 24 VDC power bus is not available, an external 115/230 VAC to 28 VDC power supply can<br />
be used, for example a SAILOR 6080 Power Supply.<br />
Do not operate in an explosive atmosphere<br />
Do not operate the equipment in the presence of flammable gases or fumes. Operation of<br />
any electrical equipment in such an environment constitutes a definite safety hazard.<br />
Keep away from live circuits<br />
Operating personnel must not remove equipment covers. Component replacement and<br />
internal adjustment must be made by qualified maintenance personnel. Do not replace<br />
components with the power cable connected. Under certain conditions, dangerous<br />
voltages may exist even with the power cable removed. To avoid injuries, always<br />
disconnect power and discharge circuits before touching them.<br />
Failure to comply with the rules above will void the warranty!<br />
iv<br />
98-133966-E2
CAUTION! Do not manually turn the Polarisation Unit of the antenna, it<br />
may cause damage to the antenna.<br />
If needed to turn the Polarisation Unit manually, remove the connector (1) marked M of the<br />
Polarisation Motor Module (2).<br />
(1)<br />
(2)<br />
Remove<br />
M<br />
VSAT restrictions<br />
Note<br />
There are restrictions in use of the frequency band 13.75 to 14 GHz in the<br />
following countries:<br />
• Belgium<br />
• Hungary<br />
• Latvia<br />
• Malta<br />
• Slovakia<br />
Contact VSAT modem provider for local setups.<br />
98-133966-E2<br />
v
vi<br />
98-133966-E2
Table of contents<br />
Chapter 1<br />
Chapter 2<br />
About this manual<br />
1.1 Intended readers ................................................................................1-1<br />
1.2 <strong>Manual</strong> overview ...............................................................................1-1<br />
1.3 Software version ............................................................................... 1-2<br />
1.4 Related documents ............................................................................ 1-2<br />
1.5 Typography ....................................................................................... 1-2<br />
1.6 Precautions ....................................................................................... 1-3<br />
Introduction<br />
2.1 SAILOR 900 VSAT system .................................................................. 2-1<br />
2.1.1 Overview ......................................................................................... 2-1<br />
2.1.2 Above Deck Unit (ADU) ....................................................................2-4<br />
2.1.3 Antenna Control Unit (ACU) .............................................................2-8<br />
2.1.4 VSAT Modem Unit (VMU) .............................................................. 2-10<br />
2.1.5 Satellite type approvals ................................................................. 2-10<br />
2.1.6 Power supply (optional) ................................................................ 2-10<br />
2.1.7 <strong>Service</strong> activation .......................................................................... 2-10<br />
2.2 Part numbers and options ................................................................ 2-11<br />
2.2.1 Applicable Thrane & Thrane model and part numbers .................... 2-11<br />
2.2.2 Options for SAILOR 900 VSAT ......................................................... 2-11<br />
98-133966-E2<br />
vii
Table of contents<br />
Chapter 3<br />
<strong>Installation</strong><br />
3.1 Unpacking .........................................................................................3-1<br />
3.1.1 What’s in the box .............................................................................3-1<br />
3.1.2 Initial inspection ............................................................................. 3-2<br />
3.1.3 Tools needed .................................................................................. 3-3<br />
3.2 Site preparation ................................................................................ 3-3<br />
3.2.1 General site considerations ............................................................. 3-3<br />
3.2.2 Obstructions (ADU shadowing) ....................................................... 3-4<br />
3.2.3 Blocking zones — azimuth and elevation .........................................3-5<br />
3.2.4 Safe access to the ADU: Radiation hazard .......................................3-6<br />
3.2.5 Ship motion and offset from the ship’s motion centre ..................... 3-7<br />
3.2.6 ADU mast design: Foundation and height .......................................3-8<br />
3.2.7 Interference ...................................................................................3-13<br />
3.2.8 Other precautions ..........................................................................3-17<br />
3.3 <strong>Installation</strong> of the ADU .....................................................................3-18<br />
3.3.1 Installing the ADU ..........................................................................3-19<br />
3.3.2 Opening and removing the service hatch ...................................... 3-22<br />
3.3.3 Grounding the ADU ....................................................................... 3-23<br />
3.3.4 Alternative ADU cable ................................................................... 3-25<br />
3.4 <strong>Installation</strong> of the ACU (bulkhead) ................................................... 3-26<br />
3.4.1 Installing the ACU (bulkhead) ....................................................... 3-26<br />
3.4.2 Grounding the ACU (bulkhead) ..................................................... 3-27<br />
3.4.3 SAILOR 900 VSAT ACU (bulkhead) with cable support ................... 3-28<br />
3.5 <strong>Installation</strong> of the 19” rack version of the ACU ................................ 3-30<br />
3.5.1 Installing the 19” rack version of the ACU ...................................... 3-30<br />
3.5.2 Grounding the 19” rack version of the ACU .....................................3-31<br />
3.6 <strong>Installation</strong> of the VMU ................................................................... 3-32<br />
3.6.1 General mounting considerations — VMU ..................................... 3-32<br />
3.7 Installing the dual-antenna mode (optional) ................................... 3-33<br />
viii<br />
98-133966-E2
Table of contents<br />
Chapter 4<br />
Chapter 5<br />
Chapter 6<br />
Interfaces<br />
4.1 Interfaces of the SAILOR 900 VSAT ACU ............................................ 4-1<br />
4.1.1 ACU bulkhead — LEDs, display and keypad ...................................... 4-1<br />
4.1.2 ACU 19” rack version — LEDs, display and keypad ............................ 4-1<br />
4.1.3 ACU bulkhead — Connector panel — overview ..................................4-2<br />
4.1.4 ACU 19” rack version — Connector panel — overview ........................4-2<br />
4.1.5 DC Input connector ..........................................................................4-3<br />
4.1.6 ADU connector ................................................................................4-4<br />
4.1.7 Rx/Tx connectors for VMU ..........................................................4-4<br />
4.1.8 NMEA 0183 connector (RS-422) .......................................................4-5<br />
4.1.9 RS-232 and RS-422 connectors .......................................................4-6<br />
4.1.10 LAN1, LAN2, LAN3 and LAN4 connectors ..........................................4-7<br />
4.2 Interfaces of the VMU .......................................................................4-9<br />
4.2.1 Connecting an iNFINITI® Series Satellite Router .............................4-9<br />
4.2.2 Connecting an Evolution® Satellite Router ................................... 4-10<br />
4.2.3 Connecting a Comtech 570 L or 625 Satellite Modem .................... 4-10<br />
4.2.4 Connecting a Satlink2900 VSAT modem ......................................... 4-11<br />
4.2.5 Connecting a Gilat SkyEdge II VSAT modem .................................. 4-12<br />
Connecting power<br />
5.1 Power source .................................................................................... 5-1<br />
5.2 Power cable selection .......................................................................5-2<br />
5.2.1 Source impedance ...........................................................................5-2<br />
5.2.2 Measuring the ship source impedance ............................................5-2<br />
5.2.3 Power cable recommendations .......................................................5-3<br />
5.3 Connecting power .............................................................................5-4<br />
5.4 Power up ..........................................................................................5-5<br />
Configuration<br />
6.1 Introduction to the built-in web interface ......................................... 6-1<br />
6.1.1 Overview ......................................................................................... 6-1<br />
6.1.2 Connecting to the web interface ......................................................6-2<br />
98-133966-E2<br />
ix
Table of contents<br />
6.2 Calibration of the SAILOR 900 VSAT ..................................................6-4<br />
6.2.1 Preparing for calibration .................................................................6-4<br />
6.2.2 Heading and calibration of azimuth and cable ................................6-6<br />
6.2.3 Flow chart for azimuth and cable calibration .................................6-10<br />
6.2.4 Line up procedure .......................................................................... 6-11<br />
6.2.5 SAILOR 900 VSAT fixed TX gain principle .......................................6-13<br />
6.3 Configuration with the web interface ..............................................6-14<br />
6.3.1 Overview and navigation ................................................................6-14<br />
6.3.2 Using the Dashboard .....................................................................6-18<br />
6.3.3 Satellite profiles and VSAT modem profiles ....................................6-21<br />
6.3.4 Setting up Blocking zones (RX and TX) ......................................... 6-27<br />
6.3.5 Configuring the LAN network ........................................................ 6-29<br />
6.3.6 E-mail setup ................................................................................. 6-32<br />
6.3.7 Sending statistics reports .............................................................. 6-33<br />
6.3.8 Sending a diagnostics report ........................................................ 6-36<br />
6.3.9 Dual antenna mode (optional) ...................................................... 6-37<br />
6.3.10 Upload .......................................................................................... 6-42<br />
6.3.11 Administration .............................................................................. 6-43<br />
6.4 Keypad and menus of the ACU ........................................................ 6-49<br />
6.4.1 ACU display and keypad ............................................................... 6-49<br />
6.4.2 Navigating the menus ...................................................................6-50<br />
6.4.3 The menu tree ...............................................................................6-51<br />
6.4.4 Adjusting brightness of the display ............................................... 6-54<br />
6.4.5 Resetting the system .....................................................................6-55<br />
6.5 SNMP support .................................................................................6-55<br />
Chapter 7<br />
Chapter 8<br />
Chapter 9<br />
<strong>Installation</strong> check<br />
7.1 <strong>Installation</strong> check list: Antenna ..........................................................7-1<br />
7.2 <strong>Installation</strong> check list: ACU, connectors and wiring ........................... 7-3<br />
7.3 <strong>Installation</strong> check list: Functional test in harbor ................................ 7-5<br />
Daily use — Quick guide<br />
<strong>Service</strong> & maintenance<br />
9.1 Getting support: Helpdesk ................................................................9-2<br />
9.1.1 Help desk and diagnostic report .....................................................9-2<br />
x<br />
98-133966-E2
Table of contents<br />
9.2 Software update .............................................................................. 9-5<br />
9.2.1 Hardware and software requirements ............................................ 9-5<br />
9.2.2 Software update (ADU and ACU) .................................................... 9-5<br />
9.2.3 Verifying the software update ......................................................... 9-6<br />
9.3 Status signalling with LEDs and status messages ............................. 9-8<br />
9.3.1 Overview ........................................................................................ 9-8<br />
9.3.2 LEDs of the ADU modules ............................................................... 9-9<br />
9.3.3 LEDs in the ACU ............................................................................ 9-10<br />
9.4 Removal and replacement of the ACU ............................................... 9-11<br />
9.5 Removal and replacement of ADU modules ..................................... 9-12<br />
9.5.1 Overview ....................................................................................... 9-12<br />
9.5.2 Replacing the GPS module ............................................................ 9-18<br />
9.5.3 Replacing the VSAT Interface Module (VIM) .................................. 9-21<br />
9.5.4 Replacing the DC-Motor Driver Module (DDM) ..............................9-24<br />
9.5.5 Replacing the Polarisation Motor Module (PMM) ..........................9-28<br />
9.5.6 Replacing the Pedestal Control Module (PCM) ..............................9-32<br />
9.5.7 Replacing motor and encoder .......................................................9-34<br />
9.5.8 Replacing the Drive Belts ..............................................................9-55<br />
9.5.9 Replacing the Zero Reference Module (ZRM) ................................9-63<br />
9.5.10 Replacing the Inertial Sensor Module (ISM) ..................................9-70<br />
9.5.11 Replacing the Polarisation Unit .....................................................9-73<br />
9.5.12 Replacing the BUC Fan ..................................................................9-77<br />
9.5.13 Replacing the Block Up Converter (BUC) .......................................9-78<br />
9.5.14 Replacing the Low Noise Block down converter (LNB) .................. 9-80<br />
9.5.15 Replacing the Ortho Mode Transducer (OMT) ................................9-82<br />
9.5.16 Replacing the rotary joint ..............................................................9-85<br />
9.6 Updating VIM/PCM calibration data ................................................9-89<br />
9.7 Troubleshooting .............................................................................. 9-91<br />
9.7.1 Overview ....................................................................................... 9-91<br />
9.7.2 Event list for troubleshooting ........................................................ 9-91<br />
9.7.3 Diagnostic report for troubleshooting ............................................ 9-91<br />
9.7.4 Troubleshooting — BUC .................................................................9-92<br />
9.7.5 Troubleshooting — LNB .................................................................9-93<br />
9.7.6 System block diagram (ADU) .........................................................9-93<br />
98-133966-E2<br />
xi
Table of contents<br />
Appendix A<br />
Appendix B<br />
Technical specifications<br />
A.1 SAILOR 900 VSAT system components .............................................. A-1<br />
A.1.1 General specifications ..................................................................... A-1<br />
A.1.2 ADU ................................................................................................A-2<br />
A.1.3 ACU ................................................................................................A-4<br />
A.1.4 Supported VSAT modems ................................................................A-5<br />
A.2 Outline drawings ..............................................................................A-6<br />
A.2.1 ADU ................................................................................................A-6<br />
A.2.2 ACU, bulkhead ................................................................................A-7<br />
A.2.3 ACU, 19 inch rack ........................................................................... A-8<br />
A.2.4 N-connector interface on the ADU ..................................................A-9<br />
A.3 VSAT LNB Data Sheet (physical LNB) ............................................... A-10<br />
A.3.1 VSAT LNB user installation and configuration information ............ A-10<br />
A.4 VSAT 8 W BUC Data Sheet (Extended) ............................................. A-12<br />
VMU cable specifications<br />
B.1 Modem Cable Comtech Serial & RSSI TT7016A ..................................B-2<br />
B.2 Modem Cable iNIFINITI iDirect VSAT modem ....................................B-3<br />
Appendix C<br />
VMU settings requirements<br />
C.1 Open AMIP setup for iDirect INFINITI & Evolution .............................C-2<br />
C.1.1 Protocol and interfaces ...................................................................C-2<br />
C.1.2 Sample options file .........................................................................C-5<br />
C.1.3 Configuration examples (OpenAMIP) ..............................................C-8<br />
C.2 Non-Open-AMIP setup for iDirect iNFINITI 5000 & Evolution X5 .......C-9<br />
C.2.1 Protocol and interfaces ...................................................................C-9<br />
C.2.2 Console port settings .....................................................................C-10<br />
C.2.3 Configuration examples (Non-OpenAMIP) .....................................C-12<br />
C.3 Comtech 570L, ROSS box & ACU .......................................................C-14<br />
C.3.1 Protocols and interfaces .................................................................C-14<br />
C.4 STM SatLink 2900 VSAT modem .......................................................C-15<br />
C.4.1 Interfaces and VSAT modem configuration .....................................C-15<br />
C.4.2 ACU configuration ..........................................................................C-16<br />
xii<br />
98-133966-E2
Table of contents<br />
C.5 Gilat SkyEdge II VSAT modem ......................................................... C-17<br />
C.5.1 Interfaces and VSAT modem configuration .................................... C-17<br />
C.5.2 ACU configuration ......................................................................... C-18<br />
Appendix D<br />
Appendix E<br />
Appendix F<br />
Command line interface<br />
D.1 Introduction ......................................................................................D-1<br />
D.1.1 Telnet connection ........................................................................... D-2<br />
D.1.2 Help ............................................................................................... D-2<br />
D.1.3 Conventions ................................................................................... D-3<br />
D.2 Supported commands ...................................................................... D-4<br />
D.2.1 config ............................................................................................. D-4<br />
D.2.2 demo ............................................................................................. D-4<br />
D.2.3 dual_antenna ................................................................................. D-5<br />
D.2.4 exit ................................................................................................. D-5<br />
D.2.5 help ............................................................................................... D-5<br />
D.2.6 modem ........................................................................................... D-6<br />
D.2.7 satellite .......................................................................................... D-6<br />
D.2.8 status ............................................................................................. D-9<br />
D.2.9 system ............................................................................................ D-9<br />
D.2.10 track ..............................................................................................D-10<br />
D.2.11 zone ...............................................................................................D-11<br />
DVB-S satellites<br />
Grounding and RF protection<br />
F.1 Why is grounding required? .............................................................. F-1<br />
F.1.1 Reasons for grounding .................................................................... F-1<br />
F.1.2 Safety .............................................................................................. F-1<br />
F.1.3 ESD Protection ................................................................................ F-1<br />
F.2 Grounding Recommendations ...........................................................F-2<br />
F.2.1 Grounding the ACU .........................................................................F-2<br />
F.2.2 Grounding the ADU .........................................................................F-3<br />
F.3 Alternative grounding for steel hulls .................................................F-5<br />
F.3.1 Grounding the ACU .........................................................................F-5<br />
F.3.2 Grounding the ADU .........................................................................F-5<br />
98-133966-E2<br />
xiii
Table of contents<br />
F.4 Alternative grounding for aluminum hulls ........................................ F-7<br />
F.4.1 Grounding the ACU ......................................................................... F-7<br />
F.4.2 Grounding the ADU ......................................................................... F-7<br />
F.5 Alternative grounding for fibre glass hulls .......................................F-9<br />
F.5.1 Grounding the ACU .........................................................................F-9<br />
F.5.2 Grounding the ADU ........................................................................F-10<br />
F.6 Separate ground cable ..................................................................... F-11<br />
F.6.1 Ground cable - construction .......................................................... F-11<br />
F.6.2 Ground cable - connection .............................................................F-12<br />
F.6.3 Isolation of the ADU from the mounting base .................................F-12<br />
F.7 Jumper cable for grounding .............................................................F-14<br />
F.8 RF interference ................................................................................F-15<br />
F.8.1 Recommendations .........................................................................F-15<br />
Appendix G<br />
Appendix H<br />
Glossary<br />
Index<br />
System messages<br />
G.1 Event messages — overview ............................................................. G-1<br />
G.2 List of ADU events .............................................................................G-2<br />
G.3 List of ACU events ............................................................................ G-9<br />
Approvals<br />
H.1 Satellite approvals ............................................................................ H-1<br />
H.2 CE (R&TTE) ........................................................................................ H-1<br />
............................................................................................................ Glossary-1<br />
.................................................................................................................Index-1<br />
xiv<br />
98-133966-E2
List of figures<br />
Chapter 1<br />
About this manual<br />
Chapter 2 Introduction<br />
Figure 2-1: Above Deck Unit and Antenna Control Unit (ACU).................................................2-2<br />
Figure 2-2: Above Deck Unit and Antenna Control Unit (ACU), 19” rack version ......................2-2<br />
Figure 2-3: Above Deck Unit (ADU).........................................................................................2-4<br />
Figure 2-4: Above Deck Unit modules 1/2............................................................................... 2-5<br />
Figure 2-5: Above Deck Unit modules 2/2 .............................................................................. 2-6<br />
Figure 2-6: SAILOR 900 VSAT ACU, connector overview ......................................................... 2-8<br />
Figure 2-7: SAILOR 900 VSAT ACU, 19” rack version............................................................... 2-9<br />
Figure 2-8: Antenna Control Unit for bulkhead installation.................................................... 2-9<br />
Figure 2-9: Antenna Control Unit for 19” rack installation ...................................................... 2-9<br />
Chapter 3 <strong>Installation</strong><br />
Figure 3-1: Signal degradation because of obstructing objects ...............................................3-4<br />
Figure 3-2: 2 blocking zones with no-transmit zones, azimuth (example) .............................. 3-5<br />
Figure 3-3: Blocking zone with no-transmit zones, elevation angle (example)....................... 3-5<br />
Figure 3-4: Radiation hazard, safety distance 30 m ............................................................... 3-6<br />
Figure 3-5: Maximum distance from the ship’s motion centre (h max)....................................3-7<br />
Figure 3-6: ADU mast flange, top and side view..................................................................... 3-8<br />
Figure 3-7: ADU mast flange, recommended flatness on the mast mount plateau.................. 3-8<br />
Figure 3-8: ADU mast flange, distance to the welded seam ................................................... 3-9<br />
Figure 3-9: ADU, bottom view................................................................................................ 3-9<br />
Figure 3-10: Free mast length and bracing for a tall mast ...................................................... 3-10<br />
Figure 3-11: Interference with the vessel’s radar.................................................................... 3-14<br />
Figure 3-12: Recommended distance to transmitters (m) for frequencies below 1000 MHz ..... 3-16<br />
Figure 3-13: Drain pipe with free space.................................................................................. 3-17<br />
Figure 3-14: Use of strong sling with a belt and tag lines for safe hoisting ............................. 3-18<br />
Figure 3-15: Free space for access to the service hatch........................................................... 3-19<br />
Figure 3-16: ADU installation, webbed sling attached to the 4 lifting brackets........................3-20<br />
Figure 3-17: Mounting the ADU on the mast flange................................................................3-20<br />
Figure 3-18: Connecting the ADU cable .................................................................................. 3-21<br />
Figure 3-19: Opening the service hatch ..................................................................................3-22<br />
Figure 3-20: Removing the 2 split pins ...................................................................................3-22<br />
Figure 3-21: Removing the service hatch................................................................................3-23<br />
98-133966-E2<br />
xv
List of figures<br />
Figure 3-22: ADU, bolt for optimum grounding ...................................................................... 3-24<br />
Figure 3-23: SAILOR 900 VSAT ACU without cable support..................................................... 3-26<br />
Figure 3-24: ACU, connector panel......................................................................................... 3-26<br />
Figure 3-25: SAILOR 900 VSAT ACU, bulkhead version, ground stud ...................................... 3-27<br />
Figure 3-26: Cable relief for the ACU......................................................................................3-28<br />
Figure 3-27: Mounting the cable relief 1/2..............................................................................3-28<br />
Figure 3-28: Mounting the cable relief 2/2 ............................................................................. 3-29<br />
Figure 3-29: ACU, 19” rack version, On/off switch at the back.................................................3-30<br />
Figure 3-30: ACU, LAN connector at the front: <strong>Service</strong> port......................................................3-31<br />
Figure 3-31: ACU, 19” rack version, ground stud .....................................................................3-31<br />
Figure 3-32: Dual mode antenna, overview............................................................................ 3-33<br />
Figure 3-33: Dual mode antenna, connecting cables (example) ............................................. 3-34<br />
Chapter 4 Interfaces<br />
Figure 4-1: ACU bulkhead, LEDs, display and keypad ..............................................................4-1<br />
Figure 4-2: ACU rack version, LEDs, display and keypad..........................................................4-1<br />
Figure 4-3: ACU bulkhead, connector panel overview.............................................................4-2<br />
Figure 4-4: ACU rack version, connector panel overview ........................................................4-2<br />
Figure 4-5: DC Input connector with power cable ...................................................................4-3<br />
Figure 4-6: LAN1 —LAN4 connectors .......................................................................................4-7<br />
Figure 4-7: Connecting an iNFINITI® Series Satellite Router..................................................4-9<br />
Figure 4-8: Connecting an Evolution Satellite Router ............................................................4-10<br />
Figure 4-9: Connecting a Comtech 570 L or 625 Satellite Modem ..........................................4-10<br />
Figure 4-10: Connecting a SatLink 2900 Modem ..................................................................... 4-11<br />
Figure 4-11: Connecting a Gilat SkyEdge II VSAT Modem ........................................................4-12<br />
Chapter 5<br />
Figure 5-1:<br />
Figure 5-2:<br />
Figure 5-3:<br />
Connecting power<br />
Measuring the ship source impedance.................................................................5-3<br />
Connecting power to DC Input..............................................................................5-4<br />
ACU display after first power on (example with LAN ports 1 and 4 used)...............5-5<br />
Chapter 6 Configuration<br />
Figure 6-1: Configuration setup.............................................................................................. 6-1<br />
Figure 6-2: LAN connector used for configuring the SAILOR 900 VSAT ...................................6-2<br />
Figure 6-3: SAILOR 900 VSAT Dashboard ...............................................................................6-3<br />
Figure 6-4: <strong>Service</strong> profile for calibration ...............................................................................6-5<br />
Figure 6-5: Web interface: SERVICE, Calibration.....................................................................6-6<br />
xvi<br />
98-133966-E2
List of figures<br />
Figure 6-6: Example for azimuth and cable calibration — step by step .................................. 6-10<br />
Figure 6-7: Web interface: SERVICE, Line up: Ready for activation .........................................6-11<br />
Figure 6-8: Web interface: SERVICE, Line up: Antenna ready................................................ 6-12<br />
Figure 6-9: Fixed TX gain principle....................................................................................... 6-13<br />
Figure 6-10: Topics in the web interface (SITE MAP)............................................................... 6-14<br />
Figure 6-11: Sections of the web interface.............................................................................. 6-15<br />
Figure 6-12: Web interface: DASHBOARD ............................................................................... 6-18<br />
Figure 6-13: Web interface: SETTINGS - list of satellite profiles (example) .............................. 6-21<br />
Figure 6-14: Web interface: SETTINGS, Satellite profiles — new entry (example).....................6-22<br />
Figure 6-15: Web interface: SETTINGS, VSAT modem profiles — list (example)........................6-24<br />
Figure 6-16: Web interface: SETTINGS, VSAT modem profiles — new entry (example) .............6-25<br />
Figure 6-17: Supported VSAT modems in software version 1.30 ..............................................6-25<br />
Figure 6-18: Satellite profile for generic modem.....................................................................6-26<br />
Figure 6-19: Web interface: SETTINGS, Blocking zones — azimuth and elevation ....................6-27<br />
Figure 6-20: Blocking zone, example: 315 - 45 degrees ..........................................................6-28<br />
Figure 6-21: Blocking zone, example: 45 - 315 degrees ..........................................................6-28<br />
Figure 6-22: Web interface: SETTINGS, Network (default settings) ..........................................6-29<br />
Figure 6-23: Web interface: SETTINGS, E-mail setup (example) ..............................................6-32<br />
Figure 6-24: Web interface: SETTINGS, Reports (example)......................................................6-33<br />
Figure 6-25: Statistics — how to read data for a range ............................................................6-35<br />
Figure 6-26: Statistics report (example) ..................................................................................6-36<br />
Figure 6-27: Dual-antenna mode, link on DASHBOARD..........................................................6-37<br />
Figure 6-28: Enabling dual-antenna mode in Master ACU......................................................6-38<br />
Figure 6-29: Dual-antenna mode, add Slave modem profile...................................................6-39<br />
Figure 6-30: Dual-antenna mode, add Slave satellite profile ................................................. 6-40<br />
Figure 6-31: Dual-antenna mode, Activate ............................................................................ 6-40<br />
Figure 6-32: Dual-antenna mode, blocking zones — azimuth and elevation............................ 6-41<br />
Figure 6-33: Dual-antenna mode, line up...............................................................................6-42<br />
Figure 6-34: Web interface: Administration ............................................................................6-43<br />
Figure 6-35: Web interface: Administration, change administrator logon and password.........6-44<br />
Figure 6-36: Web interface: ADMINISTRATION, Reset administrator password .......................6-44<br />
Figure 6-37: Web interface: ADMINISTRATION, User permissions...........................................6-45<br />
Figure 6-38: Web interface: Administration, Export/import configuration ...............................6-46<br />
Figure 6-39: Web interface: ADMINISTRATION, Factory default ..............................................6-48<br />
Figure 6-40: Display (example) and keypad of the ACU...........................................................6-49<br />
Figure 6-41: Antenna Control Unit, menu tree........................................................................ 6-51<br />
Figure 6-42: Reset the system................................................................................................ 6-55<br />
98-133966-E2<br />
xvii
List of figures<br />
Chapter 7<br />
<strong>Installation</strong> check<br />
Chapter 8 Daily use — Quick guide<br />
Figure 8-1: SAILOR 900 VSAT Quick Guide — web interface and satellite profiles.................... 8-1<br />
Figure 8-2: SAILOR 900 VSAT Quick Guide — Viewing system parameters...............................8-2<br />
Chapter 9 <strong>Service</strong> & maintenance<br />
Figure 9-1: Web interface: HELPDESK.....................................................................................9-2<br />
Figure 9-2: Web interface: HELPDESK, Event list.....................................................................9-3<br />
Figure 9-3: LAN connector used for configuring the SAILOR 900 VSAT ...................................9-5<br />
Figure 9-4: Verifying software update ....................................................................................9-7<br />
Figure 9-5: LEDs on the ACU ................................................................................................ 9-10<br />
Figure 9-6: LEDs on the ACU, 19” rack version ...................................................................... 9-10<br />
Figure 9-7: Removal and replacement of the ACU bulkhead.................................................. 9-11<br />
Figure 9-8: Removal and replacement of the ACU 19” rack .................................................... 9-11<br />
Figure 9-9: ADU modules and motor stop switch...................................................................9-12<br />
Figure 9-10: <strong>Service</strong> switch .....................................................................................................9-16<br />
Figure 9-11: Above Deck Unit modules (continued).................................................................9-17<br />
Figure 9-12: GPS module ........................................................................................................9-18<br />
Figure 9-13: Switch off the power to the antenna....................................................................9-19<br />
Figure 9-14: GPS module facing the service hatch...................................................................9-19<br />
Figure 9-15: Connector for GPS PCB.......................................................................................9-20<br />
Figure 9-16: Screws on GPS module.......................................................................................9-20<br />
Figure 9-17: VSAT Interface Module (VIM) ..............................................................................9-21<br />
Figure 9-18: Location of the VIM .............................................................................................9-21<br />
Figure 9-19: Replacing the VIM — remove 2 F-connectors ...................................................... 9-22<br />
Figure 9-20: Replacing the VIM — remove 2 N, 2 F, 1 SMA and 1 SUB-D connectors................ 9-22<br />
Figure 9-21: Replacing the VIM — remove 4 Allen screws....................................................... 9-23<br />
Figure 9-22: DC-Motor Driver Module (DDM) for Cross Elevation............................................ 9-24<br />
Figure 9-23: Location of the Cross Elevation DDM ..................................................................9-25<br />
Figure 9-24: Replacing the DDM — remove connectors..........................................................9-25<br />
Figure 9-25: Location of the Elevation DDM............................................................................9-26<br />
Figure 9-26: Elevation DDM, connectors.................................................................................9-26<br />
Figure 9-27: location of the Azimuth DDM.............................................................................. 9-27<br />
Figure 9-28: Azimuth DDM, connectors ..................................................................................9-28<br />
Figure 9-29: Polarisation Motor Module, remove connectors .................................................9-29<br />
Figure 9-30: Polarisation Motor Module, remove screws........................................................9-30<br />
xviii<br />
98-133966-E2
List of figures<br />
Figure 9-31: Polarisation Motor Module, inserting ................................................................. 9-31<br />
Figure 9-32: Location of the PCM............................................................................................9-32<br />
Figure 9-33: Removing the PCM — connectors .......................................................................9-33<br />
Figure 9-34: Motors and encoders..........................................................................................9-34<br />
Figure 9-35: Location of the Elevation Motor & Encoder .........................................................9-35<br />
Figure 9-36: Elevation motor and encoder, loosen the belt tensioner .....................................9-35<br />
Figure 9-37: Elevation Motor and Encoder, adjust belt tension...............................................9-36<br />
Figure 9-38: Elevation DDM, disconnect 2 connectors.............................................................9-36<br />
Figure 9-39: Elevation motor and encoder, loosen the screws for the motor assembly............9-37<br />
Figure 9-40: Elevation motor and encoder, tighten the screws for the motor assembly .......... 9-38<br />
Figure 9-41: Elevation motor and encoder, adjust belt tension .............................................. 9-38<br />
Figure 9-42: Elevation motor and encoder, check of belt tension............................................9-39<br />
Figure 9-43: Elevation motor and encoder, loosen the belt tensioner .....................................9-39<br />
Figure 9-44: Azimuth motor, remove cover............................................................................. 9-41<br />
Figure 9-45: Azimuth motor, loosen the belt tensioner ........................................................... 9-41<br />
Figure 9-46: Azimuth motor, adjust belt tension.....................................................................9-42<br />
Figure 9-47: Azimuth DDM, disconnect connector ..................................................................9-42<br />
Figure 9-48: Azimuth motor, loosen the screws for the motor assembly .................................9-43<br />
Figure 9-49: Azimuth motor, tighten the screws for the motor assembly.................................9-44<br />
Figure 9-50: Azimuth motor, adjust belt tension.....................................................................9-44<br />
Figure 9-51: Azimuth motor, tighten the belt tensioner ..........................................................9-45<br />
Figure 9-52: Azimuth encoder, remove cover..........................................................................9-46<br />
Figure 9-53: Azimuth DDM, disconnect connector ..................................................................9-46<br />
Figure 9-54: Azimuth encoder, remove...................................................................................9-47<br />
Figure 9-55: Azimuth encoder, adjust belt tension..................................................................9-47<br />
Figure 9-56: Azimuth Encoder, adjust belt tension ................................................................ 9-48<br />
Figure 9-57: Azimuth motor, tighten the belt tensioner ......................................................... 9-48<br />
Figure 9-58: Replacement of X-Elevation Motor & Encoder 1 .................................................9-49<br />
Figure 9-59: X-Elevation Motor & Encoder — belt tension/adjustment screw ......................... 9-50<br />
Figure 9-60: Cross Elevation motor assembly, 4 Allen screws ................................................ 9-50<br />
Figure 9-61: Cross Elevation motor assembly, do not tighten screws ...................................... 9-51<br />
Figure 9-62: X-Elevation Motor & Encoder — adjust belt tension ............................................ 9-51<br />
Figure 9-63: Belt tension in 3 positions ..................................................................................9-52<br />
Figure 9-64: Cross Elevation motor assembly, tighten screws .................................................9-52<br />
Figure 9-65: Polarisation Motor, disconnecting power............................................................9-53<br />
Figure 9-66: Polarisation Motor, removing 4x4 mm Allen screws............................................9-53<br />
Figure 9-67: Removing the sub-D connector of the PMM........................................................9-54<br />
98-133966-E2<br />
xix
List of figures<br />
Figure 9-68: Polarisation Encoder, removing .........................................................................9-54<br />
Figure 9-69: Location of the X Elevation Drive Belt.................................................................9-55<br />
Figure 9-70: Removing the cable drum ..................................................................................9-56<br />
Figure 9-71: Location of the Elevation Drive Belt .................................................................... 9-57<br />
Figure 9-72: Elevation Drive Belt............................................................................................ 9-57<br />
Figure 9-73: Elevation motor and encoder, loosen the belt tensioner.....................................9-58<br />
Figure 9-74: Elevation motor and encoder, adjust belt tension...............................................9-58<br />
Figure 9-75: Elevation Drive Belt............................................................................................9-59<br />
Figure 9-76: Azimuth drive modules, remove cover................................................................9-60<br />
Figure 9-77: Azimuth drive belt, loosen the belt tensioner ......................................................9-61<br />
Figure 9-78: Azimuth drive belt, adjust belt tension ................................................................9-61<br />
Figure 9-79: Getting access to the azimuth drive wheel..........................................................9-62<br />
Figure 9-80: Azimuth Drive Belt .............................................................................................9-62<br />
Figure 9-81: Zero Reference Modules (ZRM), location ...........................................................9-63<br />
Figure 9-82: Zero Reference Module (ZRM) ...........................................................................9-63<br />
Figure 9-83: X Elevation ZRM, disconnect connector..............................................................9-65<br />
Figure 9-84: X Elevation ZRM, slide out .................................................................................9-65<br />
Figure 9-85: Elevation ZRM, disconnect connector.................................................................9-66<br />
Figure 9-86: Elevation ZRM, remove screws........................................................................... 9-67<br />
Figure 9-87: Azimuth ZRM, remove cover...............................................................................9-68<br />
Figure 9-88: Azimuth ZRM, disconnect connector ..................................................................9-68<br />
Figure 9-89: Azimuth ZRM, disconnect connector ..................................................................9-69<br />
Figure 9-90: Polarisation ZRM, disconnecting........................................................................9-69<br />
Figure 9-91: Polarisation ZRM, loosen 2x4 mm Allen screws..................................................9-70<br />
Figure 9-92: Inertial Sensor Module (ISM), location ...............................................................9-70<br />
Figure 9-93: Inertial Sensor Module (ISM) ..............................................................................9-71<br />
Figure 9-94: Removing the ISM.............................................................................................. 9-72<br />
Figure 9-95: Removing the ISM Sub D connectors.................................................................. 9-72<br />
Figure 9-96: Removing the sub-D connector of the PMM ....................................................... 9-74<br />
Figure 9-97: Disconnecting the LNBs...................................................................................... 9-75<br />
Figure 9-98: Removing the cable spool .................................................................................. 9-75<br />
Figure 9-99: Disconnecting the OMT connector ...................................................................... 9-76<br />
Figure 9-100: Disconnecting the OMT connector ...................................................................... 9-76<br />
Figure 9-101: Removing the BUC fan ....................................................................................... 9-77<br />
Figure 9-102: Block Up Converter (BUC), location ....................................................................9-78<br />
Figure 9-103: Block Up Converter (BUC)...................................................................................9-78<br />
Figure 9-104: BUC, removing ................................................................................................... 9-79<br />
xx<br />
98-133966-E2
List of figures<br />
Figure 9-105: BUC, removing (continued).................................................................................9-79<br />
Figure 9-106: Low Noise Block (LNB)....................................................................................... 9-80<br />
Figure 9-107: LNB, removing.................................................................................................... 9-81<br />
Figure 9-108: LNB, removing (continued)................................................................................. 9-81<br />
Figure 9-109: Ortho Mode Transducer (OMT)........................................................................... 9-82<br />
Figure 9-110: OMT, removing 2xTorx20 screws on top............................................................. 9-83<br />
Figure 9-111: OMT, removing 4xTorx20 screws on the left-hand rail of the Polarisation Unit... 9-83<br />
Figure 9-112: OMT, removing 4xTorx20 screws on the right-hand rail of the Polarisation Unit 9-84<br />
Figure 9-113: OMT, removing.................................................................................................. 9-84<br />
Figure 9-114: OMT, removing the waveguide .......................................................................... 9-85<br />
Figure 9-115: Rotary joint........................................................................................................ 9-85<br />
Figure 9-116: Azimuth motor, remove cover............................................................................ 9-86<br />
Figure 9-117: Getting access to the azimuth drive wheel ..........................................................9-87<br />
Figure 9-118: Rotary joint (in place).........................................................................................9-87<br />
Figure 9-119: Rotary joint (removed)....................................................................................... 9-88<br />
Figure 9-120: Updating VIM/PCM calibration data (example) .................................................. 9-89<br />
Figure 9-121: XIM data, warning............................................................................................. 9-89<br />
Figure 9-122: XIM data not ready............................................................................................ 9-90<br />
Figure 9-123: XIM data valid ................................................................................................... 9-90<br />
Figure 9-124: Troubleshooting — BUC ......................................................................................9-92<br />
Figure 9-125: Troubleshooting — LNB.......................................................................................9-93<br />
App. A Technical specifications<br />
Figure A-1: Outline drawing: ADU.......................................................................................... A-6<br />
Figure A-2: Outline drawing: ACU, bulkhead.......................................................................... A-7<br />
Figure A-3: Outline drawing: ACU, 19 inch rack...................................................................... A-8<br />
Figure A-4: N-Connector interface on the ADU....................................................................... A-9<br />
App. B VMU cable specifications<br />
Figure B-1: Modem Cable Comtech Serial & RSSI TT7016A .................................................... B-2<br />
Figure B-2: Modem Cable iNIFINITI iDirect VSAT modem ...................................................... B-3<br />
App. C VMU settings requirements<br />
Figure C-1: Connecting iDirect iNFINITI 5000 series to the ACU (OpenAMIP) ......................... C-3<br />
Figure C-2: Connecting iDirect Evolution X5 to the ACU (OpenAMIP) ..................................... C-3<br />
Figure C-3: Supported OpenAMIP commands ........................................................................ C-4<br />
Figure C-4: VSAT modem profile, OpenAMIP (example) ......................................................... C-8<br />
98-133966-E2<br />
xxi
List of figures<br />
Figure C-5: Satellite profile, OpenAMIP (example)..................................................................C-8<br />
Figure C-6: Connecting iDirect iNFINITI 5000 series to the ACU (Non-OpenAMIP) ..................C-9<br />
Figure C-7: Connecting iDirect Evolution X5 to the ACU (Non-OpenAMIP) ............................ C-10<br />
Figure C-8: RS-232 Console cable for iDirect Non-OpenAMIP VSAT modem.......................... C-10<br />
Figure C-9: VSAT modem profile, Non-OpenAMIP (example).................................................C-12<br />
Figure C-10: Satellite profile, Non-OpenAMIP (example).........................................................C-13<br />
Figure C-11: Connecting Comtech 570L and ROSS box to the ACU (example)...........................C-14<br />
Figure C-12: Connecting SatLink 2900 VSAT modem to the ACU ..............................................C-15<br />
Figure C-13: Connecting Gilat SkyEdge II VSAT modem to the ACU..........................................C-17<br />
App. D Command line interface<br />
Figure D-1: How to use the command line interface (example for telnet) ................................ D-1<br />
Figure D-2: Command line interface, login ............................................................................ D-2<br />
App. E<br />
Figure E-1:<br />
DVB-S satellites<br />
Satellite data, example from www.lyngsat.com ....................................................E-2<br />
App. F Grounding and RF protection<br />
Figure F-1: Extending the ground plane.................................................................................F-3<br />
Figure F-2: Grounding the ADU..............................................................................................F-3<br />
Figure F-3: Grounding at a dedicated RF ground (alternative)................................................F-6<br />
Figure F-4: Alternative grounding for aluminium hulls...........................................................F-8<br />
Figure F-5: Alternative grounding for fibreglass hulls ...........................................................F-10<br />
Figure F-6: Separate ground cable........................................................................................ F-11<br />
Figure F-7: Isolation of the ADU from the mounting base......................................................F-12<br />
Figure F-8: ADU isolation and grounding cable.....................................................................F-13<br />
Figure F-9: Jumper cable for grounding (specifications) ........................................................F-14<br />
App. G<br />
App. H<br />
System messages<br />
Approvals<br />
xxii<br />
98-133966-E2
List of tables<br />
Chapter 1 About this manual<br />
Table 1-1: List of Related Documents .................................................................................... 1-2<br />
Chapter 2 Introduction<br />
Table 2-1: Model and part numbers for the SAILOR 900 VSAT system (T&T units)................. 2-11<br />
Table 2-2: Model and part numbers for options of the SAILOR 900 VSAT system .................. 2-11<br />
Chapter 3 <strong>Installation</strong><br />
Table 3-1: Maximum distance from the ship’s motion center versus ship’s roll period...........3-7<br />
Table 3-2: Mast dimensions without braces ......................................................................... 3-11<br />
Table 3-3: Mast dimensions with 3 braces............................................................................ 3-11<br />
Table 3-4: Mast dimensions with 2 braces........................................................................... 3-12<br />
Table 3-5: Minimum radar separation, X-band ................................................................... 3-14<br />
Table 3-6: Minimum radar separation, S-band.................................................................... 3-15<br />
Table 3-7: ADU cable types and maximum lengths..............................................................3-25<br />
Table 3-8: Dual mode antenna, cabling...............................................................................3-34<br />
Chapter 4 Interfaces<br />
Table 4-1: DC Input plug, outline and pin assignment...........................................................4-3<br />
Table 4-2: N connector, outline and pin assignment .............................................................4-4<br />
Table 4-3: F connector, Rx and Tx, outline and pin assignment.............................................4-4<br />
Table 4-4: NMEA 0183/2000 connector, outline and pin assignment .................................... 4-5<br />
Table 4-5: RS-232 connector, male, outline and pin assignment .......................................... 4-6<br />
Table 4-6: RS-422 connector, male, outline and pin assignment ...........................................4-7<br />
Table 4-7: Ethernet connector, outline and pin assignment.................................................. 4-8<br />
Table 4-8: Cables to connect an iNFINITI® Series Satellite Router ....................................... 4-9<br />
Table 4-9: Cables to connect a Comtech 570 L-Band Satellite Modem ................................. 4-10<br />
Table 4-10: Cables to connect a SatLink 2900 VSAT modem ................................................... 4-11<br />
Table 4-11: Cables to connect a Gilat SkyEdge VSAT modem................................................. 4-12<br />
Chapter 5<br />
Connecting power<br />
Chapter 6 Configuration<br />
Table 6-1: Satellite requirements for elevation and carrier................................................... 6-5<br />
Table 6-2: Satellite identifier and NID values........................................................................ 6-8<br />
98-133966-E2<br />
xxiii
List of tables<br />
Table 6-3: Possible error codes during calibration ................................................................6-9<br />
Table 6-4: Web interface: Event icon....................................................................................6-16<br />
Table 6-5: Web interface, DASHBOARD, SAILOR 900 VSAT parameters ...............................6-19<br />
Table 6-6: Web interface, DASHBOARD, VSAT MODEM parameter......................................6-20<br />
Table 6-7: Web interface, DASHBOARD, POINTING parameter............................................6-20<br />
Table 6-8: Elevation cutoff (in degrees) versus VSAT modem bandwidth and power ........... 6-23<br />
Table 6-9: Setup of LAN connectors ...................................................................................6-30<br />
Table 6-10: Statistics report, header record .......................................................................... 6-34<br />
Table 6-11: Parameters recorded in a statistics report .......................................................... 6-34<br />
Table 6-12: Top-level menus of the ACU ...............................................................................6-52<br />
Table 6-13: ANTENNA menu of the ACU................................................................................6-52<br />
Table 6-14: MODEM menu of the ACU...................................................................................6-53<br />
Table 6-15: NETWORK menu of the ACU ...............................................................................6-53<br />
Table 6-16: SATELLITE menu of the ACU ...............................................................................6-53<br />
Table 6-17: EVENTS menu of the ACU ...................................................................................6-54<br />
Chapter 7 <strong>Installation</strong> check<br />
Table 7-1: <strong>Installation</strong> check list: Antenna .............................................................................7-1<br />
Table 7-2: <strong>Installation</strong> check list: ACU, connectors and wiring ..............................................7-3<br />
Table 7-3: <strong>Installation</strong> check list: Functional test in harbour .................................................7-5<br />
Chapter 8<br />
Daily use — Quick guide<br />
Chapter 9 <strong>Service</strong> & maintenance<br />
Table 9-1: LEDs of the ADU modules.....................................................................................9-9<br />
Table 9-2: LEDs on the ACU ................................................................................................ 9-10<br />
App. A Technical specifications<br />
Table A-1: General specifications .......................................................................................... A-1<br />
Table A-2: Technical specifications for the Above Deck Unit ................................................. A-2<br />
Table A-3: Technical specifications for the ACU.................................................................... A-4<br />
Table A-4: Supported VSAT modems .................................................................................... A-5<br />
Table A-5: Technical specifications for VSAT LNB ................................................................ A-10<br />
Table A-6: 4-band switching ................................................................................................ A-11<br />
Table A-7: Technical specifications for VSAT 8 W BUC......................................................... A-12<br />
xxiv<br />
98-133966-E2
List of tables<br />
App. B<br />
VMU cable specifications<br />
App. C VMU settings requirements<br />
Table C-1: Messages sent from the VSAT modem to the ACU (examples).............................. C-4<br />
Table C-2: Messages sent from the ACU to the VSAT modem (examples).............................. C-5<br />
Table C-3: Ranges for signal strength for iDirect Open AMIP VSAT modem........................... C-5<br />
Table C-4: Information in the VSAT modem option file ......................................................... C-7<br />
Table C-5: Requirements for VSAT modem option file, Non-OpenAMIP ................................C-11<br />
Table C-6: Configuration of Gilat SkyEdge II VSAT modem................................................... C-18<br />
App. D Command line interface<br />
Table D-1: Command typography.......................................................................................... D-3<br />
Table D-2: UCLI command: config................................. D-4<br />
Table D-3: UCLI command: demo................................... D-4<br />
Table D-4: UCLI command: dual_antenna........................... D-5<br />
Table D-5: UCLI command: exit................................... D-5<br />
Table D-6: UCLI command: help................................... D-5<br />
Table D-7: UCLI command: modem.................................. D-6<br />
Table D-8: UCLI command: satellite.............................. D-6<br />
Table D-9: UCLI command: status................................. D-9<br />
Table D-10: UCLI command: system................................. D-9<br />
Table D-11: UCLI command: track................................. D-10<br />
Table D-12: UCLI command: zone.................................. D-11<br />
App. E DVB-S satellites<br />
Table E-1: Examples of DVB-S satellites for azimuth calibration ............................................ E-1<br />
App. F<br />
Grounding and RF protection<br />
App. G System messages<br />
Table G-1: ADU event messages ........................................................................................... G-2<br />
Table G-2: ACU event messages ...........................................................................................G-9<br />
App. H<br />
Approvals<br />
98-133966-E2<br />
xxv
List of tables<br />
xxvi<br />
98-133966-E2
Chapter 1<br />
1111<br />
About this manual 1<br />
1.1 Intended readers<br />
About this manual<br />
This is an installation and user manual for the SAILOR 900 VSAT<br />
system, intended for installers of the system and service personnel.<br />
Personnel installing or servicing the system must be properly<br />
trained and authorized by Thrane & Thrane. It is important that you<br />
observe all safety requirements listed in the beginning of this<br />
manual, and install the system according to the guidelines in this<br />
manual. For daily use of the SAILOR 900 VSAT system see the<br />
SAILOR 900 VSAT Quick guide or Daily use — Quick guide on page 8-1.<br />
1.2 <strong>Manual</strong> overview<br />
This manual has the following chapters:<br />
• Introduction<br />
• <strong>Installation</strong><br />
• Interfaces<br />
• Connecting power<br />
• Configuration<br />
• <strong>Installation</strong> check<br />
• Daily use — Quick guide<br />
• <strong>Service</strong> & maintenance<br />
This manual has the following appendices:<br />
• Technical specifications<br />
• VMU cable specifications<br />
• VMU settings requirements<br />
• Command line interface<br />
• DVB-S satellites<br />
• Grounding and RF protection<br />
• System messages<br />
• Approvals<br />
98-133966-E2 1-1
Software version<br />
1.3 Software version<br />
This manual is intended for SAILOR 900 VSAT with software version<br />
1.30.<br />
1.4 Related documents<br />
The following related documentation is referred to in this manual:<br />
Document number<br />
Title<br />
98-133401 SAILOR 900 VSAT Quick guide<br />
98-133400 <strong>Installation</strong> and user manual<br />
1.5 Typography<br />
Table 1-1: List of Related Documents<br />
In this manual, typography is used as indicated below:<br />
Bold is used for the following purposes:<br />
• To emphasize words.<br />
Example: “Do not touch the antenna”.<br />
• To indicate what the user should select in the user interface.<br />
Example: “Select SETTINGS > LAN”.<br />
Italic is used to emphasize the paragraph title in cross-references.<br />
Example: “For further information, see Connecting Cables on<br />
page...”.<br />
1-2 Chapter 1: About this manual 98-133966-E2
1.6 Precautions<br />
1.6.0.1 Warnings, Cautions and Notes<br />
Text marked with “Warning”, “Caution”, “Note” or “Important”<br />
show the following type of data:<br />
• Warning: A Warning is an operation or maintenance procedure<br />
that, if not obeyed, can cause injury or death.<br />
• Caution: A Caution is an operation or maintenance procedure<br />
that, if not obeyed, can cause damage to the equipment.<br />
• Note: A Note gives information to help the reader.<br />
• Important: A text marked Important gives information that is<br />
important to the user, e.g. to make the system work properly. This<br />
text does not concern damage on equipment or personal safety.<br />
Precautions<br />
1111<br />
About this manual<br />
1.6.0.2 General precautions<br />
All personnel who operate equipment or do maintenance as<br />
specified in this manual must know and follow the safety<br />
precautions.<br />
The warnings and cautions that follow apply to all parts of this<br />
manual.<br />
WARNING! Before using any material, refer to the<br />
manufacturers’ material safety data sheets for safety<br />
information. Some materials can be dangerous.<br />
CAUTION! Do not use materials that are not equivalent to<br />
materials specified by Thrane & Thrane. Materials that are<br />
not equivalent can cause damage to the equipment.<br />
CAUTION! The system contains items that are<br />
electrostatic discharge sensitive. Use approved industry<br />
precautions to keep the risk of damage to a minimum when<br />
you touch, remove or insert parts or assemblies.<br />
98-133966-E2 Chapter 1: About this manual 1-3
Precautions<br />
1-4 Chapter 1: About this manual 98-133966-E2
Chapter 22222<br />
Introduction 2<br />
This chapter is organised in the following sections:<br />
• SAILOR 900 VSAT system<br />
• Part numbers and options<br />
Introduction<br />
2.1 SAILOR 900 VSAT system<br />
2.1.1 Overview<br />
The SAILOR 900 VSAT is a unique stabilized maritime VSAT antenna<br />
system operating in the Ku-band (10.7 to 14.5 GHz). It provides bidirectional<br />
IP data connections both on regional satellite beams<br />
and quasi-global Ku-band satellite networks. The system only<br />
requires a single 50 Ohm cable to provide the Above Deck Unit with<br />
both DC power, data and control information. The radome does not<br />
have to be removed neither before nor after the installation. To<br />
protect the Above Deck Unit the built-in DC motors act as breaks<br />
during transport and when the Above Deck Unit is not powered. The<br />
ADU system can be accessed remotely and in-depth performance<br />
analysis can be done using the built-in web interface.<br />
The SAILOR 900 VSAT system consists of two units:<br />
• Above Deck Unit (ADU)<br />
• Antenna Control Unit (ACU)<br />
98-133966-E2 2-1
SAILOR 900 VSAT system<br />
The following figures show the SAILOR 900 VSAT system with its two<br />
variants of ACUs.<br />
Above Deck Unit (ADU)<br />
Antenna Control Unit (ACU)<br />
Figure 2-1: Above Deck Unit and Antenna Control Unit (ACU)<br />
Above Deck Unit (ADU)<br />
Antenna Control Unit (ACU)<br />
(1 U 19” rack mount)<br />
Figure 2-2: Above Deck Unit and Antenna Control Unit (ACU), 19” rack version<br />
2-2 Chapter 2: Introduction 98-133966-E2
2.1.1.1 SAILOR 900 VSAT features<br />
• Single 50 Ohm coax cable for the ADU.<br />
• Support of several VSAT modems.<br />
• Dual antenna mode 1 .<br />
SAILOR 900 VSAT system<br />
2222<br />
• SNMP support.<br />
• <strong>Service</strong> communication using SAILOR FleetBroadband over WAN.<br />
Introduction<br />
• Remote or local simultaneous software update of ADU and ACU<br />
via PC and Internet browser.<br />
• Global RF configuration.<br />
• Full remote control and troubleshooting with built-in test<br />
equipment (BITE).<br />
• ACU with 4 x LAN, NMEA 0183, NMEA 2000, RS-232 and RS-422.<br />
• All interfaces at the ACU, no additional units required.<br />
• DC powered. Start up voltage: 22 VDC guaranteed, operating<br />
range: 20 — 32 VDC.<br />
• No scheduled maintenance.<br />
1. Patent pending.<br />
98-133966-E2 Chapter 2: Introduction 2-3
SAILOR 900 VSAT system<br />
2.1.2 Above Deck Unit (ADU)<br />
The SAILOR 900 VSAT ADU is a 103 cm VSAT stabilised tracking<br />
antenna, consisting of a suspended antenna with a standard global<br />
RF configuration. The ADU’s weight is 135 kg. It is stabilized by<br />
heavy duty vibration dampers in 3-axis (plus skew) and can be used<br />
in environments with elevations of -25° to + 125°. The ADU is<br />
powered by the ACU and protected by a radome.<br />
Figure 2-3: Above Deck Unit (ADU)<br />
2-4 Chapter 2: Introduction 98-133966-E2
2.1.2.1 Modules in the SAILOR 900 VSAT ADU<br />
SAILOR 900 VSAT system<br />
2222<br />
Introduction<br />
Figure 2-4: Above Deck Unit modules 1/2<br />
1. GPS module.<br />
2. VSAT Interface Module (VIM).<br />
3. DC-Motor Driver Module for cross elevation (DDM).<br />
4. Cross elevation motor and encoder.<br />
5. Zero Reference Module (x4) (ZRM) (not visible on photo).<br />
6. DC-Motor Driver Module for elevation (on the bottom) (DDM).<br />
7. Elevation motor and encoder (not visible).<br />
8. Polarisation Motor Module (PMM).<br />
98-133966-E2 Chapter 2: Introduction 2-5
SAILOR 900 VSAT system<br />
9. Polarisation motor.<br />
10. Polarisation encoder (not visible on photo).<br />
11. Block Up Converter (BUC). (behind cable screen, not visible on<br />
photo)<br />
12. Low Noise Block downconverter (x2) (LNB).<br />
13. Ortho Mode Transducer (OMT). (not visible on photo)<br />
14. Inertial Sensor Module (ISM).<br />
15. Elevation locking pin to lock the antenna dish in a fixed position.<br />
16. Pedestal Control Module (PCM).<br />
17. <strong>Service</strong> switch.<br />
In switch-off position the DC Motor Driver modules and the BUC<br />
are turned off for safe conditions during service and repair. The<br />
switch must be in on position for normal ADU operation.<br />
Figure 2-5: Above Deck Unit modules 2/2<br />
18. DC-Motor Driver Module for Azimuth (DDM).<br />
19. Azimuth motor.<br />
20.Azimuth encoder.<br />
2-6 Chapter 2: Introduction 98-133966-E2
21. Rotary joint.<br />
22.Feed horn.<br />
See Overview on page 9-12 in the chapter <strong>Service</strong> & maintenance for<br />
a more detailed description of the modules.<br />
SAILOR 900 VSAT system<br />
2222<br />
2.1.2.2 SAILOR 900 VSAT ADU interface<br />
All communication between the ADU and the ACU passes through a<br />
single standard 50 Ohm cable (with N connector) through the rotary<br />
joint. No cable work is required inside the radome.<br />
Introduction<br />
2.1.2.3 <strong>Installation</strong> friendly<br />
Four lifting brackets (included in the delivery) and reuse of packing<br />
material help getting the ADU safely into place. Satellite profile<br />
parameters are entered using the built-in web server of the ACU,<br />
using a PC.<br />
The included cable relief support can be attached to the ACU.<br />
2.1.2.4 <strong>Service</strong> friendly<br />
The system configuration is saved in two modules, there is no loss of<br />
data at repair. The large service hatch of the radome gives easy<br />
access to the ADU on site. The service switch in the ADU stops the<br />
DC Motor Driver modules and turns the BUC off. The service tools for<br />
replacing modules are placed on a tool holder inside the radome.<br />
All modules have a service and power LED status indicator. Each<br />
module is encapsulated in a metal box with self-contained<br />
mounting bolts.<br />
If necessary, belts and modules can be exchanged through the<br />
service hatch on site.<br />
You can do remote diagnostics and service with the ADU. Its built-in<br />
test equipment checks constantly the ADU’s components for proper<br />
functioning, it monitors and logs information for all modules. The<br />
ADU performs a POST (Power On Self Test) and you can request a<br />
self test (Person Activated Self Test) and Continuous Monitoring<br />
(CM). Error codes can be read out in the web interface and in the<br />
display of the ACU.<br />
ADU software is updated automatically when making a software<br />
update of the ACU.<br />
98-133966-E2 Chapter 2: Introduction 2-7
SAILOR 900 VSAT system<br />
2.1.3 Antenna Control Unit (ACU)<br />
The ACU is the central unit in the system. It contains all user<br />
interfaces and manages all communication between the ADU and<br />
connected the VMU, a connected PC and an optional<br />
FleetBroadband service communication line. The ACU has a display,<br />
status LEDs and a keypad. It provides a DHCP client. During<br />
configuration you can configure heading offset, save satellite and<br />
VMU setups and enter No Transmit Zones (blocking zones in which<br />
the ADU does not transmit).<br />
The ACU provides DC power to the ADU through a single coaxial<br />
cable. You can use the SAILOR 6080 Power Supply to provide the DC<br />
power for the ACU.<br />
2.1.3.1 ACU interfaces<br />
The ACU has the following interfaces and switch:<br />
ADU Rx Out Tx in RS-422 LAN 1 LAN 2<br />
Modem Ctrl. Modem Ctrl.<br />
mm 2 .<br />
NMEA<br />
RS-232 LAN 3 LAN 4<br />
<strong>Service</strong> port<br />
Power<br />
On/Off<br />
Figure 2-6: SAILOR 900 VSAT ACU, connector overview<br />
• N-connector for ADU cable (50 Ohm).<br />
• 2 x F connectors for Rx and Tx cables (75 Ohm) to VSAT modem.<br />
• Multi connector for NMEA interfaces (for input from GPS compass<br />
or Gyro compass).<br />
• RS-422 interface for modem control.<br />
• RS-232 interface for modem control.<br />
• 4 x LAN ports for VSAT modem control and user equipment (i.e.<br />
for SAILOR FleetBroadband service communication line or WAN<br />
port for VSAT Internet).<br />
• Power connector.<br />
• On/Off power switch<br />
2-8 Chapter 2: Introduction 98-133966-E2
The 19” rack version of the ACU has additionally a LAN connector at<br />
the front for accessing the service port from the ACU front panel.<br />
SAILOR 900 VSAT system<br />
2222<br />
2.1.3.2 <strong>Installation</strong> friendly<br />
Figure 2-7: SAILOR 900 VSAT ACU, 19” rack version<br />
The ACU comes in two models: Wall or desktop installation<br />
(bulkhead) or in a 19” rack version.<br />
<strong>Service</strong> port<br />
Introduction<br />
Figure 2-8: Antenna Control Unit for bulkhead installation<br />
Figure 2-9: Antenna Control Unit for 19” rack installation<br />
98-133966-E2 Chapter 2: Introduction 2-9
SAILOR 900 VSAT system<br />
2.1.3.3 <strong>Service</strong> friendly<br />
You can do remote diagnostics and service with the ACU. Its built-in<br />
test equipment checks constantly the ACU’s modules for proper<br />
functioning, it monitors and logs for all modules. It performs POST<br />
(Power On Self Test) and you can request a PAST (Person Activated<br />
Self Test). Continuous Monitoring (CM) is also available. BITE error<br />
codes can be read out in the web interface and in the display of the<br />
ACU.<br />
Software update is done via a connected PC and the built-in web<br />
interface of the ACU.<br />
2.1.4 VSAT Modem Unit (VMU)<br />
SAILOR 900 VSAT is designed to be operated with third-party VSAT<br />
modems. For a list of supported VSAT modems see the SAILOR 900<br />
VSAT data sheet at thrane.com.<br />
2.1.5 Satellite type approvals<br />
For a list of satellite type approvals see the SAILOR 900 VSAT data<br />
sheet at thrane.com.<br />
2.1.6 Power supply (optional)<br />
Use the SAILOR 6080 Power Supply to provide DC power to the<br />
SAILOR 900 VSAT.<br />
2.1.7 <strong>Service</strong> activation<br />
Before you can start using the SAILOR 900 VSAT, you need to<br />
activate the system for VSAT service. Contact your service provider<br />
for activation.<br />
2-10 Chapter 2: Introduction 98-133966-E2
2.2 Part numbers and options<br />
2.2.1 Applicable Thrane & Thrane model and part<br />
numbers<br />
Part numbers and options<br />
2222<br />
The following model and part numbers are available for the SAILOR<br />
900 VSAT system:<br />
T&T part number Model number Description<br />
407009A-00500 TT-7009A-THR SAILOR 900 VSAT Above Deck Unit (ADU)<br />
407016A-00500 TT-7016A-T19 SAILOR 900 VSAT Antenna Control Unit (19 inch rack)<br />
407016A-00510 TT-7016A-TBH SAILOR 900 VSAT Antenna Control Unit (bulkhead)<br />
Table 2-1: Model and part numbers for the SAILOR 900 VSAT system (T&T units)<br />
Introduction<br />
2.2.2 Options for SAILOR 900 VSAT<br />
The following options are available for the SAILOR 900 VSAT system:<br />
Part number<br />
Description<br />
406080A-00500 Power Supply<br />
407090A-950 Antenna cable 50 m, N-Conn (not<br />
mounted), male/male<br />
407090A-925 Pigtail Cable 1.25 m, N-Conn,<br />
female/male<br />
— Accessory kit for dual antenna mode<br />
Table 2-2: Model and part numbers for options of the SAILOR 900<br />
VSAT system<br />
98-133966-E2 Chapter 2: Introduction 2-11
Part numbers and options<br />
2-12 Chapter 2: Introduction 98-133966-E2
<strong>Installation</strong> 3<br />
This chapter is organised in the following sections:<br />
• Unpacking<br />
• Site preparation<br />
• <strong>Installation</strong> of the ADU<br />
• <strong>Installation</strong> of the ACU (bulkhead)<br />
• <strong>Installation</strong> of the 19” rack version of the ACU<br />
• <strong>Installation</strong> of the VMU<br />
Chapter 33333<br />
<strong>Installation</strong><br />
3.1 Unpacking<br />
3.1.1 What’s in the box<br />
3.1.1.1 ADU<br />
Unpack your SAILOR 900 VSAT ADU and check that the following<br />
items are present:<br />
• ADU with 4 lifting brackets (already mounted)<br />
• Package with bolts, washers and cable glands (2 sizes)<br />
3.1.1.2 ACU (bulkhead)<br />
Unpack your SAILOR 900 VSAT ACU (bulkhead) and check that the<br />
following items are present:<br />
• 1 x Ethernet cable (2 m)<br />
• Power connector<br />
• 2 x 75 Ohm coax cables F-F (1m), for Rx and Tx<br />
• NMEA multi-connector<br />
• <strong>Installation</strong> manual (this manual)<br />
• Quick guide<br />
• Cable relief<br />
98-133966-E2 3-1
Unpacking<br />
3.1.1.3 ACU (19” rack version)<br />
Unpack your SAILOR 900 VSAT ACU (19” rack version) and check<br />
that the following items are present:<br />
• 1 x Ethernet cable (2 m)<br />
• 1 x Ethernet cable (short)<br />
• Power connector<br />
• 2 x 75 Ohm coax cables F-F (1m), for Rx and Tx<br />
• NMEA multi-connector<br />
• <strong>Installation</strong> manual (this manual)<br />
• Quick guide<br />
3.1.2 Initial inspection<br />
Inspect the shipping cartons and wooden box immediately upon<br />
receipt for evidence of damage during transport. If the shipping<br />
material is severely damaged or water stained, request that the<br />
carrier's agent be present when opening the cartons and wooden<br />
box. Save all box packing material for future use.<br />
WARNING! To avoid electric shock, do not apply<br />
power to the system if there is any sign of shipping<br />
damage to any part of the front or rear panel or the<br />
outer cover. Read the safety summary at the front of<br />
this manual before installing or operating the system.<br />
After unpacking the system, i.e. removing the top and sides of the<br />
wooden box and opening the cartons, inspect it thoroughly for<br />
hidden damage and loose components or fittings. If the contents are<br />
incomplete, if there is mechanical damage or defect, or if the system<br />
does not work properly, notify your dealer.<br />
3-2 Chapter 3: <strong>Installation</strong> 98-133966-E2
3.1.3 Tools needed<br />
• Unbraco key (5 mm), included, mounted on a tool holder inside<br />
the radome.<br />
Other tools that may be needed during the installation:<br />
• Torx TX20 to open the locks of the service hatch<br />
• Wrench to fasten the mounting bolts for the ADU<br />
• Wrench to fasten the N connector at the ADU<br />
• PC and Internet browser<br />
• Drill for the mounting holes for the ACU<br />
• Crimping tools<br />
For tools needed when replacing modules you find a list of tools<br />
needed for each module in the chapter <strong>Service</strong> & maintenance.<br />
Site preparation<br />
3333<br />
<strong>Installation</strong><br />
3.2 Site preparation<br />
The following topics have to be considered when installing the ADU:<br />
• General site considerations<br />
• Obstructions (ADU shadowing)<br />
• Blocking zones — azimuth and elevation<br />
• Safe access to the ADU: Radiation hazard<br />
• Ship motion and offset from the ship’s motion centre<br />
• ADU mast design: Foundation and height<br />
• Interference<br />
• Other precautions<br />
3.2.1 General site considerations<br />
For optimum system performance, some guidelines on where to<br />
install or mount the different components of the SAILOR 900 VSAT<br />
System must be followed.<br />
It is recommended to mount the ADU in a location with as much<br />
360° free line of sight to the satellite as possible while making sure<br />
that the support structure fulfills the requirements for the mast<br />
foundation. The ADU must be mounted on stiffened structures with<br />
a minimum of exposure to vibrations.<br />
98-133966-E2 Chapter 3: <strong>Installation</strong> 3-3
Site preparation<br />
3.2.2 Obstructions (ADU shadowing)<br />
Place the ADU so that it has as much free line-of-sight without any<br />
structures in the beam through one full 360 degrees turn of the<br />
vessel. Do not place the ADU close to large objects that may block<br />
the signal. To avoid obstruction elevate the ADU by mounting it on a<br />
mast or on a mounting pedestal on a deck or deck house top.<br />
The ADU is stabilized in 3-axis (plus skew) and can be used in<br />
environments with elevations of -25° to + 125° to allow for<br />
continuous pointing even in heavy sea conditions.<br />
The ADU beam is approximately 1 m in diameter for the first 30 m<br />
from the ADU. Beyond 30 m the beam gradually widens so that it is<br />
approximately 5 m in diameter at 100 m distance. This beam<br />
expansion continues with increasing distance.<br />
Any obstructions, such as masts, funnels, bridge house etc. within<br />
this field can cause signal degradation or signal loss.<br />
Note<br />
Figure 3-1: Signal degradation because of obstructing objects<br />
Please note that due to the short wavelength at Ku band<br />
and the narrow beam width of the ADU even a 6 mm steel<br />
wire placed within 50 m inside the beam can causes signal<br />
degradation.<br />
3-4 Chapter 3: <strong>Installation</strong> 98-133966-E2
3.2.3 Blocking zones — azimuth and elevation<br />
Your installation may require that you setup blocking zones for the<br />
ADU, i.e. areas where the ADU will not transmit and areas where<br />
transmit power is potentially dangerous for persons frequently<br />
being in these zones. You can set up 8 blocking zones. Each<br />
blocking zone is set up with azimuth start and stop, and elevation<br />
angle.<br />
<br />
<br />
<br />
<br />
<br />
<br />
<br />
<br />
<br />
Site preparation<br />
3333<br />
<strong>Installation</strong><br />
<br />
<br />
<br />
<br />
<br />
<br />
<br />
<br />
<br />
<br />
<br />
<br />
<br />
Figure 3-2: 2 blocking zones with no-transmit zones, azimuth (example)<br />
Figure 3-3: Blocking zone with no-transmit zones, elevation angle (example)<br />
The blocking zones are set up in the SAILOR 900 VSAT built-in web<br />
interface of the ACU. For further information see Setting up Blocking<br />
98-133966-E2 Chapter 3: <strong>Installation</strong> 3-5
Site preparation<br />
zones (RX and TX) on page 6-27.<br />
3.2.4 Safe access to the ADU: Radiation hazard<br />
The SAILOR 900 VSAT ADU radiates up to 49 dBW EIRP. This<br />
translates to a minimum safety distance of 30 m from the ADU while<br />
it is transmitting, based on a radiation level of 10 W/m 2 .<br />
MICROWAVE RADIATION<br />
NO PERSONNEL within safety<br />
distance, based on 10 W/m 2<br />
Safety distance:<br />
30 m, 10 W/m 2<br />
Figure 3-4: Radiation hazard, safety distance 30 m<br />
3-6 Chapter 3: <strong>Installation</strong> 98-133966-E2
3.2.5 Ship motion and offset from the ship’s<br />
motion centre<br />
Even though it is recommended to mount the ADU high, keep the<br />
distance between the ADU and the ship’s motion centre as short as<br />
possible. The higher up the ADU is mounted, the higher is the linear<br />
g force applied to the ADU. The g force also depends on the roll<br />
period of the ship, see Table 3-1. If the g force applied is too high,<br />
performance and ADU signal stabilization may be reduced and<br />
eventually the ADU may be damaged. Refer to the following table<br />
for allowed mounting heights above the ship’s motion centre.<br />
Site preparation<br />
3333<br />
<strong>Installation</strong><br />
<br />
Figure 3-5: Maximum distance from the ship’s motion centre (h max)<br />
Min.<br />
roll period<br />
Max. ADU mounting height (h max)<br />
Full performance<br />
Potential risk of damage<br />
4 s 12 m 16 m<br />
6 s 27 m 35 m<br />
8 s 48 m 62 m<br />
10 s 75 m 98 m<br />
Table 3-1: Maximum distance from the ship’s motion center versus ship’s<br />
roll period<br />
98-133966-E2 Chapter 3: <strong>Installation</strong> 3-7
Site preparation<br />
3.2.6 ADU mast design: Foundation and height<br />
The ADU mast must be designed to carry the weight of the ADU unit,<br />
which is 135 kg (+ the weight of the mast flange). The mast must<br />
also be able to withstand on-board vibrations and wind speeds up<br />
to 110 knots on the radome, even in icing conditions.<br />
3.2.6.1 ADU mast flange<br />
Fit the top of the ADU mast with a flange with clearance holes<br />
matching the bushings in the radome and with minimum 4 gusset<br />
plates. No center hole is necessary in the flange.<br />
• Flange thickness: Minimum 15 mm.<br />
• 4 gusset plates: Minimum 15 mm thick, must be placed close<br />
to the holes in the mounting plate and evenly distributed.<br />
Gusset plates<br />
(15 mm thick) 15 mm<br />
Figure 3-6: ADU mast flange, top and side view<br />
Recommended flatness on the mast mount plateau is below 3,0 mm.<br />
Figure 3-7: ADU mast flange, recommended flatness on the mast mount plateau<br />
3-8 Chapter 3: <strong>Installation</strong> 98-133966-E2
Site preparation<br />
3333<br />
Figure 3-8: ADU mast flange, distance to the welded seam<br />
CAUTION! Avoid sharp edges where the flange is in<br />
direct contact with the radome. Round all edges as much<br />
as possible to avoid damaging the surface of the radome.<br />
<strong>Installation</strong><br />
Figure 3-9: ADU, bottom view<br />
98-133966-E2 Chapter 3: <strong>Installation</strong> 3-9
Site preparation<br />
3.2.6.2 Mast length and diameter<br />
The placement of the ADU must ensure a rigid structural connection<br />
to the hull or structure of the ship. Parts of the ship with heavy<br />
resonant vibrations are not suitable places for the ADU. A small<br />
platform or short mast shall provide rigid support for the ADU<br />
fastening bolts and a rigid interface to the ship.<br />
If it is necessary to use a tall mast, you must stabilise the mast with<br />
bracing. Note that the design values given below depend on rigid<br />
ADU-ship interfaces. The cross-sectional properties and the<br />
corresponding maximum free length give a natural frequency close<br />
to 30 Hz. It is recommended to shorten the mast length as much as<br />
possible to obtain higher frequencies. Preferably, mount stays or<br />
wires to stabilize the mast further.<br />
Free mast length (m)<br />
Figure 3-10: Free mast length and bracing for a tall mast<br />
Note<br />
Make sure that there is free space below the drain tube. Read<br />
also Condensation and water intrusion on page 3-17.<br />
The tables in the next sections give some suggested design values<br />
for the free mast length.<br />
Note<br />
The tables list the values for steel masts. For aluminium masts,<br />
the free mast length is reduced to 75% of the values for steel.<br />
Note<br />
Bracing and rigid masts can still not prevent vertical vibration if<br />
the mast is attached to a deck plate that is not rigid. Make every<br />
effort to mount the mast on a surface that is well supported by<br />
ribs. If this is not possible, provide extra deck plate propping.<br />
3-10 Chapter 3: <strong>Installation</strong> 98-133966-E2
3.2.6.3 SAILOR 900 VSAT ADU mast length<br />
The below tables show the minimum dimensions for a SAILOR 900<br />
VSAT ADU mast with and without stays or wires. Note that the<br />
values are only guidelines - always consider the environment and<br />
characteristics of the ship before deciding on the mast dimensions.<br />
Mast without<br />
braces<br />
Max. free<br />
mast<br />
length<br />
(steel), (m)<br />
Outer<br />
Diameter<br />
(mm)<br />
Wall<br />
Thickness<br />
(mm)<br />
Weight<br />
(kg/m)<br />
Site preparation<br />
3333<br />
0.4 a<br />
200 5 24.0<br />
0.6 220 5 26.5<br />
0.8 250 5 30.2<br />
<strong>Installation</strong><br />
1 270 5 32.7<br />
Table 3-2: Mast dimensions without braces<br />
a. The height of 0.4 m is not recommended to be used as it will make<br />
access through the ADU’s service hatch difficult.<br />
Mast with 3 braces<br />
Max. free<br />
mast<br />
length<br />
(steel), (m)<br />
Outer<br />
Diameter<br />
(mm)<br />
Wall<br />
Thickness<br />
(mm)<br />
Outer<br />
Diameter<br />
for brace<br />
(mm)<br />
Thickness<br />
for brace<br />
(mm)<br />
1.2 140 10 50 5.0<br />
1.2 200 5 50 5.0<br />
1.6 140 10 70 5.0<br />
1.6 200 5 70 5.0<br />
2 160 10 70 5.0<br />
30-40°<br />
2 220 5 70 5.0<br />
2.5 180 10 80 5.0<br />
2.5 220 5 80 5.0<br />
Table 3-3: Mast dimensions with 3 braces<br />
98-133966-E2 Chapter 3: <strong>Installation</strong> 3-11
Site preparation<br />
Mast with 2 braces<br />
Max. free mast<br />
length (steel),<br />
(m)<br />
Outer<br />
Diameter<br />
(mm)<br />
Wall<br />
Thickness<br />
(mm)<br />
Outer<br />
Diameter<br />
for brace<br />
(mm)<br />
Thickness<br />
for<br />
brace<br />
(mm)<br />
1.2 160 10 80 5.0<br />
1.2 200 5 80 5.0<br />
1.6 180 10 80 5.0<br />
1.6 220 5 80 5.0<br />
2 180 10 80 5.0<br />
2 240 5 80 5.0<br />
2.5 200 10 80 5.0<br />
2.5 260 5 80 5.0<br />
Table 3-4: Mast dimensions with 2 braces<br />
3-12 Chapter 3: <strong>Installation</strong> 98-133966-E2
3.2.7 Interference<br />
Note<br />
Do not place the ADU close to interfering signal sources or<br />
receivers. For allowed distances to other transmitters see<br />
Figure 3-12: Recommended distance to transmitters (m)<br />
for frequencies below 1000 MHz on page 3-16. We<br />
recommend testing the total system by operating all<br />
equipment simultaneously and verifying that there is no<br />
interference.<br />
The ADU must be mounted as far away as possible from the ship’s<br />
radar and high power radio transmitters, because they may<br />
compromise the ADU performance. RF emission from radars might<br />
actually damage the ADU.<br />
The SAILOR 900 VSAT ADU itself may also interfere with other radio<br />
systems.<br />
Site preparation<br />
3333<br />
<strong>Installation</strong><br />
3.2.7.1 Radar<br />
It is difficult to give exact guidelines for the minimum distance<br />
between a radar and the ADU because radar power, radiation<br />
pattern, frequency and pulse length/shape vary from radar to radar.<br />
Further, the ADU is typically placed in the near field of the radar<br />
ADU and reflections from masts, decks and other items in the<br />
vicinity of the radar are different from ship to ship.<br />
However, it is possible to give a few guidelines. Since a radar<br />
radiates a fan beam with a horizontal beam width of a few degrees<br />
and a vertical beam width of up to +/- 15°, the worst interference<br />
can be avoided by mounting the ADU at a different level – meaning<br />
that the ADU is installed minimum 15° above or below the radar<br />
antenna. Due to near field effects the benefit of this vertical<br />
separation could be reduced at short distances (below<br />
approximately 10 m) between radar antenna and the SAILOR 900<br />
VSAT ADU. Therefore it is recommended to ensure as much vertical<br />
separation as possible when the SAILOR 900 VSAT ADU has to be<br />
placed close to a radar antenna.<br />
98-133966-E2 Chapter 3: <strong>Installation</strong> 3-13
Site preparation<br />
Radar<br />
Min. 15°<br />
Min. 15°<br />
Figure 3-11: Interference with the vessel’s radar<br />
3.2.7.2 Radar distance<br />
The minimum acceptable separation (d min.) between a radar and<br />
the ADU is determined by the radar wavelength/frequency and the<br />
power emitted by the radar. The tables below show some “rule of<br />
thumb” minimum separation distances as a function of radar power<br />
at X and S band. If the d min. separation listed below is applied,<br />
antenna damage is normally avoided.<br />
“d min.” is defined as the shortest distance between the radar<br />
antenna (in any position) and the surface of the SAILOR 900 VSAT<br />
ADU.<br />
X-band (~ 3 cm / 10 GHz) damage distance<br />
Radar<br />
power<br />
SAILOR 900 VSAT ADU<br />
d min. at 15° vertical<br />
separation<br />
0 – 10 kW 1.0 m 1.0 m<br />
30 kW 2.0 m 1.0 m<br />
50 kW 3.3 m 1.7 m<br />
d min. at 60° vertical<br />
separation<br />
Table 3-5: Minimum radar separation, X-band<br />
3-14 Chapter 3: <strong>Installation</strong> 98-133966-E2
S-band (~ 10 cm / 3 GHz) damage distance<br />
Radar<br />
power<br />
SAILOR 900 VSAT ADU<br />
d min. at 15° vertical<br />
separation<br />
0 – 10 kW 2.0 m 1.0 m<br />
30 kW 3.0 m 1.5 m<br />
50 kW 5.0 m 2.5 m<br />
d min. at 60° vertical<br />
separation<br />
Table 3-6: Minimum radar separation, S-band<br />
Site preparation<br />
3333<br />
The separation distance for C-band (4-8 GHz) radars should<br />
generally be the same as for X-band radars.<br />
<strong>Installation</strong><br />
3.2.7.3 Radar interference<br />
Even at distances greater than “d min.” in the previous section the<br />
radar might still be able to degrade the performance of the SAILOR<br />
900 VSAT system.<br />
The presence of one or more S or X-band radars within a radius up<br />
to 100 m may cause a minor degradation of the Ku-band<br />
connection. The degradation will be most significant at high radar<br />
pulse repetition rates.<br />
As long as receiving conditions are favourable, this limited<br />
degradation is without importance. However, if receiving conditions<br />
are poor – e.g. due to objects blocking the signal path, heavy<br />
rainfall or icing, low satellite elevation and violent ship movements<br />
– the small extra degradation due to the radar(s) could cause poor<br />
connection quality.<br />
The presence of S-band radar(s) is unlikely to cause any<br />
performance degradation – as long as the minimum distances (d<br />
min.) listed in the previous section are applied.<br />
It is strongly recommended that interference free operation is<br />
verified experimentally before the installation is finalized.<br />
CAUTION! The ADU must never be installed<br />
closer to a radar than “d min.” - even if<br />
experiments show that interference free<br />
operation can be obtained at shorter distances<br />
than “d min.” in the previous section.<br />
98-133966-E2 Chapter 3: <strong>Installation</strong> 3-15
Site preparation<br />
3.2.7.4 GPS receivers<br />
Good quality GPS receivers will work properly very close to the ADU<br />
- typically down to one meter outside the main beam.<br />
3.2.7.5 Other transmitters<br />
See the following figure for minimum recommended distance to<br />
transmitters in the frequency range below 1000 MHz.<br />
Figure 3-12: Recommended distance to transmitters (m) for frequencies below<br />
1000 MHz<br />
3-16 Chapter 3: <strong>Installation</strong> 98-133966-E2
3.2.8 Other precautions<br />
3.2.8.1 Condensation and water intrusion<br />
If possible, install the radome such that direct spray of seawater is<br />
avoided. In some weather conditions there may occur condensation<br />
inside the radome. The drain tube is designed to lead any water<br />
away from inside the radome. Make sure the ADU’s drain tube is<br />
open and that there it free space between the drain tube and the<br />
mounting surface so water can escape and there is ventilation for<br />
the ADU.<br />
Site preparation<br />
3333<br />
<strong>Installation</strong><br />
Free space<br />
Figure 3-13: Drain pipe with free space<br />
It is recommended not to use pneumatic tools for cleaning the<br />
radome, especially at a short distance and directly at the split<br />
between top and bottom.<br />
3.2.8.2 Deposits<br />
Do not place the ADU close to a funnel, as smoke deposits are<br />
corrosive. Furthermore, deposits on the radome can degrade<br />
performance.<br />
98-133966-E2 Chapter 3: <strong>Installation</strong> 3-17
<strong>Installation</strong> of the ADU<br />
3.3 <strong>Installation</strong> of the ADU<br />
The ADU is shipped fully assembled. You have to install it on the<br />
mast and attach the ADU cable.<br />
WARNING! Use a strong webbed sling with a belt to<br />
lift the ADU without damaging the radome. Make sure<br />
that the sling can carry the ADU’s weight (135 kg,<br />
288 lbs).<br />
WARNING! The ADU may be subject to swaying<br />
motions in windy conditions. Always use tag lines to<br />
stabilise the ADU during hoisting.<br />
Webbed sling with belt<br />
Tag lines<br />
Figure 3-14: Use of strong sling with a belt and tag lines for safe hoisting<br />
Before installing the ADU read the following guidelines.<br />
3-18 Chapter 3: <strong>Installation</strong> 98-133966-E2
3.3.1 Installing the ADU<br />
Make sure that there is sufficient space underneath the ADU to open<br />
the service hatch. Through this hatch you access the ADU modules<br />
for service and maintenance.<br />
Provide sufficient free space<br />
for access through<br />
the service hatch.<br />
<strong>Installation</strong> of the ADU<br />
3333<br />
<strong>Installation</strong><br />
Figure 3-15: Free space for access to the service hatch<br />
The ADU does not have to be aligned with the bow-to-stern line of<br />
the ship. When configuring the SAILOR 900 VSAT you make an<br />
azimuth calibration to obtain the correct azimuth of the ADU.<br />
• It is important to maintain vertical orientation of the ADU center<br />
line.<br />
• Consider the aspect of interference, read more about this in ADU<br />
mast design: Foundation and height on page 3-8.<br />
• Install the ADU where vibrations are limited to a minimum.<br />
• Always use all 4 bolts when installing the ADU.<br />
To install the ADU, do as follows:<br />
1. Install the mast with the mast flange and have the 4 M12 bolts<br />
ready.<br />
2. Undo all shipping buckles, take off the wooden top and remove<br />
the casing.<br />
3. Unscrew the 4 bolts holding the ADU on the wooden platform.<br />
98-133966-E2 Chapter 3: <strong>Installation</strong> 3-19
<strong>Installation</strong> of the ADU<br />
4. Attach a webbed, four-part sling with a belt to all 4 lifting<br />
brackets.<br />
Figure 3-16: ADU installation, webbed sling attached to the 4 lifting<br />
brackets<br />
5. Attach 2 tag lines of suitable length to 2 lifting brackets and man<br />
them.<br />
6. With a crane lift the ADU off the wooden platform and move it on<br />
top of the ADU mast.<br />
7. Install the ADU on the mast flange with 4 M12 bolts and washers.<br />
Read carefully and follow instructions given in Grounding the<br />
ADU on page F-3.<br />
Tightening torque value: 30 Nm<br />
Figure 3-17: Mounting the ADU on the mast flange<br />
3-20 Chapter 3: <strong>Installation</strong> 98-133966-E2
8. Put the coaxial ADU cable through the protection plate as shown<br />
in the following figure, and connect the N connector of the ADU<br />
cable to the ADU.<br />
Select a suitable size for the cable gland: 16—20 mm diameter or<br />
19—23 mm diameter. See also N-connector interface on the ADU<br />
on page A-9 for a more detailed drawing how to connect the N-<br />
connector on the ADU.<br />
Protection plate<br />
<strong>Installation</strong> of the ADU<br />
3333<br />
N connector<br />
<strong>Installation</strong><br />
1 2<br />
3 4<br />
5 6<br />
Ensure that the connector assembly is properly protected against<br />
seawater and corrosion. As a minimum, wrap it with selfamalgamating<br />
rubber.<br />
9. Put the protection plate in place and fasten the 4 bolts (picture 5).<br />
10. Fasten the nut (picture 6).<br />
Figure 3-18: Connecting the ADU cable<br />
Where the cables are exposed to mechanical wear — on deck,<br />
through bulkheads, etc. — protect the cables with steel pipes.<br />
98-133966-E2 Chapter 3: <strong>Installation</strong> 3-21
<strong>Installation</strong> of the ADU<br />
Otherwise, follow standard procedures for cabling in ship<br />
installations.<br />
3.3.1.1 Maximum allowed RF loss in the ADU cable<br />
Maximum allowed cable loss 20 dB at 1950 MHz. This is to ensure<br />
optimum performance of the system.<br />
3.3.2 Opening and removing the service hatch<br />
Open the hatch to access the antenna modules. The two latches of<br />
the service hatch must be locked by fastening the two screws in the<br />
latches with a Torx TX20 screw driver to protect the ADU modules<br />
against unauthorised access.<br />
You can remove the hatch for better mobility when servicing the<br />
antenna. Do as follows to open and remove the service hatch:<br />
1. With a Torx TX20 screw driver, remove the two screws locking the<br />
latches.<br />
2. Pull open the two latches and let the lid fall open.<br />
Open with Torx TX20<br />
Figure 3-19: Opening the service hatch<br />
3. Remove the 2 split pins and park them.<br />
Figure 3-20: Removing the 2 split pins<br />
3-22 Chapter 3: <strong>Installation</strong> 98-133966-E2
4. Pull the service hatch free. A wire keeps the service hatch<br />
attached to the antenna.<br />
3.3.3 Grounding the ADU<br />
Attention!<br />
Heavy service hatch!<br />
The wire may not always<br />
be mounted.<br />
Figure 3-21: Removing the service hatch<br />
The ADU must be grounded using the mounting bolts. If the ADU<br />
cannot or should not be electrically connected directly to the<br />
mounting surface, you can use a separate grounding cable to make<br />
the connection between the ADU and the common ground to which<br />
the ACU is also connected. If grounding to the ship ground is<br />
impossible, for example if you have a fibre glass hull, see<br />
Alternative grounding for fibre glass hulls on page F-9.<br />
To obtain a good ground connection, the metal underneath the<br />
head of at least one bolt must be clean of insulating protective<br />
coating and a serrated washer should be used. After tightening the<br />
bolts we recommend that you seal the area suitably in order to<br />
avoid corrosion of the grounding point. Use stainless steel bolts and<br />
washers.<br />
Optimum grounding is achieved by connecting the ground wire to<br />
the bolt marked in Figure 3-22.<br />
<strong>Installation</strong> of the ADU<br />
3333<br />
<strong>Installation</strong><br />
98-133966-E2 Chapter 3: <strong>Installation</strong> 3-23
<strong>Installation</strong> of the ADU<br />
Figure 3-22: ADU, bolt for optimum grounding<br />
Bolt used<br />
for best grounding<br />
For further information on grounding and RF protection see<br />
Grounding and RF protection on page F-1.<br />
3-24 Chapter 3: <strong>Installation</strong> 98-133966-E2
3.3.4 Alternative ADU cable<br />
The maximum allowed RF-loss in the ADU cable must be 20 dB at<br />
1950 MHz and 0.9 Ohm DC. This is to ensure the performance of the<br />
system. Preferably choose one of the cable types listed in the table<br />
below.<br />
Cable Type<br />
G02232-D<br />
RG223-D<br />
Absolute maximum length<br />
6 m<br />
25 m<br />
<strong>Installation</strong> of the ADU<br />
3333<br />
RG214/U<br />
50 m<br />
S 07272B-05 95 m<br />
Table 3-7: ADU cable types and maximum lengths<br />
<strong>Installation</strong><br />
Check the data sheet from the cable supplier that both the RFattenuation<br />
and the DC-resistance are kept within the maximum<br />
specified values:<br />
• ADU cable RF-attenuation at 1950 MHz: max. 20 dB including<br />
connector.<br />
• ADU cable modem-attenuation at 10 MHz: Max. 2 dB<br />
ADU cable modem-attenuation at 36 and 54 MHz: Max. 4 dB<br />
• ADU cable loop DC-resistance max: 0.9 Ohm.<br />
Also ensure that the specified minimum bending radius is<br />
respected. If this is not the case, the loss in the cable will increase.<br />
Check the documentation from the cable supplier.<br />
98-133966-E2 Chapter 3: <strong>Installation</strong> 3-25
<strong>Installation</strong> of the ACU (bulkhead)<br />
3.4 <strong>Installation</strong> of the ACU (bulkhead)<br />
The following sections describe the installation of the bulkhead<br />
ACU.<br />
<strong>Installation</strong> of the SAILOR 900 VSAT 19” Rack ACU is described in<br />
Installing the 19” rack version of the ACU on page 3-30.<br />
3.4.1 Installing the ACU (bulkhead)<br />
The cable relief for the ACU is already mounted when receiving the<br />
ACU. The cable relief is a simple system to secure cables with cable<br />
strips. It offers a number of holders to which you can secure the<br />
cables from the ACU.<br />
1. Place the ACU on a desktop.<br />
If required, fasten the ACU to the desktop with 6 screws: Insert<br />
the mounting bolts (M5) through the mounting holes and into<br />
the mounting surface.<br />
2. Make sure the grounding requirements are met. See Grounding<br />
the ACU (bulkhead) on page 3-27 and the appendix Grounding<br />
and RF protection on page F-1 for details about grounding.<br />
3. Connect all cables. See Interfaces of the SAILOR 900 VSAT ACU on<br />
page 4-1 for a description of the ACU connectors.<br />
4. Secure the cables using cable strips.<br />
3.4.1.1 Connectors of the ACU<br />
The ACU has the following connectors:<br />
ADU Rx Out Tx in RS-422 LAN 1 LAN 2<br />
Modem Ctrl.<br />
mm 2 .<br />
NMEA<br />
RS-232 LAN 3 LAN 4<br />
<strong>Service</strong> port<br />
Figure 3-24: ACU, connector panel<br />
Power<br />
On/Off<br />
Each connector is described in detail in Interfaces of the SAILOR 900<br />
VSAT ACU on page 4-1.<br />
For information on wiring 24 V DC power see DC Input connector on<br />
page 4-3.<br />
3-26 Chapter 3: <strong>Installation</strong> 98-133966-E2
For more information about power supply and power requirements<br />
see Connecting power on page 5-1.<br />
3.4.2 Grounding the ACU (bulkhead)<br />
Make sure that the grounding requirements are met. This is<br />
important to protect the ACU against lightning. See the appendix<br />
Grounding and RF protection on page F-1 for details about<br />
grounding.<br />
<strong>Installation</strong> of the ACU (bulkhead)<br />
3333<br />
3.4.2.1 ADU cable<br />
The ADU is connected to the ACU with the ADU cable (coax cable)<br />
with an N connector at both ends. For information on ADU<br />
grounding, see Grounding the ADU on page 3-23.<br />
At the ACU end, it is strongly recommended to ground the ADU<br />
cable. Use a short cable from the ACU to a grounding point and<br />
connect the short cable to the ADU cable at this grounding point,<br />
making sure the shield of the connector is properly connected.<br />
<strong>Installation</strong><br />
3.4.2.2 Ground stud<br />
To ensure that the ACU is grounded – also if the cable is<br />
disconnected from the ACU, connect an extra ground wire to the<br />
ground stud on the ACU. This ground wire must be a heavy wire or<br />
braid cable with a larger diameter than the coax cable (minimum<br />
cross section: 4 mm 2 ).<br />
Ground stud<br />
Figure 3-25: SAILOR 900 VSAT ACU, bulkhead version, ground stud<br />
98-133966-E2 Chapter 3: <strong>Installation</strong> 3-27
<strong>Installation</strong> of the ACU (bulkhead)<br />
3.4.3 SAILOR 900 VSAT ACU (bulkhead) with cable<br />
support<br />
You can mount a Cable Relief for the ACU (bulkhead). This is a<br />
simple system to which you can secure your cables using cable<br />
strips. When mounted on the ACU the cable relief offers a number of<br />
holders to which you can secure the cables from the ACU, using<br />
cable strips.<br />
To mount the cable relief, do as follows:<br />
1. Remove the two rubber washers from the bottom of the ACU at<br />
the connector panel end. The threaded bushings underneath the<br />
rubber washers are used for mounting the cable support.<br />
Figure 3-27: Mounting the cable relief 1/2<br />
3-28 Chapter 3: <strong>Installation</strong> 98-133966-E2
2. Fasten the Basic cable support to the ACU using two M4 x 6 mm<br />
countersunk screws.<br />
<strong>Installation</strong> of the ACU (bulkhead)<br />
3333<br />
<strong>Installation</strong><br />
Figure 3-28: Mounting the cable relief 2/2<br />
3. Mount the ACU by inserting 6 screws through the holes in the<br />
mounting bracket and into the mounting surface.<br />
4. Make sure the grounding requirements are met. See Grounding<br />
the ACU (bulkhead) on page 3-27 and the appendix Grounding<br />
and RF protection on page F-1 for details about grounding.<br />
5. Connect all cables. See Interfaces of the SAILOR 900 VSAT ACU on<br />
page 4-1 for a description of the ACU connectors.<br />
6. Secure the cables to the cable relief using cable strips.<br />
98-133966-E2 Chapter 3: <strong>Installation</strong> 3-29
<strong>Installation</strong> of the 19” rack version of the ACU<br />
3.5 <strong>Installation</strong> of the 19” rack version<br />
of the ACU<br />
The following sections describe the installation of the 19” rack ACU.<br />
<strong>Installation</strong> of the SAILOR 900 VSAT ACU is described in <strong>Installation</strong><br />
of the ACU (bulkhead) on page 3-26.<br />
3.5.1 Installing the 19” rack version of the ACU<br />
A cable relief bracket is already mounted when receiving the ACU.<br />
The cable relief is a simple system to secure cables with cable strips.<br />
It offers a number of holders to which you can secure the cables<br />
from the ACU. To install the 19” rack version of the ACU, do as<br />
follows:<br />
1. Slide the ACU into a 1U space in a 19” rack.<br />
2. Mount the screws in each side through the holes in the front and<br />
fasten the screws to the rack. Make sure that the unit is mounted<br />
securely according to the requirements for your 19” rack.<br />
3. Connect all cables. See Interfaces of the SAILOR 900 VSAT ACU on<br />
page 4-1 for a description of the ACU connectors.<br />
Figure 3-29: ACU, 19” rack version, On/off switch at the back<br />
Set to ON<br />
4. Set the On/Off switch at the back of the ACU to On. Then you can<br />
use the On/Off switch at the front panel of the ACU 19” rack<br />
version.<br />
3.5.1.1 Connectors of the 19” rack version of the ACU<br />
For a description of the connectors see Connectors of the ACU on<br />
page 3-26. The 19” rack version of the ACU has additionally a LAN<br />
connector at the front for accessing the service port from the ACU<br />
front panel.<br />
3-30 Chapter 3: <strong>Installation</strong> 98-133966-E2
Figure 3-30: ACU, LAN connector at the front: <strong>Service</strong> port<br />
For information on wiring 24 VDC power see DC Input connector on<br />
page 4-3. For more information about power supply and power<br />
requirements see Connecting power on page 5-1.<br />
<strong>Installation</strong> of the 19” rack version of the ACU<br />
<strong>Service</strong> port<br />
3333<br />
3.5.2 Grounding the 19” rack version of the ACU<br />
Make sure that the grounding requirements are met. See the<br />
appendix Grounding and RF protection on page F-1 for details about<br />
grounding.<br />
<strong>Installation</strong><br />
3.5.2.1 ADU cable<br />
The ADU is connected to the ACU with the ADU cable (coax cable)<br />
with an N connector at both ends. For information on ADU<br />
grounding, see Grounding the ADU on page 3-23.<br />
At the ACU end, it is strongly recommended to ground the ADU<br />
cable. Use a short cable from the ACU to a grounding point in the<br />
rack and connect the short cable to the ADU cable at this grounding<br />
point, making sure the shield of the connector is properly connected<br />
to the rack.<br />
3.5.2.2 Ground stud at the ACU<br />
To ensure that the ACU is grounded – also if the ADU cable is<br />
disconnected from the ACU, connect an extra ground wire from the<br />
rack to the ground stud on the ACU. This ground wire must be a<br />
heavy wire or braid cable with a larger diameter than the coax<br />
cable.<br />
Figure 3-31: ACU, 19” rack version, ground stud<br />
98-133966-E2 Chapter 3: <strong>Installation</strong> 3-31
<strong>Installation</strong> of the VMU<br />
3.6 <strong>Installation</strong> of the VMU<br />
For a list of supported VSAT modems see the SAILOR 900 VSAT data<br />
sheet or Figure 6-17: Supported VSAT modems in software version<br />
1.30.<br />
3.6.1 General mounting considerations — VMU<br />
1. Mount the VMU close to the ACU, preferably at a distance less<br />
than 1 m.<br />
2. Connect all cables. See Interfaces of the VMU on page 4-9 for a<br />
description of the connectors for supported VSAT modems.<br />
For cable specifications see VMU cable specifications on page B-<br />
1.<br />
3.6.1.1 Connectors and pin-out of the VMU<br />
For connectors and pin-out see the user documentation of the VMU<br />
and Interfaces of the VMU on page 4-9.<br />
3.6.1.2 Wiring Power<br />
Provide power to the VMU as described in the user documentation<br />
of the unit.<br />
3-32 Chapter 3: <strong>Installation</strong> 98-133966-E2
3.7 Installing the dual-antenna mode 1<br />
(optional)<br />
You can use the SAILOR 900 VSAT in dual antenna mode with 2<br />
ADUs, 2 ACUs and the dual-antenna accessories kit. The kit consists<br />
of 2 75 Ohm RF cables, an RF splitter and an RF combiner. In case<br />
one antenna enters a blocking zone, the other antenna of the dualantenna<br />
system takes over and the system continues working.<br />
There is a Master ACU and a Slave ACU. The VSAT modem is<br />
connected to and configured in the Master ACU. The Slave ACU is<br />
configured as a slave unit. It is connected with an Ethernet cable to<br />
the Master ACU from which it gets all satellite information.<br />
The switching from one antenna to the other is done based on the<br />
programmed blocking zones in the two antennas and takes effect<br />
whenever signal blockages occur from cranes etc.<br />
Installing the dual-antenna mode (optional)<br />
3333<br />
<strong>Installation</strong><br />
VSAT modem<br />
Figure 3-32: Dual mode antenna, overview<br />
1. Patent pending.<br />
98-133966-E2 Chapter 3: <strong>Installation</strong> 3-33
Installing the dual-antenna mode (optional)<br />
To install the dual antennas, do as follows:<br />
1. Install the master ADU, ACU, the RX combiner and the VSAT<br />
modem as shown in figure 3-32.<br />
2. Install the slave ADU, ACU, the TX splitter as shown below.<br />
3. Connect the cables as shown below and in the table below.<br />
Figure 3-33: Dual mode antenna, connecting cables (example)<br />
Connect cables<br />
Master ACU LAN port 4 to Slave ACU LAN port 4<br />
Master ACU LAN port 1 or RS 232 to VSAT modem<br />
control<br />
Master ACU Rx Out to the Rx combiner input 1<br />
Slave ACU Rx Out to the Rx combiner input 2<br />
Rx combiner output to VSAT modem Rx<br />
Master ACU Tx In to the Tx splitter output 1<br />
Slave ACU Tx In to the Tx splitter output 2<br />
Tx splitter input to VSAT modem Tx<br />
Purpose<br />
Master/Slave control<br />
VSAT modem control<br />
Rx when Master active<br />
Rx when Slave active<br />
Rx to VSAT modem<br />
Enabled when Master active<br />
Enabled when Slave active<br />
Tx from VSAT modem<br />
Table 3-8: Dual mode antenna, cabling<br />
3-34 Chapter 3: <strong>Installation</strong> 98-133966-E2
Interfaces 4<br />
This chapter is organised in the following sections:<br />
• Interfaces of the SAILOR 900 VSAT ACU<br />
• Interfaces of the VMU<br />
Chapter 44444<br />
4.1 Interfaces of the SAILOR 900 VSAT<br />
ACU<br />
4.1.1 ACU bulkhead — LEDs, display and keypad<br />
Interfaces<br />
Figure 4-1: ACU bulkhead, LEDs, display and keypad<br />
4.1.2 ACU 19” rack version — LEDs, display and<br />
keypad<br />
Figure 4-2: ACU rack version, LEDs, display and keypad<br />
98-133966-E2 4-1
Interfaces of the SAILOR 900 VSAT ACU<br />
4.1.3 ACU bulkhead — Connector panel —<br />
overview<br />
ADU Rx Out Tx in RS-422 LAN 1 LAN 2<br />
Modem Ctrl. Modem Ctrl.<br />
mm 2 .<br />
NMEA<br />
RS-232 LAN 3 LAN 4<br />
<strong>Service</strong> port<br />
Power<br />
On/Off<br />
Figure 4-3: ACU bulkhead, connector panel overview<br />
4.1.4 ACU 19” rack version — Connector panel —<br />
overview<br />
LAN 1<br />
Modem Ctrl.<br />
LAN 2<br />
Modem Ctrl.<br />
ADU<br />
Rx Out Tx in<br />
RS-422<br />
.<br />
LAN<br />
NMEA<br />
RS-232<br />
<strong>Service</strong> port LAN 3 LAN 4<br />
Power<br />
Figure 4-4: ACU rack version, connector panel overview<br />
On/Off<br />
Set to On<br />
The connector LAN to the left is typically connected to the service<br />
port at LAN3 with a straight Ethernet cable. Then you can access the<br />
service port from the front of the ACU rack version.<br />
Important<br />
Set the On/Off switch at the back of the ACU to<br />
On. Then you can use the On/Off switch at the<br />
front panel of the ACU 19” rack version.<br />
Connect the Ethernet cable to provide connection<br />
to the service port on the front of the ACU 19” rack<br />
version.<br />
4-2 Chapter 4: Interfaces 98-133966-E2
4.1.5 DC Input connector<br />
Provide DC power to the ACU, for example by using the TT-6080A<br />
Power Supply or 24 VDC from the vessel’s power supply.<br />
DC input: Female plug (Weidmuller, Part number 1930050000) for<br />
wires up to AWG10/6 mm 2 .<br />
Outline (on the ACU) Pin Pin function Wire color<br />
Vin+<br />
Vin-<br />
Left Vin+ Red<br />
Right Vin- Black<br />
Table 4-1: DC Input plug, outline and pin assignment<br />
The connector for DC input is included in the delivery. Insert the<br />
power cable as shown below, and plug in the connector. Use the<br />
two red clamps to fasten the connector.<br />
Red<br />
(left)<br />
Black<br />
(right)<br />
Interfaces of the SAILOR 900 VSAT ACU<br />
4444<br />
Interfaces<br />
Figure 4-5: DC Input connector with power cable<br />
For more information about power supply and power requirements<br />
see Connecting power on page 5-1.<br />
98-133966-E2 Chapter 4: Interfaces 4-3
Interfaces of the SAILOR 900 VSAT ACU<br />
4.1.6 ADU connector<br />
There is just one cable from the ACU to the ADU. This is used to<br />
power the ADU, supply 10 MHz clock, handle all communication<br />
between ACU and ADU, and deliver the VSAT Rx and Tx signals.<br />
Outline<br />
(on the ACU)<br />
Conductor<br />
Inner<br />
Outer<br />
Pin function<br />
DC to ADU<br />
10 MHz clock to ADU<br />
ACU to ADU internal communication<br />
VSAT Rx/Tx<br />
GND (Shield)<br />
Table 4-2: N connector, outline and pin assignment<br />
Important<br />
Do not use TNC connectors on the ADU antenna cable<br />
or on pigtails. TNC connectors cannot carry the DC<br />
current for operating the ADU.<br />
4.1.7 Rx/Tx connectors for VMU<br />
Connect the Rx and Tx channels of the VMU to the Rx and Tx<br />
connectors of the ACU with the 2 supplied Rx/Tx cables (75 Ohm<br />
coax, F-F, 1 m).<br />
Outline<br />
(on the ACU)<br />
Pin<br />
number<br />
Pin function<br />
1 Inner conductor:<br />
10 MHz clock, VSAT Rx/Tx<br />
2 Outer conductor: GND (Shield)<br />
Table 4-3: F connector, Rx and Tx, outline and pin assignment<br />
For step-by-step guidelines how to set up the VSAT modem see<br />
VMU settings requirements on page C-1.<br />
4-4 Chapter 4: Interfaces 98-133966-E2
4.1.8 NMEA 0183 connector (RS-422)<br />
Interfaces of the SAILOR 900 VSAT ACU<br />
Connect the ship’s gyro to this connector.<br />
Outline (on the ACU) Pin number Pin function Wire color<br />
1 Not connected —<br />
2 NET-H (NMEA 2000) White<br />
1 11<br />
3 NET-L (NMEA 2000) Blue<br />
4 NET-S (NMEA 2000) Red<br />
5 NET-C (NMEA 2000) Black<br />
6 Not connected —<br />
7 Not connected —<br />
4444<br />
8 Shields. Ship ground.<br />
Connect only at one<br />
end.<br />
9 Line B (+) NMEA 0183<br />
Interfaces<br />
10 Line A (-) NMEA 0183<br />
11 Not connected —<br />
Table 4-4: NMEA 0183/2000 connector, outline and pin assignment<br />
(Hardware prepared for NMEA 2000, for future use)<br />
NMEA 2000 power: 9-16 VDC. NMEA 2000 LEN (Load Equivalency<br />
Number): 2 (100mA)<br />
4.1.8.1 NMEA 0183<br />
The NMEA 0183 connection supports IEC 61162-1 and IEC 61162-2.<br />
• IEC 61162-1, baud rate 4800, format 8N1.<br />
• IEC 61162-2, baud rate 38400, format 8N1.<br />
The baud rate is auto detected by the ACU, the user cannot<br />
configure this interface.<br />
Supported NMEA string:<br />
1. HEHDT (North seeking Gyro compass)<br />
2. GPHDT (GPS compass)<br />
3. HNHDT (Non-North seeking gyro compass)<br />
98-133966-E2 Chapter 4: Interfaces 4-5
Interfaces of the SAILOR 900 VSAT ACU<br />
4. IIHDT (Integrated Instrument)<br />
5. HCHDT (Magnetic compass)<br />
Recommended NMEA 0183 cable:<br />
Two-wire constructed with one enclosed shield<br />
Network signal pair:<br />
• Size: No. 24 AWG (0.24 sq. mm) or heavier<br />
• Characteristic impedance: 95 - 140 Ohm<br />
• Propagation delay: 5 nanoseconds per meter, maximum<br />
• 15 Twists (minimum) per meter<br />
4.1.9 RS-232 and RS-422 connectors<br />
These connectors are used to access and configure the connected<br />
VSAT modem and for ACU control. See the VSAT modem<br />
requirements for use of the RS-232 or RS-422 connector.<br />
Outline (on the ACU)<br />
Pin<br />
number<br />
Pin function<br />
1 Not connected<br />
6 9<br />
2 RXD<br />
3 TXD<br />
4 DTR<br />
1 5<br />
5 Ground<br />
6 DSR<br />
7 RTS<br />
8 CTS<br />
9 Receive Signal Strength<br />
Indicator<br />
Table 4-5: RS-232 connector, male, outline and pin assignment<br />
4-6 Chapter 4: Interfaces 98-133966-E2
Outline (on the ACU)<br />
6 9<br />
1 5<br />
Pin<br />
number<br />
Pin function<br />
1 Ground<br />
2 Line A RXD (+)<br />
3 Line B TXD (-)<br />
4 Ground<br />
5 Ground<br />
6 Not connected<br />
7 Line A RXD (-)<br />
8 Line B TXD (+)<br />
Interfaces of the SAILOR 900 VSAT ACU<br />
4444<br />
9 Not connected<br />
Table 4-6: RS-422 connector, male, outline and pin assignment<br />
4.1.10 LAN1, LAN2, LAN3 and LAN4 connectors<br />
Interfaces<br />
Four Ethernet connectors (type RJ45) for PC/laptops, routers,<br />
wireless access points. The maximum cable length per connection is<br />
100 m. Depending on the VMU connected, a LAN connector may be<br />
used for modem control.<br />
<br />
<br />
<br />
<br />
<br />
<br />
<br />
<br />
<br />
Figure 4-6: LAN1 —LAN4 connectors<br />
For information how to configure the LAN network see Configuring<br />
the LAN network on page 6-29.<br />
98-133966-E2 Chapter 4: Interfaces 4-7
Interfaces of the SAILOR 900 VSAT ACU<br />
Outline<br />
Pin<br />
number<br />
Pin function<br />
Wire color<br />
1 Tx+ White/orange<br />
2 Tx- Orange<br />
3 Rx+ White/green<br />
4 Not connected Blue<br />
5 Not connected White/blue<br />
6 Rx- Green<br />
7 Not connected White/brown<br />
8 Not connected Brown<br />
Table 4-7: Ethernet connector, outline and pin assignment<br />
Cable type: CAT5, shielded.<br />
4-8 Chapter 4: Interfaces 98-133966-E2
4.2 Interfaces of the VMU<br />
For interfaces of the VMU and how to connect a VMU correctly to the<br />
ACU see the following sections and the user documentation of the<br />
VMU.<br />
For step-by-step guidelines how to set up the VSAT modem see<br />
Appendix C, VMU settings requirements.<br />
4.2.1 Connecting an iNFINITI® Series Satellite<br />
Router<br />
Connect the VSAT modem to the ACU as shown in the figure below:<br />
<br />
Interfaces of the VMU<br />
4444<br />
<br />
<br />
<br />
<br />
<br />
<br />
<br />
<br />
<br />
<br />
<br />
<br />
Interfaces<br />
Figure 4-7: Connecting an iNFINITI® Series Satellite Router<br />
Note<br />
Cable 3 is only used when using OpenAMIP protocol.<br />
Cable Description Cable specifications<br />
1 RX Out to Rx In 75 Ohm coax cables F-F (1m), included<br />
2 RS-232 to<br />
Console<br />
<br />
<br />
<br />
<br />
<br />
<br />
<br />
<br />
<br />
<br />
<br />
<br />
3 LAN 1 or 2 Standard Ethernet cable<br />
4 Tx In to Tx out 75 Ohm coax cables F-F (1 m), included<br />
Table 4-8: Cables to connect an iNFINITI® Series Satellite Router<br />
For a detailed cable specification for VSAT modems see VMU cable<br />
specifications on page B-1. For step-by-step guidelines how to set<br />
up the VSAT modem see Appendix C, VMU settings requirements.<br />
98-133966-E2 Chapter 4: Interfaces 4-9
Interfaces of the VMU<br />
4.2.2 Connecting an Evolution® Satellite Router<br />
Connect the VSAT modem to the ACU as shown in the figure below:<br />
<br />
<br />
<br />
<br />
<br />
<br />
<br />
<br />
<br />
<br />
<br />
<br />
<br />
Figure 4-8: Connecting an Evolution Satellite Router<br />
Note<br />
Cable 3 is only used when using OpenAMIP protocol.<br />
For cables see Table 4-8: Cables to connect an iNFINITI® Series<br />
Satellite Router on page 4-9. For VMU cable specifications see VMU<br />
cable specifications on page B-1.<br />
4.2.3 Connecting a Comtech 570 L or 625 Satellite<br />
Modem<br />
Connect the VSAT modem to the ACU as shown in the figure below:<br />
<br />
<br />
<br />
<br />
<br />
<br />
<br />
<br />
<br />
<br />
<br />
<br />
<br />
<br />
<br />
Figure 4-9: Connecting a Comtech 570 L or 625 Satellite Modem<br />
<br />
Note<br />
If the satellite profile is configured to use narrow band tracking<br />
(recommended) a standard RS-232 cable can be used to connect the<br />
ACU RS-232 port to the Remote control port of the VSAT modem.<br />
If the satellite profile is configured to use modem RSSI tracking a<br />
proprietary RS-232/Alarm cable must be used to connect the ACU RS-<br />
232 port to the Remote control and Alarm port of the VSAT modem.<br />
Cable Description Cable specifications<br />
1 RX Out to Rx 950-1950 MHz 75 Ohm coax cables F-F (1m) and adapter F to<br />
N 50 Ohm, included<br />
2 RS-232 to Remote control and Alarms 37-134337-A Cable Comtech Serial and RSSI<br />
Table 4-9: Cables to connect a Comtech 570 L-Band Satellite Modem<br />
4-10 Chapter 4: Interfaces 98-133966-E2
Cable Description Cable specifications<br />
3 Tx In to Tx 950-1950 MHz 75 Ohm coax cables F-F (1 m), included<br />
For VMU cable specifications see VMU cable specifications on<br />
page B-1.<br />
4.2.4 Connecting a Satlink2900 VSAT modem<br />
Connect the VSAT modem to the ACU as shown in the figure below:<br />
<br />
<br />
<br />
Table 4-9: Cables to connect a Comtech 570 L-Band Satellite Modem<br />
<br />
<br />
<br />
<br />
Interfaces of the VMU<br />
4444<br />
<br />
<br />
<br />
<br />
Figure 4-10: Connecting a SatLink 2900 Modem<br />
<br />
Interfaces<br />
Cable Description Cable specifications<br />
1 RX Out to Rx 75 Ohm coax cables F-F (1m) and<br />
adapter F to N 50 Ohm, included<br />
2 LAN1 to LAN Standard Ethernet cable<br />
3 Tx In to Tx 75 Ohm coax cables F-F (1 m), included<br />
Table 4-10: Cables to connect a SatLink 2900 VSAT modem<br />
98-133966-E2 Chapter 4: Interfaces 4-11
Interfaces of the VMU<br />
4.2.5 Connecting a Gilat SkyEdge II VSAT modem<br />
Connect the VSAT modem to the ACU as shown in the figure below:<br />
<br />
<br />
<br />
<br />
<br />
<br />
<br />
<br />
<br />
<br />
<br />
<br />
Figure 4-11: Connecting a Gilat SkyEdge II VSAT Modem<br />
Cable Description Cable specifications<br />
1 RX Out to RF IN 75 Ohm coax cables F-F (1m) and<br />
adapter F to N 50 Ohm, included<br />
2 RS-232 to SERIAL<br />
3 Tx In to RF OUT 75 Ohm coax cables F-F (1 m), included<br />
Table 4-11: Cables to connect a Gilat SkyEdge VSAT modem<br />
4-12 Chapter 4: Interfaces 98-133966-E2
Connecting power 5<br />
This chapter is organised in the following sections:<br />
• Power source<br />
• Power cable selection<br />
• Connecting power<br />
• Power up<br />
Chapter 55555<br />
5.1 Power source<br />
There are different options for the power supply:<br />
• The 24 VDC ship supply provides power for the ACU.<br />
• An AC line provides power through an AC/DC power supply. The<br />
TT-6080A Power Supply is recommended.<br />
Note<br />
Be aware of high start-up peak current: 35 A at 24 VDC,<br />
5 ms.<br />
In order to protect against short circuit in the power<br />
cable/connector, the ship’s DC outlet must be protected by a 30 A<br />
fuse or circuit breaker.<br />
Connecting power<br />
98-133966-E2 5-1
Power cable selection<br />
5.2 Power cable selection<br />
5.2.1 Source impedance<br />
The maximum length of the power cable depends on the type of<br />
cable used and the source impedance of the DC power installation<br />
in the ship.<br />
The maximum allowed source impedance depends on the usage of<br />
the power range of the terminal DC input (Start up voltage: 22 VDC<br />
guaranteed, operating range: 20 — 32 VDC; 23 A - 14 A).<br />
Select a power outlet from the DC system and measure the source<br />
impedance of the ship installation as described in the next section.<br />
Note<br />
If the total impedance is higher than the limits stated in<br />
section 5.2.3, the terminal may become unstable and start<br />
to on/off oscillate.<br />
The total impedance is made up of the source impedance of<br />
the ship power supply plus the impedance of connected<br />
cables including connectors and joints where cables are<br />
extended.<br />
For further recommendations on power cable selection, see Power<br />
cable recommendations on page 5-3.<br />
5.2.2 Measuring the ship source impedance<br />
Select a power outlet from the ship 24 VDC system and measure the<br />
source impedance of the ship installation as described below.<br />
1. Measure the voltage without load (R.var disconnected).<br />
2. Set the current to e.g. 1 A by adjusting R.var.<br />
3. Measure the corresponding voltage change.<br />
Example: 1 A and 50 mV. Source impedance: 50 mV/1 Amp = 50<br />
mOhm.<br />
5-2 Chapter 5: Connecting power 98-133966-E2
5.2.3 Power cable recommendations<br />
5.2.3.1 Overview<br />
Figure 5-1: Measuring the ship source impedance<br />
The ACU is delivered with a power connector (PCB plug-in<br />
connector, female plug, Weidmuller, Part number 1930050000),<br />
which accepts wires up to AWG10/6 mm 2 .<br />
• When installing the power cable, install positive and negative<br />
supply wires closely together side by side to keep cable<br />
inductance low.<br />
• Ensure that cable inductance for the selected cable at the desired<br />
length is less than 50 uH. Approximately 50 m maximum length.<br />
Power cable selection<br />
5555<br />
Connecting power<br />
5.2.3.2 Calculating the maximum power cable length<br />
For 24 VDC operation, the total impedance must be max. 60 mOhm<br />
(R max ), including the source impedance in the ship installation<br />
(R source ).<br />
The total impedance is made up of the following:<br />
• Source impedance in the ship installation<br />
• Impedance of the selected power cable<br />
To calculate the maximum cable extension, do as follows:<br />
1. First measure the source impedance in the ship installation as<br />
shown in Measuring the ship source impedance on page 5-2.<br />
2. Find the resistance per meter (Rwire) for the cable type you are<br />
going to use.<br />
For 4 mm 2 /AWG 11, the value is 4.8 mOhm/m at 55°C<br />
For 6 mm 2 /AWG 10, the value is 3.8 mOhm/m at 55°C<br />
98-133966-E2 Chapter 5: Connecting power 5-3
Connecting power<br />
For other cable types, refer to the data sheet for the cable.<br />
Maximum length = 05 Rmax – Rsource<br />
Rwire<br />
The length is multiplied by 0.5 above because there are two<br />
conductors in the cable.<br />
If the TT-6080A Power Supply is used, use R source = 0 mOhm.<br />
5.2.3.3 Examples for using the TT-6080A Power Supply:<br />
AWG11 max =0.5 x (60 mOhm-0)/4.8 mOhm/m = 6.2 m<br />
AWG10 max =0.5 x (60 mOhm-0)/3.8 mOhm/m = 7.9 m<br />
5.3 Connecting power<br />
5.3.0.1 To connect the power cable to the ACU<br />
1. Connect the positive and negative input terminals to the ship's DC<br />
supply according to the recommendations in the previous<br />
sections.<br />
2. Connect the power plug to DC Input.<br />
For information on pin-out, see DC Input connector on page 4-3.<br />
Figure 5-2: Connecting power to DC Input<br />
5-4 Chapter 5: Connecting power 98-133966-E2
5.4 Power up<br />
1. Connect power to the VMU.<br />
2. Switch on the ACU. The unit starts up and goes through an<br />
initialization procedure:<br />
• ACU POST<br />
• ADU Initializing<br />
• ADU POST<br />
• READY<br />
This may take some time (up to a couple of minutes).<br />
3. The SAILOR 900 VSAT is ready to be calibrated (for first time<br />
power up) or receive data from the VSAT modem (when in normal<br />
operation). The ACU display shows the following message:<br />
Steady<br />
green<br />
Power up<br />
5555<br />
Figure 5-3: ACU display after first power on (example with LAN ports 1 and 4 used)<br />
The LEDs Power and Fail/Pass are steady green, the LED Logon<br />
is off. For further information on status indicators see Status<br />
signalling with LEDs and status messages on page 9-8.<br />
Make sure there are no hardware failures or error codes present,<br />
check the display of the ACU for events. For more information on<br />
error codes and events see Troubleshooting on page 9-91 and<br />
System messages on page G-1.<br />
4. Continue to get the SAILOR 900 VSAT system operational, do the<br />
following:<br />
• Make a cable loss and an azimuth calibration.<br />
• Create VSAT modem profiles.<br />
• Create one or more satellite profiles.<br />
For step-by-step instructions, see Introduction to the built-in web<br />
interface on page 6-1.<br />
For installation check lists see, <strong>Installation</strong> check on page 7-1.<br />
Connecting power<br />
98-133966-E2 Chapter 5: Connecting power 5-5
Power up<br />
5.4.0.1 Initialisation in daily use<br />
Once the system is configured and a satellite profile is active, the<br />
startup sequence is as follows:<br />
• ACU POST<br />
• ADU Initializing<br />
• ADU SW upload (If the software versions in the ADU and ACU<br />
are not the same, a software update is done during startup.)<br />
• ADU POST<br />
• READY<br />
• POINTING ANTENNA<br />
• ACQUIRING SIGNAL<br />
• TRACKING<br />
5.4.0.2 SAILOR 900 VSAT operational<br />
When the display shows TRACKING and the LED Logon is steady<br />
green, the system is operational.<br />
5-6 Chapter 5: Connecting power 98-133966-E2
Configuration 6<br />
This chapter is organised in the following sections:<br />
• Introduction to the built-in web interface<br />
• Calibration of the SAILOR 900 VSAT<br />
• Configuration with the web interface<br />
• Keypad and menus of the ACU<br />
• SNMP support<br />
Chapter 66666<br />
6.1 Introduction to the built-in web<br />
interface<br />
6.1.1 Overview<br />
Use the built-in web interface of the SAILOR 900 VSAT ACU to make<br />
a full configuration of the SAILOR 900 VSAT with the correct VMU,<br />
the satellite positions you intend to use and other parameters.<br />
Configuration<br />
<br />
<br />
Figure 6-1: Configuration setup<br />
For the rack version, connect the LAN cable to the front LAN<br />
connector of the ACU.<br />
For quick start instructions see Calibration of the SAILOR 900 VSAT<br />
on page 6-4.<br />
Note<br />
For information on daily use of the SAILOR 900 VSAT system<br />
refer to the SAILOR 900 VSAT Quick Guide or see chapter 8,<br />
Daily use — Quick guide.<br />
98-133966-E2 6-1
Introduction to the built-in web interface<br />
No installation of software is necessary. The web interface is built<br />
into the SAILOR 900 VSAT ACU.<br />
You access the web interface from a computer with a standard<br />
Internet browser.<br />
6.1.2 Connecting to the web interface<br />
To connect to the web interface of the ACU do as follows:<br />
1. Power up the SAILOR 900 VSAT system, i.e. switch on the ACU.<br />
Wait until the LEDs on the front plate of the ACU show that the<br />
system is ready to be configured.<br />
• Power LED: Green<br />
• Logon LED: Off<br />
• Fail/Pass LED: Flashing green, during power-on self test, after<br />
that steady green.<br />
2. Connect a PC to LAN interface 3 (<strong>Service</strong> port, standard Ethernet)<br />
of the ACU. For the rack version connect the LAN cable or to the<br />
front LAN connector of the ACU.<br />
Figure 6-2: LAN connector used for configuring the SAILOR 900 VSAT<br />
3. Open your Internet browser and enter the IP address of the ACU.<br />
The IP address is http://192.168.0.1 (default).<br />
4. The web interface opens directly with the DASHBOARD page.<br />
6-2 Chapter 6: Configuration 98-133966-E2
Figure 6-3: SAILOR 900 VSAT Dashboard<br />
When the Dashboard is displayed you have verified that the<br />
connection to the SAILOR 900 VSAT can be established. The web<br />
interface is ready for use. You can continue to configure the system.<br />
If you cannot establish a connection there might be problems with<br />
the Proxy server settings of your PC. See Proxy server settings in<br />
your browser on page 6-17 for further information. For a detailed<br />
introduction to the web interface see Overview and navigation on<br />
page 6-14.<br />
If you want to use another LAN port you must configure it according<br />
to your network requirements. For information how to configure the<br />
LAN connectors see Configuring the LAN network on page 6-29.<br />
Introduction to the built-in web interface<br />
6666<br />
Configuration<br />
98-133966-E2 Chapter 6: Configuration 6-3
Calibration of the SAILOR 900 VSAT<br />
6.2 Calibration of the SAILOR 900 VSAT<br />
You must align the ADU with the vessel’s gyro compass. To do this,<br />
you make an azimuth calibration, i.e. you determine the offset of the<br />
ADU zero direction to the bow-to-stern line of the ship. This<br />
procedure is fully automatic.<br />
You can enter the satellite data for calibration directly on the<br />
calibration page or you can define a <strong>Service</strong> profile to be used in the<br />
calibration. After the calibration you create the satellite and VSAT<br />
modem profiles you want to use during normal operation, and you<br />
can set up blocking zones for the specific installation.<br />
Important<br />
For a detailed introduction to the web interface see Overview and<br />
navigation on page 6-14.<br />
The following sections describe the steps for a successful<br />
calibration:<br />
• Preparing for calibration<br />
• Heading and calibration of azimuth and cable<br />
• Flow chart for azimuth and cable calibration<br />
• Line up procedure<br />
You must logon as an administrator to do a<br />
calibration. See Administration on page 6-43.<br />
• SAILOR 900 VSAT fixed TX gain principle<br />
6.2.1 Preparing for calibration<br />
To prepare for calibration you can set up a service profile for<br />
calibration. Use this approach if you do not want to enter the<br />
satellite parameters directly on the calibration page.<br />
To setup a service profile do as follows:<br />
1. Select SETTINGS > Satellite profiles > New entry. Enter the name<br />
of the satellite profile for calibration (a name of your own choice).<br />
2. Select the VSAT modem profile <strong>Service</strong> & Calibration from the<br />
drop-down list.<br />
6-4 Chapter 6: Configuration 98-133966-E2
Figure 6-4: <strong>Service</strong> profile for calibration<br />
3. Enter the data for the satellite that you want to use as a<br />
calibration reference. For satellite data see DVB-S satellites on<br />
page E-1 or www.lyngsat.com. Make sure that the following<br />
requirements for the satellite are met:<br />
Satellite requirements for successful calibration<br />
Calibration of the SAILOR 900 VSAT<br />
6666<br />
Elevation<br />
System encryption<br />
Elevation angle: 5 — 70 degrees<br />
Not allowed for calibration: Inclined orbit.<br />
DVB-S or DVB-S2<br />
Configuration<br />
RX Polarisation<br />
Symbol rate<br />
NID<br />
Horizontal or vertical polarisation.<br />
Not allowed: Left-hand circular (L) or right-hand circular (R).<br />
The DVB symbol rate must be >5 Ms/s.<br />
Preferably a unique NID (ONID).<br />
An azimuth calibration without NID can be useful in regions where<br />
the satellite operators do not broadcast NID (US, China, Australia<br />
etc.).<br />
For NID=0 the NID is not used when checking the satellite link.<br />
Table 6-1: Satellite requirements for elevation and carrier<br />
Elevation cutoff: Not relevant for calibration.<br />
98-133966-E2 Chapter 6: Configuration 6-5
Calibration of the SAILOR 900 VSAT<br />
4. Click Apply to save the settings for the service profile for<br />
calibration. The system is ready for the azimuth and cable<br />
calibration.<br />
6.2.2 Heading and calibration of azimuth and<br />
cable<br />
Access the page for heading and calibration through SERVICE ><br />
Calibration.<br />
Figure 6-5: Web interface: SERVICE, Calibration<br />
Note<br />
If you do not want to enter the satellite data on the calibration page<br />
you can set up a service profile for calibration, see 6.2.1.<br />
Check that the satellite transponder is visible from the location of<br />
the installation and at an elevation angle between 10 and 70<br />
degrees.<br />
6-6 Chapter 6: Configuration 98-133966-E2
6.2.2.1 Fixed heading<br />
Do not use fixed heading for vessels! Use fixed heading only for<br />
fixed installations like remote areas or oil rigs, during training and<br />
test.<br />
You can enable fixed heading and enter the fixed heading in<br />
degrees. Click Apply.<br />
Note<br />
If you change the heading settings you must make an azimuth<br />
calibration afterwards.<br />
6.2.2.2 Azimuth calibration<br />
Azimuth calibration is done toward a satellite of a known position.<br />
After finding the satellite, the system can calculate the azimuth<br />
offset of the ADU installation. The satellite and transponder<br />
properties for the calibration can be selected from a list of reference<br />
satellites or supplied manually.The calibration has 2 steps: Azimuth<br />
calibration and cable calibration.<br />
There are 2 ways to make an azimuth calibration:<br />
• Using a service profile.<br />
• Using user defined input on the calibration page.<br />
To make an azimuth calibration with a service profile, do as follows<br />
Calibration of the SAILOR 900 VSAT<br />
6666<br />
1. Click SERVICE > Calibration.<br />
2. Select the service profile in the drop down list, see Preparing for<br />
calibration on page 6-4. All profiles with the VSAT modem <strong>Service</strong><br />
& Calibration are displayed in the list.<br />
Configuration<br />
Important<br />
Do not refresh the browser window during<br />
calibration, this will interrupt and restart the<br />
calibration procedure. The screen is not<br />
automatically updated when new data are<br />
available from the SAILOR 900 VSAT.<br />
You may click the button Refresh in the web<br />
interface to update the screen.<br />
3. Click Start in the section Azimuth calibration and wait typically 5<br />
minutes for the calibration to finish. After finished calibration<br />
click the button Refresh. A message is displayed when the<br />
calibration has been completed.<br />
4. Click Start below Cable calibration and wait typically 10 minutes<br />
for the calibration to finish. A message is displayed when the<br />
calibration has been completed successfully.<br />
98-133966-E2 Chapter 6: Configuration 6-7
Calibration of the SAILOR 900 VSAT<br />
To make an azimuth calibration with user defined input, do as<br />
follows:<br />
1. Select User defined in the Satellite drop down list.<br />
2. Type in the longitude and polarisation skew of the satellite. The<br />
polarisation skew is provided by the satellite operator, it is<br />
typically 0 degrees. For satellite data see DVB-S satellites on<br />
page E-1, www.lyngsat.com.<br />
Important<br />
The calibration function is not able to verify the<br />
correctness or precision of the supplied longitude. It<br />
is therefore important to supply the correct<br />
longitude including the first decimal.<br />
3. Select the polarisation of a transponder and type in its frequency<br />
and symbol rate.<br />
4. Select which satellite identifier to use for identification of the<br />
signal.<br />
Satellite identifier NID value Description<br />
NID 0 Satellite identifier is not used.<br />
NID 1—65534 Supplied NID is matched against<br />
Network ID broadcast by the satellite.<br />
Orbital position n.a. Supplied longitude is matched with<br />
orbital position broadcast by satellite.<br />
Not all service providers broadcast the<br />
orbital position.<br />
Table 6-2: Satellite identifier and NID values<br />
5. Click Start and wait typically 5 minutes for the calibration to<br />
finish. A progress bar is shown during calibration and a message<br />
is displayed when the calibration has completed. In case of<br />
failure, see the table in the following section for a description of<br />
error codes during calibration.<br />
Important It is strongly recommended to verify the result of a<br />
calibration performed with user defined data. This<br />
can be done by making a new calibration on a<br />
different satellite and verify that the resulting<br />
Azimuth calibration value differs less than one<br />
degree.<br />
6. Click Start below Cable calibration and wait typically 10 minutes<br />
for the calibration to finish. A message is displayed when the<br />
calibration has been completed successfully.<br />
6-8 Chapter 6: Configuration 98-133966-E2
The following table shows the error codes that might be displayed<br />
during a calibration.<br />
Error code<br />
Explanation<br />
1 The elevation of the selected satellite is too low. Select<br />
another satellite.<br />
2 The elevation of the selected satellite is too high. Select<br />
another satellite.<br />
4 The calibration values could not be saved. Possibly due to<br />
defective hardware.<br />
5 The antenna could not point with sufficient precision. Check<br />
that the antenna is mounted in a stable way. Other possible<br />
causes might be electrical or mechanical faults.<br />
6 No signal received. Check that there is free line of sight. Try<br />
again or try with another satellite.<br />
7 RF setup error, e.g. missing or invalid TX frequency.<br />
8 Invalid satellite, e.g. satellite not visible.<br />
Table 6-3: Possible error codes during calibration<br />
The SAILOR 900 VSAT is calibrated now. If the calibration failed<br />
there will be a message on the calibration screen.<br />
Calibration of the SAILOR 900 VSAT<br />
6666<br />
Configuration<br />
98-133966-E2 Chapter 6: Configuration 6-9
Calibration of the SAILOR 900 VSAT<br />
6.2.3 Flow chart for azimuth and cable calibration<br />
The following flow chart gives an example of an azimuth and cable<br />
calibration.<br />
<br />
<br />
<br />
<br />
<br />
<br />
<br />
<br />
<br />
<br />
<br />
<br />
<br />
<br />
<br />
<br />
<br />
<br />
<br />
<br />
<br />
<br />
<br />
<br />
<br />
<br />
<br />
<br />
<br />
<br />
<br />
<br />
<br />
<br />
<br />
<br />
<br />
<br />
<br />
<br />
<br />
<br />
<br />
<br />
<br />
<br />
<br />
<br />
<br />
<br />
<br />
<br />
<br />
<br />
<br />
<br />
<br />
<br />
<br />
<br />
<br />
<br />
<br />
<br />
<br />
<br />
<br />
<br />
<br />
<br />
<br />
<br />
<br />
<br />
Figure 6-6: Example for azimuth and cable calibration — step by step<br />
6-10 Chapter 6: Configuration 98-133966-E2
6.2.4 Line up procedure<br />
Note<br />
The ship must not move during the calibration procedure.<br />
The SAILOR 900 has been tested at factory online on a live satellite<br />
link to calibrate the TX polarisation unit. You can fine-tune the TX<br />
polarization by doing a line up as described below. To do the line<br />
up, do as follows:<br />
1. Open the web interface of the SAILOR 900, for instructions see<br />
Connecting to the web interface on page 6-2.<br />
2. Create a VSAT modem profile and a satellite profile using the<br />
previously created VSAT modem profile (See Preparing for<br />
calibration on page 6-4).<br />
3. Go to the page SERVICE > Line up. As soon as the antenna is in<br />
tracking mode and points to the satellite, the text next to Status<br />
shows Please wait. Improving tracking. This may take up to 2<br />
minutes. Wait until the text shows Ready for activation.<br />
Step 4<br />
Step 3<br />
Calibration of the SAILOR 900 VSAT<br />
6666<br />
Configuration<br />
Figure 6-7: Web interface: SERVICE, Line up: Ready for activation<br />
98-133966-E2 Chapter 6: Configuration 6-11
Calibration of the SAILOR 900 VSAT<br />
4. Click the button Activate and wait until the status field shows<br />
Antenna ready. Follow the instructions from your service provider.<br />
Figure 6-8: Web interface: SERVICE, Line up: Antenna ready<br />
5. Enter the Modem CW frequency (Continuous Wave) in GHz.<br />
This is provided by the satellite operator, typically when talking to<br />
the satellite operator on the phone before starting the line up.<br />
6. Adjust the TX polarisation as instructed by the service provider. If<br />
needed, add 90 degrees to the TX polarisation by selecting the<br />
field.<br />
7. Set the values as advised by the service provider:<br />
• TX polarisation<br />
• Azimuth<br />
• Elevation<br />
8. To save the TX polarisation offset value, click the button Save<br />
polarisation offset.<br />
9. Follow the instructions from the service provider to make a P1dB<br />
compression test (VSAT modem).<br />
10. Click the button Deactivate to finish the line up procedure.<br />
When finished, the saved value for TX polarisation is visible the next<br />
time the line up procedure is selected.<br />
6-12 Chapter 6: Configuration 98-133966-E2
6.2.5 SAILOR 900 VSAT fixed TX gain principle<br />
The SAILOR 900 VSAT uses a new transmitter chain concept. After<br />
calibration it provides a fixed gain of 44 dB from the Tx-port of the<br />
ACU to the output of the BUC. Advantages of the fixed TX gain<br />
principle are:<br />
• Fixed TX gain over frequency and cable length<br />
• TX gain independent of antenna cable length<br />
• Utilization of the full 8W BUC power over frequency<br />
• P1dB compression point the same over frequency<br />
When installing the SAILOR 900 VSAT you make a cable calibration.<br />
At that point every installation finds the same P1dB compression<br />
setting regardless of cable length. The P1dB compression point is<br />
approximately -5 dBm at the ACU Tx-port. Additionally the SAILOR<br />
900 VSAT system monitors the TX gain in real time.<br />
<br />
<br />
<br />
<br />
<br />
<br />
<br />
<br />
<br />
<br />
Calibration of the SAILOR 900 VSAT<br />
<br />
<br />
<br />
<br />
<br />
6666<br />
* You find the maximum cable loss at Maximum allowed RF loss in the<br />
ADU cable on page 3-22.<br />
Example:<br />
Figure 6-9: Fixed TX gain principle<br />
ACU Tx-port power: -5dBm > BUC output = +39 dBm<br />
(compression)<br />
Configuration<br />
98-133966-E2 Chapter 6: Configuration 6-13
Configuration with the web interface<br />
6.3 Configuration with the web<br />
interface<br />
6.3.1 Overview and navigation<br />
6.3.1.1 Topics in the web interface<br />
Use the site map to get an overview over the existing menus,<br />
submenus and topics. You can click on each menu in the site map to<br />
go directly to the page or display the respective submenu.<br />
Figure 6-10: Topics in the web interface (SITE MAP)<br />
Software version 1.30 is the version described in this chapter.<br />
6-14 Chapter 6: Configuration 98-133966-E2
6.3.1.2 Navigation<br />
The web interface consists of the following sections:<br />
3<br />
2<br />
1<br />
4<br />
Configuration with the web interface<br />
6666<br />
Figure 6-11: Sections of the web interface<br />
1. The navigation pane holds the main menu. Clicking an item in<br />
the menu opens a submenu in the navigation pane or a new<br />
page in the contents section.<br />
2. The signal status field shows the signal strength. The signal<br />
strength can vary during operation, depending on the current<br />
position relative to the satellite.<br />
3. The icon bar shows icons for active events, when relevant. For<br />
explanations of the icons, see the next section, Icons in the icon<br />
bar.<br />
4. The contents section shows the page selected in the navigation<br />
pane. This section is used for viewing or changing settings, or for<br />
performing actions.<br />
Configuration<br />
98-133966-E2 Chapter 6: Configuration 6-15
Configuration with the web interface<br />
6.3.1.3 Icons in the icon bar<br />
The following icons may appear in the icon bar in the web interface:<br />
Icon<br />
Explanation<br />
An event is active. Click the icon to see a list of active events.<br />
For explanations of the event messages, see Event list on<br />
page 9-3 and Event messages — overview on page G-1. Note<br />
that this icon will remain in the icon bar as long as the event<br />
is active.<br />
Table 6-4: Web interface: Event icon<br />
6.3.1.4 Navigating the web interface<br />
• To expand a menu, click the menu in the navigation pane.<br />
• To access status and settings, click the relevant subject in the<br />
navigation pane or click the relevant icon in the icon bar. The<br />
status or settings are displayed in the contents section.<br />
• To get an overview over the submenus available use the site<br />
map, click SITE MAP in the navigation pane. Click on items in the<br />
site map to go directly to the relevant location.<br />
Note<br />
You can give access to some configuration settings for users<br />
that are not administrators. For information on how to set<br />
up user permissions, see Setting up user permissions on<br />
page 6-45.<br />
6-16 Chapter 6: Configuration 98-133966-E2
6.3.1.5 Proxy server settings in your browser<br />
If you are connecting your computer using a LAN or WLAN interface,<br />
the Proxy server settings in your browser must be disabled before<br />
accessing the web interface. Most browsers support disabling of the<br />
Proxy server settings for one specific IP address, so you can disable<br />
Proxy server settings for the web interface only, if you wish. Consult<br />
your browser help for information.<br />
To disable the use of a Proxy server completely, do as follows:<br />
Note<br />
The following description is for Microsoft Internet Explorer. If<br />
you are using a different browser, the procedure may be<br />
different.<br />
1. In Microsoft Internet Explorer, select Tools > Internet Options ><br />
<strong>Connections</strong> > LAN Settings.<br />
Configuration with the web interface<br />
6666<br />
2. Clear the box labeled Use a proxy server for your LAN.<br />
3. Click OK.<br />
When the proxy server settings are disabled, close and restart your<br />
browser.<br />
You may need to change this setting back on return to your Internet<br />
connection.<br />
Configuration<br />
6.3.1.6 Connecting a PC<br />
To connect your PC to the ACU see Connecting to the web interface<br />
on page 6-2. If you want to use another LAN port than LAN 3 you<br />
must configure it according to your network requirements. For<br />
information how to configure the 4 LAN connectors see Configuring<br />
the LAN network on page 6-29.<br />
98-133966-E2 Chapter 6: Configuration 6-17
Configuration with the web interface<br />
6.3.2 Using the Dashboard<br />
The Dashboard is the first screen that is displayed when the user or<br />
administrator enters the IP address of the web interface of the ACU.<br />
The Dashboard is used for viewing properties and status of the ACU<br />
and ADU.<br />
Figure 6-12: Web interface: DASHBOARD<br />
6-18 Chapter 6: Configuration 98-133966-E2
6.3.2.1 Information fields on the Dashboard<br />
SAILOR 900 VSAT<br />
parameter<br />
System status<br />
GPS position<br />
Vessel heading<br />
Satellite profile<br />
Satellite position<br />
RX polarisation<br />
Description<br />
Current status of the SAILOR 900 VSAT.<br />
Examples:<br />
Not ready (waiting for input from GNSS, e.g. GPS)<br />
Ready (waiting for data from the VSAT modem or no satellite<br />
profile selected)<br />
Pointing antenna (locating the satellite)<br />
Acquiring signal (acquiring the satellite signal)<br />
Tracking (tracks the current satellite)<br />
No Tx zone (antenna is pointing in a no TX zone; TX is off)<br />
Blocking zone (antenna is pointing into a blocking zone)<br />
<strong>Service</strong> switch (service switch in ADU activated)<br />
Safe mode (error, followed by an error description)<br />
Current position of the vessel, reported by the GPS module<br />
Ship’s heading in degrees with reference to North, provided by<br />
the ship’s gyro.<br />
Name of the currently active satellite profile.<br />
Position of the satellite selected in Satellite profile.<br />
Horizontal or vertical.<br />
Configuration with the web interface<br />
6666<br />
TX polarisation a<br />
RX RF frequency a<br />
Co-pol or X-pol, auto-selected by VSAT modem<br />
Ku band receiving frequency, auto-selected by VSAT modem<br />
Configuration<br />
LNB Lo frequency a<br />
TX RF frequency a<br />
BUC Lo frequency<br />
Tracking RF<br />
frequency<br />
ACU part name, ADU<br />
part name, ACU<br />
serial number, ADU<br />
serial number,<br />
Software version<br />
Auto-selected by VSAT modem<br />
Auto-selected by VSAT modem<br />
12.8 GHz (system parameter)<br />
Currently tracking RF frequency.<br />
Part names, serial numbers for ACU and ADU, software version<br />
of the SAILOR 900 VSAT.<br />
Table 6-5: Web interface, DASHBOARD, SAILOR 900 VSAT parameters<br />
a. Can be altered when using a generic modem profile.<br />
98-133966-E2 Chapter 6: Configuration 6-19
Configuration with the web interface<br />
VSAT MODEM<br />
parameter<br />
Signal level<br />
RX IF frequency<br />
TX IF frequency<br />
Model<br />
Description<br />
Current input signal level from VSAT modem.<br />
iDirect openAMIP modem: (PWR) 0-500, delivered by the<br />
connected modem. For values VSAT modem<br />
profiles.<br />
Table 6-6: Web interface, DASHBOARD, VSAT MODEM parameter<br />
POINTING<br />
parameter<br />
Azimuth relative<br />
Elevation relative<br />
Polarisation skew<br />
Description<br />
Current value for azimuth, relative to the vessel heading.<br />
Current value for elevation, relative to the vessel.<br />
Current value for polarisation skew.<br />
Table 6-7: Web interface, DASHBOARD, POINTING parameter<br />
6-20 Chapter 6: Configuration 98-133966-E2
6.3.3 Satellite profiles and VSAT modem profiles<br />
6.3.3.1 Satellite profiles<br />
On the page Satellite profiles you add, edit and delete satellite<br />
profiles. A satellite profile contains all settings that are necessary<br />
for a successful connection to the satellite, including a VSAT modem<br />
profile. Most of the data you have to fill in are provided by your<br />
VSAT service provider.<br />
You must activate one satellite profile.<br />
Note<br />
You must add at least one VSAT modem profile before you<br />
can add a satellite profile. See VSAT modem profile — New<br />
entry and Edit on page 6-24.<br />
Configuration with the web interface<br />
6666<br />
Figure 6-13: Web interface: SETTINGS - list of satellite profiles (example)<br />
Configuration<br />
6.3.3.2 Satellite profiles — New entry and Edit<br />
Each satellite profile has one assigned VSAT modem profile.<br />
98-133966-E2 Chapter 6: Configuration 6-21
Configuration with the web interface<br />
Figure 6-14: Web interface: SETTINGS, Satellite profiles — new entry (example)<br />
To add or edit a satellite profile, do as follows:<br />
Note<br />
1. Go to SETTINGS or Satellite profiles and click Edit or New entry.<br />
2. Enter or edit the Satellite profile name.<br />
It is helpful to assign a name containing the location where the Satellite<br />
profile is to be used (e.g. "Gulf of Mexico" or "North Sea") and possibly the<br />
provider.<br />
3. Select a VSAT modem profile. The page automatically displays the<br />
parameters available for the selected VSAT modem profile.<br />
For instruction how to add a VSAT modem profile see VSAT<br />
modem profile — New entry and Edit on page 6-24.<br />
4. Enter the data for the satellite that you want to use. For satellite<br />
data see DVB-S satellites on page E-1 or www.lyngsat.com.<br />
5. Polarisation skew: See documents from VSAT provider.<br />
6-22 Chapter 6: Configuration 98-133966-E2
6. At Elevation cutoff enter the minimum elevation angle for the<br />
antenna to function in accordance with ETSI (ETSI EN 302 340)<br />
and FCC (FCC §25.205) regulations.<br />
• ETSI (ETSI EN 302 340): The minimum elevation angle<br />
depends on the Tx bandwidth and the nominal power of the<br />
VSAT modem, see the table below.<br />
Bandwidth<br />
Eirp@14.25 GH<br />
z a 63.4<br />
dBm<br />
Nominal VSAT modem power<br />
-22 dBm -<br />
20 dBm<br />
65.4<br />
dBm<br />
Configuration with the web interface<br />
-18 dBm -16 dBm -14 dBm -12 dBm -10 dBm -8 dBm -6 dBm<br />
67.4<br />
dBm<br />
69.4<br />
dBm<br />
71.4<br />
dBm<br />
73.4<br />
dBm<br />
75.4<br />
dBm<br />
77.4<br />
dBm<br />
64 kHz 3° 4° 4° 5° 6° 7° 8° 10° 12°<br />
128 kHz 3° 4° 4° 5° 6° 7° 8° 10° 12°<br />
256 kHz 3° 4° 4° 5° 6° 7° 8° 10° 12°<br />
512 kHz 3° 4° 4° 5° 6° 7° 8° 10° 12°<br />
1024 kHz 3° 4° 4° 5° 6° 7° 8° 10° 12°<br />
2048 kHz 3° 3° 3° 4° 5° 5° 6° 8° 9°<br />
4096 kHz 3° 3° 3° 3° 4° 4° 5° 6° 7°<br />
8192 kHz 3° 3° 3° 3° 3° 3° 4° 5° 5°<br />
79.4<br />
dBm<br />
6666<br />
16384 kHz 3° 3° 3° 3° 3° 3° 3° 4° 4°<br />
32768 kHz 3° 3° 3° 3° 3° 3° 3° 3° 3°<br />
Table 6-8: Elevation cutoff (in degrees) versus VSAT modem bandwidth and power<br />
a. Eirp = Fixed system gain 44 dB + antenna gain @ 14.25 GHz 41.4 dB + modem power<br />
Configuration<br />
• FCC (FCC §25.205): 5 degrees<br />
7. Click Apply to save the settings for the satellite profile.<br />
98-133966-E2 Chapter 6: Configuration 6-23
Configuration with the web interface<br />
6.3.3.3 VSAT modem profiles<br />
A VSAT modem profile contains all VSAT modem settings that are<br />
necessary for a successful connection to the satellite. The data you<br />
have to fill in are provided by your VSAT service and modem<br />
provider. You must add at least one VSAT modem profile.<br />
Figure 6-15: Web interface: SETTINGS, VSAT modem profiles — list (example)<br />
To create a new VSAT modem satellite profile, click New entry. To<br />
edit or delete a VSAT modem profile, click Edit or Delete.<br />
6.3.3.4 VSAT modem profile — New entry and Edit<br />
On the page VSAT modem profiles you create, edit or delete VSAT<br />
modem profiles. The supported VSAT modem profiles are listed in<br />
the drop-down list VSAT modem profile. The VSAT modem named<br />
<strong>Service</strong> is a modem profile used during azimuth calibration.<br />
To add or edit a VSAT modem profile, do as follows:<br />
1. Go to SETTINGS > VSAT modem profiles and click New entry or<br />
Edit.<br />
6-24 Chapter 6: Configuration 98-133966-E2
Figure 6-16: Web interface: SETTINGS, VSAT modem profiles — new entry (example)<br />
2. Fill in a VSAT modem profile name of your own choice.<br />
3. Select one of the supported VSAT modems from the drop down<br />
list.The following VSAT modem profiles are supported:<br />
Configuration with the web interface<br />
6666<br />
Figure 6-17: Supported VSAT modems in software<br />
version 1.30<br />
Configuration<br />
Generic modem: If you have a modem that is not included in the<br />
list, select the generic modem. This is mainly used for<br />
troubleshooting purposes.<br />
4. Fill in or edit the data provided by your VSAT service provider.<br />
Enter the passwords, if needed.<br />
Select the VSAT modem baud rate and whether you want to use<br />
the 10 MHz reference from the ACU or the VSAT modem.<br />
Important<br />
The SAILOR 900 VSAT can work either using the Rx or Tx 10 MHz<br />
reference signals provided by the modem or using its own built-in<br />
10 MHz reference signal. It is recommended to use the Tx 10 MHz<br />
reference signal from the modem.<br />
For OpenAMIP IP address: Make sure that you have entered this<br />
IP address also for the LAN connector that is used for the<br />
OpenAMIP modem, see Configuring the LAN network on page 6-<br />
98-133966-E2 Chapter 6: Configuration 6-25
Configuration with the web interface<br />
29.<br />
5. Click Apply to add the new profile to the list of VSAT modem<br />
profiles or to accept the edits.<br />
For a generic modem you enter all parameters in the satellite<br />
profile.<br />
Figure 6-18: Satellite profile for generic modem<br />
6-26 Chapter 6: Configuration 98-133966-E2
6.3.4 Setting up Blocking zones (RX and TX)<br />
On this page you define blocking zones, i.e. NO TX and RX zones,<br />
enter azimuth values and elevation angles for each blocking zone.<br />
You must select Active to enable a blocking zone.<br />
Configuration with the web interface<br />
6666<br />
Configuration<br />
Figure 6-19: Web interface: SETTINGS, Blocking zones — azimuth and elevation<br />
To define and set a blocking zone, do as follows:<br />
1. Select SETTINGS > Blocking zones.<br />
2. Select Active to enable the blocking zone.<br />
98-133966-E2 Chapter 6: Configuration 6-27
Configuration with the web interface<br />
3. Azimuth: Enter start and stop azimuth value in degrees for the<br />
blocking zone. Values allowed: 0 to 360 degrees. Enter clockwise.<br />
<br />
<br />
<br />
<br />
<br />
<br />
<br />
<br />
<br />
<br />
<br />
<br />
Figure 6-20: Blocking zone, example: 315 - 45 degrees<br />
<br />
<br />
<br />
<br />
<br />
<br />
<br />
<br />
<br />
<br />
<br />
Figure 6-21: Blocking zone, example: 45 - 315 degrees<br />
4. Elevation: Enter the start and stop elevation angle for the<br />
blocking zone. If you enter nothing, there will be no blocking<br />
zone. Values allowed: -30 to 90 degrees.<br />
Important<br />
<br />
You must enter 2 different elevation angles to have an<br />
active blocking zone.<br />
5. Select No TX for zones if you don’t want the system to transmit.<br />
If not selected, the system also transmits when pointing through<br />
areas with blocking objects. The VSAT modem will shut off for TX<br />
if no signal is received.<br />
6. Click Apply to save the blocking zones.<br />
6-28 Chapter 6: Configuration 98-133966-E2
6.3.5 Configuring the LAN network<br />
You can enter a host name. The host name helps identifying the<br />
SAILOR 900 VSAT system when sending e-mail reports. The ACU has<br />
four 10/100 Mbit Ethernet ports labelled LAN port 1, 2, 3 and 4. The<br />
ports are divided in three groups, each operating in its own<br />
network. You can setup DNS and Gateway.<br />
To configure the LAN network go to SETTINGS > Network.<br />
Configuration with the web interface<br />
6666<br />
Configuration<br />
Figure 6-22: Web interface: SETTINGS, Network (default settings)<br />
Important<br />
Make sure that the 3 networks do not use IP address<br />
ranges that overlap.<br />
98-133966-E2 Chapter 6: Configuration 6-29
Configuration with the web interface<br />
Sections<br />
NETWORK<br />
Host name<br />
LANPort1 +<br />
2<br />
LAN Port 3<br />
LAN Port 4<br />
Preferred use<br />
The host name is used for identifying the ACU in local<br />
networks and in e-mail reports. The default host name is acu.<br />
You can change the name. Letters (a-z), digits (0-9) and<br />
hyphen (-) are allowed as legal characters.<br />
Note: The host name must start with a letter.<br />
LAN port 1 and 2 are switched, i.e. they share the same IP<br />
address and operate on the same network. This network is<br />
usually connected to the VSAT Modem Unit.<br />
LAN port 1 can be set to static IP (default), DHCP client or DHCP<br />
server.<br />
IMPORTANT — OpenAMIP IP modem: Make sure that you<br />
have entered this IP address also for the VSAT modem<br />
profile of the OpenAMIP modem, see VSAT modem profile<br />
— New entry and Edit on page 6-24.<br />
LAN port 3 is dedicated as the service port. By default this port<br />
has the IP address 192.168.0.1; the current value can be<br />
displayed in the ACU display. In a 19” rack mount it is<br />
recommended to connect LAN port 3 to the front port (via rear<br />
connector, see the figure ACU rack version, connector panel<br />
overview on page 4-2), for access to the service port from the<br />
rack front.<br />
LAN port 3 can be set to static IP, DHCP client or DHCP server<br />
(default).<br />
LAN port 4 can be used for connection to the LAN of the vessel<br />
or other general purpose.<br />
LAN port 4 can be set to static IP, DHCP client (default) or DHCP<br />
server.<br />
Table 6-9: Setup of LAN connectors<br />
6.3.5.1 Static IP or DHCP Client<br />
If you select DHCP client the network IP address and sub-net mask<br />
must be provided by a DHCP server on that network.<br />
If you select Static IP address you must specify a unique IP address<br />
and a sub-net mask.<br />
6-30 Chapter 6: Configuration 98-133966-E2
6.3.5.2 DHCP Server Settings.<br />
On LAN ports 1,3 and 4 you can choose to run a DHCP server. Select<br />
the check box DHCP Server. The DHCP server settings are only<br />
displayed and can be selected when the port mode is set to Static<br />
IP, otherwise the DHCP server settings are not shown.<br />
The DHCP start and end addresses must be on the same network as<br />
the port's static IP.<br />
6.3.5.3 DNS setup<br />
If you have access to a Domain Name Server (DNS) you can specify<br />
the address of the e-mail server by using the server name instead of<br />
its IP address. This can be used in Outgoing mail server in E-mail<br />
setup on page 6-32.<br />
You may statically specify the address of one or two DNS. Select the<br />
DNS source as static and fill in IP address or addresses.<br />
Alternatively, if your DHCP server can provide a DNS address and<br />
you have selected DHCP client above, then select the same LAN as<br />
your DNS source.<br />
6.3.5.4 Gateway setup<br />
If the ACU needs to communicate with network units outside the<br />
specified sub-nets, you must specify a default gateway (typically a<br />
router).<br />
The default gateway can be set as a static IP address. Then set the<br />
default gateway source to static and enter the IP address of the<br />
default gateway. To remove the default gateway set it to 0.0.0.0.<br />
Alternatively, if your DHCP server is able to provide a default<br />
gateway address and you have selected DHCP client above, then<br />
select the same LAN as your default gateway source.<br />
Configuration with the web interface<br />
6666<br />
Configuration<br />
6.3.5.5 Zeroconf Settings<br />
On LAN ports 1,3 and 4 you can choose to add a zeroconf address in<br />
the network (169.254.0.0/24).This zeroconf address will be in<br />
addition to the existing static or DHCP IP address. One port at a time<br />
can be enabled.<br />
Zeroconf allows devices to connect to a network automatically.<br />
98-133966-E2 Chapter 6: Configuration 6-31
Configuration with the web interface<br />
6.3.6 E-mail setup<br />
To be able to send diagnostics and statistics reports using e-mail<br />
you must set up a couple of parameters. Contact your IT department<br />
for the specific data.<br />
To configure the e-mail setup, do the following:<br />
1. Go to SETTINGS > E-mail setup.<br />
Figure 6-23: Web interface: SETTINGS, E-mail setup (example)<br />
2. Enter the data for Outgoing mail server (SMTP), SMTP port<br />
number, SMTP authentication, User name and password. This<br />
data is typically provided by your IT department.<br />
Note<br />
You must set Outgoing mail server to an IP address if<br />
DNS has not been set up in DNS setup in Configuring<br />
the LAN network on page 6-29.<br />
6-32 Chapter 6: Configuration 98-133966-E2
6.3.7 Sending statistics reports<br />
SAILOR 900 VSAT can send a statistics report at fixed intervals. This<br />
report contains historical information from the SAILOR 900 VSAT of<br />
up to 1 month. It is sent as a zipped attachment to an e-mail. The file<br />
format is a comma separated value file (csv). The report can then be<br />
processed in spreadsheet applications, e.g. Microsoft Excel.<br />
Figure 6-24: Web interface: SETTINGS, Reports (example)<br />
Configuration with the web interface<br />
6666<br />
To set up sending a statistics report, do as follows:<br />
1. Configure e-mail first, see E-mail setup on page 6-32.<br />
2. Go to SETTINGS > Reports.<br />
3. In the section STATISTICS REPORT enter the following:<br />
• Sender e-mail address, this address will be the e-mail address<br />
from sending the report.<br />
• List of recipients (comma separated).<br />
• Send the report each: Select disabled, day (default) with 2-<br />
minute samples, week with hourly samples or month with<br />
hourly samples. The report contains statistics data for the<br />
selected.<br />
4. Click Apply.<br />
You can also send the report at any time by clicking Send now or<br />
download it directly to your computer by clicking Download. You<br />
can select statistics for the day, week or month. Use Send now to<br />
validate the e-mail setup.<br />
Configuration<br />
98-133966-E2 Chapter 6: Configuration 6-33
Configuration with the web interface<br />
The following parameters are recorded in the statistics report:<br />
Parameter recorded<br />
Hostname<br />
ACU SN<br />
ADU SN<br />
SW ver.<br />
System type<br />
Description<br />
Host name, entered in the web interface<br />
on the page SETTINGS > Network.<br />
ACU serial number<br />
ADU serial number<br />
Software version<br />
SAILOR 900 VSAT or SAILOR 100 Satellite TV<br />
Table 6-10: Statistics report, header record<br />
Parameter recorded<br />
UTC. (s)<br />
UTC (YYYY-MM-DD hh:mm)<br />
RSSI.Av<br />
RSSI.Max<br />
RSSI.Min<br />
POS.Lat (degree)<br />
POS.Long (degree)<br />
POS.Valid<br />
Heading.Samp (degree)<br />
Heading.Max (degree)<br />
Heading.Min (degree)<br />
Heading.Range (+/-degree)<br />
Antenna.Azi (degree) Antenna.Azi<br />
Max (degree) Antenna.Azi Min<br />
(degree) Antenna.Azi Range (+/-<br />
degree)<br />
Antenna.Ele (+/-degree)<br />
Antenna.Ele Max (+/-degree)<br />
Antenna.Ele Min (+/-degree)<br />
Vsat.rx_lo_freq (GHz)<br />
Vsat.tx_lo_freq (GHz)<br />
Tracking.rf freq (GHz)<br />
Tracking.type<br />
Sat.long (degree)<br />
Description<br />
UTC in seconds and date format for the data set.<br />
Received signal strength (average, maximum and<br />
minimum value) for the sampling interval.<br />
Latitude value of position.<br />
Longitude value of position.<br />
Fix = valid position, No Fix = invalid position.<br />
Ship’s heading (sample, maximum and minimum<br />
value, range) for the sampling interval. See Figure 6-<br />
25: Statistics — how to read data for a range.<br />
Current antenna azimuth (sample, maximum and<br />
minimum value, range) for the sampling interval. See<br />
Figure 6-25: Statistics — how to read data for a range.<br />
Current antenna elevation (sample, maximum and<br />
minimum value) for the sampling interval.<br />
Rx frequency of VSAT modem for this record.<br />
Tx frequency of VSAT modem for this record.<br />
Tracking RF frequency for this record.<br />
Narrow filter, DVB-S2 decoder and VSAT modem RSSI.<br />
Longitude position of the satellite.<br />
Table 6-11: Parameters recorded in a statistics report<br />
6-34 Chapter 6: Configuration 98-133966-E2
Parameter recorded<br />
Carrier rf.rx (GHz)<br />
Carrier rf.tx (GHz)<br />
Rx Lock (%)<br />
Logon (%)<br />
Pos Ok (%)<br />
VMU Connection (%)<br />
Blocking (%)<br />
DualAntenna.mode<br />
DualAntenna.logon_remote (%)<br />
DualAntenna.active (%)<br />
Description<br />
Rx frequency of carrier for this record.<br />
Tx frequency of carrier for this record.<br />
Configuration with the web interface<br />
Rx locked and logon time, in percent, for the sampling<br />
interval.<br />
Valid position, in percent of the sampling interval.<br />
Link with VSAT modem, in percent of the sampling<br />
interval.<br />
Ship in blocking zone, in percent of the sampling<br />
interval.<br />
Shows the current mode and the time active and<br />
remote logon.<br />
Table 6-11: Parameters recorded in a statistics report (Continued)<br />
6666<br />
Configuration<br />
Figure 6-25: Statistics — how to read data for a range<br />
6.3.7.1 Processing the statistics report in a spreadsheet<br />
application<br />
The statistics report is in a data format that can be imported into<br />
spreadsheet applications, e.g. Microsoft Excel, for further<br />
processing.<br />
1. Save the zipped file to your computer and extract the text file. The<br />
file name contains the identification of the system (example: aduacu3_stat_20111021110901_day.csv).<br />
98-133966-E2 Chapter 6: Configuration 6-35
Configuration with the web interface<br />
2. Open the spreadsheet application, for example Microsoft Excel.<br />
On the tab Data click the tab Import from text. Import the<br />
unzipped text file and follow the instructions in the wizard. When<br />
asked about the delimiter, select ‘comma’.<br />
The following figure shows an example of a statistics report in MS<br />
Excel 2007.<br />
Figure 6-26: Statistics report (example)<br />
6.3.8 Sending a diagnostics report<br />
You can send automatically generated diagnostic reports at fixed<br />
intervals. The diagnostic report contains information relevant for the<br />
service personnel during troubleshooting.<br />
To set up sending a statistics report, do as follows:<br />
1. Go to SETTINGS > Reports.<br />
2. In the section DIAGNOSTICS REPORT enter the following:<br />
• Sender e-mail address, this address will be the e-mail address<br />
from sending the report.<br />
• List of recipients (comma separated).<br />
6-36 Chapter 6: Configuration 98-133966-E2
• Send the report each: Select disabled, day (default), week or<br />
month. The report contains events and notifications of the<br />
selected period.<br />
3. Click Apply.<br />
To generate a diagnostic report, click Send now or go to the page<br />
HELPDESK and click Generate report to download it directly to your<br />
computer. See also Download of a diagnostic report or a statistics<br />
report on page 9-2.<br />
6.3.9 Dual antenna mode (optional)<br />
The following tasks must be taken care of when setting up a dualantenna<br />
system:<br />
• Configuring the Master ACU<br />
• Configuring the Slave ACU<br />
• Blocking zone setup<br />
• Line up and commissioning<br />
At the bottom of the DASHBOARD of the web interface there is a<br />
section where you can switch over to the other ACU dashboard. Next<br />
to Status you can see whether the current ACU is active or not.<br />
Configuration with the web interface<br />
6666<br />
Configuration<br />
Figure 6-27: Dual-antenna mode, link on DASHBOARD<br />
The dual-antenna system switches between the 2 antennas in the<br />
following scenarios:<br />
98-133966-E2 Chapter 6: Configuration 6-37
Configuration with the web interface<br />
• When in a programmed blocking zone.<br />
• When the signal is blocked for more than 2 minutes.<br />
• ADU is malfunctioning.<br />
In the statistics report you can get more detailed information on the<br />
dual-antenna mode, see also Table 6-11 on page 34.<br />
6.3.9.1 Configuring the Master ACU<br />
The Master ACU is configured exactly the same way as a standalone<br />
SAILOR 900 VSAT system with satellite profiles and VSAT<br />
modem profiles. Do as follows:<br />
1. Go to SETTINGS > Dual antenna.<br />
2. Select Enable and click Apply.<br />
Figure 6-28: Enabling dual-antenna mode in Master ACU<br />
The SAILOR 900 VSAT is now ready to act as Master ACU.<br />
6-38 Chapter 6: Configuration 98-133966-E2
6.3.9.2 Configuring the Slave ACU<br />
The Slave ACU is configured to use the Master ACU as VSAT modem<br />
profile. The VSAT modem profile must point to the IP address of the<br />
Master ACU, that is the IP address of the LAN port at which the<br />
Master/Slave communication cable is connected.<br />
1. Add a specific VSAT modem profile for dual-antenna mode, go to<br />
SETTINGS > Satellite profiles > VSAT modem profiles > New entry.<br />
2. Enter the profile name, for example Dual Antenna Master.<br />
3. As VSAT modem select Dual Antenna Master.<br />
4. IP address: this is the IP address of the LAN connector at the<br />
Master ACU. See Configuring the LAN network on page 6-29.<br />
5. Click Apply.<br />
Figure 6-29: Dual-antenna mode, add Slave modem profile<br />
Configuration with the web interface<br />
6666<br />
Configuration<br />
98-133966-E2 Chapter 6: Configuration 6-39
Configuration with the web interface<br />
6. Add a satellite profile that uses the VSAT modem Dual Antenna<br />
Master, go to SETTINGS > Satellite profiles > New entry.<br />
Figure 6-30: Dual-antenna mode, add Slave satellite profile<br />
7. Enter the satellite profile name, for example: Dual Antenna<br />
Master.<br />
8. As VSAT modem profile select Dual Antenna Master.<br />
9. Click Apply.<br />
10. Go to SETTINGS > Satellite profiles and activate the satellite<br />
profile Dual Antenna Master.<br />
Figure 6-31: Dual-antenna mode, Activate<br />
6-40 Chapter 6: Configuration 98-133966-E2
6.3.9.3 Blocking zone setup<br />
It is recommended to define the following 3 blocking zones in each<br />
SAILOR 900 VSAT system:<br />
1. Actual blocking zones on the vessel (No TX)<br />
2. Switching blocking zones (TX allowed).<br />
3. Personnel safety zones (No TX)<br />
1<br />
1<br />
2<br />
2<br />
3<br />
Configuration with the web interface<br />
3<br />
6666<br />
Configuration<br />
Figure 6-32: Dual-antenna mode, blocking zones — azimuth and elevation<br />
For instructions how to set up blocking zones see Setting up<br />
Blocking zones (RX and TX) on page 6-27.<br />
98-133966-E2 Chapter 6: Configuration 6-41
Configuration with the web interface<br />
6.3.9.4 Line up and commissioning<br />
The SAILOR 900 VSAT antenna systems must be lined up and<br />
commissioned one by one. The lineup procedure is done for each<br />
antenna as it would have been done for a single antenna system. In<br />
order to be able to do the lineup for each antenna you must force<br />
the dual system to use one or the other antenna at a time. Do as<br />
follows:<br />
1. Enter the web interface of the Master ACU, go to the page<br />
SERVICE > Dual antenna mode.<br />
2. Set the mode to either Master active or Slave active to force the<br />
system to use that antenna until it is changed again or the Master<br />
system is rebooted. After reboot the dual antenna mode will be<br />
set to Auto (default).<br />
6.3.10 Upload<br />
Figure 6-33: Dual-antenna mode, line up<br />
For uploading new software to the SAILOR 900 VSAT see Software<br />
update on page 9-5.<br />
6-42 Chapter 6: Configuration 98-133966-E2
6.3.11 Administration<br />
In this section of the web interface you can configure the following<br />
administrative settings:<br />
• Accessing the administration settings (user name, password)<br />
• Setting up user permissions<br />
• Importing and exporting a system configuration<br />
• Resetting to factory default<br />
6.3.11.1 Accessing the administration settings (user name,<br />
password)<br />
The Administration settings require an Administration user name<br />
and password. To log on as administrator, do as follows:<br />
1. Select ADMINISTRATION from the left navigation pane.<br />
2. Enter the Administration user name and password.<br />
The default user name is admin and the default password is<br />
1234.<br />
Configuration with the web interface<br />
6666<br />
Configuration<br />
Figure 6-34: Web interface: Administration<br />
If you have forgotten the administrator password, you can reset<br />
the password. For further information, see the next section.<br />
3. Click Logon.<br />
The Administration page is now updated to let you change the<br />
user name and password or log off Administration.<br />
98-133966-E2 Chapter 6: Configuration 6-43
Configuration with the web interface<br />
To change the administrator password, do as follows:<br />
1. After entering the administrator user name and password in the<br />
ADMINISTRATION page, locate the section Change administrator<br />
logon.<br />
Figure 6-35: Web interface: Administration, change administrator logon and<br />
password<br />
2. Type in the new password and retype it on the next line.<br />
3. Click Change. At the next logon the new password is required.<br />
To reset the administrator password, do as follows:<br />
1. Contact your service partner for a reset code. Report the serial<br />
number of the ACU. You find it in the Dashboard, ACU serial<br />
number.<br />
2. Click the link Forgot administrator password? at the bottom of the<br />
ADMINISTRATOR LOGON page (see Figure 6-34: Web interface:<br />
Administration).<br />
Figure 6-36: Web interface: ADMINISTRATION, Reset administrator password<br />
3. Type in the reset code obtained from your service partner and<br />
click Reset.<br />
4. Type in the user name Admin, the default password 1234 and<br />
click Logon.<br />
6-44 Chapter 6: Configuration 98-133966-E2
6.3.11.2 Logging off administration<br />
If you have not entered anything for 30 minutes under<br />
ADMINISTRATION, you are logged off automatically. To log off<br />
manually, click Logoff under administrator logoff in the<br />
ADMINISTRATION page.<br />
6.3.11.3 Setting up user permissions<br />
You can manage user access to certain functions of the SAILOR 900<br />
VSAT system. You can allow or deny users that are not<br />
administrators access to certain functions and make these pages<br />
read-only. This is useful if you want to protect the system against<br />
unintended changes or tampering of the system.<br />
Important<br />
Study this screen thoroughly and decide which areas<br />
of the SAILOR 900 VSAT system you want to give<br />
non-administrator users access to.<br />
To set up the user permissions, do as follows:<br />
1. From the left navigation pane, select ADMINISTRATION > User<br />
permissions.<br />
Configuration with the web interface<br />
6666<br />
Configuration<br />
Figure 6-37: Web interface: ADMINISTRATION, User permissions<br />
2. For each item under ALLOW USERS TO: select<br />
• Yes to allow access<br />
98-133966-E2 Chapter 6: Configuration 6-45
Configuration with the web interface<br />
• No to block access to the settings. Then the pages are readonly,<br />
changes cannot be made by non-administrator users.<br />
Change network: Change IP configuration of the LAN connectors.<br />
For further information see Configuring the LAN network on<br />
page 6-29.<br />
Change email settings: Change e-mail addresses for sending<br />
reports. For further information see E-mail setup on page 6-32.<br />
Modify XIM data: Only used during service and maintenance. For<br />
further information see Updating VIM/PCM calibration data on<br />
page 9-89.<br />
3. Click Apply.<br />
The settings to which access is denied are now greyed out for the<br />
non-administrator user.<br />
6.3.11.4 Importing and exporting a system configuration<br />
If you need to reuse a configuration in another SAILOR 900 VSAT<br />
system, you can save the current configuration to a file, which can<br />
then be loaded into another SAILOR 900 VSAT. You can also use this<br />
feature for backup purposes.<br />
The configuration file contains all the settings you have entered<br />
during system setup: satellite profiles, modem profiles, LAN setup,<br />
blocking zones, etc.<br />
To save a configuration to a file, do as follows:<br />
1. Select ADMINISTRATION > Export/import config.<br />
2. Click the button Export. Follow the download instructions on the<br />
screen. You can use this configuration file for upload into another<br />
SAILOR 900 VSAT,<br />
Figure 6-38: Web interface: Administration, Export/import configuration<br />
6-46 Chapter 6: Configuration 98-133966-E2
To load a configuration from a file, do as follows:<br />
1. Select ADMINISTRATION > Export/import config.<br />
2. Click the button Browse and locate the configuration file (.cfg<br />
file) you want to upload. Then click the button Open.<br />
3. In the web interface click the button Upload.<br />
To clone a system configuration, do as follows:<br />
1. Reset to factory default, see the following section for details.<br />
2. Import a configuration from file, see section above.<br />
Configuration with the web interface<br />
6666<br />
Configuration<br />
98-133966-E2 Chapter 6: Configuration 6-47
Configuration with the web interface<br />
6.3.11.5 Resetting to factory default<br />
When resetting SAILOR 900 VSAT to factory default, the following<br />
settings are deleted:<br />
• All satellite profiles<br />
• All VSAT modem profiles<br />
• Blocking zones<br />
• Heading settings<br />
• Network setup<br />
• User permissions<br />
• ACU display: brightness setting<br />
To reset to factory default settings, do as follows:<br />
1. From the left navigation pane, select ADMINISTRATION > Factory<br />
default.<br />
2. Click Reset to factory default.<br />
Note<br />
Figure 6-39: Web interface: ADMINISTRATION, Factory default<br />
Calibration data for azimuth and cable calibration are not<br />
reset during factory default.<br />
6-48 Chapter 6: Configuration 98-133966-E2
6.4 Keypad and menus of the ACU<br />
6.4.1 ACU display and keypad<br />
In the ACU display you can see the current state of the system. You<br />
can also see events (warnings, errors and information) and how the<br />
system has been configured. Use the keypad to navigate through<br />
the menu tree.<br />
1 2 3 4 5 6<br />
7<br />
1. Current status of the SAILOR 900 VSAT:<br />
NOT READY (Waiting for input from GNSS, e.g. GPS)<br />
READY (no satellite profile selected)<br />
POINTING ANTENNA (Locating the satellite)<br />
ACQUIRING SIGNAL (Acquiring the satellite signal)<br />
TRACKING (Tracks the current satellite)<br />
FREQUENCY SCAN (Scanning for transponders)<br />
BLOCKING ZONE (Antenna is pointing into a blocking zone)<br />
2. Current menu. See The menu tree on page 6-51.<br />
3. TX: Current transmission state, ON or OFF (off when in blocking<br />
zone).<br />
4. GPS: GPS signal is received from the GPS module, OK or —.<br />
5. HDG: Ship heading data received from the ship’s gyro, OK or —.<br />
6. LAN: LAN connectors used, 1, 2, 3, 4, —. See Figure 4-3: ACU<br />
bulkhead, connector panel overview on page 4-2.<br />
7. SAT: Satellite position of currently active satellite profile.<br />
8. RX: RX polarisation of currently active satellite profile. H<br />
(horizontal), V (vertical), L (left-hand) R (right-hand).<br />
8<br />
Signal strength<br />
Figure 6-40: Display (example) and keypad of the ACU<br />
9. RX: Rx RF tracking frequency in GHz and LNB LO Frequency.<br />
10. TX:X TX polarisation of currently active satellite profile. X (Cross<br />
polarisation) or Co (Co-pol).<br />
9<br />
10<br />
Keypad and menus of the ACU<br />
6666<br />
Configuration<br />
98-133966-E2 Chapter 6: Configuration 6-49
Keypad and menus of the ACU<br />
After 1 hour the display is dimmed to lowest intensity. Press any key<br />
to light up the display.<br />
6.4.2 Navigating the menus<br />
Use the keypad to navigate the menus.<br />
• Press OK or to select a menu item.<br />
• Use the arrow keys and to go through<br />
the menu items or enter a number, digit by digit.<br />
• Use the arrow keys and to go through the settings and<br />
move from one digit to the next.<br />
• Press OK to select a setting.<br />
• Press again to move one level up. If applicable, confirm to<br />
store the new setting by pressing OK.<br />
6-50 Chapter 6: Configuration 98-133966-E2
6.4.3 The menu tree<br />
In the menu tree you can see how the system has been configured.<br />
You can also enter satellite information directly, if it is necessary to<br />
change the satellite information and you cannot use a connected PC<br />
and the web interface.<br />
MAIN<br />
ANTENNA<br />
MODEM<br />
NETWORK<br />
SATELLITE<br />
EVENTS<br />
ANT<br />
POINTING<br />
POLARIZATION<br />
GPS<br />
HEADING<br />
VERSIONS<br />
SERIAL NUMBERS<br />
MODEM<br />
MODEM/TYPE<br />
TX ENABLE<br />
RX LOCK<br />
SIGNAL LEVEL *<br />
NET<br />
PORT 1/2 IP<br />
PORT 1/2 MASK<br />
PORT 3 IP<br />
PORT 3 MASK<br />
PORT 4 IP<br />
PORT 4 MASK<br />
DEFAULT GATEWAY<br />
SAT<br />
POSITION<br />
RX POLARIZATION<br />
TX POLARIZATION**<br />
RX FREQUENCY<br />
LNB SATLO **<br />
TX FREQUENCY<br />
BUC LO<br />
ANT-1<br />
ANTENNA STATE<br />
ELEVATION<br />
AZIMUTH<br />
ANT-2<br />
RX POLARIZATION<br />
TX POLARIZATION<br />
ANT-3<br />
LATITUDE<br />
LONGITUDE<br />
FIX TYPE<br />
ANT-4<br />
HEADING<br />
ANT-5<br />
SW VERSION<br />
ANT-6<br />
ACU<br />
ADU<br />
Keypad and menus of the ACU<br />
6666<br />
EVENT<br />
<br />
<br />
<br />
<br />
* for some modems<br />
** for some antenna configurations<br />
Figure 6-41: Antenna Control Unit, menu tree<br />
Configuration<br />
98-133966-E2 Chapter 6: Configuration 6-51
Keypad and menus of the ACU<br />
6.4.3.1 Top-level menu<br />
Top-level<br />
menu<br />
MAIN<br />
Description<br />
View with current status of the SAILOR 900 VSAT. Example when logged on to<br />
the satellite:<br />
This view is displayed after a time out of 10 minutes. Press any key (except left<br />
arrow) to enter the menu at MAIN.<br />
New events are shown in this display. If an event is displayed, press OK to<br />
jump directly to the menu EVENTS for viewing the currently active events.<br />
ANTENNA<br />
MODEM<br />
NETWORK<br />
SATELLITE<br />
EVENTS<br />
Shows the current ADU parameters, position, software version and serial<br />
numbers of the ADU and ACU.<br />
Selected VMU type and setup, including signal level.<br />
Shows the IP addresses and netmasks of the LAN connectors of the ACU and<br />
the management mask.<br />
Current satellite information. This information is entered using the web<br />
interface.<br />
View system events. Active events are shown as: X ACTIVE EVENTS in the<br />
MAIN display. Press OK to update the list.<br />
Table 6-12: Top-level menus of the ACU<br />
6.4.3.2 Menu descriptions<br />
ANTENNA<br />
menu<br />
Description<br />
POINTING ANTENNA: See list of states at ACU display and keypad on page 6-49.<br />
ELEVATION: Current elevation angle of the antenna<br />
AZIMUTH: Current azimuth of the antenna, with reference to North<br />
POLARISATION<br />
GPS<br />
RX POLARISATION: HORIZONTAL or VERTICAL, read from connected VSAT<br />
modem.<br />
TX POLARIZATION: X-POL or Co-POL, read from connected VSAT modem.<br />
LATITUDE: current latitude, read from GPS module.<br />
LONGITUDE: current longitude, read from GPS module.<br />
FIX TYPE: 2D or 3D<br />
Table 6-13: ANTENNA menu of the ACU<br />
6-52 Chapter 6: Configuration 98-133966-E2
ANTENNA<br />
menu<br />
HEADING<br />
VERSIONS<br />
SERIAL<br />
NUMBERS<br />
MODEM menu<br />
MODEM TYPE<br />
TX ENABLE<br />
RX LOCK<br />
SIGNAL LEVEL<br />
NETWORK menu<br />
Description<br />
Ship’s heading in degrees with reference to North, provided by the ship’s<br />
gyro.<br />
Current software version.<br />
ACU: ACU serial number;<br />
ADU: Serial number of the antenna<br />
Table 6-13: ANTENNA menu of the ACU (Continued)<br />
Description<br />
Connected modem type.<br />
On or off, information delivered by the connected VSAT modem.<br />
On or off, information delivered by the connected VSAT modem.<br />
Current input signal level from VSAT modem.<br />
iDirect openAMIP modem: (PWR) 0-500, delivered by the connected<br />
modem. For values
Keypad and menus of the ACU<br />
SATELLITE menu<br />
TX POLARIZATION<br />
RX FREQUENCY<br />
LNB LO<br />
TX FREQUENCY<br />
BUC LO<br />
Description<br />
X-polarisation or Co-polarisation, auto-selected by VSAT modem<br />
Ku band receiving frequency of the active satellite, auto-selected by<br />
VSAT modem.<br />
Auto selected by VSAT modem.<br />
Transmission frequency, auto-selected by VSAT modem<br />
12.8 GHz, system parameter<br />
Table 6-16: SATELLITE menu of the ACU (Continued)<br />
EVENT<br />
menu<br />
Description<br />
In this menu all active events are listed. Use and to go through the<br />
active events.<br />
Events can be of the type WARNING or ERROR. For a list of events see Event<br />
messages — overview on page G-1.<br />
If a new event occurs or there is a change in the event list while you are in<br />
the EVENTS menu, a * is shown in the upper left corner of the display, next<br />
to the menu name. Press OK to update the EVENTS list, the * will be<br />
removed.<br />
A > means the event text is longer than the display. Press to > to see the<br />
remaining text.<br />
Table 6-17: EVENTS menu of the ACU<br />
Example:<br />
EVENT 1/4*: This is the first event out of a list of 4 and<br />
there has been a change in the list. EVENT 1/4 will<br />
always be shown, the * indicates that there has been a<br />
change.<br />
6.4.4 Adjusting brightness of the display<br />
To adjust the brightness do the following:<br />
1. Press and hold OK for a short moment until BRIGHTNESS XXX%<br />
is displayed (XXX is the current brightness value).<br />
2. Hold OK pressed + press for lighter or for darker display.<br />
3. Release OK to leave the brightness menu.<br />
6-54 Chapter 6: Configuration 98-133966-E2
6.4.5 Resetting the system<br />
To reset the system do the following:<br />
1. Press and hold and until the ACU display shuts down and<br />
the ACU reboots.<br />
2. Wait until the system has rebooted and is operational again. The<br />
last active satellite profile will be used.<br />
6.5 SNMP support<br />
The SAILOR 900 VSAT supports SNMP v2 requests to retrieve<br />
configuration and present settings. SNMP is always enabled on all<br />
Ethernet interfaces. The SNMP community string is public.<br />
The SAILOR 900 VSAT offers via SNMP most of the data that are<br />
available from the DASHBOARD web pages. Detailed documentation<br />
about supported OIDs can be found in the SAILOR 900 VSAT MIB<br />
file.<br />
The MIB entries are grouped as shown below:<br />
• System configuration<br />
• Navigation coordinates<br />
• Antenna pointing<br />
• Dashboard and profile<br />
• Tracking receiver<br />
Note<br />
Figure 6-42: Reset the system<br />
All SNMP values are of a nature which does not need to be<br />
polled more often than once a minute. Polling SNMP values<br />
more frequently will impact the performance of the ACU.<br />
SNMP support<br />
6666<br />
Configuration<br />
98-133966-E2 Chapter 6: Configuration 6-55
SNMP support<br />
6-56 Chapter 6: Configuration 98-133966-E2
<strong>Installation</strong> check 7<br />
Now that you have installed the system, you can test it to verify it is<br />
ready for customer delivery. Follow the check lists below to test the<br />
system for proper operation.<br />
Chapter 77777<br />
• <strong>Installation</strong> check list: Antenna<br />
• <strong>Installation</strong> check list: ACU, connectors and wiring<br />
• <strong>Installation</strong> check list: Functional test in harbor<br />
7.1 <strong>Installation</strong> check list: Antenna<br />
Step Task Further information Done<br />
1. Check that the antenna is free<br />
of obstructions.<br />
2. Make sure there is sufficient<br />
space for access through the<br />
service hatch.<br />
See Obstructions (ADU<br />
shadowing) on page 3-4.<br />
See Installing the ADU on<br />
page 3-19.<br />
3. Make sure to maintain the<br />
vertical orientation of the ADU<br />
center line.<br />
4. Check that the ADU is installed<br />
where vibrations are limited to<br />
a minimum.<br />
5. Check that you programmed<br />
the blocking zones correctly.<br />
See Blocking zones —<br />
azimuth and elevation on<br />
page 3-5<br />
and<br />
<strong>Installation</strong> check<br />
6. Make sure that the safety distance<br />
for radiation hazard of 30 metres<br />
is kept.<br />
Setting up Blocking zones<br />
(RX and TX) on page 6-27<br />
See Safe access to the ADU:<br />
Radiation hazard on page 3-6<br />
Table 7-1: <strong>Installation</strong> check list: Antenna<br />
98-133966-E2 7-1
<strong>Installation</strong> check list: Antenna<br />
Step Task Further information Done<br />
7. Check that the mounting<br />
height of the antenna is in<br />
accordance with the ship’s<br />
min. roll period.<br />
8. Make sure that the<br />
requirements for mast<br />
foundation and height,<br />
including flatness, gusset<br />
plates and distance from<br />
welding seams are met.<br />
9. Make sure that the distances to<br />
radar, Inmarsat systems, GPS<br />
receivers and other<br />
transmitters are as required.<br />
10. Make sure that the drain tube<br />
is open and risk for water<br />
intrusion is at a minimum.<br />
11. Check that the ADU is<br />
grounded correctly, using the<br />
mounting bolts.<br />
See Ship motion and offset<br />
from the ship’s motion<br />
centre on page 3-7.<br />
See ADU mast design:<br />
Foundation and height on<br />
page 3-8.<br />
See Interference on page 3-<br />
13.<br />
See Other precautions on<br />
page 3-17.<br />
See Grounding the ADU on<br />
page 3-23<br />
and<br />
Grounding and RF<br />
protection on page F-1.<br />
Table 7-1: <strong>Installation</strong> check list: Antenna (Continued)<br />
7-2 Chapter 7: <strong>Installation</strong> check 98-133966-E2
7.2 <strong>Installation</strong> check list: ACU,<br />
connectors and wiring<br />
Step<br />
Task<br />
1. Check that the ACU is grounded correctly,<br />
using the mounting bolts and washers.<br />
<strong>Installation</strong> check list: ACU, connectors and wiring<br />
Verification and further<br />
information<br />
See Grounding the ACU<br />
(bulkhead) on page 3-27<br />
or Grounding the 19” rack<br />
version of the ACU on<br />
page 3-31<br />
Grounding and RF<br />
protection on page F-1.<br />
2. Make sure you strain relieved the cables. See <strong>Installation</strong> of the<br />
ACU (bulkhead) on<br />
page 3-26 or Installing<br />
the 19” rack version of the<br />
ACU on page 3-30.<br />
3. Make sure that the VSAT modem is<br />
mounted close to the ACU.<br />
4. Check that the ADU antenna N-connector<br />
is properly connected with the 50 Ohm RF<br />
cable.<br />
5. Check that the ACU antenna N-connector<br />
is properly connected with the 50 ohm RF<br />
cable.<br />
6. Check that the ACU's Rx Out is connected<br />
to the VSAT modem’s Rx in using the<br />
included 1 m F-F 75 ohm cable.<br />
and<br />
See General mounting<br />
considerations — VMU on<br />
page 3-32.<br />
Visual inspection of the<br />
cover plate at the bottom<br />
of the ADU.<br />
Visual inspection of the<br />
connector panel of the<br />
ACU.<br />
Visual inspection of the<br />
connector panel of the<br />
ACU and the VSAT<br />
modem.<br />
Done<br />
7777<br />
<strong>Installation</strong> check<br />
7. Check that the ACU's Tx In is connected to<br />
the VSAT modem's Tx out using the<br />
included 1 m F-F 75 ohm cable.<br />
Visual inspection of the<br />
connector panel of the<br />
ACU and the VSAT<br />
modem.<br />
Table 7-2: <strong>Installation</strong> check list: ACU, connectors and wiring<br />
98-133966-E2 Chapter 7: <strong>Installation</strong> check 7-3
<strong>Installation</strong> check list: ACU, connectors and wiring<br />
Step<br />
Task<br />
Verification and further<br />
information<br />
Done<br />
8. Check connection of the VSAT modem:<br />
COMTECH only!: Check that the ACU RS-<br />
232 port is connected to the Remote<br />
Control port and Alarm port of the VMU<br />
using the serial cable (specifications in<br />
Modem Cable Comtech Serial & RSSI<br />
TT7016A on page B-2).<br />
iDirect iNFINITI Series/ Evolution only!:<br />
Check that the ACU RS-232 port is<br />
connected to the Console port of the VMU<br />
using the included serial cable.<br />
iDirect iNFINITY Series only!: Check that<br />
the ACU LAN port 1 is connected to the<br />
LAN B of the VMU using the included<br />
CAT5 Ethernet cable.<br />
iDirect Evolution only!: Check that the<br />
ACU LAN port 1 is connected to the LAN of<br />
the VMU using the included CAT5<br />
Ethernet cable.<br />
STM SatLink 2900: Check that the ACU<br />
LAN port 1 is connected to the LAN of the<br />
VMU using the included CAT5 Ethernet<br />
cable.<br />
Gilat SkyEdge II VSAT modem: Check that<br />
the ACU RS-232 port is connected to the<br />
SERIAL port of the VMU using the<br />
included serial cable.<br />
9. Check that the ADU's NMEA 0183<br />
connector is connected to the NMEA 0183<br />
bus of the vessel using the included<br />
multi-connector<br />
10. Measure that the power has the correct<br />
polarity in the power connector, before<br />
connecting it to the ACU power input.<br />
(Vin+: left, Vin-: right).<br />
Visual inspection of the<br />
connector panel of the<br />
ACU and the VSAT<br />
modem. See also:<br />
Connecting a Satlink2900<br />
VSAT modem on page 4-11<br />
Connecting an iNFINITI®<br />
Series Satellite Router on<br />
page 4-9<br />
Connecting an<br />
Evolution® Satellite<br />
Router on page 4-10<br />
Connecting a Satlink2900<br />
VSAT modem on page 4-11<br />
Connecting a Gilat<br />
SkyEdge II VSAT modem<br />
on page 4-12<br />
Visual inspection of the<br />
connector panel of the<br />
ACU connector.<br />
Use a volt meter. See<br />
Table 4-1: DC Input plug,<br />
outline and pin<br />
assignment on page 4-3.<br />
Table 7-2: <strong>Installation</strong> check list: ACU, connectors and wiring (Continued)<br />
7-4 Chapter 7: <strong>Installation</strong> check 98-133966-E2
7.3 <strong>Installation</strong> check list: Functional<br />
test in harbor<br />
Step Task Further information Done<br />
1. Check that the antenna is<br />
tracking the satellite<br />
2 Check that the VMU is in lock<br />
and ready for Tx.<br />
3 Connect a user PC LAN (not<br />
the service PC) to the<br />
Internet LAN connector,<br />
either on the LAN port 2 of<br />
the ACU (only X5 VSAT<br />
modem) or to the User LAN<br />
connector on the VMU.<br />
2. Open a DOS window and<br />
type: ping 4.2.2.2.<br />
3. Open a web browser and<br />
browse to www.google.com.<br />
4. If step 4 is successful and<br />
step 5 is not then it seems<br />
like the DNS is not<br />
configured correctly.<br />
The logon LED in the ACU display<br />
must be steady green and the<br />
display shows: TRACKING.<br />
In the web interface check:<br />
DASHBOARD:<br />
System status: Tracking<br />
In the web interface check:<br />
DASHBOARD > VSAT MODEM ><br />
Signal level and RX frequency<br />
show values.<br />
Check the VSAT modem<br />
documentation for details.<br />
Check that you get a response.<br />
Check that the web page is<br />
downloaded.<br />
Check with the VSAT modem<br />
documentation how the DNS server<br />
must be set up, “Obtain DNS server<br />
address automatically” or enter<br />
specific DNS server addresses.<br />
Table 7-3: <strong>Installation</strong> check list: Functional test in harbour<br />
<strong>Installation</strong> check list: Functional test in harbor<br />
7777<br />
<strong>Installation</strong> check<br />
98-133966-E2 Chapter 7: <strong>Installation</strong> check 7-5
<strong>Installation</strong> check list: Functional test in harbor<br />
7-6 Chapter 7: <strong>Installation</strong> check 98-133966-E2
Daily use — Quick guide 8<br />
QUICK GUIDE<br />
Chapter 88888<br />
SAILOR 900 VSAT<br />
Introduction<br />
The SAILOR 900 VSAT system has been<br />
configured during installation with all needed<br />
satellite and modem profiles. After startup it<br />
uses the last selected satellite profile.<br />
To change to another satellite (or modem profile),<br />
or change an antenna parameter, connect<br />
a PC to the Antenna Control Unit (ACU) and<br />
enter the built-in web interface.<br />
Setup and configuration<br />
1. Switch on the SAILOR 900 VSAT at the power<br />
switch of the ACU.<br />
2. Connect a PC to LAN port 3 (Rack version:<br />
Front LAN connector) of the ACU, use a<br />
straight Ethernet cable.<br />
3. Enter the address http://192.168.0.1 (default)<br />
in your Internet browser. The built-in web<br />
interface opens<br />
directly with the<br />
DASHBOARD.<br />
4. Click SETTINGS and<br />
activate the new<br />
satellite profile.<br />
For detailed information see the SAILOR 900<br />
VSAT <strong>Installation</strong> & user manual.<br />
Daily use — Quick guide<br />
Figure 8-1: SAILOR 900 VSAT Quick Guide — web interface and satellite profiles<br />
98-133966-E2 8-1
SAILOR 900 VSAT<br />
Viewing system parameters<br />
Navigation<br />
1. Switch on the SAILOR 900 VSAT at<br />
the power switch of the ACU.<br />
2. Use the arrow keys on the keypad<br />
of the Antenna Control Unit (ACU)<br />
to go to a menu.<br />
3. Press OK, then the arrow keys on<br />
the keypad to select a parameter.<br />
The current menu name is shown<br />
in the upper left corner of the<br />
display.<br />
For changing a parameter in the<br />
SAILOR 900 VSAT use the built-in web<br />
interface of the ACU. See overleaf<br />
for a short introduction to the web<br />
interface.<br />
Resetting the ACU<br />
1. Press and hold the arrow up and<br />
down keys until the ACU display<br />
shuts down and the ACU reboots.<br />
2. Wait until the system has rebooted<br />
and is operational again. The<br />
last active satellite profile will be<br />
selected.<br />
For detailed information see the SAILOR<br />
900 VSAT <strong>Installation</strong> & user manual.<br />
MAIN<br />
ANTENNA<br />
MODEM<br />
NETWORK<br />
SATELLITE<br />
EVENTS<br />
ANT<br />
POINTING<br />
POLARIZATION<br />
GPS<br />
HEADING<br />
VERSIONS<br />
SERIAL NUMBERS<br />
MODEM<br />
MODEM/TYPE<br />
TX ENABLE<br />
RX LOCK<br />
SIGNAL LEVEL *<br />
NET<br />
PORT 1/2 IP<br />
PORT 1/2 MASK<br />
PORT 3 IP<br />
PORT 3 MASK<br />
PORT 4 IP<br />
PORT 4 MASK<br />
DEFAULT GATEWAY<br />
SAT<br />
POSITION<br />
RX POLARIZATION<br />
TX POLARIZATION**<br />
RX FREQUENCY<br />
LNB SATLO **<br />
TX FREQUENCY<br />
BUC LO<br />
EVENT<br />
<br />
<br />
<br />
<br />
ANT-1<br />
ANTENNA STATE<br />
ELEVATION<br />
AZIMUTH<br />
ANT-2<br />
RX POLARIZATION<br />
TX POLARIZATION<br />
ANT-3<br />
LATITUDE<br />
LONGITUDE<br />
FIX TYPE<br />
ANT-4<br />
HEADING<br />
ANT-5<br />
SW VERSION<br />
ANT-6<br />
ACU<br />
ADU<br />
* for some modems<br />
** for some antenna configurations<br />
98-133401-D<br />
thrane.com<br />
Figure 8-2: SAILOR 900 VSAT Quick Guide — Viewing system parameters<br />
8-2 Chapter 8: Daily use — Quick guide 98-133966-E2
<strong>Service</strong> & maintenance 9<br />
In this chapter you find the following sections:<br />
Chapter 99999<br />
• Getting support: Helpdesk<br />
• Software update<br />
• Status signalling with LEDs and status messages<br />
• Removal and replacement of the ACU<br />
• Removal and replacement of ADU modules<br />
• Replacing the GPS module<br />
• Replacing the VSAT Interface Module (VIM)<br />
• Replacing the DC-Motor Driver Module (DDM)<br />
• Replacing the Polarisation Motor Module (PMM)<br />
• Replacing the Pedestal Control Module (PCM)<br />
• Replacing motor and encoder<br />
• Replacing the Drive Belts<br />
• Replacing the Zero Reference Module (ZRM)<br />
• Replacing the Inertial Sensor Module (ISM)<br />
• Replacing the Polarisation Unit<br />
• Replacing the BUC Fan<br />
• Replacing the Block Up Converter (BUC)<br />
• Replacing the Low Noise Block down converter (LNB)<br />
• Replacing the Ortho Mode Transducer (OMT)<br />
• Replacing the rotary joint<br />
• Troubleshooting<br />
• System block diagram (ADU)<br />
<strong>Service</strong> & maintenance<br />
98-133966-E2 9-1
Getting support: Helpdesk<br />
9.1 Getting support: Helpdesk<br />
If this manual does not provide the remedies to solve your problem,<br />
contact your service provider.<br />
9.1.1 Help desk and diagnostic report<br />
9.1.1.1 Support at the Help desk<br />
During the installation you can enter the support contact for this<br />
installation.<br />
To access the Help desk, select HELPDESK from the left navigation<br />
pane.<br />
Figure 9-1: Web interface: HELPDESK<br />
Click the link, enter support contact information and click Apply.<br />
Clicking the link Legal notice provides licence text for the source<br />
code of the parts of the SAILOR 900 VSAT software that falls under<br />
free and open source software.<br />
If you need help with ACU or ADU related issues call your service<br />
provider.<br />
9.1.1.2 Download of a diagnostic report or a statistics report<br />
You can download a diagnostic report. This report contains<br />
information relevant for the service personnel during<br />
troubleshooting. To generate a diagnostics report click Download.<br />
You can download a statistics report. This report contains<br />
information relevant for the service personnel during<br />
troubleshooting.<br />
9-2 Chapter 9: <strong>Service</strong> & maintenance 98-133966-E2
To generate a statistics report select the period for the statistics from<br />
the drop down list and click Download.<br />
You can also configure the system to send diagnostic reports at<br />
defined time intervals. For further details on this see Sending a<br />
diagnostics report on page 6-36.<br />
9.1.1.3 Event list<br />
When an event is registered, the web interface shows an event icon<br />
in the icon bar as long as the event is active. The ACU display<br />
shows also active events. To view the event list with active events,<br />
click the event icon from the icon bar at the top of the web interface,<br />
or select HELPDESK > Event list from the left navigation pane.<br />
Figure 9-2: Web interface: HELPDESK, Event list<br />
The Event list page shows a detailed list of active events and<br />
notifications including the time of the first occurrence, ID and<br />
severity of the event message, and a short text describing the error.<br />
Active events are cleared from the event list when the error is<br />
cleared. They are moved to the section Notifications and are<br />
displayed there with severity CLEARED for 24 hours.<br />
All entries in the section Notifications are cleared automatically<br />
after 24 hours and after restart of the system.<br />
For a list of all events with description, error code (ID), explanation<br />
and remedy see List of events with explanation and remedy on<br />
page C-1.<br />
Getting support: Helpdesk<br />
9999<br />
<strong>Service</strong> & maintenance<br />
98-133966-E2 Chapter 9: <strong>Service</strong> & maintenance 9-3
Getting support: Helpdesk<br />
9.1.1.4 Self test<br />
You can start a self test of the SAILOR 900 VSAT ADU and ACU.<br />
1. Click Self test in the HELPDESK page.<br />
2. Click the menu item Self test.<br />
Important<br />
Warning! The SAILOR 900 VSAT will reboot to<br />
perform the self test. Rebooting the ACU will<br />
terminate all existing connections.<br />
9.1.1.5 Reset to factory defaults<br />
You can reset the SAILOR 900 VSAT ADU and ACU to factory<br />
defaults. See Resetting to factory default on page 6-48.<br />
Important<br />
Warning! Reset to factory default will delete all<br />
settings, including satellite and VSAT modem<br />
profiles, blocking zones, network setup, user<br />
permissions and ACU display brightness settings.<br />
9-4 Chapter 9: <strong>Service</strong> & maintenance 98-133966-E2
9.2 Software update<br />
9.2.1 Hardware and software requirements<br />
The following items are required before the software can be<br />
updated:<br />
• One computer with a standard Ethernet port available.<br />
• A standard Internet browser.<br />
• 1024×768 pixels or higher display resolution. The program is best<br />
viewed using small fonts.<br />
• One straight LAN cable.<br />
• The file containing the new software.<br />
9.2.2 Software update (ADU and ACU)<br />
Note<br />
1. Power up the SAILOR 900 VSAT system, i.e. switch on the ACU.<br />
Wait until the SAILOR logo has disappeared from the ACU display.<br />
2. Connect a PC to LAN interface 3 (<strong>Service</strong> port, standard Ethernet)<br />
of the ACU. For the rack version, connect the LAN cable to the<br />
front LAN connector of the ACU.<br />
3. Open your Internet browser and enter the IP address of the ACU.<br />
The IP address is http://192.168.0.1 (default). For further details<br />
on network setup see Configuring the LAN network on page 6-29.<br />
4. The web interface opens directly with the DASHBOARD page.<br />
5. Click SERVICE from the left navigation pane. The Upload page is<br />
displayed.<br />
6. Click Browse... and locate the new software file.<br />
7. Click Upload.<br />
Software update should only be done by qualified service<br />
personnel.<br />
Figure 9-3: LAN connector used for configuring the SAILOR 900 VSAT<br />
Software update<br />
9999<br />
<strong>Service</strong> & maintenance<br />
98-133966-E2 Chapter 9: <strong>Service</strong> & maintenance 9-5
Software update<br />
Note that the upload procedure takes a couple of minutes. When<br />
done, the ACU automatically restarts with the new software<br />
version.<br />
Important<br />
Do not browse away from the upload page. This<br />
will terminate the upload process. Wait for the<br />
browser to reload automatically.<br />
The start-up procedure after a software upload takes longer than<br />
the usual start-up time, as the software in the ADU must also be<br />
updated. The ACU display shows: ADU SW UPLOAD.<br />
9.2.2.1 If software upload fails - how to recover<br />
To recover from a failed software upload, turn off the ACU and turn<br />
it on again. Then repeat the upload procedure as described in<br />
Software update on page 9-5.<br />
9.2.3 Verifying the software update<br />
9.2.3.1 Testing procedure<br />
1. The software version can be viewed in the DASHBOARD window<br />
of the web interface.<br />
2. After completing the software update procedure, the ACU will<br />
perform a POST (Power On Self Test).<br />
3. When the POST has finished, the green Pass/Fail LED on the front<br />
of the ACU must become steadily green. Verify that the Pass/Fail<br />
LED is not red nor flashing orange once every 2 seconds. Wait<br />
until the Pass/Fail LED is green.<br />
4. Verify that the software update has been completed successfully.<br />
You find the software version number in the DASHBOARD window<br />
of the web interface.<br />
9-6 Chapter 9: <strong>Service</strong> & maintenance 98-133966-E2
Figure 9-4: Verifying software update<br />
Software update<br />
9999<br />
<strong>Service</strong> & maintenance<br />
98-133966-E2 Chapter 9: <strong>Service</strong> & maintenance 9-7
Status signalling with LEDs and status messages<br />
9.3 Status signalling with LEDs and<br />
status messages<br />
9.3.1 Overview<br />
9.3.1.1 Built-In Test Equipment<br />
The ADU and the ACU have a Built-In Test Equipment (BITE)<br />
function in order to make fault diagnostics easy during service and<br />
installation. The BITE test is performed during:<br />
• Power On Self Test (POST), which is automatically performed each<br />
time the system is powered on.<br />
• Person Activated Self Test (PAST), which is initiated by starting a<br />
self test in the web interface HELPDESK > Self test.<br />
For details on error messages after a POST or a self test see Event<br />
list on page 9-3.<br />
9.3.1.2 Means of signalling<br />
The SAILOR 900 VSAT provides various methods for signalling the<br />
system status. LEDs on the front panel of the ACU are used to signal:<br />
• Power on/off<br />
• Logon<br />
• Fail/Pass<br />
The built-in web interface of the ACU shows any events (BITE error<br />
codes) with a short message describing each error. This is also<br />
displayed in the ACU.<br />
In an error situation, one of the following system status messages<br />
may be shown:<br />
• ACU POST error<br />
• ADU POST error<br />
• SAFE MODE (plus information about the specific error, see System<br />
messages on page G-1).<br />
9-8 Chapter 9: <strong>Service</strong> & maintenance 98-133966-E2
During service and maintenance, one of the following system status<br />
messages may be shown:<br />
• <strong>Service</strong> switch<br />
• Azimuth calibration<br />
• TX cable calibration<br />
• XIM data error<br />
9.3.2 LEDs of the ADU modules<br />
Each ADU module has a Power and a <strong>Service</strong> LED.<br />
LED Behavior Description<br />
Power Steady green Power supply OK<br />
Off<br />
No power<br />
<strong>Service</strong> Steady green Module ok, application running.<br />
Flashing green<br />
Flashing red/green<br />
Steady red<br />
Waiting for upload<br />
Uploading application<br />
Module error or loading error<br />
Table 9-1: LEDs of the ADU modules<br />
For a list of modules see Removal and replacement of ADU modules<br />
on page 9-12.<br />
Status signalling with LEDs and status messages<br />
9999<br />
<strong>Service</strong> & maintenance<br />
98-133966-E2 Chapter 9: <strong>Service</strong> & maintenance 9-9
Status signalling with LEDs and status messages<br />
9.3.3 LEDs in the ACU<br />
The ACU has 3 LEDs: Power, Logon and Fail/Pass LED.<br />
LEDs<br />
Figure 9-5: LEDs on the ACU<br />
LEDs<br />
Figure 9-6: LEDs on the ACU, 19” rack version<br />
LED Behavior Description<br />
Power Steady green Power supply OK<br />
Steady red<br />
Off<br />
Power supply failure<br />
No power<br />
Logon Flashing green Current status is displayed:<br />
• Searching satellite<br />
• Identifying satellite<br />
• Carrier lock & TX enabled from modem<br />
Fail/Pass<br />
LED<br />
Steady green<br />
Off<br />
Steady red<br />
Flashing green<br />
Flashing red<br />
Steady green<br />
Satellite link established<br />
No satellite link acquired<br />
A fault which prevents operation is present in<br />
the system (ACU, ADU, MODEM).<br />
A Power On Self Test (POST) or Person<br />
Activated Self Test (PAST) in progress. The<br />
current status is displayed.<br />
Active BITE failure or warning. The event is<br />
shown in the ACU display.<br />
No faults.<br />
Table 9-2: LEDs on the ACU<br />
9-10 Chapter 9: <strong>Service</strong> & maintenance 98-133966-E2
9.4 Removal and replacement of the<br />
ACU<br />
There are no parts in the ACU that you can remove or replace.<br />
Contact your Thrane & Thrane service partner for further repair or<br />
replacement.<br />
Figure 9-7: Removal and replacement of the ACU bulkhead<br />
Figure 9-8: Removal and replacement of the ACU 19” rack<br />
Removal and replacement of the ACU<br />
9999<br />
<strong>Service</strong> & maintenance<br />
98-133966-E2 Chapter 9: <strong>Service</strong> & maintenance 9-11
Removal and replacement of ADU modules<br />
9.5 Removal and replacement of ADU<br />
modules<br />
9.5.1 Overview<br />
All replacement of modules must be carried out by a Thrane &<br />
Thrane A/S service partner. The figure below shows the modules<br />
and their position. Some modules are equipped with LEDs for status<br />
information and troubleshooting.<br />
For instructions on how to open and remove the service hatch see<br />
Opening and removing the service hatch on page 3-22.<br />
Figure 9-9: ADU modules and motor stop switch<br />
9-12 Chapter 9: <strong>Service</strong> & maintenance 98-133966-E2
1. GPS module.<br />
This module is positioned near the service switch at the bottom<br />
of the pedestal. It converts the GPS satellite signals into current<br />
position data.<br />
2. VSAT Interface Module (VIM).<br />
The purpose of the VIM is to interface between the ADU coaxial<br />
cable carrying several signals (DC, modem, RX IF, L-band TX)<br />
and the cable to the LNB/BUC, and the PCM. The VIM takes the<br />
received L-band transponder signal from the LNB and converts it<br />
to a lower frequency and allows the whole L-band transmitter<br />
band to be routed to the BUC.<br />
For tracking purpose the VIM has a DVB-S/S2 demodulator for<br />
tracking at the TV-satellites. For narrow band signal or non-DVB<br />
tracking the VIM also has a power detector as signal strength<br />
indicator. The VIM also has PSU for the external LNB and BUC.<br />
The VIM consists of the following blocks:<br />
• Power supply block for on board circuits, supply to PCM board<br />
and regulated external output to LNB (with band switching)<br />
and BUC.<br />
• DVB-S/S2 tracking receiver with tuner and demodulator<br />
including wide band signal detector and narrow band channel<br />
detector.<br />
• LNB Receive signal down converter with mixer and PLL.<br />
• Cable attenuator section to control the output power variation<br />
to the BUC.<br />
• FPGA section to control the functions of the VIM including<br />
DVB transport stream decoding.<br />
• Filters for splitting and combining the DC, modem, received<br />
down converted IF from the LNB and the transmit signal to the<br />
BUC.<br />
3. DC-Motor Driver Module for cross elevation (DDM).<br />
The DDM shall - based on inputs from the PCM - control the<br />
torque delivered by the brush-less DC-motors (BLDCM), used to<br />
control the position of the parabolic reflector.<br />
The DDM board is:<br />
• Communication slave of the ADU Serial-Bus (S-Bus)<br />
connecting the DC-motor Driver Modules (DDM), the<br />
Polarization Motor Module (PMM), the Inertial Sensor Module<br />
(ISM) and the Pedestal Control Module (PCM).<br />
• Connection to the BLDCM, and delivering the required phase<br />
current to the motor.<br />
• Decoding the HALL-sensor input from the Zero Reference<br />
Module (ZRM).<br />
Removal and replacement of ADU modules<br />
9999<br />
<strong>Service</strong> & maintenance<br />
98-133966-E2 Chapter 9: <strong>Service</strong> & maintenance 9-13
Removal and replacement of ADU modules<br />
• Decoding the input from the Optical Rotary Encoder (ORE).<br />
• Incorporating a break function when not powered.<br />
4. Cross elevation motor and encoder.<br />
5. Zero Reference Module (x4, 3 in the previous figure, 1 in the next<br />
figure) (ZRM) (not visible on photo).<br />
In order to be able to find the predefined zero point of the<br />
antenna direction, HALL sensors and corresponding magnets<br />
mount in the gearwheels. Due to the magnetic hysteresis<br />
behaviour of the hall sensor, the software will have to make the<br />
magnets pass the hall sensor in both directions, and when use<br />
the mean value as the zero point.<br />
The ZRM features two LEDs; one for indication of power supply,<br />
and one for indication of zero point.<br />
6. DC-Motor Driver Module for elevation (on the bottom side)<br />
(DDM).<br />
As in item 3 above.<br />
7. Elevation motor and encoder (not visible on photo).<br />
8. Polarisation Motor Module (PMM).<br />
The PMM shall - based on inputs from the PCM - control the<br />
angle position of the Polarization Mechanism Assembly (PMA).<br />
The PMM board is:<br />
• Communication slave of the ADU Bus also connecting the DCmotor<br />
Driver Modules (DDM), the Inertial Sensor Module<br />
(ISM) and the Pedestal Control Module (PCM).<br />
• Driving a stepper motor, with micro stepping capability.<br />
• Motor Filter which filters electrical noise and minimizes<br />
acoustic noise.<br />
• Detection of temperature and power level from the Ortho<br />
Mode Transducer (OMT).<br />
• Decoding the HALL-sensor input from the Zero Reference<br />
Module (ZRM).<br />
• Decoding the input from the Optical Rotation Encoder (ORE).<br />
9. Polarisation motor.<br />
10. Polarisation encoder (not visible on photo).<br />
11. Block Up Converter (BUC). (behind cable screen, not visible on<br />
photo)<br />
The BUC converts the L-band (950 to 1700 MHz) Intermediate<br />
Frequency (IF) up to Ku-band (13.75-14.50 GHz (extended)) radio<br />
signal, and amplifies it to transmit power level. It receives<br />
transmit signal and power from VIM.<br />
9-14 Chapter 9: <strong>Service</strong> & maintenance 98-133966-E2
12. Low Noise Block down converter (x2) (LNB).<br />
The LNB receives the Ku-band (10.70-12.75 GHz) radio signal,<br />
amplifies it and converts it down to a L-band (950 or 2150 MHz)<br />
Intermediate Frequency (IF). The conversion is controlled by 2<br />
Local Oscillator (LO) frequencies and the LO frequency is locked<br />
to an external reference signal.<br />
The Ku-band interface is WR75 waveguide and the IF interface is<br />
a 75 Ohm F-connector. DC power and 10 MHz external reference<br />
signal are also supplied over the IF cable. The L-band IF output<br />
is routed to the VSAT Interface Module (VIM) located on the<br />
ADU’s azimuth pedestal.<br />
13. Ortho Mode Transducer (OMT). (behind cable screen, not visible<br />
on photo)<br />
The OMT provides a low-loss waveguide interface between the<br />
dual polarised ADU feed-horn and the BUC/LNB.The main<br />
purpose of the OMT is to separate transmitter and receiver<br />
signals and to provide sufficient isolation between BUC and LNB.<br />
The OMT uses the orthogonality of the signals to split and<br />
provide isolation. The OMT also detects the BUC output power<br />
and temperature.<br />
14. Inertial Sensor Module (ISM).<br />
The ISM shall — based on request from the PCM — provide<br />
information about movement of the parabolic reflector, in the<br />
form of samples from gyro- and acceleration-sensors.<br />
The ISM board is:<br />
• Communication as slave of the ADU Bus connecting the<br />
Inertial Sensor Module (ISM), the DC-motor Driver Modules<br />
(DDM), the Polarization Motor Module (PMM), and the<br />
Pedestal Control Module (PCM).<br />
• Collection of contemporary sample-data sets from all sensors<br />
and provide those to the PCM on request. A set of samples<br />
should be collected within less than 100 micro seconds.<br />
• High stability and accuracy 3 axis accelerometer and angular<br />
rate sensor.<br />
• Prepared for wide range 3 axis accelerometer.<br />
• Calibration of sensor offset, gain, and misalignment over<br />
temperature (stored in non-volatile memory).<br />
• Secure fixing to the parabolic reflector.<br />
• Diagnosis of board supplies, sensor inputs, etc.<br />
15. Elevation locking pin to lock the antenna dish in a fixed position<br />
(for safety during service) (not visible on photo).<br />
Removal and replacement of ADU modules<br />
9999<br />
<strong>Service</strong> & maintenance<br />
98-133966-E2 Chapter 9: <strong>Service</strong> & maintenance 9-15
Removal and replacement of ADU modules<br />
16. Pedestal Control Module (PCM).<br />
The PCM will - based on several inputs - control the position of<br />
the parabolic reflector and the polarization angle of the<br />
polarisation mechanism assembly via 3 brush less DC-motors<br />
and a stepper motor.<br />
The PCM board is:<br />
• Modem communication with a below deck Antenna Control<br />
Unit via a VSAT interface module (VIM).<br />
• Control of the VIM module devices via a parallel interface<br />
connector.<br />
• Communication master of the ADU Bus connecting to the DCmotor<br />
Driver Modules (DDM), the Polarization Motor Module<br />
(PMM), and the Inertial Sensor Module (ISM).<br />
• Communication with the GPS module.<br />
• Provide power to the modules connected via the ADU bus<br />
(motor drivers supplies and bus interface circuits' supplies)<br />
with over-current protection (hot swap) via the bus cable.<br />
• Modules are by means of shielded DB9 cables connected in a<br />
chain in the following order: PCM — DDM (azimuth) — DDM (Xelevation)<br />
— DDM (elevation) — ISM — PMM. PMM module<br />
contains signal terminations.<br />
17. <strong>Service</strong> switch.<br />
In switch-off position the DC Motor Driver modules (DDM), the<br />
Polarisation Motor Module (PMM) and the BUC are turned off for<br />
safe conditions during service and repair. The switch must be in<br />
on position for normal ADU operation. The switch only controls<br />
movements and prevents any transmission. In Off position the<br />
DDMs, PMM and BUC are turned off for safety during service and<br />
repair of the ADU.<br />
Figure 9-10: <strong>Service</strong> switch<br />
9-16 Chapter 9: <strong>Service</strong> & maintenance 98-133966-E2
18. DC-Motor Driver Module for Azimuth (DDM).<br />
As in item 3 above.<br />
19. Azimuth motor.<br />
20.Azimuth encoder.<br />
Figure 9-11: Above Deck Unit modules (continued)<br />
21. Rotary joint.<br />
The cable signals for the ADU (DC power, internal modem<br />
communication, TX IF, RX and L-band TX) to and from the ACU<br />
have to be ported from the stationary platform to the azimuth<br />
rotating part of the ADU. This is done via the rotary joint.<br />
22.Feed horn.<br />
The feeder horn carries the mirror centred of the dish and in the<br />
correct distance. Thereby the signal from the satellite is reflected<br />
by the dish and picked up by the mirror. Then it is transported<br />
through the horn to the OMT.<br />
Before contacting your service partner check the LEDs on all<br />
modules (VIM, DDMs, PCM, PMM and ISM). See LEDs of the ADU<br />
modules on page 9-9 and LEDs in the ACU on page 9-10.<br />
Removal and replacement of ADU modules<br />
9999<br />
<strong>Service</strong> & maintenance<br />
98-133966-E2 Chapter 9: <strong>Service</strong> & maintenance 9-17
Removal and replacement of ADU modules<br />
9.5.1.1 Tools needed<br />
Have the following tools ready at hand when starting to replace<br />
modules:<br />
• 4x150 mm Allen key (located inside the service door of the ADU)<br />
• Torx 20 screw driver<br />
• Flat head screw driver<br />
• 8 mm open-end spanner<br />
• 11 mm open-end spanner<br />
• 18 mm open-end spanner<br />
• Acoustic frequency meter<br />
9.5.2 Replacing the GPS module<br />
Top view<br />
Bottom view<br />
Figure 9-12: GPS module<br />
The GPS Module is equipped with a receiver antenna (on top side)<br />
receiving the signals transmitted from the GPS satellites (low orbit),<br />
typical 10-12 are visible above the horizon. On the opposite side<br />
(bottom side) of the GPS Module the engine is located. It converts<br />
the GPS satellite signals into current position data (latitude,<br />
longitude and level). A minimum of 4 GPS satellites should be seen<br />
by the GPS Module to produce a valid position.<br />
The GPS module is identical to the ones used in Thrane & Thrane<br />
SAILOR FleetBroadband products.<br />
9-18 Chapter 9: <strong>Service</strong> & maintenance 98-133966-E2
To replace the GPS module, do as follows:<br />
1. Open the service hatch by releasing the two latches.<br />
2. Switch off the power to the antenna on the service switch.<br />
Figure 9-13: Switch off the power to the antenna<br />
3. Rotate the antenna pedestal so that the arm with the GPS module<br />
faces the service hatch.<br />
Figure 9-14: GPS module facing the service hatch<br />
Removal and replacement of ADU modules<br />
Tools needed:<br />
• 4x150 mm Allen key<br />
(located inside the<br />
service hatch of the<br />
ADU).<br />
9999<br />
<strong>Service</strong> & maintenance<br />
98-133966-E2 Chapter 9: <strong>Service</strong> & maintenance 9-19
Removal and replacement of ADU modules<br />
4. Disconnect the connector located on the bottom side of the GPS<br />
PCB.<br />
5. Loosen the 4x4 mm Allen screws.<br />
Figure 9-15: Connector for GPS PCB<br />
Figure 9-16: Screws on GPS module<br />
6. Lift the complete GPS module free, in the key holes, from the<br />
pedestal.<br />
To insert a new GPS module follow the instructions above in reverse<br />
order.<br />
9-20 Chapter 9: <strong>Service</strong> & maintenance 98-133966-E2
9.5.3 Replacing the VSAT Interface Module (VIM)<br />
The VIM is the interface between the antenna cable signals (power,<br />
internal modem communication, RX IF and L-band TX) and to the<br />
cable to the LNB /BUC and PCM. The VIM also provides power to the<br />
LNB and BUC and all other modules in the ADU.<br />
The VIM has two LEDs for status and troubleshooting:<br />
• Power LED: green or Off<br />
• <strong>Service</strong> LED: green or red<br />
To replace the VIM, do as follows:<br />
Power LED (green)<br />
<strong>Service</strong> LED<br />
(green or red)<br />
Figure 9-17: VSAT Interface Module (VIM)<br />
1. Open the service hatch by releasing the two latches.<br />
2. Switch off the power to the antenna on the service switch.<br />
VIM<br />
Removal and replacement of ADU modules<br />
Tools needed:<br />
• 4 x 150 mm Allen key<br />
(located inside the<br />
service door of the ADU)<br />
• 8 mm open-end spanner<br />
• 11 mm open-end spanner<br />
• 18 mm open-end<br />
spanner<br />
• Flat head screw driver<br />
9999<br />
Figure 9-18: Location of the VIM<br />
3. Rotate the antenna pedestal so that the arm of the GPS module<br />
faces the service hatch.<br />
<strong>Service</strong> & maintenance<br />
98-133966-E2 Chapter 9: <strong>Service</strong> & maintenance 9-21
Removal and replacement of ADU modules<br />
4. Disconnect the 2 F-connectors at the top of the VIM.<br />
Figure 9-19: Replacing the VIM — remove 2 F-connectors<br />
5. Disconnect the 2 N-connectors, one at the top and one at the<br />
bottom of the VIM, the 2 F-connectors (note the connections) on<br />
top of the VIM, the SUB-D-connector, then the small cable (SMA<br />
connector) at the bottom of the VIM.<br />
Figure 9-20: Replacing the VIM — remove 2 N, 2 F, 1 SMA and 1 SUB-D<br />
connectors<br />
9-22 Chapter 9: <strong>Service</strong> & maintenance 98-133966-E2
6. Remove the 4x4 mm Allen screws and remove the VIM.<br />
To insert a new VIM follow the instructions above in reverse order.<br />
Important<br />
Figure 9-21: Replacing the VIM — remove 4 Allen screws<br />
After installing a new VIM you must update the<br />
calibration data. For instructions see Updating<br />
VIM/PCM calibration data on page 9-89.<br />
Removal and replacement of ADU modules<br />
9999<br />
<strong>Service</strong> & maintenance<br />
98-133966-E2 Chapter 9: <strong>Service</strong> & maintenance 9-23
Removal and replacement of ADU modules<br />
9.5.4 Replacing the DC-Motor Driver Module<br />
(DDM)<br />
The ADU is equipped with three (3) DDMs for the axes:<br />
• Cross Elevation DDM<br />
• Elevation DDM<br />
• Azimuth DDM<br />
By the input from the PCM the DDM controls the power delivered to<br />
the DC-motors to control the orientation of the ADU.<br />
The DDM has two LEDs for status and troubleshooting:<br />
• Power LED: green or Off<br />
• <strong>Service</strong> LED: green or red<br />
<strong>Service</strong> LED<br />
(green or red)<br />
Power LED<br />
(green)<br />
Figure 9-22: DC-Motor Driver Module (DDM) for Cross Elevation<br />
For step-by-step instructions see:<br />
• Removing the Azimuth DDM on page 9-27<br />
• Inserting a new Azimuth DDM on page 9-28<br />
• Removing the Azimuth DDM on page 9-27<br />
• Inserting a new Azimuth DDM on page 9-28<br />
• Removing the Azimuth DDM on page 9-27<br />
• Inserting a new Azimuth DDM on page 9-28<br />
9-24 Chapter 9: <strong>Service</strong> & maintenance 98-133966-E2
9.5.4.1 Removing the Cross Elevation DDM<br />
To replace the Cross Elevation DDM, do as follows:<br />
1. Open the service hatch by releasing the two latches.<br />
2. Switch off the power to the antenna on the service switch.<br />
DDM<br />
Figure 9-23: Location of the Cross Elevation DDM<br />
3. Rotate the antenna pedestal so that the arm with the GPS module<br />
faces the service hatch.<br />
4. Disconnect the 3 connectors at the top of the Cross Elevation<br />
DDM, then the 2 SUB-D connectors at the bottom of the DDM.<br />
Removal and replacement of ADU modules<br />
Tools needed:<br />
• 4 x 150 mm Allen key<br />
(located inside the<br />
service door of the ADU)<br />
• Flat head screw driver<br />
9999<br />
Figure 9-24: Replacing the DDM — remove connectors<br />
5. Remove the 4x4 mm Allen screws (visible when the connectors<br />
are removed) and remove the Cross Elevation DDM.<br />
<strong>Service</strong> & maintenance<br />
98-133966-E2 Chapter 9: <strong>Service</strong> & maintenance 9-25
Removal and replacement of ADU modules<br />
9.5.4.2 Inserting a new Cross Elevation DDM<br />
To insert a new DDM follow the instructions above in reverse order.<br />
9.5.4.3 Removing the Elevation DDM<br />
Tools needed:<br />
• 4 x 150 mm Allen key<br />
(located inside the<br />
service door of the ADU)<br />
• Flat head screw driver<br />
To replace the Elevation DDM, do as follows:<br />
1. Open the service hatch by releasing the two latches.<br />
2. Switch off the power to the antenna on the service switch.<br />
Figure 9-25: Location of the Elevation DDM<br />
3. Rotate the antenna pedestal so that the arm with the GPS module<br />
faces the service hatch.<br />
4. Disconnect the 3 connectors at the front of the Elevation DDM,<br />
then the 2 SUB-D connectors at the rear of the Elevation DDM.<br />
Figure 9-26: Elevation DDM, connectors<br />
5. Remove the 4x4 mm Allen screws (visible when the connectors<br />
are removed) and remove the Elevation DDM.<br />
9-26 Chapter 9: <strong>Service</strong> & maintenance 98-133966-E2
9.5.4.4 Inserting a new Elevation DDM<br />
To insert a new Elevation DDM follow the instructions above in<br />
reverse order.<br />
9.5.4.5 Removing the Azimuth DDM<br />
To replace the Azimuth DDM, do as follows:<br />
1. Open the service hatch by releasing the two latches.<br />
2. Switch off the power to the antenna on the service switch.<br />
3. Rotate the antenna pedestal so that the arm with the GPS module<br />
faces the service hatch.<br />
4. Locate the Azimuth DDM at the front of the antenna.<br />
Removal and replacement of ADU modules<br />
Tools needed:<br />
• 4 x 150 mm Allen key<br />
(located inside the<br />
service door of the ADU)<br />
• Flat head screw driver<br />
9999<br />
Figure 9-27: location of the Azimuth DDM<br />
<strong>Service</strong> & maintenance<br />
98-133966-E2 Chapter 9: <strong>Service</strong> & maintenance 9-27
Removal and replacement of ADU modules<br />
5. Disconnect the 3 connectors at the right of the Azimuth DDM,<br />
then the 2 SUB-D connectors at the left of the Azimuth DDM.<br />
Figure 9-28: Azimuth DDM, connectors<br />
6. Remove the 4x4 mm Allen screws (visible when the connectors<br />
are removed) and remove the Azimuth DDM.<br />
9.5.4.6 Inserting a new Azimuth DDM<br />
To insert a new Azimuth DDM follow the instructions above in<br />
reverse order.<br />
9.5.5 Replacing the Polarisation Motor Module<br />
(PMM)<br />
9.5.5.1 Removing the Polarisation Motor Module (PMM)<br />
To remove the Polarisation Motor Module, do as follows:<br />
Tools needed:<br />
• 4 x 150 mm Allen key<br />
(located inside the<br />
service door of the ADU)<br />
• Flat head screw driver<br />
1. Open the service hatch by releasing the two latches.<br />
2. Switch off the power to the antenna on the service switch.<br />
9-28 Chapter 9: <strong>Service</strong> & maintenance 98-133966-E2
3. Rotate the antenna pedestal so that the arm with the GPS module<br />
faces the service hatch.<br />
4. Rotate the Antenna Dish to top position.<br />
5. Press in and turn the elevation locking pin (only available from<br />
serial number TBD) to locked position.<br />
6. Rotate the Polarisation Unit so that the Polarisation Motor<br />
Module (PMM) can be reached.<br />
7. Disconnect the 6 connectors from the PMM.<br />
Removal and replacement of ADU modules<br />
9999<br />
Figure 9-29: Polarisation Motor Module, remove connectors<br />
8. Remove the 4x4 mm Allen screws.<br />
<strong>Service</strong> & maintenance<br />
98-133966-E2 Chapter 9: <strong>Service</strong> & maintenance 9-29
Removal and replacement of ADU modules<br />
9. Remove the PMM.<br />
Figure 9-30: Polarisation Motor Module, remove screws<br />
9.5.5.2 Inserting a new Polarization Motor Module.<br />
To insert a new Polarization Motor Module (PMM) follow the<br />
instructions above in reverse order — while observing the following<br />
guidelines:<br />
1. Connect the 6-pin connector with the colored wires (Polarization<br />
Encoder) to the plug marked ORE on the PMM.<br />
2. Connect the 6-pin connector with white wires, only 4 wires<br />
available, (Zero Reference Module) to the plug marked ZRM on<br />
the PMM.<br />
9-30 Chapter 9: <strong>Service</strong> & maintenance 98-133966-E2
3. Connect the 6-pin connector with white wires, all 6 wires<br />
available, (Ortho Mode Transducer) to the plug marked OMT on<br />
the PMM.<br />
ORE<br />
ZRM OMT<br />
Figure 9-31: Polarisation Motor Module, inserting<br />
Removal and replacement of ADU modules<br />
9999<br />
<strong>Service</strong> & maintenance<br />
98-133966-E2 Chapter 9: <strong>Service</strong> & maintenance 9-31
Removal and replacement of ADU modules<br />
9.5.6 Replacing the Pedestal Control Module<br />
(PCM)<br />
The PCM controls the antenna dish and the Polarization Mechanism<br />
Assembly with the three DC motors and a step motor.<br />
Communication between the PCM and ACU is done via the VIM. The<br />
VIM is also controlled by the PCM via a parallel interface cable.<br />
The PCM is the communication master of the ADU serial-bus<br />
connecting the DDM, PMM and ISM. Communication to the GPS<br />
Module and power to all modules is via S-bus.<br />
The PCM has two LEDs for status and troubleshooting:<br />
• Power LED: green or Off<br />
• <strong>Service</strong> LED: green or red<br />
Tools needed:<br />
• 4 x 150 mm Allen key<br />
(located inside the<br />
service door of the ADU)<br />
• Flat head screw driver<br />
• 8 mm open-end spanner<br />
To replace the PCM, do as follows:<br />
1. Open the service hatch by releasing the two latches.<br />
2. Switch off the power to the antenna on the service switch.<br />
Figure 9-32: Location of the PCM<br />
3. Rotate the antenna pedestal so that the Pedestal Control Module<br />
(PCM) faces the service hatch.<br />
9-32 Chapter 9: <strong>Service</strong> & maintenance 98-133966-E2
4. Disconnect the 2 connectors at the top, then the 2 SUB-D<br />
connectors at the bottom, then the SMA connector at the bottom<br />
(left) of the PCM.<br />
5. Remove the 4x4 mm Allen screws (all become visible when the<br />
connectors are removed) and remove the PCM.<br />
To insert a new PCM follow the instructions above in reverse order.<br />
Important<br />
SMA<br />
Figure 9-33: Removing the PCM — connectors<br />
After installing a new PCM you must update the<br />
calibration data. For instructions see Updating<br />
VIM/PCM calibration data on page 9-89.<br />
Removal and replacement of ADU modules<br />
9999<br />
<strong>Service</strong> & maintenance<br />
98-133966-E2 Chapter 9: <strong>Service</strong> & maintenance 9-33
Removal and replacement of ADU modules<br />
9.5.7 Replacing motor and encoder<br />
The ADU is equipped with three (3) DC-motors, two of which are<br />
identical, and one (1) step motor, for the axes:<br />
• Elevation (DC motor).<br />
• Azimuth (DC motor).<br />
• Cross Elevation (DC motor).<br />
• Polarisation motor (step motor).<br />
The DC-motors are all brush less motors, controlled by their<br />
individual DDM. The step motor is controlled by its PMM. To each of<br />
the DC-motors and step motor a corresponding encoder provides<br />
feedback of its position.<br />
Elevation<br />
motor & encoder<br />
Azimuth motor<br />
Azimuth encoder<br />
X elevation<br />
motor & encoder<br />
For step-by-step instructions see:<br />
Polarisation<br />
motor<br />
Figure 9-34: Motors and encoders<br />
Removing the Elevation Motor and Encoder on page 9-35<br />
Inserting a new Elevation Motor and Encoder on page 9-37<br />
Removing the Azimuth Motor on page 9-40<br />
Inserting a new Azimuth Motor on page 9-43<br />
Removing the Azimuth Encoder on page 9-45<br />
Inserting a new Azimuth Encoder on page 9-47<br />
Removing the X Elevation Motor and Encoder on page 9-49<br />
Inserting a new X Elevation Motor and Encoder on page 9-51<br />
Removing the Polarisation Motor on page 9-53<br />
Inserting a new Polarisation Motor on page 9-53<br />
Removing the Polarisation Encoder on page 9-54<br />
Inserting a new Polarisation Encoder on page 9-54<br />
Polarisation encoder<br />
9-34 Chapter 9: <strong>Service</strong> & maintenance 98-133966-E2
9.5.7.1 Removing the Elevation Motor and Encoder<br />
To remove the Elevation Motor and Encoder, do as follows:<br />
1. Open the service hatch by releasing the two latches.<br />
2. Switch off the power to the antenna on the service switch.<br />
Figure 9-35: Location of the Elevation Motor & Encoder<br />
3. Rotate the Antenna Pedestal so motor assembly and elevation<br />
belt faces the service hatch.<br />
4. Loosen the belt tension device by loosening the 4x4 mm Allen<br />
screws.<br />
Removal and replacement of ADU modules<br />
Tools needed:<br />
• 4 x 150 mm Allen key<br />
(located inside the<br />
service door of the ADU)<br />
• Acoustic frequency meter<br />
9999<br />
Figure 9-36: Elevation motor and encoder, loosen the belt tensioner<br />
<strong>Service</strong> & maintenance<br />
98-133966-E2 Chapter 9: <strong>Service</strong> & maintenance 9-35
Removal and replacement of ADU modules<br />
5. Adjust the belt-tension screw to middle position.<br />
Figure 9-37: Elevation Motor and Encoder, adjust belt tension<br />
6. Disconnect the 8-pin connector and the 6-pin connector (colored<br />
wires) from the Elevation DDM.<br />
Figure 9-38: Elevation DDM, disconnect 2 connectors<br />
9-36 Chapter 9: <strong>Service</strong> & maintenance 98-133966-E2
7. Loosen the 4x4 mm Allen screws from the motor assembly.<br />
Figure 9-39: Elevation motor and encoder, loosen the screws for the motor assembly<br />
8. Slide free in the key holes of the motor assembly and remove the<br />
motor.<br />
9.5.7.2 Inserting a new Elevation Motor and Encoder<br />
To insert a new Elevation Motor and Encoder follow the instructions<br />
above in reverse order — while observing the following guidelines:<br />
1. String the Elevation belt around the pulley of the motor assembly<br />
and below the belt tensioner.<br />
Removal and replacement of ADU modules<br />
9999<br />
<strong>Service</strong> & maintenance<br />
98-133966-E2 Chapter 9: <strong>Service</strong> & maintenance 9-37
Removal and replacement of ADU modules<br />
2. Tighten the 4x4 mm Allen screws from the motor assembly.<br />
Figure 9-40: Elevation motor and encoder, tighten the screws for the motor<br />
assembly<br />
3. Adjust the belt-tension screw.<br />
Figure 9-41: Elevation motor and encoder, adjust belt tension<br />
The tension of the belt is 60-80 Hz on average (use an Optibel<br />
frequency measuring device or alike), with the antenna disk in<br />
two positions — dish elevation position 1 (125 °) and position 2 (-<br />
25 °).<br />
9-38 Chapter 9: <strong>Service</strong> & maintenance 98-133966-E2
Position 1<br />
Position 2<br />
Figure 9-42: Elevation motor and encoder, check of belt tension<br />
4. Tighten the belt tension device by tightening the 4x4 mm Allen<br />
screws.<br />
Removal and replacement of ADU modules<br />
9999<br />
Figure 9-43: Elevation motor and encoder, loosen the belt tensioner<br />
5. Check the tension of the belt again (60-80 Hz). If needed, repeat<br />
the tension adjustment.<br />
<strong>Service</strong> & maintenance<br />
98-133966-E2 Chapter 9: <strong>Service</strong> & maintenance 9-39
Removal and replacement of ADU modules<br />
9.5.7.3 Removing the Azimuth Motor<br />
Tools needed:<br />
• 4 x 150 mm Allen key<br />
(located inside the<br />
service door of the ADU)<br />
• Acoustic frequency meter<br />
To remove the Azimuth Motor, do as follows:<br />
1. Open the service hatch by releasing the two latches.<br />
2. Switch off the power to the antenna on the service switch.<br />
3. Rotate the Antenna Dish to top position.<br />
4. Press in and turn the elevation locking pin (only available from<br />
serial number TBD) to locked position.<br />
5. Rotate the antenna pedestal so that the Azimuth DDM faces from<br />
the service hatch.<br />
9-40 Chapter 9: <strong>Service</strong> & maintenance 98-133966-E2
6. Loosen the 15x4 mm Allen screws (the 3 Allen screws on top are<br />
longer than the rest) on the cover over the azimuth drive<br />
modules, and remove the cover (lift and slide).<br />
L=35 mm L=35 mm L=35 mm<br />
Figure 9-44: Azimuth motor, remove cover<br />
7. Loosen the belt tension device by loosening the 4x4 mm Allen<br />
screws.<br />
Removal and replacement of ADU modules<br />
9999<br />
Figure 9-45: Azimuth motor, loosen the belt tensioner<br />
<strong>Service</strong> & maintenance<br />
98-133966-E2 Chapter 9: <strong>Service</strong> & maintenance 9-41
Removal and replacement of ADU modules<br />
8. Adjust the belt-tension screw to middle position.<br />
Figure 9-46: Azimuth motor, adjust belt tension<br />
9. Disconnect the 8-pin connector from the Azimuth DDM.<br />
Figure 9-47: Azimuth DDM, disconnect connector<br />
9-42 Chapter 9: <strong>Service</strong> & maintenance 98-133966-E2
10. Loosen the 4x4 mm Allen screws from the motor assembly.<br />
Figure 9-48: Azimuth motor, loosen the screws for the motor assembly<br />
11. Slide free in the key holes of the motor assembly and remove the<br />
motor.<br />
9.5.7.4 Inserting a new Azimuth Motor<br />
To insert a new Azimuth Motor follow the instructions above in<br />
reverse order — while observing the following guidelines:<br />
1. String the Azimuth belt around the pulley of the motor assembly<br />
and around the belt tensioner.<br />
Removal and replacement of ADU modules<br />
9999<br />
<strong>Service</strong> & maintenance<br />
98-133966-E2 Chapter 9: <strong>Service</strong> & maintenance 9-43
Removal and replacement of ADU modules<br />
2. Tighten the 4x4 mm Allen screws from the motor assembly.<br />
Figure 9-49: Azimuth motor, tighten the screws for the motor assembly<br />
3. Adjust the belt tension using the belt-tension adjustment screw.<br />
Figure 9-50: Azimuth motor, adjust belt tension<br />
The tension of the belt is 90-100 Hz on average (use an Optibel<br />
frequency measuring device or alike).<br />
9-44 Chapter 9: <strong>Service</strong> & maintenance 98-133966-E2
4. Tighten the belt tension device by tightening the 4x4 mm Allen<br />
screws.<br />
Figure 9-51: Azimuth motor, tighten the belt tensioner<br />
5. Check the tension of the belt again (90-100 Hz). If needed, repeat<br />
the tension adjustment.<br />
9.5.7.5 Removing the Azimuth Encoder<br />
To remove the Azimuth Encoder, do as follows:<br />
1. Open the service hatch by releasing the two latches.<br />
2. Switch off the power to the antenna on the service switch.<br />
3. Rotate the Antenna Dish to top position.<br />
4. Press in and turn the elevation locking pin (only available from<br />
serial number TBD) to locked position.<br />
5. Rotate the antenna pedestal so that the Azimuth DDM faces from<br />
the service hatch.<br />
Removal and replacement of ADU modules<br />
Tools needed:<br />
• 4 x 150 mm Allen key<br />
(located inside the<br />
service door of the ADU)<br />
• Acoustic frequency meter<br />
9999<br />
<strong>Service</strong> & maintenance<br />
98-133966-E2 Chapter 9: <strong>Service</strong> & maintenance 9-45
Removal and replacement of ADU modules<br />
6. Loosen the 15x4 mm Allen screws (the 3 Allen screws on top are<br />
longer than the rest) on the cover over the azimuth drive<br />
modules, and remove the cover (lift and slide).<br />
L=35 mm L=35 mm L=35 mm<br />
Figure 9-52: Azimuth encoder, remove cover<br />
7. Disconnect the 6-pin connector (colored wires) from the Azimuth<br />
DDM.<br />
Figure 9-53: Azimuth DDM, disconnect connector<br />
9-46 Chapter 9: <strong>Service</strong> & maintenance 98-133966-E2
8. Loosen the belt tension device by loosening the 4x4 mm Allen<br />
screws and slide out the Azimuth Encoder.<br />
Figure 9-54: Azimuth encoder, remove<br />
9. Adjust the belt-tension screw to middle position.<br />
Figure 9-55: Azimuth encoder, adjust belt tension<br />
9.5.7.6 Inserting a new Azimuth Encoder<br />
To insert a new Azimuth Encoder follow the instructions above in<br />
reverse order — while observing the following guidelines:<br />
1. String the Azimuth belt around the pulley of the motor assembly<br />
and left around the encoder/belt tensioner.<br />
Removal and replacement of ADU modules<br />
9999<br />
<strong>Service</strong> & maintenance<br />
98-133966-E2 Chapter 9: <strong>Service</strong> & maintenance 9-47
Removal and replacement of ADU modules<br />
2. Adjust the belt tension using the belt-tension adjustment screw.<br />
Figure 9-56: Azimuth Encoder, adjust belt tension<br />
The tension of the belt is 90-100 Hz on average (use an Optibel<br />
frequency measuring device or alike).<br />
3. Tighten the belt tension device by tightening the 4x4 mm Allen<br />
screws.<br />
Figure 9-57: Azimuth motor, tighten the belt tensioner<br />
4. Check the tension of the belt again (90-100 Hz). If needed, repeat<br />
the tension adjustment.<br />
9-48 Chapter 9: <strong>Service</strong> & maintenance 98-133966-E2
9.5.7.7 Removing the X Elevation Motor and Encoder<br />
To remove the Cross Elevation Motor and Encoder, do as follows:<br />
1. Open the service hatch by releasing the two latches.<br />
2. Switch off the power to the antenna on the service switch.<br />
3. Rotate the antenna dish to top position.<br />
4. Rotate the antenna pedestal so that the arm with the GPS module<br />
faces the service hatch.<br />
5. Press in and turn the elevation locking pin (only available from<br />
serial number TBD) to locked position.<br />
6. Disconnect the 3 cables at the top of the Cross Elevation DDM.<br />
Removal and replacement of ADU modules<br />
Tools needed:<br />
• 4 x 150 mm Allen key<br />
(located inside the<br />
service door of the ADU)<br />
• Acoustic frequency meter<br />
9999<br />
Figure 9-58: Replacement of X-Elevation Motor & Encoder 1<br />
7. Loosen the Cross-Elevation Drive belt tension/adjustment screw.<br />
<strong>Service</strong> & maintenance<br />
98-133966-E2 Chapter 9: <strong>Service</strong> & maintenance 9-49
Removal and replacement of ADU modules<br />
Figure 9-59: X-Elevation Motor & Encoder — belt tension/adjustment screw<br />
8. Loosen the 4x4 mm Allen screws of the motor assembly.<br />
Figure 9-60: Cross Elevation motor assembly, 4 Allen screws<br />
9. Lift the complete Cross Elevation Motor & Encoder assembly free,<br />
in the key holes, from the pedestal and remove it.<br />
9-50 Chapter 9: <strong>Service</strong> & maintenance 98-133966-E2
9.5.7.8 Inserting a new X Elevation Motor and Encoder<br />
To insert a new Cross Elevation Motor & Encoder follow the<br />
instructions above in reverse order — while observing the following<br />
mounting guidelines:<br />
1. Do not tighten the 4x4 mm Allen screws of the motor assembly.<br />
Figure 9-61: Cross Elevation motor assembly, do not tighten screws<br />
2. Adjust the belt tension using the belt tension/adjustment screw.<br />
Figure 9-62: X-Elevation Motor & Encoder — adjust belt tension<br />
The tension of the belt is 80—100 Hz on average, with the cross<br />
elevation beam in 3 positions.<br />
Removal and replacement of ADU modules<br />
9999<br />
<strong>Service</strong> & maintenance<br />
98-133966-E2 Chapter 9: <strong>Service</strong> & maintenance 9-51
Removal and replacement of ADU modules<br />
Position 2<br />
Position 3<br />
Position 1<br />
Figure 9-63: Belt tension in 3 positions<br />
3. Now tighten the 4x4 mm Allen screws of the Cross Elevation<br />
Motor & Encoder assembly.<br />
Figure 9-64: Cross Elevation motor assembly, tighten screws<br />
4. Check the tension of the belt again (80-100 Hz). If needed, repeat<br />
the tension adjustment.<br />
9-52 Chapter 9: <strong>Service</strong> & maintenance 98-133966-E2
9.5.7.9 Removing the Polarisation Motor<br />
To remove the Polarisation Motor, do as follows:<br />
1. Follow the instructions in Removing the Polarisation Unit on<br />
page 9-73.<br />
2. Disconnect the power connector of the Polarisation Motor.<br />
Figure 9-65: Polarisation Motor, disconnecting power<br />
3. Remove the 4x4 mm Allen screws that hold the motor.<br />
Figure 9-66: Polarisation Motor, removing 4x4 mm Allen screws<br />
4. Remove the Polarisation Motor.<br />
Removal and replacement of ADU modules<br />
Tools needed:<br />
• 4 x 150 mm Allen key<br />
(located inside the<br />
service door of the ADU)<br />
• Flat head screw driver<br />
9999<br />
9.5.7.10 Inserting a new Polarisation Motor<br />
To insert a new Polarisation Motor follow the instructions above in<br />
reverse order.<br />
<strong>Service</strong> & maintenance<br />
98-133966-E2 Chapter 9: <strong>Service</strong> & maintenance 9-53
Removal and replacement of ADU modules<br />
9.5.7.11 Removing the Polarisation Encoder<br />
To remove the Polarisation Encoder, do as follows:<br />
Tools needed:<br />
• 4 x 150 mm Allen key<br />
(located inside the<br />
service door of the ADU)<br />
• Flat head screw driver<br />
1. Follow the instructions in Removing the Polarisation Unit on<br />
page 9-73.<br />
2. Disconnect the 6-pin connector (with the colored wires) from the<br />
PMM, marked ORE, and free the cable to the Polarisation<br />
Encoder.<br />
ORE ZRM OMT<br />
Figure 9-67: Removing the sub-D connector of the PMM<br />
3. Loosen the 2x4 mm Allen screws and rotate the Polarisation<br />
Encoder in the key holes.<br />
4. Free the Polarisation Encoder from the cable holders.<br />
5. Remove the Polarisation Encoder.<br />
Figure 9-68: Polarisation Encoder, removing<br />
9.5.7.12 Inserting a new Polarisation Encoder<br />
To insert a new Polarisation Motor follow the instructions above in<br />
reverse order.<br />
9-54 Chapter 9: <strong>Service</strong> & maintenance 98-133966-E2
9.5.8 Replacing the Drive Belts<br />
The ADU has 3 drive belts:<br />
• X Elevation drive belt<br />
• Elevation drive belt<br />
• Azimuth drive belt<br />
For step-by-step instructions see:<br />
Removing the X Elevation Drive Belt on page 9-55<br />
Inserting a new X Elevation Drive Belt on page 9-56<br />
Removing the Elevation Drive Belt on page 9-57<br />
Inserting a new Elevation Drive Belt on page 9-59<br />
Removing the Azimuth Drive Belt on page 9-60<br />
Inserting a new Azimuth Drive Belt on page 9-63<br />
9.5.8.1 Removing the X Elevation Drive Belt<br />
To remove the X Elevation Drive Belt, do as follows:<br />
1. Open the service hatch by releasing the two latches.<br />
2. Switch off the power to the antenna on the service switch.<br />
Removal and replacement of ADU modules<br />
Tools needed:<br />
• 4 x 150 mm Allen key<br />
(located inside the<br />
service door of the ADU)<br />
• Acoustic frequency meter<br />
9999<br />
Figure 9-69: Location of the X Elevation Drive Belt<br />
3. Rotate the antenna pedestal so that the arm with the GPS module<br />
faces the service hatch.<br />
<strong>Service</strong> & maintenance<br />
98-133966-E2 Chapter 9: <strong>Service</strong> & maintenance 9-55
Removal and replacement of ADU modules<br />
4. Loosen the Cross Elevation Drive Belt tension adjustment screw,<br />
see Figure 9-59: X-Elevation Motor & Encoder — belt<br />
tension/adjustment screw.<br />
5. Loosen the 4x4 mm Allen screws of the motor assembly, see<br />
Figure 9-60: Cross Elevation motor assembly, 4 Allen screws.<br />
6. Remove the cable drum by removing the 4x4 mm Allen screws<br />
and leave the cable drum hanging in the cables.<br />
Figure 9-70: Removing the cable drum<br />
7. Remove the Cross Elevation Drive Belt.<br />
9.5.8.2 Inserting a new X Elevation Drive Belt<br />
To insert a new X Elevation Drive Belt the instructions above in<br />
reverse order — while observing the following mounting guidelines:<br />
Follow the instructions given in Inserting a new X Elevation Motor<br />
and Encoder on page 9-51.<br />
9-56 Chapter 9: <strong>Service</strong> & maintenance 98-133966-E2
9.5.8.3 Removing the Elevation Drive Belt<br />
To remove the Elevation Drive Belt, do as follows:<br />
1. Open the service hatch by releasing the two latches.<br />
2. Switch off the power to the antenna on the service switch.<br />
Figure 9-71: Location of the Elevation Drive Belt<br />
3. Rotate the Antenna Pedestal so the Elevation Drive Belt faces the<br />
service hatch.<br />
Removal and replacement of ADU modules<br />
Tools needed:<br />
• 4 x 150 mm Allen key<br />
(located inside the<br />
service door of the ADU)<br />
• Acoustic frequency meter<br />
9999<br />
Figure 9-72: Elevation Drive Belt<br />
<strong>Service</strong> & maintenance<br />
98-133966-E2 Chapter 9: <strong>Service</strong> & maintenance 9-57
Removal and replacement of ADU modules<br />
4. Press in and turn the elevation locking pin (only available from<br />
S/N TBD) to locked position.<br />
5. Loosen the belt tension device by loosening the 4x4 mm Allen<br />
screws.<br />
Figure 9-73: Elevation motor and encoder, loosen the belt tensioner<br />
6. Adjust the belt-tension screw to middle position.<br />
Figure 9-74: Elevation motor and encoder, adjust belt tension<br />
7. Cut the two plastic tie-wraps on the elevation drive wheel.<br />
9-58 Chapter 9: <strong>Service</strong> & maintenance 98-133966-E2
8. Remove the Elevation Drive Belt.<br />
Figure 9-75: Elevation Drive Belt<br />
9.5.8.4 Inserting a new Elevation Drive Belt<br />
To insert a new Elevation Belt follow the instructions above in<br />
reverse order — while observing the following guidelines:<br />
Follow the instructions in Inserting a new Elevation Motor and<br />
Encoder on page 9-37.<br />
Removal and replacement of ADU modules<br />
9999<br />
<strong>Service</strong> & maintenance<br />
98-133966-E2 Chapter 9: <strong>Service</strong> & maintenance 9-59
Removal and replacement of ADU modules<br />
9.5.8.5 Removing the Azimuth Drive Belt<br />
Tools needed:<br />
• 4 x 150 mm Allen key<br />
(located inside the<br />
service door of the ADU)<br />
• Acoustic frequency meter<br />
1. Open the service hatch by releasing the two latches.<br />
2. Switch off the power to the antenna on the service switch.<br />
3. Rotate the antenna pedestal so that the arm with the GPS module<br />
faces the service hatch and<br />
4. Rotate the Antenna Dish to top position.<br />
5. Press in and turn the elevation locking pin (only available from<br />
serial number TBD) to locked position.<br />
6. Loosen the 15x4 mm Allen screws (the 3 Allen screws on top are<br />
longer than the rest) on the cover over the azimuth drive<br />
modules, and remove the cover (lift and slide).<br />
L=35 mm L=35 mm L=35 mm<br />
Figure 9-76: Azimuth drive modules, remove cover<br />
9-60 Chapter 9: <strong>Service</strong> & maintenance 98-133966-E2
7. Loosen the belt tension device by loosening the 4x4 mm Allen<br />
screws.<br />
Figure 9-77: Azimuth drive belt, loosen the belt tensioner<br />
8. Adjust the belt-tension screw to middle position.<br />
Figure 9-78: Azimuth drive belt, adjust belt tension<br />
Removal and replacement of ADU modules<br />
9999<br />
<strong>Service</strong> & maintenance<br />
98-133966-E2 Chapter 9: <strong>Service</strong> & maintenance 9-61
Removal and replacement of ADU modules<br />
9. Remove the RF connector (N-type, finger nut) from the Rotary<br />
Joint.<br />
Step 9<br />
Step 8<br />
Figure 9-79: Getting access to the azimuth drive wheel<br />
10. Loosen the 4x4 mm Allen screws from the cover plate over the<br />
azimuth drive wheel.<br />
11. Remove the cover plate.<br />
12. Remove the Azimuth Drive Belt.<br />
Figure 9-80: Azimuth Drive Belt<br />
9-62 Chapter 9: <strong>Service</strong> & maintenance 98-133966-E2
9.5.8.6 Inserting a new Azimuth Drive Belt<br />
To insert a new Azimuth Drive Belt follow the instructions above in<br />
reverse order - while observing the following guidelines:<br />
Follow the instructions in Inserting a new Azimuth Motor on page 9-<br />
43.<br />
9.5.9 Replacing the Zero Reference Module (ZRM)<br />
The ADU has the following identical ZRMs, one for each drive wheel<br />
(each axes):<br />
• X Elevation ZRM<br />
• Elevation ZRM<br />
• Azimuth ZRM<br />
• Polarization ZRM<br />
Figure 9-81: Zero Reference Modules (ZRM), location<br />
The ZRM has a Hall sensor detecting a zero point (small magnet<br />
mounted on the drive wheel). The zero point signal of the ZRM is<br />
sent to the PCM to be used in the orientation of the ADU.<br />
Removal and replacement of ADU modules<br />
9999<br />
Figure 9-82: Zero Reference Module (ZRM)<br />
<strong>Service</strong> & maintenance<br />
98-133966-E2 Chapter 9: <strong>Service</strong> & maintenance 9-63
Removal and replacement of ADU modules<br />
For step-by-step instructions see:<br />
Removing the X Elevation ZRM on page 9-64<br />
Inserting a new X Elevation ZRM on page 9-66<br />
Removing the Elevation ZRM on page 9-66<br />
Inserting a new Elevation ZRM on page 9-67<br />
Removing the Azimuth ZRM on page 9-67<br />
Inserting a new Azimuth ZRM on page 9-69<br />
Removing the Polarisation ZRM on page 9-69<br />
Inserting a new Polarisation ZRM on page 9-70<br />
9.5.9.1 Removing the X Elevation ZRM<br />
Tools needed:<br />
• 4 x 150 mm Allen key<br />
(located inside the<br />
service door of the ADU)<br />
1. Open the service hatch by releasing the two latches.<br />
2. Switch off the power to the antenna on the service switch.<br />
3. Rotate the antenna pedestal so that the Azimuth DDM faces the<br />
service hatch.<br />
4. Rotate the antenna dish to top position.<br />
5. Press in and turn the elevation locking pin (only available from<br />
serial number TBD) to locked position.<br />
9-64 Chapter 9: <strong>Service</strong> & maintenance 98-133966-E2
6. Disconnect the connector from the Zero Reference Module.<br />
Figure 9-83: X Elevation ZRM, disconnect connector<br />
7. Through the 2 holes (above the Cross Elevation DDM) in the<br />
pedestal loosen the 2x4 mm Allen screws.<br />
Removal and replacement of ADU modules<br />
9999<br />
8. Slide out the X Elevation ZRM.<br />
Figure 9-84: X Elevation ZRM, slide out<br />
<strong>Service</strong> & maintenance<br />
98-133966-E2 Chapter 9: <strong>Service</strong> & maintenance 9-65
Removal and replacement of ADU modules<br />
9.5.9.2 Inserting a new X Elevation ZRM<br />
To insert a new X Elevation ZRM follow the instructions above in<br />
reverse order.<br />
9.5.9.3 Removing the Elevation ZRM<br />
Tools needed:<br />
• 4 x 150 mm Allen key<br />
(located inside the<br />
service door of the ADU)<br />
1. Open the service hatch by releasing the two latches.<br />
2. Switch off the power to the antenna on the service switch.<br />
3. Rotate the antenna pedestal so that the Elevation Drive Belt faces<br />
the service hatch.<br />
4. Rotate the antenna dish to top position.<br />
5. Press in and turn the elevation locking pin (only available from<br />
serial number TBD) to locked position.<br />
6. Disconnect the connector from the Elevation ZRM.<br />
Figure 9-85: Elevation ZRM, disconnect connector<br />
9-66 Chapter 9: <strong>Service</strong> & maintenance 98-133966-E2
7. Loosen the 2x4 mm Allen screws.<br />
Figure 9-86: Elevation ZRM, remove screws<br />
8. Slide out the Elevation ZRM.<br />
9.5.9.4 Inserting a new Elevation ZRM<br />
To insert a new Elevation ZRM follow the instructions above in<br />
reverse order.<br />
9.5.9.5 Removing the Azimuth ZRM<br />
1. Open the service hatch by releasing the two latches.<br />
2. Switch off the power to the antenna on the service switch.<br />
3. Rotate the antenna pedestal so that the Azimuth DDM faces the<br />
service hatch.<br />
4. Rotate the antenna dish to top position.<br />
5. Press in and turn the elevation locking pin (only available from<br />
serial number TBD) to locked position.<br />
Removal and replacement of ADU modules<br />
Tools needed:<br />
• 4 x 150 mm Allen key<br />
(located inside the<br />
service door of the ADU)<br />
9999<br />
<strong>Service</strong> & maintenance<br />
98-133966-E2 Chapter 9: <strong>Service</strong> & maintenance 9-67
Removal and replacement of ADU modules<br />
6. Loosen the 15x4 mm Allen screws (the 3 Allen screws on top are<br />
longer than the rest) on the cover over the azimuth drive<br />
modules, and remove the cover (lift and slide).<br />
L=35 mm L=35 mm L=35 mm<br />
Figure 9-87: Azimuth ZRM, remove cover<br />
7. Disconnect the connector from the Azimuth ZRM.<br />
Figure 9-88: Azimuth ZRM, disconnect connector<br />
9-68 Chapter 9: <strong>Service</strong> & maintenance 98-133966-E2
8. Loosen the 2x4 mm Allen screws.<br />
Figure 9-89: Azimuth ZRM, disconnect connector<br />
9. Slide out the Azimuth ZRM.<br />
9.5.9.6 Inserting a new Azimuth ZRM<br />
To insert a new Cross Elevation ZRM follow the instructions above in<br />
reverse order.<br />
9.5.9.7 Removing the Polarisation ZRM<br />
1. Follow the instructions in Removing the Polarisation Unit on<br />
page 9-73.<br />
2. Disconnect the connector from the Polarisation ZRM.<br />
Removal and replacement of ADU modules<br />
Tools needed:<br />
• 4 x 150 mm Allen key<br />
(located inside the<br />
service door of the ADU)<br />
• Flat head screw driver<br />
9999<br />
Figure 9-90: Polarisation ZRM, disconnecting<br />
<strong>Service</strong> & maintenance<br />
98-133966-E2 Chapter 9: <strong>Service</strong> & maintenance 9-69
Removal and replacement of ADU modules<br />
3. Loosen the 2x4 mm Allen screws.<br />
Figure 9-91: Polarisation ZRM, loosen 2x4 mm Allen screws<br />
4. Slide out the Polarisation ZRM.<br />
9.5.9.8 Inserting a new Polarisation ZRM<br />
To insert a new Polarisation ZRM follow the instructions above in<br />
reverse order.<br />
9.5.10 Replacing the Inertial Sensor Module (ISM)<br />
Figure 9-92: Inertial Sensor Module (ISM), location<br />
9-70 Chapter 9: <strong>Service</strong> & maintenance 98-133966-E2
(green or red)<br />
When the antenna dish is moved by the motors and ships motions,<br />
in all its plans the ISM provides the information regarding these<br />
movements.<br />
This information is based on rate gyro and accelerometers mounted<br />
in the ISM.<br />
The information is passed on to the PCM.<br />
The ISM has two LEDs for status and troubleshooting:<br />
• Power LED: green or Off<br />
• <strong>Service</strong> LED: green or red<br />
9.5.10.1 Removing the ISM<br />
Power LED<br />
(green)<br />
<strong>Service</strong> LED<br />
Figure 9-93: Inertial Sensor Module (ISM)<br />
1. Open the service hatch by releasing the two latches.<br />
2. Switch off the power to the antenna on the service switch.<br />
Removal and replacement of ADU modules<br />
Tools needed:<br />
• 4 x 150 mm Allen key<br />
(located inside the<br />
service door of the ADU)<br />
• Flat head screw driver<br />
9999<br />
3. Press in and turn the elevation locking pin (only available from<br />
S/N TBD) to locked position.<br />
4. Rotate the antenna so that you can reach the ISM.<br />
5. Loosen the 4x4 mm Allen screws.<br />
<strong>Service</strong> & maintenance<br />
98-133966-E2 Chapter 9: <strong>Service</strong> & maintenance 9-71
Removal and replacement of ADU modules<br />
6. Slide the cable support free in the key holes, and leave it hanging<br />
in the cables.<br />
Figure 9-94: Removing the ISM<br />
7. Disconnect the two SUB-D connectors using a small flat screw<br />
driver.<br />
8. Remove the 4x4 mm Allen screws, loosened in step 5.<br />
9. Remove the ISM.<br />
Figure 9-95: Removing the ISM Sub D connectors<br />
9-72 Chapter 9: <strong>Service</strong> & maintenance 98-133966-E2
9.5.10.2 Inserting a new ISM<br />
To insert a new Inertial Sensor Module follow the instructions above<br />
in reverse order.<br />
9.5.11 Replacing the Polarisation Unit<br />
9.5.11.1 Removing the Polarisation Unit<br />
1. Open the service hatch by releasing the two latches.<br />
2. Switch off the power to the antenna on the service switch.<br />
3. Rotate the antenna pedestal so that the Azimuth DDM faces the<br />
service hatch.<br />
4. Press in and turn the elevation locking pin (only available from<br />
S/N TBD) to locked position.<br />
Removal and replacement of ADU modules<br />
Tools needed:<br />
• 4 x 150 mm Allen key<br />
(located inside the<br />
service door of the ADU)<br />
• Flat head screw driver<br />
• 11 mm open-end spanner<br />
• 18 mm open-end spanner<br />
9999<br />
<strong>Service</strong> & maintenance<br />
98-133966-E2 Chapter 9: <strong>Service</strong> & maintenance 9-73
Removal and replacement of ADU modules<br />
CAUTION! Do not manually turn the Polarisation Unit of the antenna, it may cause<br />
damage to the antenna.<br />
Before turning the Polarisation Unit manually, remove the connector (1) marked M of<br />
the Polarisation Motor Module (2).<br />
(1)<br />
(2)<br />
Remove<br />
M<br />
5. Disconnect the SUB-D connector from the PMM.<br />
Figure 9-96: Removing the sub-D connector of the PMM<br />
9-74 Chapter 9: <strong>Service</strong> & maintenance 98-133966-E2
6. Disconnect the two RF F-connectors from the two LNBs. Mark the<br />
LNBs after the label on the wires: Co-pol (left) and X-pol (right).<br />
Remove also the RF N-connector.<br />
Figure 9-97: Disconnecting the LNBs<br />
7. Remove the 4x4 Allen screws to free the cable spool attached to<br />
the PMM. Let the cable spool hang freely in the cables.<br />
Removal and replacement of ADU modules<br />
9999<br />
Figure 9-98: Removing the cable spool<br />
<strong>Service</strong> & maintenance<br />
98-133966-E2 Chapter 9: <strong>Service</strong> & maintenance 9-75
Removal and replacement of ADU modules<br />
8. Disconnect the connector on the OMT.<br />
Figure 9-99: Disconnecting the OMT connector<br />
9. Remove the 2x4 mm Allen screws at the OMT and loosen the 4x4<br />
mm Allen screws on the Polarisation Unit.<br />
10. Rotate the Polarisation Unit in clockwise direction until end stop.<br />
11. Rotate the Polarisation Unit further in the key holes and remove<br />
it.<br />
Note<br />
Figure 9-100: Disconnecting the OMT connector<br />
The Polarisation Unit is attached to the OMT collar<br />
to the feeder horn tube on the rear side of the<br />
unit.<br />
9-76 Chapter 9: <strong>Service</strong> & maintenance 98-133966-E2
9.5.11.2 Inserting a new Polarisation Unit<br />
To insert a new Polarisation Unit follow the instructions above in<br />
reverse order.<br />
9.5.12 Replacing the BUC Fan<br />
9.5.12.1 Removing the BUC Fan<br />
1. Open the service hatch by releasing the two latches.<br />
2. Switch off the power to the antenna on the service switch.<br />
3. Rotate the antenna pedestal so that the Azimuth DDM faces the<br />
service hatch.<br />
4. Press in and turn the elevation locking pin (only available from<br />
S/N TBD) to locked position.<br />
5. Rotate the Polarisation Unit so that you can reach the BUC fan.<br />
6. Disconnect the fan connector.<br />
7. Remove the 2x4 mm Allen screws.<br />
Step 6<br />
Step 7<br />
Removal and replacement of ADU modules<br />
Tools needed:<br />
• 4 x 150 mm Allen key<br />
(located inside the<br />
service door of the ADU)<br />
9999<br />
8. Remove the BUC fan.<br />
Figure 9-101: Removing the BUC fan<br />
<strong>Service</strong> & maintenance<br />
98-133966-E2 Chapter 9: <strong>Service</strong> & maintenance 9-77
Removal and replacement of ADU modules<br />
9.5.12.2 Inserting a new BUC Fan<br />
To insert a new BUC Fan follow the instructions above in reverse<br />
order.<br />
9.5.13 Replacing the Block Up Converter (BUC)<br />
Figure 9-102: Block Up Converter (BUC), location<br />
Power LED<br />
(green)<br />
Figure 9-103: Block Up Converter (BUC)<br />
The BUC converts the L-band IF (950 – 1700 MHz) up to Ku-band<br />
radio signal (13.75-14.50 GHz (extended)) and amplifies the TX<br />
power level. The BUC receives the TX signal and power from the<br />
VIM.<br />
9.5.13.1 Removing the BUC<br />
Tools needed:<br />
1. Follow the instructions in Removing the Polarisation Unit on<br />
page 9-73.<br />
• 4 x 150 mm Allen key<br />
(located inside the<br />
service door of the ADU)<br />
9-78 Chapter 9: <strong>Service</strong> & maintenance 98-133966-E2
2. Remove the 4x4 mm Allen screws from the waveguide flange at<br />
the side of the BUC.<br />
3. Loosen the 2x4 mm Allen screws from the bracket at the side of<br />
the BUC.<br />
4. Slide the BUC to the right to free it from the Polarisation Unit.<br />
5. Disconnect the finger nut N-connector from the BUC.<br />
9.5.13.2 Inserting a new BUC<br />
Figure 9-104: BUC, removing<br />
Step 5<br />
Step 3<br />
Figure 9-105: BUC, removing (continued)<br />
To insert a new BUC follow the instructions above in reverse order.<br />
Removal and replacement of ADU modules<br />
9999<br />
<strong>Service</strong> & maintenance<br />
98-133966-E2 Chapter 9: <strong>Service</strong> & maintenance 9-79
Removal and replacement of ADU modules<br />
9.5.14 Replacing the Low Noise Block down<br />
converter (LNB)<br />
Power LED<br />
(green)<br />
<strong>Service</strong> LED<br />
(green or red)<br />
Figure 9-106: Low Noise Block (LNB)<br />
The LNB down-converter receives the Ku-band radio signal (10.70-<br />
12.75 GHz), which will be amplified and converted down to a L-band<br />
IF (950 – 2150 MHz). The conversion is controlled by two or four<br />
LO’s, locked to an external reference signal. The Ku-band interface<br />
is a WR75 waveguide and the IF interface is a 75 Ohm F connector. It<br />
has DC-power, 10 MHz external ref. Signal and a 22 KHz control<br />
signal is delivered via the IF cable. The L-band output is delivered to<br />
the VIM.<br />
The removal and insertion procedures of the Co-pol LNB and the X-<br />
pol LNG are identical.<br />
9.5.14.1 Removing the LNB<br />
Tools needed:<br />
1. Follow the instructions in Removing the Polarisation Unit on<br />
page 9-73.<br />
• 4 x 150 mm Allen key<br />
(located inside the<br />
service door of the ADU)<br />
• Torx20 screw driver<br />
9-80 Chapter 9: <strong>Service</strong> & maintenance 98-133966-E2
2. Remove the 4x4 mm Allen screws that fix the LNB to the OMT.<br />
Figure 9-107: LNB, removing<br />
3. Remove the 4xTorx20 screws and separate the LNB from the filter.<br />
(Reuse the filter.)<br />
Figure 9-108: LNB, removing (continued)<br />
Removal and replacement of ADU modules<br />
9999<br />
9.5.14.2 Inserting a new LNB<br />
To insert a new LNB follow the instructions above in reverse order.<br />
<strong>Service</strong> & maintenance<br />
98-133966-E2 Chapter 9: <strong>Service</strong> & maintenance 9-81
Removal and replacement of ADU modules<br />
9.5.15 Replacing the Ortho Mode Transducer (OMT)<br />
Figure 9-109: Ortho Mode Transducer (OMT)<br />
The OMT interfaces a low-loss waveguide from the dual-polarized<br />
feed-horn to the BUC/LNB.<br />
The purpose of the OMT is to separate the TX and RX signals and<br />
provide isolation between BUC and LNB. DC power, 10 MHz external<br />
reference signal and a 22 kHz control signal is delivered via the IF<br />
cable. The OMT uses the independency of the signals to split and<br />
provide isolation. The OMT also detects the output power and<br />
temperature of the BUC.<br />
9.5.15.1 Removing the OMT<br />
Tools needed:<br />
• 4 x 150 mm Allen key<br />
(located inside the<br />
service door of the ADU)<br />
• Torx20 screw driver<br />
1. Follow the instructions in Removing the Polarisation Unit on<br />
page 9-73.<br />
2. Follow the instruction in Removing the LNB on page 9-80 and<br />
remove both Co-pol LNB (to the left) and X-pol LNB (to the right).<br />
9-82 Chapter 9: <strong>Service</strong> & maintenance 98-133966-E2
3. Remove the 2xTorx20 screws on top of the OMT.<br />
Figure 9-110: OMT, removing 2xTorx20 screws on top<br />
4. Remove the 4xTorx 20 screws on the left-hand rail of the<br />
Polarisation Unit fixing the rail to the waveguide between the<br />
BUC and OMT.<br />
Figure 9-111: OMT, removing 4xTorx20 screws on the left-hand rail of the<br />
Polarisation Unit<br />
Removal and replacement of ADU modules<br />
9999<br />
<strong>Service</strong> & maintenance<br />
98-133966-E2 Chapter 9: <strong>Service</strong> & maintenance 9-83
Removal and replacement of ADU modules<br />
5. Remove the 4xTorx 20 screws on the right-hand rail of the<br />
Polarisation Unit fixing the rail to the OMT.<br />
Figure 9-112: OMT, removing 4xTorx20 screws on the right-hand rail of the<br />
Polarisation Unit<br />
6. Remove the 4x4 mm Allen screws from the waveguide flange at<br />
the side of the BUC.<br />
Figure 9-113: OMT, removing<br />
7. The OMT and waveguide are now free to be removed from the<br />
Polarisation Unit.<br />
9-84 Chapter 9: <strong>Service</strong> & maintenance 98-133966-E2
8. Remove the 4xTorx 20 screws and remove the waveguide from<br />
the OMT.<br />
9.5.15.2 Inserting a new OMT<br />
Figure 9-114: OMT, removing the waveguide<br />
To insert a new OMT follow the instructions above in reverse order.<br />
9.5.16 Replacing the rotary joint<br />
Figure 9-115: Rotary joint<br />
Removal and replacement of ADU modules<br />
9999<br />
<strong>Service</strong> & maintenance<br />
98-133966-E2 Chapter 9: <strong>Service</strong> & maintenance 9-85
Removal and replacement of ADU modules<br />
9.5.16.1 Removing the rotary joint<br />
Tools needed:<br />
• 4 x 150 mm Allen key<br />
(located inside the<br />
service door of the ADU)<br />
1. Open the service hatch by releasing the two latches.<br />
2. Switch off the power to the antenna on the service switch.<br />
3. Rotate the antenna pedestal so that the Azimuth DDM faces the<br />
service hatch.<br />
4. Rotate the Antenna Dish to top position.<br />
5. Press in and turn the elevation locking pin (only available from<br />
serial number TBD) to locked position.<br />
6. Loosen the 15x4 mm Allen screws (the 3 Allen screws on top are<br />
longer than the rest) on the cover over the azimuth drive<br />
modules, and remove the cover (lift and slide).<br />
L=35 mm L=35 mm L=35 mm<br />
Figure 9-116: Azimuth motor, remove cover<br />
9-86 Chapter 9: <strong>Service</strong> & maintenance 98-133966-E2
7. Remove the RF connector (N-type, finger nut) from the Rotary<br />
Joint.<br />
8. Loosen the 4x4 mm Allen screws from the cover plate over the<br />
azimuth drive wheel.<br />
9. Remove the cover plate.<br />
Step 8<br />
10. Loosen the 3x4 mm Allen screws.<br />
Step 7<br />
Figure 9-117: Getting access to the azimuth drive wheel<br />
Removal and replacement of ADU modules<br />
9999<br />
Figure 9-118: Rotary joint (in place)<br />
11. Rotate the rotary joint on the key holes and lift it carefully up.<br />
<strong>Service</strong> & maintenance<br />
98-133966-E2 Chapter 9: <strong>Service</strong> & maintenance 9-87
Removal and replacement of ADU modules<br />
12. Disconnect the RF connector (N-type, finger nut) from the bottom<br />
end of the rotary joint.<br />
13. Remove the rotary joint.<br />
Figure 9-119: Rotary joint (removed)<br />
9.5.16.2 Insert a new Rotary Joint.<br />
To insert a new Rotary Joint follow the instructions above in reverse<br />
order.<br />
9-88 Chapter 9: <strong>Service</strong> & maintenance 98-133966-E2
9.6 Updating VIM/PCM calibration<br />
data<br />
After installing a new VIM (VSAT Interface Module) or PCM<br />
(Pedestal Control Module) you must update the calibration data.<br />
The ACU does not know which of the two modules (PCM or VIM) has<br />
been replaced. The ACU needs to know which set of data to keep.<br />
You must select the module that was not exchanged so the<br />
calibration data can be copied to the module that was exchanged<br />
during service.<br />
1. Enter the web interface (http://192.168.0.1) and click SERVICE ><br />
XIM DATA. A screen similar to the one in the figure below will<br />
appear:<br />
2. The figure shows at Unit-no Unit-Serial-Number for the PCM,<br />
because this module was exchanged during service. In this case<br />
the user must press the select button below the VIM module in<br />
order to copy the current calibration data to the new PCM<br />
module.<br />
Important<br />
Figure 9-120: Updating VIM/PCM calibration data (example)<br />
Select always the XIM data for the module that<br />
was not exchanged.<br />
3. Click Select, then a warning will appear.<br />
Figure 9-121: XIM data, warning<br />
4. Click OK to continue, the data is copied into the replaced module.<br />
Updating VIM/PCM calibration data<br />
9999<br />
<strong>Service</strong> & maintenance<br />
98-133966-E2 Chapter 9: <strong>Service</strong> & maintenance 9-89
Updating VIM/PCM calibration data<br />
Figure 9-122: XIM data not ready<br />
5. Click Refresh. When the XIM data has been successfully copied<br />
from one module to the other, the web interface displays a<br />
window showing the status of both modules as Valid (Select<br />
boxes are greyed out).<br />
Figure 9-123: XIM data valid<br />
The XIM data are now updated and the SAILOR 900 VSAT is<br />
operational again.<br />
9-90 Chapter 9: <strong>Service</strong> & maintenance 98-133966-E2
9.7 Troubleshooting<br />
9.7.1 Overview<br />
This section describes an initial check of the primary functions of the<br />
SAILOR 900 VSAT system, and provides some guidelines for<br />
troubleshooting, if one of the checks should fail.<br />
Generally, if a fault occurs without any obvious reason, it is always<br />
recommended to observe the LEDs and the ACU display showing the<br />
active events. Possible failure states are shown in the web interface<br />
and the display of the ACU:<br />
• SAFE MODE (e.g. hardware error, missing communication link<br />
between the ADU and ACU, excessive ship motion)<br />
• XIM error (after exchange of modules)<br />
• ADU POST error (hardware error)<br />
• ACU POST error (hardware error)<br />
For information on the function of the LEDs, see Status signalling<br />
with LEDs and status messages on page 9-8.<br />
For a list of all the error messages and warnings, see Event<br />
messages — overview on page G-1.<br />
9.7.2 Event list for troubleshooting<br />
You can use the event list for troubleshooting. It is described in<br />
detail at Help desk and diagnostic report on page 9-2.<br />
You can download the event list as part of a diagnostic report.<br />
9.7.3 Diagnostic report for troubleshooting<br />
You can generate a diagnostic report containing results from the<br />
POST, all events and system log information since the last reset to<br />
factory default. For more information see Sending a diagnostics<br />
report on page 6-36.<br />
Troubleshooting<br />
9999<br />
<strong>Service</strong> & maintenance<br />
98-133966-E2 Chapter 9: <strong>Service</strong> & maintenance 9-91
Troubleshooting<br />
9.7.4 Troubleshooting — BUC<br />
T<br />
<br />
<br />
<br />
<br />
<br />
<br />
<br />
<br />
<br />
<br />
<br />
<br />
<br />
<br />
<br />
<br />
<br />
<br />
<br />
<br />
<br />
<br />
<br />
<br />
<br />
<br />
<br />
<br />
<br />
<br />
<br />
<br />
Figure 9-124: Troubleshooting — BUC<br />
9-92 Chapter 9: <strong>Service</strong> & maintenance 98-133966-E2
9.7.5 Troubleshooting — LNB<br />
T<br />
<br />
<br />
<br />
<br />
<br />
<br />
<br />
<br />
<br />
<br />
<br />
<br />
<br />
<br />
<br />
<br />
<br />
<br />
<br />
<br />
<br />
<br />
<br />
<br />
9.7.6 System block diagram (ADU)<br />
<br />
<br />
<br />
<br />
<br />
<br />
<br />
<br />
<br />
<br />
<br />
Figure 9-125: Troubleshooting — LNB<br />
On the next page you find the system block diagram of the ADU.<br />
<br />
<br />
<br />
<br />
<br />
<br />
<br />
<br />
<br />
<br />
<br />
<br />
<br />
<br />
<br />
<br />
<br />
<br />
<br />
<br />
<br />
<br />
<br />
<br />
<br />
<br />
<br />
<br />
<br />
<br />
Troubleshooting<br />
<br />
<br />
<br />
<br />
9999<br />
<strong>Service</strong> & maintenance<br />
98-133966-E2 Chapter 9: <strong>Service</strong> & maintenance 9-93
Appendices
Technical specifications<br />
A.1 SAILOR 900 VSAT system<br />
components<br />
A<br />
Appendix A<br />
AAAA<br />
Technical specifications<br />
A.1.1<br />
General specifications<br />
Item<br />
Specification<br />
Frequency band<br />
Rx<br />
Tx<br />
Reflector size<br />
Ku-band (VSAT)<br />
10.70 to 12.75 GHz<br />
13.75 to 14.50 GHz (extended)<br />
103 cm (40 inch)<br />
Certification (approval) Compliant with CE (Maritime), ETSI EN 302 340,<br />
CEI/IEC 60950-1, CEI/IEC 60945, CEI/IEC 60950-22<br />
ADU cable type (ACU to<br />
ADU)<br />
ADU cable connector at the<br />
ADU<br />
ADU cable connector at the<br />
ACU<br />
System power supply range<br />
Total system power<br />
consumption<br />
Single 50 Ohm coax cable for Rx, Tx, ACU-ADU modem and<br />
power<br />
Female N-Connector (50 Ohm)<br />
Female N-Connector (50 Ohm)<br />
20—32 VDC<br />
(Start up voltage: 22 VDC guaranteed)<br />
370 W peak, 175 W typical (up to 8 W BUC)<br />
Table A-1: General specifications<br />
98-133966-E2 A-1
SAILOR 900 VSAT system components<br />
A.1.2<br />
ADU<br />
Item<br />
Dimensions (overall)<br />
Weight<br />
Antenna type, pedestal<br />
Antenna type, reflector<br />
system<br />
Transmit Gain<br />
Receive Gain<br />
System G/T<br />
BUC output power<br />
EIRP<br />
LNB<br />
Tracking Receiver<br />
Polarisation<br />
Specification<br />
Diameter x Height: Ø 130 cm (51.3 inch) x H 150 cm (58.9 inch)<br />
135 kg (288 lbs)<br />
3-axis (plus skew) stabilised tracking ADU with integrated<br />
GPS<br />
Reflector/sub-reflector, ring focus<br />
41.4 dBi typ. @ 14.25 GHz (excluding radome)<br />
40.1 dBi typ. @ 11.70 GHz (excluding radome)<br />
17.9 dB/K typ. @ 11.70 GHz, at 30° elevation and clear sky<br />
(including radome)<br />
8 W<br />
49 dBW (including radome)<br />
2 units 4-band LNBs (band selection by ACU)<br />
Internal "all band/modulation type" and VSAT modem RSSI<br />
Linear Cross or Co-Pol (selected by ACU)<br />
Elevation Range -25° to +125°<br />
Azimuth Range<br />
Unlimited (Rotary Joint)<br />
Ship motion, angular Roll ±30°, Pitch ±15°, Yaw ±10°<br />
Ship, turning rate and<br />
acceleration<br />
ADU motion, linear<br />
15°/s and 15°/s 2<br />
Linear accelerations ±2.5 g max any direction<br />
Table A-2: Technical specifications for the Above Deck Unit<br />
A-2 Appendix A: Technical specifications 98-133966-E2
SAILOR 900 VSAT system components<br />
AAAA<br />
Item<br />
Satellite acquisition<br />
Specification<br />
Automatic - w. Gyro/GPS compass input<br />
Vibration, operational Sine: IEC 945 (8.7.2), DNV A, MIL-STD-167-1 (5.1.3.3.5).<br />
Random: Maritime<br />
Technical specifications<br />
Vibration, survival<br />
Shock<br />
Temperature (ambient)<br />
Humidity<br />
Rain (IP class)<br />
Wind resistance<br />
Ice<br />
Sine: IEC 945 (8.7.2) dwell, MIL-STD-167-1 (5.1.3.3.5) dwell.<br />
Random: Maritime survival<br />
MIL-STD-810F 516.5 (Proc. II)<br />
Operational: -25° C to 55° C<br />
Storage: -40°C to 85°C<br />
100%, condensing<br />
IEC 945 Exposed (IPX6)<br />
Operational: 80 kt.<br />
Survival: 110 kt.<br />
Survival: 25 mm (1 inch)<br />
Solar radiation 1120 W/m2 to MIL-STD-810F 505.4<br />
Compass safe distance 1 m to IEC 945<br />
Maintenance, scheduled<br />
Maintenance, unscheduled<br />
Built-in tests<br />
Power OFF<br />
Input power<br />
None<br />
All electronic, electromechanical modules and belts can be<br />
replaced through the service hatch.<br />
Power On Self Test (POST)<br />
Person Activated Self Test (PAST)<br />
Continuous Monitoring (CM) with error log<br />
Automatic safe mode<br />
Powered by ACU<br />
Table A-2: Technical specifications for the Above Deck Unit (Continued)<br />
98-133966-E2 Appendix A: Technical specifications A-3
SAILOR 900 VSAT system components<br />
A.1.3<br />
ACU<br />
Item<br />
Dimensions, rack mount<br />
H x W x D<br />
Dimensions, bulkhead mount<br />
H x W x D<br />
Weight, rack mount<br />
Weight, bulkhead mount<br />
Ambient temperature<br />
Humidity<br />
IP class<br />
Specification<br />
1 U, 19 inch<br />
4.4 x 48 x 33 cm (1.75 x 19 x 13 inch)<br />
stand-alone unit<br />
4.3 x 25.5 x 27.8 cm (1.67 x 10.0 x 10.9 inch)<br />
4.5 kg (10 lbs)<br />
2.7 kg (6 lbs)<br />
Operational: -25°C to +55°C<br />
Storage: -40°C to +85°C<br />
IEC 945 protected, 95% (non-condensing)<br />
IP31<br />
Compass safe distance 1 m to IEC 945<br />
Interfaces 1 x N-Connector for antenna RF Cable (50 Ohm) w.<br />
automatic cable loss compensation<br />
2 x F-Connectors (75 Ohm) for Rx/Tx to VSAT modem<br />
4 x Ethernet<br />
1 x RS-422 data (VSAT modem control)<br />
1 x RS-232 data (VSAT modem control)<br />
1 x NMEA 2000 (CAN bus) and NMEA 0183 (RS-422) for<br />
Gyro/GPS compass input<br />
1 x DC power input<br />
1 x Grounding bolt<br />
Input power<br />
Modem interface (control)<br />
See System power supply range and Total system power<br />
consumption on page A-1.<br />
iDirect openAMIP protocol & custom protocol<br />
Table A-3: Technical specifications for the ACU<br />
A-4 Appendix A: Technical specifications 98-133966-E2
SAILOR 900 VSAT system components<br />
AAAA<br />
Item<br />
Man Machine Interface (MMI)<br />
No transmit zones<br />
Specification<br />
OLED (red) display, 5 push buttons,<br />
3 discrete indicator LEDs and ON/OFF switch<br />
Programmable<br />
Technical specifications<br />
Table A-3: Technical specifications for the ACU (Continued)<br />
A.1.4<br />
Supported VSAT modems<br />
Item<br />
Specification<br />
VSAT modems supported<br />
iDirect iNFINITI (Serial)<br />
iDirect iNFINITI (OpenAMIP)<br />
iDirect Evolution (Serial)<br />
iDirect Evolution (OpenAMIP)<br />
COMTECH CDM 570L<br />
COMTECH CDM 625L<br />
COMTECH 570L and ROSS<br />
STM SatLink 2900<br />
Gilat SkyEdge II<br />
For a list of supported VSAT modems see also the<br />
SAILOR 900 VSAT data sheet.<br />
Table A-4: Supported VSAT modems<br />
98-133966-E2 Appendix A: Technical specifications A-5
Outline drawings<br />
A.2 Outline drawings<br />
A.2.1<br />
ADU<br />
Figure A-1: Outline drawing: ADU<br />
A-6 Appendix A: Technical specifications 98-133966-E2
A.2.2<br />
ACU, bulkhead<br />
Outline drawings<br />
AAAA<br />
Technical specifications<br />
Figure A-2: Outline drawing: ACU, bulkhead<br />
98-133966-E2 Appendix A: Technical specifications A-7
Outline drawings<br />
A.2.3<br />
ACU, 19 inch rack<br />
Figure A-3: Outline drawing: ACU, 19 inch rack<br />
A-8 Appendix A: Technical specifications 98-133966-E2
A.2.4 N-connector interface on the ADU<br />
Outline drawings<br />
AAAA<br />
Technical specifications<br />
Figure A-4: N-Connector interface on the ADU<br />
98-133966-E2 Appendix A: Technical specifications A-9
VSAT LNB Data Sheet (physical LNB)<br />
A.3 VSAT LNB Data Sheet (physical LNB)<br />
The following table shows the data of the LNBs which are fitted in the ADU.<br />
The SAILOR 900 VSAT is designed to make any Ku Band frequency in the range of 10.7 GHz to<br />
12.75 GHz available to a VSAT modem by allowing the user to select the LNB LO of his choice —<br />
without having to exchange the physical LNBs in the ADU. This is achieved by the sophisticated<br />
single-cable solution of the SAILOR 900 VSAT.<br />
Please see A.3.1 for configuration information.<br />
Interface Model<br />
Spec.<br />
Input, Ku-band 2-band<br />
WR75 waveguide<br />
Output, IF 2-band<br />
F (75 )<br />
LO type 2-band Locked to 10 MHz external reference over IF interface or ACU internal<br />
LO frequencies 2-band<br />
9.75, 10.75 GHz<br />
Parameter<br />
Condition/remark Unit Min Typ Max<br />
Input frequency range VSAT<br />
GHz 10.7 12,75<br />
Output (IF) frequency range 2-band<br />
MHz 950 2150<br />
VSWR<br />
Input<br />
- 2.0 : 1<br />
Output<br />
- 1.7 : 1<br />
Noise Figure<br />
At 25 °C<br />
dB 0,8<br />
Gain<br />
dB 60<br />
Gain (relative)<br />
Over 500 MHz BW dB -2.0 0 2.0<br />
Gain (relative)<br />
Over 36 MHz BW dB -0.5 0 0.5<br />
External ref. freq. (input) Nominal<br />
MHz 10<br />
Power supply voltage DC<br />
V 11.0 19.0<br />
Supply current<br />
DC<br />
mA 350<br />
LO selection voltage Voltage, low (L) (input) V 11.0 14.0<br />
Voltage, high (H) (input) V 16.0 19.0<br />
Temperature range (ambient) Operation<br />
°C -30 75<br />
Storage<br />
°C -40 85<br />
Dimensions (incl. connector) L<br />
mm 140<br />
over all<br />
W<br />
mm 58<br />
H<br />
mm 50<br />
Weight<br />
Total<br />
g 350<br />
Table A-5: Technical specifications for VSAT LNB<br />
A.3.1<br />
VSAT LNB user installation and configuration information<br />
The SAILOR 900 VSAT can interpret 4-band LNB switching signals as well as exact LO information<br />
acquired directly from the attached VSAT modem by means of a data connection.<br />
When using a VSAT modem which is integrated to use LO information transferred via a data<br />
connection, the LO must be in the range of 9.6 GHz to 11.3 GHz (Optimum values are 9.75 GHz and<br />
10.75 GHz as these match the physical LNB values).<br />
All VSAT modems that can be used with SAILOR 900 VSAT use this approach for selecting the LO<br />
frequency, except a COMTECH modem with ROSS server. A COMTECH modem with ROSS server<br />
reads switching signals by means of a data connection instead of using voltage and tone signals.<br />
A-10 Appendix A: Technical specifications 98-133966-E2
A.3.1.1<br />
Example configuration for an iDirect i5100 (L-<br />
Band range 950 - 1700 MHz)<br />
KuBand frequency:<br />
L-Band frequency:<br />
LO:<br />
11.7389 GHz<br />
1638.9 MHz<br />
10.1 GHz<br />
Since the LO frequency of 10.1 GHz is in the range of 9.6 GHz to<br />
11.3 GHz, this is a valid set of data. The SAILOR 900 VSAT will<br />
tune to 11.7389 GHz and provide the carrier on the L-Band<br />
frequency 1638.9 MHz.<br />
VSAT LNB Data Sheet (physical LNB)<br />
AAAA<br />
Technical specifications<br />
A.3.1.2<br />
Example configuration for a special VSAT modem<br />
(L-Band range 950 - 1450 MHz)<br />
KuBand frequency:<br />
L-Band frequency:<br />
LO:<br />
12.750 GHz<br />
1450 MHz<br />
11.3 GHz<br />
Since the LO frequency of 11.3 GHz is in the range of 9.6 GHz to<br />
11.3 GHz, this is a valid set of data. The SAILOR 900 VSAT will<br />
tune to 12.750 GHz and provide the carrier on the L-Band<br />
frequency 1450 MHz.<br />
A.3.1.3<br />
4-band switching<br />
When using 4-band switching and a VSAT modem which is<br />
integrated with SAILOR 900 VSAT to use voltage and tone for<br />
switching, the switching is done according to the following<br />
table:<br />
LO frequency Voltage 11—19 V Tone 22 kHz<br />
Ku band frequency<br />
(L-band 950—2150 MHz)<br />
9.75 GHz 11—14 V Tone off 10.7—11.9 GHz<br />
10.25 GHz 11—14 V Tone on 11.2—12.4 GHz<br />
10.75 GHz 16—19 V Tone off 11.7—12.75 GHz<br />
11.25 GHz 16—19 V Tone on 12.2—12.75 GHz<br />
Table A-6: 4-band switching<br />
Currently none of the VSAT modems which are integrated with<br />
the SAILOR 900 VSAT use voltage and tone switching.<br />
98-133966-E2 Appendix A: Technical specifications A-11
VSAT 8 W BUC Data Sheet (Extended)<br />
A.4 VSAT 8 W BUC Data Sheet (Extended)<br />
Interface Model Spec.<br />
Input,IF N(50)<br />
Output,Kuband 8W WR75waveguide(39.0dBmmin.)<br />
Spectrum Noninverting<br />
LOtype <br />
Lockedto10MHzexternalreferenceoverIFinterfaceorACUinternal<br />
LOfrequency Extended 12.80GHz<br />
TXON/OFF <br />
10MHzreferenceON/OFF<br />
Cooling <br />
Externaltemperaturecontrolledfannotincl.BUC<br />
Parameter Condition/remark Unit Min Typ Max<br />
Outputfrequencyrange VSATExt.TX<br />
GHz 13.75 14.50<br />
Input(IF)frequencyrange Extended<br />
MHz 950 1700<br />
VSWR<br />
Input(10,9501700MHz) 2.0:1<br />
Output(13.7514.50GHz) 2.0:1<br />
OutputpoweratP1dB Worstcase<br />
dBm 39.0<br />
Outputpower 10MHzrefOFF TXband,at35dBmref. dBm 60<br />
Gain(absolutelinear) Overoutputfreq.range dB 61 65 69<br />
Gain(relative)<br />
Over500MHzBW dB 2.5 0,0 2.5<br />
Gain(relative)<br />
Over36MHzBW<br />
dB 1.0 0,0 1.0<br />
Spurious<br />
RXband<br />
dBc<br />
60<br />
TXband<br />
dBc<br />
15<br />
Phasenoise<br />
10Hz<br />
dBc/Hz<br />
50<br />
100Hz<br />
dBc/Hz<br />
60<br />
1kHz<br />
dBc/Hz<br />
70<br />
10kHz<br />
dBc/Hz<br />
80<br />
100kHz<br />
dBc/Hz<br />
90<br />
1MHz<br />
dBc/Hz<br />
110<br />
IMD3<br />
At2x+33dBmcarriers dBc 26<br />
Externalref.freq.(input) Nominal<br />
MHz 10,000000<br />
Externalreferencefreq.(input) Deviation<br />
Hz 100 0 100<br />
Powersupplyvoltage DC<br />
V 20.0 50.0<br />
Supplypower<br />
DC<br />
W 85<br />
Temperaturerange<br />
Operationw.external<br />
forcedcooling<br />
°C 30 75<br />
Storage<br />
°C 40 85<br />
Dimensions<br />
L<br />
mm 176<br />
W<br />
mm 170<br />
H<br />
mm 102<br />
Weight<br />
Total<br />
g 2700<br />
Table A-7: Technical specifications for VSAT 8 W BUC<br />
A-12 Appendix A: Technical specifications 98-133966-E2
VMU cable specifications<br />
B<br />
This appendix contains cable specifications for cables<br />
between the ACU and a VSAT modem.<br />
• Modem Cable Comtech Serial & RSSI TT7016A<br />
• Modem Cable iNIFINITI iDirect VSAT modem<br />
Appendix BBBBB<br />
VMU cable specifications<br />
98-133966-E2 B-1
Modem Cable Comtech Serial & RSSI TT7016A<br />
B.1 Modem Cable Comtech Serial &<br />
RSSI TT7016A<br />
Figure B-1: Modem Cable Comtech Serial & RSSI TT7016A<br />
B-2 Appendix B: VMU cable specifications 98-133966-E2
B.2 Modem Cable iNIFINITI iDirect<br />
VSAT modem<br />
Modem Cable iNIFINITI iDirect VSAT modem<br />
BBBB<br />
VMU cable specifications<br />
Figure B-2: Modem Cable iNIFINITI iDirect VSAT modem<br />
98-133966-E2 Appendix B: VMU cable specifications B-3
Modem Cable iNIFINITI iDirect VSAT modem<br />
B-4 Appendix B: VMU cable specifications 98-133966-E2
VMU settings<br />
requirements<br />
C<br />
In this appendix you find detailed information how to set up<br />
supported VSAT modems. The following VSAT modems are<br />
described:<br />
• Open AMIP setup for iDirect INFINITI & Evolution<br />
• Non-Open-AMIP setup for iDirect iNFINITI 5000 &<br />
Evolution X5<br />
• Comtech 570L, ROSS box & ACU<br />
• STM SatLink 2900 VSAT modem<br />
• Gilat SkyEdge II VSAT modem<br />
Appendix CCCCC<br />
VMU settings<br />
98-133966-E2 C-1
Open AMIP setup for iDirect INFINITI & Evolution<br />
C.1 Open AMIP setup for iDirect<br />
INFINITI & Evolution<br />
C.1.1<br />
Protocol and interfaces<br />
C.1.1.1<br />
Introduction<br />
The following sections describe the protocol and interface between<br />
the SAILOR 900 VSAT ACU and an iDirect OpenAMIP VSAT modem.<br />
OpenAMIP operation is normally used by service providers offering<br />
global VSAT service as the protocol supports roaming between<br />
satellites (Automatic Beam Switching).<br />
OpenAMIP, an ASCII message based protocol invented and<br />
Trademarked by iDirect is a specification for the interchange of<br />
information between an antenna controller (ACU) and a VSAT<br />
modem (VMU). This protocol allows the VSAT modem to command<br />
the ACU to search and lock to a particular satellite as well as<br />
allowing exchange of information necessary to permit the VSAT<br />
modem to initiate and maintain communication via the antenna and<br />
the satellite. In general, OpenAMIP is not intended for any purpose<br />
except to permit a modem and the ACU to perform synchronized<br />
automatic beam switching.<br />
Thrane & Thrane A/S received OpenAMIP certification for SAILOR<br />
900 VSAT from VT iDirect Inc on 22 September 2011.<br />
C.1.1.2<br />
<strong>Connections</strong><br />
Connect the ACU and iDirect modem with the following cables:<br />
• Ethernet cable for TCP/IP data communication<br />
• RS-232 console cable for signal strength indication (part number:<br />
407090A-020)<br />
• 75 Ohm RF cables F-F connectors for rx and tx frequencies.<br />
See Connecting an iNFINITI® Series Satellite Router on page 4-9<br />
and Connecting an Evolution® Satellite Router on page 4-10 for<br />
C-2 Appendix C: VMU settings requirements 98-133966-E2
details on cable connections and pin allocation for the RS-232<br />
Console cable.<br />
Open AMIP setup for iDirect INFINITI & Evolution<br />
CCCC<br />
Figure C-1: Connecting iDirect iNFINITI 5000 series to the ACU (OpenAMIP)<br />
VMU settings<br />
Figure C-2: Connecting iDirect Evolution X5 to the ACU (OpenAMIP)<br />
98-133966-E2 Appendix C: VMU settings requirements C-3
Open AMIP setup for iDirect INFINITI & Evolution<br />
C.1.1.3<br />
Protocol<br />
The SAILOR 900 VSAT ACU supports all OpenAMIP commands<br />
except the X command which is optional. All the supported<br />
OpenAMIP commands are shown in the following figure.<br />
Figure C-3: Supported OpenAMIP commands<br />
Messages sent from VSAT<br />
modem<br />
S -15.000000 0.000000<br />
0.000000<br />
H 1451.815000 1.905000<br />
P H V<br />
B 11250.000000 12800.00000<br />
T 1403.290000 0.618000<br />
A 15<br />
W 300<br />
L 1 1<br />
K 90.000000<br />
Explanation<br />
Longitude, Max_lat, Pol_skew<br />
Hunt_frequency, Hunt_bandwidth<br />
Rx_polarity, Tx_polarity<br />
Rx-lcl_osc, Tx_lcl_osc<br />
Tx_frequency, Tx_bandwidth<br />
Keepalive_interval in mS [ACU: s<br />
message]<br />
latlong_interval in seconds [ACU: w<br />
message]<br />
Modem locked<br />
Max_skew<br />
Table C-1: Messages sent from the VSAT modem to the ACU (examples)<br />
C-4 Appendix C: VMU settings requirements 98-133966-E2
Messages sent from the ACU to the<br />
VSAT modem<br />
s 1 1<br />
w 1 55.794010 12.52272 985523005<br />
Note<br />
Explanation<br />
Functional, Tx OK<br />
GPS valid, Latitude, Longitude,<br />
Time<br />
Table C-2: Messages sent from the ACU to the VSAT modem (examples)<br />
The iDirect modems only sends the satellite information<br />
once when booting. If the ACU has not received the<br />
information for some reason, the system cannot point. In<br />
that case the modem will automatically boot after 5<br />
minutes and send the satellite information again.<br />
The signal strength from the modem is measured on RS-232<br />
pin 9. It is a DC voltage in the range of 0 - 5 VDC.<br />
Open AMIP setup for iDirect INFINITI & Evolution<br />
CCCC<br />
VMU settings<br />
Ranges for signal strength<br />
VDC<br />
Antenna status<br />
0-2.5 RF energy is detected, but from the wrong satellite.<br />
2.6-5.0 Carrier lock, correct satellite.<br />
Table C-3: Ranges for signal strength for iDirect Open AMIP VSAT<br />
modem<br />
The signal strength displayed web interface on the Dashboard<br />
as 0 – 500. The minimum value for an Internet connection is<br />
250 - 260.<br />
C.1.2<br />
Sample options file<br />
The following section presents a portion of a sample iDX 2.0.x<br />
Options file with OpenAMIP messages and parameters<br />
defined. OpenAMIP keys appear highlighted in bold.<br />
[OPTIONS_FILE]<br />
product_mode = idirect_scpc<br />
modem_sn = 40170<br />
generated_by = NMS-10.0.0<br />
did = 12885226<br />
modem_type = Remote<br />
modem_hardware = 5000<br />
is_mesh = 0<br />
disable_options_flash_command = 0<br />
carrier_type = 0<br />
98-133966-E2 Appendix C: VMU settings requirements C-5
Open AMIP setup for iDirect INFINITI & Evolution<br />
...<br />
[MOBILE]<br />
is_mobile = 1<br />
tx_handshake_enabled = 0<br />
gps_input = 2<br />
latlong_interval = 300<br />
latlong_fail_interval = 10<br />
init_tx_power_offset = 0.000000<br />
[MAPSERVER_0]<br />
hostname = 172.20.130.3<br />
port = 5003<br />
[BEAMS]<br />
beam_21 = PPS_Perf_Eval<br />
maxbeam = 21<br />
[ANTENNA]<br />
manufacturer = OpenAMIP<br />
model = OpenAMIP<br />
addr = 172.26.81.34<br />
port = 2000<br />
connect_timeout = 30<br />
dedicated_interface = ixp1<br />
[SATELLITE]<br />
min_look_angle = 0.000000<br />
tx_frequency = 1300.000000<br />
tx_bandwidth = 36.000000<br />
hunt_bandwidth = 36.000000<br />
rx_lcl_osc = 11250.000000<br />
tx_lcl_osc = 12800.000000<br />
max_skew = 90.000000<br />
name = T12<br />
channelname = T12_EMEA<br />
longitude = -15.000000<br />
max_lat = 0.000000<br />
pol_skew = 0.000000<br />
hunt_frequency = 1075.000000<br />
polarity = H<br />
tx_polarity = X<br />
noise_reference_frequency = 0.000000<br />
C-6 Appendix C: VMU settings requirements 98-133966-E2
The option file must use following information:<br />
Section in the<br />
option file<br />
[SATELLITE]<br />
Requirements<br />
The modem provides RX and TX frequency<br />
information via a data connection to the SAILOR 900<br />
VSAT.<br />
The single-cable solution makes it possible to<br />
configure the VSAT modem to use any LO frequency in<br />
the range from 9.6 GHz to 11.3 GHz. The SAILOR 900<br />
VSAT will tune to the correct Ku-Band frequency and<br />
provide the correct L-Band frequency to the VSAT<br />
modem.<br />
Example: “rx_lcl_osc = 11250.000000”<br />
SAILOR 900 has an extended 8 Watt BUC with LO up<br />
conversion frequency of 12.8 GHz.<br />
— Example: “tx_lcl_osc = 12800.000000”<br />
Note: SAILOR 900 VSAT supports any LNB frequency<br />
due to the 1-cable design.<br />
Open AMIP setup for iDirect INFINITI & Evolution<br />
CCCC<br />
VMU settings<br />
[MOBILE]<br />
The iDirect modem must be set to mobile unit and<br />
receive the GPS information from the ACU with<br />
the command “w ”.<br />
Example: “is_mobile = 1”<br />
Tx handshake must not be enabled in the iDirect<br />
modem.<br />
[ODU]<br />
Example: “tx_handshake_enabled = 0”<br />
The SAILOR 900 VSAT can work either using the<br />
Rx or Tx 10 MHz reference signals provided by the<br />
modem or using its own built-in 10 MHz reference<br />
signal. It is recommended to use the Tx 10 MHz<br />
reference signal from the modem. See also VSAT<br />
modem profile — New entry and Edit on page 6-<br />
24.<br />
Example: “odu_rx_10_mhz = 1”<br />
The SAILOR 900 VSAT needs the Tx 10 MHz<br />
reference signal in order to allow TX ON.<br />
Example: “odu_tx_10_mhz = 1”<br />
Table C-4: Information in the VSAT modem option file<br />
98-133966-E2 Appendix C: VMU settings requirements C-7
Open AMIP setup for iDirect INFINITI & Evolution<br />
C.1.3<br />
Configuration examples (OpenAMIP)<br />
Examples of modem profile and satellite configuration from the ACU<br />
web MMI are shown in the figures below.<br />
Figure C-4: VSAT modem profile, OpenAMIP (example)<br />
Figure C-5: Satellite profile, OpenAMIP (example)<br />
Simple OpenAMIP protocol in iDS 8.0.2.7 is NOT supported by the<br />
SAILOR 900 VSAT.<br />
Full OpenAMIP protocol from iDX 2.0 and up is supported by the<br />
SAILOR 900 VSAT.<br />
C-8 Appendix C: VMU settings requirements 98-133966-E2
C.2 Non-Open-AMIP setup for<br />
iDirect iNFINITI 5000 &<br />
Evolution X5<br />
C.2.1<br />
C.2.1.1<br />
Protocol and interfaces<br />
Introduction<br />
The following sections describe the protocol and interface<br />
between the ACU and an iDirect Non-OpenAMIP modem.<br />
Non-OpenAMIP operation is normally used by service<br />
providers offering regional VSAT service.<br />
Non-Open-AMIP setup for iDirect iNFINITI 5000 & Evolution X5<br />
CCCC<br />
VMU settings<br />
C.2.1.2<br />
<strong>Connections</strong><br />
Connect the ACU and iDirect modem with the following<br />
cables:<br />
• RS-232 console cable for control communication<br />
• 75 Ohm RF cables F-F connectors for rx and tx frequencies.<br />
See Connecting an iNFINITI® Series Satellite Router on<br />
page 4-9 and Connecting an Evolution® Satellite Router on<br />
page 4-10 for details on cable connections.<br />
Figure C-6: Connecting iDirect iNFINITI 5000 series to the ACU (Non-OpenAMIP)<br />
98-133966-E2 Appendix C: VMU settings requirements C-9
Non-Open-AMIP setup for iDirect iNFINITI 5000 & Evolution X5<br />
Figure C-7: Connecting iDirect Evolution X5 to the ACU (Non-OpenAMIP)<br />
The pin allocation for the RS-232 Console cable is shown below. See<br />
also Appendix B on page C-1 for a cable drawing.<br />
Figure C-8: RS-232 Console cable for iDirect Non-OpenAMIP VSAT modem<br />
C.2.2<br />
Console port settings<br />
The iDirect modem must be configured to use following console port<br />
settings:<br />
• Baud rate: 4800 or 9600<br />
• Data bits: 8<br />
• Parity: None<br />
• Stop bit: 1<br />
C.2.2.1<br />
Passwords<br />
The SAILOR 900 VSAT ACU will log in to the modem using root and<br />
user passwords. The default passwords are:<br />
• Root: P@55w0rd!<br />
• User: iDirect<br />
C-10 Appendix C: VMU settings requirements 98-133966-E2
C.2.2.2 Supported commands<br />
After login to the modem the ACU will issue commands to the<br />
modem every second. The following commands are supported<br />
by the SAILOR 900 ACU:<br />
• rx snr<br />
• options show FREQ_TRANS<br />
• rx freq<br />
• tx freq<br />
• latlong <br />
The signal strength command: rx snr is issued every 2<br />
seconds. The rest of the commands are issued one by one<br />
every 2 seconds between each signal strength command.<br />
Meaning each of the other commands is issued every 8<br />
seconds.<br />
The signal strength in the ACU display and web interface is<br />
shown as dB., e.g: 8.5 dB. The minimum value for Internet<br />
connection is around 2-3 dB.<br />
Non-Open-AMIP setup for iDirect iNFINITI 5000 & Evolution X5<br />
CCCC<br />
VMU settings<br />
C.2.2.3<br />
VSAT modem option file<br />
The option file of the VSAT modem must also include the<br />
following information:<br />
Section in<br />
option file<br />
Satellite<br />
information<br />
SAILOR 900<br />
VSAT<br />
information<br />
Description<br />
Receive frequency of the transponder. Used with “rx<br />
freq” command Transmit frequency if known otherwise<br />
just a dummy tx frequency (e.g. 1.000 MHz). Used with<br />
“tx freq” command.<br />
The modem provides RX and TX frequency information<br />
via a data connection to the SAILOR 900 VSAT.<br />
The single-cable solution makes it possible to configure<br />
the VSAT modem to use any LO frequency in the range<br />
from 9.6 GHz to 11.3 GHz. The SAILOR 900 VSAT will tune<br />
to the correct Ku-Band frequency and provide the<br />
correct L-Band frequency to the VSAT modem.<br />
The SAILOR 900 VSAT has an extended 8 Watt BUC with<br />
LO up conversion frequency of 12.8 GHz.<br />
Table C-5: Requirements for VSAT modem option file, Non-OpenAMIP<br />
98-133966-E2 Appendix C: VMU settings requirements C-11
Non-Open-AMIP setup for iDirect iNFINITI 5000 & Evolution X5<br />
Section in<br />
option file<br />
GPS<br />
Rx 10 MHz<br />
Tx 10 MHz<br />
Description<br />
The iDirect modem must be set to mobile unit and<br />
receive the GPS information from the ACU with the<br />
command “latlong ”.<br />
Tx handshake must be disabled in the iDirect modem.<br />
The SAILOR 900 VSAT can work either using the Rx<br />
or Tx 10 MHz reference signals provided by the<br />
modem or using its own built-in 10 MHz reference<br />
signal. It is recommended to use the Tx 10 MHz<br />
reference signal from the modem. See also VSAT<br />
modem profile — New entry and Edit on page 6-24.<br />
The SAILOR 900 VSAT needs the Tx 10 MHz reference<br />
signal in order to allow TX ON.<br />
Table C-5: Requirements for VSAT modem option file, Non-OpenAMIP<br />
C.2.3<br />
Configuration examples (Non-OpenAMIP)<br />
Examples of modem profile and satellite configuration from the ACU<br />
web MMI are shown in the figures below.<br />
Figure C-9: VSAT modem profile, Non-OpenAMIP (example)<br />
C-12 Appendix C: VMU settings requirements 98-133966-E2
Non-Open-AMIP setup for iDirect iNFINITI 5000 & Evolution X5<br />
CCCC<br />
VMU settings<br />
Figure C-10: Satellite profile, Non-OpenAMIP (example)<br />
98-133966-E2 Appendix C: VMU settings requirements C-13
Comtech 570L, ROSS box & ACU<br />
C.3 Comtech 570L, ROSS box & ACU<br />
C.3.1<br />
Protocols and interfaces<br />
The following sections describe how to connect an ACU, a<br />
Comtech570L VSAT modem, a ROSS box and an Ethernet switch.<br />
The SAILOR 900 VSAT software version 1.30 supports Comtech ROSS<br />
ROAM protocol 1+ which includes the satellite longitude in the<br />
responses from the ACU to the ROSS box. 1.30 also supports setting<br />
inclined orbit by entering user defined data.<br />
C.3.1.1<br />
<strong>Connections</strong><br />
Connect the ACU and Comtech 570L, ROSS box and Ethernet switch<br />
with the following cables:<br />
• Ethernet cables for TCP/IP data communication (x3)<br />
• RS-232 console cable<br />
• 75 Ohm RF cables F-F connectors for rx and tx frequencies.<br />
Figure C-11: Connecting Comtech 570L and ROSS box to the ACU (example)<br />
See also Connecting a Satlink2900 VSAT modem on page 4-11 and<br />
cable specifications at Modem Cable Comtech Serial & RSSI TT7016A<br />
on page B-2.<br />
C-14 Appendix C: VMU settings requirements 98-133966-E2
C.4 STM SatLink 2900 VSAT modem<br />
C.4.1<br />
Interfaces and VSAT modem<br />
configuration<br />
The following sections describe how to connect an ACU to an<br />
STM SatLink 2900 VSAT modem. The STM SatLink 2900 and<br />
the SAILOR 900 VSAT are fully integrated and require almost<br />
no user setup.<br />
STM SatLink 2900 software version required: 14.2.0 or higher.<br />
C.4.1.1<br />
<strong>Connections</strong><br />
Connect the ACU and STM SatLink 2900 with the following<br />
cables:<br />
• Ethernet cable for TCP/IP data communication. Connect<br />
LAN A on the VSAT modem to LAN 1 on the ACU.<br />
• 75 Ohm RF cables F-F connectors for RX and TX<br />
frequencies<br />
STM SatLink 2900 VSAT modem<br />
CCCC<br />
VMU settings<br />
Figure C-12: Connecting SatLink 2900 VSAT modem to the ACU<br />
See also Connecting a Satlink2900 VSAT modem on page 4-11.<br />
C.4.1.2<br />
Modem configuration requirements<br />
Type the following command in a modem console to set up<br />
the STM Satlink 2900 modem to use the SAILOR 900 VSAT:<br />
odu antenna 30<br />
98-133966-E2 Appendix C: VMU settings requirements C-15
STM SatLink 2900 VSAT modem<br />
To display the antenna setup for the STM Satlink 2900 modem, type:<br />
odu antctrl show<br />
Example:<br />
odu antctrl show<br />
Antenna Controller Configuration<br />
--------------------------------<br />
Type<br />
: Thrane & Thrane<br />
SAILOR 900<br />
Enabled<br />
: All<br />
IP address : 10.110.2.226<br />
Polling frequency : 5 sec<br />
Antenna Stability Tries : 300<br />
Antenna Controller Status<br />
--------------------------------<br />
Controller detected : no<br />
Packets sent : 0<br />
Packets received : 0<br />
C.4.2<br />
ACU configuration<br />
To set up the ACU to work with an STM Satlink 2900 VSAT modem,<br />
do as follows:<br />
1. Add a modem profile with the STM Satlink 2900 modem. See<br />
VSAT modem profile — New entry and Edit on page 6-24.<br />
2. Add a satellite profile using the STM Satlink modem profile just<br />
created. See Satellite profiles — New entry and Edit on page 6-21.<br />
3. Edit the network settings and input the IP information supplied<br />
with the modem. See Configuring the LAN network on page 6-29.<br />
4. Activate the satellite profile.<br />
C-16 Appendix C: VMU settings requirements 98-133966-E2
C.5 Gilat SkyEdge II VSAT modem<br />
C.5.1<br />
Interfaces and VSAT modem<br />
configuration<br />
The following sections describe how to connect an ACU to a<br />
Gilat SkyEdgeII VSAT modem. The Gilat SkyEdge II and the<br />
SAILOR 900 VSAT are fully integrated and require only little<br />
user setup.<br />
Gilat SkyEdge II VSAT modem<br />
CCCC<br />
C.5.1.1<br />
<strong>Connections</strong><br />
Connect the ACU and Gilat SkyEdge II with the following<br />
cables:<br />
• Ethernet cable for TCP/IP data communication. Connect<br />
LAN A on the VSAT modem to LAN 1 on the ACU.<br />
• 75 Ohm RF cables F-F connectors for RX and TX<br />
frequencies<br />
VMU settings<br />
Figure C-13: Connecting Gilat SkyEdge II VSAT modem to the ACU<br />
See also Connecting a Gilat SkyEdge II VSAT modem on<br />
page 4-12.<br />
C.5.1.2<br />
Modem configuration requirements<br />
1. Connect a PC with an Ethernet cable to LAN port 1 of the<br />
VSAT modem.<br />
2. Set the PC to static IP address: 192.168.1.2<br />
3. Start an Internet browser (e.g. Internet Explorer) and go to<br />
URL://192.168.1.1 in order to get access to the web server of<br />
the VSAT modem.<br />
98-133966-E2 Appendix C: VMU settings requirements C-17
Gilat SkyEdge II VSAT modem<br />
Parameter<br />
4. Login with: User name: inst and Password: $Sat2598$<br />
5. Go to the menu Installer.<br />
Settings<br />
RF Downlink frequency<br />
LNB LO<br />
BUC LO<br />
BUC 10MHz<br />
Reference Signal<br />
In the section General the RF Downlink frequency is<br />
shown. Write it down as it is going to be used for the<br />
selection of LNB LO.<br />
Further down on the page you find the BUC and LNB LO<br />
frequencies.<br />
Depending on the RF Downlink frequency select an<br />
appropriate LNB LO of 9.75, 10.25, 10.75 or 11.25 GHz<br />
which will result in an L-band frequency between 950<br />
and 1650 MHz which is the operating frequency band of<br />
the Sky Edge II Access modem.<br />
Select the BUC to be 12.8 GHz as this is the BUC LO of the<br />
SAILOR 900 VSAT. Remember to inform the hub operator<br />
about this when doing line up and commissioning.<br />
The BUC 10MHz Reference Signal must be configured to<br />
ON, otherwise the SAILOR 900 VSAT will never allow TX.<br />
Scroll further down to enable GPS for the Location<br />
Coordinates. This enables the serial protocol of the<br />
modem so it can communicate with the ACU.<br />
Table C-6: Configuration of Gilat SkyEdge II VSAT modem<br />
6. Go to the top of the page and press the Submit button and OK to<br />
save the new settings.<br />
The VSAT modem is now configured to be used with the SAILOR 900<br />
VSAT.<br />
C.5.2<br />
ACU configuration<br />
To set-up the ACU to work with a Gilat SkyEdge II VSAT modem, do<br />
as follows:<br />
1. Add a modem profile with the Gilat SkyEdge II modem. See VSAT<br />
modem profile — New entry and Edit on page 6-24.<br />
2. Add a satellite profile using the Gilat SkyEdge II modem profile<br />
just created. See Satellite profiles — New entry and Edit on<br />
page 6-21.<br />
3. Edit the network settings and input the IP information supplied<br />
with the modem. See Configuring the LAN network on page 6-29.<br />
4. Activate the satellite profile.<br />
C-18 Appendix C: VMU settings requirements 98-133966-E2
Command line interface<br />
D<br />
D.1 Introduction<br />
Appendix DDDDD<br />
After you have done the initial configuration and connected<br />
the SAILOR 900 VSAT to your network, you can configure the<br />
SAILOR 900 VSAT by using Telnet. You can also setup VSAT<br />
modem parameters.<br />
H:\>telnet 192.168.0.1<br />
acu login: admin<br />
Password:<br />
UCLI:/$ config current_list<br />
UCLI:/$ config activate<br />
Connect to SAILOR 900<br />
1<br />
Read or change settings<br />
2 3<br />
using IP address<br />
Figure D-1: How to use the command line interface (example for telnet)<br />
After successful login you can read and change settings. Use<br />
the command config activate to activate the new<br />
settings in the ACU.<br />
You will need to refresh the browser window before the<br />
changed settings become visible.<br />
Write new settings to<br />
SAILOR 900<br />
Command line interface<br />
Note<br />
Every change is performed on the active satellite profile<br />
or the active VSAT modem profile.<br />
Parameter identifiers are case sensitive.<br />
98-133966-E2 D-1
Introduction<br />
D.1.1<br />
Telnet connection<br />
You can access the command line interface via Telnet.<br />
D.1.1.1<br />
User name and password<br />
Access to the SAILOR 900 VSAT system is protected by a user name<br />
and password. This is the same user name and password that is<br />
used in the web interface under ADMINISTRATION, for further<br />
details see Accessing the administration settings (user name,<br />
password) on page 6-43.<br />
D.1.1.2<br />
Telnet<br />
The interface is on the standard Telnet port 23. Use any LAN port<br />
and corresponding IP address of the ACU.<br />
To start telnet session do as follows:<br />
1. Open a Telnet client of your choice.<br />
2. At the prompt, enter the IP address of the ACU, user name<br />
(admin) and password (1234).<br />
Figure D-2: Command line interface, login<br />
D.1.2<br />
Help<br />
If you enter help directly at the prompt UCLI:/$ all available<br />
commands are listed. Additionally any command will take help as<br />
first argument and display detailed information of the specific<br />
command.<br />
D-2 Appendix D: Command line interface 98-133966-E2
D.1.3<br />
Conventions<br />
The command description below uses the following special<br />
typography:<br />
Convention<br />
Courier font<br />
Bold Courier font<br />
<br />
[argument]<br />
Example:<br />
Description<br />
Information that is displayed on the screen.<br />
Text the user must enter.<br />
Required argument<br />
Optional argument<br />
Table D-1: Command typography<br />
satellite lon [longitude]<br />
zone active <br />
Introduction<br />
DDDD<br />
Command line interface<br />
98-133966-E2 Appendix D: Command line interface D-3
Supported commands<br />
D.2 Supported commands<br />
The following commands are described in detail. They are listed in<br />
alphabetical order.<br />
• config<br />
• demo<br />
• dual_antenna<br />
• exit<br />
• help<br />
• modem<br />
• satellite<br />
• status<br />
• system<br />
• track<br />
• zone<br />
D.2.1<br />
config<br />
Command<br />
config<br />
config pending_list<br />
Description<br />
Shows the sub commands available, including a short<br />
description.<br />
Shows the number of pending changes.<br />
config current_list<br />
config activate<br />
Shows the values for the current satellite profile,<br />
antenna and some tracking information.<br />
Use this command to save and activate the pending<br />
changes in the SAILOR 900 VSAT.<br />
Table D-2: UCLI command: config<br />
D.2.2<br />
demo<br />
Command<br />
demo start<br />
Description<br />
Starts a demo pattern where the antenna<br />
will turn azimuth, elevation and cross<br />
elevation until it receives the command<br />
demo stop.<br />
Table D-3: UCLI command: demo<br />
D-4 Appendix D: Command line interface 98-133966-E2
Supported commands<br />
Command<br />
Description<br />
demo stop<br />
Stops the antenna demo pattern.<br />
demo reset Resets the antenna to angle 0.<br />
Table D-3: UCLI command: demo<br />
D.2.3 dual_antenna<br />
Command<br />
Description<br />
dual_antenna mode<br />
Shows the current dual antenna mode<br />
• single<br />
• master<br />
DDDD<br />
• slave<br />
dual_antenna status • Shows the current dual-antenna mode<br />
status<br />
• active<br />
• inactive<br />
Command line interface<br />
Table D-4: UCLI command: dual_antenna<br />
D.2.4<br />
exit<br />
Command<br />
exit<br />
Description<br />
Exits the connection to the SAILOR 900 VSAT.<br />
Table D-5: UCLI command: exit<br />
D.2.5<br />
help<br />
Command<br />
help<br />
help satellite<br />
help modem<br />
Description<br />
Shows a list of commands available, including a short<br />
description.<br />
Shows the sub commands and description for the command<br />
satellite.<br />
Shows the sub commands and a short description for the<br />
command modem.<br />
Table D-6: UCLI command: help<br />
98-133966-E2 Appendix D: Command line interface D-5
Supported commands<br />
Command<br />
help track<br />
help status<br />
help system<br />
help config<br />
help zone<br />
Description<br />
Shows the sub commands and description for the command<br />
track.<br />
Shows the sub commands and description for the command<br />
status.<br />
Shows the sub commands and a short description for the<br />
command system.<br />
Shows the sub commands, unit and description for the<br />
command config.<br />
Shows the sub commands, unit and description for the<br />
command zone.<br />
Table D-6: UCLI command: help (Continued)<br />
D.2.6<br />
modem<br />
Command<br />
modem<br />
modem name<br />
modem model<br />
Description<br />
Shows a list of sub commands available, including a short<br />
description.<br />
Shows the VSAT modem name of the currently active satellite profile<br />
(entered in the web interface).<br />
Shows the currently active VSAT modem model (selected in the web<br />
interface).<br />
Table D-7: UCLI command: modem<br />
D.2.7<br />
satellite<br />
Command<br />
satellite name<br />
satellite lon<br />
satellite lon 1W<br />
Description<br />
Shows the name of the currently active satellite<br />
profile.<br />
Shows or sets the longitude position of the<br />
satellite, in degrees.<br />
• 1.0W or 1.0E or -1.0 for west and 1.0 for east<br />
Table D-8: UCLI command: satellite<br />
D-6 Appendix D: Command line interface 98-133966-E2
Command<br />
satellite skew<br />
satellite skew 3.7<br />
satellite max_inc<br />
satellite max_inc 2.5<br />
satellite rx_pol<br />
satellite rx_pol v<br />
satellite tx_pol<br />
satellite tx_pol v<br />
Description<br />
Shows or sets an additional skew offset of the<br />
satellite. Some satellite has additional skew<br />
because they have been placed different in the<br />
orbit. E.g. Optus satellites in Australia are offset -<br />
45 degrees. Most satellites have 0 degree skew<br />
offset.<br />
• Skew of the satellite: –90° to +90°.<br />
Shows or sets the maximum inclination of the used<br />
satellite. Some satellites are old and are therefore<br />
moving in larger circles in space. Setting the<br />
maximum inclination will add this to the SAILOR<br />
900 VSAT acquisition window size used to find the<br />
satellite.<br />
• Maximum inclination of satellite 0.0° to 90°<br />
Shows or sets the current RX polarisation:<br />
• v (vertical)<br />
• h (horizontal)<br />
Shows or sets the current RX polarisation:<br />
• v (vertical)<br />
• h (horizontal)<br />
Supported commands<br />
DDDD<br />
Command line interface<br />
satellite ele_cut_off<br />
satellite ele_cut_off 5<br />
satellite rx_lo<br />
Shows or sets the elevation referenced to earth<br />
where the SAILOR 900 VSAT must shut off for<br />
transmission. This is an FCC requirement. The<br />
elevation cut off depends on how much power is<br />
transmitted and which coding is used.<br />
• Valid range: 0° to 90°<br />
For further information see Elevation cutoff (in<br />
degrees) versus VSAT modem bandwidth and power<br />
on page 6-23.<br />
Shows the Rx LO / LNB LO. Range: 9.6 GHz to<br />
11.3 GHz.<br />
Table D-8: UCLI command: satellite (Continued)<br />
98-133966-E2 Appendix D: Command line interface D-7
Supported commands<br />
Command<br />
satellite rx_rf_freq<br />
satellite rx_rf_freq<br />
12.123456 9.75<br />
satellite rx_if_freq<br />
satellite rx_if_freq<br />
1200.123 9.75<br />
Description<br />
Shows or sets the Ku-band rx frequency and LNB<br />
Lo frequency.<br />
• RF frequency: 10.7 — 12.75 GHz.<br />
• LNB Lo frequency: 9.6 GHz — 11.3 GHz.<br />
The SAILOR 900 VSAT supports any LNB Lo!<br />
Note: Setting the Ku-band rx frequency and LNB Lo<br />
automatically configures the L-band rx frequency:<br />
Rx L-band freq = rx_rf_freq – LNB Lo<br />
Example: 1567.890 MHz = 11.567890 GHz – 10<br />
GHz<br />
Shows or sets the IF rx frequency together with the<br />
LNB Lo frequency.<br />
• IF frequency within 950 MHz – 2150 MHz.<br />
• LNB Lo frequency within 9.6 GHz – 11.3 GHz.<br />
The SAILOR 900 VSAT supports any LNB Lo!<br />
Note: Setting the L-band rx frequency and LNB Lo<br />
automatically configures the Ku-band rx frequency:<br />
Rx Ku-band frequency = LNB Lo + rx_if_frequency<br />
Example: 11.567890 GHz = 10 GHz +<br />
1567.890000 MHz<br />
satellite tx_lo Shows the current TX LO frequency, fixed at 12.8<br />
GHz.<br />
satellite tx_rf_freq<br />
satellite tx_rf_freq<br />
14.123456<br />
Shows or sets the Set the RF frequency used for tx.<br />
• Valid range: 13.75 GHz to 14.5 GHz.<br />
Note: Configuring the Ku-band tx frequency<br />
automatically configures the L-band frequency:<br />
L-band frequency = Ku-band tx frequency – 12.8<br />
GHz (BUC Lo)<br />
Example: 1308.300000 MHz = 14.108300 GHz –<br />
12.8 GHz<br />
Table D-8: UCLI command: satellite (Continued)<br />
D-8 Appendix D: Command line interface 98-133966-E2
Command<br />
satellite tx_if_freq<br />
satellite tx_if_freq<br />
1200.123<br />
D.2.8<br />
Command<br />
status<br />
status<br />
status system<br />
status track_all<br />
status event_list<br />
Description<br />
Shows or sets the Set the IF frequency for tx.<br />
• Valid range: 950 MHz to 1700 MHz.<br />
Note: Configuring the L-band tx frequency<br />
automatically configures the Ku-band frequency:<br />
Ku-band frequency = 12.8 GHz (BUC Lo) + L-band<br />
frequency<br />
Example: 14.108300 GHz = 12.8 GHz +<br />
1308.300000 MHz<br />
Table D-8: UCLI command: satellite (Continued)<br />
Description<br />
Shows the sub commands available, including a short<br />
description.<br />
Shows the current status of the SAILOR 900 VSAT. For<br />
further information on status values see Information<br />
fields on the Dashboard on page 6-19.<br />
Shows the current values for all tracking parameters:<br />
• vessel heading<br />
• azimuth relative<br />
• elevation relative<br />
• polarisation skew<br />
• GPS latitude and longitude<br />
Shows a list of active events. For further information on<br />
events see System messages on page G-1.<br />
Table D-9: UCLI command: status<br />
Supported commands<br />
DDDD<br />
Command line interface<br />
D.2.9<br />
system<br />
Command<br />
system<br />
Description<br />
Shows the sub commands available, including a short<br />
description.<br />
Table D-10: UCLI command: system<br />
98-133966-E2 Appendix D: Command line interface D-9
Supported commands<br />
Command<br />
system restart<br />
system info<br />
Description<br />
Sends a command to the ACU to restart the system<br />
instantaneously. It makes a power-on self test and then<br />
points to the last used satellite.<br />
Shows the software version, part names and serial<br />
numbers of the SAILOR 900 VSAT.<br />
Table D-10: UCLI command: system<br />
D.2.10 track<br />
Command<br />
track<br />
track mode<br />
track mode dvb<br />
track dvb_sym<br />
track dvb_sym 22<br />
track dvb_nid<br />
track dvb_nid 0<br />
Description<br />
Shows the sub commands available, including a short<br />
description.<br />
Shows or sets the receiver bandwidth or mode, the way<br />
the SAILOR 900 VSAT tracks the satellite:<br />
• narrow (recommended, uses the built-in 300 kHz<br />
filter of the SAILOR 900 VSAT)<br />
• rssi (uses the RSSI signal from the VSAT modem)<br />
• wide (uses the wide-band filter to track the satellite)<br />
• dvb (uses the built-in DVB-S2 receiver of the SAILOR<br />
900 VSAT to track the satellite. You must configure<br />
dvb_sym and dvb_nid.)<br />
Shows or sets the current mega symbols rate for the<br />
DVB-S2 receiver when in dvb mode. The symbol rate<br />
used to verify and track a transponder.<br />
• Valid range: 0.1 — 99<br />
Shows or sets the DVB NID to be verified by the built-in<br />
DVB-S2 tracking receiver, when using tracking mode<br />
DVB. It configures the NID used to verify and track a<br />
transponder.<br />
• Valid range: 0 — 65535<br />
A NID of ‘0’ disables the NID check. Then the NID<br />
will be omitted in the verification of the transponder.<br />
Table D-11: UCLI command: track<br />
D-10 Appendix D: Command line interface 98-133966-E2
Command<br />
track rx_rf_freq<br />
Command<br />
zone<br />
zone azimuth <br />
Description<br />
zone elevation <br />
The frequency for the receiver to tune to. Verify that the<br />
frequency is in the same range as the modem<br />
rx_rf_frequency, above or below 11.7 GHz. I.f rx_rf_freq is<br />
set to 0, the tracking frequency is the same as the RX<br />
frequency provided by the modem<br />
• Valid range: 10.7 GHz to 12.75 GHz.<br />
Table D-11: UCLI command: track<br />
D.2.11 zone<br />
Description<br />
Shows the sub commands, unit and<br />
description for the command zone.<br />
Sets the azimuth angles of the blocking<br />
zone for one zone.<br />
• Valid zones: 0 to 7<br />
• Valid angles: 0 to 360<br />
Sets the elevation angles for a blocking<br />
zone.<br />
• Valid zones: 0 to 7<br />
• Valid angles: 0 to 360<br />
zone tx_off Enables or disables TX inside the blocking<br />
zone.<br />
zone active Enables or disables the blocking zone.<br />
Supported commands<br />
DDDD<br />
Command line interface<br />
zone <br />
Shows the setting for the blocking zone.<br />
Table D-12: UCLI command: zone<br />
98-133966-E2 Chapter D: Command line interface D-11
Supported commands<br />
D-12 Chapter D: Command line interface 98-133966-E2
DVB-S satellites<br />
E<br />
This appendix contains examples of DVB-S satellite data for<br />
azimuth calibration of the SAILOR 900 VSAT.<br />
VSAT coverage<br />
Satellite<br />
name<br />
Satellite<br />
position<br />
RX<br />
polarisation<br />
RX<br />
frequency<br />
Symbol<br />
rate<br />
Appendix EEEEE<br />
NID<br />
Americas<br />
SatMex6<br />
113°W<br />
Transponder<br />
Horizontal<br />
12.080 GHz<br />
25.635 MS/s<br />
0<br />
Backup<br />
—<br />
—<br />
—<br />
—<br />
USA<br />
Echostar9<br />
121°W<br />
Transponder<br />
Horizontal<br />
11.943 GHz<br />
20.000 MS/s<br />
4106<br />
Backup<br />
Vertical<br />
12.016 GHz<br />
20.000 MS/s<br />
4106<br />
South East Asia<br />
NSS6<br />
Transponder<br />
Backup<br />
95°E<br />
Horizontal<br />
Horizontal<br />
11.676 GHz<br />
12.729 GHz<br />
27.500 MS/s<br />
26.400 MS/s<br />
65535<br />
100<br />
DVB-S satellites<br />
Europe<br />
Thor 5 T2<br />
0.8°W<br />
Transponder<br />
Horizontal<br />
11.785 GHz<br />
30.000 MS/s<br />
70<br />
Backup<br />
Vertical<br />
12.418 GHz<br />
28.000 MS/s<br />
70<br />
Europe<br />
Telstar 11N<br />
37,5°W<br />
Transponder<br />
Horizontal 11.658 GHz 5.9 MS/s 0<br />
Europe<br />
Astra2<br />
28.2°E<br />
Transponder<br />
Horizontal<br />
11.623 GHz<br />
27.500 MS/s<br />
32<br />
Backup<br />
Horizontal<br />
12.032 GHz<br />
27.500 MS/s<br />
2<br />
Table E-1: Examples of DVB-S satellites for azimuth calibration<br />
98-133966-E2 E-1
VSAT coverage<br />
Satellite<br />
name<br />
Satellite<br />
position<br />
RX<br />
polarisation<br />
RX<br />
frequency<br />
Symbol<br />
rate<br />
NID<br />
China<br />
Apstar6<br />
134°E<br />
Transponder<br />
Horizontal<br />
12.435 GHz<br />
27.500 MS/s<br />
65<br />
Backup<br />
Vertical<br />
12.675 GHz<br />
27.500 MS/s<br />
65<br />
Australia<br />
Optus D1<br />
160°E<br />
Transponder<br />
-45°skew<br />
Horizontal<br />
12.391 GHz<br />
12.600 MS/s<br />
0<br />
Backup<br />
Horizontal<br />
12.407 GHz<br />
12.600 MS/s<br />
0<br />
Singapore Thaicom 5 78.5°E Horizontal<br />
12.272 GHz<br />
30.000 MS/s<br />
88<br />
Vertical<br />
12.313 GHz<br />
30.000 MS/s<br />
1<br />
Singapore<br />
Apstar 2R<br />
(Telstar 10) /<br />
Apstar 7<br />
76.5°E Vertical 11.167 GHz 45.000 MS/s 0<br />
Table E-1: Examples of DVB-S satellites for azimuth calibration (Continued)<br />
For satellite data of other regions or transponders see<br />
www.lyngsat.com.<br />
Example:<br />
Figure E-1: Satellite data, example from www.lyngsat.com<br />
The above transponder has following parameters:<br />
• Frequency: 11.038 GHz<br />
• Polarisation: V-Vertical<br />
• Symbol Rate: 22.000 MS/s<br />
• NID: 1<br />
• Coverage: Europe.<br />
E-2 Appendix E: DVB-S satellites 98-133966-E2
Grounding and RF<br />
protection<br />
F<br />
F.1 Why is grounding required?<br />
Appendix FFFFF<br />
F.1.1<br />
Reasons for grounding<br />
Grounding the SAILOR 900 VSAT system is required for at<br />
least two reasons:<br />
• Safety: Lightning protection of persons and equipment.<br />
• Protection: ESD (ElectroStatic Discharge) protection of<br />
equipment.<br />
F.1.2<br />
Safety<br />
First of all grounding of the system is required for safety<br />
reasons. In the event of a lightning strike at the ADU a proper<br />
grounding of the system will provide a low resistance path to<br />
divert the strike discharge to seawater.<br />
F.1.3<br />
ESD Protection<br />
The ESD protection circuits in the ACU rely on proper<br />
grounding of the system in order to work properly. Otherwise<br />
sensitive circuits within the ACU might be damaged due to<br />
ESD when you are handling the equipment.<br />
Grounding and RF<br />
98-133966-E2 F-1
Grounding Recommendations<br />
F.2 Grounding Recommendations<br />
F.2.1<br />
Grounding the ACU<br />
The ACU should be grounded to the ship/hull. For this purpose you<br />
may use a short ADU cable and a grounding kit. Further, the ACU<br />
must be grounded at its grounding stud in order to ensure proper<br />
grounding if the short ADU cable is disconnected. For further<br />
information, see Grounding the terminal on page 2-33.<br />
If you use the Extended cable support, make the ground<br />
connections through the cable support. You may need to extend the<br />
ground plane using copper foil, see the following section.<br />
F.2.1.1<br />
Extending the ground plane<br />
In some cases it may not be possible to access the hull and at the<br />
same time place the ACU in a suitable place. A way to insure good<br />
grounding and at the same time make it possible to ground the coax<br />
cable - is to extend the ship ground plane by means of copper foil.<br />
The maximum length of the foil is determined by the width of the<br />
foil:<br />
Copper foil 5 cm wide: Max 50 cm<br />
Copper foil 10 cm wide: Max 100 cm<br />
Copper foil 20 cm wide: Max 200 cm<br />
Note<br />
The foil must be at least 0.1 mm thick.<br />
Connect the foil to the hull by plenty of screws or hard–soldering.<br />
Run the foil past the place where the short ADU cable is to be<br />
F-2 Appendix F: Grounding and RF protection 98-133966-E2
grounded and mount a grounding kit on top of the foil. For<br />
details on the jumper cable see Jumper cable for grounding<br />
on page F-14.<br />
Jumper cable<br />
F.2.2<br />
Cable to ADU<br />
Figure F-1: Extending the ground plane<br />
Grounding the ADU<br />
You can ground the ADU to the ship/hull via one or more of its<br />
mounting bolts. Make sure to remove painting, dirt, grease<br />
etc. at the mounting holes in order to make good electrical<br />
contact to the hull. Use serrated washers when securing the<br />
mounting bolts and seal the joint with protective coating to<br />
avoid corrosion.<br />
Grounding Recommendations<br />
FFFF<br />
Grounding and RF<br />
Antenna bottom<br />
Serrated washer<br />
(stainless steel)<br />
M12 bolt<br />
(stainless steel)<br />
Mounting base<br />
Figure F-2: Grounding the ADU<br />
Note<br />
For optimum grounding use the mounting bolt located closest to the ADU<br />
cable plate, see Figure 3-22: ADU, bolt for optimum grounding on page 3-22.<br />
98-133966-E2 Appendix F: Grounding and RF protection F-3
Grounding Recommendations<br />
It is always recommended to establish the shortest possible<br />
grounding path e.g. on steel hulls the ADU should be grounded<br />
directly to the hull 2 . However, due to the fact that this is not<br />
possible on e.g. fibreglass hulls (nor is it preferable on aluminium<br />
hulls) a number of alternative grounding methods are suggested in<br />
the following paragraphs.<br />
2. Please note that the ADU ground connection is made at the same electrical<br />
ground potential as the ACU.<br />
F-4 Appendix F: Grounding and RF protection 98-133966-E2
F.3 Alternative grounding for steel<br />
hulls<br />
The following guidelines assume a two-wire, isolated<br />
grounding arrangement; that is no part of the circuit, in<br />
particular the battery negative, is connected to any ground<br />
potential or equipment.<br />
F.3.1<br />
Grounding the ACU<br />
The ACU should preferably be grounded to the ship with the<br />
short cable. Further, the ACU must be grounded at its<br />
grounding stud in order to ensure a proper grounding if the<br />
short ADU cable is disconnected.<br />
The ground connection can be established either at the hull<br />
(recommended) or at a dedicated RF ground if available<br />
(alternative).<br />
Importan However, bear in mind that the ADU ground<br />
connection is to be made at the same electrical<br />
ground potential as the ACU (see Grounding the<br />
ADU).<br />
The ACU provides galvanic isolation (as required) from its<br />
input power terminals to the chassis/grounding stud. This<br />
way the isolated grounding arrangement is maintained.<br />
F.3.2<br />
Note<br />
Grounding the ADU<br />
Alternative grounding for steel hulls<br />
For optimum grounding use the mounting bolt located closest to the ADU<br />
cable plate, see Figure 3-22: ADU, bolt for optimum grounding on page 3-22.<br />
FFFF<br />
Grounding and RF<br />
F.3.2.1<br />
Terminal grounded at the hull (recommended)<br />
In this case the ADU is grounded to the ship via one (or more)<br />
of its mounting bolts. Make sure to remove painting, dirt,<br />
grease etc. at the mounting holes in order to make good<br />
electrical contact to the hull. Use serrated washers when<br />
securing the mounting bolts and seal the joint with protective<br />
coating to avoid corrosion.<br />
98-133966-E2 Appendix F: Grounding and RF protection F-5
Alternative grounding for steel hulls<br />
F.3.2.2<br />
Terminal grounded at a dedicated RF ground<br />
(alternative)<br />
In this case the ADU is grounded with a separate ground cable. The<br />
ground cable must be routed parallel and close to the shielded coax<br />
cable connecting the ADU to the ACU grounding kit. A heavy gauge<br />
wire with tinned strands (min. 6 mm 2 ) can be used for this purpose.<br />
Note<br />
The ADU must be electrically isolated at its mounting bolts by<br />
means of shoulder bushings and washers ensuring the<br />
isolated RF ground - see Isolation of the ADU from the<br />
mounting base on page F-12.<br />
<br />
<br />
<br />
<br />
<br />
<br />
<br />
<br />
<br />
<br />
<br />
<br />
<br />
<br />
<br />
<br />
<br />
<br />
<br />
<br />
Figure F-3: Grounding at a dedicated RF ground (alternative)<br />
F-6 Appendix F: Grounding and RF protection 98-133966-E2
F.4 Alternative grounding for<br />
aluminum hulls<br />
The following guidelines assume a two-wire, isolated<br />
grounding arrangement; that is no part of the circuit, in<br />
particular the battery negative, is connected to any ground<br />
potential or equipment.<br />
F.4.1<br />
Grounding the ACU<br />
The ACU should preferably be grounded with the short cable.<br />
Further, the ACU must be grounded at its grounding stud to<br />
ensure a proper grounding if the short ADU cable is<br />
disconnected.<br />
The ground connection must be established at a dedicated RF<br />
ground (either capacitively or electrically coupled).<br />
Important Remember to make the ADU ground connection at the<br />
same electrical ground potential as the ACU (see<br />
Grounding the ADU).<br />
The ACU provides galvanic isolation (as required) from its<br />
input power terminals to the chassis/grounding stud. This<br />
way the isolated grounding arrangement is maintained.<br />
Alternative grounding for aluminum hulls<br />
FFFF<br />
F.4.2<br />
Grounding the ADU<br />
If the mounting base of the ADU is electrically connected to<br />
the hull (or any other ground potential than the ACU), the<br />
ADU must be isolated at its mounting bolts by means of<br />
shoulder bushings and washers, see F.6.3. This is done in<br />
order to prevent DC currents flowing in the hull thus causing<br />
electrolytic corrosion.<br />
However, a ground connection must be established via one of<br />
the mounting bolts using a separate ground cable. The<br />
ground cable must be routed parallel and in close proximity<br />
to the shielded coax cable hence connecting the ADU to the<br />
ACU Grounding kit. A heavy gauge wire with tinned strands<br />
(min. 6 mm 2 ) can be used for this purpose.<br />
Grounding and RF<br />
98-133966-E2 Appendix F: Grounding and RF protection F-7
Alternative grounding for aluminum hulls<br />
<br />
<br />
<br />
<br />
<br />
<br />
<br />
<br />
<br />
Figure F-4: Alternative grounding for aluminium hulls<br />
F-8 Appendix F: Grounding and RF protection 98-133966-E2
F.5 Alternative grounding for fibre<br />
glass hulls<br />
F.5.1<br />
Grounding the ACU<br />
The ACU should preferably be grounded with the short ADU<br />
cable and a grounding kit (available from Thrane & Thrane).<br />
Further, the ACU must be grounded at its grounding stud in<br />
order to ensure a proper grounding if the short ADU cable is<br />
disconnected.<br />
The ground connection must be established at a dedicated RF<br />
ground (either capacitive or electrical coupled).<br />
Importan Bear in mind that the ADU ground connection is to<br />
be made at the same electrical ground potential as<br />
the ACU (see Grounding the ADU).<br />
Alternative grounding for fibre glass hulls<br />
FFFF<br />
Grounding and RF<br />
98-133966-E2 Appendix F: Grounding and RF protection F-9
Alternative grounding for fibre glass hulls<br />
F.5.2<br />
Grounding the ADU<br />
If the mounting base of the ADU is electrically connected to any<br />
other ground potential than the ACU (e.g. Lightning Ground), the<br />
ADU must be isolated at its mounting bolts by means of shoulder<br />
bushings and washers - see section F.6.3.<br />
However, a ground connection must be established via one of the<br />
mounting bolts using a separate ground cable. The ground cable<br />
must be routed parallel and in close proximity to the shielded coax<br />
cable hence connecting the ADU to the ACU Grounding kit. A heavy<br />
gauge wire with tinned strands (min. 6 mm 2 ) can be used for this<br />
purpose.<br />
<br />
<br />
<br />
<br />
<br />
<br />
<br />
Figure F-5: Alternative grounding for fibreglass hulls<br />
F-10 Appendix F: Grounding and RF protection 98-133966-E2
F.6 Separate ground cable<br />
F.6.1<br />
Ground cable - construction<br />
When dealing with electrical installations in a marine environment,<br />
all wiring must be done with double insulated, tinned strands, high<br />
quality and if exposed also UV resistant cables. This shall also apply<br />
to the separate ground cable mentioned in the previous<br />
paragraphs.<br />
The ground cable is constructed using an appropriate cable with a<br />
cross section area of at least 6 mm 2 (AWG10) and terminated with<br />
insulated ring crimp terminals – see illustration below. The crimp<br />
terminals must be a marine approved type e.g. the DuraSeal series<br />
from Raychem.<br />
<br />
<br />
<br />
Separate ground cable<br />
FFFF<br />
Grounding and RF<br />
<br />
<br />
<br />
<br />
Figure F-6: Separate ground cable<br />
98-133966-E2 Chapter F: Grounding and RF protection F-11
Separate ground cable<br />
F.6.2<br />
Ground cable - connection<br />
Mount the ground cable close to and parallel to the shielded coax<br />
cable thus minimizing ground loop problems. If possible, route the<br />
coax cable and the ground cable in metal conduits bonded to the<br />
hull or within a mast (depending on the actual installation).<br />
The ground cable must be connected at one of the<br />
mounting/grounding bolts on the ADU. Use bolts and washers of<br />
stainless steel and seal the joint with protective coating to avoid<br />
corrosion. If the ADU is to be isolated from the mounting base,<br />
shoulder bushings and washers must be used — see figure F-7,<br />
Isolation of the ADU from the mounting base on page F-12.<br />
At the other end, connect the ground cable as described in<br />
Grounding the ACU on page F-2.<br />
F.6.3<br />
Isolation of the ADU from the mounting base<br />
In cases where the ADU is to be isolated from the mounting base,<br />
shoulder bushings and washers (accessories) must be used as<br />
illustrated below. Please note that the isolation has to be<br />
implemented on all four mounting bolts (including the bolt securing<br />
the ground cable).<br />
Isolating washer<br />
Isolating shoulder bush<br />
Plain washer<br />
(stainless steel)<br />
Spring washer<br />
(stainless steel)<br />
Figure F-7: Isolation of the ADU from the mounting base<br />
The ground cable must be connected at one of the<br />
mounting/grounding bolts on the ADU as illustrated below.<br />
F-12 Chapter F: Grounding and RF protection 98-133966-E2
Remember to seal the joint with protective coating to avoid<br />
corrosion.<br />
Ground cable<br />
Figure F-8: ADU isolation and grounding cable<br />
Isolating shoulder bush<br />
Plain washer (stainless steel)<br />
Ground cable<br />
Serrated washer (stainless steel)<br />
Plain washer (stainless steel)<br />
Spring washer (stainless steel)<br />
Separate ground cable<br />
FFFF<br />
Grounding and RF<br />
98-133966-E2 Chapter F: Grounding and RF protection F-13
Jumper cable for grounding<br />
F.7 Jumper cable for grounding<br />
Figure F-9: Jumper cable for grounding (specifications)<br />
F-14 Chapter F: Grounding and RF protection 98-133966-E2
F.8 RF interference<br />
Interference induced from nearby high-power RF transmitters might<br />
cause system failures and in extreme cases permanent damage to<br />
the SAILOR 900 VSAT equipment. If there are problems with<br />
interference from HF transmitters, it is advisable to mount ferrite<br />
clamps on the coax cable in order to provide suppression of induced<br />
RF. The ferrites will have no effect on the differential-mode signals<br />
but increases the impedance in relation to common-mode RFI.<br />
F.8.1<br />
Recommendations<br />
Use 1-5 pcs. hinged clamp cores (e.g. the RFC or SFC series from<br />
Kitagawa) mounted on the ADU cable near the ADU.<br />
RF interference<br />
FFFF<br />
Grounding and RF<br />
98-133966-E2 Chapter F: Grounding and RF protection F-15
RF interference<br />
F-16 Chapter F: Grounding and RF protection 98-133966-E2
System messages<br />
G<br />
G.1 Event messages — overview<br />
Appendix GGGGG<br />
The SAILOR 900 VSAT detects events during<br />
• POST (Power On Self Test) — a self test performed at every<br />
power-up.<br />
• PAST (Person Activated Self test) — started in the web<br />
interface<br />
• CM (Continuous Monitoring) — automatically performed<br />
while the system is in operation.<br />
When the SAILOR 900 VSAT detects an event that requires<br />
your action, it issues an event message and the red Fail/Pass<br />
LED in the LED panel of the ACU is lit. As long as an event is<br />
active, it is shown in the ACU display and the web interface (in<br />
HELPDESK > Event list or click the event icon on the<br />
DASHBOARD).<br />
Note<br />
Active events and notifications are shown. As soon as the<br />
event is cleared, it is not displayed any longer. It is then<br />
moved to the Notifications section. Notifications are cleared<br />
after 24 hours.<br />
State the Event ID when contacting your service partner.<br />
The event description might contain a number of digits in<br />
brackets, e.g. (00000005). This is supplemental information<br />
and used for service and diagnostics purposes.<br />
System messages<br />
98-133966-E2 G-1
List of ADU events<br />
G.2 List of ADU events<br />
Error code (ID) Unit Severity Description Explanation<br />
0A001-0 Antenna ERROR Production data Production data is invalid<br />
0A002-0 Antenna ERROR XIM internal Antenna configuration data stored in the<br />
PCM module is invalid<br />
0A003-0 Antenna ERROR XIM external Antenna configuration data stored in the<br />
VIM module is invalid<br />
0A004-0 Antenna ERROR XIM I/X match Antenna configuration data stored in the<br />
PCM module does not match the<br />
configuration data stored in the VIM<br />
module<br />
0A005-0 Antenna ERROR Antenna type The configuration antenna type is<br />
unsupported or unknown<br />
0A006-0 Antenna ERROR PCM FPGA load The PCM FPGA cannot be initialised and<br />
loaded correctly<br />
0A007-0 Antenna ERROR VIM FPGA load The VIM FPGA cannot be initialised and<br />
loaded correctly<br />
0A008-0 Antenna ERROR XIM production Production/calibration data stored in the<br />
VIM module is invalid<br />
0A00A-0 Antenna ERROR GPS initialisation The GNSS device cannot be initialised.<br />
Check cable and GNSS device<br />
0A014-0 Antenna ERROR AMB device discovery Missing one or more of the following<br />
devices: ISM, DDM and PMM. Check<br />
cables.<br />
0A015-0 Antenna ERROR Azi DDM ABS device Cannot initialise the azimuth DDM info:<br />
0x00000000: Device not found<br />
(possible cabling problem)<br />
0x0000bbaa: Device internal error<br />
(device should be replaced)<br />
aa=status, bb=state<br />
0A016-0 Antenna ERROR Xel DDM ABS device Cannot initialise the cross-elevation<br />
DDM info: See POST_ID_PCM_ABS_AZI<br />
0A017-0 Antenna ERROR Ele DDM ABS device Cannot initialise the elevation DDM info:<br />
See POST_ID_PCM_ABS_AZI<br />
Table G-1: ADU event messages<br />
G-2 Appendix G: System messages 98-133966-E2
Error code (ID) Unit Severity Description Explanation<br />
List of ADU events<br />
0A018-0 Antenna ERROR ISM ABS device Cannot initialise the ISM info:<br />
0x00000000: Device not found<br />
(possible cabling problem)<br />
0x000cbbaa: Device internal error<br />
(device should be replaced)<br />
aa=status, bb=state, c=calibration data<br />
error<br />
0A019-0 Antenna ERROR PMM ABS device Cannot initialise the azimuth PMM info:<br />
See POST_ID_PCM_ABS_AZI<br />
0A01E-0 Antenna ERROR Sensor sanity Too many invalid values measured by<br />
the ISM during initialisation. Check for<br />
vibrations or malfunctioning ISM.<br />
0A021-0 Antenna ERROR Azi axis calibration Azimuth axis zero reference not found.<br />
Check belt and zero reference module.<br />
info:<br />
0x00000001: Timeout (operation did not<br />
complete in time)<br />
0x00000010: Encoder or mechanical<br />
problem<br />
0x00000020: Zero reference not found<br />
0x00000040: End stop not found<br />
0A022-0 Antenna ERROR Xel axis calibration Cross-elevation axis zero reference or<br />
end stops not found at expected<br />
locations. Check belt, zero reference<br />
module, and end stops. info: See<br />
POST_ID_PCM_ANT_AZI<br />
0A023-0 Antenna ERROR Ele axis calibration Elevation axis zero reference or end<br />
stops not found at expected locations.<br />
Check belt, zero reference module, and<br />
end stops. info: See<br />
POST_ID_PCM_ANT_AZI<br />
0A024-0 Antenna ERROR Pol axis calibration Polarisation axis zero reference or end<br />
stops not found at expected locations.<br />
Check movement of the polarisation unit<br />
and the zero reference module. info: See<br />
POST_ID_PCM_ANT_AZI<br />
GGGG<br />
System messages<br />
Table G-1: ADU event messages (Continued)<br />
98-133966-E2 Appendix G: System messages G-3
List of ADU events<br />
Error code (ID) Unit Severity Description Explanation<br />
0A025-0 Antenna ERROR Antenna calibration One or more errors occurred during<br />
antenna start-up info:<br />
0x00000001: Timeout (calibration did<br />
not complete in time)<br />
0x00000010: Azimuth axis<br />
0x00000020: Cross-elevation axis<br />
0x00000040: Elevation axis<br />
0x00000080: Polarisation axis<br />
0A028-0 Antenna ERROR Demodulator load The second receiver demodulator cannot<br />
be initialised and loaded correctly<br />
0A029-0 Antenna ERROR VIM PLL lock The PLL on the VIM does not lock.<br />
0A02B-0 Antenna ERROR ABS software version The ABS software version in the antenna<br />
is too old to match the hardware<br />
requirements. Upgrade to newer/newest<br />
software version.<br />
0A034-0 Antenna WARNING ACU communication The communication link between ACU<br />
and antenna is down<br />
0A035-0 Antenna WARNING ISM data valid Sensor measurements from the ISM are<br />
invalid. This indicates a malfunctioning<br />
ISM<br />
0A036-0 Antenna WARNING ISM data range Sensor measurements from the ISM are<br />
out of range<br />
0A037-0 Antenna WARNING GNSS communication Lost connection to the GNSS device<br />
0A038-0 Antenna WARNING GNSS data range Received information from the GNSS<br />
device which is out of range<br />
0A039-0 Antenna WARNING GNSS device warning Local GNSS device warning<br />
0A03A-0 Antenna WARNING GNSS device error Local GNSS device error<br />
0A03B-0 Antenna ERROR Azi DDM shutdown The azimuth motor control has detected<br />
one of the following situations: Extreme<br />
temperature, voltage, current or<br />
velocity. The motor was then shut down.<br />
This is usually a temporary situation and<br />
is probably fixed by a restart of the<br />
system.<br />
0A03C-0 Antenna ERROR Xel DDM shutdown As Azi DDM shutdown but detected by<br />
the cross-elevation motor control.<br />
Table G-1: ADU event messages (Continued)<br />
G-4 Appendix G: System messages 98-133966-E2
Error code (ID) Unit Severity Description Explanation<br />
List of ADU events<br />
0A03D-0 Antenna ERROR Ele DDM shutdown As Azi DDM shutdown but detected by<br />
the elevation motor control.<br />
0A03E-0 Antenna ERROR PMM shutdown As Azi DDM shutdown but detected by<br />
the polarisation motor control.<br />
0A03F-0 Antenna WARNING AMB timing This indicates a busy situation. It may<br />
occur during installation procedures. No<br />
user interaction is required.<br />
0A040-0 Antenna WARNING VIM cable attn The output power cannot be controlled<br />
correctly. Check the Tx chain<br />
0A041-0 Antenna WARNING BUC voltage low The voltage for the BUC is too low<br />
probably caused by a malfunctioning<br />
VIM or BUC<br />
0A042-0 Antenna WARNING BUC voltage high The voltage for the BUC is too high<br />
probably caused by a malfunctioning<br />
VIM<br />
0A043-0 Antenna WARNING LNB voltage low The voltage for the LNB is too low<br />
probably caused by a malfunctioning<br />
VIM or LNB<br />
0A044-0 Antenna WARNING LNB voltage high The voltage for the LNB is too high<br />
probably caused by a malfunctioning<br />
VIM<br />
0A045-0 Antenna WARNING PMM fan The fan is not working or the tacho input<br />
from the fan is not connected. Check<br />
cable and fan.<br />
0A046-0 Antenna WARNING OMT temperature The temperature of the BUC is too high.<br />
Check if fan is working.<br />
0A047-0 Antenna ERROR VIM PLL lock The PLL of the VIM is out of lock. Check<br />
the 10 MHz reference signal.<br />
0A048-0 Antenna WARNING VIM tuner lock The PLL of the second receiver (DVB) is<br />
out of lock. Check the 10 MHz reference<br />
signal<br />
GGGG<br />
System messages<br />
0A049-0 Antenna WARNING Azi encoder slip A slip of the azimuth encoder has been<br />
detected. No user interaction is required<br />
unless this is a permanent situation in<br />
which case the belt and encoder of the<br />
azimuth axis must be checked<br />
Table G-1: ADU event messages (Continued)<br />
98-133966-E2 Appendix G: System messages G-5
List of ADU events<br />
Error code (ID) Unit Severity Description Explanation<br />
0A04A-0 Antenna WARNING Xel encoder slip A slip of the cross-elevation encoder has<br />
been detected. No user interaction is<br />
required unless this is a permanent<br />
situation in which case the belt and<br />
encoder of the cross-elevation axis must<br />
be checked<br />
0A04B-0 Antenna WARNING Ele encoder slip A slip of the elevation encoder has been<br />
detected. No user interaction is required<br />
unless this is a permanent situation in<br />
which case the belt and encoder of the<br />
elevation axis must be checked<br />
0A04C-0 Antenna WARNING Pol encoder slip A slip of the polarisation encoder has<br />
been detected. No user interaction is<br />
required unless this is a permanent<br />
situation in which case the encoder of<br />
the polarisation axis must be checked<br />
0A04D-0 Antenna WARNING GNSS position No position available from the GNSS<br />
device or position too old.<br />
0A04E-0 Antenna WARNING GNSS velocity No velocity available from the GNSS<br />
device<br />
0A04F-0 Antenna ERROR Heading data Heading information is missing in the<br />
antenna<br />
0A050-0 Antenna ERROR Azi DDM communication Communication error between PCM and<br />
azimuth DDM. Check cable.<br />
0A051-0 Antenna ERROR Xel DDM communication Communication error between PCM and<br />
cross-elevation DDM. Check cable.<br />
0A052-0 Antenna ERROR Ele DDM communication Communication error between PCM and<br />
elevation DDM. Check cable.<br />
0A053-0 Antenna ERROR ISM communication Communication error between PCM and<br />
ISM. Check cable.<br />
0A054-0 Antenna ERROR PMM communication Communication error between PCM and<br />
PMM. Check cable.<br />
0A055-0 Antenna WARNING Azi DDM warning The azimuth motor controller has<br />
temporarily observed an unusual<br />
situation with regards to temperature,<br />
voltage, current or velocity. No user<br />
interaction required.<br />
Table G-1: ADU event messages (Continued)<br />
G-6 Appendix G: System messages 98-133966-E2
Error code (ID) Unit Severity Description Explanation<br />
List of ADU events<br />
0A056-0 Antenna WARNING Xel DDM warning The cross-elevation motor controller has<br />
temporarily observed an unusual<br />
situation with regards to temperature,<br />
voltage, current or velocity. No user<br />
interaction required.<br />
0A057-0 Antenna WARNING Ele DDM warning The elevation motor controller has<br />
temporarily observed an unusual<br />
situation with regards to temperature,<br />
voltage, current or velocity. No user<br />
interaction required.<br />
0A058-0 Antenna WARNING PMM warning The polarisation motor controller has<br />
temporarily observed an unusual<br />
situation with regards to temperature,<br />
voltage, current or velocity. No user<br />
interaction required.<br />
0A059-0 Antenna WARNING Azi cal. limits Azimuth axis calibration result check<br />
limits exceeded. Pointing performance<br />
may be degraded. info:<br />
0x00000100: Zero width is low<br />
0x00000200: Zero width is high<br />
0x00000400: Zero slack is high<br />
0x00001000: Friction average is high<br />
0x00002000: Friction peak is high<br />
0x00004000: Friction asymmetry is high<br />
Zero width low/high: Zero reference<br />
module placement may be incorrect.<br />
Zero slack high: Mechanical slack may<br />
be too high. Friction average/peak high:<br />
Mechanical friction is higher than<br />
expected. Friction asymmetry high:<br />
Mechanical imbalance may be too high.<br />
0A05A-0 Antenna WARNING Xel cal. limits Cross-elevation axis calibration result<br />
check limits exceeded. Pointing<br />
performance may be degraded. info: See<br />
EV_PCM_CM_AZI_CAL_LIMITS<br />
GGGG<br />
System messages<br />
0A05B-0 Antenna WARNING Ele cal. limits Elevation axis calibration result check<br />
limits exceeded. Pointing performance<br />
may be degraded. info: See<br />
EV_PCM_CM_AZI_CAL_LIMITS<br />
0A05C-0 Antenna WARNING Pol cal. limits Polarisation axis calibration result check<br />
limits exceeded. Pointing performance<br />
may be degraded. info: See<br />
EV_PCM_CM_AZI_CAL_LIMITS<br />
Table G-1: ADU event messages (Continued)<br />
98-133966-E2 Appendix G: System messages G-7
List of ADU events<br />
Error code (ID) Unit Severity Description Explanation<br />
0A05D-0 Antenna WARNING ISM warning The ISM has temporarily observed an<br />
unusual situation with regards to<br />
temperature or voltage. No user<br />
interaction required. If repeated after<br />
cool down and reboot, the ISM or cables<br />
around it may be defective.<br />
0A05E-0 Antenna WARNING Low elevation The antenna is not allowed to transmit<br />
because the elevation is too low.<br />
0A05F-0 Antenna WARNING Heading range Heading data range error. External<br />
heading unit supplies unreliable data.<br />
Table G-1: ADU event messages (Continued)<br />
G-8 Appendix G: System messages 98-133966-E2
G.3 List of ACU events<br />
Error code (ID) ACU PCB Severity Description Explanation<br />
List of ACU events<br />
08060-0 ADM WARNING ADU modem ACU/ADU communication error detected<br />
(framing and parity). If the situation is<br />
persistent, check if cable specifications<br />
comply (length and attenuation).<br />
08061-0 ADM WARNING VMU linux shell password The specified password (root) for the<br />
VSAT modem is not accepted by the<br />
modem<br />
08062-0 ADM WARNING VMU debug shell password The specified password (user) for the<br />
VSAT modem is not accepted by the<br />
modem<br />
08063-0 ADM ERROR ADU connection The ACU has lost connection with the<br />
antenna<br />
08064-0 ADM ERROR ADM PLL lock The intermediate frequency PLL is not in<br />
lock. Check the 10 MHz reference signal<br />
08065-0 ADM WARNING GNSS data Missing GPS data (fix)<br />
08066-0 ADM WARNING Heading data Missing heading information. Check<br />
cable and heading provider device.<br />
08067-0 ADM ERROR PCB temperature ADM temperature too high. The ACU is<br />
not equipped with a fan, so make sure<br />
environmental specifications comply<br />
08068-0 ADM ERROR PSM power The PSM fails to provide the requested<br />
supply voltage<br />
08069-0 ADM WARNING Blocking Zone The antenna has entered a blocking<br />
zone<br />
0806A-0 ADM WARNING VMU connection The ACU has lost connection with the<br />
VSAT modem<br />
GGGG<br />
System messages<br />
0806B-0 ADM WARNING ROSS connection The ACU has lost connection with the<br />
ROSS device<br />
0806C-0 ADM ERROR VMU frequency setup There is a mismatch in the frequency<br />
setup. Probably the VSAT modem is not<br />
configured correctly to match the<br />
requirements of the ACU and antenna. A<br />
common mismatch is the absence of Rx<br />
or Tx LO parameter in the VSAT modem.<br />
Table G-2: ACU event messages<br />
98-133966-E2 Appendix G: System messages G-9
List of ACU events<br />
Error code (ID) ACU PCB Severity Description Explanation<br />
0806D-0 ADM ERROR ADU power The ADU supply voltage is outside the<br />
allowed limits. This could happen if the<br />
PSM fails to provide the requested<br />
supply voltage or if the voltage<br />
difference across the hotswap is<br />
unacceptable high.<br />
0806E-0 ADM ERROR VMU 10 MHz reference The VMU 10 MHz Rx or Tx reference<br />
signal is not present. Whether this error<br />
Rx or Tx reference, depends on the users<br />
selection on the modem profile page.<br />
Make sure VMU Rx/Tx cable is<br />
connected and that the VMU is<br />
configured to output the RX/TX 10 MHz<br />
reference signal.<br />
0806F-0 ADM ERROR ROSS synchronization The ACU has become out of sync with<br />
the ROSS device, most likely because the<br />
ACU has been replaced, or the ROSS<br />
satellite profile is new. A manual<br />
(forced) hand off sequence must be<br />
initiated from the ROSS, refer to the<br />
ROSS manual for the procedure.<br />
08073-0 ADM WARNING Slave connection The system is configured as a dual<br />
antenna master, but no dual mode slave<br />
has connected to it. Either disable dual<br />
mode from the web mmi or configure a<br />
another system as a dual mode slave.<br />
08074-0 ADM WARNING Master connection The system is configured as a dual<br />
antenna slave, but it was not possible to<br />
connect to the dual mode master. Check<br />
that the IP address entered in the<br />
modem profile is correct and check that<br />
the master and slave systems are<br />
physically connected as described in the<br />
manual.<br />
08076-0 ADM WARNING Incompatible message version The system is configured as a dual<br />
antenna system, but the software<br />
versions on master and slave system are<br />
different. Ensure that both master and<br />
slave has identical software.<br />
Table G-2: ACU event messages (Continued)<br />
G-10 Appendix G: System messages 98-133966-E2
Error code (ID) ACU PCB Severity Description Explanation<br />
List of ACU events<br />
08100-0 ADM ERROR PSM low voltage (22 V) The ADM measures a different ADU<br />
voltage than expected. If the problem is<br />
not solved by a restart, and the PSM is<br />
not reporting any errors, the ADM is<br />
probably defect.<br />
08101-0 ADM ERROR PSM high voltage (48 V) The ADM measures a different ADU<br />
voltage than expected. Check for short<br />
circuit of the antenna coax connector. If<br />
the problem is not solved by a restart,<br />
and the PSM is not reporting any errors,<br />
the ADM is probably defective.<br />
08102-0 ADM ERROR PSM 5 V power Internal voltage supply error of the ADM.<br />
08103-0 ADM ERROR ADM hotswap The ACU is not able to supply the correct<br />
voltage to the antenna. Check for short<br />
circuits in coax cable and the antenna<br />
08104-0 ADM ERROR ADU communication The ACU cannot communicate with the<br />
antenna. Check cable and antenna.<br />
08107-0 ADM ERROR ADM FPGA load The ADM FPGA cannot be initialised and<br />
loaded<br />
08108-0 ADM ERROR TX Power Detector calibration The Tx power detector calibration is not<br />
valid.<br />
08109-0 ADM ERROR ADU XIM data There is a mismatch with the antenna<br />
configuration data. Either the PCM or<br />
the VIM in the antenna are<br />
malfunctioning or one of them has been<br />
replaced. In the latter case, please select<br />
which is the original device in the web<br />
MMI and restart the system.<br />
0810A-0 ADM ERROR ADM production data Production data has been corrupted<br />
0810B-0 ADM ERROR ADU software version Some error occurred during upload of<br />
software to the ADU, which means that<br />
the ADU software version is not as<br />
expected. Either the software in the ACU,<br />
does not meet the minimum version<br />
required by the ADU, the software image<br />
in the ACU is corrupted or the upload<br />
procedure failed because of a<br />
communication error.<br />
GGGG<br />
System messages<br />
Table G-2: ACU event messages (Continued)<br />
98-133966-E2 Chapter G: System messages G-11
List of ACU events<br />
Error code (ID) ACU PCB Severity Description Explanation<br />
0810C-0 ADM ERROR File system integrity One or more file system partitions are<br />
corrupt. You may have lost your settings<br />
and collected statistics. If restarting the<br />
system does not help, contact your<br />
service technician.<br />
09000-0 KDM ERROR KDM 3V3 supply Internal 3V3 voltage supply error in the<br />
KDM<br />
09001-0 KDM ERROR KDM 12V supply Internal 12V voltage supply error in the<br />
KDM<br />
09002-0 KDM ERROR KDM display Display hardware error in the KDM<br />
09010-0 KDM ERROR KDM link/SW version Link to the KDM module could not be<br />
established. Either the KDM board is<br />
malfunctioning, or - if the system<br />
software has just been updated - the SW<br />
is too old and is not compatible with the<br />
PSM hardware.<br />
0B000-0 PSM ERROR PSM production data Missing or invalid production data in the<br />
PSM. It should be replaced.<br />
0B001-0 PSM ERROR NMEA 2000 identifier Missing or invalid production data in the<br />
PSM. It should be replaced.<br />
0B010-0 PSM ERROR PSM link/SW version Link to the PSM module could not be<br />
established. Either the PSM board is<br />
malfunctioning, or - if the system<br />
software has just been updated - the SW<br />
is too old and is not compatible with the<br />
PSM hardware.<br />
0B060-0 PSM WARNING NMEA 0183 parse error Parse errors detected on the NMEA 0183<br />
interface. Check NMEA 0183 cable,<br />
signal levels etc.<br />
Table G-2: ACU event messages (Continued)<br />
G-12 Chapter G: System messages 98-133966-E2
Approvals<br />
H<br />
H.1 Satellite approvals<br />
Appendix HHHHH<br />
TBD<br />
H.2 CE (R&TTE)<br />
The SAILOR 900 VSAT is CE certified (R&TTE directive) as<br />
stated in the “Declaration of Conformity with R&TTE<br />
Directive”, enclosed in copy on the next page.<br />
Approvals<br />
98-133966-E2 H-1
CE (R&TTE)<br />
H-2 Appendix H: Approvals 98-133966-E2
Glossary<br />
Glossary 9<br />
A<br />
ABS<br />
ACU<br />
ADM<br />
AMB<br />
B<br />
BUC<br />
C<br />
CE<br />
CM<br />
D<br />
DDM<br />
DHCP<br />
DNS<br />
DVB<br />
E<br />
EIRP<br />
ESD<br />
ADU Bus Slave<br />
Antenna Control Unit<br />
ACU Digital Module. A main processor board in the ACU.<br />
Antenna Module Bus<br />
Block Up Converter - The BUC can be thought of the “transmitter”, and its actions are<br />
effectively the direct opposite to the LNB. The BUC consists of the Up Converter and<br />
HPA.<br />
Conformité Européenne. This term signifies that a CE certified product conforms to<br />
European health, environmental, and safety regulations. In short, it makes the<br />
product legal to be sold in the European Union.<br />
Continuous Monitoring<br />
DC-Motor Driver Module<br />
Dynamic Host Configuration Protocol. A protocol for assigning dynamic IP addresses<br />
to devices on a network. With dynamic addressing, a device can have a different IP<br />
address every time it connects to the network.<br />
Domain Name System. A system translating server names (URLs) to server addresses.<br />
Digital Video Broadcasting, a set of standards relating to digital television.<br />
Effective Isotropically-Radiated Power. The amount of power that would have to be<br />
emitted by an isotropic antenna (that evenly distributes power in all directions) to<br />
produce the peak power density observed in the direction of maximum antenna gain.<br />
ElectroStatic Discharge<br />
9999<br />
Glossary<br />
98-133966-E2<br />
Glossary-1
Glossary<br />
ETSI<br />
European Telecommunication Standard Institute<br />
F<br />
FPGA<br />
Field Programmable Gate Array<br />
G<br />
GNSS<br />
GPL<br />
GPS<br />
Global Navigation Satellite System, e.g. GPS.<br />
General Public License<br />
Global Positioning System. A system of satellites, computers, and receivers that is<br />
able to determine the latitude and longitude of a receiver on Earth by calculating the<br />
time difference for signals from different satellites to reach the receiver.<br />
H<br />
HDT<br />
HeaDing True, NMEA sentence.<br />
I<br />
IEC<br />
ISM<br />
International Electrotechnical Commission. The international standards and<br />
conformity assessment body for all fields of electrotechnology.<br />
Inertial Sensor Module<br />
K<br />
KDM<br />
Keyboard and Display Module of the ACU<br />
L<br />
LAN<br />
LEN<br />
LGPL<br />
LNB<br />
LO<br />
Local Area Network<br />
Load Equivalent Number<br />
Lesser General Public License<br />
Low Noise Block. A device used to amplify or boost the weak received signal without<br />
amplifying the noise signals (hence the “low noise” part of LNB) and to convert the<br />
high frequencies of the signal into lower frequencies, a process called down<br />
converting, for conveyance to the indoor equipment (demodulator) for processing.<br />
Local Oscillator. LO frequency used by BUC and LNB.<br />
Glossary-2<br />
98-133966-E2
M<br />
MIB<br />
N<br />
NID<br />
NMEA<br />
O<br />
OMT<br />
openAMIP<br />
ORE<br />
P<br />
PAST<br />
PCM<br />
PMM<br />
POST<br />
PSM<br />
R<br />
RF<br />
Management Information Base<br />
Network IDentification<br />
Glossary<br />
National Marine Electronics Association (standard). A combined electrical and data<br />
specification for communication between marine electronic devices such as echo<br />
sounder, sonars, anemometer (wind speed and direction), gyrocompass, autopilot,<br />
GPS receivers and many other types of instruments. It has been defined by, and is<br />
controlled by, the U.S.-based National Marine Electronics Association.<br />
Ortho Mode Transducer<br />
Open Antenna-Modem Interface Protocol, facilitates the exchange of information<br />
between an ACU and a satellite router. It allows the router to command the antenna<br />
and enables automatic beam switching (ABS).<br />
Optical Reference Encoder<br />
Person Activated Self Test<br />
Pedestal Control Module<br />
Polarisation Motor Module<br />
Power On Self Test. A system test that is activated each time the system is powered<br />
on.<br />
Power Supply Module<br />
Radio Frequency. Electromagnetic wave frequencies between about 3 kilohertz and<br />
about 300 gigahertz including the frequencies used for communications signals<br />
(radio, television, cell-phone and satellite transmissions) or radar signals.<br />
9999<br />
RFI<br />
Radio Frequency Interference. A non-desired radio signal which creates noise or<br />
dropouts in the wireless system or noise in a sound system.<br />
Glossary<br />
ROSS<br />
Roaming Oceanic Satellite Server<br />
98-133966-E2<br />
Glossary-3
Glossary<br />
RSSI<br />
Received Signal Strength Indicator<br />
S<br />
SNMP<br />
Simple Network Management Protocol. An Internet-standard protocol for managing<br />
devices on IP networks. It is used mostly in network management systems to monitor<br />
network-attached devices for conditions that warrant administrative attention.<br />
U<br />
UCLI<br />
User Command Line Interface<br />
V<br />
VIM<br />
VMU<br />
VSAT<br />
VSAT Interface Module<br />
VSAT Modem Unit<br />
Very Small Aperture Terminal, a two-way satellite ground station or a stabilized<br />
maritime VSAT antenna with a dish antenna that is smaller than 3 metres.<br />
W<br />
WAN<br />
Wide Area Network<br />
X<br />
XIM<br />
Xim Interface Module, term for the module that connects the PCM and the ACU. X<br />
stands for one of various interface modules.<br />
Z<br />
ZRM<br />
Zero Reference Module<br />
Glossary-4<br />
98-133966-E2
Index 10<br />
Numerics<br />
10 MHz reference, 6-25<br />
A<br />
access<br />
limit, 6-45<br />
ACU<br />
description, 2-8<br />
LED, 9-8<br />
ACU (bulkhead)<br />
grounding, 3-27<br />
installing, 3-26<br />
ACU bulkhead<br />
connector panel, overview, 4-2<br />
LEDs, display and keypad, 4-1<br />
ACU display<br />
description, 6-49<br />
ACU events, G-9<br />
ACU interfaces, 2-8<br />
ACU menus<br />
quick guide, 8-2<br />
ACU rack version<br />
connector panel, overview, 4-2<br />
grounding, 3-31<br />
installing, 3-30<br />
LEDs, display and keypad, 4-1<br />
administration<br />
settings, 6-43<br />
administrator<br />
log off, 6-45<br />
logon, command line interface, D-2<br />
logon, web interface, 6-43<br />
password, 6-43<br />
password, change, 6-44<br />
password, reset, 6-44<br />
ADU<br />
cable sizes, A-9<br />
connector, 4-4<br />
description, 2-4<br />
grounding, optimal, 3-23<br />
ADU cable<br />
alternatives, 3-25<br />
connection, 3-21<br />
modem attenuation, 3-25<br />
ADU cable loop<br />
DC-resistance, 3-25<br />
ADU events, G-2<br />
aluminum hulls<br />
grounding, F-7<br />
antenna<br />
drainage, 3-17<br />
grounding recommendations, F-3<br />
installation location, 3-3<br />
isolation from mounting base, F-12<br />
mast design, 3-8<br />
obstructions, 3-4<br />
opening, 3-22<br />
radiation, 3-6<br />
stabilization, 2-4<br />
antenna dish position<br />
fix, 2-6, 9-15<br />
Apstar, E-2<br />
Astra2 satellite, E-1<br />
attenuation<br />
ADU cable, 3-25<br />
Australia satellite, E-2<br />
azimuth calibration, 6-4<br />
DVB symbol rate minimum, 6-5<br />
B<br />
baud rate<br />
NMEA 0183, 4-5<br />
VSAT modem, 6-25<br />
beam switching, C-2<br />
BITE test, 9-8<br />
block diagram, 9-94<br />
blocking zones<br />
azimuth, 3-5<br />
elevation, 3-5<br />
braces<br />
mast, 2 pieces, 3-12<br />
mast, 3 pieces, 3-11<br />
Index<br />
10101010<br />
98-133966-E2<br />
Index-1<br />
Index
Index<br />
browser settings<br />
for web interface, 6-17<br />
BUC<br />
troubleshooting, 9-92<br />
BUC data sheet, A-12<br />
BUC LO frequency, A-12<br />
BUC power, 6-13<br />
C<br />
cable<br />
calibration data reset, 6-48<br />
Comtech 570 L or 625 Satellite Modem, 4-10,<br />
4-11, 4-12<br />
ground, F-11<br />
iNFINITI 5000 Series Satellite Router, 4-9<br />
power, 5-2<br />
RS-232 to Console, 4-9<br />
cable loss<br />
ADU cable, 3-22<br />
cable requirements<br />
NMEA, 4-5<br />
cable size<br />
N-connector, ADU, A-9<br />
cable support<br />
ACU (bulkhead), 3-28<br />
cable type<br />
LAN, 4-8<br />
calibration<br />
azimuth, 6-4, 6-7<br />
cable, 6-7<br />
elevation requirements, 6-5<br />
error codes, 6-9<br />
flow chart, 6-10<br />
NID, 6-5<br />
polarisation, 6-5<br />
satellite data, 6-5, 6-8, 6-22, E-1<br />
service profile, 6-4<br />
calibration data, 6-48<br />
enter, 6-4<br />
reset, 6-48<br />
update, 9-89<br />
change administrator password, 6-44<br />
Change network, 6-46<br />
China satellite, E-2<br />
command line interface, D-1<br />
config, D-4<br />
demo, D-4<br />
dualantenna, D-5<br />
exit, D-5<br />
help, D-2<br />
modem, D-6<br />
satellite, D-6<br />
status, D-9<br />
supported commands, D-4<br />
system, D-9<br />
track, D-10<br />
user name and password, D-2<br />
zone, D-11<br />
commands in command line interface, D-4<br />
compass safe distance, A-4<br />
Comtech 570 L or 625 Satellite Modem, 4-10, 4-<br />
11, 4-12<br />
cable, 4-10, 4-11, 4-12<br />
condensation in antenna, 3-17<br />
config<br />
command line interface, D-4<br />
configuration<br />
copy, 6-46<br />
export, 6-46<br />
import, 6-46<br />
LAN network, 6-29<br />
site map, 6-14<br />
step-by-step, 6-2<br />
configuration examples<br />
Non-OpenAMIP, C-12<br />
OpenAMIP, C-8<br />
Configuration program, 6-1<br />
connect<br />
Comtech 570 L or 625 Satellite Modem, 4-10,<br />
4-11, 4-12<br />
Evolution X5 Satellite Router, 4-10<br />
iNFINITI 5000 Series Satellite Router, 4-9<br />
power cable, 5-4<br />
web interface, 6-2<br />
Index-2<br />
98-133966-E2
connector<br />
ADU, 4-4<br />
DC, 4-3<br />
DC Input, 4-3<br />
LAN, 4-7<br />
management PC, 4-7<br />
modem control, 4-7<br />
NMEA 0183/2000, 4-5<br />
RS-232, 4-6<br />
RS-422, 4-6<br />
service port, 4-7<br />
TNC, 4-4<br />
VMU Rx-Tx, 4-4, 4-5<br />
contact information, 9-2<br />
corrosion<br />
smoke deposits, 3-17<br />
country restrictions<br />
VSAT, -v<br />
current<br />
start up peak, 5-1<br />
D<br />
daily use, 8-1<br />
DC connector, 4-3<br />
DC Input<br />
connector, 4-3<br />
default<br />
reset to factory settings, 6-48<br />
default gateway, 6-31<br />
degradation<br />
due to the radar, 3-15<br />
Ku-band connection, 3-15<br />
demo<br />
command line interface, D-4<br />
DHCP client, 6-30<br />
DHCP server, 6-30, 6-31<br />
diagnostic report, 6-36, 9-2<br />
display<br />
ACU, description, 6-49<br />
distance<br />
antenna to GPS receiver, 3-16<br />
antenna to radar, 3-13<br />
DNS setup, 6-31<br />
drainage of antenna, 3-17<br />
drawing<br />
ACU bulkhead, A-7<br />
ACU rack version, A-8<br />
ADU, A-6<br />
dual antenna<br />
blocking zone, 6-41<br />
cabling, 3-34<br />
command line interface, D-5<br />
commissioning, 6-42<br />
configuration, 6-37<br />
installation, 3-33<br />
line up, 6-42<br />
dual-antenna mode<br />
slave DASHBOARD, 6-37<br />
DVB symbol rate<br />
azimuth calibration, 6-5<br />
DVB-S, 6-5<br />
DVB-S satellite data, E-1<br />
DVB-S2, 6-5<br />
E<br />
elevation angle<br />
minimum, 6-23<br />
elevation cutoff, 6-23<br />
E-mail setup, 6-32<br />
error codes, G-1<br />
calibration, 6-9<br />
error messages, 9-3, G-1<br />
ACU, G-9<br />
ADU, G-2<br />
ETSI<br />
elevation angle, 6-23<br />
event, G-1<br />
events<br />
ACU, G-9<br />
ADU, G-2<br />
list of active, 9-3<br />
Evolution X5 Satellite Router<br />
connect, 4-10<br />
exit<br />
command line interface, D-5<br />
export configuration, 6-46<br />
Index<br />
10101010<br />
98-133966-E2<br />
Index-3<br />
Index
Index<br />
F<br />
factory default<br />
calibration data, 6-48<br />
reset, 6-48<br />
factory defaults<br />
reset to, 9-4<br />
failure states<br />
view, 9-91<br />
FCC<br />
elevation angle, 6-23<br />
Features, 2-3<br />
fiberglass hulls<br />
grounding, F-9<br />
fix antenna<br />
lock, 2-6, 9-15<br />
fixed heading, 6-7<br />
fixed TX gain, 6-13<br />
flange thickness, 3-8<br />
flatness, 3-8<br />
flow chart<br />
calibration, 6-10<br />
G<br />
gain<br />
fixed TX, 6-13<br />
gateway setup, 6-31<br />
GPS receiver<br />
distance from antenna, 3-16<br />
grounding, F-1<br />
ACU (bulkhead), 3-27<br />
ACU rack version, 3-31<br />
ADU, 3-23<br />
aluminum hulls, F-7<br />
antenna, F-3<br />
cable, F-11<br />
fiberglass hulls, F-9<br />
recommendations, F-2<br />
steel hulls, F-5<br />
terminal, F-2<br />
gusset plates, 3-8<br />
H<br />
hatch<br />
remove, 3-22<br />
help<br />
command line interface, D-2<br />
helpdesk number, 9-2<br />
changing in web interface, 9-2<br />
humidity in antenna, 3-17<br />
I<br />
impedance<br />
cable, 5-3<br />
ship, 5-2<br />
total, 5-2<br />
import configuration, 6-46<br />
iNFINITI 5000 Series Satellite Router<br />
cable, 4-9<br />
connect, 4-9<br />
installation<br />
ACU (bulkhead), 3-26<br />
ACU rack versionl, 3-30<br />
Interfaces, 4-1, 5-1<br />
interference, 3-13<br />
from radar, 3-13<br />
RF, F-15<br />
IP address<br />
for web interface, 6-2, 9-5<br />
OpenAMIP modem, 6-25, 6-30<br />
static, 6-30<br />
L<br />
LAN<br />
cable type, 4-8<br />
connector, 4-7<br />
network setup, 6-29<br />
LAN configuration<br />
default gateway, 6-31<br />
DHCP client, 6-30<br />
LAN connector<br />
management, 4-7<br />
LAN network<br />
configuration, 6-29<br />
Index-4<br />
98-133966-E2
LED<br />
ACU, 9-8<br />
license<br />
software, -ii<br />
limit access to web interface, 6-45<br />
Line up, 6-11<br />
LNB<br />
configuration, A-10<br />
data sheet, A-10<br />
LO frequency, A-10<br />
troubleshooting, 9-93<br />
LO frequency, A-10, A-12<br />
load<br />
configuration, 6-46<br />
lock<br />
service hatch, 3-22<br />
locking pin, 2-6, 9-15<br />
log off<br />
administrator, 6-45<br />
logon<br />
administrator, command line interface, D-2<br />
administrator, web interface, 6-43<br />
M<br />
mail server<br />
setup, 6-32<br />
management PC<br />
connect, 4-7<br />
mast<br />
2 braces, 3-12<br />
3 braces, 3-11<br />
design, 3-8<br />
flange thickness, 3-8<br />
flatness, 3-8<br />
foundation, 3-8<br />
gusset plates, 3-8<br />
height, 3-8<br />
without braces, 3-11<br />
mast flange, 3-8<br />
mast for antenna, 3-8<br />
mast length, 3-11<br />
Master ACU<br />
dual antenna, 6-38<br />
messages, G-1<br />
sent from VMU, OpenAMIP, C-4<br />
MIB, 6-55<br />
MIB file, 6-55<br />
microwave radiation, -iii<br />
minimum elevation angle, 6-23<br />
Model numbers, 2-11<br />
modem<br />
command line interface, D-6<br />
signal level, ACU display, 6-52<br />
supported types, 6-25<br />
modem control<br />
connector, 4-7<br />
modem option file<br />
Non-OpenAMIP, C-11<br />
modify XIM data, 6-46<br />
motion centre<br />
ship, 3-7<br />
N<br />
navigation, 6-15<br />
navigation in web interface, 6-16<br />
N-connector<br />
cable sizes, A-9<br />
network<br />
LAN setup, 6-29<br />
NID<br />
calibration, 6-5<br />
NMEA<br />
cable requirements, 4-5<br />
connector, 4-5<br />
LEN, 4-5<br />
NMEA 0183<br />
baud rate, 4-5<br />
Non-Open AMIP<br />
examples, C-12<br />
setup, C-9<br />
Non-OpenAMIP<br />
supported commands, C-11<br />
notifications, 9-3<br />
NSS6 satellite, E-1<br />
O<br />
obstructions<br />
distance and size, 3-4<br />
On/Off switch<br />
rack version, 4-2<br />
Index<br />
10101010<br />
98-133966-E2<br />
Index-5<br />
Index
Index<br />
OpenAMIP<br />
setup, C-2<br />
supported commands, C-4<br />
OpenAMIP IP modem<br />
IP address, 6-25, 6-30<br />
OpenAMIP keys, C-5<br />
opening antenna, 3-22<br />
options<br />
order number, 2-11<br />
options file, C-5<br />
order number<br />
options, 2-11<br />
order numbers, 2-11<br />
outline drawing<br />
ACU bulkhead, A-7<br />
ACU rack version, A-8<br />
ADU, A-6<br />
P<br />
password<br />
administrator, 6-43<br />
change, 6-44<br />
UCLI, D-2<br />
PAST, 9-8<br />
peak current, 5-1<br />
permissions<br />
user, 6-45<br />
Person Activated Self Test, 9-8<br />
placing the antenna, 3-3<br />
polarisation skew, 6-8<br />
pole mount, 3-8<br />
POST, 9-8<br />
power<br />
sources, 5-1<br />
power cable<br />
connect, 5-4<br />
selection, 5-2<br />
Power On Self Test, 9-8<br />
power supply, 2-8<br />
protect access to settings, 6-45<br />
Proxy server, disabling, 6-17<br />
Q<br />
quick guide, 8-1<br />
ACU menus, 8-2<br />
web interface, 8-1<br />
R<br />
radar<br />
distance from antenna, 3-13<br />
signal degradation, 3-15<br />
radiation, -iii<br />
radiation level, 3-6<br />
reference signal, 10 MHz, 6-25<br />
refresh<br />
browser, 6-7<br />
web interface, 6-7<br />
remove<br />
service hatch, 3-22<br />
report<br />
send by e-mail, 6-32<br />
reset, 6-55, 9-4<br />
factory default, 6-48<br />
password, 6-44<br />
reset administrator password, 6-44<br />
reset keys on ACU, 6-55<br />
RF interference<br />
recommendations, F-15<br />
RF loss<br />
ADU cable, maximum, 3-22<br />
ROAM protocol<br />
ROSS, C-14<br />
roll period<br />
limitations, 3-7<br />
mounting height, 3-7<br />
ship, 3-7<br />
ROSS box, C-14<br />
ROSS ROAM protocol, C-14<br />
RS-232<br />
connector, 4-6<br />
RS-232 to Console<br />
cable, 4-9<br />
RS-422<br />
connector, 4-6<br />
Rx-Tx<br />
connector, 4-4, 4-5<br />
Index-6<br />
98-133966-E2
S<br />
safety summary, -iii<br />
samples<br />
statistics, 6-33<br />
sampling interval, 6-33<br />
satelite<br />
Singapore, E-2<br />
satellite<br />
Apstar, E-2<br />
Astra2, E-1<br />
Australia, E-2<br />
China, E-2<br />
command line interface, D-6<br />
NSS6, E-1<br />
SatMex6, E-1<br />
SES, E-1<br />
Telstar 10, E-2<br />
Telstar 11N, E-1<br />
Thaicom 5, E-2<br />
Thor 5 T2, E-1<br />
satellite data, E-1, E-2<br />
calibration, 6-5, 6-8, 6-22<br />
SatMex6 satellite, E-1<br />
save<br />
configuration, 6-46<br />
schematics diagram, 9-94<br />
self test, 2-7, 9-4<br />
send e-mail<br />
diagnostic report, 6-36<br />
server setup<br />
SMTP, 6-32<br />
service hatch<br />
lock, 3-22<br />
remove, 3-22<br />
service port<br />
rack version, 4-2<br />
service profile<br />
calibration, 6-4<br />
SES satellite, E-1<br />
setup<br />
diagnostic report, 6-36<br />
e-mail, 6-32<br />
for statistics report, 6-32<br />
statistics report, 6-33<br />
user permissions, 6-45<br />
shadowing, 3-4<br />
ship motion centre, 3-7<br />
Index<br />
signal level<br />
modem, ACU display, 6-52<br />
Singapore satellite, E-2<br />
site map, 6-14<br />
SkyEdge II, C-17<br />
Slave ACU<br />
dual antenna, 6-39<br />
smoke deposits, 3-17<br />
SMTP<br />
server, 6-32<br />
SMTP login, 6-32<br />
SNMP, 6-55<br />
community string, 6-55<br />
software license, -ii<br />
software update, 9-5<br />
software version, 1-2, 6-14<br />
verify, 9-6<br />
source impedance<br />
measuring, 5-2<br />
specifications, A-1<br />
ACU, A-4<br />
ADU, A-2<br />
BUC, A-12<br />
cable Comtech VSAT modem, B-2<br />
cable iDirect VSAT modem, B-3<br />
LNB, A-10<br />
spreadsheet<br />
statistics report, 6-35<br />
start-up current, 5-1<br />
static IP, 6-2<br />
static IP address, 6-30<br />
statistics<br />
sampling frequency, 6-33<br />
send by e-mail, 6-32<br />
statistics report, 6-33, 6-34<br />
example, 6-35<br />
import into spreadsheet application, 6-35<br />
setup, 6-33<br />
status<br />
command line interface, D-9<br />
status messages, 9-8<br />
steel hulls<br />
grounding, F-5<br />
STM Satlink 2900 VSAT modem<br />
setup, C-15, C-17<br />
support<br />
contact information, 9-2<br />
10101010<br />
98-133966-E2<br />
Index-7<br />
Index
Index<br />
symbol rate<br />
DVB, azimuth calibration, 6-5<br />
system<br />
ACU reset, keys to press, 6-55<br />
command line interface, D-9<br />
system configuration<br />
copy, 6-46<br />
System messages, G-1<br />
T<br />
technical data, A-1<br />
Telnet, D-2<br />
Telstar 10, E-2<br />
Telstar 11N satellite, E-1<br />
terminal<br />
grounding recommendations, F-2<br />
Thaicom 5, E-2<br />
Thor 5 T2 satellite, E-1<br />
TNC connector, 4-4<br />
tools needed, 3-3<br />
track<br />
command line interface, D-10<br />
troubleshooting<br />
BUC, 9-92<br />
diagnostic report, 9-2<br />
LNB, 9-93<br />
TT number, 2-11<br />
TX gain<br />
fixed, 6-13<br />
U<br />
update<br />
calibration data, 9-89<br />
updating software, 9-5<br />
upload<br />
configuration, 6-46<br />
use<br />
daily, 8-1<br />
user name<br />
UCLI, D-2<br />
user permissions, 6-45<br />
setup, 6-45<br />
V<br />
VMU connector, 4-4, 4-5<br />
VSAT modem<br />
baud rate, 6-25<br />
Comtech 570 L or 625, 4-10<br />
Comtech 570L, C-14<br />
Gilat SkyEdge II, C-17<br />
Gilat SkyEdge II, cabling, 4-12<br />
iDirect iNFINITI, C-9<br />
iDirect INFINITI (open AMIP), C-2<br />
iNFINITI, cabling, 4-9<br />
Satlink2900, cabling, 4-11<br />
STM Satlink 2900, C-15, C-17<br />
supported types, 6-25<br />
VSAT modem option file<br />
Non-OpenAMIP, C-11<br />
OpenAMIP, C-5<br />
VSAT restrictions, -v<br />
W<br />
warning messages, G-1<br />
warnings, 9-3<br />
web interface<br />
browser settings, 6-17<br />
connect, 6-2<br />
LAN connector, 4-7<br />
navigating, 6-16<br />
refresh, 6-7<br />
web mmi<br />
LAN connector, 4-7<br />
Wiring, 4-1, 5-1<br />
X<br />
XIM, 9-91<br />
XIM data, 9-89<br />
modify, 6-46<br />
Z<br />
Zeroconf, 6-31<br />
zone<br />
command line interface, D-11<br />
Index-8<br />
98-133966-E2
98-133966-E<br />
info@thrane.com • thrane.com