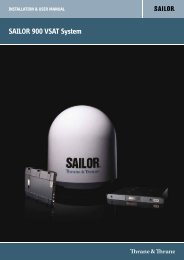
- Page 1: TRAINING, INSTALLATION & SERVICE MA
- Page 5 and 6: Safety summary The following genera
- Page 7 and 8: CAUTION! Do not manually turn the P
- Page 9 and 10: Table of contents Chapter 1 Chapter
- Page 11 and 12: Table of contents Chapter 4 Chapter
- Page 13 and 14: Table of contents 9.2 Software upda
- Page 15 and 16: Table of contents C.5 Gilat SkyEdge
- Page 17 and 18: List of figures Chapter 1 About thi
- Page 19 and 20: List of figures Figure 6-6: Example
- Page 21 and 22: List of figures Figure 9-31: Polari
- Page 23 and 24: List of figures Figure 9-105: BUC,
- Page 25 and 26: List of tables Chapter 1 About this
- Page 27 and 28: List of tables App. B VMU cable spe
- Page 29 and 30: Chapter 1 1111 About this manual 1
- Page 31 and 32: 1.6 Precautions 1.6.0.1 Warnings, C
- Page 33 and 34: Chapter 22222 Introduction 2 This c
- Page 35 and 36: 2.1.1.1 SAILOR 900 VSAT features
- Page 37 and 38: 2.1.2.1 Modules in the SAILOR 900 V
- Page 39 and 40: 21. Rotary joint. 22.Feed horn. See
- Page 41 and 42: The 19” rack version of the ACU h
- Page 43 and 44: 2.2 Part numbers and options 2.2.1
- Page 45 and 46: Installation 3 This chapter is orga
- Page 47 and 48: 3.1.3 Tools needed • Unbraco key
- Page 49 and 50: 3.2.3 Blocking zones — azimuth an
- Page 51 and 52: 3.2.5 Ship motion and offset from t
- Page 53 and 54:
Site preparation 3333 Figure 3-8: A
- Page 55 and 56:
3.2.6.3 SAILOR 900 VSAT ADU mast le
- Page 57 and 58:
3.2.7 Interference Note Do not plac
- Page 59 and 60:
S-band (~ 10 cm / 3 GHz) damage dis
- Page 61 and 62:
3.2.8 Other precautions 3.2.8.1 Con
- Page 63 and 64:
3.3.1 Installing the ADU Make sure
- Page 65 and 66:
8. Put the coaxial ADU cable throug
- Page 67 and 68:
4. Pull the service hatch free. A w
- Page 69 and 70:
3.3.4 Alternative ADU cable The max
- Page 71 and 72:
For more information about power su
- Page 73 and 74:
2. Fasten the Basic cable support t
- Page 75 and 76:
Figure 3-30: ACU, LAN connector at
- Page 77 and 78:
3.7 Installing the dual-antenna mod
- Page 79 and 80:
Interfaces 4 This chapter is organi
- Page 81 and 82:
4.1.5 DC Input connector Provide DC
- Page 83 and 84:
4.1.8 NMEA 0183 connector (RS-422)
- Page 85 and 86:
Outline (on the ACU) 6 9 1 5 Pin nu
- Page 87 and 88:
4.2 Interfaces of the VMU For inter
- Page 89 and 90:
Cable Description Cable specificati
- Page 91 and 92:
Connecting power 5 This chapter is
- Page 93 and 94:
5.2.3 Power cable recommendations 5
- Page 95 and 96:
5.4 Power up 1. Connect power to th
- Page 97 and 98:
Configuration 6 This chapter is org
- Page 99 and 100:
Figure 6-3: SAILOR 900 VSAT Dashboa
- Page 101 and 102:
Figure 6-4: Service profile for cal
- Page 103 and 104:
6.2.2.1 Fixed heading Do not use fi
- Page 105 and 106:
The following table shows the error
- Page 107 and 108:
6.2.4 Line up procedure Note The sh
- Page 109 and 110:
6.2.5 SAILOR 900 VSAT fixed TX gain
- Page 111 and 112:
6.3.1.2 Navigation The web interfac
- Page 113 and 114:
6.3.1.5 Proxy server settings in yo
- Page 115 and 116:
6.3.2.1 Information fields on the D
- Page 117 and 118:
6.3.3 Satellite profiles and VSAT m
- Page 119 and 120:
6. At Elevation cutoff enter the mi
- Page 121 and 122:
Figure 6-16: Web interface: SETTING
- Page 123 and 124:
6.3.4 Setting up Blocking zones (RX
- Page 125 and 126:
6.3.5 Configuring the LAN network Y
- Page 127 and 128:
6.3.5.2 DHCP Server Settings. On LA
- Page 129 and 130:
6.3.7 Sending statistics reports SA
- Page 131 and 132:
Parameter recorded Carrier rf.rx (G
- Page 133 and 134:
• Send the report each: Select di
- Page 135 and 136:
6.3.9.2 Configuring the Slave ACU T
- Page 137 and 138:
6.3.9.3 Blocking zone setup It is r
- Page 139 and 140:
6.3.11 Administration In this secti
- Page 141 and 142:
6.3.11.2 Logging off administration
- Page 143 and 144:
To load a configuration from a file
- Page 145 and 146:
6.4 Keypad and menus of the ACU 6.4
- Page 147 and 148:
6.4.3 The menu tree In the menu tre
- Page 149 and 150:
ANTENNA menu HEADING VERSIONS SERIA
- Page 151 and 152:
6.4.5 Resetting the system To reset
- Page 153 and 154:
Installation check 7 Now that you h
- Page 155 and 156:
7.2 Installation check list: ACU, c
- Page 157 and 158:
7.3 Installation check list: Functi
- Page 159 and 160:
Daily use — Quick guide 8 QUICK G
- Page 161 and 162:
Service & maintenance 9 In this cha
- Page 163 and 164:
To generate a statistics report sel
- Page 165 and 166:
9.2 Software update 9.2.1 Hardware
- Page 167 and 168:
Figure 9-4: Verifying software upda
- Page 169 and 170:
During service and maintenance, one
- Page 171 and 172:
9.4 Removal and replacement of the
- Page 173 and 174:
1. GPS module. This module is posit
- Page 175 and 176:
12. Low Noise Block down converter
- Page 177 and 178:
18. DC-Motor Driver Module for Azim
- Page 179 and 180:
To replace the GPS module, do as fo
- Page 181 and 182:
9.5.3 Replacing the VSAT Interface
- Page 183 and 184:
6. Remove the 4x4 mm Allen screws a
- Page 185 and 186:
9.5.4.1 Removing the Cross Elevatio
- Page 187 and 188:
9.5.4.4 Inserting a new Elevation D
- Page 189 and 190:
3. Rotate the antenna pedestal so t
- Page 191 and 192:
3. Connect the 6-pin connector with
- Page 193 and 194:
4. Disconnect the 2 connectors at t
- Page 195 and 196:
9.5.7.1 Removing the Elevation Moto
- Page 197 and 198:
7. Loosen the 4x4 mm Allen screws f
- Page 199 and 200:
Position 1 Position 2 Figure 9-42:
- Page 201 and 202:
6. Loosen the 15x4 mm Allen screws
- Page 203 and 204:
10. Loosen the 4x4 mm Allen screws
- Page 205 and 206:
4. Tighten the belt tension device
- Page 207 and 208:
8. Loosen the belt tension device b
- Page 209 and 210:
9.5.7.7 Removing the X Elevation Mo
- Page 211 and 212:
9.5.7.8 Inserting a new X Elevation
- Page 213 and 214:
9.5.7.9 Removing the Polarisation M
- Page 215 and 216:
9.5.8 Replacing the Drive Belts The
- Page 217 and 218:
9.5.8.3 Removing the Elevation Driv
- Page 219 and 220:
8. Remove the Elevation Drive Belt.
- Page 221 and 222:
7. Loosen the belt tension device b
- Page 223 and 224:
9.5.8.6 Inserting a new Azimuth Dri
- Page 225 and 226:
6. Disconnect the connector from th
- Page 227 and 228:
7. Loosen the 2x4 mm Allen screws.
- Page 229 and 230:
8. Loosen the 2x4 mm Allen screws.
- Page 231 and 232:
(green or red) When the antenna dis
- Page 233 and 234:
9.5.10.2 Inserting a new ISM To ins
- Page 235 and 236:
6. Disconnect the two RF F-connecto
- Page 237 and 238:
9.5.11.2 Inserting a new Polarisati
- Page 239 and 240:
2. Remove the 4x4 mm Allen screws f
- Page 241 and 242:
2. Remove the 4x4 mm Allen screws t
- Page 243 and 244:
3. Remove the 2xTorx20 screws on to
- Page 245 and 246:
8. Remove the 4xTorx 20 screws and
- Page 247 and 248:
7. Remove the RF connector (N-type,
- Page 249 and 250:
9.6 Updating VIM/PCM calibration da
- Page 251 and 252:
9.7 Troubleshooting 9.7.1 Overview
- Page 253:
9.7.5 Troubleshooting — LNB T
- Page 257 and 258:
Technical specifications A.1 SAILOR
- Page 259 and 260:
SAILOR 900 VSAT system components A
- Page 261 and 262:
SAILOR 900 VSAT system components A
- Page 263 and 264:
A.2.2 ACU, bulkhead Outline drawing
- Page 265 and 266:
A.2.4 N-connector interface on the
- Page 267 and 268:
A.3.1.1 Example configuration for a
- Page 269 and 270:
VMU cable specifications B This app
- Page 271 and 272:
B.2 Modem Cable iNIFINITI iDirect V
- Page 273 and 274:
VMU settings requirements C In this
- Page 275 and 276:
details on cable connections and pi
- Page 277 and 278:
Messages sent from the ACU to the V
- Page 279 and 280:
The option file must use following
- Page 281 and 282:
C.2 Non-Open-AMIP setup for iDirect
- Page 283 and 284:
C.2.2.2 Supported commands After lo
- Page 285 and 286:
Non-Open-AMIP setup for iDirect iNF
- Page 287 and 288:
C.4 STM SatLink 2900 VSAT modem C.4
- Page 289 and 290:
C.5 Gilat SkyEdge II VSAT modem C.5
- Page 291 and 292:
Command line interface D D.1 Introd
- Page 293 and 294:
D.1.3 Conventions The command descr
- Page 295 and 296:
Supported commands Command Descript
- Page 297 and 298:
Command satellite skew satellite sk
- Page 299 and 300:
Command satellite tx_if_freq satell
- Page 301 and 302:
Command track rx_rf_freq Command zo
- Page 303 and 304:
DVB-S satellites E This appendix co
- Page 305 and 306:
Grounding and RF protection F F.1 W
- Page 307 and 308:
grounded and mount a grounding kit
- Page 309 and 310:
F.3 Alternative grounding for steel
- Page 311 and 312:
F.4 Alternative grounding for alumi
- Page 313 and 314:
F.5 Alternative grounding for fibre
- Page 315 and 316:
F.6 Separate ground cable F.6.1 Gro
- Page 317 and 318:
Remember to seal the joint with pro
- Page 319 and 320:
F.8 RF interference Interference in
- Page 321 and 322:
System messages G G.1 Event message
- Page 323 and 324:
Error code (ID) Unit Severity Descr
- Page 325 and 326:
Error code (ID) Unit Severity Descr
- Page 327 and 328:
Error code (ID) Unit Severity Descr
- Page 329 and 330:
G.3 List of ACU events Error code (
- Page 331 and 332:
Error code (ID) ACU PCB Severity De
- Page 333 and 334:
Approvals H H.1 Satellite approvals
- Page 335 and 336:
Glossary Glossary 9 A ABS ACU ADM A
- Page 337 and 338:
M MIB N NID NMEA O OMT openAMIP ORE
- Page 339 and 340:
Index 10 Numerics 10 MHz reference,
- Page 341 and 342:
connector ADU, 4-4 DC, 4-3 DC Input
- Page 343 and 344:
LED ACU, 9-8 license software, -ii
- Page 345 and 346:
S safety summary, -iii samples stat
- Page 348:
98-133966-E info@thrane.com • thr