Bag Boy Electric Cart Manual rev2 - Bag Boy Company
Bag Boy Electric Cart Manual rev2 - Bag Boy Company
Bag Boy Electric Cart Manual rev2 - Bag Boy Company

You also want an ePaper? Increase the reach of your titles
YUMPU automatically turns print PDFs into web optimized ePapers that Google loves.
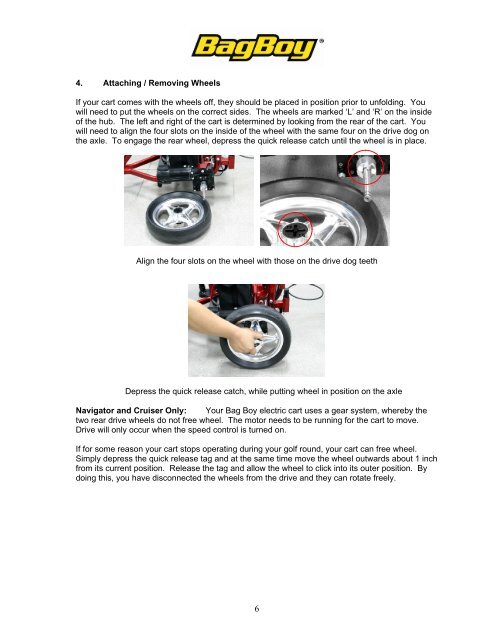
4. Attaching / Removing Wheels<br />
If your cart comes with the wheels off, they should be placed in position prior to unfolding. You<br />
will need to put the wheels on the correct sides. The wheels are marked ‘L’ and ‘R’ on the inside<br />
of the hub. The left and right of the cart is determined by looking from the rear of the cart. You<br />
will need to align the four slots on the inside of the wheel with the same four on the drive dog on<br />
the axle. To engage the rear wheel, depress the quick release catch until the wheel is in place.<br />
Align the four slots on the wheel with those on the drive dog teeth<br />
Depress the quick release catch, while putting wheel in position on the axle<br />
Navigator and Cruiser Only: Your <strong>Bag</strong> <strong>Boy</strong> electric cart uses a gear system, whereby the<br />
two rear drive wheels do not free wheel. The motor needs to be running for the cart to move.<br />
Drive will only occur when the speed control is turned on.<br />
If for some reason your cart stops operating during your golf round, your cart can free wheel.<br />
Simply depress the quick release tag and at the same time move the wheel outwards about 1 inch<br />
from its current position. Release the tag and allow the wheel to click into its outer position. By<br />
doing this, you have disconnected the wheels from the drive and they can rotate freely.<br />
6