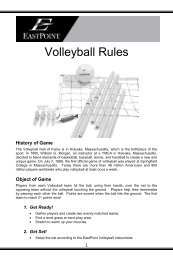
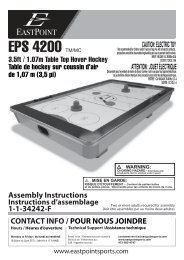
English - EastPoint Sports
English - EastPoint Sports
English - EastPoint Sports

You also want an ePaper? Increase the reach of your titles
YUMPU automatically turns print PDFs into web optimized ePapers that Google loves.
EPS 2000TM<br />
2pc Table Tennis Table<br />
PADDLES AND BALLS<br />
NOT INCLUDED<br />
Two or more adults required for assembly<br />
Assembly Instructions<br />
Model 1-1-33242
IMPORTANT -<br />
Lay out all parts before you begin<br />
• Please review the parts identifier and make sure that you have all parts before beginning assembly.<br />
• If any questions or issues, please contact us at 1-973-585-4747 BEFORE returning the product to the original place<br />
of purchase.<br />
• Please keep your original sales receipt. Staple it on the adjacent page in the space provided for future reference/use.<br />
It will be required to receive service help or parts under warranty.<br />
CONTACT INFO<br />
Hours<br />
Monday to Friday<br />
(9:00am to 5pm EST)<br />
Technical Support or Replacement Parts<br />
Email us at: consumerservice@eastpointsports.com<br />
Visit us at: www.eastpointsports.com<br />
Call: 973-585-4747<br />
1
BEFORE BUILDING -<br />
Please inspect your playfield<br />
Your Table Tennis Playfield is NOT replaceable. Any damage that exists to your playfield is not reparable<br />
under warranty. If your playfield is damaged, the entire game must be returned to the original place of<br />
purchase for an exchange.<br />
Please attach<br />
RECEIPT HERE<br />
It will be required to receive service help or parts under warranty.<br />
2
TOOLS: Required<br />
• 1 - Phillips Head Screwdriver<br />
(Standard Size) – Not Included<br />
• 1 – Hex Wrench – Included<br />
• 1 – Allen Wrench - Included<br />
Recommended (Not Required):<br />
• Electric Screwdriver or Power Driver<br />
CAUTION – DO NOT OVER TIGHTEN. Over Tightening will result in<br />
irreparable damage to the product. If using, please make sure that the<br />
tool is set to a very low torque to prevent damage to the product.<br />
• Socket Wrench Set<br />
How to use the PARTS IDENTIFIER<br />
Before you begin assembly, please make sure that<br />
you have all the parts listed and in the correct<br />
quantities. This will ensure the quickest and most<br />
organized assembly.<br />
Be sure to work on the assembly on a soft<br />
non-marring surface such as carpet or the inside of<br />
the corrugate box top to prevent causing damage<br />
to the table surface during assembly.<br />
Item #<br />
1<br />
Instructions Parts ID #<br />
Part Name<br />
Part Name<br />
Part Image<br />
Part Quantity<br />
# 52703-QT x2<br />
FOR USE WITH STEP # 1<br />
Step Used In<br />
PARTS IDENTIFIER<br />
1<br />
Top Board A<br />
2<br />
Top Board B<br />
3<br />
Bracket (Pre-installed)<br />
4<br />
Bracket (Pre-installed)<br />
NOT Replaceable<br />
FOR STEP 1<br />
x1<br />
NOT Replaceable<br />
FOR STEP 1<br />
x1<br />
#33242-03ES<br />
x4<br />
#33242-04ES<br />
x4<br />
5<br />
End Apron (1 Pre-installed)<br />
6<br />
Side Apron (2 Pre-installed)<br />
7<br />
Corner Cap (2 Pre-installed)<br />
8<br />
Handle<br />
#33242-05ES<br />
FOR STEP 3<br />
x1<br />
#33242-06ES<br />
FOR STEP 3<br />
x2<br />
#33242-07ES<br />
FOR STEP 5<br />
x2<br />
#33242-08ES<br />
FOR STEP 5<br />
x2<br />
9<br />
Front Leg (2 Pre-installed)<br />
10<br />
Front Leg Cross Tube<br />
11<br />
Inner Leg<br />
12<br />
Wheel<br />
#33242-09ES<br />
FOR STEP 6<br />
x2<br />
#33242-10ES<br />
FOR STEP 7<br />
x2<br />
#33242-11ES<br />
FOR STEP 8<br />
x2<br />
#33242-12ES<br />
FOR STEP 8<br />
x4<br />
13<br />
Inner Leg Cross Tube A<br />
14<br />
Right Linkage Tube<br />
15<br />
Left Linkage Tube<br />
16<br />
Long Safety Strap<br />
#33242-13ES<br />
FOR STEP 9<br />
x2<br />
#33242-14ES<br />
FOR STEP 10<br />
x2<br />
#33242-15ES<br />
FOR STEP 10<br />
x2<br />
#33242-16ES<br />
FOR STEP 11<br />
x1<br />
3
PARTS IDENTIFIER -Continued<br />
17<br />
Short Safety Strap<br />
18<br />
Gravity Lock<br />
19<br />
Center Net Tube<br />
20<br />
Center Net A<br />
#33242-17ES<br />
FOR STEP 11<br />
21<br />
Center Net B<br />
x2<br />
#33242-18ES<br />
FOR STEP 12<br />
22<br />
Center Net C<br />
x2<br />
#33242-19ES<br />
FOR STEP 17<br />
23<br />
Center Net D<br />
x4<br />
#33242-20ES<br />
FOR STEP 17<br />
24<br />
Ball Tray<br />
x2<br />
#33242-21ES<br />
FOR STEP 17<br />
x2<br />
#33242-22ES<br />
FOR STEP 17<br />
x2<br />
#33242-23ES<br />
FOR STEP 17<br />
x2<br />
#33242-24ES<br />
FOR STEP 17<br />
x2<br />
25<br />
Table Tennis Post<br />
26<br />
Table Tennis Net<br />
27<br />
Inner Leg Cross Tube B<br />
#33242-25ES<br />
FOR STEP 19<br />
x2<br />
#33242-26ES<br />
FOR STEP 19<br />
x1<br />
#33242-27ES<br />
FOR STEP 9<br />
x1<br />
HARDWARE<br />
60<br />
4 x 15mm Screw<br />
(NOTE: 12 Screws Pre-installed)<br />
61<br />
6.5 x 45mm Allen Key Bolt<br />
62<br />
6.5mm Nut<br />
63<br />
Bushing<br />
#33242-60ES<br />
FOR STEP 5,11,17<br />
64<br />
T Style Washer<br />
x17<br />
#33242-61ES<br />
FOR STEP 7-10,12,18<br />
65<br />
6.5mm Nylon Nut<br />
x28<br />
#33242-62ES<br />
FOR STEP 6, 8,10<br />
66<br />
4mm Allen Key<br />
x14<br />
#33242-63ES<br />
FOR STEP 10<br />
67<br />
6.5 - 8mm - Wrench<br />
x8<br />
#33242-64ES<br />
FOR STEP 12<br />
68<br />
6.5 x 51mm Allen Key Bolt<br />
x2<br />
#33242-65ES<br />
FOR STEP 12<br />
x2<br />
#33242-66ES<br />
x1<br />
#33242-67ES<br />
x1<br />
#33242-68ES<br />
FOR STEP 6<br />
x2<br />
4
Table Tennis Table<br />
BEFORE<br />
BEFORE BUILDING - Please inspect your<br />
playfield and layout all your parts<br />
Your Table Tennis Playfield is NOT replaceable.<br />
Any damage that exists to your playfield is not<br />
reparable under warranty. If your playfield is<br />
damaged, the entire game must be returned to<br />
the original place of purchase for an exchange.<br />
STEP 1<br />
Player End<br />
1<br />
2<br />
1 Top Board A x1<br />
2 Top Board B x1<br />
We suggest<br />
using flattened<br />
carton to build<br />
table on. This<br />
will supply a<br />
clean flat surface<br />
to protect table<br />
tops.<br />
Table Center<br />
Player End<br />
Put the boards<br />
upside down<br />
with the center<br />
end facing each<br />
other (these are<br />
the sides<br />
without screws<br />
on the edge).<br />
STEP 2<br />
2<br />
66<br />
Loosen all Apron<br />
screws on backside<br />
of Board B<br />
by using Allen<br />
Key.<br />
66<br />
60<br />
Unscrew 1mm<br />
HARDWARE<br />
QTY.<br />
60 4 x 15mm Screw (Pre-installed) x12<br />
66 4mm Allen Key x1<br />
5
Table Tennis Table<br />
STEP 3<br />
6<br />
6<br />
5<br />
5 End Apron x1<br />
6 Side Apron x2<br />
Slide the cut outs<br />
in apron into the<br />
gap between the<br />
boards and<br />
screws.<br />
Repeat for all 3<br />
Aprons.<br />
6<br />
60<br />
STEP 4<br />
66<br />
Tighten all screws<br />
to secure all 3<br />
aprons.<br />
66<br />
HARDWARE<br />
QTY.<br />
60 4 x 15mm Screw (Pre-installed) x12<br />
66 4mm Allen Key x1<br />
DO NOT<br />
overtighten<br />
screws.<br />
60<br />
DO NOT<br />
overtighten<br />
6
Table Tennis Table<br />
STEP 5<br />
60<br />
8<br />
7 Corner Cap x2<br />
8 Handle x2<br />
Attach 2<br />
remaining<br />
Corner Caps.<br />
60<br />
7<br />
HARDWARE<br />
QTY.<br />
60 4 x 15mm Screw x10<br />
66 4mm Allen Key x1<br />
Attach 2<br />
handles.<br />
DO NOT<br />
overtighten<br />
screws.<br />
66<br />
STEP 6<br />
9<br />
67<br />
66<br />
9<br />
68<br />
62<br />
68<br />
9 Front Leg x2<br />
HARDWARE<br />
QTY.<br />
62 6.5mm Nut x2<br />
66 4mm Allen Key x1<br />
67 6.5 - 8mm Wrench x1<br />
68 6.5 x 51mm Bolt x2<br />
Lay Legs flat on<br />
table top surface.<br />
Line up the holes<br />
in the Legs with<br />
the holes on the<br />
Brackets, then<br />
insert the Bolt (61).<br />
Repeat for both<br />
front Legs.<br />
DO NOT<br />
overtighten<br />
bolts.<br />
STEP 7<br />
61<br />
10<br />
61<br />
61<br />
10<br />
61<br />
10 Front Leg Cross Tube x2<br />
HARDWARE<br />
QTY.<br />
Repeat for both<br />
sets of front Legs.<br />
DO NOT<br />
overtighten<br />
bolts.<br />
61 6.5 x 45mm Bolt x4<br />
66 4mm Allen Key x1<br />
66<br />
NOTE: use lower hole for<br />
Front Leg Cross Tube<br />
7
Table Tennis Table<br />
STEP 8<br />
61<br />
62<br />
11<br />
12<br />
11<br />
67<br />
11 Inner Leg x2<br />
12 Wheel x4<br />
Make sure sink<br />
holes face<br />
outward.<br />
Gravity Lock<br />
hole should be<br />
on the right side<br />
(on outside of<br />
table).<br />
Make sure the<br />
inner Legs align to<br />
the brackets, then<br />
bolt on all 4 legs.<br />
DO NOT<br />
overtighten<br />
bolts.<br />
A<br />
B<br />
9.5mm/0.375”<br />
NOTE: Leave<br />
approximately<br />
9.5mm/0.375’’<br />
gap between<br />
each board<br />
NOTE: Sink Holes face out<br />
5 SINK HOLES<br />
11<br />
67<br />
66<br />
HARDWARE<br />
QTY.<br />
61 6.5 x 45mm Bolt x4<br />
62 6.5mm Nut x4<br />
66 4mm Allen Key x1<br />
67 6.5 - 8mm Wrench x1<br />
IMPORTANT: Make sure sink<br />
holes face outward. Gravity Lock<br />
hole should be on the right side<br />
(on outside of table).<br />
STEP 9<br />
61<br />
61<br />
13<br />
13<br />
27<br />
66<br />
13 Inner Leg Cross Tube A x2<br />
27 Inner Leg Cross Tube B x1<br />
DO NOT<br />
overtighten<br />
bolts.<br />
HARDWARE<br />
QTY.<br />
61 6.5 x 45mm Bolt x6<br />
66 4mm Allen Key x1<br />
8
Table Tennis Table<br />
STEP 10<br />
NOTE: the position of “V” shape on linkage Tubes. Make sure all linkage Tubes are<br />
assembled correctly. V should point skyward and be located closer to the inner legs.<br />
IMPORTANT:<br />
Flat side of all Linkage<br />
Tubes should face all legs<br />
(As Shown Below)<br />
15<br />
14<br />
14<br />
15<br />
11<br />
Player End<br />
63<br />
62<br />
9<br />
FLAT SIDE<br />
FLAT SIDE<br />
14<br />
63<br />
62<br />
FLAT SIDE<br />
61<br />
61<br />
FLAT SIDE<br />
FLAT SIDE<br />
FLAT SIDE<br />
14 Right Linkage Tube x2<br />
15 Left Linkage Tube x2<br />
HARDWARE<br />
QTY.<br />
61 6.5 x 45mm Bolt x8<br />
62 6.5mm Nut x8<br />
There are Right Linkage Tubes & Left Linkage Tubes.<br />
NOTE: The position of “V” shape on Linkage Tubes and make sure all Linkage Tubes are<br />
assembled correctly.<br />
For each Linkage Tube, one end should be connected to inside of front leg and the<br />
other end should be connected to outside of inner legs. (See Diagram Above).<br />
Repeat for all 4 Linkage Tubes.<br />
Player End<br />
63 Bushing x8<br />
9
Table Tennis Table<br />
STEP 11<br />
66<br />
16 Long Safety Strap x1<br />
17 Short Safety Strap x2<br />
DO NOT<br />
overtighten<br />
screws.<br />
HARDWARE<br />
QTY.<br />
60<br />
17<br />
Pre - drilled screw hole<br />
60<br />
16<br />
60 4 x 15mm Screw x3<br />
66 4mm Allen Key x1<br />
STEP 12<br />
NOTE: Repeat for both Gravity Locks.<br />
18<br />
65<br />
66<br />
18 Gravity Lock x2<br />
HARDWARE<br />
QTY.<br />
61 6.5 x 45mm Bolt x2<br />
64 T Style Washer x2<br />
Note the position<br />
of the Gravity<br />
Lock. (See inset for<br />
details)<br />
Repeat for both<br />
Gravity Locks.<br />
65 6.5mm Nylon Nut x2<br />
61<br />
64<br />
67<br />
66 4mm Allen Key x1<br />
67 6.5 - 8mm Wrench x1<br />
STEP 13<br />
At least three adults<br />
IMPORTANT:<br />
Be sure to keep both<br />
halves even with each<br />
other as you flip<br />
them up.<br />
Turn table on its side<br />
3 or 4 strong<br />
adults are<br />
recommended to<br />
flip the table as<br />
shown.<br />
Be sure to keep<br />
both halves even<br />
with each other<br />
as you flip<br />
them up.<br />
10
Table Tennis Table<br />
STEP 14<br />
Fold table tops in<br />
Lock Wheels<br />
Make sure to lock<br />
Safety Strap before<br />
moving on to step<br />
15.<br />
STEP 15<br />
DO NOT<br />
lean table<br />
on legs!<br />
IMPORTANT: Lift<br />
table and turn it<br />
in the air.<br />
DO NOT lean table<br />
on its legs to<br />
avoid damage.<br />
NOTE:<br />
Lift off floor and<br />
turn in the air<br />
STEP 16<br />
NOTE: Place on all 4 wheels at once<br />
Once table is<br />
upright, unlatch<br />
the Safety Strap<br />
and Gravity Locks<br />
then lower the<br />
two table halves,<br />
one at a time.<br />
Check and<br />
make sure no<br />
bolts or screws<br />
came loose.<br />
11
Table Tennis Table<br />
STEP 17<br />
19<br />
20<br />
19<br />
60<br />
21<br />
23<br />
24 22<br />
Snap and lock into place<br />
STEP 18<br />
19 Center Net Tube x4<br />
20 Center Net A x2<br />
21 Center Net B x2<br />
22 Center Net C x2<br />
23 Center Net D x2<br />
24 Ball Tray x2<br />
HARDWARE<br />
QTY.<br />
60 4 x 15mm Screw x4<br />
Repeat for both<br />
center net<br />
assemblies.<br />
61<br />
NOTE: Make sure<br />
Center Net is aligned<br />
at Center of table before<br />
tightening Bolts (63).<br />
Step 17 Assembly<br />
x2<br />
HARDWARE<br />
QTY.<br />
61 6.5 x 45mm Bolt x4<br />
Before installing<br />
centered net,<br />
make sure table<br />
halves are<br />
aligned. This will<br />
ensure the NET<br />
is centered<br />
when installed.<br />
DO NOT<br />
overtighten<br />
Bolts.<br />
61<br />
Step 17<br />
Assembly<br />
STEP 19<br />
26<br />
A<br />
Screw on<br />
the Posts<br />
25<br />
B<br />
Slide on<br />
the Net<br />
25 Table Tennis Post x2<br />
26 Table Tennis Net x1<br />
Screw on the Table<br />
Tennis Posts into<br />
the center net<br />
assemblies.<br />
Slide Net onto<br />
Posts.<br />
12
STORAGE POSITION and PLAY POSITION<br />
Table Tennis Table<br />
NOTE: Make sure to secure<br />
Safty Straps after table<br />
tops are flipped up and<br />
Gravity Locks engage.<br />
NOTE: Make sure Gravity Locks<br />
engage on both sides of table<br />
when putting Table into the<br />
Storage Position.<br />
PADDLES AND BALLS<br />
NOT INCLUDED<br />
NOTE: Make sure Gravity Locks engage on both sides of table when putting Table into the Storage Position.<br />
NOTE: Make sure to secure Safty Straps after table tops are flipped up and Gravity Locks engage.<br />
NOTE: Use Two Adults when putting table into the play position. First release the Safty Strap. Then with the table<br />
supported with one hand on the handle, release the Gravity Lock and gently lower the table top to the down<br />
(Play Position). Repeat for both ends.<br />
HAVE FUN!<br />
13
Limited Warranty<br />
As described in and as limited by this Limited Warranty, <strong>EastPoint</strong> <strong>Sports</strong>, Ltd. (the “Company”) warrants this Table Tennis Table (the “Product”) to be free from defects in<br />
workmanship and materials for a period of 90 days from the date of original purchase. The term defects shall mean any imperfections that impair the use of the product.<br />
The Company reserves the right to request confirmation of Proof of Purchase when requesting parts or service in order to confirm that the game is within its warranty period.<br />
What is Covered: Except as provided herein, this Limited Warranty covers all defects in materials and workmanship. This Limited Warranty is void if the Product is:<br />
• Damaged through improper usage or storage, negligence, misuse, abuse, transportation damage, acts of nature, or accident (including failure to follow the<br />
instructions supplied with the product)<br />
• Used in commercial applications, rentals or a commercial environment<br />
• Modified or repaired by anyone not authorized by the Company<br />
What is Not Covered:<br />
The Limited Warranty does not cover:<br />
• Expendable items such as cosmetic parts, game playing accessories, and any other items that may show signs of wear due to normal usage<br />
• Any transportation/delivery/installation costs incurred by the Consumer (either home from the original place of purchase or back to the original place of purchase)<br />
What the Company Will Pay For:<br />
• If any part or component of the Product which is covered by this Limited Warranty is found by the Company to be defective, the Company will provide replacement<br />
parts without charge. The Company’s obligation to repair or replace the Product or any portion thereof, shall be limited to the original purchase price of the product.<br />
• If during the Limited Warranty period, the product is found to be defective, the Company will, at the Company’s option, repair, replace, or make remuneration for the<br />
Product (either the same or equivalent value) without charge.<br />
How to Obtain Warranty Service: In order to enforce your rights under this Limited Warranty, you must follow these procedures:<br />
• You must return the ORIGINAL COPY OF YOUR SALES RECEIPT to the Company.<br />
• You must call the Company’s Consumer Service Department at 1-877-279-7071 on Monday through Friday between the hours of 9:00 A.M. and 5:00 P.M. (EST) to notify<br />
the Company of the nature of the problem. At the Company’s option, replacement parts or a new Product (either the same or equivalent value) will be sent to you<br />
at no charge.<br />
• If you are instructed to return the Product to the Company for servicing, you are responsible for shipping the Product, at your expense, to the address designated<br />
by the Company in packaging that will protect against further damage.<br />
• You must also include your name, address, daytime telephone number, Product model number, and a description of the problem.<br />
• The Company will pay for any shipping charges to return the repaired of replaced Product to you.<br />
THIS LIMITED WARRANTY IS AVAILABLE ONLY TO THE ORIGINAL PURCHASER OF THE PRODUCT AND IS VALID ONLY IN THE UNITED STATES. THE COMPANY’S<br />
LIABILITY IS LIMITED TO THE REPAIR, REPLACEMENT, OR REMUNERATION, AT ITS OPTION, OF ANY DEFECTIVE PRODUCT AND SHALL NOT INCLUDE ANY LIABILITY<br />
FOR INDIRECT, INCIDENTAL, OR CONSEQUENTIAL DAMAGES OF ANY KIND. THIS WARRANTY IS EXPRESSLY MADE IN LIEU OF ALL OTHER WARRANTIES, EXPRESSED<br />
OR IMPLIED, INCLUDING BUT NOT LIMITED TO THE IMPLIED WARRANTY OF MERCHANTABILITY AND THE IMPLIED WARRANTY OF FITNESS FOR A PARTICULAR<br />
PURPOSE. SOME STATES DO NOT ALLOW LIMITATIONS ON HOW LONG AN IMPLIED WARRANTY LASTS OR DO NOT ALLOW FOR EXCLUSION OF INCIDENTAL OR<br />
CONSEQUENTIAL DAMAGES. TO THAT EXTENT, THE ABOVE LIMITATIONS MAY NOT APPLY TO YOU.<br />
This Limited Warranty gives you specific legal rights, but you may also have other rights that vary from state to state.<br />
If you have any questions regarding this Limited Warranty or the operation of the Product, you may call or write us.<br />
ALL WARRANTY CLAIMS MUST BE ACCOMPANIED BY A COPY OF THE SALES RECEIPT/PROOF OF PURCHASE. REPORT ANY DEFECTS TO:<br />
<strong>EastPoint</strong> <strong>Sports</strong>, 628 ROUTE 10, SUITE #5 WHIPPANY, NEW JERSEY 07981 • 1-973-585-4747<br />
TABLE MAINTENANCE AND CARE<br />
Table Top –<br />
• If Table Tennis surface needs to be cleaned, you can use any gentle surface cleaner<br />
(not bleach or ammonia) with a lint free cloth.<br />
628 ROUTE 10, SUITE #5 WHIPPANY, NEW JERSEY 07981 • 1-973-585-4747<br />
14
628 ROUTE 10, SUITE #5 WHIPPANY, NEW JERSEY 07981 • 1-973-585-4747<br />
1-1-33242 IM0024