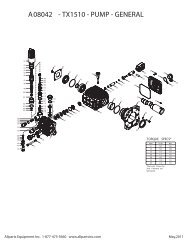
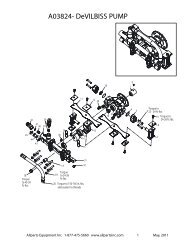
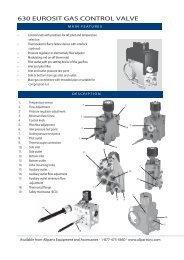
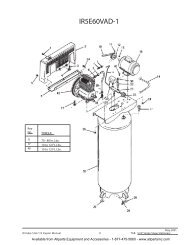
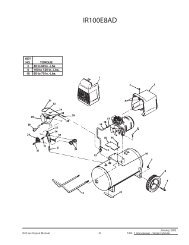
Illustrated Parts Diagram
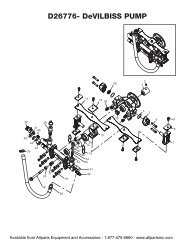
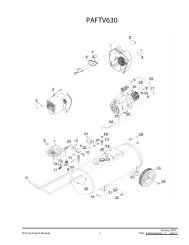
Illustrated Parts Diagram
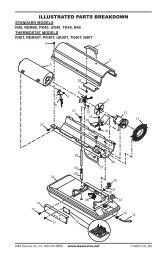
Illustrated Parts Diagram

Create successful ePaper yourself
Turn your PDF publications into a flip-book with our unique Google optimized e-Paper software.
R<br />
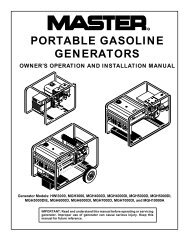
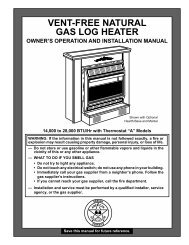
OWNER’S MANUAL<br />
PROPANE SUPPLY<br />
User must provide propane gas and propane<br />
tank(s).<br />
Use this heater only with a propane vapor<br />
withdrawal supply system. The amount of<br />
propane gas ready for use from propane<br />
tanks varies. Two factors decide this amount:<br />
1. The amount of propane gas in tank(s)<br />
2. The temperature of tank(s)<br />
The chart below shows the number of 45-kg<br />
tanks needed to run this heater.<br />
Do not operate this product with any tank<br />
smaller than 45 kg.<br />
Temperature<br />
(°C) At Tank Number of Tanks<br />
12° 2<br />
0° 3<br />
-10° (Use larger<br />
propane supply)<br />
Less gas is vaporized at lower temperatures.<br />
You may need a larger supply in colder<br />
weather. Your local propane gas dealer will<br />
help you select the proper supply system.<br />
INSTALLATION<br />
WARNING: Review and understand<br />
the warnings in the<br />
Safety Information Section, page<br />
2. They are needed to safely operate<br />
this heater. Follow all local<br />
codes when using this heater.<br />
WARNING: Test all gas piping<br />
and connections for leaks<br />
after installing or servicing. Never<br />
use an open flame to check for a<br />
leak. Apply a mixture of liquid<br />
soap and water to all joints.<br />
Bubbles forming show a leak.<br />
Correct all leaks at once.<br />
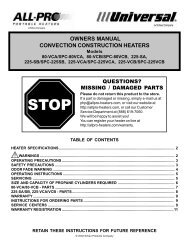
1. Provide propane supply system (see<br />
Propane Supply, page 5).<br />
2. Connect fuel gas connector on hose/<br />
regulator assembly to propane tank(s).<br />
Tighten firmly using wrench.<br />
IMPORTANT: Tighten regulator with<br />
black adjustment knob pointing down.<br />
Pointing adjustment knob down protects<br />
regulator from weather damage.<br />
3. Connect hose to inlet connector.<br />
Tighten firmly using a wrench.<br />
4. Open propane supply valve on propane<br />
tank(s).<br />
5. Adjust regulator between .34 and 1.34<br />
bar (see Figure 7). Note: Higher regulator<br />
setting will allow heater to produce<br />
more heat.<br />
6. Check all connections for leaks.<br />
WARNING: Never use an open<br />
flame to check for a leak. Apply a<br />
mixture of liquid soap and water<br />
to all joints. Bubbles forming show<br />
a leak. Correct all leaks at once.<br />
7. Close propane supply valve.<br />
150 Model Shown<br />
0<br />
l<br />
Supply<br />
Valve<br />
Fuel Gas<br />
Connector<br />
Hose<br />
Hose<br />
Inlet Connector<br />
Propane<br />
Tank<br />
Regulator<br />
Figure 6 - Hose and Inlet Connector<br />
I<br />
N<br />
.34 Bar<br />
E<br />
S<br />
A<br />
C<br />
E<br />
Adjustment Knob<br />
(pointing down)<br />
Figure 5 - Regulator With Adjustment<br />
Knob Pointing Down<br />
5<br />
10<br />
15<br />
20<br />
1.34 Bar<br />
5<br />
1<br />
1<br />
2<br />
5<br />
10<br />
15<br />
20<br />
Regulator<br />
Figure 7 - Adjustable Regulator Set At .34<br />
Bar<br />
100166<br />
5