Lawn Genie Richdel L80306p Controller Owner's ... - Irrigation Direct
Lawn Genie Richdel L80306p Controller Owner's ... - Irrigation Direct
Lawn Genie Richdel L80306p Controller Owner's ... - Irrigation Direct

You also want an ePaper? Increase the reach of your titles
YUMPU automatically turns print PDFs into web optimized ePapers that Google loves.
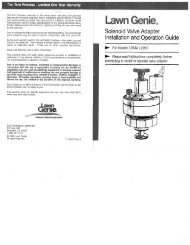
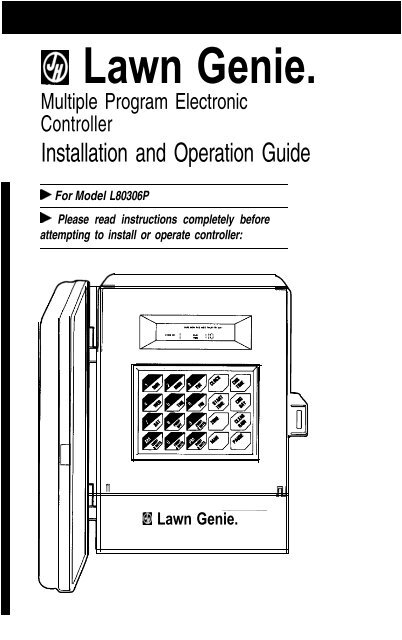
E!l <strong>Lawn</strong> <strong>Genie</strong>.<br />
Multiple Program Electronic<br />
<strong>Controller</strong><br />
Installation and Operation Guide<br />
b For Model L80306P<br />
b Please read instructions completely before<br />
attempting to install or operate controller:<br />
m<br />
_____<br />
H <strong>Lawn</strong> <strong>Genie</strong>.
This manual explains<br />
how to install your<br />
<strong>Lawn</strong> <strong>Genie</strong> sprinkler<br />
controller and program<br />
it for the watering<br />
schedule that’s right<br />
for your garden. The<br />
folllowing sections are<br />
arranged to match the<br />
most efficient installation<br />
sequence.<br />
Refer to them in the<br />
order presented for<br />
best results.<br />
Setting the current time and day ................................... 9<br />
Setting the run times and daily schedule..................... 10<br />
Setting the start times ................................................. 12<br />
Water considerations .................................................. 13<br />
Typical program for lawn & garden.............................. 14<br />
Additional information<br />
Installing apump-start relay........................................ 15<br />
Special functions.......................................................... 16<br />
Trouble-shooting ......................................................... 19<br />
Warranty.................................................................... 21<br />
Your watering schedule .............................................. 24<br />
(<br />
it. All without any effort on<br />
your part once you’ve programmed<br />
your system.<br />
The <strong>Lawn</strong> <strong>Genie</strong> L80306P<br />
controller gives you four<br />
ways to control how you<br />
distribute water to various<br />
parts of your yard. Here’s<br />
how they work:<br />
Zone control<br />
<strong>Lawn</strong>s, shrubs, flower beds<br />
and other foliage all need<br />
different amounts of water.<br />
You can tailor the water delivered<br />
to different parts of<br />
your yard by assigning a different<br />
day schedule and run<br />
Programming options<br />
Certain parts of your yard<br />
may need water every<br />
other day. Other parts may<br />
need water twice a week.<br />
Multiple programming lets<br />
you assign each of your<br />
Zones a separate watering<br />
day schedule. You can program<br />
a combination of specific<br />
days of the week or<br />
day intervals-whichever<br />
best suits your needs. For<br />
example, Zone 1 may water<br />
Mondays only, Zone 3 may<br />
water Tuesdays and<br />
Thursdays only, Zones 4<br />
and 5 may water every<br />
Here’s how the controller connects to your system<br />
Plug-In <strong>Controller</strong> unit Automatic Automatic<br />
in-line valve<br />
(some installations)<br />
Introduction ................................................................ 3 Your <strong>Lawn</strong> <strong>Genie</strong> sprinkler time to one or more sprinkler<br />
heads controlled by a 6 may water daily. For<br />
other day, and Zones 2 and<br />
Features ....................................................................... 4<br />
controller is the heart of<br />
your automated watering single valve. Each valve and details, see “Setting the<br />
Installation<br />
system. It lets you supply the sprinklers it controls are days to water” on page 11.<br />
Installing the controller.................................................. 6 different parts of your lawn called a Zone. The L80306P Start times<br />
and garden with precisely lets you divide your yard You can specify up to four<br />
Connecting the valves................................................... 7 the water they require, into as many as six Zones. different times per day for<br />
Connecting the battery .................................................. 8 ’<br />
exactly when they require<br />
your system to start water-<br />
Programming<br />
ing. Each start time you set<br />
will water in sequence all<br />
Zones programmed for that<br />
day, beginning with the<br />
lowest numbered Zone.<br />
Zones set to water on other<br />
days will start at these<br />
same times on the days for<br />
which they’re programmed.<br />
Watering run time<br />
To deliver the correct<br />
amount of water to the<br />
foliage within each Zone,<br />
you can set each Zone to<br />
shut off after a specified<br />
period of time-from<br />
0 to 12 hours, 59 minutes.<br />
Sprinkler<br />
2
<strong>Controller</strong> display<br />
Shows time of day, day of the week, Zone being watered and watering<br />
run time. Also alerts you to programming errors and short circuits.<br />
Clock key<br />
For preparing clock to accept the current time and day.<br />
CHG Time key<br />
For setting current time of day, as well as start and run times for each Zone.<br />
Start Time key<br />
For setting up to four start times per day.<br />
CHG Day key<br />
For setting current day and watering days for each Zone.<br />
Zone key<br />
For displaying the six Zone settings to allow for programming and<br />
reviewing schedules.<br />
Clear/Rain key<br />
For stopping automatic watering in progress, preventing automatic<br />
watering from starting, or clearing entry errors.<br />
Pause key<br />
For temporarily interrupting a watering cycle in progress.<br />
Manual key<br />
For watering all Zones or a selected Zone manually.<br />
Day/Numbers keys<br />
For setting clock time, watering days and watering run times.<br />
Terminal screws<br />
For connecting transformer, valve wires and optional pump relay to controller.<br />
Battery connector<br />
For installing 9-volt battery for built-in, fail-safe program.<br />
Plug-in transformer<br />
For converting 120-volt household current into safe, low-voltage power.<br />
(250-volt source on 50 Hz units.)<br />
5
Select the location<br />
A. Choose an indoor location near a standard<br />
1 20-volt dual electrical outlet. (250-volt outlet for 50 Hz<br />
international units.)<br />
A<br />
CAUTION: DO NOT place the con troller<br />
where temperatures may exceed 130”<br />
Fahrenheit (55” Centigrade), on a circuit controlled<br />
by a switch, or on the same circuit as<br />
a high power user (refrigerator, air conditioner;<br />
garage door opener; etc.). Malfunctions<br />
may result.<br />
Mount the controller<br />
A. Install a No. 8 screw at eye level in the wall, leaving<br />
l/8” of screw head projecting.<br />
B. Slip the keyhole opening on the back of the controller<br />
over the screw head.<br />
C. Open the controller case and install two screws through<br />
the holes in the wiring compartment at the bottom of the<br />
controller.<br />
NOTE: To install the controller on a plaster or<br />
masonry wall, use plastic or lead anchors to<br />
secure screws.<br />
Wire the valves<br />
A. Run valve wiring underground wherever possible. For Wires to individual controller terminals<br />
line runs less than 800 feet long, use 18-gauge, plastic<br />
jacketed thermostat control wire; over 800 feet, use<br />
14-gauge wire. Your dealer can provide this wire in 2,3,<br />
4, 5,6,7 and 8-wire color-coded strands.<br />
B. Connect a single common wire to one of the wires<br />
from each valve. NOTE: It doesn’t matter which of the<br />
two valve wires you use.<br />
C. Solder or join all splices with wire nuts; then seal<br />
One wire from each valve connects<br />
with vinyl or waterproof cement to assure a water-<br />
to a single common wire running to<br />
controller<br />
resistant connection.<br />
IMPORTANT: The power transformer is protected<br />
by an electronic circuit breaker: Do not connect<br />
a combination of valves requiring an inrush current<br />
of more than 1 amp at 24 VAC.<br />
Connect the valve wires to controller<br />
A. Run all valve wires up through the insulated hole in<br />
bottom of controller.<br />
B. Connect the wire from valve number 1 to the terminal<br />
screw marked 1 on the controller; the wire from valve<br />
number 2, to the terminal 2, and so on. This allows your<br />
controller to selectively water the Zone controlled by<br />
( each valve.<br />
NOTE: On the L80306P terminal designations<br />
are marked on the inside of the wiring<br />
compartment cover.<br />
C. Connect the common wire to the terminal marked<br />
COMM.<br />
D. If using a water pump or master valve, refer to<br />
page 15 for installation details.<br />
CONTROLLER<br />
Individual wires<br />
connect valves to<br />
separate terminals<br />
Single common<br />
wire connects al<br />
valves to COMM<br />
terminal
Connect the battery<br />
A battery back-up system is built into your <strong>Lawn</strong> <strong>Genie</strong><br />
controller to maintain your programmed watering schedule<br />
in memory in case of temporary power failure.<br />
A. Connect a 9-volt alkaline battery (not supplied) to the<br />
battery connector in the wiring compartment of the controller<br />
case.<br />
B. Place the battery in the wiring compartment,<br />
C. Replace the wiring compartment cover.<br />
D. Replace the battery at least once a year. More often<br />
if frequent power failures occur.<br />
CAUTION: DO NOT allow the battery connector to<br />
! touch the controller’s terminal strip (directly above<br />
the wiring compartment). Also, do not connect or<br />
disconnect valve wires while any Zones are in<br />
operation.<br />
El<br />
NOTE: Check local codes to ensure that wiring and<br />
installation meet all requirements.<br />
In the controllers display, ; ,? P represents noon, and I ,z R<br />
represents midnight. When the power is first turned on,<br />
the controller always displays ‘it It fi for Sunday, and a<br />
time of ‘-I I:r 0 P (4:00 PM).<br />
Set the current time and day:<br />
Setting the current time is easy. Here’s how you’d<br />
do it if the time were now 10:03 AM.<br />
A. Press @ The display’s clock digits will flash.<br />
B. Press the numbered keys to enter current time<br />
of day, then m or @. Be sure to set both hours and<br />
minutes (e.g. 10:03 must be entered as l-O-O-3).<br />
C. Press @. ‘it 1-I fi will begin flashing on the display.<br />
D. Press the day key corresponding to today. The new<br />
day will flash in the display.<br />
E. Press @. The correct time and day are now set, and<br />
the clock is running.<br />
NOTf: Once you’ve pressed @, @ or CHG/DAY, you<br />
must make a controller entry within 30 seconds<br />
or the display will automatically return to its<br />
original setting.<br />
,,:,<br />
r:,,,g<br />
YW<br />
8
How long and how often to water<br />
To program a Zone to water at specific day intervals:<br />
To accommodate the special watering needs of different<br />
parts of your yard, you can assign each Zone its own separate<br />
watering day schedule. You can set each Zone to<br />
water either on specific days of the week or at<br />
specific intervals between watering days (for example,<br />
every second day).<br />
In addition, your controller gives you a wide range of run<br />
times to provide precisely the right amount of water to<br />
each Zone. Settings may vary from OFF to 12 hours,<br />
59 minutes.<br />
To program a Zone to water on specific days<br />
of the week:<br />
A. Press @. ZONE 1 is displayed with a run time of : n 5.<br />
B. Press @. The run time begins to flash.<br />
C. Press the appropriate numbered keys to set any<br />
watering run time up to 12 hours, 59 minutes.<br />
D. PressCHG/Day. All the Zone’s options are displayed, with<br />
‘z, l_i I-! through ‘J Iii-!-flashing.<br />
E. Press the appropriate interval keys in any combination<br />
to set the desired schedule: m, @, @, 4!!!!&~<br />
F. Press @ The schedule for Zone 1 is now entered<br />
into the controllers memory, and ZONE 2 is displayed,<br />
ready for programming.<br />
G. Repeat steps B through F for each Zone.<br />
NOTE: The day you program an interval schedule<br />
becomes Day 1 of that schedule. For example, if<br />
you press @ on Monday. that Zone will water<br />
next on Wednesday<br />
IMPORTANT You must set all Zones that are not<br />
connected or you do not wish to water to OFF:<br />
Do this by pressing @ until desired Zone number<br />
appears in the display, then press @ , followed<br />
by @ and @. Otherwise controller will automatically<br />
shut down your entire system until<br />
properly programmed.<br />
As each Zone waters, 1; I_: I7 7-l c-if will flash on the<br />
display, accompanied by a minute-by-minute countdown<br />
of watering time remaining. Upon reaching zero, the display<br />
will begin counting down the next Zone to be<br />
watered.<br />
NOTE: The L80306P controller has a preset factory<br />
program which will keep your systern operating in<br />
the event of a power failure, and an inactive battery<br />
This preset program will start a watering cycle every<br />
day beginning at 2:00 AM and will water each Zone<br />
for 5 minutes.<br />
10<br />
A. Press @, ZONE 1 is displayed with a run time<br />
of : I:r ‘E,.<br />
B. Press @$. The run time begins to flash.<br />
C. Press the appropriate numbered keys to set any<br />
watering run time up to 12 hours, 59 minutes.<br />
D. Press @. All the Zone’s options are displayed, with<br />
‘i, 1-r I7 through I:, I’l7-flashing.<br />
E. Press the appropriate day keys to set one or more<br />
days you wish to water that Zone every week.<br />
F. Press @. The schedule for Zone 1 is now entered<br />
into the controller’s memory, and ZONE 2 is displayed,<br />
ready for programming.<br />
G. Repeat steps B through F for each Zone<br />
IMPORTANT- You must set all Zones that are not<br />
connected or that you do not wish to water to OFF:<br />
Do this by pressing @ until each Zone to be set<br />
appears, then press @ , then Clear/Rain & @<br />
Otherwise controller will automatically shut down<br />
your entire system until properly programmed.<br />
11
You can set your controller to water up to four times a<br />
day. Each start time you set will activate a watering cycle<br />
which will begin at that time in the lowest numbered<br />
Zone and progress sequentially across all other<br />
scheduled Zones.<br />
To water once a day, use START NO.1 only. Add other<br />
start times (up to three) to increase daily watering<br />
frequency.<br />
For example, suppose you schedule Zones I,2 and 3 to<br />
water every day, and schedule Zones 4.5 and 6 to water<br />
Wednesday and Friday only If you set two start times<br />
of 8:OO AM and 7:00 PM, Zones 1,2 and 3 will begin<br />
watering at those times every day, and Zones 4,5 and 6<br />
will begin watering at those times on Wednesday and<br />
Friday only<br />
To simplify programming, write down your watering<br />
schedule first, using the reference chart on page 24.<br />
Set the start times:<br />
Press @, START NO. 1 is displayed with a time<br />
IJ -<br />
_‘I_Cl_I<br />
-1-t 1-1 1-t<br />
n,cc.<br />
,-4-t<br />
Press CHG/Time. The time digits begin to flash.<br />
Press the appropriate numbered keys to set hours,<br />
minutes, and m or @ for START NO. 1<br />
0. Press @ again. START NO.1 is now entered, and<br />
START NO. 2 is indicated with I:r F F displayed.<br />
E. Repeat steps B, C and D to set additional start times.<br />
IMPORTANT- Program any unused start times to<br />
OFF For each, press @ , followed by @ , @<br />
and @.<br />
Since all Zones on a Program water in sequence, beginning<br />
with the lowest numbered Zone, make sure<br />
all Program start times are far enough apart to prevent<br />
watering cycles from overlapping. If overlap occurs, the<br />
controller will automatically delay the next Program start<br />
time to allow completion of the current watering cycle.<br />
A watering cycle that runs past midnight will cancel any<br />
overlapping start times before midnight.<br />
Enter start times in any order. Start times are activated<br />
1 in chronological order, regardless of programming<br />
sequence. For example, START NO.1 may actually be<br />
the last watering time of the day.<br />
Watering considerations<br />
If possible, schedule watering cycles in the early morning,<br />
when water pressure is at its highest. This allows<br />
ample time for water to soak in while evaporation and<br />
wind drift are low. Evening watering can leave foliage<br />
damp for too long, leading to mildew under some<br />
circumstances.<br />
Ask your local nursery or garden center for a schedule<br />
suited to the special weather and soil conditions in<br />
your area.<br />
12 13
Al<br />
/II<br />
To connect your controller to a well pump or<br />
master valve:<br />
Here’s an example of how you might use the L80306P to<br />
program a watering schedule for a typical lawn and garden.<br />
Please refer to the instructions on the preceding<br />
pages for details on specific keystroke sequences.<br />
To set Zones 1,2 and 3 to water on Mondays and<br />
Wednesdays, press: @ ,@ , m, B<br />
To set Zones 4 and 5 to water every fourth day, press:<br />
To set Zone 6 to OFF, press: @ , @ , @ , @.<br />
To set all Zones to run for 15 minutes each, press:<br />
@,@,Q.Q.<br />
To set a watering cycle to start at 6:00 AM, press:<br />
To set a second start time at 8:00 PM for watering<br />
twiceaday,press:@,@,m,m,m. -<br />
If your water doesn’t come from the pipes of a standard<br />
public water supply, you may be using an electrically<br />
operated master valve, or a pump to draw directly from<br />
a well, pond, or similar source. In these cases, you’ll need<br />
to make the following wiring connections so your sprinkler<br />
controller can activate the valve or pump.<br />
A. Bring two wires up through the same hole in the<br />
controller cabinet used for the valve wiring.<br />
B. Connect one wire to the terminal marked PUMP<br />
C. Connect the second wire to the terminal marked COMM.<br />
D. For master valve installations, connect both wires to<br />
a master valve rated at 24 VAC and a current no greater<br />
than 9 VA.<br />
E. For pump start relay installations, connect the two<br />
wires to an auxiliary relay with a coil rated at 24 VAC<br />
and a current no greater than 9 VA. Then wire the relay’s<br />
contact to supply voltage to the pump’s contactor. A qualified<br />
electrician can make these connections for you. For<br />
best results, use <strong>Lawn</strong> <strong>Genie</strong>’s L3OOOOW Pump Starter to<br />
control a pump up to 2 HP at 240 volts.<br />
NOTE: The controller's pump output will turn<br />
on only when a Zone is watering manually or<br />
au toma tically<br />
IMPORTANT: The power transformer is protected<br />
by an electronic circuit breaker: Do not connect<br />
a combination of pump relay and valves requiring<br />
an inrush current of more than 1 amp at 24 VAC.<br />
FROM<br />
PUMPSTART<br />
RELAY<br />
14 15
Clearing Errors<br />
You can correct a mistake while setting hours, minutes or<br />
watering days, press Clear/Rain to return to the original<br />
setting, then enter in the correct information.<br />
The controller will not accept a run time greater than 12<br />
hours, 59 minutes. Instead, it will respond by flashing<br />
1: 1; E fl:: on the display for 30 seconds. During this time<br />
you must press @ and enter the correct run time, or<br />
the controller will revert to the previous run time settings.<br />
Interrupting the watering cycle<br />
You can stop a watering cycle already in progress by<br />
pressing @ once (PAUSE and RUN TIME messages<br />
will flash). Press @ again to resume watering. If left in<br />
pause mode until midnight, controller will automatically<br />
reset to begin watering at the first programmed start time<br />
of the new day.<br />
Turning off the system/rain shut-off<br />
Reviewing your programmed schedule<br />
You can review any start time or Zone data-even while<br />
watering. Cycle through the settings for either function by<br />
repeatedly pressing either @ or @ If no key is<br />
pressed for 30 seconds, the display returns to the controllers<br />
current operating mode.<br />
Manual watering<br />
You can manually water all Zones or a selected Zone at<br />
any time-except when an automatic watering cycle is<br />
already in progress.<br />
To water all Zones (except Zones set to OFF), press @<br />
twice. Each Zone will water in numerical sequence for<br />
its programmed run time.<br />
To water a selected Zone, press MAN once. Then press<br />
@ repeatedly to display the desired Zone. Press @<br />
again to start watering the Zone displayed.<br />
To water a selected Zone for a specific amount of<br />
time, press MAN once. Then @ repeatedly to<br />
display the desired Zone. Next, press @ and enter<br />
the new run time using the numbered keys. Finally,<br />
press @ once more to start watering this Zone.<br />
Changing run times in manual mode won’t alter your<br />
original program settings.<br />
You can prevent automatic watering from starting by<br />
pressing @ when no watering is taking place. I; A I fi<br />
will flash on the display. Press @ again to resume<br />
watering.<br />
Pushing @ when automatic watering is already in<br />
progress will terminate the watering then taking place,<br />
but resume automatic watering at the next start time.<br />
You may still activate manual watering when controller is<br />
in rain mode.<br />
Changing programmed settings<br />
You can enter new program settings for time and day,<br />
start times, and Zones at any time-even while watering<br />
is taking place. However if you alter run time or<br />
watering days on a Zone that is currently operating, the<br />
change will not effect the watering then in progress; all<br />
changes take effect with the next watering cycle.<br />
Likewise, changing start time, clock time, or clock day<br />
will not effect watering already in progress.<br />
16 17
Electronic circuit breaker operation<br />
If the controller detects a short circuit, it will automatically<br />
turn off power to the shorted Zone’s automatic valve.<br />
The display will alternately flash I’ I_! ‘i, and E I; I? U R ,<br />
while showing the shorted Zone’s number. The controller<br />
will continue to automatically water all other Zones under<br />
the programmed watering cycles, while the display continues<br />
flashing the Zone number with the short circuit.<br />
To return the controller and display to normal operating<br />
mode after repairing the short, press CLEAR/RAIN.<br />
Battery back-up<br />
In the event of a power failure, a battery back-up system<br />
will maintain your programmed watering schedule in<br />
memory for up to 24 hours. It will not operate the clock<br />
to keep the correct time of day.<br />
Voltage Specifications<br />
Input<br />
120 VAC<br />
60 HERTZ<br />
15 WATTS<br />
International Units<br />
250 VAC<br />
50 HERTZ<br />
15 WATTS<br />
output<br />
24 VAC<br />
1 AMP<br />
Problem<br />
One or more valves<br />
do not water<br />
F I_: 5 and a Zone number<br />
are alternately flashing<br />
on display<br />
Clock won’t keep correct time<br />
and/or controller won ‘t retain<br />
programming<br />
Zones turn on when they’re<br />
NOT programmed to start<br />
Clock has correct time but<br />
no valves will turn on<br />
One Zone won’t shut off<br />
electrically<br />
All Zones programmed for a<br />
certain day water more than<br />
once that day<br />
Malfunctions aren’t common, but when they<br />
occur, they’re often due to one of these<br />
frequently overlooked causes.<br />
Possible Cause<br />
1.<br />
2.<br />
3.<br />
4.<br />
1.<br />
2.<br />
3.<br />
1.<br />
2.<br />
3.<br />
4.<br />
1.<br />
1<br />
2<br />
3<br />
1<br />
2<br />
1<br />
Faulty solenoid<br />
Poor wire connection/common<br />
Possible break in wire<br />
Valve flow stem screwed down too far<br />
Faulty solenoid<br />
Poor or shorted wire connection<br />
All unconnected Zones are not<br />
programmed to OFF mode.<br />
No battery<br />
Weak or bad battery<br />
<strong>Controller</strong> on circuit controlled by a switch<br />
<strong>Controller</strong> on same circuit as high power user<br />
(refrigerator, air conditioner, garage door opener, etc.)<br />
Total combined run times have overlapped<br />
with another start time<br />
<strong>Controller</strong> is in RAIN mode<br />
The common wire is not connected<br />
Valve flow stem is screwed down too far<br />
Faulty valve<br />
Particles of dirt or debris are stuck in valve<br />
More than one start time is programmed<br />
WARNING: 00 not link two or more<br />
controllers using a common transformer<br />
or common wire.<br />
For additional assistance call our Customer Service Hot-line (800) 231-5117.<br />
18 19
LIMITED WARRANTY<br />
<strong>Lawn</strong> <strong>Genie</strong> warrants to the purchaser of its products for<br />
a period of two (2) years from the date of original purchase<br />
that any defective product proved to be caused by faulty<br />
workmanship or faulty materials, when installed per instructions<br />
and used in a normal manner, will be repaired<br />
or replaced at <strong>Lawn</strong> <strong>Genie</strong>’s option at no charge, providing<br />
the product is received at the <strong>Lawn</strong> <strong>Genie</strong> factory, or authorized<br />
factory service center, with all transportation charges<br />
prepaid within two years of the date of original purchase.<br />
This warranty does not apply to damages or malfunctions<br />
resulting from accidents, misuse or neglect. <strong>Lawn</strong> <strong>Genie</strong> will<br />
not pay labor or other costs of removal or reinstallation of<br />
any so-called defective products.<br />
NO IMPLIED WARRANTIES (INCLUDING BUT NOT<br />
LIMITED TO) FITNESS FOR A PARTICULAR PURPOSE,<br />
WHERE APPLICABLE, AND MERCHANTABILITY SHALL<br />
EXTEND BEYOND THE PERIOD OF THE EXPRESS WARRANTY<br />
DESCRIBED ABOVE. IN NO EVENT SHALL LAWN GENIE<br />
BE RESPONSIBLE FOR INCIDENTAL OR CONSEQUENTIAL<br />
DAMAGES TO PROPERTY WHICH MAY ARISE FROM OR<br />
RELATE TO THE PURCHASE OF ANY LAWN GENIE PRODUCT.<br />
Some states do not allow limitations on how long<br />
an implied warranty lasts or the exclusion or limitation of<br />
incidental or consequential damages, so one or both of the<br />
above limitations may not apply to you.<br />
This warranty gives you specific legal rights, and you<br />
may also have other rights which vary from state to state.<br />
To exercise your warranty, send unit, with photocopy<br />
of dated receipt, postage prepaid to*:<br />
9455 Railroad Drive<br />
El Paso, TX 79924<br />
(915) 757-2586<br />
(800) 231-5117<br />
20
I<br />
Zone Watering Days Run Time location<br />
6<br />
Start Times<br />
1-A !<br />
1-B I<br />
2-A I<br />
2-B I<br />
q<br />
Hardie <strong>Irrigation</strong><br />
- -<br />
A James Htrdte Company<br />
21 559001 Rev. 10-92