S1-AM009-L - DDKS Industries, hydraulic components distributor
S1-AM009-L - DDKS Industries, hydraulic components distributor
S1-AM009-L - DDKS Industries, hydraulic components distributor

Create successful ePaper yourself
Turn your PDF publications into a flip-book with our unique Google optimized e-Paper software.
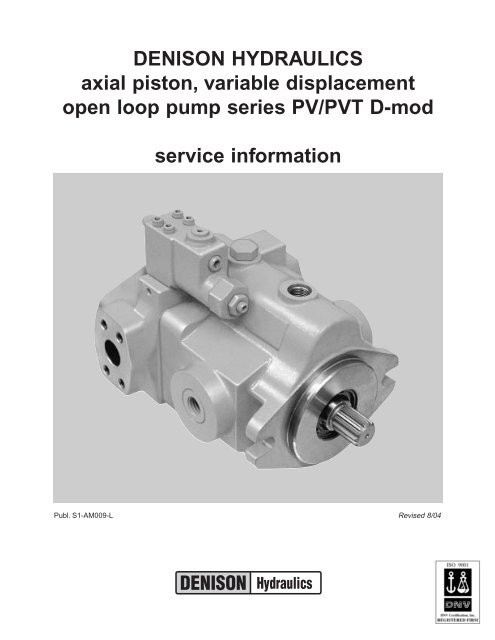
DENISON HYDRAULICS<br />
axial piston, variable displacement<br />
open loop pump series PV/PVT D-mod<br />
service information<br />
Publ. <strong>S1</strong>-<strong>AM009</strong>-L Revised 8/04
CONTENTS<br />
PAGE<br />
typical characteristics-------------------------------------------------------------------------------------- 3<br />
fluid connections------------------------------------------------------------------------------------------- 3<br />
higher speed guides---------------------------------------------------------------------------------------- 4<br />
general information---------------------------------------------------------------------------------------- 4<br />
operation of pump----------------------------------------------------------------------------------------- 5<br />
mounting----------------------------------------------------------------------------------------------------- 5<br />
shaft options------------------------------------------------------------------------------------------------- 5<br />
shaft information------------------------------------------------------------------------------------------- 5<br />
side load capability----------------------------------------------------------------------------------------- 5<br />
piping-------------------------------------------------------------------------------------------------------- 5<br />
system relief valves---------------------------------------------------------------------------------------- 5<br />
service information----------------------------------------------------------------------------------------- 6<br />
recommended fluids--------------------------------------------------------------------------------------- 6<br />
viscosity----------------------------------------------------------------------------------------------------- 6<br />
viscosity index---------------------------------------------------------------------------------------------- 6<br />
temperature------------------------------------------------------------------------------------------------- 6<br />
maintenance------------------------------------------------------------------------------------------------- 6<br />
fluid cleanliness--------------------------------------------------------------------------------------------- 6<br />
comparison of solid contamination classification systems------------------------------------------- 6<br />
startup procedure for new installation------------------------------------------------------------------- 6<br />
troubleshooting--------------------------------------------------------------------------------------------- 7<br />
assembly tool drawings------------------------------------------------------------------------------------ 9<br />
figure 1 shaft seal installation tool---------------------------------------------------------------------- 9<br />
figure 2 ball bearing installation tool------------------------------------------------------------------- 9<br />
figure 3 shaft seal installation tool--------------------------------------------------------------------- 9<br />
figure 4 trunnion assembly tool------------------------------------------------------------------------ 10<br />
figure 5 trunnion removal tool------------------------------------------------------------------------- 10<br />
disassembly procedure----------------------------------------------------------------------------------- 11<br />
trunnion removal------------------------------------------------------------------------------------------ 12<br />
rework limits of wear parts------------------------------------------------------------------------------ 13<br />
parts inspection-------------------------------------------------------------------------------------------- 14<br />
figure 6 exploded view of pump----------------------------------------------------------------------- 17<br />
parts list---------------------------------------------------------------------------------------------------- 18<br />
assembly procedure--------------------------------------------------------------------------------------- 21<br />
cleaning and inspection-------------------------------------------------------------------------------- 21<br />
housing and shaft seal---------------------------------------------------------------------------------- 21<br />
shaft and bearing---------------------------------------------------------------------------------------- 21<br />
housing and shaft---------------------------------------------------------------------------------------- 21<br />
housing and hanger------------------------------------------------------------------------------------- 21<br />
barrel holddown----------------------------------------------------------------------------------------- 21<br />
barrel, piston/shoe/retainer----------------------------------------------------------------------------- 22<br />
housing and rotating group---------------------------------------------------------------------------- 22<br />
port block assembly------------------------------------------------------------------------------------- 22<br />
figure 7 port plate installation------------------------------------------------------------------------ 22<br />
torque on housing bolts-------------------------------------------------------------------------------- 23<br />
‘C’ compensator----------------------------------------------------------------------------------------- 23<br />
figure 8 ‘C’ compensator assembly------------------------------------------------------------------ 23<br />
‘F’ & ‘L’ compensator---------------------------------------------------------------------------------- 23<br />
figure 9 ‘F ‘& ‘L’ compensator----------------------------------------------------------------------- 23<br />
‘J’ & ‘K’ torque limiter--------------------------------------------------------------------------------- 24<br />
figure 10 ‘J’& ‘K’ torque limiter--------------------------------------------------------------------- 24<br />
‘T’ power limiter---------------------------------------------------------------------------------------- 25<br />
figure 11 ‘T’ power limiter---------------------------------------------------------------------------- 25<br />
final assembly------------------------------------------------------------------------------------------- 26<br />
pump test--------------------------------------------------------------------------------------------------- 27<br />
‘C compensator test------------------------------------------------------------------------------------- 27<br />
‘F’ compensator test------------------------------------------------------------------------------------ 27<br />
‘L’ compensator test------------------------------------------------------------------------------------- 27<br />
‘J’ & ‘K’ torque limiter test---------------------------------------------------------------------------- 28<br />
figure 12 ‘J’ & ‘K’ torque limiter adjustment------------------------------------------------------ 28<br />
‘T’ power limiter test----------------------------------------------------------------------------------- 29<br />
figure 13 ‘T’ power limiter adjustment------------------------------------------------------------- 29<br />
compensator section drawings-------------------------------------------------------------------------- 30<br />
PV6 installation------------------------------------------------------------------------------------------- 31<br />
PV10 installation------------------------------------------------------------------------------------------ 32<br />
PV15 installation------------------------------------------------------------------------------------------ 33<br />
PV20 installation------------------------------------------------------------------------------------------ 34<br />
PV29 installation------------------------------------------------------------------------------------------ 35<br />
PVT6 installation------------------------------------------------------------------------------------------ 36<br />
PVT10 installation---------------------------------------------------------------------------------------- 37<br />
PVT15 installation---------------------------------------------------------------------------------------- 38<br />
PVT20 installation---------------------------------------------------------------------------------------- 39<br />
PVT29 installation---------------------------------------------------------------------------------------- 40<br />
‘J’ & ‘K’ torque limiter installation-------------------------------------------------------------------- 41<br />
‘T’ power limiter installation---------------------------------------------------------------------------- 42<br />
ordering code---------------------------------------------------------------------------------------------- 43<br />
conversions & formulas--------------------------------------------------------------------------------- 44<br />
notes-------------------------------------------------------------------------------------------------------- 45<br />
Seal Kit---------------------------------------------------------------------------------------------------- 19<br />
2
DATA<br />
TYPICAL CHARACTERISTICS<br />
Specification Term Series Series Series Series Series<br />
PV6 PV10 PV15 PV20 PV29<br />
PVT6 PVT10 PVT15 PVT20 PVT29<br />
•displacement in 3 /rev. 0.88 1.26 2.09 2.62 3.78<br />
at max angle cm 3 /rev. 14.4 21.1 34.2 42.9 61.9<br />
•pressure, continuous psi 3500 3500 3500 3500 3000<br />
bar 241 241 241 241 207<br />
intermittent 1) psi 4500 4500 4500 4500 4000<br />
bar 310 310 310 310 276<br />
•speed, max. 2) rpm 1800 1800 1800 1800 1800<br />
•rotating inertia lb in 2 2.00 3.3 7.87 11.97 21.84<br />
kg m 2 .0006 .00099 .00233 .00355 .00647<br />
•compensator response<br />
off-stroke ms 50 50 50 50 50<br />
on-stroke ms 120 120 120 120 120<br />
•maximum compensator psi 4000 4000 4000 4000 3500<br />
bar 276 276 276 276 241<br />
•compensator- psi/turn 650 650 650 650 650<br />
adjustment bar/turn 44.8 44.8 44.8 44.8 44.8<br />
•max. vol. adjustment<br />
full to zero- stroke turns 8.5 8.5 8.5 9.7 10.5<br />
maximum torque 3) lb-in 28 25 41 49 45<br />
Nm 3.2 2.8 4.6 5.5 5.1<br />
•minimum inlet- in-Hg -6.12 -6.12 -6.12 -6.12 -6.12<br />
at 1800 rpm mm-Hg -155 -155 -155 -155 -155<br />
•maximum inlet- psi 50 50 50 50 50<br />
pressure all series bar 3.4 3.4 3.4 3.4 3.4<br />
•max. case pressure psi 10 10 10 10 10<br />
bar 0.70 0.70 0.70 0.70 0.70<br />
•peak case pressure- psi 15 15 15 15 15<br />
over inlet pressure bar 1 1 1 1 1<br />
•input mounting SAE 82-2 101-2 101-2 127-2 127-2<br />
(A) (B) (B) (C) (C)<br />
•input shaft, keyed SAE 19-1 22-1 22,25-1 4) 32-1 32-1<br />
splined 22-4 22-4 22,25-4 4) 32-4 32-4<br />
(A,B) (B) (B,B-B) (C) (C)<br />
•shaft bearing life at-<br />
1800 rpm, 2500 psi<br />
ball bearing hrs 3100 4800 3500 4400 2100<br />
roller bearing hrs 9600 9400 3100 5100 2600<br />
1500 rpm, 172 bar<br />
ball bearing hrs 3720 5760 4200 5280 2520<br />
roller bearing hrs 11520 11280 3720 6120 3120<br />
•weight-approx. -PV lb 24 36 43 57 73<br />
Kg 11 16 20 26 33<br />
•weight-approx. -PVT lb 30 45 55 71 93<br />
Kg 14 20 25 32 42<br />
FLUID CONNECTIONS<br />
1)<br />
10% of operation time, not exceeding 6 successive seconds.<br />
2)<br />
for speeds over 1800 rpm see higher speeds guideline chart pg. 4.<br />
3)<br />
this is a maximum torque-actual torque reduces by about 25% at full stroke.<br />
4)<br />
PV15 uses 22-1,22-4 (SAE-B) only.<br />
Term Series Series Series Series Series<br />
PV6 PV10 PV15 PV20 PV29<br />
PVT6 PVT10 PVT15 PVT20 PVT29<br />
•port A&B, PV SAE St. Thd. -12 -20 -20 -20 -20<br />
(inlet, outlet) BSPP 3/4 1-1/4 1-1/4 1-1/4 1-1/4<br />
•port A (inlet),PVT in. 1” 1-1/4” 1-1/2” 1-1/2” 2”<br />
SAE code 61split flg. mm 25.4 31.75 38.1 38.1 50.8<br />
•port B (outlet),PVT in. 3/4” 1” 1” 1” 1”<br />
SAE code 61split flg. mm 19.1 25.4 25.4 25.4 25.4<br />
•port D SAE St. Thd. -8 -10 -10 -12 -12<br />
BSPP 1/2 3/4 3/4 1 1<br />
•port V SAE St. Thd. -4 -4 -4 -4 -4<br />
BSPP 1/4 1/4 1/4 1/4 1/4<br />
3
DATA<br />
HIGHER SPEED GUIDES<br />
PV6<br />
PVT6<br />
PV10<br />
PVT10<br />
PV15<br />
PVT15<br />
PV20<br />
PVT20<br />
PV29<br />
PVT29<br />
Minimum inlet pressure<br />
maximum<br />
speed pressure gage absolute pressure case pressure<br />
rpm psi bar in-Hg mm-Hg psi bar psi bar<br />
1800 -3.00 -0.21 -6.12 -155 11.70 0.80 10 0.69<br />
2050 -3.00 -0.21 -6.12 -155 11.70 0.80 7 0.48<br />
2100 -3.00 -0.21 -6.12 -155 11.70 0.80 5 0.34<br />
2750 -2.35 -0.16 -4.79 -122 12.35 0.85 5 0.34<br />
2900 -0.96 -0.07 -1.97 -50 13.74 0.95 5 0.34<br />
3000 0.00 0.00 0.00 0 14.70 1.00 5 0.34<br />
1800 -3.00 -0.21 -6.12 -155 11.70 0.80 10 0.69<br />
2100 -3.00 -0.21 -6.12 -155 11.70 0.80 7 0.48<br />
2500 -3.00 -0.21 -6.12 -155 11.70 0.80 5 0.34<br />
2550 -2.51 -0.17 -5.12 -130 12.19 0.84 5 0.34<br />
2700 -1.03 -0.07 -2.10 -53 13.67 0.94 5 0.34<br />
2800 0.00 0.00 0.00 0 14.70 1.00 5 0.34<br />
3000 2.18 0.15 4.44 114 16.88 1.16 5 0.34<br />
1800 -3.00 -0.21 -6.12 -155 11.70 0.80 10 0.69<br />
2100 -3.00 -0.21 -6.12 -155 11.70 0.80 7 0.48<br />
2230 -3.00 -0.21 -6.12 -155 11.70 0.80 5 0.34<br />
2275 -2.53 -0.17 -5.16 -130 12.17 0.84 5 0.34<br />
2350 -1.71 -0.12 -3.49 -89 12.99 0.90 5 0.34<br />
2500 0.00 0.00 0.00 0 14.70 1.00 5 0.34<br />
1800 -3.00 -0.21 -6.12 -155 11.70 0.80 10 0.69<br />
2050 -3.00 -0.21 -6.12 -155 11.70 0.80 7 0.48<br />
2100 -2.45 -0.17 -6.12 -127 12.25 0.85 5 0.34<br />
2200 -1.25 -0.09 -5.16 -65 13.45 0.93 5 0.34<br />
2300 0.00 0.00 0.00 0 14.70 1.00 5 0.34<br />
2400 1.31 0.09 2.66 68 16.01 1.10 5 0.34<br />
1800 -3.00 -0.21 -6.12 -155 11.70 0.80 10 0.69<br />
2050 -3.00 -0.21 -6.12 -155 11.70 0.80 7 0.48<br />
2100 -2.45 -0.17 -4.99 -127 12.25 0.85 5 0.34<br />
2200 -1.25 -0.09 -2.55 -65 13.45 0.93 5 0.34<br />
2300 0.00 0.00 0.00 0 14.70 1.00 5 0.34<br />
2400 1.31 0.09 2.66 68 16.01 1.10 5 0.34<br />
MAXIMUM ALLOWABLE<br />
THROUGH DRIVE TORQUE<br />
Note: Watch the case pressures carefully. Rapid compensation at high speeds can<br />
cause severe case spikes. If the pump feeds into a blocked center valve that closes<br />
quickly, use both case drain ports and direct short case drain lines and a relief valve.<br />
Max. input torque: max. torque allowed on input shaft from the combined torques of<br />
front and rear pumps.<br />
Max. rear drive torque: max. torque allowed from rear pump.<br />
input<br />
shaft<br />
rear mounting<br />
pad<br />
PVT6<br />
input max. rear rear max.<br />
shaft input mounting drive coupling rear drive<br />
torque pad (spline) torque<br />
lbs-in.(Nm)<br />
lbs-in.(Nm)<br />
SAE-19-1 (A) key 1125 (127,1) SAE-82-2 (A) SAE-16-4 (A) 1125 (127,1)<br />
SAE-22-4 (B) spline 2025 (228,8) SAE-22-4 (B) 1125 (127,1)<br />
max. input<br />
torque<br />
rear drive<br />
coupling<br />
- max. rear<br />
drive torque<br />
PVT10<br />
PVT15<br />
SAE-22-1 (B) key 1680 (189,8) SAE-82-2,101-2 (A, B) SAE-16-4 (A) 1680 (189,8)<br />
SAE-22-4 (B) spline 2550 (288,1) SAE-22-4 (B) 1925 (217,5)<br />
SAE-22-1(B) key 1680 (189,8) SAE-82-2,101-2 (A, B) SAE-16-4 (A) 1680 (189,8)<br />
SAE-22-4 (B) spline 2185 (246,9) SAE-22-4 (B) 2000 (226)<br />
SAE-25-1 (B-B) key 2850 (332) SAE-25-4 (B-B) 2000 (226)<br />
SAE-25-4 (B-B) spline 3825 (432,2) 2000 (226)<br />
PVT20<br />
SAE-32-1 (C) key 4675 (528,3) SAE-82-2,101-2,127-2 SAE-16-4 (A) 3850 (435)<br />
SAE-32-4 (C) spline 4675 (528,3) (A,B,C) SAE-22-4 (B) 3850 (435)<br />
SAE-25-4 (B-B) 3850 (435)<br />
SAE-32-4 (C) 3850 (435)<br />
PVT29<br />
SAE-32-1 (C) key 4880 (551,4) SAE-82-2,101-2,127-2 SAE-16-4(A) 3850 (435)<br />
SAE-32-4 (C) spline 6300 (711,9) (A,B,C) SAE-22-4 (B) 3850 (435)<br />
SAE-25-4 (B-B) 3850 (435)<br />
SAE-32-4 (C) 3850 (435)<br />
GENERAL INFORMATION<br />
The PV pumps have a displacement of 0.88 to 3.78 cu. in/rev,. 14.4 to 61.9 cc/rev. with<br />
a continuous working pressure of 3500 psi, 241 bar except the PV29 which is rated at<br />
3000 psi, 207 bar, intermittent operation at 4500 psi, 310 bar except the PV29 which is<br />
rated at 4000 psi, 276 bar. These pumps can be equipped with a pressure compensator,<br />
ventable compensator, load sensing or power limit control.<br />
The PV pumps have been designed to operate in a wide range of applications in<br />
industries where high pressure and variable flow are required at competitive cost.<br />
4
DESCRIPTION<br />
OPERATION OF PUMP<br />
These pumps have the familiar principles originated for DENISON HYDRAULICS axial<br />
piston units.<br />
The shaft is splined to the barrel which carries the nine axial pistons. Each piston terminates<br />
in a ball on which is swaged a shoe that is free to pivot and rotate. It bears<br />
against the cam surface which is angled to the shaft axis. The opposite end of the barrel<br />
lightly bears against the port plate with its arcuate openings. These communicate to<br />
the ports A & B of the piston unit. The barrel and piston shoes are free to move axially<br />
to compensate for wear, for thickness variations of the fluid film and for dimensional<br />
changes caused by temperature and pressure.<br />
The piston shoes are held against the cam surface by the hold-down plate. It rotates at<br />
shaft speed and is permitted to adjust to the cam angle by the hold-down ball which<br />
loads it.<br />
The hanger cam axis, the shaft, and the plane of the piston ball centers all coincide<br />
with the center of moments of the unit to give a fully balanced design. This reduces<br />
control forces and wear to a mimimum.<br />
The angle of the cam surface determines the displacement as well as the direction of<br />
fluid flow for a given rotation. The cam surface is supported on a movable hanger.<br />
Various controls adjust and limit the hanger angle.<br />
MOUNTING<br />
These pumps are designed to operate in any position. The mounting hub and two bolt<br />
mounting flange are in full conformance with SAE standards, except as noted on<br />
installation drawings. The pump shaft must be in alignment with the shaft of the source<br />
driver and should be checked with a dial indicator. The mating pilot bore and coupling<br />
must be concentric. This concentricity is particularly important if the shaft is rigidly connected<br />
to the driven load without a flexible coupling.<br />
See installation drawings pgs. 31 through 42, for mounting and pg. 4 maximum allowable<br />
torque in the data section for torque limits.<br />
series 6 10 15 20 29<br />
PV (rear ported) 23-9862 23-9863 23-9864 23-9865 23-9866<br />
PVT (side ported) 23-9982 23-9983 23-9980 23-9984 23-9985<br />
PV/PVT torque limiter 23-9996 23-9996 23-9996 23-9996 23-9996<br />
SHAFT OPTIONS:<br />
SHAFT INFORMATION:<br />
SAE splined and keyed, see installation drawings for details.<br />
Splined: The shafts will accept a maximum misalignment of 0.002”, 0,06mm total indicator<br />
reading when the pump is foot mounted and 0.001”, 0,03 mm when flange<br />
mounted. Angular misalignment at the male and female spline axis must be less than ±<br />
0.002” per inch radius, ± 0,002 mm/mm per mm radius. The coupling interface must be<br />
lubricated.<br />
DENISON recommends lithium molydisulfide or similar grease. The female coupling<br />
should be hardened to 27-34 Rc and must conform to SAE-J498c, class 5 flat root<br />
side fit.<br />
Keyed: High strength heat treated keys must be used. Replacement keys must be<br />
hardened to 27-34 Rc. The key corners must be chamfered 0.030”-0.040”,<br />
0.075-1.0 mm at 45° to clear radii that exist in the keyway.<br />
SIDE LOAD CAPABILITY:<br />
PIPING<br />
The PV series is designed for inline-drive and side loading on the shaft is not recommended.<br />
If this is unavoidable consult your nearest DENISON HYDRAULICS representative.<br />
Connect inlet and outlet lines to the port block of the pump.<br />
See installation drawings in the back of this bulletin for port connections.<br />
The maximum case pressure is 10 psi, 0.7 bar continuous, 15 psi, 1 bar intermittent.<br />
Case pressure must never exceed inlet pressure by more than 15 psi, 1 bar. When<br />
connecting case drain line make certain that drain plumbing passes above highest<br />
point of the pump before passing to the reservoir. If not, install a 5 psi, 0.3 bar case<br />
pressure check valve to be certain the case is filled with oil at all times.<br />
The case leakage line must be of sufficient size to prevent back pressure in excess of<br />
15 psi, 1 bar and returned to the reservoir below the surface of the oil as far from the<br />
supply suction as possible. All fluid lines, whether pipe, tubing, or hose must be adequate<br />
size and strength to assure free flow through the pump. An undersize inlet line<br />
will prevent the pump from operating at full rated speed. An undersize outlet line will<br />
create back pressure and cause heat generation. Flexible hose lines are recommended.<br />
If rigid piping is used, the workmanship must be accurate to eliminate strain on the<br />
pump port block or to the fluid connections. Sharp bends in the lines must be eliminated<br />
wherever possible. All system piping must be cleaned with solvent or equivalent<br />
before installing pump. Make sure the entire <strong>hydraulic</strong> system is free of dirt, lint, scale,<br />
or other foreign material.<br />
Caution: Do not use galvanized pipe. Galvanized coating can flake off with continued<br />
use.<br />
SYSTEM RELIEF VALVES<br />
Although the PV series pumps have very fast off-stroke compensator response, system<br />
relief valves are recommended in all cases for safety considerations.<br />
5
DESCRIPTION<br />
SERVICE INFORMATION<br />
RECOMMENDED FLUIDS<br />
VISCOSITY<br />
VISCOSITY INDEX<br />
TEMPERATURE<br />
MAINTENANCE<br />
These <strong>hydraulic</strong> products are designed to give long dependable service when properly<br />
applied and their systems properly maintained. These general instructions apply to typical<br />
systems. Specific instructions for particular equipment can be developed from<br />
them.<br />
The fluid recommended for use in these pumps has a petroleum base and contains<br />
agents which provide oxidation inhibition and anti-rust, anti-foam and de-aerating properties<br />
as described in DENISON HYDRAULICS standard HF-1. Where anti-wear additive<br />
fluids are specified, see DENISON HYDRAULICS standard HF-0.<br />
max. at cold start- 7500 SUS, 1600 cSt<br />
at low pressure, low flow, and if possible, low speed<br />
max. at full power- 750 SUS, 160 cSt<br />
optimum for max. life- 140 SUS, 30 cSt<br />
minimum at full power- 60 SUS, 10 cSt<br />
90 V. I. minimum. Higher values extend the range of operating temperature but may<br />
reduce the service life of the fluid.<br />
Determined by the viscosity characteristics of the fluid used. Because high temperatures<br />
degrade seals, reduce the service life of the fluid and create hazards, fluid temperature<br />
should not exceed 180 0 F,. 82 0 C. at the case drain.<br />
The pump is self-lubricating and preventative maintenance is limited to keeping system<br />
fluid clean by changing filters frequently. Keep all fittings and screws tight. Do not operate<br />
at pressures and speeds in excess of the recommended limit. If the pump does not<br />
operate properly, check the troubleshooting chart before attempting to overhaul the<br />
unit. Overhauling may be accomplished by referring to the disassembly, rework limits of<br />
wear parts, and assembly procedures. Refer to the service manual for troubleshooting<br />
and overhaul information.<br />
FLUID CLEANLINESS<br />
COMPARISON OF SOLID CONTAMINATION CLASSIFICATION SYSTEM<br />
NATIONAL AERONAUTICS STANDARD (NAS) 1638<br />
Fluid must be cleaned before and continuously during operation, by filters that maintain<br />
a cleanliness level of ISO 17/14. This approximately corresponds to NAS 1638 class 8<br />
(class 9 for 15 micron and smaller). This fluid level cleanliness can usually be accomplished<br />
by the effective use of 10 micron filters. Better cleanliness levels will significantly<br />
extend the life of the <strong>components</strong>.. As contaminant generation may vary with each<br />
application, each must be analyzed to determine proper filtration to maintain the<br />
required cleanliness level.<br />
class<br />
00 0 1 2 3 4 5 6 7 8 9 10 11 12<br />
5-15µm 125 250 500 1000 2000 4000 8000 16000 32000 64000 128000 256000 512000 1024000<br />
particle 15-25µm 22 44 89 178 356 712 1425 2850 5700 11400 22800 45600 91200 182400<br />
size 25-50µm 4 8 16 32 63 126 253 506 1012 2025 4050 8100 16200 32400<br />
range 50-100µm 1 2 3 6 11 22 45 90 180 360 720 1440 2880 5760<br />
>100µm 0 0 1 1 2 4 8 16 32 64 128 256 512 1024<br />
maximum >5µm 152 304 609 1217 2432 4864 9731 19462 38924 77849 155698 311396 622792 1245584<br />
particles >15µm 27 54 109 217 432 864 1731 3462 6924 13849 27698 55396 110792 221584<br />
ISO:DIS 4406; SAE J1165<br />
iso solid contaminant code<br />
8/5 9/6 10/7 11/8 12/9 13/10 14/11 15/12 16/13 17/14 18/15 19/16 20/17 21/18 22/19<br />
maximum >5µm 250 500 1000 2000 4000 8000 16000 32000 64000 130000 250000 500000 1000000 2000000 4000000<br />
particles >15µm 32 64 130 250 500 1000 2000 4000 8000 16000 32000 64000 130000 250000 500000<br />
NOTES: All measurements are for a 100 ml sample size.<br />
STARTUP PROCEDURE FOR<br />
NEW INSTALLATION<br />
• Read and understand the instruction manual. Identify <strong>components</strong> and their function.<br />
• Visually inspect <strong>components</strong> and lines for possible damage.<br />
• Check reservoir for cleanliness. Drain and clean as required<br />
• Check fluid level and fill as required with filtered fluid at least as clean as that recommended.<br />
Fill pump case with clean oil prior to starting.<br />
• Check alignment of drive.<br />
• Check oil cooler and activate it, if included in circuit. Check fluid temperature<br />
• Reduce pressure settings of compensator and relief valve. Make sure accurate<br />
6
TROUBLESHOOTING<br />
STARTUP PROCEDURE<br />
(continued)<br />
TROUBLESHOOTING<br />
pressure readings can be made at appropriate places.<br />
• If solenoids in system, check for actuation.<br />
• Start pump drive. Make sure pump fills properly.<br />
• Bleed system of air. Recheck fluid level.<br />
• Cycle unloaded machine at low pressure and observe actuation (at low speed, if<br />
possible).<br />
• Increase pressure settings gradually in steps. Check for leaks in all lines especially<br />
in pump and motor inlet lines.<br />
• Make correct pressure adjustments.<br />
• Gradually increase speed. Be alert for trouble as indicated by changes in sounds,<br />
system shocks and air in fluid.<br />
• Equipment is operational.<br />
Component problems and circuit problems are often interrelated. An improper circuit<br />
may operate with apparent success but will cause failure of a particular component<br />
within it. The component failure is the effect, not the cause of the problem. This general<br />
guide is offered to help in locating and eliminating the cause of problems by studying<br />
their effects.<br />
effect of trouble possible cause fault which needs remedy<br />
noisy pump air in fluid leak in suction line<br />
low fluid level<br />
turbulent fluid<br />
return lines above fluid level<br />
gas leak from accumulator<br />
excessive pressure drop in the inlet line from a<br />
pressurized reservoir<br />
suction line strainer acting as air trap<br />
cavitation in fluid too cold<br />
rotating group fluid too viscous<br />
fluid too heavy<br />
shaft speed too high<br />
suction line too small<br />
suction strainer too small<br />
suction strainer too dirty<br />
operating altitude too high<br />
boost or replenishment pressure too low<br />
replenishment flow too small for dynamic<br />
conditions<br />
misaligned shaft faulty installation<br />
distortion in mounting<br />
axial interference<br />
faulty coupling<br />
excessive overhung loads<br />
mechanical fault piston and shoe looseness or failure<br />
in pump bearing failure<br />
incorrect port plate selection or index<br />
eroded or worn parts in the displacement control<br />
erosion on barrel air in fluid see noisy pump above<br />
ports and port cavitation see noisy pump above<br />
plate<br />
high wear in excessive loads reduce pressure settings<br />
pump<br />
reduce speeds<br />
contaminant par- improper filter maintenance<br />
ticles in fluid filters too coarse<br />
introduction of dirty fluid to system<br />
reservoir openings<br />
improper reservoir breather<br />
improper line replacement<br />
Improper fluid fluid too thin or thick for operating temperature<br />
range<br />
breakdown of fluid with time/temperature/shearing<br />
effects<br />
incorrect additives in new fluid<br />
destruction of additive effectiveness with chemical<br />
aging<br />
improper repair incorrect parts<br />
incorrect procedures, dimensions, finishes<br />
unwanted water condensation<br />
in fluid faulty breather/strainer<br />
heat exchanger leakage<br />
faulty clean-up practice<br />
water in makeup fluid<br />
7
TROUBLESHOOTING<br />
TROUBLESHOOTING<br />
(continued)<br />
effect of trouble possible cause fault which needs remedy<br />
pressure shocks cogging load mechanical considerations<br />
worn relief valve needed repairs<br />
worn compensa- needed repairs<br />
tor<br />
slow response in replace or relocate<br />
check valves<br />
excessive de- improve decompression control<br />
compression<br />
energy rates<br />
excessive line reduce line size or lengths<br />
capacitance bleed air<br />
(line volume,<br />
line stretch,<br />
accumulator<br />
effects)<br />
barrel blow-off re-check pump hold-down, rotating group, drain<br />
pressure<br />
heating of fluid excessive pump recheck case drain flow and repair as required<br />
leakage fluid too thin<br />
improper assembly, port timing<br />
relief valve set too low (compared to load or to compensator)<br />
instability caused by back pressure, worn parts<br />
compensator set too high (compared to relief)<br />
worn parts<br />
pump too large<br />
for fluid needs<br />
heat exchanger<br />
reservoir<br />
select smaller pump displacement<br />
water turned off or too little flow<br />
water too hot<br />
fan clogged or restricted<br />
efficiency reduced by mud or scale deposits<br />
intermittent <strong>hydraulic</strong> fluid flow<br />
too little fluid<br />
improper baffles<br />
insulating air blanket that prevents heat rejection<br />
heat pickup from adjacent equipment<br />
decrease in set loose compen- tighten the adjusting screw 28-11<br />
pressure sator adjusting<br />
screw<br />
defective function overhaul or exchange<br />
of relief valve<br />
low tank oil level replenish fluid<br />
deterioration of check drain flow<br />
pump repair or replace<br />
pressure does improper direct- change direction of rotation<br />
not rise ion of rotation<br />
low tank oil level replenish fluid<br />
wrong setting of readjust and lock<br />
relief valve or<br />
compensator<br />
faulty relief valve repair or replace<br />
or compensator<br />
clogging of check and clean suction strainers<br />
suction line<br />
deterioration in repair or replace<br />
pump function<br />
insufficient flow low tank oil level replenish fluid<br />
leak in suction tighten fittings<br />
line<br />
improper stroke loosen adjusting screw 22 and locknut 45<br />
adjustment and set properly<br />
deterioration in repair or replace<br />
pump function<br />
compensator check valve miss- iinstall 30-50 psi 2-3 bar check valve within 12<br />
unstable ing from pump inches 0.3 meters of pump discharge port<br />
discharge port<br />
8
ASSEMBLY TOOL DRAWINGS<br />
.039 R.<br />
(1mm)<br />
E<br />
DIA.<br />
FIGURE 1 SHAFT SEAL INSTALLATION TOOL<br />
SERIES A* B C† D&E F<br />
PV6 & in. 1.75 2.17 .185 .79<br />
PVT6 mm 44.5 55.1 4.7 20<br />
PV10 & in. 1.75 2.17 .185 .79<br />
PVT10 mm 44.5 55.1 4.7 as 20<br />
PV15 & in. 1.95 2.36 .197 needed .79<br />
PVT15 mm 49.5 59.9 5.0 20<br />
PV20 & in. 2.15 2.56 .204 .79<br />
PVT20 mm 54.6 65.0 5.2 20<br />
PV29 & in. 2.15 2.56 .204 .79<br />
PVT29 mm 54.6 65.0 5.2 20<br />
Material - steel<br />
*± .008 in,. ± .204 mm<br />
† +.00 -.008 in., +.00 -.204 mm<br />
.039 R.<br />
(1 mm)<br />
.019 R.<br />
(.05 mm)<br />
.197<br />
(5 mm)<br />
.078 R.<br />
(2 mm)<br />
A<br />
DIA.<br />
B<br />
DIA.<br />
A<br />
DIA.<br />
B<br />
DIA.<br />
C<br />
DIA.<br />
150<br />
150<br />
.79.<br />
(20.06)<br />
C<br />
D<br />
.039 R.<br />
(1 mm)<br />
150<br />
FIGURE 2 BALL BEARING INSTALLATION TOOL<br />
SERIES A B C D<br />
PV6 & in. 2.36 2.08 1.02 4.33<br />
PVT6 mm 59.9 52.8 25.9 110<br />
PV10 & in. 2.76 2.44 1.02 4.52<br />
PVT10 mm 70.1 62 25.9 114.8<br />
PV15 & in. 3.15 2.83 1.22 5.19<br />
PVT15 mm 80.0 71.9 31 131.8<br />
PV20 & in. 3.54 3.15 1.42 6.3<br />
PVT20 mm 89.9 80.0 36 160<br />
PV29 & in. 3.54 3.15 1.42 6.3<br />
PVT29 mm 89.9 80.0 36 160<br />
D<br />
.039 R.<br />
(1 mm)<br />
Material - steel<br />
* +.012 -.004 in., +.306 -.102 mm<br />
FIGURE 3 SHAFT SEAL INSTALLATION TOOL<br />
C<br />
SERIES<br />
& SHAFT A* B† C D E<br />
PV & PVT 6 -2 in. 1.00 .750 2.24 1.65 1.57<br />
mm 25.4 19.1 56.9 41.9 39.9<br />
PV & PVT6 -1 in. 1.00 .875 2.68 2.08 2.00<br />
PV & PVT 10 mm 25.4 22.2 68 52.8 50.8<br />
PV & PVT 15 in. 1.20 .875 2.68 2.08 2.00<br />
-1 & -2 mm 30.5 22.2 68 52.8 50.8<br />
PVT15 in. 1.20 1.00 2.68 2.08 2.00<br />
-4 & -5 mm 30.5 25.4 68 52.8 50.8<br />
PV & PVT 20 in. 1.40 1.250 2.68 2.08 2.00<br />
PV & PVT 29 mm 35.6 31.8 68 52.8 50.8<br />
B<br />
+0.2 (5mm)<br />
+0.1 (2.5mm)<br />
.02<br />
(.5mm)<br />
RAD.<br />
.012<br />
(.30mm)<br />
RAD.<br />
D<br />
E<br />
BLEND RADIUS<br />
.118 TO .197<br />
150<br />
15°<br />
.039<br />
(1mm)<br />
RAD.<br />
150<br />
.197<br />
(5mm)<br />
Material - Teflon (preferred) or steel heat treated to Rc 40-45,<br />
chromium plated.<br />
*± .004 in,. ± .102 mm<br />
† +.008 -.004 in., +.204 -.102 mm<br />
9
ASSEMBLY TOOL DRAWINGS<br />
FIGURE 4 TRUNNION ASSEMBLY TOOL<br />
SERIES A* B† C REF.<br />
PV6 & in. 1.75 .997/.996 1/2-13 x 3/4 dp. 039-91348<br />
PVT6 mm 44.45 25.32/25.30<br />
PV10 & in. 1.75 .997/.996 1/2-13 x 3/4 dp. 039-91348<br />
PVT10 mm 44.45 25.32/25.30<br />
PV15 & in. 2.00 1.247/1.246 3/4-10 x 1.00 dp. 039-91349<br />
PVT15 mm 50.8 31.67/31.65<br />
PV20 & in. 2.25 1.497/1.496 3/4-10 x 1.00 dp. 039-91350<br />
PVT20 mm 57.15 38.02/38.00<br />
PV29 & in. 2.25 1.497/1.496 3/4-10 x 1.00 dp. 039-91350<br />
PVT29 mm 57.15 38.02/38.00<br />
B<br />
A<br />
C<br />
Material - steel, or rework ref. trunnion to B diameter<br />
FIGURE 5 TRUNNION REMOVAL TOOL<br />
SERIES A B C D E F<br />
DIA DIA THD. DIA<br />
PV6 & in. 1.75 1.50 .56 4.25 1/2-13 2.50<br />
PVT6 mm 44.45 38.1 14.2 10.8 63.5<br />
PV10 & in. 1.75 1.50 .56 4.25 1/2-13 2.50<br />
PVT10 mm 44.45 38.1 14.2 10.8 63.5<br />
PV15 & in. 2.00 1.75 .81 4.50 3/4-10 2.75<br />
PVT15 mm 50.8 44.5 20.6 11.4 69.8<br />
PV20 & in. 2.25 2.00 .81 4.75 3/4-10 3.00<br />
PVT20 mm 57.15 50.8 20.6 12.1 76.2<br />
PV29 & in. 2.25 2.00 .81 4.75 3/4-10 3.00<br />
PVT29 mm 57.15 50.8 20.6 12.1 76.2<br />
F B C<br />
1<br />
A (min.) 3/4<br />
D (min.)<br />
2<br />
3<br />
4 E<br />
item description material<br />
1 sleeve steel<br />
2 washer steel<br />
3 nut hardened steel GR-5<br />
4 all-thread rod hardened steel GR-5<br />
10
UNIT DISASSEMBLY<br />
DISASSEMBLY PROCEDURE<br />
Disassemble the pump according to the instructions in this section. Please refer to the exploded<br />
view (Fig. 6).<br />
Pump disassembly for inspection should be limited to the following cases:<br />
a) Malfunction or oil leakage resulting from damage or wear and tear.<br />
b) Trouble-shooting procedures described herein do not solve the problem.<br />
Disassembly should be done only as far as necessary to replace or repair worn parts.<br />
It should be noted that assembly and disassembly should be performed in a clean environment.<br />
Caution: Springs assembled in the pump are normally set under high compression<br />
and are dangerous to any workman whenever disassembly is performed. Serious bodily<br />
injury may be inflicted during disassembly due to the springs’ sudden release.<br />
It is usually not necessary to replace spring 18 fitted in cylinder barrel 3. Do not replace the<br />
spring unless absolutely necessary.<br />
After disassembly, the internal parts should be coated with a film of clean oil and protected<br />
from dirt and moisture.<br />
It is recommended that the length of the protruding part of the adjusting screw 22 on the<br />
pump, items 11 and 18 (as applicable) on the control 28 be measured and noted as this<br />
information will prove useful during assembly.<br />
Care must be taken to avoid dropping, damaging or contaminating the machined parts and<br />
the PC valve.<br />
1. Drain housing 1 fluid.<br />
2. Position the pump with the drain port up.<br />
3. For tandem pumps, remove the external pump, adapter 69 and the coupling, 70.<br />
4. Loosen nut 45 and remove the adjusting screw 22 and thread seal 54.<br />
5. Remove four screws 28 or 28 item 13 and then remove valve assembly 28 with O-ring 28<br />
item 10. If pump contains a torque limiter, remove tube line from torque limiter to compensator.<br />
Remove four screws holding torque limiter to pump housing, then remove torque limiter<br />
asembly.<br />
6. Remove four screws 46. First loosen two of the diagonally positioned screws, then loosen<br />
the other two diagonally positioned screws. Remove the screws and carefully raise port block<br />
2. If gasket 24 clings to block and housing, tap the side of block opposite PC valve with a<br />
hammer.<br />
Note: Port plate 4 may cling to the block 2 due to oil film. DO NOT ALLOW THE<br />
PLATE TO FALL AND BE DAMAGED.<br />
7. Remove port plate 4 gently from barrel face.<br />
8. Place pump onto work bench with the shaft in a horizontal position. Remove barrel 3 with<br />
piston assembly 5, holddown ball 14, retainer plate 15 and dowel 56 simultaneously.<br />
9. Place barrel 3 on a clean cloth or plastic film. Before removing pistons, check for excess<br />
play. Hold the side of retainer plate 15 and gently remove the piston assembly 5.<br />
10. It is recommended that the retainer plate 15 be marked when removing the first piston<br />
and that the pistons be placed in order of removal due to the individual piston’s fit between<br />
the rim of the shoe and retainer plate 15.<br />
11. Remove holddown ball 14 and dowels 56.<br />
Note: With the given procedures (1) through (11), necessary inspection of the pump<br />
can be performed. Prior to inspection, the disassembled parts are to be handled as<br />
follows:<br />
a) Place housing 1 on the fixture with the shaft downward. Cover the housing with a dustproof<br />
plastic film.<br />
b) Place port block 2 on the work bench with the assembled guide sleeve 23 and needle<br />
11
UNIT DISASSEMBLY<br />
DISASSEMBLY PROCEDURE<br />
continued<br />
bearing 36. Guide sleeve must be placed upward. Cover the block with a dust-proof plastic<br />
film.<br />
c) Place PC valve 28 with the machined face that attaches to port block 2 upward. Cover<br />
the PC valve with dust-proof plastic film. If unit contains a torque limiter, place torque limiter in<br />
a plastic bag.<br />
proceed to INSPECTION<br />
Note: Further disassembly may be required if any of the following is observed:<br />
a) When cylinder barrel 3 is placed flat, the dowels 56 must protrude slightly. If otherwise<br />
or if the dowel is easily pushed in, perform the following steps (12) through (14).<br />
b) If the hanger 9 has little or no inclination against the shaft 8 or if it can easily be moved<br />
by hand, perform the following steps (15) through (17).<br />
c) If oil seal leakage or excessive ball bearing play is apparent, perform steps (18)<br />
through (22).<br />
d) If PC valve functions irregularly, perform the following steps (23) through (28).<br />
e) If “J” or “K” torque limiter valve functions irregularly, perform the following steps (29)<br />
through (33).<br />
f) If “T” torque limiter valve functions irregularly, perform the following steps (34) through<br />
(36).<br />
g) If guide sleeve is worn excessively, perform the following steps (37) and (38).<br />
12. Place cylinder barrel 3 on the fixture with the face upward. Compress spring 18 with a<br />
simple hand press and remove retaining ring 40 with pliers.<br />
13. Remove washer 27 and spring 18<br />
14. Remove cylinder barrel from fixture.<br />
Proceed to INSPECTION.<br />
spring load and spring deflection as follows:<br />
item model PV/PVT-6 PV/PVT-10 PV/PVT-15 PV/PVT-20 PV/PVT-29<br />
spring lbs. 55 68 99 111 133<br />
load N 244 304 440 495 591<br />
spring in. 0.66 0.61 0.62 0.67 0.71<br />
deflection mm 16.8 15.6 15.7 16.9 18.0<br />
15. Refer to Fig. 5, trunnion removal tool. Insert threaded rod into threaded hole in trunnion.<br />
16 Tighten nut to withdraw trunnion from housing. Repeat on the other side.<br />
TRUNNION REMOVAL<br />
17. Remove the hanger 9, spring seat 20 and spring 19 in this order.<br />
Proceed to INSPECTION.<br />
18. Remove key 12. Tap gently at the end of the key with a hammer or chisel if it is difficult to<br />
remove.<br />
19. Remove retaining ring 41.<br />
20. Remove shaft 8. (Pull shaft toward port block 2. Light hammering may be applied if<br />
removal is difficult.)<br />
21. If ball bearing play is excessive or abnormal noise is heard when the outer ring is rotated<br />
by hand, replacement with new bearing is necessary. Remove retaining ring 42 and remove<br />
the bearing 35 with a hand press or by light hammering toward the spline.<br />
22. If oil leaks are observed, the oil seal must be replaced. Remove oil seal 38 from the housing<br />
1. Use a push rod which is of a smaller diameter than the outside diameter of the oil seal.<br />
Caution: Removed seals should not be re-used.<br />
item model PV/PVT-6 PV/PVT-10 PV/PVT-15 PV/PVT-20 PV/PVT-29<br />
O.D. in. 1.77 1.77 1.97 2.16 2.16<br />
of seal mm 45 45 50 55 55<br />
Proceed to INSPECTION.<br />
12
UNIT DISASSEMBLY<br />
COMPENSATOR DISASSEMBLY<br />
23. Loosen hex. nut 28-12 and remove adjusting screw 28-11 from cap 28-3.<br />
24. Remove cap 28-3.<br />
25. Remove spring 28-6 and spring seat 28-5.<br />
26. Remove spool 28-2.<br />
‘F’ AND ‘L’ COMPENSATOR<br />
27. If control is F or L compensator, loosen hex. nut 28-12 and remove adjusting screw 28-18<br />
from body 28-1 . Remove spring 28-7 and cone 28-16.<br />
Proceed to INSPECTION.<br />
Note: if cone is badly worn or damaged, perform the following steps:<br />
28. Remove plug 28-20. Using a rod, tap seat out from the opposite end (‘F’ & ‘L’ compensator).<br />
“J” & “K” TORQUE LIMITER<br />
29. See figure 10. Remove tube line connecting torque limiter assembly to “F” compensator.<br />
Remove screws 28-12 and remove torque limiter assembly from pump housing.<br />
30. Remove plug 28-1 with attached parts. Note if feedback arm 28-7 rotates freely from<br />
side to side, and that the spring returns it to the full stroke position.<br />
31. Remove seal piston 28-4 with spring and spring hat 28-5 and 28-8.<br />
32. Remove elbow fitting 28-21 . Push the spool 28-8 back and forth to check for free motion<br />
in bushings and sleeve 28-6<br />
Proceed to INSPECTION<br />
“T” POWER LIMITER<br />
33. Fitting 28-27 along with the adjusting screw 28-18 can be removed from body as an<br />
assembly.<br />
34. Remove pin 28-24 and ball 28-17.<br />
35. Remove fiting 28-29. Using a rod, tap seat out from the opposite end.<br />
GUIDE SLEEVE REMOVAL<br />
36. Insert a pin in drain hole—Item 23.<br />
37. Turn in Item 22 against this pin to draw out the guide sleeve.<br />
REWORK LIMITS OF WEAR<br />
PARTS<br />
max. min. dimension after rework<br />
item rework PV/PVT-6 PV/PVT-10 PV/PVT-15 PV/PVT-20 PV/PVT-29<br />
shoe face in. .004 .1136 .1333 .1530 .1727 .1923<br />
mm .102 2.885 3.386 3.886 4.387 4.884<br />
port plate in. .006 .144 .167 .184 .204 .224<br />
mm .153 3.658 4.242 4.674 5.182 5.690<br />
1. Barrel bores—measure each bore at 4 places, including one deep within the bore where<br />
the piston normally doesn’t run. If the difference in measurements exceeds .0004”, or .010<br />
mm the barrel should be replaced.<br />
2. Barrel face—may be lapped slightly, not more than .0002”, or .005 mm.<br />
3. Pistons—measure each piston at 4 places,. If the difference in measurements exceeds<br />
.0004,” or .010 mm the piston is worn out.<br />
4. Shoes—end play on piston balls not to exceed .003”, or .080 mm.<br />
5. Shoe face—may be lapped .004”, or .102 mm. They must be lapped as a set of nine with<br />
the shoe retainer 15 in place.<br />
6. Port plate—may be lapped .006”, or .153 mm, maintain flatness to 200 µ inches, or 5<br />
microns.<br />
7. Wear plate 16—replace if worn.<br />
8. Shoe retainer 15—do not lap. If thickness measured at several points varies more than<br />
.004”, or .102 mm, replace the retainer.<br />
13
PARTS INSPECTION<br />
no. part inspection procedure corrective action<br />
1 housing Check for cracks around tapped holes. Replace if cracked.<br />
Check for cracks around retainer ring groove.<br />
Replace if cracked<br />
Perform dye color check over entire housing when oil leakage Replace if cracked.<br />
is observed<br />
2 port block Defect can be observed. Replace<br />
Excessive wear of guide sleeve 23, (when axial scratch can Replace guide sleeve<br />
be detected by fingernail or diameter difference is over 0.001<br />
in. or 0.025 mm on several random points.<br />
When there is excessive play with the drive shaft 8 inserted Replace<br />
into the needle bearing 36.<br />
(Maximum radial play is 0.003 in. or 0.076 mm.)<br />
3 cylinder barrel Visual inspection of face,<br />
Uniform, minute concentric nicks. Can be lap-repaired up to 5 µm<br />
or .005 mm.<br />
Deep, localized nicks.<br />
Replace part<br />
(flush reservoir and circuit).<br />
Seizure, scoring or discoloring.<br />
Replace part (check <strong>hydraulic</strong> fluid<br />
type, oil temperature rise, excessive<br />
pressure and correct as required).<br />
Visual inspection of bore’s inner condition,<br />
Localized polish at edge.<br />
Can be re-used as is.<br />
Minute, longtitudinal nicks.<br />
Can be re-used as is.<br />
Localized longtitudinal nicks.<br />
Replace part<br />
(flush reservoir and circuit).<br />
Localized seizure, scoring or discoloring.<br />
Replace part (check <strong>hydraulic</strong> fluid<br />
type, oil temperature rise, excessive<br />
pressure and correct as required.<br />
Also replace mating piston assy).<br />
Bore Wear<br />
Wash inside of bore and piston surface with solvent. Insert If there is resistance when withdrawpiston<br />
completely in bore, cover the sausage shaped hole in ing, the bore is satisfactory.<br />
the barrel and the center hole of shoe and withdraw piston<br />
Insert piston halfway into bore and check for excessive play in Measure piston diameter at several<br />
the radial direction.<br />
random points. If the difference is<br />
over .0006 in., or .015 mm replace<br />
both piston assembly 5 and barrel 3.<br />
4 port plate Visual check of surface<br />
Uniform minute concentric pattern.<br />
Repair by lapping.<br />
Deep indention on plate.<br />
Grind until indention is removed and<br />
lap.<br />
Heat colored at places other than surfaces next to port.<br />
Use as is. Lap if excessively discolored.<br />
Cavitation erosion between ports.<br />
Grind and lap until erosion is<br />
removed. Can be used until fine<br />
groove links up between port edge<br />
and small hole.<br />
5 piston assembly shoe play<br />
Excessive play apparent when pressed down with the fingers Replace part. Check suction pressure<br />
and drawn out if clatter of movement can be heard; also if (when below -5 in. Hg, improve sucmovement<br />
can be visibly detected.<br />
tion pressure), clean strainer.<br />
Visual check of shoe face.<br />
Minute, slight trace or localized polished portion.<br />
Repair by lapping (difference in flange<br />
thickness between the 9 shoes<br />
should not be more than 0.0012 in.,<br />
or .03 mm. This also applies to the<br />
following repairs:<br />
Random radial marks are clearly visible.<br />
Repair by lapping. (Flush reservoir<br />
and circuit.) Check suction pressure<br />
and if less than -5 in. Hg, improve<br />
suction pressure.<br />
burrs on shoe flange.<br />
Visual check of piston outer diameter.<br />
Measure several points with a micrometer.<br />
Visual check of piston’s outer surface.<br />
Slight discoloration or cross hatch trace.<br />
Localized scratch marks apparent in longitudinal direction.<br />
If slight, repair by lapping. If severe,<br />
replace part.<br />
Replace if dimensional difference is<br />
more than 0.0006 in,. or .015 mm.<br />
Can be used as is. (Recommend polishing<br />
with emery paper).<br />
If the marks cannot be removed,<br />
replace. (Flush reservoir and circuit).<br />
14
PARTS INSPECTION<br />
no. part inspection procedure corrective action<br />
5 piston assembly seizure, scoring or discoloring. Replace both piston ass’y. 5 and<br />
cylinder barrel 3. Check <strong>hydraulic</strong><br />
fluid type, temperature rise, excessive<br />
pressure and correct as<br />
required.<br />
8 drive shaft Visual check of shaft end’s outer surface. Remove with emery paper. Check<br />
Burnt brown spots over entire surface.<br />
fitting to coupling hub. If loose,<br />
Uneven wear on key side surface.<br />
Pitting or corrosion over entire surface or partial surface.<br />
remake to force fit.<br />
Replace part. Check fitting to coupling<br />
hub. If loose, remake to force fit.<br />
Check alignment between prime<br />
mover and pump and correct as<br />
required.<br />
Visual check of oil seal surface.<br />
Lip contact marks, bright polish.<br />
Can be used as is.<br />
Contact marks width over 0.04 in., or 1 mm and can be<br />
Replace part. (Check oil seal lip for<br />
detected with fingernail.<br />
wear and hardening and replace oil<br />
seal if worn or hard).<br />
Visual check of key groove bottom end. If cracked, replace drive shaft 8.<br />
(if in doubt, check for cracks with dye-color).<br />
Check alignment with prime mover<br />
and correct as required.<br />
Needle bearing 36 rolling contact surface. Apparent wear on If dimensional difference with noncontact<br />
surface. contact surface is more than 0.0008<br />
in., or .020 mm replace part.<br />
Visual check of spline for external pump (PVT only). Apparent Replace drive shaft 8.<br />
wear on spline teeth<br />
9 hanger Visual check of trunnion bearing 10.<br />
When contact surface is not excessively worn.<br />
When contact surface shows apparent wear, uneven contact<br />
and localized nicks.<br />
Visual check of contact surface with plunger 21.<br />
Wear Marks: Up to width 0.2 in,. or 5 mm.<br />
Over width 0.2 in,. or 5 mm.<br />
10 trunnion shaft Visual check of contact surface to hanger 9.<br />
very slight wear.<br />
12 key Wear on side surface<br />
discoloration.<br />
Can be used as is.<br />
When inside diameter difference is<br />
directionally more than 0.0008 in,. or<br />
.020 mm, replace part.<br />
Can be used as is.<br />
Replace part. (When used without<br />
replacement, adjust such that maximum<br />
volume is below catalog value<br />
using adjustment screw 22.<br />
Re-use after polishing with emery<br />
cloth.<br />
Localized seizure, scoring or discoloring. Replace part. Also replace hanger 9<br />
Check <strong>hydraulic</strong> fluid type, temperature<br />
rise, excessive pressure and<br />
correct as required.<br />
Re-use after removing discoloration<br />
with emery paper.<br />
Stepped wear.<br />
Measure and if worn over 0.002 in., or<br />
.051 mm, replace part. When coupling<br />
hub and shaft fit is loose,<br />
remake to force fit. Re-check alignment<br />
with prime mover and check<br />
for excessive pressure and side load<br />
and correct as necessary.<br />
15 shoe retainer Contact condition with flange surface of shoe.<br />
Contact surface is brightly polished.<br />
Re-use as is.<br />
Contact surface is apparently indented and shoe flange is Replace part. Piston assy. 5 can be<br />
brightly polished or slightly deformed.<br />
used unless excessively defective<br />
and if shoe outer flange edge is not<br />
burred. Check <strong>hydraulic</strong> fluid type,<br />
temperature rise, suction pressure<br />
and correct as required.<br />
16 wear plate Check face condition.<br />
Polish over entire surface or partial bright polish.<br />
Re-use as is.<br />
Scratches or wear over entire surface or over partial surface. Replace<br />
Copper alloy adhesion over entire surface or on high pressure Replace<br />
side only.<br />
18 spring Measure free heights.<br />
PV-6 1.38 in,. or 35 mm Replace when height is decreased<br />
PV-10 1.57 in., or 40 mm<br />
more than 5% from the given<br />
PV-15 1.79 in., or 45.5 mm<br />
heights.<br />
15
PARTS INSPECTION<br />
no. part inspection procedure corrective action<br />
18 spring (continued) PV-20 1.97 in., or 50 mm Replace when height is decreased<br />
PV-29 2.05 in,. or 52 mm<br />
more than 5% from the given<br />
heights.<br />
19 spring Measure free heights.<br />
PV-6 2.44 in., or 62 mm Replace when height is decreased<br />
PV-10 2.60 in., or 66 mm<br />
more than 3% from the given<br />
PV-15 2.99 in., or 76 mm<br />
heights.<br />
PV-20 2.99 in., or 76 mm<br />
PV-29 3.19 in., or 81 mm<br />
21 plunger Check contact condition of spherical surface,<br />
Wear up to width 0.2 in., or 5 mm.<br />
Re-use as is.<br />
Wear over width 0.2 in., or 5 mm.<br />
Replace. If re-use is necessary, rotate<br />
contacting surface location 180<br />
degrees. When wear occurs over a<br />
short period of time, check temperature<br />
rise, excessive pressure and<br />
correct as required.<br />
23 guide sleeve Check contact condition of outer surface. Slight and uneven Re-use as is.<br />
contact on one side and partially polished<br />
Clear localized contact with strong, bright polish.<br />
Take micrometer reading at several<br />
points and if difference more than<br />
0.0008 in., or .020 mm, replace.<br />
Check <strong>hydraulic</strong> fluid type,<br />
temperature rise, excessive pressure<br />
Seizure, scoring or discoloring.<br />
and correct as required.<br />
Replace. Check <strong>hydraulic</strong> fluid type,<br />
oil temperature, excessive pressure<br />
and correct as required.<br />
28 ‘C’ compensator O-Ring 28-8,28-9, 28-10<br />
‘F’,’L’ compensator Cross sectional condition. Replace if diameter difference is over<br />
15%.<br />
Surface condition.<br />
Spring 28-6<br />
Measure free height.<br />
Visual check of spool 28-2.<br />
Localized contact or discoloration.<br />
Replace when cracked, torn or<br />
hardened.<br />
Replace when less than 1.8 in., or<br />
45.7 mm.<br />
Replace when dimensional difference<br />
is more than .0004 in, or .010 mm.<br />
Wear condition of control edge of land.<br />
Replace PC valve if rounded off either<br />
in localized areas or over the entire<br />
circumference. Spool 28-2 is fitted to<br />
valve body 28-1 .<br />
‘F’,’L’ compensator Visual check of cone 28-16.<br />
‘T’ power limiter Wear condition of cone and seat contact area. Replace if worn or pitted in this area.<br />
Visual check of spring 28-7.<br />
Replace if distorted.<br />
‘J’ & ‘K’ torque limiter Gasket 28-17 Replace<br />
O-ring 28-19, 28-23, 28-27<br />
Replace as a rule.<br />
Visual check of arm 28-7<br />
Excessive wear at contact with hanger<br />
May be reversed<br />
Check of spring 28-5<br />
Replace if broken<br />
Check of spring 28-15 Replace if broken or less than 1.82”,<br />
or 46.2 mm free length<br />
Check of spool 28-8<br />
Replace if broken, bent or worn<br />
35 ball bearing Check wear condition.<br />
Radial play of outer race.<br />
Replace if excessive play is detected.<br />
Rotation noise.<br />
Wash with cleaning fluid and dry with air. Rotate outer ring Replace it irregular noise audible.<br />
manually.<br />
Visual check of rolling surface<br />
Discoloration or pitting signs on ball surface or race track.<br />
Replace when clear discoloration or<br />
pittings can be detected visually.<br />
36 needle bearing Check wear condition. (See no.2)<br />
24 gasket Check wear condition. Replace<br />
25 gasket Check wear condition. Replace<br />
38 oil seal Check wear condition Replace<br />
54 thread seal Check wear condition. Thread seal 54 and O-Rings 55<br />
55 O-ring Check wear condition. 69-2 and 69-3 can be used unless<br />
68-2 O-ring Check wear condition oil leak, deformation, hardening or<br />
69-2 O-ring Check wear condition hair cracks are apparent.<br />
69-3 O-ring Check wear condition<br />
16
EXPLODED VIEW OF PUMP<br />
ITEM 28 (‘J’ OR ‘K’ TORQUE LIMITER)<br />
FIGURE 6 PV/PVT EXPLODED VIEW<br />
17
PARTS LIST<br />
item description PV6/PVT6 PV10/PVT10 PV15/PVT15 PV20/PVT20 PV29/PVT29 qty<br />
1 housing, UNF 039-91366 039-91367 039-91368 039-91369 039-91370 1<br />
housing, BSPP 039-91371 039-91372 039-91373 039-91374 039-91375<br />
housing, UNF for ‘J’ or ‘K’ torque limiter 039-92157 039-92158 039-92159 039-92160 039-92161<br />
housing, BSPP for ‘J’ or ‘K’ torque limiter 039-92177 039-92178 039-92179 039-92180 039-92181<br />
2 port block assembly-PV, (CW, UNF) S29-01330 S29-10811 S29-10815 S29-10819 S29-10823 1<br />
port block assembly-PV, (CCW, UNF) S29-01335 S29-10812 S29-10816 S29-10820 S29-10824<br />
port block assembly-PV, (CW, BSPP) S29-10891 S29-10813 S29-10817 S29-10821 S29-10825<br />
port block assembly-PV, (CCW, BSPP) S29-10892 S29-10814 S29-10818 S29-10822 S29-10826<br />
port block assembly-PVT, (CW) S29-15439 S29-15440 S29-15441 S29-15442 S29-15443<br />
port block assembly-PVT, (CCW) S29-15434 S29-15435 S29-15436 S29-15437 S29-15438<br />
3 barrel* 039-54035 039-54036 039-54037 039-54038 039-54039 1<br />
4 port plate, CW* 039-54040 039-54041 039-54042 039-54043 039-54044 1<br />
port plate, CCW* 039-54045 039-54046 039-54047 039-54048 039-54049<br />
5 piston & shoe assembly* S29-01166 S29-01167 S29-01168 S29-01169 S29-01170 9<br />
shaft, PV, splined, code 1 039-54055 039-54056 039-54057 039-54058 039-54059<br />
8 shaft, PV, keyed, code 2 039-54050 039-54051 039-54052 039-54053 039-54054 1<br />
shaft, PVT splined, code 1 039-91958 039-91959 039-91989 (2) 039-91961 039-91962<br />
shaft, PVT keyed, code 2 039-91963 039-91964 039-91990 (1) 039-91966 039-91967<br />
9 hanger S29-16587 S29-16588 S29-16589 S29-16590 S29-16455 1<br />
10 trunnion 039-91348 039-91348 039-91349 039-91350 039-91350 2<br />
12 key (keyed shaft only) 039-54075 039-54076 039-54076 039-54078 039-54078 1<br />
14 holddown ball* 039-54254 039-54255 039-54256 039-54257 039-54258 1<br />
15 shoe retainer* 039-54080 039-54081 039-54082 039-54083 039-54084 1<br />
16 wear plate* 039-91351 039-91352 039-91353 039-91354 039-91355 1<br />
18 spring* 039-54090 039-54091 039-54092 039-54093 039-54094 1<br />
19 spring 039-54095 039-54096 039-54097 039-54098 039-54099 1<br />
20 spring seat 039-54100 039-54101 039-54102 039-54103 039-54104 1<br />
21 plunger 039-54105 039-54106 039-54107 039-54108 039-54109 1<br />
22 adjusting screw 039-91977 039-91977 039-91979 039-91980 039-91980 1<br />
23 guide sleeve (included in port block ass’y) 039-54120 039-54121 039-54122 039-54123 039-54124<br />
24 gasket♦ 039-54125 039-54126 039-54127 039-54128 039-54129 1<br />
27 washer* 039-54135 039-54136 039-54137 039-54138 039-54139 2<br />
28 ‘C’ pressure compensator valve S29-15104 S29-15104 S29-15104 S29-15104 S29-15104 1<br />
‘F’ pressure compensator valve, (UNF) S29-12120 S29-12120 S29-12120 S29-12120 S29-12120<br />
‘F’ pressure compensator valve, (BSPP) S29-12121 S29-12121 S29-12121 S29-12121 S29-12121<br />
‘L’ pressure compensator valve, (UNF) S29-12122 S29-12122 S29-12122 S29-12122 S29-12122<br />
‘L’ pressure compensator valve, (BSPP) S29-12123 S29-12123 S29-12123 S29-12123 S29-12123<br />
‘J’ torque limiter S29-15581 S29-15581 S29-16686 S29-15579 S29-15579<br />
‘K’ torque limiter S29-15526 S29-15525 S29-16687 S29-15523 S29-16686<br />
‘T’ power limiter valve (UNF) S29-12364 S29-12365 S29-12366 S29-12367 S29-12368<br />
‘T’ power limiter valve (BSPP) S29-12369 S29-12370 S29-12371 S29-12372 S29-12373<br />
35 ball bearing 230-03205 230-82054 230-00306 230-82193 230-82193 1<br />
36 needle bearing (included in port block ass’y) 230-82199 230-82200 230-82201 230-82202 230-82203<br />
38 shaft seal♦ 620-82091 620-82091 620-82092 620-82093 620-82093 1<br />
40 retaining ring* 356-65104 356-65108 356-65110 356-65114 356-65118 1<br />
41 retaining ring* 356-65105 356-65109 356-65111 356-65115 356-65115 1<br />
42 retaining ring* 356-65106 356-65106 356-65112 356-65116 356-65116 2<br />
43 retaining ring* 356-65107 356-65107 356-65113 356-65117 356-65117 1<br />
45 hex nut 333-00004 333-00004 333-00005 333-00005 333-00005 1<br />
46 screw, SHC 361-10234-8 361-11234-8 361-12254-8 361-10254-8 361-13264-8 4<br />
54 thread seal♦ 635-00010 635-00010 635-00006 635-00006 635-00006 1<br />
55 O-ring (for UNF models only)♦ 691-00906 691-00908 691-00908 691-00908 691-00908 1<br />
56 dowel 039-57824 039-57825 039-57826 039-57827 039-57828 3<br />
57 pin (included in port block assembly) 324-30015 324-30021 324-30022 324-30022 324-30023 1<br />
58 plug (UNF) 488-35002 488-35002 488-35002 488-35002 488-35002 1<br />
plug (BSPP)♦ 447-01008-2 447-01008-2 447-01008-2 447-01008-2 447-01008-2<br />
59 plug (included in port block assembly) 447-00026 447-00026 447-00026 447-00026 447-00026<br />
60 shipping plug-drain (UNF) (not shown) 449-00588 449-00574 449-00574 449-00574 449-00574 1<br />
shipping plug-drain (BSPP) 449-00599 449-00601 449-00601 449-00601 449-00601<br />
61 nameplate (not shown) 039-54241 039-54241 039-54241 039-54241 039-54241 1<br />
62 drive screw (not shown) 320-65018 320-65018 320-65018 320-65018 320-65018 4<br />
63 shipping plug-system port (UNF) (not shown) 449-00525 449-00584 449-00584 449-00584 449-00584 1<br />
shipping plug-system port (BSPP) 449-00600 449-00602 449-00602 449-00602 449-00602<br />
shipping plug-system inlet port PVT <strong>S1</strong>4-08795 <strong>S1</strong>4-08796 <strong>S1</strong>5-08794 <strong>S1</strong>5-08794 <strong>S1</strong>4-09338<br />
64 shipping plug-system port (UNF) (not shown) 449-00525 449-00584 449-00584 449-00584 449-00584 1<br />
shipping plug-system port (BSPP) 449-00600 449-00602 449-00602 449-00602 449-00602<br />
shipping plug-system outlet port PVT <strong>S1</strong>4-47691 <strong>S1</strong>4-08795 <strong>S1</strong>4-08795 <strong>S1</strong>4-08795 <strong>S1</strong>4-08795<br />
66 caution tag (not shown) FORM 2435 FORM 2435 FORM 2435 FORM 2435 FORM 2435 1<br />
67 inspection tag (not shown) 039-54253 039-54253 039-54253 039-54253 039-54253 1<br />
68-1 plug, PVT less rear mount 488-35019 488-35019 488-35062 488-35062 488-35062 1<br />
68-2 O-ring, PVT less rear mount♦ 691-00920 691-00920 691-00924 691-00924 691-00924 1<br />
shipping cover, PVT/rear mount (not shown) S24-10537 S24-10538 S24-10538 S24-10539 S24-10539<br />
(1) SAE 22-1 (SAE B keyed) (2) SAE 22-4 (SAE B splined) (3) SAE 25-1 (SAE B-B keyed) (4) SAE 25-4 (SAE B-B splined)<br />
18
PARTS LIST<br />
item description PV6/PVT6 PV10/PVT10 PV15/PVT15 PV20/PVT20 PV29/PVT29 qty<br />
69 PVT rear adapter kit, SAE-A S29-15433 S29-15430 S29-15430 S29-15430 S29-15430 1<br />
PVT rear adapter kit, SAE-B N.A. S29-15431 S29-15431 S29-15431 S29-15431<br />
PVT rear adapter kit, SAE-C<br />
N.A. S29-15432 S29-15432 S29-15432 S29-15432<br />
69-1 rear mount adapter, PVT/SAE 82-2 (SAE-A) 039-91974 N.A.<br />
N.A. N.A. N.A. 1<br />
rear mount adapter, PVT/SAE 101-2 (SAE-B) N.A. 039-91975 039-91975 039-91975 039-91975<br />
rear mount adapter, PVT/SAE-127-2 (SAE-C) N.A. 039-91976 039-91976 039-91976 039-91976<br />
69-2 O-ring, PVT/rear mount adapter♦ 671-00140 671-00152 671-00152 671-00152 671-00152 1<br />
69-3 O-ring, PVT/SAE 82-2 (SAE-A)♦ 671-00152 671-00152 671-00152 671-00152 671-00152 1<br />
O-ring, PVT/SAE 101-2 (SAE-B)♦ N.A. 671-00155 671-00155 671-00155 671-00155<br />
O-ring, PVT/SAE 127-2 (SAE-C)♦ N.A. 671-00159 671-00159 671-00159 671-00159<br />
69-4 screw, PVT/SAE 82-2 (SAE-A) 306-40108 306-40026 306-40026 306-40026 306-40026 2<br />
screw, PVT/SAE 101-2 (SAE-B) N.A. 306-40018 306-40018 306-40018 306-40018<br />
screw, PVT/SAE 127-2 (SAE-C) N.A. 306-40008 306-40008 306-40008 306-40008<br />
69-5 washer, PVT/SAE 82-2 (SAE-A) 350-10145 350-10145 350-10145 350-10145 350-10145 2<br />
washer, PVT/SAE 101-2 (SAE-B) N.A. 350-10146 350-10146 350-10146 350-10146<br />
washer, PVT/SAE 127-2 (SAE-C) N.A. 350-10147 350-10147 350-10147 350-10147<br />
70 coupling, PVT/SAE 16-4 on SAE 82-2 rear 039-91985 039-91986 039-91986 039-91987 039-91987 1<br />
pad (SAE-A splined on SAE-A rear pad)<br />
coupling, PVT/SAE 22-4 on SAE 82-2 rear 039-91968 039-91981 039-91981 039-91988 032-91988<br />
pad (SAE-B splined on SAE-A rear pad)<br />
coupling, PVT/SAE 22-4 on SAE 101-2 rear N.A. 039-91969 039-91969 039-91971 039-91971<br />
pad (SAE-B splined on SAE-B rear pad)<br />
coupling, PVT/SAE 25-4 on SAE 101-2 rear N.A. N.A. 039-91970 039-91972 039-91972<br />
pad (SAE-B-B splined on SAE-B rear pad)<br />
coupling, PVT/SAE 32-4 on SAE 127-2 rear N.A. N.A.<br />
N.A. 039-91973 039-91973<br />
pad (SAE-C splined on SAE-C rear pad)<br />
S-1 seal kit (SAE) S29-15454-0 S29-15455-0 S29-15456-0 S29-15457-0 S29-15458-0<br />
S-5 seal kit (SAE) S29-15454-5 S29-15455-5 S29-15456-5 S29-15457-5 S29-15458-5<br />
S-1 seal kit (BSPP) S29-15459-0 S29-15460-0 S29-15461-0 S29-15462-0 S29-15463-0<br />
S-5 seal kit (BSPP) S29-15459-5 S29-15460-5 S29-15461-5 S29-15462-5 S29-15463-5<br />
rotating group parts kit (CW rotation) S29-12833 S29-12835 S29-12837 S29-12839 S29-12841<br />
rotating group parts kit (CCW rotation) S29-12834 S29-12836 S29-12838 S29-12840 S29-12842<br />
ITEM 28 ‘C’ PRESSURE COMPENSATOR VALVE<br />
28-1 body and spool S29-15170 S29-15170 S29-15170 S29-15170 S29-15170 1<br />
28-2 spool (part of 28-1)<br />
28-3 cap 039-54142 039-54142 039-54142 039-54142 039-54142 1<br />
28-4 spring seat 039-91558 039-91558 039-91558 039-91558 039-91558 1<br />
28-5 spring seat 039-91560 039-91560 039-91560 039-91560 039-91560 1<br />
28-6 spring 039-91557 039-91557 039-91557 039-91557 039-91557 1<br />
28-8 O-ring♦ 605-10056 605-10056 605-10056 605-10056 605-10056 1<br />
28-9 O-ring♦ 691-00111 691-00111 691-00111 691-00111 691-00111 1<br />
28-10 O-ring♦ 605-10058 605-10058 605-10058 605-10058 605-10058 3<br />
28-11 adjusting screw, 3/8-16 UNCx7/8 311-45053 311-45053 311-45053 311-45053 311-45053 1<br />
28-12 hex nut, 3/8-16 UNC 335-16001 335-16001 335-16001 335-16001 335-16001 1<br />
28-13 screw 361-08704-8 361-08704-8 361-08704-8 361-08704-8 361-08704-8 4<br />
28-14 plug 431-90104 431-90104 431-90104 431-90104 431-90104 1<br />
ITEM 28 ‘F’ & ‘L’ PRESSURE COMPENSATOR VALVE<br />
28-1 body and spool (UNF) S29-11822 S29-11822 S29-11822 S29-11822 S29-11822 1<br />
body and spool (BSPP) S29-11823 S29-11823 S29-11823 S29-11823 S29-11823<br />
28-2 spool (part of 28-1)<br />
28-3 cap 039-54142 039-54142 039-54142 039-54142 039-54142 1<br />
28-4 spring seat 039-54143 039-54143 039-54143 039-54143 039-54143 1<br />
28-5 spring seat 033-57530 033-57530 033-57530 033-57530 033-57530 1<br />
28-6 spring 039-57806 039-57806 039-57806 039-57806 039-57806 1<br />
28-7 spring 039-59945 039-59945 039-59945 039-59945 039-59945 1<br />
28-8 O-ring♦ 605-10056 605-10056 605-10056 605-10056 605-10056 1<br />
28-9 O-ring♦ 691-00111 691-00111 691-00111 691-00111 691-00111 1<br />
28-10 O-ring♦ 605-10058 605-10058 605-10058 605-10058 605-10058 3<br />
28-11 adjusting screw, 3/8-16 UNCx7/8 311-45053 311-45053 311-45053 311-45053 311-45053 2<br />
28-12 hex nut, 3/8-16 UNC 335-16001 335-16001 335-16001 335-16001 335-16001 1<br />
28-13 screw 361-08284-8 361-08284-8 361-08284-8 361-08284-8 361-08284-8 4<br />
28-14 plug 431-90104 431-90104 431-90104 431-90104 431-90104 1<br />
28-15 seat 039-57952 039-57952 039-57952 039-57952 039-57952 1<br />
28-16 cone 039-59948 039-59948 039-59948 039-59948 039-59948 1<br />
28-18 setscrew, 3/8-16 039-59949 039-59949 039-59949 039-59949 039-59949 1<br />
28-19 seal♦ 635-00002 635-00002 635-00002 635-00002 635-00002 1<br />
28-20 plug 431-90400 431-90400 431-90400 431-90400 431-90400 1<br />
28-21 plug 488-35001 488-35001 488-35001 488-35001 488-35001 1<br />
28-22 acorn nut, 3/8-16 UNC 327-16000 327-16000 327-16000 327-16000 327-16000 1<br />
28-23 washer 350-10122 350-10122 350-10122 350-10122 350-10122 1<br />
28-24 pin (used in ‘L’ compensator valves only) 324-30016 324-30016 324-30016 324-30016 324-30016 1<br />
28-25 orifice 039-91181 039-91181 039-91181 039-91181 039-91181 1<br />
28-26 O-ring♦ 691-00904 691-00904 691-00904 691-00904 691-00904 1<br />
19
PARTS LIST<br />
ITEM 28, ‘J’ AND ‘K’ TORQUE LIMITER VALVE (USE WITH ‘F’ OR ‘L’ COMPENSATOR VALVE)<br />
item description PV6/PVT6 PV10/PVT10 PV15/PVT15 PV20/PVT20 PV29/PVT29 qty<br />
assembly no. ‘J’ torque limiter S29-15581 S29-15581 S29-16686 S29-15523 S29-15579 1<br />
assembly no. ‘K’ torque limiter S29-15526 S29-15525 S29-16687 S29-15523 S29-16686<br />
28-1 plug 039-92273 039-92273 039-92273 039-92273 039-92273 1<br />
28-2 screw, 5/16-24 312-13200 312-13200 312-13200 312-13200 312-13200 1<br />
28-3 acorn nut, 5/16-24 327-25006 327-25006 327-25006 327-25006 327-25006 1<br />
28-4 seal piston 032-59367 032-59367 032-59367 032-59367 032-59367 1<br />
28-5 main spring, ‘J’ torque limiter 225-92098 225-92098 225-92100 225-92110 033-70512 1<br />
main spring, ‘K’ torque limiter 225-92101 225-92096 225-92098 225-92110 225-92100<br />
28-6 sleeve 032-91437 032-91437 032-91437 032-91437 032-91437 1<br />
28-7 feedback arm 032-92136 032-92136 032-92137 032-92137 032-92137 1<br />
28-8 spool 032-91438 032-91438 032-91438 032-91438 032-91438 1<br />
28-9 spring hat 033-92139 033-92139 033-92139 033-92139 033-92139 1<br />
28-10 dowel, 1/4 x 2-1/4 324-21636 324-21636 324-21636 324-21636 324-21636 1<br />
28-11 plug, 1/16 NPT 431-90104 431-90104 431-90104 431-90104 431-90104 1<br />
28-12 screw, SHC 361-08255 361-08255 361-08255 361-08255 361-08255 4<br />
28-13 pivot plug 039-92156 039-92156 039-92156 039-92156 039-92156 2<br />
28-14 washer 033-92144 033-92144 033-92144 033-92144 033-92144 1<br />
28-15 return spring 225-92114 225-92114 225-92114 225-92114 225-92114 1<br />
28-16 body 033-92135 033-92135 033-92135 033-92135 033-92135 1<br />
28-17 gasket 033-92138 033-92138 033-92138 033-92138 033-92138 1<br />
28-18 dowel rod, 1/8 x 1.75 324-20828 324-20828 324-20828 324-20828 324-20828 1<br />
28-19 O-ring♦ 691-00012 691-00012 691-00012 691-00012 691-00012 1<br />
28-20 nut, 5/16-24 335-13100 335-13100 335-13100 335-13100 335-13100 1<br />
28-21 elbow 033-91702 033-91702 033-91702 033-91702 033-91702 1<br />
28-22 washer 345-10012 345-10012 345-10012 345-10012 345-10012 4<br />
28-23 O-ring♦ 671-00010 671-00010 671-00010 671-00010 671-00010 4<br />
28-24 bushing 216-10010 216-10010 216-10010 216-10010 216-10010 2<br />
28-25 dowel, 3/32 x 3/4 324-20610 324-20610 324-20610 324-20610 324-20610 1<br />
28-26 orifice, .047,” 1.2 mm 035-25528 035-25528 035-25528 035-25528 035-25528 1<br />
28-27 O-ring♦ 691-00904 691-00904 691-00904 691-00904 691-00904 1<br />
28-28 O-ring♦ 691-00903 691-00903 691-00903 691-00903 691-00903 1<br />
28-29 tube, (connects ‘F’ control to torque limiter) CW 039-92174 039-92175 039-92176 039-92167 039-92168 1<br />
tube, (connects ‘F’ control to torque limiter) CCW 039-92169 039-92170 039-92171 039-92172 039-92173<br />
ITEM 28, T’ POWER LIMITER VALVE<br />
assembly no., UNF S29-12364 S29-12365 S29-12366 S29-12367 S29-12368<br />
assembly no., BSPP S29-12369 S29-12370 S29-12371 S29-12372 S29-12373<br />
28-1 body and spool S29-12226 S29-12226 S29-12226 S29-12226 S29-12226 1<br />
28-2 spool (part of 28-1)<br />
28-3 cap 039-54142 039-54142 039-54142 039-54142 039-54142 1<br />
28-4 spring seat 039-91558 039-91558 039-91558 039-91558 039-91558 1<br />
28-5 spring seat 033-91560 033-91560 033-91560 033-91560 033-91560 1<br />
28-6 spring 225-92094 225-92094 225-92094 225-92094 225-92094 1<br />
28-7 spring 039-59945 039-59945 039-59945 039-59945 039-59945 1<br />
28-8 O-ring♦ 605-10056 605-10056 605-10056 605-10056 605-10056 1<br />
28-9 O-ring♦ 691-00111 691-00111 691-00111 691-00111 691-00111 1<br />
28-10 O-ring♦ 605-10058 605-10058 605-10058 605-10058 605-10058 3<br />
28-11 adjusting screw, 3/8-16 UNCx7/8 311-45053 311-45053 311-45053 311-45053 311-45053 1<br />
28-12 hex nut, 3/8-16 UNC 335-16001 335-16001 335-16001 335-16001 335-16001 3<br />
28-13 screw 361-08284-8 361-08284-8 361-08284-8 361-08284-8 361-08284-8 4<br />
28-14 plug 431-90104 431-90104 431-90104 431-90104 431-90104 1<br />
28-15 seat 039-57952 039-57952 039-57952 039-57952 039-57952 1<br />
28-16 cone 039-59948 039-59948 039-59948 039-59948 039-59948 1<br />
28-17 ball 201-10001 201-10001 201-10001 201-10001 201-10001 1<br />
28-18 setscrew, 3/8-16 039-59949 039-59949 039-59949 039-59949 039-59949 2<br />
28-19 seal♦ 635-00002 635-00002 635-00002 635-00002 635-00002 2<br />
28-20 plug 449-00510 449-00510 449-00510 449-00510 449-00510 1<br />
28-21 O-ring♦ 691-00904 691-00904 691-00904 691-00904 691-00904 1<br />
28-22 acorn nut, 3/8-16 UNC 327-16000 327-16000 327-16000 327-16000 327-16000 2<br />
28-23 washer 350-10122 350-10122 350-10122 350-10122 350-10122 1<br />
28-24 pin 324-20818 324-20818 324-20818 324-20818 324-20818 1<br />
28-25 seat 039-57953 039-57953 039-57953 039-57953 039-57953 1<br />
28-26 spring 039-57982 039-57982 039-57982 039-57982 039-57982 1<br />
28-27 fitting 039-57950 039-57950 039-57950 039-57950 039-57950 1<br />
28-28 orifice (in ‘P’ port of pump) 039-57983 039-57984 039-57985 039-57986 039-57987 1<br />
28-29 fitting (UNF) 039-57997 039-57997 039-57997 039-57997 039-57997 1<br />
fitting (BSPP) 039-57998 039-57998 039-57998 039-57998 039-57998<br />
28-30 orifice, .0625”, 1.59 mm 036-20641 036-20641 036-20641 036-20641 036-20641 1<br />
* part of rotating group part kit<br />
♦Ιtems included in seal kit. Seals must be ordered as a complete kit<br />
NOTE: For rotation change, both port block (2) and port plate (4) must be changed.<br />
NOTE: Spool and body, 28-1 & 28-2, are a matched set. Change entire assembly, do not attempt to change separately.<br />
20
ASSEMBLY PROCEDURE<br />
CLEANING AND INSPECTION<br />
The assembly operation must be performed more carefully than the disassembly operation<br />
and should be performed in a clean environment using parts that have been adequately<br />
cleaned.<br />
Check the disassembled parts with the exploded view given in Fig. 6 for any missing<br />
parts or irregularities. Use emery paper #600 to #800 to remove any slight corrosion.<br />
HOUSING AND SHAFT SEAL<br />
Check deformation of retaining rings. If deformed, replace.<br />
Place the housing in the press with the mounting flange facing upwards.<br />
Apply grease between the lips of the oil seal. Grease should not protrude above the tip<br />
of the lip and should fill approximately 80% of the space.<br />
Use push rod and slowly press the oil seal into the housing 1 until seated. Use tool<br />
(Fig. 1). Install retaining ring 43.<br />
SHAFT AND BEARING<br />
Inspect drive shaft 8 oil seal surface for nicks or scratches Use emery paper to remove<br />
minor nicks and scratches . When the nicks or scratches are deep, finish by grinding<br />
and polish with emery paper.<br />
In all cases, use caution with plunge cuts such that the finished surface will not feed in<br />
the axial direction.<br />
Assemble the first retaining ring 42 on the drive shaft end side. The side opposite the<br />
part to be held by the retaining ring must always be on the sharp edged side of the<br />
retaining ring.<br />
Press ball bearing onto the drive shaft 8. Install the other retaining ring 42.<br />
The following is maximum pressing force guidelines. Use tool (Fig. 2).<br />
pressing force<br />
series bearing number lb. N<br />
PV/PVT6 230-03205 1330 5900<br />
PV/PVT10 230-82054 1500 6700<br />
PV/PVT15 230-03206 1690 7500<br />
PV/PVT20 230-82193 2200 9800<br />
PV/PVT29 230-82193 2200 9800<br />
Rotate the outer ring manually to check for any irregular noise.<br />
HOUSING AND SHAFT<br />
Fit a protective cone (Fig. 3) for oil seal on the shaft end and apply a light coat of lithium<br />
grease on the outer surface. Carefully assemble the drive shaft 8 into the housing<br />
1.<br />
Assemble retaining ring 41 into the housing.<br />
HOUSING AND HANGER<br />
Place the housing on a fixture with the shaft end facing downwards and insert spring<br />
19, and spring seat 20 into the housing.<br />
Lightly coat the wear plate 16 with grease and mate to hanger 9. Fit into the housing.<br />
Install undersize trunnion pin, (Fig. 4) into one side of hanger housing, aligning with<br />
bore in hanger.<br />
Apply a very, very light coating (almost transparent) of anaerobic pipe sealant (Loctite<br />
Pipe Sealant with Teflon, Prolok Pipe Sealant with Teflon, or equal) to the opposite<br />
trunnion bore in the housing. This is to seal any slight imperfections of the bores or<br />
trunnion pin.<br />
Using 6 ton max. force, press the trunnion pin flush with the housing boss.<br />
Remove the assembly pin from the opposite side and repeat above steps on that side.<br />
BARREL HOLDDOWN<br />
Place the cylinder barrel 3 on a fixture and insert washers 27 and spring 18 in the center<br />
hole. Washers 27 should be located on both ends of the spring.<br />
Confirm that the face and the bore surface of the cylinder barrel 3 are free of scratches<br />
and foreign substances. Compress spring 18 using a mechanical press and secure<br />
with retaining ring 40. Make sure the retaining ring has been correctly fitted into the<br />
groove.<br />
21
ASSEMBLY PROCEDURE<br />
Place cylinder barrel 3 on a clean sheet of paper or cloth and insert the three dowels<br />
56 into the holes located outside of the spline hole. Place the holddown ball 14 on top.<br />
Compress manually and ascertain spring 18 force.<br />
BARREL,<br />
PISTON/SHOE/RETAINER<br />
Hold the shoe retainer 15 horizontally with one hand, insert the 9 piston assemblies 5<br />
into the bores of the shoe retainer, in order of disassembly. The shoes should freely<br />
move on the piston.<br />
Support the shoe retainer horizontally and insert the piston assemblies 5 carefully into<br />
the cylinder barrel bores 3.<br />
HOUSING AND ROTATING<br />
GROUP<br />
Place the housing 1 so that the drive shaft 8 is horizontal. Assemble the cylinder barrel<br />
3, piston assembly 5, holddown ball 14 and shoe retainer 15 together onto the drive<br />
shaft.<br />
Do not force the drive shaft spline into the cylinder barrel groove but carefully rotate to<br />
engage, while applying slight thrust. The assembly is correct when the edge of the<br />
cylinder barrel is inserted approximately 1/3 inches below the edge of the housing.<br />
Place the housing with the shaft end pointing downwards on a fixture and coat the face<br />
of the cylinder barrel with clean <strong>hydraulic</strong> fluid. Place gasket 24 on the housing.<br />
PORT BLOCK ASSEMBLY<br />
Press needle bearing 36 into port block,till bearing bottoms in the bore. Press on the<br />
stamped side of the needle bearing.<br />
Place port block on press with support under adjusting screw pad. Press guide sleeve<br />
23 into port block.<br />
Assemble the plunger 21 and port plate 4 onto the port block 2. Note Figure 7 for correct<br />
location and placement of port plate.<br />
FIGURE 7<br />
port plate installation<br />
FIGURE 7<br />
Lightly coat surface of plate with grease and place the port plate on the port block 2<br />
locating the”U” shaped slot marked R or L over the pin (57, figure 6).<br />
Hold the port block so the plunger 21 does not fall off, and carefully place the block on<br />
the housing.<br />
The clearance between the housing and port block on the contact surface should be<br />
approximately 0.04 to 0.1 in., 1 to 2.5 mm.<br />
Secure the port block 2 with socket head screws 46, tightened diagonally.<br />
22
ASSEMBLY PROCEDURE<br />
TORQUE ON HOUSING BOLTS<br />
The final tightening torque should be as follows:<br />
lb.-ft<br />
Nm<br />
series min. max. min. max<br />
PV/PVT6 14.0 16.0 19.0 21.7<br />
PV/PVT10 25.0 29.0 33.9 39.3<br />
PV/PVT15 56.0 61.0 75.9 82.7<br />
PV/PVT20 56.0 61.0 75.9 82.7<br />
PV/PVT29 100.0 110.0 135.6 149.1<br />
‘C’ COMPENSATOR<br />
'C' Compensator valve 28 is assembled as follows: (See figure 8)<br />
FIGURE 8<br />
‘C’ compensator assembly<br />
B<br />
A – Inlet<br />
B – Outlet<br />
D – Case drain<br />
FIGURE 8<br />
‘C’ compensator<br />
Carefully clean the valve body 28-1 and spool 28-2 and soak in clean <strong>hydraulic</strong> fluid.<br />
A<br />
‘C’ COMPENSATOR CIRCUIT<br />
D<br />
Check O-Rings 28-8 and 28-9 for deformation and wear (as given in no. 28 of<br />
"INSPECTION") and when determined to be in good condition, assemble 28-8 to cap,<br />
28-3, and 28-9 to spring seat 28-4.<br />
Carefully insert spool 28-2 into the bore in the valve body 28-1. (Spool and body are<br />
matched set.) Install plug 28-14 in body.<br />
‘F’ & ‘L’ COMPENSATOR<br />
B<br />
V<br />
A – Inlet<br />
B – Outlet<br />
D – Case drain<br />
V – Vent<br />
Fit spring seats 28-4 and spring seat 28-5 on both ends of the spring 28-6 and assemble<br />
into the valve body.<br />
With adjusting screw 28-11 and nut 28-12 set on the cap, place the cap on the spring<br />
seat 28-4 and screw into the threaded hole on the valve body. Tighten until the edge<br />
surface is flush.<br />
After checking the O-ring 28-10 for deformation and wear, coat the mounting surface<br />
facing the valve body with lithium grease and install the O-ring.<br />
'F' and ‘L’ Compensator valve 28 is assembled as follows: (See figure 9)<br />
28<br />
A<br />
‘F’ COMPENSATOR CIRCUIT<br />
B<br />
D<br />
V<br />
A – Inlet<br />
B – Outlet<br />
D – Case drain<br />
V – Vent<br />
A<br />
‘L’ COMPENSATOR CIRCUIT<br />
D<br />
FIGURE 9<br />
‘F’ & ‘L’ compensator<br />
23
ASSEMBLY PROCEDURE<br />
Carefully clean the valve body 28-1 and spool 28-2 and soak in clean <strong>hydraulic</strong> fluid.<br />
Check O-Rings 28-8 and 28-9 for deformation and wear (as given in no. 28 of<br />
"INSPECTION") and when determined to be in good condition, assemble 28-8 to cap,<br />
28-3, and 28-9 to spring seat 28-4.<br />
For the ‘L’ compensator only, install pin 28-4 into spool 28-2.<br />
Carefully insert spool 28-2 into the bore in the valve body 28-1. (Spool and body are<br />
matched set.) Install plug 28-14 in body.<br />
Assemble spring seats 28-4 and spring seat 28-5 on both ends of the spring 28-6 and<br />
assemble into the valve body.<br />
With adjusting screw 28-11 and nut 28-22 set on the cap, place the cap on the spring<br />
seat 28-4 and screw into the threaded hole on the valve body. Tighten until the edge<br />
surface is flush.<br />
To install seat 28-15, insert open end into bore and press in place. Install plug<br />
28-20 and tighten.<br />
Assemble washer 28-19 and spring 28-7 on adjusting screw 28-18, assemble cone 28-<br />
16 in spring and assemble into the valve body.<br />
Set adjusting screw to measurement taken at disassembly and lock in place with nut<br />
28-12 Cover with acorn nut 28-22.<br />
After checking the O-ring 28-10 for deformation and wear, coat the mounting surface<br />
facing the valve body with lithium grease and install the O-ring.<br />
‘J’ AND ‘K’TORQUE LIMITER<br />
The torque limiter functions in conjunction with the ‘F’ or ‘L’ compensator described previously.<br />
B<br />
A<br />
‘J’ AND ‘K’TORQUE<br />
LIMITER CIRCUIT<br />
D<br />
V<br />
See figure 10. Place spring hat 9, spring 5, and seal piston 4 with o-ring 19 in bore,<br />
then follow with plug 1, screw 2, and nuts 20 and 3.<br />
Press dowel 25 into fedback arm 7.<br />
Using grease to hold it in place, place sleeve 6 on dowel 25 in hole in feedback arm 7,<br />
then place feedback arm in body 16 so that spool 8 can be slid thru front bore in body,<br />
sleeve and rear bore in body.<br />
With orifice 26 in elbow 21 and o-ring 19 in place on elbow, screw elbow into port.<br />
Carefully slide dowel rod 18 thru feedback arm and then screw pivot plugs into body to<br />
retain each end of pivot rod.<br />
Slide dowel 10 into body and thru feedback arm. Put washer 22 on dowel, and follow<br />
with spring 15. Push dowel in until it touches rear of body, letting it capture spring 15,<br />
then tighten plug 11 into body.<br />
Check that feedback arm can pivot as to touch body at each end of its throw.<br />
Assemble screws 12 with washers 14 and o-rings 23 and place in body. Place gasket<br />
17 over screws and on body.<br />
12, 14, 23<br />
5 8 8, 9 9<br />
A<br />
19, 21, 26 16 16 18,13<br />
13<br />
28<br />
3 3 20 20 11<br />
22 19 19 44 15 15 10 10 22 22<br />
A 77 6 24 11 17<br />
25 25<br />
FIGURE 10<br />
‘J’ and ‘K’ torque limiter<br />
FIGURE 10<br />
'J' and 'K' torque limiter<br />
SECTION A-A A-A<br />
24
ASSEMBLY PROCEDURE<br />
T’ POWER LIMITER<br />
‘T’ power limiter valve 28 is assembled as follows:<br />
See figure 11. Carefully clean the valve body 28-1 and spool 28-2 and soak in clean<br />
<strong>hydraulic</strong> fluid.<br />
Install orifice 28-30 in body as shown.<br />
To install seat 28-15, insert open end into bore and press in place, beyond the threaded<br />
hole for fitting, 28-27. Install fitting 28-29, tighten with port offset away from spring<br />
cavity, to allow installing the cap, 28-3.<br />
Carefully insert spool 28-2 into the bore in the valve body 28-1. (Spool and body are<br />
matched set.) Install plug 28-14 in body.<br />
Check O-Rings 28-8 and 28-9 for deformation and wear (as given in no. 28 of<br />
"INSPECTION") and when determined to be in good condition, assemble 28-8 to cap,<br />
28-3, and 28-9 to spring seat 28-4.<br />
Assemble spring seats 28-4 and spring seat 28-5 on both ends of the spring 28-6 and<br />
assemble into the valve body.<br />
With adjusting screw 28-11 and nut 28-12 set on the cap, 28-3, place the cap on the<br />
spring seat 28-4 and screw into the threaded hole on the valve body. Tighten until the<br />
edge surface is flush.<br />
Assemble washer 28-19 and spring 28-7 on adjusting screw 28-18, assemble cone 28-<br />
16 in spring and assemble into the valve body.<br />
Set adjusting screw to measurement taken at disassembly and lock in place with nut<br />
28-12 Cover with acorn nut 28-22.<br />
Place ball 28-17 in body above orifice 28-2.<br />
Insert pin 28-24 into fitting assembly 28-27 and tighten in valve body.<br />
Assemble seat 28-25, spring 28-26 washer 28-19 and nut 28-12 on adjusting screw<br />
28-18.<br />
Set adjusting screw to measurement taken at disassembly and lock in place with nut<br />
28-12. Cover with acorn nut 28-22.<br />
After checking the O-ring 28-10 for deformation and wear, coat the mounting surface<br />
facing the valve body with lithium grease and install the O-ring.<br />
‘T’ POWER LIMITER CIRCUIT<br />
FIGURE 11<br />
‘T’ power limiter<br />
25
ASSEMBLY PROCEDURE<br />
FINAL ASSEMBLY<br />
Assemble compensator or power limiter valve 28 on the mounting pad of port block.<br />
The tightening torque is as follows: 8.3 to 9.7 Ibs.-ft., 11 .3 to 13.2 Nm.<br />
If the pump contains the ‘J’ or ‘K’ torque limiter, place the control on its mounting pad<br />
with the feedback arm on the barrel side of the hanger, with the adjustment facing the<br />
same way. The feedback arm will bear against the hanger with the force of the return<br />
spring, item 15. Be sure the gasket is positioned and the O-rings are on the cap<br />
screws, then tighten the cap screws to 8.3 to 9.7 Ibs.-ft., 11 .3 to 13.2 Nm.<br />
Attach the connecting tube to the fitting on the front of the torque limiter body and the<br />
other end to the ‘F’ control on the top of the pump.<br />
Install thread seal 54 and hex nut 45 to adjusting screw 22 and then screw into the<br />
hole on port block till screw contacts piston. Set to the desired stroke using table given<br />
below and lock with hex nut.<br />
max. volume adjustment screw 22<br />
unit PV6 PV10 PV15 PV20 PV29<br />
PVT6 PVT10 PVT15 PVT20 PVT29<br />
number of turns full to zero 8.5 8.5 8.5 9.7 10.5<br />
maximum torque to turn in. lbs. 28 25 41 49 45<br />
adjusting screw Nm 3.2 2.8 4.6 5.5 5.1<br />
Rotate the drive shaft 8 with a lever or hub attached to the drive shaft end in the direction<br />
of the arrow plate several times and confirm that the rotation is smooth.<br />
Cover the piping port on the side where the PC valve is mounted with the palm of the<br />
hand. Rotate the drive shaft and if air is forced out of the piping port, the pump is properly<br />
functioning.<br />
For pumps with ‘T’ power limiter, install orifice 28-28 into the piping port on the side<br />
where the power limiter is mounted, and retain with shipping plug.<br />
Screw plug 58 with O-ring 55 to the housing and seal other openings with plastic cap<br />
seals or specified covers.<br />
For PVT pumps with auxiliary pump mounted, install coupling 70, adapter 69-1, O-ring<br />
69-2, O-ring 69-3, Install auxiliary pump with screws and washers 69-4 and 69-5.<br />
Torque the screws as follows:<br />
rear mount pad lb.-ft. Nm<br />
min. max. min. max.<br />
SAE 82-2 (SAE-A) 28 34 38 46<br />
SAE 101-2 (SAE-B) 68 82 90 110<br />
SAE 127-2 (SAE-C) 135 165 180 220<br />
Clean the outside of the pump and install onto the original equipment or return to storage<br />
room.<br />
26
TEST PROCEDURE<br />
TEST CONDITIONS<br />
PUMP TEST<br />
Operating speed: 1770 ±. 30 RPM<br />
Oil temperature 120 0 ± 10 0 F., 49 0 ± 5.5 0 C.<br />
Case pressure 3 to 10 PSI, .21 to .69 bar<br />
With the operating speed at 1770 ±30 RPM, record delivery flow rate, drain flow rate<br />
and fluid temperature at minimum outlet pressure and maximum rated continuous<br />
pressure.<br />
unit PV/PVT6 PV/PVT10 PV/PVT15 PV/PVT20 PV/PVT29<br />
max. rated psi 3500 3500 3500 3500 3000<br />
continuous pressure bar 241 241 241 241 241<br />
max. flow at gpm 7.1 10.3 16.6 21.4 30.4<br />
minimum pressure l/min. 26.9 39 62.8 81 115<br />
min. flow at max. gpm 5.9 8.7 14.4 18.6 26.6<br />
rated pressure l/min. 22.3 32.9 54.5 70.4 100.7<br />
max. case leakage gpm .53 .58 .90 1.2 1.5<br />
at rated pressure l/min. 2.0 2.2 3.4 4.5 5.7<br />
Evaluation Criteria:<br />
A. Rate of flow at minimum outlet pressure:<br />
B. Rate of flow at max. rated continuous pressure:<br />
C. Case drain leakage at max. rated continuous pressure and full flow:<br />
D. Compensator leakage—the additional case drain leakage incurred at the max. rated<br />
continuous pressure when the pump is compensated (The actual increase in case<br />
leakage above the actual case leakage in "C".)<br />
unit PV/PVT6 PV/PVT10 PV/PVT15 PV/PVT20 PV/PVT29<br />
max. leakage, ‘C’ gpm .8 .8 .8 .8 .8<br />
compensator l/min. 3 3 3 3 3<br />
max leakage,’F’,‘L’,’J’, gpm .9 .9 .9 .9 .9<br />
‘K’&‘T’ compensator l/min. 3.4 3.4 3.4 3.4 3.4<br />
‘C’ COMPENSATOR TEST<br />
1. Increase the system pressure above the compensator setting. Observe system<br />
pressure when the pump starts to destroke. Continue increasing system pressure until<br />
pump fully destrokes. At no time should the system pressure vary ±150 psi, 10,3 bar<br />
from the compensator setting. The control should be steady and stable during all<br />
stages of destroking.<br />
2. Adjust system pressure to a maximum of 150 psi, 10,3 bar below compensator setting<br />
while running at "test conditions". Flow and leakage readings shall return to rated<br />
conditions.<br />
3. Repeat two more times. Compensator settings should be repeatable.<br />
‘F’ COMPENSATOR TEST<br />
1. Insert a needle valve in the vent port of ‘F’ compensator. Back main pressure<br />
adjustment screw 28-8 out. Set differential adjustment screw 28-11 at 250 psi, 17,2<br />
bar) system pressure. Reset main pressure adjustment to 500 psi, 34,5 bar above the<br />
maximum rated continuous pressure for the pump. Check to see that the pump will<br />
compensate at 500 psi 34,5 bar above the maximum rated continuous pressure.<br />
2. Test according to the test procedure for the "C" compensator. Open and close valve<br />
in vent port several times. (When valve is open, pressure should go to differential pressure<br />
setting, 250 psi, 17,2 bar. If all flows and leakages are acceptable, remove the<br />
valve from the vent port.<br />
‘L’ COMPENSATOR TEST<br />
1. Insert a needle valve in the vent port of ‘L’ compensator. Remove the pin from<br />
inside the spool of "L" compensator. Back main adjustment screw 28-18 out. Set differential<br />
adjustment screw 28-11 at 250 psi, 17,2 bar system pressure. Reset main pressure<br />
adjustment to 500 psi, 34,5 bar above the maximum rated continuous pressure<br />
for the pump. Check to see that the pump will compensate at 500 psi, 34,5 bar above<br />
the maximum rated continuous pressure.<br />
2. Test according to test procedure for the "C" compensator. Open and close valve in<br />
vent port several times. (When valve is open, pressure should go to differential pressure<br />
setting, 250 psi, 17,2 bar. if all flows and leakages are acceptable, remove the<br />
valve from the vent port, re-insert pin into spool.<br />
27
TEST PROCEDURE<br />
‘J’ AND ‘K’TORQUE LIMITER<br />
1. Note: on all pump adjustment screws, CW rotation increases the setting, and CCW<br />
decreases the setting.<br />
2. On the “F” (or “L”) control, back out the maximum pressure adjustment until there is<br />
no resistance, and set the differential spool to 250 psi, 17,2 bar. Now the pump will<br />
give full flow up to 250 psi, 17,2 bar and then destroke fully.<br />
3. Set the system relief at the desired pressure, and the maximum pressure adjustment<br />
on the “F” (or “L”) control 250 psi, 17,2 bar lower. It may be necessary to adjust<br />
the maximum torque screw in (CW) to keep the pump from destroking before the max.<br />
pressure is reached.<br />
4. Set the maximum torque adjustment to obtain the proper torque or flow at the proper<br />
pressure.<br />
Torque (lbs-in) = pressure(psi) x flow (gpm)x 231<br />
rpm 2π x overall. eff.<br />
Flow (gpm) = torque (lbs-in) x rpm x 2π x overall. eff.<br />
pressure(psi) x 231<br />
or:<br />
Torque (Nm) = pressure(bar) x flow (l/m) x 1000<br />
rpm x 20π x overall eff.<br />
Flow (l/m) = torque (Nm) x rpm x 20π x overall. eff.<br />
pressure(bar) x 1000<br />
5. As an example, settings on a size 20 pump might be as follows:<br />
Differential spool: 250 psi, 17,2 bar.<br />
System relief: 3250 psi, 224 bar (relief valve in outlet line)<br />
Maximum pressure (compensator): 3000 psi, 207 bar<br />
Maximum torque: 951 lb.-in. at 2500 psi at 1800 rpm, .86 overall efficiency<br />
Flow (gpm) = 951 x 1800 x 2π x .86 = 16 gpm<br />
2500 x 231<br />
or:<br />
Maximum torque: 107 Nm. at 172 bar at 1800 rpm, .86 overall efficiency<br />
Flow (l/m) = 107 x 1800 x 20π x .86 = 60,5 l/m<br />
172 x 1000<br />
FIGURE 12<br />
‘J’ and ‘K’ torque limiter<br />
PV PUMP<br />
“L” OR “F” COMP<br />
MAXIMUM PRESSURE<br />
ADJUSTEMENT<br />
MAXIMUM FLOW<br />
ADJUSTEMENT<br />
TORQUE<br />
LIMITER<br />
MAXIMUM<br />
TORQUE<br />
ADJUSTMENT<br />
28
TEST PROCEDURE<br />
‘T’ POWER LIMITER TEST<br />
Power limiter setting consists of first adjusting the flow (1) at the high pressure compensator<br />
setting for the required horsepower, then adjusting the high flow pressure<br />
adjustment (3) to the required horsepower at full volume. Before plumbing the pressure<br />
line to the pump, check for the presence of the orifice 28-28 in the pressure port.<br />
1. Calculate these two settings, (flow at maximum pressure, and pressure at maximum<br />
flow) using the equation:<br />
HP= PxQ/ (Eff. x 1714) where P= Pressure in PSI<br />
Q= flow in U.S. GPM<br />
or Kw= PxQ/ (Eff. x 600) where P= Pressure in Bar<br />
Q= flow in LPM<br />
2. Back out adjustment (3) till there is no resistance.<br />
3. Turn in adjustment (2) until it is at least 500 psi, 34,5 bar above the high pressure<br />
limit.<br />
4. Start the unit and set the system relief valve to desired high pressure limit.<br />
5. Adjust the flow control setting (1) to achieve the desired flow at the high pressure<br />
limit.<br />
6. Set the system relief valve to 200 psi, 14 bar above the desired high pressure compensator<br />
setting.<br />
7 Back the compensator adjustment (2) out to the desired setting.<br />
8. Back the system relief valve down to the calculated pressure at maximum flow.<br />
9. Turn the adjustment (3) in until you just reach full flow.<br />
10. Check all adjustments by raising system relief to above the compensator setting.<br />
Re-adjust flow control setting (1) if necessary to achieve the calculated high pressure<br />
flow.<br />
Note: Electric motor current may be used instead of calculated pressures and<br />
flows to set power. In step 5, adjust the flow control setting (1) to achieve the rated<br />
motor current. In step 9, turn the adjustment (3) in to achieve rated motor current.<br />
Note: The minimum power setting is normally 30% of full power. (Maximum pressure<br />
at full volume.)<br />
(3) HIGH FLOW<br />
PRESSURE<br />
ADJUSTMENT<br />
FIGURE 13<br />
‘T’ power limiter adjustment<br />
(2) COMPENSATOR<br />
ADJUSTMENT<br />
“V”<br />
(1) FLOW<br />
ADJUSTMENT<br />
29
COMPENSATOR SECTION DRAWINGS<br />
PRESSURE COMPENSATOR<br />
ADJUSTMENT SCREW<br />
"C" COMPENSATOR<br />
"V"<br />
VENT PORT<br />
PRESSURE COMPENSATOR<br />
ADJUSTMENT SCREW<br />
250-400 PSI DIFFERENTIAL PRESSURE ADJUSTING SCREW<br />
(17-28 BAR)<br />
"F" COMPENSATOR<br />
"V"<br />
VENT PORT<br />
PRESSURE COMPENSATOR<br />
ADJUSTMENT SCREW<br />
250-400 PSI DIFFERENTIAL PRESSURE ADJUSTING SCREW<br />
(17-28 BAR)<br />
"L" COMPENSATOR<br />
30
PV6 INSTALLATION<br />
2.79<br />
(70,9)<br />
3.74<br />
(95,0) DIA. R.<br />
.47<br />
(11,9)<br />
1.54<br />
(39,1)<br />
1.79<br />
(45,5)<br />
*<br />
4.11<br />
(104,4)<br />
"V"<br />
COMPENSATOR VENT PORT<br />
SAE - 4 7/16-20 UNF-2B<br />
(BSPP-1/4" THREADS - OPTIONAL)<br />
FOR CCW<br />
FOR CW<br />
.1884<br />
.1874<br />
(4,785)<br />
(4,760)<br />
*<br />
4.56<br />
SQUARE KEY<br />
(115,8)<br />
1.46<br />
(37,1)<br />
*<br />
3.78<br />
(96,0)<br />
1.00<br />
(25,4)<br />
.832<br />
(21,13)<br />
*<br />
6.71<br />
(170,4)<br />
.750<br />
.749<br />
(19,05)<br />
(19,02)<br />
* DIA.<br />
9.41<br />
(239,0)<br />
9.89<br />
(251,23)<br />
MAXIMUM<br />
NOTE:<br />
TWO BOLT MOUNTING FLANGE CONFORMS TO SAE 82-2 (SAE A) SPECIFICATIONS<br />
EXCEPT FOR DIMENSIONS MARKED WITH AN ASTERISK '* '.<br />
6.11<br />
(155,2)<br />
4.17<br />
(105,9)<br />
5.12<br />
(130,0)<br />
.25<br />
(6,4)<br />
*<br />
1.63<br />
(41,4)<br />
9.72<br />
(246,9)<br />
1.57 2.70<br />
(39,9)<br />
(68,6)<br />
DRAIN PORT "D"<br />
SAE - 8<br />
(BSPP-1/2" THREADS - OPTIONAL)<br />
MAXIMUM<br />
6.43<br />
(163,3)<br />
"F" AND "L" COMPENSATOR - KEYED SHAFT<br />
MAXIMUM VOLUME STOP<br />
ADJUSTING SCREW<br />
1.67<br />
(42,4)<br />
MAXIMUM FOR CCW<br />
(SPLINED SHAFT SHOWN BELOW)<br />
SYSTEM PORTS<br />
SAE 12 1 1/16-12 UNF-2B<br />
(BSPP-3/4 " THREADS - OPTIONAL)<br />
- 2 PLACES AS SHOWN<br />
FOR CW<br />
3.03<br />
(77,0)<br />
2.20<br />
(55,9)<br />
5.62<br />
(142,7)<br />
*<br />
.03<br />
(0,75)<br />
1.30<br />
(33,0)*<br />
.98<br />
(24,9)<br />
1.89<br />
(48,0)<br />
2.15<br />
(54,6)<br />
3.250<br />
3.248<br />
(82,55) DIA.<br />
(82,50)<br />
45°<br />
30°*<br />
SAE 22-4 (SAE B) INVOLUTE SPLINE DATA<br />
* CLASS 5, FLAT ROOT SIDE FIT PER J498c<br />
NUMBER OF TEETH<br />
PITCH<br />
.06<br />
(1,5)<br />
.49<br />
(12,4)<br />
13<br />
16/32<br />
INLET PORT FOR CW ROTATION<br />
OUTLET PORT FOR CCW ROTATION<br />
1.13<br />
(28,7)<br />
2.25<br />
(57,2)<br />
OUTLET PORT FOR CW ROTATION<br />
INLET PORT FOR CCW ROTATION<br />
PRESSURE ANGLE<br />
30°<br />
MAJOR DIA.<br />
.875/.853 (22,23/21,67)<br />
MINOR DIA.<br />
.715 (18,16)<br />
NOTE: DIMENSIONS IN PARENTHESIS ARE METRIC (SI UNITS).<br />
"C" COMPENSATOR - SPLINED SHAFT<br />
(KEYED SHAFT SHOWN ABOVE)<br />
"C" Series PV6<br />
31
PV10 INSTALLATION<br />
3.07<br />
(78,0)<br />
R.<br />
4.72<br />
(119,9)<br />
.57<br />
(14,5)<br />
1.61<br />
(40,9)<br />
.2510<br />
.2500<br />
1.25<br />
(31,8)<br />
(6,375) SQUARE KEY<br />
(6,350)<br />
.987<br />
(25,07)<br />
.875<br />
.874<br />
DIA.<br />
(22,23)<br />
(22,20)<br />
1.75<br />
(44,5)<br />
.37<br />
(9,4)<br />
1.30<br />
(33,0)<br />
3.27 .06<br />
(83,1) (1,5)<br />
2.33<br />
4.31<br />
(59,2) (109,5)<br />
10.59<br />
(268,9)<br />
NOTE:<br />
TWO BOLT MOUNTING FLANGE CONFORMS TO SAE 101-2 (SAE B) SPECIFICATIONS<br />
1.88<br />
(47,8)<br />
WITH THE FOLLOWING EXCEPTIONS:<br />
1. THERE IS NO 2.00 (50,8) DIA. COUNTERBORE IN FACE OF MTG. FLANGE.<br />
2. DIMENSIONS MARKED WITH AN ASTERISK '*<br />
'.<br />
6.85<br />
(174,0)<br />
5.75<br />
(146,1)<br />
*<br />
1.77<br />
(45,0)<br />
MAXIMUM<br />
10.21<br />
(259,3)<br />
DRAIN PORT "D"<br />
SAE - 10<br />
(BSPP-3/4" THREADS - OPTIONAL)<br />
2.32<br />
(58,9)<br />
6.88<br />
(174,8)<br />
COMPENSATOR VENT PORT "V"<br />
SAE - 4 7/16-20 UNF-2B<br />
(BSPP-1/4" THREADS - OPTIONAL) FOR CCW<br />
1.38<br />
(35,1)<br />
MAXIMUM<br />
7.20<br />
(182,9)<br />
4.84<br />
(122,9)<br />
"F" AND "L" COMPENSATOR - KEYED SHAFT<br />
MAXIMUM VOLUME STOP<br />
ADJUSTING SCREW<br />
FOR CCW<br />
FOR CW<br />
(SPLINED SHAFT SHOWN BELOW)<br />
SYSTEM PORTS<br />
SAE-20 1-5/8"-12 UNF-2B<br />
(BSPP-1-1/4" THREADS - OPTIONAL)<br />
- 2 PLACES AS SHOWN<br />
FOR CW<br />
4.06<br />
(103,1)<br />
6.11<br />
(155,2)<br />
.98<br />
(24,9)<br />
2.48<br />
(63,0)<br />
2.09<br />
(53,1)<br />
4.000<br />
3.998<br />
(101,60) DIA.<br />
(101,55)<br />
45°<br />
30°<br />
.06<br />
(1,5)<br />
.53<br />
(13,5)<br />
1.18<br />
(30,0)<br />
2.36<br />
(60,0)<br />
OUTLET PORT FOR CW ROTATION<br />
INLET PORT FOR CCW ROTATION<br />
SAE 22-4 (SAE B) INVOLUTE SPLINE DATA<br />
CLASS 5, FLAT ROOT SIDE FIT PER J498c<br />
10.01<br />
(254,3)<br />
MAXIMUM<br />
INLET PORT FOR CW ROTATION<br />
OUTLET PORT FOR CCW ROTATION<br />
*<br />
NUMBER OF TEETH<br />
PITCH<br />
PRESSURE ANGLE<br />
MAJOR DIA.<br />
MINOR DIA.<br />
13<br />
16/32<br />
30°<br />
.875/.853 (22,23/21,67)<br />
.715 (18,16)<br />
NOTE: DIMENSIONS IN PARENTHESIS ARE METRIC (SI UNITS).<br />
"C" COMPENSATOR - SPLINED SHAFT<br />
(KEYED SHAFT SHOWN ABOVE)<br />
"C" Series PV10<br />
*<br />
*<br />
*<br />
*<br />
*<br />
32
PV15 INSTALLATION<br />
3.46<br />
(87,9)<br />
4.72<br />
(119,9)<br />
*<br />
R.<br />
.57<br />
(14,8)<br />
1.89<br />
(48,0)<br />
2.29*<br />
(58,2)<br />
1.88<br />
(47,8)<br />
*<br />
5.00<br />
(127,0)<br />
SAE - 4 7/16-20 UNF-2B<br />
(BSPP-1/4" THREADS - OPTIONAL)<br />
FOR CCW<br />
FOR CW<br />
.2510<br />
.2500<br />
(6,375)<br />
(6,350)<br />
SQUARE KEY<br />
1.25<br />
(31,8)<br />
5.23<br />
(132,8)<br />
4.45<br />
(113,0)<br />
7.95<br />
(201,9)<br />
.987<br />
(25,07)<br />
COMPENSATOR VENT PORT "V"<br />
.875<br />
.874<br />
(22,23)<br />
(22,20)<br />
10.85<br />
(275,6)<br />
12.35<br />
MAXIMUM<br />
(313,7)<br />
NOTE:<br />
TWO BOLT MOUNTING FLANGE CONFORMS TO SAE 101-2 (SAE B) SPECIFICATIONS<br />
WITH THE FOLLOWING EXCEPTIONS:<br />
1. THERE IS NO 2.00 (50.8) DIA. COUNTERBORE IN FACE OF MTG.<br />
2. DIMENSIONS MARKED WITH AN ASTERISK '* '<br />
7.44<br />
(189,0)<br />
5.75<br />
(146,1)<br />
6.85<br />
(174,0)<br />
.37<br />
(9,4)<br />
1.71<br />
(43,4)<br />
*<br />
1.97<br />
(50,0)<br />
"F" AND "L" COMPENSATOR - KEYED SHAFT<br />
DRAIN PORT "D"<br />
SAE - 10<br />
(BSPP-3/4" THREADS - OPTIONAL)<br />
2.90<br />
(73,7)<br />
7.51<br />
(190,8)<br />
2.55<br />
(64,8)<br />
MAXIMUM<br />
(SPLINED SHAFT SHOWN BELOW)<br />
MAXIMUM VOLUME STOP<br />
ADJUSTING SCREW<br />
FOR CCW<br />
SYSTEM PORTS<br />
SAE-20 1 5/8-12 UNF-2B<br />
(BSPP-1 1/4" THREADS - OPTIONAL)<br />
- 2 PLACES AS SHOWN<br />
FOR CW<br />
2.87<br />
(72,9)<br />
6.93<br />
(176,0)<br />
3.86<br />
(98,0)<br />
.08<br />
(2,0)<br />
.98<br />
(24,9)<br />
2.48<br />
(63,0)<br />
4.000<br />
3.998<br />
(101,60)<br />
(101,55)<br />
DIA.<br />
45°<br />
*30°<br />
SAE 22-4 (SAE B) INVOLUTE SPLINE DATA<br />
* CLASS 5, FLAT ROOT SIDE FIT PER J498c<br />
NUMBER OF TEETH<br />
.06<br />
(1,5)<br />
13<br />
1.30<br />
(33,0) *<br />
.53<br />
(13,5)<br />
11.77<br />
(299,0)<br />
MAXIMUM<br />
INLET PORT FOR CW ROTATION<br />
OUTLET PORT FOR CCW ROTATION<br />
1.31<br />
(33,3)<br />
2.62<br />
(66,5)<br />
OUTLET PORT FOR CW ROTATION<br />
INLET PORT FOR CCW ROTATION<br />
PITCH<br />
16/32<br />
PRESSURE ANGLE<br />
30°<br />
MAJOR DIA.<br />
.875/.853 (22,23/21,67)<br />
MINOR DIA.<br />
.715 (18,16)<br />
"C" COMPENSATOR - SPLINED SHAFT<br />
(KEYED SHAFT SHOWN ABOVE)<br />
NOTE: DIMENSIONS IN PARENTHESIS ARE METRIC (SI UNITS). "C" Series PV15<br />
33
PV20 INSTALLATION<br />
5.83*<br />
(148,1)<br />
3.66<br />
(93,0)<br />
DIA.<br />
R.<br />
.70<br />
(17,8)<br />
1.93<br />
(49,0)<br />
.3136<br />
.3126<br />
(7,965)<br />
(7,940)<br />
SQUARE KEY<br />
2.30<br />
(58,4)<br />
1.87<br />
(47,5)<br />
1.25<br />
(31,8)<br />
11.47<br />
(291,3)<br />
5.53<br />
(140,5)<br />
1.391<br />
(35,33)<br />
1.250<br />
1.248<br />
(31,75)<br />
(31,70)<br />
DIA.<br />
12.62<br />
(320,5) MAXIMUM<br />
NOTE:<br />
TWO BOLT MOUNTING FLANGE CONFORMS TO SAE 127-2 (SAE C) SPECIFICATIONS<br />
WITH THE FOLLOWING EXCEPTIONS:<br />
1. THERE IS NO 2.50 (63,5) DIA. COUNTERBORE IN FACE OF MTG. FLANGE.<br />
2. DIMENSIONS MARKED WITH AN ASTERISK '*'.<br />
8.28<br />
(210,3)<br />
7.13<br />
(181,1)<br />
.37<br />
(9,4)<br />
*<br />
4.21<br />
(106,9)<br />
2.16<br />
(54,9)<br />
1.73<br />
(43,9)<br />
.08<br />
(2,0)<br />
*<br />
*<br />
*<br />
1.97<br />
(50,0)<br />
12.48<br />
(317,0)<br />
3.07<br />
(78,0)<br />
7.46<br />
(189,5)<br />
1.10<br />
(27,9)<br />
2.92<br />
(74,2)<br />
5.000<br />
4.998 DIA.<br />
(127,00)<br />
(126,95)<br />
45°<br />
30°<br />
.08<br />
(2,0)<br />
*<br />
.65<br />
(16,5)<br />
SAE 32-4 (SAE C) INVOLUTE SPLINE DATA<br />
* CLASS 5, FLAT ROOT SIDE FIT PER J498c<br />
NUMBER OF TEETH<br />
14<br />
PITCH<br />
12/24<br />
PRESSURE ANGLE<br />
MAJOR DIA.<br />
30°<br />
1.250/1.224 (31,75/31,09)<br />
MINOR DIA.<br />
1.040 (26,4)<br />
NOTE: DIMENSIONS IN PARENTHESIS ARE METRIC (SI UNITS).<br />
COMPENSATOR VENT PORT "V"<br />
SAE - 4 7/16-20 UNF-2B<br />
(BSPP-1/4" THREADS - OPTIONAL)<br />
FOR CCW<br />
FOR CW<br />
5.43<br />
(137,9)<br />
4.65<br />
(118,1)<br />
8.34<br />
(211,8)<br />
"F" AND "L" COMPENSATOR - KEYED SHAFT<br />
(SPLINED SHAFT SHOWN BELOW)<br />
DRAIN PORT "D"<br />
SAE - 12<br />
(BSPP-1" THREADS - OPTIONAL)<br />
MAXIMUM<br />
3.35<br />
(85,1)<br />
8.18<br />
(207,8)<br />
2.14<br />
(54,4)<br />
MAXIMUM<br />
MAXIMUM VOLUME STOP (BSPP-1 1/4" THREADS - OPTIONAL)<br />
ADJUSTING SCREW<br />
FOR CCW<br />
SYSTEM PORTS<br />
SAE-20 1 5/8-12 UNF-2B<br />
- 2 PLACES AS SHOWN<br />
FOR CW<br />
2.72<br />
(69,1)<br />
1.38<br />
(35,1)<br />
2.76<br />
(70,1)<br />
OUTLET PORT FOR CW ROTATION<br />
INLET PORT FOR CCW ROTATION<br />
INLET PORT FOR CW ROTATION<br />
OUTLET PORT FOR CCW ROTATION<br />
(KEYED SHAFT SHOWN ABOVE)<br />
"C" COMPENSATOR - SPLINED SHAFT<br />
"C" Series PV20<br />
*<br />
34
PV29 INSTALLATION<br />
4.13<br />
(104,9)<br />
5.83<br />
(148,1)<br />
R.<br />
DIA.<br />
.70<br />
(17,8)<br />
2.36<br />
(59,9)<br />
2.32<br />
(58,9)<br />
*<br />
6.18<br />
(157,0)<br />
12.05<br />
(306,1)<br />
COMPENSATOR VENT PORT "V"<br />
SAE - 4 7/16-20 UNF-2B<br />
(BSPP-1/4" THREADS - OPTIONAL)<br />
FOR CCW<br />
.3136<br />
.3126 SQUARE KEY<br />
(7,965)<br />
1.87*<br />
(7,940) (47,5)<br />
5.90<br />
(149,9)<br />
1.391<br />
(35,33)<br />
1.25<br />
(31,8)<br />
9.24<br />
(234,7)<br />
1.250<br />
1.248<br />
(31,75)<br />
(31,70)<br />
DIA.<br />
13.14<br />
(333,8)<br />
MAXIMUM<br />
NOTE:<br />
TWO BOLT MOUNTING FLANGE CONFORMS TO SAE 127-2 (SAE C) SPECIFICATIONS<br />
WITH THE FOLLOWING EXCEPTIONS:<br />
1. THERE IS NO 2.50 (63,5) DIA. COUNTERBORE IN FACE OF MTG. FLANGE.<br />
2. DIMENSIONS MARKED WITH AN ASTERISK ' '.<br />
8.66<br />
(220,0)<br />
7.13<br />
(181,1)<br />
8.39<br />
(213,1) *<br />
.37<br />
(9,4)<br />
*<br />
2.19<br />
(55,6)<br />
2.36<br />
(59,9)<br />
2.50<br />
(63,5)<br />
(SPLINED SHAFT SHOWN BELOW)<br />
"F" AND "L" COMPENSATOR - KEYED SHAFT<br />
DRAIN PORT "D"<br />
SAE - 12<br />
(BSPP-1" THREADS - OPTIONAL)<br />
8.79<br />
(223,3)<br />
2.02<br />
(51,3)<br />
MAXIMUM<br />
MAXIMUM VOLUME STOP<br />
ADJUSTING SCREW<br />
FOR CCW<br />
3.54<br />
(89,9)<br />
8.29<br />
(210,6)<br />
4.61<br />
(117,1)<br />
.08<br />
(2,0)<br />
1.10<br />
(27,9)<br />
1.73<br />
(43,9)<br />
3.03<br />
(77,0)<br />
3.34<br />
(84,8)<br />
5.000<br />
4.980<br />
(127,00)<br />
(126,49)<br />
DIA.<br />
45°<br />
SAE 32-4 (SAE C) INVOLUTE SPLINE DATA<br />
* CLASS 5, FLAT ROOT SIDE FIT PER J498c<br />
NUMBER OF TEETH<br />
PITCH<br />
.08<br />
(2,0)<br />
14<br />
12/24<br />
30° *<br />
.65<br />
(16,5)<br />
13.00<br />
(330,2)<br />
MAXIMUM<br />
INLET PORT FOR CW ROTATION<br />
OUTLET PORT FOR CCW ROTATION<br />
1.63<br />
(41,4)<br />
3.25<br />
(82,6)<br />
PRESSURE ANGLE<br />
MAJOR DIA.<br />
MINOR DIA.<br />
30°<br />
1.250/1.224 (31,75/31,09)<br />
1.040 (26,4)<br />
(KEYED SHAFT SHOWN ABOVE)<br />
"C" COMPENSATOR - SPLINED SHAFT<br />
NOTE: DIMENSIONS IN PARENTHESIS ARE METRIC (SI UNITS). "C" Series PV29<br />
FOR CW<br />
5.12<br />
(130,0)<br />
SYSTEM PORTS<br />
SAE-20 1 5/8-12 UNF-2B<br />
(BSPP-1 1/4" THREADS - OPTIONAL)<br />
- 2 PLACES AS SHOWN<br />
FOR CW<br />
OUTLET PORT FOR CW ROTATION<br />
INLET PORT FOR CCW ROTATION<br />
*<br />
*<br />
35
PVT6 INSTALLATION<br />
1.54<br />
(39,1) 1.79 *<br />
(45,5)<br />
1.46<br />
*<br />
4.11<br />
(104,4)<br />
10.01<br />
(254,3)<br />
9.41<br />
(239,0)<br />
MAXIMUM<br />
COMPENSATOR VENT PORT<br />
SAE - 4 7/16-20 UNF-2B<br />
(BSPP-1/4" THREADS - OPTIONAL)<br />
FOR CCW<br />
FOR CW<br />
2.79<br />
(70,9)<br />
.1884<br />
.1874<br />
(4,785)<br />
(4,760)<br />
(37,1)<br />
1.00<br />
* SQUARE KEY (25,4)<br />
.750 *<br />
3.78<br />
(96,0)<br />
4.56<br />
(115,8)<br />
.832<br />
(21,13)<br />
*<br />
1.03<br />
(26,2)<br />
2.06<br />
(52,3)<br />
3.25<br />
(82,6)<br />
6.71<br />
(170,4)<br />
FOR CCW<br />
NOTE:<br />
TWO BOLT MOUNTING FLANGE CONFORMS<br />
TO SAE 82-2 (SAE A) SPECIFICATIONS<br />
EXCEPT FOR DIMENSIONS MARKED<br />
6.26<br />
(159,0)<br />
*<br />
WITH AN ASTERISK ' '.<br />
.749<br />
(19,05)<br />
(19,02)<br />
SAE 19-1 (SAE A)<br />
INLET<br />
3/8-16 UNC-2B<br />
THREAD x .75 DP.<br />
4 PLACES<br />
SAE-8<br />
(BSPP-1/2" THREADS - OPTIONAL)<br />
9.81<br />
(249,2)<br />
3.13<br />
(79,5) 0.43<br />
7.79<br />
MAXIMUM<br />
1.59<br />
FOR CW<br />
(10,9)<br />
(197,9)<br />
2.70<br />
1.57 (40,4)<br />
.25<br />
MAXIMUM VOLUME STOP<br />
(68,6) (39,9) (6,4)<br />
ADJUSTING SCREW<br />
6.12<br />
(155,4)<br />
7.79<br />
(197,9)<br />
.52<br />
(13,2)<br />
1.04<br />
(26,4)<br />
ADAPTER PLATE<br />
SAE 82-2 (SAE A)<br />
MOUNTING FLANGE<br />
1" DIA. (REF.)<br />
0.43<br />
(10,9)<br />
"F" AND "L" COMPENSATOR - KEYED SHAFT<br />
DRAIN PORT<br />
*<br />
(SPLINED SHAFT SHOWN BELOW)<br />
6.11<br />
(155,2)<br />
4.17<br />
(105,9)<br />
4.17<br />
(105,9)<br />
5.12<br />
(130,0)<br />
2.09<br />
(53,1)<br />
3/8-16 UNC-2B<br />
THREAD x .75 DP.<br />
2 PLACES<br />
1.89<br />
(48,0)<br />
1.00" INLET - CW<br />
.75" OUTLET - CCW<br />
(SAE 4-BOLT SPLIT FLANGE<br />
CODE 61)<br />
.75" OUTLET - CW<br />
1.00" INLET - CCW<br />
(SAE 4-BOLT SPLIT FLANGE<br />
CODE 61)<br />
3.25<br />
(82,6)<br />
1.88<br />
(47,8)<br />
0.94<br />
(23,9)<br />
3/8-16 UNC-2B<br />
THREAD x .75 DP.<br />
4 PLACES<br />
.44<br />
(11,2)<br />
0.88<br />
(22,4)<br />
.75 DIA. REF.<br />
6.12<br />
(155,4)<br />
SAE 22-4 (SAE B) INVOLUTE SPLINE DATA<br />
* CLASS 5, FLAT ROOT SIDE FIT PER J498c<br />
NUMBER OF TEETH<br />
PITCH<br />
PRESSURE ANGLE<br />
MAJOR DIA.<br />
MINOR DIA.<br />
13<br />
16/32<br />
30°<br />
.875/.853 (22,23/21,67)<br />
.715 (18,16) MIN.<br />
NOTE: DIMENSIONS IN PARENTHESIS ARE METRIC (SI UNITS).<br />
.49<br />
(12,4)<br />
.03<br />
3.03<br />
(0,75)<br />
*<br />
(77,0)<br />
1.30<br />
(33,0)<br />
.98 *<br />
(24,9)<br />
45°<br />
* 30°<br />
.06<br />
(1,5)<br />
2.20<br />
(55,9)<br />
5.62<br />
(142,7)<br />
2.15<br />
(54,6)<br />
3.250<br />
3.248<br />
(82,55)<br />
(82,50)<br />
3.74<br />
(95,0) DIA.<br />
"C" COMPENSATOR - SPLINED SHAFT<br />
R.<br />
.47<br />
(11,9)<br />
DIA.<br />
NOTE:<br />
TWO BOLT MOUNTING FLANGE CONFORMS<br />
TO SAE 82-2 (SAE A) SPECIFICATIONS<br />
EXCEPT FOR DIMENSIONS MARKED<br />
*<br />
WITH AN ASTERISK ' '.<br />
(KEYED SHAFT SHOWN ABOVE)<br />
"C" SERIES PVT6<br />
36
PVT10 INSTALLATION<br />
4.06<br />
11.58 MAXIMUM<br />
1.61<br />
(294.1)<br />
10.21<br />
(40,9)<br />
(259,3)<br />
2.33<br />
4.31<br />
*<br />
(59,2) (109,5)<br />
.2510 * 1.88<br />
(47,8)<br />
.2500<br />
1.25<br />
(6,350)<br />
(31,8)<br />
1.25 DIA.<br />
(REF.)<br />
3.07<br />
(103,1)<br />
(78,0)<br />
4.00<br />
(101,6)<br />
.987<br />
(25,07)<br />
2.31<br />
(58,7)<br />
1.16<br />
(29,5)<br />
.875<br />
.874<br />
DIA.<br />
(22,23)<br />
(22,20)<br />
INLET<br />
0.59<br />
SAE 22-1 (SAE B)<br />
7/16-14 UNC-2B<br />
(15,0)<br />
THREAD x .875 DP.<br />
1.18<br />
ADAPTER PLATE<br />
NOTE:<br />
4 PLACES<br />
(30,0)<br />
SAE 101-2 (SAE B)<br />
TWO BOLT MOUNTING FLANGE CONFORMS TO SAE 101-2 (SAE B)<br />
MOUNTING FLANGE<br />
SPECIFICATIONS WITH THE FOLLOWING EXCEPTIONS:<br />
6.60<br />
1. THERE IS NO 2.00 (50,8) DIA. COUNTERBORE IN FACE OF MTG. FLANGE.<br />
(167.6) 8.67<br />
0.58<br />
2. DIMENSIONS MARKED WITH AN ASTERISK ' * '.<br />
(220,2)<br />
(14,7)<br />
"F" AND "L" COMPENSATOR - KEYED SHAFT<br />
(SPLINED SHAFT SHOWN BELOW)<br />
DRAIN PORT<br />
MAXIMUM VOLUME STOP<br />
SAE - 10<br />
7.04<br />
(178,8)<br />
ADJUSTING SCREW (BSPP-3/4" THREADS - OPTIONAL)<br />
3.52<br />
8.67<br />
* 1.75<br />
(220,2)<br />
(89,4)<br />
(44,5)<br />
2.32<br />
1.77<br />
.37<br />
FOR CCW<br />
FOR CW<br />
0.58<br />
(58,9) (45,0)<br />
(14,7)<br />
* 1.30<br />
(9,4)<br />
(33,0)<br />
.06 (6,375) SQUARE KEY (1,5) 3.27<br />
(83,1)<br />
COMPENSATOR VENT PORT<br />
SAE - 4 7/16-20 UNF-2B<br />
(BSPP-1/4" THREADS - OPTIONAL)<br />
2.09<br />
(53,1)<br />
FOR CCW<br />
5.75<br />
(146,1)<br />
5.75<br />
(146,1)<br />
4.19<br />
(106,4)<br />
3/8-16 UNC-2B<br />
2 PLACES<br />
THREAD x .75 DP.<br />
6.85<br />
(174,0)<br />
FOR CW<br />
4.84<br />
(122,9)<br />
7.20<br />
(182,9)<br />
1/2-13 UNC-2B<br />
THREAD x 1.00 DP.<br />
2 PLACES<br />
2.09<br />
(53,1)<br />
1.25" INLET - CW<br />
1.00" OUTLET - CCW<br />
(SAE 4-BOLT SPLIT FLANGE<br />
CODE 61)<br />
3.25 DIA. - SAE A<br />
MOUNTING FLANGE<br />
1.00" OUTLET - CW<br />
1.25" INLET - CCW<br />
(SAE 4-BOLT SPLIT FLANGE<br />
CODE 61)<br />
4.00<br />
(101,6)<br />
2.06<br />
(52,3)<br />
1.03<br />
(26,2)<br />
OUTLET<br />
3/8-16 UNC-2B<br />
4 PLACES<br />
THREAD. x .75 DP.<br />
1.04<br />
(26,4)<br />
SAE 22-4 (SAE B) INVOLUTE SPLINE DATA<br />
CLASS 5, FLAT ROOT SIDE FIT PER J498c<br />
NUMBER OF TEETH<br />
PITCH<br />
PRESSURE ANGLE<br />
MAJOR DIA.<br />
MINOR DIA.<br />
0.52<br />
(13,2)<br />
13<br />
16/32<br />
30°<br />
.875/.853 (22,23/21,67)<br />
.715 (18,16)<br />
NOTE: DIMENSIONS IN PARENTHESIS ARE METRIC (SI UNITS).<br />
1.00 DIA.<br />
(REF.)<br />
10.99<br />
(279.1)<br />
6.60<br />
(167.6)<br />
MAXIMUM<br />
.98<br />
(24,9)<br />
* 45°<br />
30°<br />
.53<br />
(13,5)<br />
.06<br />
(1,5)<br />
6.11<br />
(155,2)<br />
4.000<br />
3.998<br />
(101,60)<br />
(101,55)<br />
DIA.<br />
.57<br />
(14,5)<br />
R.<br />
*<br />
4.72<br />
(119,9)<br />
NOTE:<br />
TWO BOLT MOUNTING FLANGE CONFORMS TO SAE 101-2 (SAE B)<br />
SPECIFICATIONS WITH THE FOLLOWING EXCEPTIONS:<br />
1. THERE IS NO 2.00 (50,8) DIA. COUNTERBORE IN FACE OF MTG. FLANGE.<br />
2. DIMENSIONS MARKED WITH AN ASTERISK '<br />
*<br />
'.<br />
(KEYED SHAFT SHOWN ABOVE)<br />
"C" COMPENSATOR - SPLINED SHAFT<br />
"C" SERIES PVT10<br />
37
PVT15 INSTALLATION<br />
1.89<br />
(48,0)<br />
.2510<br />
.2500<br />
(6,375)<br />
(6,350)<br />
SAE 22-1 (SAE B)<br />
SQUARE KEY<br />
*<br />
*<br />
1.25<br />
(31,8)<br />
2.29<br />
(58,2)<br />
1.88<br />
(47,8)<br />
12.41<br />
(315.2)<br />
MAXIMUM<br />
5.00<br />
(127,0)<br />
10.85<br />
(275,6)<br />
1.50 DIA.<br />
(REF.)<br />
COMPENSATOR VENT PORT<br />
SAE-4 7/16-20 UNF-2B<br />
(BSPP-1/4" THREADS - OPTIONAL)<br />
5.23<br />
(132,8)<br />
FOR CCW<br />
FOR CW<br />
4.45<br />
(113,0)<br />
3.46<br />
(87,9)<br />
.987<br />
(25,07)<br />
.875<br />
.874<br />
(22,23)<br />
(22,20)<br />
1.38<br />
(35,1)<br />
2.76<br />
(70,1)<br />
4.00<br />
(101,6)<br />
7.95<br />
(201,9)<br />
NOTE:<br />
TWO BOLT MOUNTING FLANGE CONFORMS TO SAE 101-2 (SAE B)<br />
SPECIFICATIONS WITH THE FOLLOWING EXCEPTIONS:<br />
1. THERE IS NO 2.00 (50.8) DIA. COUNTERBORE IN FACE OF MTG. FLANGE.<br />
2. DIMENSIONS MARKED WITH AN ASTERISK ' '.<br />
*<br />
FOR CCW<br />
8.29<br />
(210,6)<br />
4.15<br />
(105,0)<br />
FOR CW<br />
7.35<br />
(186,7)<br />
INLET<br />
1/2-13 UNC-2B<br />
THREAD x 1.00 DEEP<br />
4 PLACES<br />
9.54<br />
(242,3)<br />
"F" AND "L" COMPENSATOR - KEYED SHAFT<br />
ADJUSTING SCREW<br />
MAXIMUM VOLUME STOP<br />
0.58<br />
(14,7)<br />
DRAIN PORT<br />
SAE-10<br />
(BSPP-3/4" THREADS - OPTIONAL)<br />
11.86<br />
(301,2)<br />
MAXIMUM<br />
9.54<br />
(242,3)<br />
2.90<br />
(73,7)<br />
0.70<br />
(17,8)<br />
1.40<br />
(35,6)<br />
(SPLINED SHAFT SHOWN BELOW)<br />
1.97<br />
(50,0)<br />
ADAPTER PLATE<br />
SAE 101-2 (SAE B)<br />
MOUNTING FLANGE<br />
0.58<br />
(14,7)<br />
1.74<br />
(44,2)<br />
0.37<br />
(9,4)<br />
2.09<br />
(53,1)<br />
7.44<br />
(189,0)<br />
5.75<br />
(146,1)<br />
5.75<br />
(146,1)<br />
4.19<br />
(106,4)<br />
3/8-16 UNC-2B<br />
2 PLACES<br />
THREAD x .75 DP.<br />
6.85<br />
(174,0)<br />
1/2-13 UNC-2B<br />
THREAD x 1.00 DP.<br />
2 PLACES<br />
2.48<br />
(63,0)<br />
4.00<br />
(101,6)<br />
2.06<br />
(52,3)<br />
1.03<br />
(26,2)<br />
0.09<br />
(2,0)<br />
1.30<br />
(33,0)<br />
1.16<br />
(29,5)<br />
*<br />
3.86<br />
(98,0)<br />
6.93<br />
(176,0)<br />
2.87<br />
(72,9)<br />
R.<br />
*<br />
4.72<br />
(119,9)<br />
45°<br />
30°<br />
*<br />
.57<br />
(14,8)<br />
1.50" INLET - CW<br />
1" OUTLET - CCW<br />
(SAE 4-BOLT SPLIT FLANGE<br />
CODE 61)<br />
3.25 DIA. - SAE A<br />
MOUNTING FLANGE<br />
1" OUTLET - CW<br />
1.50" INLET - CCW<br />
(SAE 4-BOLT SPLIT FLANGE<br />
CODE 61)<br />
OUTLET<br />
3/8-16 UNC-2B<br />
.52<br />
(13,2)<br />
THREAD X .75 DEEP<br />
4 PLACES 1.04<br />
(26,4)<br />
*<br />
SAE 22-4 (SAE B) OR SAE 25-4 (SAE B-B)<br />
INVOLUTE SPLINE DATA<br />
CLASS 5, FLAT ROOT SIDE FIT PER J498c<br />
NUMBER OF TEETH<br />
PITCH<br />
PRESSURE ANGLE<br />
MAJOR DIA.<br />
1.00 DIA.<br />
(REF.)<br />
7.35<br />
(186.7)<br />
0.53<br />
(13,5)<br />
SAE 25-4 (SAE B-B)<br />
22-4 (SAE B) 25-4 (SAE B-B)<br />
15<br />
16/32<br />
30°<br />
1.000/.998 (25,4/25,3)<br />
13<br />
16/32<br />
30°<br />
.875/.853 (22,2/21,7)<br />
.715 MIN. (18,2)<br />
MINOR DIA. .853 MIN. (21,7)<br />
NOTE: DIMENSIONS IN PARENTHESIS ARE METRIC (SI UNITS).<br />
NOTE:<br />
4.000<br />
3.998<br />
(101,60)<br />
(101,55)<br />
DIA.<br />
TWO BOLT MOUNTING FLANGE CONFORMS TO SAE 101-2 (SAE B)<br />
SPECIFICATIONS WITH THE FOLLOWING EXCEPTIONS:<br />
1. THERE IS NO 2.00 (50.8) DIA. COUNTERBORE IN FACE OF MTG. FLANGE.<br />
2. DIMENSIONS MARKED WITH AN ASTERISK '*<br />
'.<br />
"C" COMPENSATOR - SPLINED SHAFT<br />
(KEYED SHAFT SHOWN ABOVE)<br />
"C" SERIES PVT15<br />
38
PVT20 INSTALLATION<br />
1.93<br />
(49,0)<br />
SAE 32-1 (SAE C)<br />
2.30<br />
(58,4)<br />
1.87<br />
(47,5)<br />
1.25<br />
(31,8)<br />
11.47<br />
(291,3)<br />
5.53<br />
(140,5)<br />
13.32<br />
(338,3)<br />
MAXIMUM<br />
COMPENSATOR VENT PORT<br />
SAE - 4 7/16-20 UNF-2B<br />
(BSPP-1/4" THREADS - OPTIONAL)<br />
FOR CCW<br />
FOR CW<br />
3.66<br />
(93,0)<br />
.3136<br />
.3126<br />
(7,965)<br />
(7,940)<br />
SQUARE KEY<br />
1.50 DIA. REF.<br />
4.65<br />
(118,1)<br />
5.43<br />
(137,9)<br />
1.391<br />
(35,33)<br />
1.38<br />
(35,1)<br />
2.75<br />
(69,9)<br />
4.00<br />
(101,6)<br />
8.34<br />
(211,8)<br />
NOTE:<br />
TWO BOLT MOUNTING FLANGE CONFORMS TO SAE 127-2 (SAE C)<br />
SPECIFICATIONS WITH THE FOLLOWING EXCEPTIONS:<br />
1. THERE IS NO 2.50 (63,5) DIA. COUNTERBORE IN FACE OF MTG. FLANGE.<br />
2. DIMENSIONS MARKED WITH AN ASTERISK ' * '.<br />
4.17<br />
(105,9)<br />
8.34<br />
(211,8)<br />
FOR CCW FOR CW<br />
0.58<br />
(14,7)<br />
ADAPTER PLATE<br />
SAE 127-2 (SAE C)<br />
MOUNTING FLANGE<br />
(SAE B SHOWN ABOVE)<br />
1.250<br />
1.248<br />
(31,75)<br />
(31,70)<br />
MAXIMUM VOLUME STOP<br />
ADJUSTING SCREW<br />
DIA.<br />
THREAD x 1.00 DP.<br />
4 PLACES<br />
13.18<br />
(334,8)<br />
INLET<br />
1/2-13 UNC-2B<br />
7.95<br />
(201,9)<br />
10.44<br />
(265,2)<br />
MAXIMUM<br />
10.44<br />
(265,2)<br />
0.70<br />
(17,8)<br />
1.40<br />
(35,6)<br />
ADAPTER PLATE<br />
SAE 101-2 (SAE B)<br />
MOUNTING FLANGE<br />
(SAE C SHOWN BELOW)<br />
"F" AND "L" COMPENSATOR - KEYED SHAFT<br />
(SPLINED SHAFT SHOWN BELOW)<br />
DRAIN PORT<br />
SAE - 12<br />
(BSPP-1" THREADS - OPTIONAL)<br />
3.35<br />
(85,1)<br />
1.97<br />
(50,0)<br />
2.16<br />
(54,9)<br />
1.73<br />
(43,9)<br />
*<br />
*<br />
*<br />
0.58<br />
(14,7)<br />
.37<br />
(9,4)<br />
*<br />
.08 4.21<br />
(2,0) (106,9)<br />
2.09<br />
(53,1)<br />
5.75<br />
(146,1)<br />
5/8-11 UNC-2B<br />
THREAD x 1.25 DP. MIN.<br />
2 PLACES<br />
7.13<br />
(181,1)<br />
4.19<br />
(106,4)<br />
7.13<br />
(181,1)<br />
8.28<br />
(210,3)<br />
3/8-16 UNC-2B<br />
2 PLACES<br />
THREAD x .75 DP.<br />
1/2-13 UNC-2B<br />
THREAD x 1.00 DP.<br />
2 PLACES<br />
2.72<br />
(69,1)<br />
5.00<br />
(101,6)<br />
2.06<br />
(52,3)<br />
1.03<br />
(26,2)<br />
*<br />
1.10<br />
(27,9)<br />
45°<br />
30°<br />
7.46<br />
(189,5)<br />
3.07<br />
(78,0)<br />
2.92<br />
(74,2)<br />
R.<br />
5.83*<br />
(148,1)<br />
.70<br />
(17,8)<br />
DIA.<br />
1.50" INLET - CW<br />
1.00" OUTLET - CCW<br />
(SAE 4-BOLT SPLIT<br />
FLANGE CODE 61)<br />
3.25 DIA - SAE A<br />
MOUNTING FLANGE<br />
1.00" OUTLET - CW<br />
1.50" INLET - CCW<br />
(SAE 4-BOLT SPLIT<br />
FLANGE CODE 61)<br />
OUTLET<br />
3/8-16 UNC-2B<br />
THREAD x .75 DP.<br />
4 PLACES<br />
NUMBER OF TEETH<br />
PITCH<br />
PRESSURE ANGLE<br />
MAJOR DIA.<br />
MINOR DIA.<br />
1.04<br />
(26,4)<br />
SAE 32-4 (SAE C) INVOLUTE SPLINE DATA<br />
CLASS 5, FLAT ROOT SIDE FIT PER J498c<br />
0.52<br />
(13,2)<br />
1.00 DIA.<br />
(REF.)<br />
7.95<br />
(201,9)<br />
14<br />
12/24<br />
30°<br />
1.250/1.224 (31,75/31,09)<br />
1.040 (26,4)<br />
.65<br />
(16,5)<br />
.08 *<br />
(2,0)<br />
NOTE:<br />
5.000<br />
4.998<br />
(127,00)<br />
(126,95)<br />
DIA.<br />
TWO BOLT MOUNTING FLANGE CONFORMS TO SAE 127-2 (SAE C)<br />
SPECIFICATIONS WITH THE FOLLOWING EXCEPTIONS:<br />
1. THERE IS NO 2.50 (63,5) DIA. COUNTERBORE IN FACE OF MTG. FLANGE.<br />
2. DIMENSIONS MARKED WITH AN ASTERISK ' '.<br />
(KEYED SHAFT SHOWN ABOVE)<br />
"C" COMPENSATOR - SPLINED SHAFT<br />
*<br />
"C" SERIES PVT20<br />
NOTE: DIMENSIONS IN PARENTHESIS ARE METRIC (SI UNITS).<br />
39
PVT29 INSTALLATION<br />
4.13<br />
(104,9)<br />
14.14 MAXIMUM<br />
COMPENSATOR VENT PORT<br />
SAE - 4 7/16-20 UNF-2B<br />
(359,2) 12.05<br />
(BSPP-1/4" THREADS - OPTIONAL)<br />
(306,1)<br />
2.36<br />
(59,9)<br />
2.32 6.18<br />
FOR CCW<br />
FOR CW<br />
(58,9)*<br />
(157,0)<br />
1.87*<br />
(47,5)<br />
2.00 DIA.<br />
.3136<br />
1.25<br />
(REF.)<br />
5.12<br />
.3126<br />
(7,965) SQUARE KEY<br />
(31,8)<br />
(130,0)<br />
(7,940)<br />
5.90<br />
(149,9)<br />
1.391<br />
(35,33)<br />
1.53<br />
(38,9)<br />
3.06<br />
(77,7)<br />
4.00<br />
(101,6)<br />
9.24<br />
(234,7)<br />
1.250<br />
1.248<br />
(31,75)<br />
(31,70)<br />
DIA.<br />
SAE 32-1 (SAE C)<br />
NOTE:<br />
TWO BOLT MOUNTING FLANGE CONFORMS TO SAE 127-2 (SAE C)<br />
SPECIFICATIONS WITH THE FOLLOWING EXCEPTIONS:<br />
1. THERE IS NO 2.50 (63,5) DIA. COUNTERBORE IN FACE OF MTG. FLANGE.<br />
INLET<br />
1/2-13 UNC-2B<br />
THREAD x 1.00 DP.<br />
4 PLACES<br />
8.51<br />
(216,2)<br />
11.24<br />
(285,5)<br />
DRAIN PORT<br />
0.84<br />
(21,3)<br />
1.68<br />
(42,7)<br />
ADAPTER PLATE<br />
SAE 101-2 (SAE B)<br />
MOUNTING FLANGE<br />
(SAE C SHOWN BELOW)<br />
(SPLINED SHAFT SHOWN BELOW)<br />
"F" AND "L" COMPENSATOR - KEYED SHAFT<br />
ADJUSTING SCREW<br />
MAXIMUM VOLUME STOP<br />
SAE - 12<br />
(BSPP-1" THREADS - OPTIONAL)<br />
0.58<br />
(14,7)<br />
2.09<br />
(53,1)<br />
5.75<br />
(146,1)<br />
5/8-11 UNC-2B<br />
THREAD x 1.25 DP. MIN.<br />
2 PLACES<br />
4.19<br />
(106,4)<br />
7.13<br />
(181,1)<br />
3/8-16 UNC-2B<br />
2 PLACES<br />
THREAD x .75 DP.<br />
1/2-13 UNC-2B<br />
THREAD x 1.00 DP.<br />
2 PLACES<br />
3.03<br />
(77,0)<br />
FOR CCW<br />
9.31<br />
(236,5)<br />
4.65<br />
(118,1)<br />
FOR CW<br />
5.00<br />
(127,0)<br />
0.58<br />
(14,7)<br />
ADAPTER PLATE<br />
SAE 127-2 (SAE C)<br />
MOUNTING FLANGE<br />
(SAE B SHOWN ABOVE)<br />
2.06<br />
(52,3)<br />
1.03<br />
(26,2)<br />
14.01<br />
(355,9)<br />
MAXIMUM<br />
11.24<br />
(285,5)<br />
2.50<br />
(63,5)<br />
2.36<br />
(59,9)<br />
2.19<br />
(55,6)<br />
*<br />
.08<br />
(2,0)<br />
1.73<br />
(43,9)<br />
*<br />
1.10<br />
(27,9)<br />
45°<br />
.37<br />
(9,4)<br />
*<br />
4.61<br />
(117,1)<br />
8.29<br />
(210,6)<br />
3.54<br />
(89,9)<br />
3.34<br />
(84,8)<br />
8.39<br />
(213,1)<br />
7.13<br />
(181,1)<br />
8.66<br />
(220,0)<br />
R.<br />
.70<br />
(17,8)<br />
5.83<br />
(148,1)<br />
DIA.<br />
2.00" INLET - CW<br />
1.00" OUTLET - CCW<br />
(SAE 4-BOLT SPLIT FLANGE<br />
CODE 61)<br />
3.25 DIA - SAE A<br />
MOUNTING FLANGE<br />
1.00" OUTLET - CW<br />
2.00" INLET - CCW<br />
(SAE 4-BOLT SPLIT FLANGE<br />
CODE 61)<br />
OUTLET<br />
3/8-16 UNC-2B<br />
THREAD X .75 DEEP<br />
.52 1.00 DIA.<br />
(REF.)<br />
4 PLACES<br />
(13,2)<br />
1.04<br />
(26,4)<br />
8.51<br />
(216,2)<br />
* 30° .08<br />
.65 (2,0)<br />
(16,5)<br />
5.000<br />
4.980<br />
(127,00)<br />
(126,49)<br />
DIA.<br />
NOTE:<br />
TWO BOLT MOUNTING FLANGE CONFORMS TO SAE 127-2 (SAE C)<br />
SPECIFICATIONS WITH THE FOLLOWING EXCEPTIONS:<br />
1. THERE IS NO 2.50 (63,5) DIA. COUNTERBORE IN FACE OF MTG. FLANGE.<br />
2. DIMENSIONS MARKED WITH AN ASTERISK '* '.<br />
SAE 32-4 (SAE C) INVOLUTE SPLINE DATA<br />
CLASS 5, FLAT ROOT SIDE FIT PER J498c<br />
NUMBER OF TEETH<br />
PITCH<br />
PRESSURE ANGLE<br />
MAJOR DIA.<br />
MINOR DIA.<br />
14<br />
12/24<br />
30°<br />
1.250/1.224 (31,75/31,09)<br />
1.040 (26,4)<br />
"C" SERIES PVT29<br />
(KEYED SHAFT SHOWN ABOVE)<br />
"C" COMPENSATOR - SPLINED SHAFT<br />
NOTE: DIMENSIONS IN PARENTHESIS ARE METRIC (SI UNITS).<br />
40
‘J’ & ‘K’TORQUE LIMITER INSTALLATION<br />
COMPENSATOR VENT CONNECTION<br />
7/16-20 JIC 37°<br />
D<br />
1.50<br />
TYP.<br />
DIFFERENTIAL SPOOL ADJUSTMENT<br />
C<br />
CW ROTATION:<br />
TUBE AND "F" COMPENSATOR<br />
ON THIS SIDE<br />
CCW ROTATION:<br />
TUBE AND "F" COMPENSATOR<br />
ON THIS SIDE<br />
A<br />
PV/PVT "A" "B" REF. "C" "D"<br />
6 3.50 9.06 5.56 1.54<br />
10 4.00 9.84 5.84 1.61<br />
15 4.38 10.61 6.23 1.89<br />
20 4.63 11.06 6.43 1.93<br />
29 5.00 11.90 6.90 2.36<br />
1<br />
3<br />
TORQUE LIMIT<br />
ADJUSTMENT<br />
COMPENSATOR OVERRIDE ADJUSTMENT<br />
(MAXIMUM PRESSURE)<br />
4<br />
5 6<br />
2<br />
B<br />
1.88<br />
TYP.<br />
"J" TORQUE LIMITER (LOW RANGE)<br />
"K" TORQUE LIMITER (HIGH RANGE)<br />
"C" SERIES PV/PVT<br />
(PV SHOWN)<br />
Drawing #23-9996<br />
"A"<br />
41
42<br />
‘T’ POWER LIMITER INSTALLATION
43<br />
ORDERING CODE
CONVERSIONS & FORMULAS<br />
DEFINITION & UNIT<br />
displacement<br />
flow<br />
power<br />
torque<br />
in 3 /rev x 16.387 = cm 3 /rev<br />
U.S.gpm x 3.78 = L/min<br />
hp x 0.7457 = kW<br />
lb-ft x 1.3558 = Nm<br />
cm 3 /rev x 0.06102 = in 3 /rev<br />
L/min x 0.264 =U.S. gpm<br />
kW x 1.341 = hp<br />
Nm x 0.7376 = lb-ft<br />
pressure<br />
weight<br />
force<br />
volume<br />
area<br />
length<br />
temperature<br />
viscosity<br />
FLUID POWER FORMULAS<br />
Pump input torque<br />
lbs. in.<br />
Pump input power<br />
hp<br />
Pump output flow<br />
U.S. gpm<br />
Fluid motor speed<br />
rpm<br />
Fluid motor torque<br />
lbs. in.<br />
Fluid motor power<br />
hp<br />
(metric)<br />
Pump input torque<br />
Nm<br />
Pump input power<br />
kW<br />
Pump output flow<br />
Lpm<br />
Fluid motor speed rpm(min -1 ) (tr/mn)<br />
Fluid motor torque<br />
Nm<br />
Fluid motor power<br />
kW<br />
lbs/in 2 (psi) x 0.0690 = bar<br />
lbs/in 2 (psi) x 6.90 = kPa<br />
lb x 0.4535 = kg<br />
lb x 4.448 = N<br />
bar x 14.50 = lbs/in 2 (psi)<br />
kPa x 0.1450 = lbs/in 2 (psi)<br />
kg x 2.205 = lbs<br />
N x 0.2248 = lbs<br />
in 3 x 16.387 = cm 3 cm 3 x 0.06102 = in 3<br />
in 2 x 6.452 = cm 2 cm 2 x 0.1550 = in 2<br />
in x 25.4= mm<br />
degree F-32 = C<br />
1.8<br />
cSt x 1.0 = mm 2 /sec<br />
(SSU-14) ≅ cSt<br />
4.25<br />
pressure(psi) x displacement (in 3 /rev)<br />
2π x mech. eff.<br />
rpm x (in 3 /rev) x (psi)<br />
395934 x overall eff.<br />
rpm x (in 3 /rev) x volumetric eff.<br />
231<br />
231 x flow rate(U.S. gpm) x volumetric eff.<br />
displacement (in 3 /rev)<br />
mm x 0.03937 = in<br />
1.8 x C+32 = F<br />
pressure(psi) x displacement (in 3 /rev) x mech. eff.<br />
2π<br />
rpm x (in 3 /rev) x (psi) x overall eff.<br />
395934<br />
pressure(bar) x displacement (cm 3 /rev)<br />
20π x mech. eff.<br />
rpm x (cm 3 /rev) x (bar)<br />
600000 x overall eff.<br />
rpm x (cm 3 /rev) x volumetric eff.<br />
1000<br />
1000 x flow rate (Lpm) x volumetric eff.<br />
displacement (cm 3 /rev)<br />
mm 2 /sec x 1.0 = cSt<br />
pressure(bar) x displacement (cm 3 /rev) x mech. eff.<br />
20π<br />
rpm x (cm 3 /rev) x (bar) x overall eff.<br />
600000<br />
cSt x 4.25 + 14≅ SSU<br />
"The product information, specifications, and descriptions contained in this catalog have been<br />
compiled for the use and convenience of our customers from information furnished by the<br />
manufacturer, and we cannot, and do not accept any responsibility for the accuracy or correctness<br />
of any description, calculation, specification, or information contained herein. No such description,<br />
calculation, specification, or information regarding the products being sold has been made part of<br />
the basis of the bargain nor has same created or amounted to an express warranty that the products<br />
would conform thereto. We are selling the goods and merchandise illustrated and described in<br />
this catalog on an as is basis, and disclaim any implied warranty, including any warranty of<br />
merchantability or warranty of fitness for any particular purposes whatsoever, with respect to the<br />
goods and merchandise sold. All manufacturer warranties shall be passed on to our customers,<br />
but we shall not be responsible for special, indirect, incidental or consequential damages<br />
resulting from the use of any of the products or information contained or described in the<br />
catalog. Further, we reserve the right to revise or otherwise make product improvements at any<br />
time without notification."<br />
44
45<br />
NOTES
46<br />
NOTES
47<br />
NOTES
Sales & Service Locations Worldwide<br />
Denison Hydraulics Inc<br />
14249 Industrial Parkway<br />
Marysville, OH 43040 USA<br />
Tel :........................... 937-644-3915<br />
Fax :.......................... 937-642-3738<br />
E-mail:<br />
denison@denison<strong>hydraulic</strong>s.com<br />
Call toll-free<br />
800-551-5956<br />
in North America or<br />
visit<br />
www.denison<strong>hydraulic</strong>s.com<br />
to locate a<br />
Denison representative<br />
nearest you.<br />
North America<br />
Canada<br />
Denison Hydraulics Canada Inc.<br />
2880 Brighton Road, Unit 1<br />
Oakville, ON L6H 5S3, Canada<br />
Tel : +1 (905) 829-5800<br />
Fax : +1 (905) 829-5805<br />
Latin America<br />
Mexico, Central America, South<br />
America, Caribbean countries<br />
Denison Hydraulics Inc.<br />
7850 NW 146 Street<br />
Suite 512<br />
Miami Lakes, FL 33016, USA<br />
Tel : +1 (305) 362-2246<br />
Fax : +1 (305) 362-6220<br />
Asia-Pacific<br />
For more information, please contact:<br />
Australia<br />
Denison Hydraulics PTY<br />
41-43 St Hilliers Road<br />
P.O.Box 192<br />
Auburn N.S.W. 2144, Australia<br />
Tel : +61 (2) 9646 5200<br />
Fax : +61 (2) 9643 1305<br />
Hong Kong<br />
Denison Hydraulics Ltd.<br />
Unit 6A, 33/F Cable TV Tower<br />
9 Hoi Shing Road, Tsuen Wan<br />
NT, Hong Kong<br />
Tel : +852 2498 8381<br />
Fax : +852 2499 1522<br />
Japan<br />
Denison Japan Inc.<br />
4-2-1 Tsujido-Shinmachi<br />
Fujisawa 251-0042, Japan<br />
Tel : +81 (466) 35-3050<br />
Fax : +81 (466) 35-2019<br />
People Republic of China<br />
Shanghai Denison Hydraulics<br />
Engineering Ltd.<br />
Room 8018, No. 601<br />
Zhang Yang Road,<br />
Pudong New Area<br />
Shanghai 200120, P.R. China<br />
Tel : +86 (21) 58205042 / 34<br />
Fax : +86 (21) 58205014<br />
Singapore<br />
Denison Hydraulics PTE LTD<br />
Blk 4012 Ang Mo Kio Ave 10,<br />
Unit #07-01D Techplace I<br />
Singapore 569628<br />
Tel : +65 268 7840<br />
Fax : +65 268 7847<br />
Taiwan<br />
Denison Hydraulics LTD<br />
6F-10, No. 79,<br />
Sec. 2 Roosevelt Rd,<br />
Taipei, Taiwan, ROC<br />
Tel : +886-2-23645101<br />
Fax : +886-2-23639025<br />
Europe<br />
Austria<br />
Denison Hydraulics GmbH<br />
Zweigniederlassung Linz<br />
Haibachstraße 69<br />
4061 Pasching, Austria<br />
Tel : +43 (72 29) 48 87<br />
Fax : +43 (72 29) 6 30 92<br />
Benelux<br />
Denison Hydraulics Benelux B.V.<br />
Pascalstraat 100<br />
3316 GR Dordrecht, Holland<br />
Tel : +31 (78) 6543 070<br />
Fax : +31 (78) 6175 755<br />
Denmark<br />
Denison Hydraulics Denmark A/S<br />
Industrikrogen 2<br />
2635 Ishöj, Denmark<br />
Tel : +45 (4371) 15 00<br />
Fax : +45 (4371) 15 16<br />
Finland<br />
Denison Lokomec Oy<br />
Polunmäenkatu 22<br />
P.O. Box 116<br />
33721 Tampere, Finland<br />
Tel : + 358 (3) 357 5100<br />
Fax : + 358 (3) 357 5111<br />
France<br />
Denison Hydraulics S.A.<br />
14 route du bois blanc<br />
BP 539<br />
18105 Vierzon, France<br />
Tel : +33 (2) 48 53 01 20<br />
Fax : +33 (2) 48 75 02 91<br />
Great Britain<br />
Denison Hydraulics UK LTD<br />
Kenmore Road<br />
Wakefield 41, Industrial Park<br />
Wakefield, WF2 OXE<br />
West Yorkshire, England<br />
Tel : +44 (1924) 826 021<br />
Fax : +44 (1924) 826 146<br />
Germany<br />
Denison Hydraulics GmbH<br />
Auf dem Sand 14<br />
D 40721 Hilden, Germany<br />
Tel : +49 (0) 2103 / 940-3<br />
Fax : +49 (0) 2103 / 940-558<br />
Italy<br />
Denison Hydraulics Srl<br />
Via Le Europa 68<br />
20090 Cusago (MI), Italy<br />
Tel : +39 (02) 90330-1<br />
Fax : +39 (02) 90390694/5/6<br />
Denison Calzoni S.p.A<br />
Via Caduti di Sabbiuno15/17<br />
40011 Anzola dell'Emilia<br />
Bologna, Italy<br />
Tel : +39 (051) 6501611<br />
Fax : +39 (051) 736221<br />
Spain<br />
Denison Hydraulics S.A.<br />
Gomis 1<br />
08023 Barcelona, Spain<br />
Tel : +34 (93) 253 1990<br />
Fax : +34 (93) 211 6507<br />
Sweden<br />
Denison Hydraulics Svenska AB<br />
Sporregatan 13<br />
213 77 - Malmö, Sweden<br />
Tel : +46 (40) 600 13 00<br />
Fax : +46 (40) 600 13 50<br />
Others<br />
Other European, Middle East,<br />
African countries<br />
Denison Hydraulics S.A.<br />
ATTN: Export Office<br />
14 route du bois blanc<br />
BP 538<br />
18105 Vierzon, France<br />
Tel : +33 (2) 48 53 01 20<br />
Fax : +33 (2) 48 53 01 46<br />
Printed in USA 06-02 HP<br />
http://www.denison<strong>hydraulic</strong>s.com<br />
Copyright © 2002 Denison Hydraulics Inc. All rights reserved. 4-30-02