Autopilot System Installation Instructions - New Holland PLM Portal
Autopilot System Installation Instructions - New Holland PLM Portal
Autopilot System Installation Instructions - New Holland PLM Portal
Create successful ePaper yourself
Turn your PDF publications into a flip-book with our unique Google optimized e-Paper software.
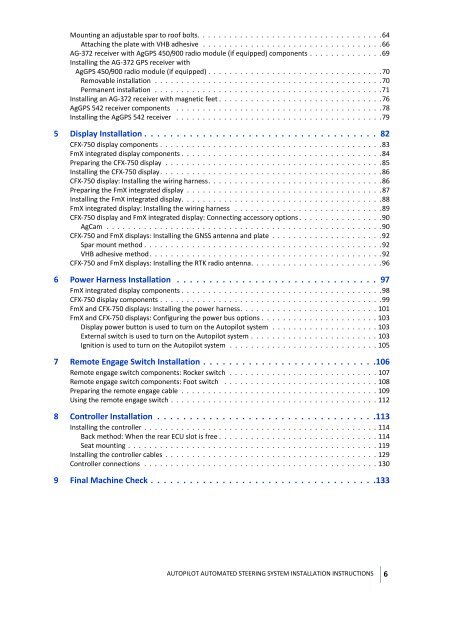
Mounting an adjustable spar to roof bolts. . . . . . . . . . . . . . . . . . . . . . . . . . . . . . . . . . .64<br />
Attaching the plate with VHB adhesive . . . . . . . . . . . . . . . . . . . . . . . . . . . . . . . . . .66<br />
AG-372 receiver with AgGPS 450/900 radio module (if equipped) components . . . . . . . . . . . . . .69<br />
Installing the AG-372 GPS receiver with<br />
AgGPS 450/900 radio module (if equipped) . . . . . . . . . . . . . . . . . . . . . . . . . . . . . . . . .70<br />
Removable installation . . . . . . . . . . . . . . . . . . . . . . . . . . . . . . . . . . . . . . . . . . .70<br />
Permanent installation . . . . . . . . . . . . . . . . . . . . . . . . . . . . . . . . . . . . . . . . . . .71<br />
Installing an AG-372 receiver with magnetic feet . . . . . . . . . . . . . . . . . . . . . . . . . . . . . . .76<br />
AgGPS 542 receiver components . . . . . . . . . . . . . . . . . . . . . . . . . . . . . . . . . . . . . . .78<br />
Installing the AgGPS 542 receiver . . . . . . . . . . . . . . . . . . . . . . . . . . . . . . . . . . . . . . .79<br />
5 Display <strong>Installation</strong> . . . . . . . . . . . . . . . . . . . . . . . . . . . . . . . . . . . . 82<br />
CFX-750 display components . . . . . . . . . . . . . . . . . . . . . . . . . . . . . . . . . . . . . . . . . .83<br />
FmX integrated display components . . . . . . . . . . . . . . . . . . . . . . . . . . . . . . . . . . . . . .84<br />
Preparing the CFX-750 display . . . . . . . . . . . . . . . . . . . . . . . . . . . . . . . . . . . . . . . . .85<br />
Installing the CFX-750 display. . . . . . . . . . . . . . . . . . . . . . . . . . . . . . . . . . . . . . . . . .86<br />
CFX-750 display: Installing the wiring harness. . . . . . . . . . . . . . . . . . . . . . . . . . . . . . . . .86<br />
Preparing the FmX integrated display . . . . . . . . . . . . . . . . . . . . . . . . . . . . . . . . . . . . .87<br />
Installing the FmX integrated display. . . . . . . . . . . . . . . . . . . . . . . . . . . . . . . . . . . . . .88<br />
FmX integrated display: Installing the wiring harness . . . . . . . . . . . . . . . . . . . . . . . . . . . .89<br />
CFX-750 display and FmX integrated display: Connecting accessory options . . . . . . . . . . . . . . . .90<br />
AgCam . . . . . . . . . . . . . . . . . . . . . . . . . . . . . . . . . . . . . . . . . . . . . . . . . . . .90<br />
CFX-750 and FmX displays: Installing the GNSS antenna and plate . . . . . . . . . . . . . . . . . . . . .92<br />
Spar mount method . . . . . . . . . . . . . . . . . . . . . . . . . . . . . . . . . . . . . . . . . . . . .92<br />
VHB adhesive method. . . . . . . . . . . . . . . . . . . . . . . . . . . . . . . . . . . . . . . . . . . .92<br />
CFX-750 and FmX displays: Installing the RTK radio antenna. . . . . . . . . . . . . . . . . . . . . . . . .96<br />
6 Power Harness <strong>Installation</strong> . . . . . . . . . . . . . . . . . . . . . . . . . . . . . . . 97<br />
FmX integrated display components . . . . . . . . . . . . . . . . . . . . . . . . . . . . . . . . . . . . . .98<br />
CFX-750 display components . . . . . . . . . . . . . . . . . . . . . . . . . . . . . . . . . . . . . . . . . .99<br />
FmX and CFX-750 displays: Installing the power harness. . . . . . . . . . . . . . . . . . . . . . . . . . 101<br />
FmX and CFX-750 displays: Configuring the power bus options . . . . . . . . . . . . . . . . . . . . . . 103<br />
Display power button is used to turn on the <strong>Autopilot</strong> system . . . . . . . . . . . . . . . . . . . . 103<br />
External switch is used to turn on the <strong>Autopilot</strong> system . . . . . . . . . . . . . . . . . . . . . . . . 103<br />
Ignition is used to turn on the <strong>Autopilot</strong> system . . . . . . . . . . . . . . . . . . . . . . . . . . . . 105<br />
7 Remote Engage Switch <strong>Installation</strong> . . . . . . . . . . . . . . . . . . . . . . . . . . .106<br />
Remote engage switch components: Rocker switch . . . . . . . . . . . . . . . . . . . . . . . . . . . . 107<br />
Remote engage switch components: Foot switch . . . . . . . . . . . . . . . . . . . . . . . . . . . . . 108<br />
Preparing the remote engage cable . . . . . . . . . . . . . . . . . . . . . . . . . . . . . . . . . . . . . 109<br />
Using the remote engage switch . . . . . . . . . . . . . . . . . . . . . . . . . . . . . . . . . . . . . . . 112<br />
8 Controller <strong>Installation</strong> . . . . . . . . . . . . . . . . . . . . . . . . . . . . . . . . . .113<br />
Installing the controller . . . . . . . . . . . . . . . . . . . . . . . . . . . . . . . . . . . . . . . . . . . . 114<br />
Back method: When the rear ECU slot is free . . . . . . . . . . . . . . . . . . . . . . . . . . . . . . 114<br />
Seat mounting . . . . . . . . . . . . . . . . . . . . . . . . . . . . . . . . . . . . . . . . . . . . . . . 119<br />
Installing the controller cables . . . . . . . . . . . . . . . . . . . . . . . . . . . . . . . . . . . . . . . . 129<br />
Controller connections . . . . . . . . . . . . . . . . . . . . . . . . . . . . . . . . . . . . . . . . . . . . 130<br />
9 Final Machine Check . . . . . . . . . . . . . . . . . . . . . . . . . . . . . . . . . . .133<br />
AUTOPILOT AUTOMATED STEERING SYSTEM INSTALLATION INSTRUCTIONS 6


