orking - MetosExpo - Free
orking - MetosExpo - Free
orking - MetosExpo - Free

You also want an ePaper? Increase the reach of your titles
YUMPU automatically turns print PDFs into web optimized ePapers that Google loves.
i l l 1 1 <strong>orking</strong><br />
---------.-..<br />
Classical Proportions Winter 1977, $2.50
.. · ·<br />
1-1<br />
·<br />
inc<br />
· \\bod\ v l .<br />
vork lng<br />
Bicnniallksign Book<br />
There's a ealth of inforOlation and ideas<br />
in the back issues of Fine Woo d<strong>orking</strong><br />
and the Biennial Design Book<br />
Our readers tell us they regard Fine Woodw<strong>orking</strong> more as a reference resource than as a magazine because of the<br />
timeless and hard-to-find nature of its contents. And because there is so much material to cover (new ideas and techniques<br />
pop up all the time) we don't intend to repeat ourselves editorially. All eight back issues are now available and<br />
you can have a complete set for your shop.<br />
The Biennial Design Book is something else again. Conceived as a way of showing all the fine work being done today,<br />
the 8000 photographs readers sent to us exceeded all our expectations. We managed to cull them down to a<br />
wide-ranging 600. Taken together, they represent the highly creative and incredibly varied work being done today.<br />
Some of the pieces are traditional, most are contemporary, and some skillfully blend the two. Innovation abounds<br />
throughout.<br />
Winter<br />
A source of inspiration for today and a record for tomorrow.<br />
2<br />
Winter 1975, Number 1<br />
1976, Number 5<br />
The Renwick Multiples, Checkered Bowls, Tramp Art, Hand Planes, Carving Design Stacking, Design Considerations, Keystone Carvers, Carease Construction, Dealing<br />
Decisions, Woodw<strong>orking</strong><br />
Number<br />
Thoughts, Marquetry Cutting, Which Three?, Library With Plywood, Patch·Pad Cutting, Drying Wood, Gothic Tracery, Measured Drawings,<br />
Ladders, A Serving Tray, Stamp Box, All in One, French Polishing, Birch Plywood, Wood Invitational, Guitar Joinery, The Bowl Gouge, English Treen, Shaper Knives.<br />
Bench Stones.<br />
Spring 1977, Number 6<br />
Spring 1976, The Wood Butcher,<br />
Marquetry Today,<br />
Number<br />
Split Turnings,<br />
3<br />
Number<br />
Wood Threads, The Scraper, California Woodw<strong>orking</strong>, Bent Lami·<br />
Eagle Carvings, Hand Dovetails, Mechanical Desks, nations, Dry Kiln, Expanding Tables, Two Sticks, Stacked Plywood, Two Tools, Pricing<br />
Textbook Mistakes, Antique Tools, Spiral Steps, Gustav Stickley, Oil/Varnish Mix, Work, Going to Craft Fairs, Colonial CoStS, Serving Cart, Woodw<strong>orking</strong> Schools.<br />
Shaker Lap Desk, Back to School.<br />
Summer 1977, 7<br />
Summer 1976, Cooperative<br />
Wood, Mortise<br />
Number<br />
and Tenon,<br />
4<br />
Number<br />
Shop, Glues and Gluing, Winter Market, Three-Legged Stool, Lute Roses,<br />
The Christian Tradition, Hand Shaping, Yankee Diversity, Bowl Turning, Wharton Esherick, Doweling, Spalted Wood, Antiqued Pine Furniture,<br />
Plane Speaking, Desert Cabinetry, Hidden Drawers, Green Bowls, Queen Anne, Gate Solar Kiln, Carving Fans, Bending a Tray, Two Meetings, Index to Volume One.<br />
Leg Table, Turning Conference, Stroke Sander, Furniture Plans.<br />
Fall 1977, 8<br />
Fall 1976, Out West, Steam Bending, Triangle Marking, Painted Furniture, Chain-Saw Lumbering,<br />
Rip Chain, Getting Lumber, Sawing by Hand, Gaming Tables, Two Contemporary<br />
Itt<br />
Cabinetmaker's<br />
1'1 "' •<br />
Notebook, Water and Wood, Hidden Beds, Exotic Woods, Veneer,<br />
Tackling Carving, Market Talk, Abstract Sculptures, Workbench, Ornamental Turning, Tables, Wooden Clamps, Elegant Fakes, Aztec Drum, Gout Stool, Two Tools, Measuring<br />
Moisture,<br />
Heat Treating, Mosaic Rosettes, Shaped Tambours, Buckeye Carvings, Hardwood<br />
,0"'<br />
The Flageolet, Young Americans.<br />
,00<br />
Sources.<br />
To "doc 'h' bock i""",, 'h, Bimial Docig. Book, "ed e,m" ,dd"" ,ed p',m'", ,Ioog wi,h Ii" of .h"<br />
want. Each back issue is $2.50 postpaid. The Design Book is $8.00 postpaid. Make your payments to the Taunton Press and<br />
2<br />
send to the address below.<br />
The liumton&ess, 52 Church Hill Road, Box 355A, Newtown, CT 06470
Fine<br />
WqqQWorki ng<br />
Winter 1977, Number 9<br />
Publisher<br />
Paul Roman<br />
Editor<br />
John Kelsey<br />
Contributing Editors<br />
Tage Frid<br />
R. Bruce Hoadley<br />
Alastair A. Stair<br />
Consulting Editors<br />
George Frank, A. W. Marlow<br />
C orresponden ts<br />
South: David Landen<br />
c.:<br />
West: Alan Marks<br />
Texas: Jim Richey<br />
New England: Rosanne Somerson<br />
Washington, D. Stanley N. Wellborn<br />
England: John Makepeace, Colin Tipping<br />
Editorial Assistants<br />
Ruth Dobsevage, Vivian Dorman<br />
Barbara Hannah, Nancy Knapp<br />
JoAnn Muir<br />
Art Consultant<br />
Roger Barnes<br />
Illustrators<br />
Joe Esposito, Stan Tkaczuk<br />
A dver/ising<br />
Janice A. Roman, Manager<br />
Lois Beck<br />
Advertising Representative<br />
Granville M. Fillmore<br />
Subscriptions<br />
Carole E. Ando, Managet<br />
Gloria Carson, Sandra DiGiovanni<br />
Viney Merrill<br />
Business Manager<br />
Irene Arfaras<br />
DEPARTMENTS<br />
4 Letters<br />
&<br />
17 Methods of Work<br />
22 Questions Answers<br />
27 Books<br />
E.<br />
30 Addenda, Errata<br />
32 The Woodcraft Scene by Richard Preiss : Repair and restoration<br />
75 Sources of Supply: Hardware specialists<br />
ARTICLES<br />
34<br />
38<br />
Designing for Dining by Tage Frid : Dutch pull-out extends table<br />
Tall Chests by Lester Margon : An appreciation<br />
4439 Tall Chests by Timothy Philbrick : The art of proportioning<br />
Entry Doors by Ben Davies : Frame-and-panel is sturdy, handsome<br />
48 The Right Way to Hang a Door by Tage Frid<br />
49 Drawer Bottoms by Alan Marks : Six variations on a theme<br />
52 School Shop by Richard Starr : Teaching far more than manual skills<br />
54 Health Hazards in Woodw<strong>orking</strong> by Stanley N. Wellborn<br />
58 Basic Blacksmithing by Ray Larsen : How to forge tools<br />
1.<br />
62 Carving Cornucopia by Ann Pappert and Ray Jenkins<br />
64 Carving Lab by Robert Buyer : A basic exercise for beginners<br />
66 Routed Edge Joint by John Harra : Fence guides router for seamless fit<br />
1.<br />
68 Shaker Round Stand by John Kassay : Legs dovetail to turned pedestal<br />
Cutting Corners by Peter Rose : How to mount marquetry<br />
Small Turned Boxes by Wendell Smith : Grain determines technique<br />
70<br />
72<br />
76<br />
Unhinged<br />
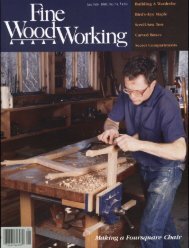
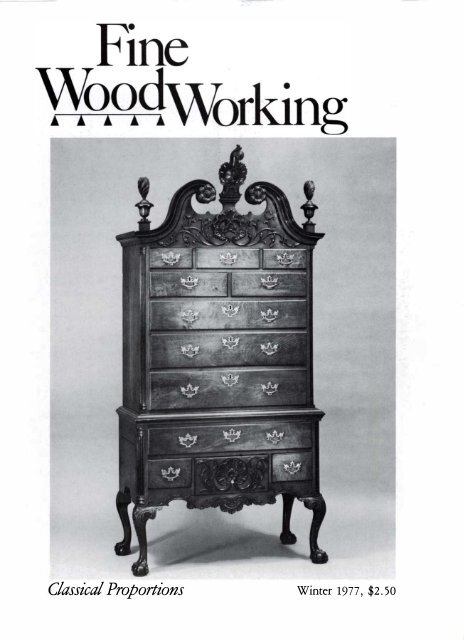
Cover: Late 18th-century Phtiadelphia<br />
highboy. A pinnacle of the cabinetmaker's<br />
art, this chest exemplifies what is usually<br />
praised as 'exquisite proportioning.' Although<br />
it is commonly asserted that the oldtime<br />
craftsmen had some mysterious instinct<br />
fo r proportioning, the evidence is that<br />
as apprentices they were taught how to<br />
apply a carefid mathematical framework.<br />
The discussion begins on page 38. (Photo<br />
courtesy of Yale University Art Gallery,<br />
Mabel Brady Garvan Collection.)<br />
Fine Woodw<strong>orking</strong> is published quarterly, March,June, September, and December, by The<br />
Taunton Press, Inc., Newtown, CT 06470, Telephone (203) 426-8171. Second-class postage<br />
paid at Newtown, CT 06470 and additional mailing offices. Postal Service Publication<br />
umber 105190. Copyright 1977 by The Taunton Press, Inc. No reproduction without<br />
permission of The Taunton Press, Inc. ISSN 0361-3453. Subscnptioll rates: United States<br />
and possessions, $9.00 for one year, $16.00 for two years, $23.00 for three years; foreign<br />
rate, add 1.00 per year. Single copy, $2.50. Address all correspollde1lce to the appropriate<br />
department (Subscription, Editorial or Advertising). The Taunton Press, 52 Church Hill<br />
Rd., PO Box 355, Newtown, CT 06470. Postmaster: Send notice of undelivered copies on<br />
form 3579 to The Taunton Press, PO Box 355, Newtown, CT 06470.<br />
3
LETTERS ______________________________________ _<br />
I would like to offer a couple of offbeat sources for hardwoods<br />
that may have escaped the attention of other woodworkers.<br />
Near here is a veneer mill that makes face veneer and<br />
assembles it to order for the many furniture factories in the<br />
East. As you know, fine veneer is cut from logs, whole or half,<br />
and there is a " remainder" of the log, which has served as the<br />
holding surface, when the knife has cut as close to the holding<br />
mechanism as it can safely go . Confusingly, this remainder is<br />
called the flitch, just as is the bundle of veneer cut from it.<br />
These flitches become waste material to the mill, and are<br />
stacked outside until disposed of, in whatever way they can<br />
be. They are sold to whoever comes along and is willing to<br />
take them at the offered price.<br />
The center of the flitch includes the pith , leading to lessthan-ideal<br />
drying (twists, warps, etc.). But it is a piece of<br />
hardwood, 8 ft . to 12 ft . long, out of which a dressed 2x6 can<br />
be gotten-and, of course, turning squares, blocks, etc. By<br />
gluing up, you can get any size you want. Cost : largely what<br />
the market will bear, but low. Walnut is at $0.70 per board<br />
foot. Last year maple was $0.20 per board foot, but right now<br />
it's in excess supply and they're using it to fire the boiler, and<br />
selling it for $0.25 a board, 8 ft . to 12 ft . long ; similarly with<br />
oak, at $0.40 per board.<br />
Now, disadvantages exist. One must have a heavy saw (I<br />
use a radial) and a planer to do anything with it. It's strictly<br />
self-service ; bring your own truck and load it by hand yourself<br />
.. .<br />
I don't know how many such mills there are around the<br />
country, but for those near enough, it's a source of fine wood<br />
hardly available elsewhere.<br />
Now to a second source , mostly for the amateur, but worth<br />
knowing about and probably available anywhere in the<br />
country. The Japanese have virtually a monopoly on motorcycle<br />
sales in this country. And they ship them in crates made<br />
from the group of timbers generally termed "Philippine<br />
hardwoods:" red and white lauan, tanquile, tiaong, almon,<br />
bagtikan, mayapis, and some other strange things I can't<br />
identify. It's rough-sawn and out of square, and in short and<br />
medium lengths (30 to 80 in.). Density of the woods found<br />
varies from not much better than balsa to some pieces resembling<br />
narra or satinwood, very hard and dense. You pick<br />
them up at the motorcycle dealer, who thanks you for getting<br />
them out of the way, and about a day of nail-pulling will<br />
reduce a small pickup-truck load to a large stack of rough<br />
boards. It's hard work, and you've got to be sure to get all the<br />
nails and staples out before running them through the<br />
planer, but the net result is a free supply of good-grade hardwood<br />
for use in small items to be naturally finished, or large<br />
ones to be painted (the nail holes mar them, as there is invariably<br />
a black rust stain, so only small items can be made without<br />
a nail hole to cover up) .<br />
-Donald L. McKinsey, Charlotte, N. C.<br />
In your Fall '77 issue, p. 63, you refer to the use of epoxy<br />
glues for gluing up ivory and wood. Recently I had occasion to<br />
repair an ivory bracelet, and on consulting a restorer connected<br />
with the Walters Art Gallery in Baltimore, Md., I was<br />
FINISH AHEAD OF THE PACK<br />
PASTE WOOD FILLERS<br />
a<br />
oak,<br />
Filling the grain of wood prior to applying<br />
a varnish or lacquer finish makes a smooth<br />
surface. This is important with porous<br />
wood such as ash, butternut and<br />
mahogany. By tinting the filler the finisher<br />
can create a contrast. Filler is applied with<br />
the grain using stiff brush. When it loses<br />
its gloss. wipe cross grain with a piece of<br />
be<br />
burlap. Allow overnight drying, then sand.<br />
Can be thinned with benzine or turpentine<br />
and should be a heavy paint consistency.<br />
Japan colors can mixed to reach the de·<br />
sired color. Quart size.<br />
OSN31-EZ NaturaljOak $6.25<br />
OSN41-EZ Medium Walnut $6.25<br />
OSN51-EZ Medium Brown Mahogany $6.25<br />
SANDING SEALER<br />
Can be brushed or sprayed onto a surface<br />
prior to finishing. Quick drying, it can be<br />
sanded soon after application. Not to be<br />
confused wi th paste fillers which can be<br />
used to srain the wood. Sanding sealer is<br />
used before the application of clear lacquers.<br />
OSP22-BV Quart $4.15<br />
OSP21-BV Gallon $9.95<br />
REFINED SHELLAC FLAKES<br />
Specially processed shellac flakes which have<br />
been dewaxed to yield a much clearer and<br />
harder finish than bleached orange shellac.<br />
The results are well worth the price.<br />
18Q62-BV Refined, 1 lb. $5.50<br />
with these recommended supplies<br />
1 E. Clock built by<br />
All prices postpaid<br />
Cadye<br />
Lynch<br />
MEASURED DRAWING<br />
40A31-BE $6.00<br />
Telephone your order toll free: (SOO) 225-1153<br />
(Ma. residents dial (SOO) 842-1234)<br />
Mastercharge, Visa, American Express welcome.<br />
W
advised to use an animal-based glue such as Elmer's, and<br />
against using an epoxy because various components in the<br />
latter glue would leach out various elements in the ivory.<br />
-Jose/Rosenblatt, Baltimore, Md.<br />
Tight controls and rigid standards are essential in the<br />
workshop, but must this single-mindedness be extended to<br />
the ideas expressed in this magazine? A presumedly accomplished<br />
woodworker fumes over an article on stacked plywood<br />
and calls one of the pieces ' 'ugly." Is it asking too much that<br />
some sort of coherent critique accompany such a sweeping<br />
esthetic judgment? This semantic quibbling over what is and<br />
what is not "fine" woodw<strong>orking</strong> appears rather unenlightening<br />
also. After all, if chain-saw lumbering, heat treating and<br />
dry kilns fall within the scope of the magazine, why exclude<br />
plywood? Maybe someone else might find the information<br />
useful.<br />
While walnut and teak are not in themselves "political,"<br />
does not the use of expensive or endangered species raise certain<br />
economic and environmental issues? To choose to ignore<br />
the implications of using, say, redwood, is indeed to make a<br />
political choice. Is quality in woodw<strong>orking</strong> a mere function of<br />
technical sophistication and precious material , or do we allow<br />
a social criterion in addition? Since these concerns are not<br />
likely to surface in the pages of Popular Mechanics, I hope<br />
they are not to be banished from the pages of your magazine.<br />
-Christopher Loekle, Skowhegan, Maine<br />
By way of remark rather than criticism I suggest you have<br />
PORCELAIN CASTERS<br />
1/2" 11/8" Add a touch of elegance with fine quality,<br />
decorative white PORCELAIN CAST·<br />
ERS with black die cast housings.<br />
Wheels are wide x in diameter.<br />
Ideal for small furniture, dry sinks, tables,<br />
carts, and antiques.<br />
Set of 4 .................. $7.98 ppd<br />
"c" 1 ates for year<br />
cell<br />
BATTERY OPERATED<br />
CLOCK MOVEMENT<br />
Cordless electric battery move·<br />
ment has trim medium impact<br />
transparent plastic case. Oper·<br />
on an ordinary size<br />
flashlight battery. Center<br />
23/8"<br />
fixation. Hand setting<br />
13/16" 31/4"<br />
from fronfor rear.<br />
Includes hands. Unit is<br />
wide x<br />
high x deep.<br />
$10.95 ea. ppd<br />
STATEMENT OF OWNERSHIP, MANAGEMENT AND CIRCULATION<br />
(Required by 39 U.S.c. 3685)<br />
1. Title of publication: Fine Woodw<strong>orking</strong>. 2. Date of filing: October 1, 1977.3. Frequency<br />
of issue: Quarterly. 3a. No. of issues published annually: 4. 3b. Annual subscription<br />
price: $9.00. 4. Location of known o ff ice of publication: 52<br />
I<br />
Church Hill Road,<br />
PO Box 355, Newtown, CT 06470.5. Location of the headquaners or general business<br />
offices of the publishers: 52 Church Hill Road, PO Box 355, Newtown,<br />
10.<br />
CT 06470.<br />
6. Names and complete addresses of Publisher, Editor, and Managing Editor: Paul<br />
Roman, Publisher and Editor; John Kelsey, Managing Editor; 52 Church Hill Road, PO<br />
Box 355, Newtown, CT 06470. 7.0wner: The Taunton Press, Inc., 52 Church Hill<br />
Road, PO Box 355, Newtown, CT 06470. Stockholders owning or holding I percent or<br />
more of the total amount of stock: Paul Roman, Janice A. Roman. 8. Known bondholders,<br />
mortgagees, and other security holders owning or holding percent or more of<br />
total amount of bonds, monga g es or other securities: None. 9. For completion by nonptofit<br />
organizations a\Jthorize d to mail at special rates: Not applicable. Extent and<br />
nature o f circulation:<br />
I.<br />
E.<br />
A. Total no. copies (net press run).. .. .... 79,120<br />
F.<br />
B. Paid circulation<br />
Sales through dealers and carriers, street<br />
vendors and counter sales .. .. ... .. .. .. ..... 3,957<br />
2. Mail Subscriptions. . ... .. . ......... .. 67,115<br />
C. Total p aid circulation (sum of lOBI and IOB2) ... 71,072<br />
D. <strong>Free</strong> d istributjon by mail, carrier or other means<br />
samples, complimentary, and other free copies. . . .. 594<br />
Total Distribution (Sum of C and D) ........... 71,666<br />
Copies<br />
Average no. copies<br />
each ISsue dunng<br />
preceding<br />
12 months<br />
not distributed<br />
1. Office use, left over, unaccounted, spoiled<br />
after printing. . .... ... ... .. 7,353<br />
2. Returns from news agents. . . ... .. ....... .. 101<br />
G. Total (Sum of E, FI and 2-<br />
should equal net press run shown in A) . ...... .. 79,120<br />
Actual no. copies<br />
of single issue<br />
published nearest<br />
to filing date<br />
Sept. I, 1977<br />
. 79,858<br />
.. .. . 3,998<br />
.. ... 61,979<br />
... 65,977<br />
612<br />
... ... 66,589<br />
...... 13,269<br />
I<br />
. 79,858<br />
11.1 certify that the statements made by me above are correct and complete, Signature<br />
and title of editor, publisher, business manager, or owner: Paul Roman, President and<br />
Publisher. 12. For completion by publishers mailing at the regular rates (Section<br />
132. 121, Postal Service Manual): In accordance with the p rovisions of this statute, I<br />
hereby request permission to mail the publication named in Item at the phased<br />
postage rates presently authorized by 39 U.s.c. 3626. Signature and title of Editor,<br />
Publisher, Business Manager, or Owner: Paul Roman, President and Publisher.<br />
CHECKERBOARD<br />
70-2<br />
FACE KITS<br />
With<br />
1/21/8" this kit you are able to make<br />
a beautiful chess board. Includes<br />
squares of light and dark<br />
veneers. Also included in the kit is<br />
a pI. can of contact cement, a<br />
veneer roller, glue brush. veneer<br />
strips for the border and edges<br />
and complete<br />
•<br />
instructions.<br />
$6.95 ppd.<br />
116<br />
Best catalog.manual<br />
...<br />
$1.00<br />
a must for your workshop!<br />
pages Full color illustrations. Larger selection of<br />
superior quality items for the creative craftsman. Sent free<br />
with order ... separately<br />
__ Please rush me<br />
@ $10.95 4) Casters (set of<br />
Clock ea.<br />
r----SATISFACTION 100% GUARANTEED! ----,<br />
@ $7.98<br />
$6.95 $1.00<br />
ea. ppd.<br />
ppd .<br />
ea.<br />
__ @ @<br />
ppd.<br />
Checkerboard Kit<br />
--New larger Catalog(s) ppd. (<strong>Free</strong> with order)<br />
__________________ ___________________ _<br />
Name<br />
Address<br />
City<br />
State<br />
Zip<br />
<br />
Minnesota<br />
'Rbodworkers<br />
/ .<br />
Supply Company<br />
MN Dept.\6F 21801 Industrial Blvd., Rogers, 55374<br />
,-------------------<br />
5
__<br />
If you thought IISwiss-Precisionll<br />
could only be found in watchmaking,<br />
then you don/t know about<br />
inventory of replacement parts right here in New York.<br />
our power tools • Which is where our factory-trained service personnel are as<br />
well. And if it's a question about correct machine set-up or<br />
Only you know how good your tools have to be. In the<br />
case of woodw<strong>orking</strong> machinery, they should be better than<br />
you are at first, so that they'll help you become the<br />
craftsman you want to be in the long run.<br />
I n other words, the stationary power tools you choose<br />
should offer accuracy and capabilities beyond those which<br />
you need-even if you're already an accomplished<br />
craftsman.<br />
We went to the best company in Switzerland for<br />
our precision woodw<strong>orking</strong> machinery.<br />
That's where our line of INCA<br />
saws, jointers, planers, and<br />
shapers are made and exported<br />
to over 60 countries around the<br />
world. In fact, these meticulously<br />
engineered units have long been<br />
the No.1 seller to exacting<br />
European craftsmen - amateur<br />
and professionals alike.<br />
One look at any of the six<br />
'SAJW<br />
Upper blade guides machines we sell throughon<br />
Bandsaw.<br />
out the 50 states will explain<br />
this well-deserved popularity. The table<br />
castings are tough, precision milled alloys and the<br />
guide rails are aircraft quality extrusions. All<br />
of the major rotating components are dynamically<br />
balanced and every unit is assembled with the<br />
same pride of workmanship that the Swiss put into<br />
their watches.<br />
Our precision INCA power tools will help \<br />
sharpen your skills as a woodworker.<br />
Take the 10" Cabinetmaker's Saw, for example.<br />
You'll need a day or two just to try out all of its 15<br />
separate capabilities; and you'll need even longer to<br />
appreciate all the optional accessories such as a sliding<br />
table for especially accurate crosscut and mitring work with<br />
large, heavy pieces.<br />
What's more, with a 20mm (25/32") arbor at the saw<br />
blade for strength and rigidity where it counts, you'll be<br />
proud of the accurate mortises, dadoes and compound<br />
angles which can be achieved. And over the years, your<br />
investment in an INCA will pay off by helping you I:recome<br />
the craftsman you want to be.<br />
When you buy INCA machinery from us, you get<br />
more than a two-year factory warranty.*<br />
You get peace of mind. That's because we maintain a large<br />
\<br />
B 5/B" Jointer I<br />
with thickness<br />
planing<br />
capability.<br />
I<br />
I<br />
I<br />
I<br />
I<br />
usage, we're as close as your phone. The only thing<br />
foreign to us is a dissatisfied customer and we're proud<br />
that we've almost never had one.<br />
Remember, the warranty* packed with the product is<br />
backed by Garrett Wade or one of our authorized dealers.<br />
Just reading our catalog could make you a better<br />
craftsman.<br />
That's because it's more than a catalog. It's a wealth of<br />
information on our Swiss-precision INCA power tools. You'll<br />
also find valuable data on saw blade selection and detailed<br />
descriptions on the other accessories which make these units<br />
so accurate and versatile. All totaled, it's crammed with the<br />
kind of things that you'll find useful for a woodworker to know.<br />
So send us this coupon today. We want you to be as good<br />
as you can get.<br />
302 FW 12-7<br />
GarrettWade Company,<br />
Dept.<br />
10001<br />
Fifth Avenue,<br />
New York, N.Y.<br />
$1<br />
Gentlemen:<br />
o<br />
$1<br />
Please send me your INCA catalog. I have enclosed for first<br />
class handling and postage.<br />
o I'm also interested in fine quality hand tools. Here's another for<br />
________________________________________<br />
your lOB-page catalog. Send me both First Class.<br />
______________________________________<br />
Name<br />
_<br />
Address s .<br />
____________<br />
State'<br />
Zip,<br />
City' _________________________________________
LETTERS (continued)<br />
been inadequate in your coverage of traditional joinery and<br />
cabinetmaking of the simpler varieties. The normal, natural<br />
way to make most things out of wood is to join pieces in various<br />
ways. Too many of the newer generation treat wood as a<br />
plastic material. Their designs, often marvelous, are tours de<br />
fo rce rather than logical solutions to construction problems.<br />
-W. G. Raoul, Lookout Mountain, Tenn.<br />
Re Joseph T. Ponessa's letter (Fall '77, p. 14) : I am puzzled<br />
as to how one could conclude that the excerpt on doweling<br />
from my book pertains to joining edges. As both text and<br />
illustrations show, it is about joining parts of cabinet cases<br />
and the like-usually (I hope) end grain to flat surfaces . Edge<br />
joining is, if I am not mistaken, gluing together two edges<br />
along the grain of both pieces.<br />
-James Krenov, Stockholm, Sweden<br />
Everything in Keyser's estimable article on steam bending<br />
(Fall '77, p. 40) agrees with my experience, such as it is. However,<br />
I'd like to comment on one or two aspects of this process<br />
when not bending large (in cross section, not length) pieces.<br />
First, the faster one gets the wood out of the steam box and<br />
bent to the desired shape, the better. During the fIrst 30<br />
seconds, less for small cross sections, the wood should bend<br />
with little or no resistance. In fact, failure of a bend (compression<br />
failure usually) happens instantaneously with no<br />
pressure being exercised at all. Failures usually lie in a particular<br />
piece of wood, not in excess bending pressure . ..<br />
Second, to achieve rapid bending, avoid using clamps and<br />
heavy straps if you can . Obviously, they work but they take<br />
time. The larger the cross section of the wood, the longer it<br />
stays hot and limber, and the more likely clamps and straps<br />
will be required, so some of this is self-correcting. But the<br />
time during which easy flexibility remains is much shorter<br />
than the touch temperature of the wood would suggest, once<br />
it has lost its "softness" and begun to stiffen. Ask any<br />
wooden boat builder who is fItting new steamed ribs to existing<br />
planks.<br />
Third, to achieve a rapid bend, in seconds if possible, two<br />
or three people are frequently required. I try to make my<br />
molds-leaving room for springback-so they may be fastened<br />
to a large piece of plywood or another flat surface.<br />
The molds are always for the concave side of the curve,<br />
never the convex. Fit a stopper or end block at one end of the<br />
mold (usually the greatest curvature if asymmetrical), then<br />
fasten a series of blocks, and fashion wedges for each, so when<br />
driven home each wedge will clamp the piece to the mold.<br />
Rehearse yours and your assistants' moves. Take out the<br />
steamed piece. Moving as quickly as deliberation permits, run<br />
the steamed piece up against the stopper. The assistant<br />
immediately wedges it tight at the fust block, so you cannot<br />
pull it free, but not so tight that it will not seat flat on the<br />
plywood base. Then, as fast as each assistant can wedge the<br />
piece by each succeeding block, wrap the thing around the<br />
mold, securing as you go. Fifteen seconds is not a bad time.<br />
-Henry Kramer, Somervzfle, N. J.<br />
An alternative to Jim Richey's planemaker's saw (Fall '77,<br />
34 Lumber Samples in One Lumber Sample Pack.<br />
Our sample pack will not only introduce you to all the<br />
cabinet lumber we offer, but may introduce you to some woods<br />
you may never have worked before.<br />
Now, you can experiment with<br />
and compare the color and grain of Ash with<br />
Benge, Birch, Bubinga, Wormy Chestnut,<br />
Cherry, Coco Bola, Black Ebony, Macassar<br />
Ebony, Ekki, Green Heart, Holly, Honduras<br />
Mahogany, Hard Maple, Soft Maple,<br />
Narra, English Brown Oak, Red Oak (plain<br />
sliced and rift cut), White Oak (plain<br />
sliced and rift cut), Padouk, Poplar, Purple<br />
Heart, East Indian Rosewood, Honduras<br />
Rosewood, Sugar Pine, Teak, Brazilian<br />
Tulip, American Walnut, French Walnut,<br />
Nicaraguan Walnut, Wenge and Zebra<br />
Wood.<br />
These are not veneers but lumber<br />
samples >-4 by 2 by 6 inches.<br />
D<br />
D<br />
name<br />
address<br />
[Own<br />
York. New<br />
NY 10011<br />
Street. 39 West 19<br />
$18.00. Here's my check for Send me your lumber<br />
sample pack plus your new catalog.<br />
Here's a ollar.Just send me your new catalog plus a two<br />
dollar credit on my first order.<br />
srare<br />
zip<br />
8
EASY TO MAKE TOY PUZZLES<br />
Here are nine enchanting wooden toy puzzle designs<br />
that you can make easily from standard size lumber.<br />
The easy-to-follow, full size patterns include a duck,<br />
kitty cat, snail, squirrel, pig, gingerbread man, teddy<br />
ALL NINE PATTERNS ARE ONLY:<br />
$4.00 ppd. (First Class Mail-Calif. Res. add 24¢ Sales Tax)<br />
bear, toy soldier & jalopy. Each of these puzzles will<br />
stand by itself when it's finished.<br />
toy making supplies is<br />
&<br />
FA· I 2<br />
Our catalog of more than 150 wooden toy designs<br />
sent free with your puzzle pattern order. Catalog alone is 50¢.<br />
2907 Lake Forest Road<br />
P.O. Box 5459, Dept. ,Tahoe City, Calif. 95730<br />
LO!Je-Built Toys & Crafts<br />
SINCE 1925<br />
•<br />
77 POLAND STREET, BRIDGEPORT, CONN., U.S.A.<br />
THE BRINK & COTTON MFG.CO.<br />
06605<br />
J-in-l Power Tool!<br />
This one po wer-fed tool<br />
•.•<br />
SAWS to desired Width<br />
..<br />
PLANES to desired Thickness<br />
•••<br />
MOLDS all popular Panerns<br />
-all in one fast operation!<br />
Only Complete Workshop Of Its Kind In The World!<br />
Tool<br />
From the day it arrives the Belsaw will make and save you<br />
money. With shortages and inflation driving lumber prices<br />
sky-high, this versatile power tool quickly pays for itself by<br />
easily converting low cost rough lumber into high value<br />
finished stock. Make your own quarter-round, base mold,<br />
door and window stop, casing, tongue-and-groove ... all<br />
popular patterns. Other Belsaw operators turn out picture<br />
frames, fencing, clock cases, furniture, bee hives, bed slats,<br />
surveyor's stakes ... all kinds of millwork. Handles tough<br />
oak and walnut as easily as pine using only one small motor,<br />
and so simple to operate even beginners can use it.<br />
same. ... and YOU can do the<br />
Men and women everywhere are using this one<br />
low-cost power-feed machine to start and build<br />
their own new businesses<br />
Supply lumberyards, carpenters and<br />
contractors in your area with door and window<br />
trim ... base shoe ... bed mold ... cove and<br />
quarter round ... All of their trim. You can sell<br />
picture frame to custom framing shops,<br />
paint stores, department stores and direct to<br />
users. All patterns available or design your own.<br />
6 .. fgE Bookl .. with facts and full d.talls ...... USH COUPON TODAYI<br />
"I<br />
READ WHAT<br />
I<br />
BElSAW<br />
it<br />
OWNERS SAY:<br />
1<br />
bought a batch of walnut in the rough, and<br />
after planing it on the Belsaw I figured I saved<br />
enough money to pay for two-thirds the cost of<br />
the Planer, It really does a good job."<br />
R. S. Clark-Springfield, Ohio<br />
S60,OOO<br />
"This machine pays for itself making money<br />
out of scrap boards, It is a very well built<br />
machine and confess is more than really<br />
expected for the price. It does everything you<br />
say itwill,"<br />
Stephen Schulll-Orangeville, Penna.<br />
''I've been a planer man for years and am now<br />
retired, The Belsaw has earned me in<br />
eleven years, , , iI's the best investment I<br />
ever made,"<br />
Robert Sawyer-Roseburg, Oregon<br />
Does The Belsaw Pay?<br />
YOU BET!<br />
"I recommend the Betsaw as the most useful<br />
shop toot any craftsman could own, We use<br />
one every day in the Workbench model shop, ,<br />
couldn't get along without It."<br />
Jay Hedden, Editor<br />
Workbench Magazine<br />
BOOKLET!<br />
There is NO OBLIGATION and<br />
NO SALESMAN Will Call-ever!<br />
4067 Field<br />
If coupon<br />
-.<br />
has been<br />
.....<br />
BELSAW POWER TOOLS Co.<br />
removed. just send<br />
postcard with name<br />
Building<br />
and address to: Kansas City,<br />
fA <br />
MO 64111<br />
... .. . .<br />
..<br />
• BELSAW POWER TOOLS Co.<br />
4067 Field Building • •<br />
_DYES, please<br />
gives me complete facts about Belsaw' s Planer-<br />
Molder-Saw and full details on how I can qualify<br />
for a 3D-Day <strong>Free</strong> Trial right in my own shop. I<br />
understand there is No Obligation and that No<br />
Kansas City, MO 64111 :<br />
•<br />
' II<br />
send me the FREE Booklet that II<br />
II<br />
..<br />
<br />
I<br />
Addr... !• ::_.""N" •<br />
I City<br />
.U·-. .. "':i ... 1<br />
..<br />
•<br />
9
Create a faIllily<br />
treasure<br />
clock.<br />
Build an exquisite Grandfather clock of truly outstanding quality! For<br />
over half a century our fine craftsmen have<br />
$2.50<br />
been producing each kit with<br />
painstaking care. The love and pride we put into our work is the hallmark<br />
of every Kuempel<br />
We do the hard part, yet the satisfaction of making a family heirloom<br />
can be yours using just the tools you already have around the house.<br />
These designs, in cherry. mahogany or walnut, combine the simpilcity<br />
of yesteryear with stately elegance to enhance the decor of any home.<br />
Choose bright sounding tubular bell or resonant rod chimes. Hand-<br />
h!!i:<br />
21195<br />
;;l<br />
Minnetonka l b e n :rtisr<br />
Blvd .• e cpd fth<br />
• Excelsior, e u :<br />
MN<br />
ti:l<br />
55331<br />
Write for complete literature or send for plans of three clocks<br />
F·D7<br />
r: r . 'plsStit7!: ii r ti; a:e n e S pirit of the<br />
A sophisticated Wood line of tools for the Catalog serious woodcarver, handcrafted in the U.S.A.<br />
Carving<br />
1.00<br />
Wood<br />
Tools. Lignum Vitae. Boxwood<br />
.•<br />
and Hickory Mallets.<br />
Worker's Rasps. Adzes. Slip Stones. Handles and Benches.<br />
Sculpture House. Inc 38 East 30th Street. New York. N. Y. 10016<br />
LETTERS (continued)<br />
p. 77) can be made by using a power hacksaw blade. Mter<br />
grinding to the desired shape, a suitable handle can be<br />
riveted in place. This method eliminates the step of cutting<br />
teeth. Also, used blades can be had for zilch.<br />
-Bruce Sampson, Arlington, Ohio<br />
Re your review of John Rodd's Repairing and Restoring<br />
Antique Furniture (Summer ' 77, p. 21): Rodd' s book has a<br />
lot going for it , but not "sound common sense" when it<br />
comes to many of his methods of restoration. The first sentence<br />
of chapter one strikes at the heart of a basic dilemma a<br />
furniture conservator doing private work faces-the desires of<br />
the customer versus the continued integrity of the artifact. He<br />
states, "When the restoration of a piece of antique furniture<br />
is contemplated, it is important that the owner and the individual<br />
or firm which is to carry out the work come to an accord<br />
regarding exactly what is to be done." Within this statement<br />
lies the hoped-for understanding that the conservator has a<br />
fum commitment to transfer to future generations as much of<br />
the original artifact as possible. To do otherwise is to indulge<br />
in the pilferage of one's cultural heritage.<br />
Within Rodd's book this basic principle is ignored or<br />
humored . In the summary to his fust chapter we are informed<br />
"a good patina is a great treasure," but that " an ugly patina<br />
should be removed ..." Now one either has a patina or one<br />
doesn't. And one is either concerned with it as part of the<br />
intrinsic value and history of an artifact, or one isn't. If all we<br />
should be interested in is appearance, then let's throw out the<br />
whole concept of conservation or restoration and call it<br />
''fIXing old furniture." He also states it has never been his<br />
practice to label new pieces put into a piece of antique furniture.<br />
But I think is is mandatory that any new piece placed<br />
into an artifact be marked and identifiable as such by the reasonably<br />
trained eye. Concealment does the future no favors,<br />
and the conservator must not be party to this type of fraud ...<br />
On page 51 Rodd recommends dipping furniture into a<br />
tank of solvent to remove a finish. It is one sure way to destroy<br />
forever any patina. It is economical, but the cost to the<br />
artifact may be overwhelming.<br />
On page 117, a very disturbing practice reminds me of<br />
Vietnam , where a city is destroyed to save it. We find a tabletop<br />
planed down to 3/8 in. in places and new wood glued on<br />
the other side, all in the name of flattening the top. The new<br />
wood is shown glued across the width of the top ; this arrangement<br />
is bound to cause cracking and splitting. And where is<br />
the antique he started out with? A good part of it will be<br />
swept up and tossed out with the trash ...<br />
Furniture restorers and conservators must start protecting<br />
the artifacts they love most-antique furniture. It is a quickly<br />
diminishing commodity, and sadly much of its demise has<br />
been at our own hands.<br />
-Richard O. Byrne, Ste-Foy, Quebec<br />
As an engineer for a furniture company, I can shed some<br />
light on John Selock's question (Fall '76, p. 9) on finishing<br />
cherry. Almost all the finishes one sees in stores are applied in<br />
the step method, in order to maintain quality and consistency<br />
from one cutting to the next. Sanding and polishing must be<br />
perfect. Finish in this order : Spray transparent stain with a<br />
touch of pink, let dry ; spray transparent stain with a touch of<br />
green, let dry ; wipe stain with a touch of red ; spray with<br />
10
Oudasts<br />
Varnish 2 to 1.<br />
Varathane® is a clear plastic coating.<br />
It is as easy to apply as varnish, yet produces<br />
a clear gloss or satin film which has a life<br />
span up to twice that of varnish. Varathane<br />
plastic coating resists alcohol, household<br />
chemicals, abrasion, marring, chipping,<br />
peeling or flaking.<br />
H i not Flecto, i not \aratbane.<br />
FLECTO p.<br />
<br />
The Fleclo Company, Inc.<br />
O .<br />
Box 12955<br />
, ., Oakland, Ca., 94604<br />
Keep contours<br />
from becoming detours.<br />
'iiiiiiiiiiii Poplar<br />
4480.<br />
Use the Rockwell Speed Block Sander.<br />
Model<br />
4 W' 4Ys"<br />
Its unique design lets you<br />
sand where other sanders can't<br />
reach. On difficult contoured<br />
surfaces. And the x<br />
offset sanding pad gives you flush<br />
sanding on all four sides. At 12,000<br />
orbits per minute.<br />
Hold it in the palm of your<br />
hand. See how snug it fits,<br />
and how easy it is to flick the<br />
power switch with your<br />
thumb.<br />
It's plenty reliable, too.<br />
With a powerful 2-amp<br />
motor. All ball-bearing<br />
contruction. And direct<br />
motor-to-pad design.<br />
Stop by your local<br />
Rockwell dealer for a<br />
closer look. Or write for<br />
Rockwell's 1978 Buyer's<br />
Guide. Advertising<br />
Dept. , Rockwell<br />
International,6263<br />
Ave .. Memphis ,<br />
• Tenn. 38138.<br />
,, Rockwell International<br />
CRAFTSMAN STOCKS 44<br />
...<br />
VARIETIES<br />
of Choice Domestic and Imported WOOD<br />
Send for your new 15211<br />
13;0 NtH'<br />
CATALOG<br />
- everything for<br />
your wood shop!<br />
OVER 4,000<br />
ITEMS FOR<br />
THE WOOD<br />
HOBBYIST<br />
Everything you need for your wood pro1ects<br />
including Dremel and Stanley Power Tools at Big<br />
Discounts. Craftsman Serves you better!<br />
As nne hardwoods become more and more scarce ... Craftsman<br />
now works a whole year ahead to lay in big stocks of<br />
more than 40 varieties. When you order your wood from<br />
Craftsman you count on choice quality and prompt shipment!<br />
Craftsman's new 1978 "biggest ever" catalog is your<br />
complete one-stop source for everything in your shop from<br />
wood to hardware. Over 4000 items in stock . . . at lowest<br />
money saving prices. This is Craftsman's 48th year of service<br />
•<br />
to the home craftsman, school shop and professional woodworker.<br />
Mail coupon today for your own personal copy of<br />
• • • •<br />
WE STOCK: Craftsman's new 152 page catalog!<br />
Amaranth Coco Bolo<br />
Red Oak · Benin . Teak '<br />
r------------------.,<br />
•<br />
Vermilion Cherry Birds<br />
• from<br />
••• •<br />
Name<br />
Send new Craftsman Catalog<br />
I<br />
Prima Vera Satinwood · •<br />
Curly Maple Avodire I<br />
1/64" 4" Address<br />
Sycamore Bubinga<br />
African Zebra Honduras<br />
Mahogany American Wal- I<br />
nut· Aromatic . Red Cedar<br />
• Be sure to give . Zip . State number lime! Zip<br />
I<br />
Thicknesses to I<br />
I<br />
-saves<br />
I<br />
107<br />
.<br />
.<br />
L<br />
:<br />
Eye Maple ' Black Ebony . • CRAFTSMAN WOOD SERVICE CO. Dept. PW 107<br />
a,, u a!! i a K se ; I 2729 South Mary<br />
5t. Chicago, Illinois 60608<br />
I<br />
enclose 50c for mailing and handling • •<br />
I<br />
I<br />
.3;,j ; is ; '." ) . WOOD SERVICE COMPANY = City<br />
8 Pages of Pre·Cut Hardwood Clock Cases, Clock Kits, Clock Movements!<br />
"--"-.II.IIIi111I111.·11i] ......<br />
2729 South Mary St., Chicago, III.<br />
.-..<br />
Dept. PW<br />
60608 __________________<br />
<br />
11
___<br />
LETTERS (continued)<br />
<strong>Free</strong> Carving Instructions<br />
with any purchase. <br />
FREE P.O.<br />
round Tang Blades.<br />
Send for Literalure<br />
$2<br />
If you enjoy woodw<strong>orking</strong>, you<br />
289<br />
It<br />
will appreciate<br />
N.Y. t 2572<br />
Warren's new Solid Brass Chuck. holds our new<br />
1/2" Tang Blades as well as 5/16", half and<br />
Fred Clark<br />
WARREN TOOLS<br />
Box Rhinebeck.<br />
..<br />
a teaching facility<br />
with<br />
IAN KIRBY<br />
at<br />
windsor mill<br />
121 union st·<br />
north adams<br />
mass·<br />
01247<br />
"A UNIQUE FURNITURE TREATMENT FOR THE DISCRIMINATING HOMEMAKER!"<br />
J amestowne Antique<br />
Furniture Polish<br />
A SIMMERING special new now process makes called it possible HEARTH<br />
to homogenize LEMON OIL AND .<br />
CARNAUBA of the wood and WAX restore enrich the finish the beauty<br />
and patina.<br />
&ALTO. P.O. BOX -JAMfSTOWNf 5308 BAlTO., WAX MD. co., 2' 209 INC. •<br />
REAL WOODS DIVISION BROOKSIDE<br />
VENEERS, LTD<br />
Complete selection exotic hardwood veneers<br />
- from our architectural inventory<br />
carving blocks<br />
Mail Order - Retail<br />
Send for our catalogue -50¢<br />
Your own collection wood veneer samples<br />
L<br />
$2.00 post paid<br />
107<br />
Personal<br />
Street,<br />
Attention<br />
Bldg. R-B<br />
given to<br />
Elizabeth,<br />
every order<br />
__________________________ N.J. 07206<br />
Trumbull<br />
<br />
brown glaze, let set awhile, wipe to desired grain effect ; spray<br />
sealer, let dry (sand lightly if necessary) ; apply speckle and<br />
rag glaze distressing if desired ; spray as many coats of lacquer<br />
as desired (usually two) ; rub with 4-0 steel wool and oil.<br />
-James Heuer, Holland, Mich.<br />
In the Fall '76 issue of Fine Woodw<strong>orking</strong>, Tage Frid describes<br />
a workbench and advises how to construct one. He<br />
states that he and his srudents construct such workbenches<br />
every two or three years and that ' 'This year each bench cost<br />
us about $100, half for wood and half for hardware." This<br />
seemed too good to be true, so following his advice, I ordered<br />
the hardware from Woodcraft Supply, Woburn, Mass ., and<br />
did pay about $50. However, after submitting the cutting list<br />
to a lumber company, you can imagine my shock to learn that<br />
instead of $50, the lumber would cost more than $200.<br />
I would like to know where Mr. Frid got his lumber in 1976<br />
for $50 when it costs four times that much today?<br />
-Joseph T. Greenwood, Paterson, N}.<br />
[Editor's note: Tage Frid replies, "We used 8/4 maple of random<br />
widths and lengths for our benches, and in 1975 we paid about<br />
$0.68 per board foot. The price today would be between $0.76 and<br />
$0.80 a board foot.<br />
"The mistake Mr. Greenwood made was to submit a cutting list<br />
to a lumber company. This means the lumber company has to cut<br />
the lumber to size, and thickness-plane it to dimension. The material<br />
would cost about $50, the rest would be handling and labor. Of<br />
course, when buying small quantities, the price per board foot is a<br />
little higher. "J<br />
Duane Waskow's "A Square Square" (Fall '77, p. 23) did<br />
not go far enough . It was proven that we have two identical<br />
squares but not necessarily square. Reversing the squares on a<br />
flat surface will prove if the two identical squares are square.<br />
"Wooden Clamps" by Richard Showalter (Fall '77, p. 64)<br />
is an excellent article, unfortunately not read by your technical<br />
illustrator. Note the direction of the wood grain in the exploded<br />
illustration of the bar clamp and the photograph<br />
above it (p. 69). The author points out the problem of tapping<br />
into end grain. If someone made a clamp as shown it<br />
would break in the highly stressed area on a center line between<br />
the two retaining pins.<br />
-Clinton W. Bostock, W. Suffield, Conn.<br />
After reading two articles (Spring '77, Fall '77) related to<br />
thread construction and use, I see no mention of hickory<br />
(shagbark) as a wood for threads.<br />
Even though hickory is an open-grained wood, it has<br />
strength through its resilient characteristics. This resilience<br />
separates it from all other woods and prevents it from splitting<br />
out when worked and used.<br />
Craftsmen of 100 and 200 years ago knew their woods well<br />
and used them to their best advantage. Therefore they<br />
seldom used wood other than hickory for strong threads, and<br />
A<br />
B<br />
12
Finish it<br />
with the<br />
finest. ..<br />
FREE CATALOG gives<br />
wood staining and<br />
finishing tips. Send self·<br />
addressed, stamped<br />
(46¢) envelope (9x12")<br />
to Deft, Inc., Dept. FW,<br />
17451 Von Karman Ave.,<br />
Irvine, CA 92714.<br />
UNDERSTANDING<br />
ORIGINAL HARDWARE<br />
Being a woodworker, you already know<br />
your styles, woods, joints-and how to use<br />
them-tools, glues, and finishes, BUT, do<br />
you know your HARDW ARE?-perhaps<br />
not as well as you should .<br />
Wood Shed<br />
75 -- ---SPECIAUSTS IN<br />
VENEERS - OVER SPECIES<br />
FROM ALL PARTS OF THE WORLD<br />
1807 Elmwood Ave.<br />
Buffalo, N.Y. 14207<br />
PADAUK LIGNUM VITAE<br />
716-876-4719<br />
TROPICAL OLIVE<br />
Write for free price list.<br />
10<br />
TURN CRAFT CLOCKS<br />
•<br />
Movements, Dials, Hardware<br />
and all component<br />
parts related clock building.<br />
Now stocking the new<br />
Urgos Grandfather Triple<br />
• 33<br />
Chime nine tube movement .<br />
(The Cadillac of movements).<br />
Page Catalog-$2.00<br />
$25.00<br />
refundable<br />
on order.<br />
Special<br />
611<br />
quantity discounts.<br />
55427<br />
Dept . FWI,<br />
Winnetka Ave. No.<br />
Golden Valley, Minn.<br />
Enjoy the satisfaction of<br />
making and owning a clock<br />
you have created.<br />
Complete, simplified plans.<br />
Easy to read detailed construction.<br />
•<br />
Includes material lists.<br />
Many show Shaper/Router<br />
Cutters used.<br />
Choose<br />
from Grandfather,<br />
Grandmother (Traditional<br />
Early American), School,<br />
Bracket.<br />
TURNCRAFT<br />
Cottage, Steeple,<br />
Vienna<br />
IMPORTS<br />
Regulator,<br />
CO. CLOCK<br />
Wag-on<br />
Wall.<br />
Phone: 612-544-1711<br />
Reproducing original hardware has been our<br />
ONLY business since 1932. We will share<br />
our years of experience with you , in this<br />
space, in the coming months.<br />
BAL]jND<br />
BALL<br />
463 W. LINCO LN HIGHWAY<br />
EXTON, PA 19341<br />
( 215) 363-7330<br />
<br />
vloodworhint<br />
me'ol wO"<br />
I.nc<br />
'og<br />
c;?r<br />
L[lllOuLS ::' :::500d<br />
00 """ -" "" ''<br />
steel<br />
£ii?(C; 'he eWo;eo, beo,h '0. p.o'e,·<br />
TOOL NEVER WEARS OUT!<br />
Only knives need be replaced at less<br />
than sharpening. <strong>Free</strong> 10 day trial<br />
with ad. 3Y2" dia., 2" w., 1" b., $90.<br />
ea.; for rabbitting (with spurs) $9.<br />
more. Solid carbide knives last twice<br />
as long as carbide-tipped.<br />
Carbide tipped ATB SAW BLADES, 10", 60 T., o/s" bore,<br />
$42.-ppd. Request our free $ale Bulletin or send $2<br />
1977 Bimex, Inc.<br />
BIMEX, F 12<br />
for our 56-p. catalog.<br />
N.E.<br />
INC. Dept.<br />
Complete Shop Outfitters<br />
©<br />
487 Armour Circle<br />
Atlanta, Georgia 30324<br />
Tel. (404) 873-2925 (No CODs)<br />
adjustable<br />
5811<br />
work platforms<br />
weighs for<br />
001 316<br />
maximum safety<br />
and stability<br />
South<br />
New Jersey<br />
Indianapolis, IN 46204<br />
13
LETTERS (continued)<br />
Richard Showalter's identification of the wood used in his<br />
"antique clamp" was probably incorrect, as hickory looks<br />
similar to ash .<br />
-Gary Randall, Sussex, N. I<br />
Pat. Pend. Shown actual size<br />
BRASS FINGER PLANES<br />
for the<br />
INSTRUMENTMAKER and CABINETMAKER<br />
The forefinger nestles in the<br />
whale's tail. Made from solid brass,<br />
ebony wedge and tool steel blade.<br />
IN THREE SIZES<br />
Small (1-3/8" long, 3/8" blade) ........... $23 ea.<br />
Medium (1-3/4" long, 1/2" blade) ......... $25 ea.<br />
Large (2-1/8" long, 5/8" blade) ........... $28 ea.<br />
Set of 3 ................................. $70<br />
Add $1.00 per order for postage and handling<br />
Make checks payable to:<br />
(R.I. residents add 6% sales tax)<br />
OTNER-BOTNER<br />
r------------------------,<br />
P.O. Box 6023, Providence, R.I. 02940<br />
PERFECT<br />
LION MITER TRIMMER<br />
is a simple-to-use hand too,l for the doit-yourselfer,<br />
craftsman, cabinet maker<br />
and carpenter. Ends the frustration of<br />
rough and mismatched joining. This<br />
versatile tool makes glass-smooth<br />
trim cuts on any wood - soft or<br />
hard - to 4" wide for 45 0 angles<br />
to 6" for squaring, and<br />
any angle in between,<br />
left or right. Super<br />
sha rp tool-steel kn ives<br />
make thousands of cuts,<br />
yet keep their edge .<br />
Make picture frames,<br />
bu ild cabinets, trim<br />
out a room like a PRO!<br />
______________________________________<br />
FOR FREE INFORMATION, WRITE:<br />
Lion Miter Trimmer<br />
R R-2, Box 18J . Windsor, VT05089 . (603) 675-2105<br />
Name<br />
L ________________________ _ <br />
Ad d ress<br />
City State Zip<br />
Regarding Timothy Ellsworth's article on hand planes<br />
(Winter '75) : He intimates through illustration that adjustments<br />
may be made by tapping the body of the wooden plane<br />
with an iron hammer. This is a definite NO NO. Use of the<br />
iron hammer will over a period of time destroy the plane<br />
body. Use a wooden mallet or a block. Tapping the blade to<br />
get a deeper cut should also be done only with a wooden<br />
mallet or block. The hammer burrs over the top end of the<br />
blade. This same erroneous recommendation is made in many<br />
books published as long as 50 to 75 years ago .<br />
-John W. Olson, Kensington, Md.<br />
Bob Sutter's "Plane Speaking" (Summer '76, p. 28) implies<br />
that the block plane is advantageous for planing end<br />
grain ...<br />
If the bevel is ground to an angle of 25°, the top<br />
edge of the cutting iron would have an angle of 4r on<br />
ordinary block planes. Since other planes (smooth , jack, fore,<br />
etc .) have the plane irons resting on a seat of 45° , there is no<br />
advantage of the block plane producing a smoother cut on<br />
end grain simply because block planes have irons angled at<br />
about one-half that of a bench plane. Only low-angle block<br />
planes have an advantage in planing end grain.<br />
-Lyle Terrell, New Orleans, La.<br />
Since Granberg Industries introduced their chain-saw mills<br />
in 1963, there has been a continuous debate on the need of<br />
special ripping chain for cutting roots, logs, and burlwoods.<br />
We manufacture George's Chain-saw Mills, and more than<br />
three years of crosscutting and ripping of tree roots, logs or<br />
burls (estimated over 5000 slabs) have shown me that any<br />
chain properly sharpened as I'm suggesting here will do the<br />
job satisfactorily. All of our chain is currently being sharpened<br />
at 20° top plate angle, instead of the 30° to 35 ° of new<br />
chain. All depth rakers are filed or ground to .040. We use<br />
chipper chain sharpened this way for all types of general<br />
woodw<strong>orking</strong> of slabs, root burl, and log ripping. All chain is<br />
sharpened this way regardless of the size of our power heads,<br />
or the type of chain, using electric sharpeners. We use saw<br />
bars to 6 ft . long, and build mill frames to 10 ft . long (our<br />
exclusive feature) . Our slant mill is the most versatile piece of<br />
equipment in the world for slabbing roots, logs, or burls.<br />
When the top plate angle of the tooth is reduced, the size<br />
of the wood chip is smaller and so is the drag on the chain, as<br />
the sawdust must be drawn completely across the cutting area<br />
before it is ejected outside the cut. The result is higher chain<br />
speed, essential to successful cutting. It seems to us that the<br />
smaller angle on the tooth stays sharper longer. Also, reducing<br />
the cutting angle tends to eliminate the grabbing action<br />
and clutch slip when ripping logs. Less vibration reduces<br />
operator fatigue. Changing the angle to 10° or 0° gives a<br />
smoother surface and a little slower cutting, but is easier to<br />
sandpaper later on. We gradually change the tooth plate<br />
angle as we resharpen new chains, 5 ° to 10° at a time. Chains<br />
are discarded when two-thirds of the tooth is gone, because<br />
the drive links are worn down, and the chain has a tendency<br />
to gallop while cutting. Never cut with dull chain : Sharp<br />
14
Address<br />
St.<br />
Zip<br />
VT.<br />
Imported<br />
and stocked by<br />
RUSS ZIMMERMAN<br />
RFD 3, BOX 57A, PUTNEY, 05346<br />
• 5<br />
•<br />
African<br />
1 2 6<br />
Zebrawood Shorts<br />
Random lengths to feet, widths to inches<br />
and inch thicknesses<br />
Quarter sawn, rough<br />
6%<br />
Kiln dried<br />
$2.10 a board foot Minimum order $10.00<br />
California residents add sales tax<br />
F.O.B. Los Angeles, shipped freight collect<br />
BankAmericard<br />
and Master Charge<br />
accepted<br />
5800 So. Boyle Ave., Los Angeles, Calif. 90058 (213) 583-451 1<br />
BUILD THIS WOODEN TOY STEAM TRAIN<br />
This is a fine wooden toy reproduction of a nineteenth<br />
century steam train. An order for the woodw<strong>orking</strong><br />
drawings brings you plans for the locomotive plus seven<br />
cars : tender, freight car, flat car, passenger car, gondola,<br />
crane car and caboose. This is a handsome sturdy<br />
toy and an easy project. Our catalog of wooden toy<br />
ideas and toy building supplies is included free with<br />
your train plan order. Catalog alone is 50¢.<br />
$4.00 pd. (Calif. Res. add 24¢ Sales Tax)<br />
Sent by first class mail<br />
Loue-Built Toys & Crafts<br />
2907 Lake Forest Road<br />
P.O. Box 5459, Dept.FA.12,Tahoe City, Calif. 95730<br />
Learn<br />
WOODWORKING<br />
at the<br />
NEW ENG<br />
LAND<br />
CRAFTSMANSHIP CENTER<br />
Small classes three times a day, six days a week<br />
in general woodw<strong>orking</strong> and furniture making.<br />
Continuous courses year-round, completely flexible<br />
scheduling possible. Wood sculpture in the<br />
round, spring and fall. Accessible to all of Greater<br />
Boston Area. Call: (617) 923-1130 or write:<br />
PO Box 47, 5 Bridge Street. , Watertown, Massachusetts<br />
02172.<br />
& &<br />
TOOLMARK WOOD LATHE DUPLICATOR<br />
Features Quality Precision<br />
$285.00<br />
Write for <strong>Free</strong> Literature Compare<br />
TOOLMARK CO. (61 2) 561 -4210<br />
6840 Shingle Creek Pkwy<br />
Minneapolis, MN 55430<br />
FOB Mpls<br />
BUY<br />
Don't just buy a woodw<strong>orking</strong> machine<br />
what the machine can really do<br />
INCA-PRECISION SWISS STATIONARY<br />
POWER TOOLS<br />
8%" wide jointer/planer (illustration)-1 2,OOO vibration free cuts per minute.<br />
Will handle hardest teaks to balsa w oods to glass clean finish.<br />
Optional thicknessing attachment permits board thicknessing from 2%"<br />
max. to '/40" min. to absolute.perfection. Five other industrial quality<br />
machines, designed for precision production and priced for the perfectionist<br />
craftsman, hobbyist and cabinetmaker. TWO YEAR WARRANTY.<br />
r 3" 3 of 9 10" ..... of 2'/,."<br />
10Vo" combination jointerlplaner wIth automatic feed thickn bandsaw<br />
for wood, non-ferrous metals, plastic. blada selections, 6V." depth cut 10"<br />
cIrcular<br />
MO<br />
saw<br />
414<br />
dapth of cut. Attachments to parform 15 addHional oparl>tions.<br />
circular saw depth cut. Same attachments as 10" saw. VERTI<br />
CAL SPINDLE SHAPER, speed.<br />
See your local Home Improvement Center, Hardware or machinery dealer or write<br />
Anson Industries Inc. for informalion of an INCA dealer nearest you.<br />
ANSON IN DOS TRIES INC.<br />
Dealer Information<br />
Dept. West Cypress Street, Glendale Calil. 91204<br />
Please send me the INCA<br />
__ __<br />
Upon Request<br />
________<br />
preCision stalionary power tool calalog and price<br />
__<br />
sheet.<br />
_<br />
I<br />
enclose $1 .00 for first class postage and handling.<br />
Name<br />
City<br />
15
LETTERS (continued)<br />
PENDING PATENT<br />
>-- '(,.<br />
.<br />
• "//<br />
Maintains the saw-kerf during long saw-cuts_ <br />
_<br />
8<br />
Prevents saw-binding and saw "kick-back"_<br />
Controls the droop and sag of material<br />
being cut.<br />
, .<br />
. "'I!j<br />
Holds edges in close proximity for welding, '<br />
/<br />
,'#;;<br />
,.. •<br />
soldering, gluing. 1",;<br />
Craftsmen-professional and amateur-have .<br />
all experienced the annoyance and potential '0<br />
hazard in the uncontrolled behavior of the<br />
material wh ile long saw-cuts are made<br />
through large panels.<br />
The new "Pony" Kerf Keeper is des i gned to<br />
provide the help you 've always need ed, that<br />
extra pair of hands to hold the material in<br />
place while you make the cut. It is a simple.<br />
inexpensive I ittle device that can be slipped<br />
into the saw-kerf once it has been started and<br />
clamped firmly by tightening the wing-nut.<br />
Write<br />
N. Ashland<br />
for full details,<br />
Ave. Chicago,<br />
or ask your<br />
L<br />
favorite<br />
60622<br />
hardware or tool supply dealer.<br />
ADJUSTABLE CLAMP COMPANY<br />
431 / I<br />
the NEW "Pony': KerfKeep<br />
1' ( A <br />
:;/ <br />
GERMAN BLADE IMPORTS<br />
SPECIAL OFFER FOR THE SERIOUS<br />
*<br />
WOODWORKING HOBBYIST!<br />
*<br />
Alternate<br />
10"<br />
Top Bevel<br />
X 60T<br />
-Carbide Tipped<br />
X %<br />
Circular<br />
BORE<br />
Saw Blade<br />
Hook<br />
Designed for superior chip free cuts in hard and soft<br />
.10<br />
wood-particle board-single faced laminated particle<br />
board. ATB Grind-.1 18 Kerf Angle-1 5 Bevel<br />
Angle.<br />
FULL MONEY BACK WARRANTY<br />
Highest Industrial Quality<br />
$38.95<br />
Telephone City<br />
GERMAN BLADE IMPORTS<br />
P.O. Box 684. Conyers. Ga.<br />
______ & Area Code State _<br />
30207<br />
________<br />
Name ____________________<br />
Zip<br />
_<br />
__<br />
38.95 0 Check<br />
Street ____________________ _<br />
S 0<br />
Enclosed is Money Order<br />
Please Charge to my:<br />
L---________________________<br />
Bank Americard No:<br />
Master Charge No:<br />
Signature<br />
J<br />
chain and a well-oiled bar save wear and replacement costs.<br />
We have reserve chisel chain when we need to rip clean logs<br />
as smoothly as possible. These cuts are made with chisel chain<br />
filed or sharpened to 0° top plate angle and the rakers filed to<br />
.040. The corner of the tooth on chisel chain can be dulled so<br />
easily cutting dirty wood that we do not use it on anything<br />
but clean wood.<br />
Special skip-tooth chain simply eliminates some chain<br />
teeth to reduce the amount of wood chips traveling along the<br />
cut. It costs more money and is not readily available.<br />
Special ripping chain is designed to break up the chips into<br />
irregular sizes so they offer less resistance as they are carried<br />
through the cut. It costs even more money, is not easily available<br />
and takes great care in sharpening, although it gives a<br />
fairly smooth cut . .. Some saws come equipped with power<br />
sharp top cutters and cannot be changed. The balance of the<br />
little saws are mostly a chain that is a marriage of the chisel<br />
chain and the chipper, and when filed or sharpened to 20°<br />
angle or less, offer good ripping features-less vibration when<br />
crosscutting-a little slower, but-less operator weariness.<br />
-George Grube, Ei Cajon, Caiz!<br />
[Editor's note : George Grube manufactures a variety of chain-saw<br />
mills of his own design, ranging from a $20 "Mighty Mini" device<br />
that attaches to a small chain saw , up to a 4-ft. by 10-ft. slant mill<br />
that costs $650. His address is 14135 Old Highway 80, El Cajon,<br />
Calif. 9202 1, tel. (7 14) 443-2911.]<br />
As a charter subscriber I have greatly enjoyed your magazine.<br />
It has filled a long-existing void in world publications<br />
and I have commended it to my friends around the world<br />
with almost paternal pride.<br />
With this sentiment, perhaps you can appreciate my disappointment<br />
when I tell you that the articles on chain-saw milling<br />
and rip chain in your Fall '77 issue are highly misleading<br />
as to the development of the techniques and the equipment<br />
with which to perform them. From their presentation the<br />
reader must infer the equipment, the procedure and the<br />
technique sprang full-blown from the fertile brain of the<br />
writer of these articles, Robert Sperber. I assure you, nothing<br />
could be farther from the truth .<br />
The portable chain-saw mill, as pictured and described in<br />
that article, was invented in the late 1950s by Ernest Hayden<br />
of Callahan, Calif. , and John Tanner of Douglas, Alaska.<br />
This company, as Granberg Industries, Inc., and under the<br />
earlier name of Nygran Industries, has been manufacturing<br />
that device under license from the inventors since November<br />
of 1960 and during the past 17 years this device has become<br />
internationally known as the ' 'Alaskan Chain Saw Mill." It is<br />
the rare country, island or region where it is not in use today .<br />
. . . While imitation is said to be the most sincere form of<br />
flattery, we can take no comfort in such a bromide . .. Since<br />
he is making his equipment for sale, our 'attorneys are in the<br />
process of reminding Me. Sperber of his legal responsibilities<br />
to the property of others. We have filed suit in federal court<br />
to prevent this continuing infringement of our U. S. patents.<br />
... Our disappointment, therefore, is with you as this lack of<br />
skeptical curiosity on the part of your staff is most unprofessional<br />
and irresponsible. We trust this incident resulted from<br />
a momentary lapse of diligence and that cloak of competence<br />
you wear isn't concealing clay feet.<br />
-F. D. Schrupp, Granberg Industries, Richmond, Cail!<br />
16
METHODS OF WORK __ _<br />
Bench<br />
damp<br />
My clamping device extends the top (for holding and<br />
clamping) of a small workbench in limited-floorspace workshops.<br />
It can be used in conjunction with a tail vise on the<br />
opposite end of the bench or alone with dog holes drilled on<br />
DOMESTIC & FOREIGN<br />
HARDWOODS<br />
I" 4"<br />
Quality stock for Cabinet Work<br />
Most all sizes from up to in thickness<br />
HARDWOODS<br />
ASH - BASSWOOD - BIRCH<br />
B TTER UT - CHERRY - CHESTNUT<br />
EBONY - MAPLE - OA K - POPLAR<br />
ROSEWOO D - TEAK - WAL<br />
Also hardwood plywoods<br />
UT<br />
SOFTWOODS<br />
hacksaw<br />
I-in. thick hardwood , any length/<br />
line with the clamp head device.<br />
The Record brand clamp head can be bought from Silvo<br />
Hardware for $5.89.<br />
My unit was constructed with 3-in. angle iron 6 in. long<br />
with the slots drilled and hacksawed 1 in. from either end.<br />
The 3/8 x 4-in. lag screws were driven through the slots into<br />
the end of my workbench so that the angle iron is flush wit<br />
the top. Tightening and loosening the lag screws facilitates<br />
rapid installation and removal. Wooden bars of various<br />
lengths are handy for different projects.<br />
-Robert Bessmer, Avenll Park, N. Y.<br />
Testing<br />
finishes<br />
After turning wooden bowls, several of my eighth-grade<br />
students asked if they could use them for eating cereal . I was<br />
surprised and intrigued by the question, so I set out to test<br />
the water resistance of various nontoxic finishes, hoping that<br />
one would be good enough for such wet food.<br />
I tested Deft, Benjamin Moore Urethane Varnish and constantine's<br />
Wood Bowl Seal on basswood, Philippine mahogany<br />
and pine-the woods used in our school shop. I also<br />
tested three oil finishes-Watco Danish oil, salad oil and<br />
mineral oil-on pine only.<br />
The test pieces (which I called ' 'concaves' ') were turned on<br />
the lathe from 3-1I2-in. discs of 1-3/4-in. stock. Th outside<br />
was merely trued, the inside cut to a bowl contour. I made a<br />
concave of each wood for each finish, plus two extras-one to<br />
test unfinished, and a control (finished but not tested) . The<br />
test liquid was water ; to obtain a permanent record I added a<br />
powdered red stain.<br />
I finished the concaves according to the labels on the cans,<br />
filled each with stain, and enclosed them in plastic bags to<br />
eliminate evaporation as a variable. I arbitrarily decided to let<br />
the basswood samples soak for a week, the pine for two weeks,<br />
SUGAR PINE - CYPRESS - CEDAR<br />
SPRUCE - DOUGLAS FIR etc.<br />
248 Ferris Avenue,<br />
MAURICE L_<br />
914-946-4111 White Plains, N.Y. 10603<br />
CONDON CO., INC.<br />
Open Saturdays 8 AM until 2 PM<br />
Now available again ...<br />
THE<br />
FINE ART OF<br />
CABINETMAKING<br />
11,<br />
finding one's self in one's work, making tools-all craftsmen will identify with<br />
Krenov as he explains not just the how but also the why of w<strong>orking</strong> and living<br />
with wood. "What makes a cabinetmaker a true master? You could read dozens<br />
of books on tools and tricks of the trade without ga ining the insight this one<br />
book provides."-Workbench 132 pages, 145 illus., $13.50.<br />
x<br />
Now you can re-create Krenov's museum-quality cabinetry in your own workroom.<br />
In his own detailed way, this master woodworker covers everything from<br />
A<br />
choosing wood to coopering, doweling, and dovetailing - from frame and panel<br />
work to drawer latches, hinges and handles. Complete with over 300 photos and<br />
detailed drawings illustrating his actual techniques. 224 pages, 81f2 $14.95.<br />
Also available: CABINETMAKER'S NOTEBOOK by James Krenov. Getting started,<br />
-------10-DAY FREE EXAMINATION -------<br />
IrimI Van Nostrand Reinhold<br />
7625 Empire Drive . Florence. Kentucky 41042<br />
__<br />
Please send me the following books by James Krenov for 10 days' free examina·<br />
tion. At the end of that time I will either remit the amount of your invoice (including<br />
postage, handling, and my local sales tax) or return the book(s) and owe<br />
nothing. (Payment must accompany orders with P.O. box addresses. Offer good<br />
in U.S.A. only, and subject to credit department approval.)<br />
____________________ (24555·6)<br />
___ _<br />
Address<br />
City State Zip<br />
SAVE! Enclose payment with order and publisher pays postage and handling.<br />
Same return-refund guarantee. Your local sales tax must be included with<br />
payment.<br />
F 7100<br />
_______________________ THE FINE ART OF CABINETMAKING $14.95<br />
(24551-3) A CABINETMAKER'S NOTEBOOK $13.50<br />
Name<br />
17
METHODS (continued)<br />
1001<br />
:-.Jorfh America's largest antique<br />
dealer for the colleml h)'<br />
Iron Horse Antiques<br />
SAND-O-FLEX<br />
Eliminates ®<br />
Hand Sanding<br />
fingers Thousands per of minute flexible sand sanding<br />
curved and flat surfaces. Sand both<br />
beads, harming flutes fine and detail scrolls can also without<br />
used on the finest veneers. An indispensable<br />
furniture tool maker.<br />
be<br />
and<br />
PROOUCTS,<br />
for the<br />
INC.<br />
cabinet<br />
201 W.<br />
_MERIT<br />
I:i ABRASIVE<br />
$U85C)1,1.R'I'O/FW.I.$HING1ONSTlUCOAPOI.&'!OPoI<br />
MANVILLE, BOX 5447<br />
COMPTON, CALIFORNIA 90224<br />
r----------------------,<br />
ORDER BY MAIL<br />
If not available from your local hardware<br />
dealer, or lumber yard, order direct:<br />
SANDER KIT 8 brush 6" wheel and 3<br />
D abrasive refill coils. Adapters for 3/8 or<br />
1/4" chucks or bench motor. Price $2495<br />
includes postage and handling.<br />
<strong>Free</strong> Home Workshop and Craftsman<br />
D brochure.<br />
FW<br />
-----------------------<br />
Bandsawn pine samples around unfinished<br />
control are (clockwise from top left ) bowl<br />
seal, urethane varnish, salad oil, Watco.<br />
the mahogany for three weeks. Since<br />
the unfinished samples quickly soaked<br />
up stain and were completely red within<br />
a day, I stopped this series after 24<br />
hours. Every day the rest of the concaves<br />
were emptied, dried, examined<br />
and refilled with stain. At the end of<br />
the test periods I let them dry for two<br />
days before bandsawing into halves, to<br />
avoid the distortion that cutting wet<br />
wood might cause.<br />
In every case the biggest changes occurred<br />
during the first few days. All the<br />
Deft samples stained in 24 hoursbasswood<br />
the most and mahogany the<br />
least. The concaves finished with urethane<br />
and Wood Bowl Seal stained primarily<br />
on torn end grain, which had<br />
not been sanded perfectly smooth, and<br />
(in pine) along cracks in knots. The<br />
finishes themselves took on a salmon<br />
color, but penetration below the finish<br />
was minimal.'<br />
Mineral oil and salad oil were the<br />
least effective finishes, with Watco<br />
somewhat better but still not as good as<br />
Deft. The sectioned surfaces seemed to<br />
indicate that the stain traveled along<br />
the oiled surface of the wood, rather<br />
than through it. Note that two coats of<br />
the oil finishes were wiped on. Certainly<br />
the results would be different if the<br />
wood had been immersed and soaked<br />
in oil.<br />
These tests demonstrated, fust, that<br />
any finish increases the water resistance<br />
of wood, and second, that end grain<br />
must be sanded absolutely thoroughly<br />
for a finish to be effective. Knots also<br />
reduce the overall effectiveness of a finish.<br />
I concluded that two coats of<br />
urethane or Wood Bowl Seal are durable<br />
enough to resist the wetness of<br />
cereal, and that Deft and Watco are<br />
probably adequate for the usual uses of<br />
wooden bowls-salads, nuts, etc.<br />
I don't mean to recommend these<br />
finishes or eating wet foods from them .<br />
But I do hope my testing method will<br />
be useful to others who are trying to<br />
Sta"ley Circular Plane 1897 Co<br />
recent<br />
American<br />
$6 111051<br />
Classic<br />
52.50 300<br />
You'll find it listed in our periodical offer<br />
ng over antit J ue lools and implements fo r use and<br />
1I1\'CSlmcnt. Send for a nne year subscription. or<br />
for a sample copy.<br />
Write for our latest<br />
Dept. to: 25<br />
BOOK CATALOG<br />
Sixly·four pages of hal'd·lO·find bc:x)ks about wood·<br />
' ()rking. stlip buildin g . metal workin g , farming. tex·<br />
tdes. household utensils. Hundreds of lilies on lI'aditional<br />
cr'lfts.<br />
Iron RD<br />
their<br />
Horse 2, Poultney,<br />
history.<br />
Antiques.<br />
Oil Vermont<br />
methods and<br />
Inc.<br />
tools. Send<br />
cenlS<br />
Visil HubbardlOn, our shop VI. Rle. ::lV,<br />
F·78, 05764<br />
LONG ISLAND<br />
'11+'1'3;-<br />
TE L. 11TH 212-784'2874 CITY, STREET N.Y. 11101<br />
ASK FOR FREE CATALOG<br />
SOLD THROUGH LEADING DISTRIBUTORS<br />
WETZLER CLAMP CO., Inc.<br />
43· 13<br />
18
__<br />
Zip,<br />
__<br />
METHODS (continued)<br />
compare the relative merits of the particular<br />
finishes they like.<br />
-c. Orentficher, New York, N. Y.<br />
Carving gouge<br />
Before shelling out a lot of money for<br />
carving tools, I always think about what<br />
I want to carve and what tools I'll need.<br />
Often the tools will cost me nothing if I<br />
make them myself.<br />
To make a small carving gouge, I use<br />
a hardened steel cut nail. The tapered<br />
shape needs very little grinding. I don't<br />
bother grinding off the head ; I just<br />
grind it down with the rest of the shaft,<br />
grinding one side flat and the other<br />
three sides into the curve I want. Then,<br />
holding the blank in a vise, I file the<br />
inside groove with a round (chain-saw)<br />
fi le. I grind a tang and mount the<br />
gouge in a hardwood handle, often<br />
with the bulge, or palm-grip, up, for<br />
easier carving at a shallow angle. Then I<br />
sharpen, putting the bevel on the inside,<br />
with file and slipstone.<br />
-j. B. Small, ]r. , Shippensburg, Pa.<br />
Staining curly maple<br />
Curly maple-fiddleback, tiger-tail,<br />
or whatever you may call it-requires a<br />
staining technique all its own. Maple<br />
with a curl was the favorite wood for the<br />
stocks of the muzzle-loading rifles of<br />
yesteryear. The staining method described<br />
here has come down by word of<br />
mouth from the old gunsmiths.<br />
Great-grandpa used two stains and<br />
he made both of them. For the first you<br />
must find a handful of rusty cut<br />
nails-very old and very rusty cut nails<br />
are best. Place about a dozen in a soup<br />
bowl and cover them with homemade<br />
apple-cider vinegar, the stronger the<br />
better. Do not use a metal dish and do<br />
not substitute synthetic vinegars or<br />
white vinegar. Cover to prevent evaporation<br />
and let stand for two weeks.<br />
For the second stain dissolve potassium<br />
dichromate crystals in water. It<br />
need not be a saturated solution but I<br />
use it fairly strong. You can buy these<br />
8 PIECE CHIP CARVING SET<br />
Get into a fun hobby! These fine German<br />
carver's tools will let you make just about<br />
any cut you could wan!. Comfortable<br />
hardwood handles are about 6" long.<br />
Special knife alloy steel takes and holds a<br />
razor edge ..... $19.95<br />
Here are only<br />
1978<br />
four<br />
36<br />
out of<br />
hundreds of hard· to· find<br />
8<br />
woodw<strong>orking</strong> tools from<br />
28<br />
Leichtung's page,<br />
full·color catalog . . . pages<br />
(including cabinet models); plus another<br />
6 PIECE<br />
CABINETMAKER'S<br />
CHISEL SET<br />
These shapes and this quality<br />
have been used by Europe's<br />
master craftsmen for two cen·<br />
turies! Hand·forged, ground<br />
and honed Tungsten·Vanadium<br />
steel. Marvelously comfortable<br />
ribbed·ash handles with<br />
$34.95 ¥.",<br />
nickelled double· reinforcing<br />
hoops. From lOW·IZ" long; set<br />
includes C 'JC W, I" and<br />
1!I4" widths .....<br />
of Danish workbenches<br />
color<br />
pages loaded with other rare tools. Send for your<br />
catalog today; use the easy coupon below.<br />
5 PIECE CABINETMAKER'S<br />
SCREWDRIVER SET<br />
Tools of this design were used by<br />
the 18th century masters<br />
Heppelwhite, Sheraton and Phyfe.<br />
T umed oval beech handles are just<br />
"fist·right". Put a wrench to the<br />
flattened area below the ferrule for<br />
your most stubbom screws.<br />
Lengths (ferrule to tip) 3", 4", 5",<br />
6" and 8" ..... $15.95<br />
:.-== __ We welcome phone orders<br />
$19.95 ....................... $34.95 __ _<br />
o 6 7 (216) 461-4677<br />
Yes pc. Ric Leichtung,<br />
@<br />
Please send me: (Leichtung pays all postage!)<br />
_ @<br />
8 Chip Carving Sets<br />
o<br />
5 @ $8.95 .....................................<br />
@ $15.95 Cabinetmaker's Chisel Sets<br />
Brad Point Bit Sets<br />
II 0 TOTAL 0<br />
5% COST ___<br />
Cabinetmaker's Screwdriver Sets<br />
Nail/Brad Pliers<br />
Ohio Residents add Tax<br />
___ Method of Payment<br />
Check Bank Americard<br />
II ______<br />
Master Charge<br />
Card Good thru. II<br />
(For MC) Enter 4 digits below<br />
Name<br />
City<br />
$11.95 ..................,<br />
Mail to:<br />
LEICHTUNG, INC.<br />
7 PIECE BRAD POINT<br />
WOOD BIT SET<br />
Made just for wood not metal.<br />
Brad point leads right to razor<br />
sharp flutes so that you drill<br />
the hole exactly where you<br />
want it ... perfectly straight<br />
and cleanly round. Excellent<br />
chip ejection, so no binding.<br />
Fit any %" portable drill or drill<br />
press. Set includes )f,", 3/ 16",<br />
!14", 5/ 16", %", 7/ 16" and W<br />
sizes. Made by German pro's<br />
for pro's ... and "wood·be"<br />
pro's .....<br />
o<br />
$11.95<br />
o<br />
Enclosed is $1.00.<br />
Please send me<br />
your 36 page 1978<br />
FORTHE PLUS NEXT TWO YEARS!<br />
Catalog of Fine<br />
Tools all catalogs,<br />
brochures and new tool bulletins<br />
BONUS,<br />
Enclosed is my order for<br />
Woodw<strong>orking</strong> Tools. As my<br />
please send your 36<br />
___________<br />
FREE!<br />
page 1978 Catalog of Fine Tools<br />
etc. for the next two years<br />
__ _<br />
Address<br />
State<br />
701 Beta Drive #1277 FW<br />
Cleveland, Ohio 44143<br />
19
METHODS (continued)<br />
Convert waste and rough-sawn<br />
material to dressed lu mber, free<br />
of wave and chatter marks. Plane<br />
boards up to 14" wide. Plane<br />
down to 1/16".<br />
Quickly switch from planing<br />
or edging to molding. Select from<br />
41 sets of stock molding knives.<br />
* 1976, 128.<br />
Use for picture frames, miniature<br />
doll furniture, models,<br />
dozens of other workshop tasks.<br />
As described by Popular Mechanics,<br />
November, page<br />
I<br />
WILLIAMS & HUSSEY MACHINE CORP.<br />
ORDER<br />
DEPARTMENT<br />
enclose check NOW.<br />
58.<br />
or<br />
MILfORD.<br />
money Satisfaction order guaranteed.<br />
NH 03055<br />
TE L 603-6733446<br />
Owgmy MASTER Giv CHARGE card info & expire BANKAMERICARD dale. o 0<br />
in amount $ _____<br />
H<br />
________________________ __<br />
Name<br />
L ______________ <br />
(W &<br />
Molder-Planer will be shipped to you from<br />
New Hampshire via truck; wt. 84 Ibs. Pay shipping<br />
charge upon receipt.)<br />
D Handfeed Model W·7 @ S269.00<br />
_<br />
_<br />
DPower Infeed Model W·7PF @S360.00<br />
__________________<br />
DPower In·and·Outfeed Model W·7S @S415.00<br />
___ Street Address<br />
City State Zip<br />
crystals, or you might try begging a few<br />
from your high-school chemistry teacher.<br />
This stain can be used immediately.<br />
We will assume your curly maple<br />
stock is now in the white and you have<br />
it sanded dead smooth. Use a rag swab<br />
to coat the stock with the vinegar stain.<br />
When it dries it should be about the<br />
color of a slate roof --not very pretty.<br />
This stain will penetrate deeply into the<br />
soft spots, but it will only sit on the<br />
surface of the hard stripes. Allow an<br />
hour for drying, or speed it up a bit<br />
with some heat. Now with a good grade<br />
of 220 garnet paper, sand this stain off<br />
the hard stripes ; you will be unable to<br />
sand it off the soft spots where it has<br />
penetrated deeply. Sand a bit more<br />
here and a bit less there to bring out all<br />
the figure . Be sure to use a sanding<br />
block. The stripes are very hard and the<br />
spaces are soft. Sanding without a block<br />
can result in a washboard effect.<br />
Now, using a new swab, stain the<br />
stock with the potassium dichromate<br />
stain. This stain will penetrate those<br />
hard, white stripes and color them a<br />
rich orange-yellow. It will also change<br />
that slate color to a rich dark brown .<br />
When the second stain is dry, sand it<br />
off with a very fine paper. Now put<br />
several drops of boiled linseed oil in the<br />
palm of each hand and rub it in lovingly,<br />
lean back, and feast your eye. The<br />
oil is only to bring out the color. Allow<br />
plenty of drying time before you apply<br />
your favorite finish.<br />
If you prefer to stick to grandpap' s<br />
methods, give it an oil finish. An old<br />
gunsmith put it this way:" ... three<br />
drops of boiled linseed oil and then<br />
three weeks of rub." Use as little oil as<br />
possible to cover the stock.<br />
-Bob Winger, Montoursvzfle, Pa.<br />
Tripod jig<br />
With the aid of this homemade jig,<br />
mortises for tripod table legs can be<br />
routed while the pedestal is on the<br />
lathe, after it is turned cylindrical and<br />
before it is turned to shape. The jig<br />
consists of a triangular box that fits<br />
around the cylinder, with mortises in its<br />
faces to guide a router bit. To build the<br />
jig, fust make a full-scale drawing of<br />
the pedestal bottom and construct an<br />
equilateral triangle around it. Draw<br />
another triangle 112 in. outside the<br />
fust ope, as shown. T: n cut three rectangular<br />
pieces of 1I2-in. plywood to<br />
Rosewoods, Ebonies,<br />
Cocobolo, Wa lnut.<br />
Logs, Lumber,<br />
Flitches, Sawn Veneer.<br />
Wholesale Only,<br />
Dealer Inquiries Invited<br />
s1UYmill<br />
PO Box 329<br />
Nazareth, Pennsylvania 18064<br />
215-759-2837<br />
r:""-"""-"'-'-'-'-'-'-'-'- ""-'--'-'-"""<br />
Build-Restore <br />
Refinish -'-'''.2g !<br />
<br />
anything of<br />
t "<br />
-<br />
I WOOD<br />
<br />
tOO-Page<br />
<br />
<br />
Catalog of woods, veneers,<br />
lr!;<br />
<br />
tools, plans, how-to books <br />
<br />
EXPERTLY match any wood! Any finish! Build<br />
any furniture you need! Constantine, head- <br />
<br />
quarters for woodworkers, offers everything in one giant catalog. Finest woods, veneers, inlays,<br />
borders, cabinet hardware. Wood finishes,<br />
touch-up materials. Cane, rush. Lamp parts. lr!;<br />
Carved moldings, framing. Sliding, revolving <br />
hdwe. Coffee mill kit. Uphol. supplies. Specialty <br />
tools. 2,000 hard-to-find practical products.<br />
TEAR OUT AD. MAIL TODAY.<br />
Road, 10461<br />
CONSTANTINE Est. 1812 <br />
2065 Eastchester Bronx, N.Y. lr!;<br />
lr!;<br />
D Send CATALOG. 5Oc enclosed .<br />
lr!; D ALSO enclosed $5.95 for practical instruction<br />
book-"Veneering Simplified." Save vast sums <br />
beautifying with veneers. Resurface beatup<br />
table tops, chests, etc. Cover cheaper lumber<br />
for cabinets, room dividers, headboards, etc.<br />
<br />
<br />
181 photos guide you step-by-step. IO-day<br />
<br />
Address<br />
money-back guarantee. Perfect supplement to<br />
____________________________<br />
<br />
Name Ztp<br />
<br />
.------ <br />
....-..-.-.- .-.- .-.-....-......-...-.- .-.-<br />
residents<br />
York<br />
<br />
giant catalog of materials. New State<br />
please add applicable tax<br />
<br />
lr!;<br />
<br />
<br />
<br />
Itt:<br />
..<br />
20
good turn<br />
Because of our high volume of sales made on Roll<br />
Top Desk Locks, The Guild offers you a<br />
by availing each unit for $12.00 (prus 6% sales tax<br />
for California residents). This low price also includes<br />
Roll Top<br />
both<br />
Desk<br />
handling<br />
Lock Specifications:<br />
and return postage fees.<br />
For further savings yet, quantity prices are<br />
available on request.<br />
Brass, spring loaded, Strike Plate -1116" x 1" x 2-114"<br />
Brass Front Plate on casing -1116" x 5/S" x3-1/4"<br />
Steel Casing - 5/16" x 1-7/16" x 1-3/4"<br />
Two Nickeled Keys per unit<br />
90804<br />
To obtain your lock(s), indicate quantity requested,<br />
enclose ceck or money order in full amount, and<br />
remit to - The Guild, 2749 East Anaheim Street,<br />
Long Beach. California<br />
l'eG<br />
Fine Antique Restoration of <br />
Furniture 90804 _.<br />
thCZ.tlC<br />
2749 E. Anaheim St. Long Beach, CA <br />
Telephone (Area Code 213) 434-1255 ...<br />
Fine tools for the discriminating<br />
woodworker at attractive prices.<br />
WOODWORKER'S<br />
SUPPLY" ne. \!,·wf1,·.tr.:a<br />
$1.00<br />
Write for our 1977-78 catalog. Please enclose<br />
for postage and handling.<br />
Woodworker's Supply, Inc.<br />
P.O. Box 14117<br />
11200 Menaul NE<br />
Albuquerque, N.M. 87112<br />
Name<br />
Street<br />
______________ _<br />
______________ _<br />
City _______ _ State __ _<br />
Zip Code ____________ _<br />
METHODS (continued)<br />
1I2in.<br />
W V ---Router<br />
Router<br />
<br />
bit enters Base plate ...1 here == ___<br />
the width determined by the drawing<br />
and about twice as long as the mortises<br />
will be. With table-saw blade set at 60·<br />
and plywood held vertically against the<br />
fence, cut the long edges at a 30·<br />
angle. Then cut mortise templates in<br />
the exact center of each piece-a dado<br />
blade simplifies the operation ; chisel<br />
the ends square. The width of the mortises<br />
will vary according to the router bit<br />
and template follower you plan to use.<br />
For the back piece of the jig, bandsaw<br />
an equilateral triangle of 1-3/4-in.<br />
thick scrap wood to fit. Then glue and<br />
nail the four pieces together.<br />
With the pedestal cylinder held by<br />
the tailstock of the lathe, position the<br />
jig and center the headstock spur on its<br />
bottom plate. Triangular spacers may<br />
be inserted between the pedestal and<br />
jig base to adjust the length of the<br />
mortise. Rout the first mortise, turn jig<br />
and pedestal 120· , mortise, and repeat.<br />
To cut dovetail housings (p . 68) , first<br />
remove the bulk of the wood with a<br />
straight bit the diameter of the dovetail<br />
waists, then rout out the sloping sides<br />
with a dovetail bit.<br />
-Lyle Terrell, New Orleans, La.<br />
Rubber clamps<br />
Over the years I have refinished several<br />
old pieces with delicate curved surfaces<br />
and very hard-to-redo finishes,<br />
where normal clamps just won 't work<br />
well . I tried string tourniquets with not<br />
too great results. Aviation bungee cord<br />
worked well but is expensive and hard<br />
to find. Now I use tire tubes cut in long<br />
ribbons. Bound around any surface<br />
they conform to shape and apply a very<br />
satisfactory even pressure. The more<br />
wraps, the more pressure. I cut ribbons<br />
about 1-1 /2 in. wide, stretch each wrap<br />
as tightly as I can and tie off the end<br />
with an overlap.<br />
-c. H. Dimmick, Sparta, N. }.<br />
"-"-'-"""-'f"""l<br />
IUIMrA11<br />
I<br />
I<br />
,<br />
I<br />
I ,<br />
! J<br />
unimat the precision lathe that converts to ver· t<br />
tical mill, drill press, surface grinder and polisher<br />
'<br />
...<br />
-over 100,000 in use by R & D labs, inventors, -,<br />
i<br />
hObbyists and precision machinists. A complete<br />
i,machine shop in miniature. Reg. $229.95. Add<br />
$5.00 for shipping. ,<br />
(1000.A3 Unlmat 5·in·l shop $184.50<br />
I ", <br />
I ®f':-<br />
I<br />
lunimat-5.in.l Machine Shop-World Famous<br />
,<br />
,<br />
,<br />
I<br />
I C... <br />
i<br />
, J;Jl<br />
T 9='iijI_<br />
fHargraVe Miter Frame Clam p-Clamps all four<br />
icorners at one time. Quickly adiusted. Absolutely<br />
, accurate. Aluminum alloy corner blocks. Screws<br />
i<br />
......<br />
and adiusting nuts are steel. Capacity 2 to 14"<br />
' Add S1 .00 for shipping.<br />
F80.CIS Miter Frame Clamp .... . ... $11.25<br />
Hargrave Extension Screws-Each set increases<br />
I ..<br />
capacity of No. 780 clamp 12". Any number of<br />
extensions may be used.<br />
.75<br />
No. 780·E available only<br />
in sets of four. Add for shipping.<br />
780E·C15 Set of 4 Extension Screws .. $5.29<br />
Sand·O·Flex Contour Sander<br />
I<br />
Kil-For curved or<br />
fiat surfaces. Firm cushioning bristles force<br />
'12"%" lJ.,." 6" x<br />
abrasive strips into, around and over corners,<br />
small openings, convex and concave surfaces.<br />
Aluminum wheel contains 80" to 150" of abrasive<br />
I<br />
- cloth strips, which is fed out as used. Use on<br />
metal, wood, fiberglass or ceramics. No iob too<br />
tough. Kit contains #350·R wheel, dia. 1"<br />
wide by bore, 3 abrasive refills in assorted<br />
i<br />
grits for wood or metal sanding, shank adap·<br />
I ter to fit chucks, and an arbor reducer bushing<br />
Add $1 .5G-Reg. $24.95.<br />
35·M2<br />
,<br />
Sand·Q·Flex Sander . .. ... . .... $17.98 1<br />
I<br />
%" to<br />
included.<br />
I RECORD<br />
i Dual<br />
, Record WOOdworkers' Vises-The finest vise<br />
Action<br />
7"<br />
made. "Toe·inll Jaws give even gripping<br />
I Screw. power.<br />
Quick action special buttress<br />
threads increase grip with tension. Built·in adi.<br />
,<br />
"Dog" on front iaw. 520-711 Jaw, opens 8" Wt.<br />
1<br />
i<br />
6<br />
22 Ibs. 521/20-9" Jaw, opens 13". Wt. 40 Ibs. Add<br />
shipping cost to price of vise. (Ask you Post<br />
, office.)<br />
52D·Rl0 Vise-22 Ibs. " ....... $34.50<br />
i<br />
, 52V2D.Rl0 9" Vise-40 Ibs. . .... $47.50<br />
No. 59 Stanley Doweling Jig-Make boring dowel<br />
I<br />
... .. holes in edge, end or surface of boards easy<br />
,<br />
complete with guides ' to 'I2" -with depth<br />
gage. Add .7 for hipping. Reg. 523.45.<br />
, 59.S19 Doweling Jig<br />
4'12" 100%<br />
.. . ..... . . .. $15.39<br />
Palm grip design for one hand<br />
use. Thumb control SWitch, off·<br />
sel pad for 4 way flush sanding,<br />
12,000 OPM.<br />
Ball<br />
Bearing, 5/64" Orbit, 2 Amps.<br />
Direct Motor to pad design.<br />
Pad size x 41/.". Add $2.00<br />
for shipping. Reg. $64.99.<br />
44IO(330)·R7 . .... ..... $47.98<br />
Rockwell Speed· Bloc Sander-<br />
, i<br />
,<br />
,<br />
,<br />
,<br />
,<br />
i SILVO (BRAt-ID t-IAMEI TOOL CATALOG<br />
' THOUSANDS OF EXCITING TOOL VALUES:<br />
Stanley, Wen, Speedy·Sprayers, Milwaukee, Rock·<br />
Wiss, Channel·lock, General, Pony Clamps and<br />
I i many Nationally Advertised brands of lools and<br />
well, Dremel, Skil, Nicholson, Disston, Mil lers<br />
Falls, Helios, Wellsaw, Plumb, Kennedy, Huot,<br />
Ridgid, Crescent, Vise·Grip, Audel Books, Unimat,<br />
, supplies. We ship Coast to Coast at prices hard<br />
to beat. Send $1.00 for our big S I L VO TOOL i I<br />
ct.-.c"-":.-c"-""-'I 107 19106<br />
CATALOG today. ,<br />
I SILVO HARDWARE CO. I<br />
Walnut St., Dept. FW8·2 Phila., Pa.<br />
• I<br />
t<br />
21
Q&A ____ _<br />
Consulting editors Andy Marlow and<br />
George Frank invite questions from<br />
readers about cabinetmaking and finishing.<br />
And we invite readers to join<br />
the discussion with their own answers to<br />
problems raised in this column, for although<br />
Marlow and Frank have about a<br />
century of experience in the woodw<strong>orking</strong><br />
arts, there 's always more to<br />
learn. WriteQIA, Fine Woodw<strong>orking</strong>,<br />
Box 355, Newtown, Conn. 06470.<br />
A unique collection of Old Fashioned<br />
cut nails guaranteed to charm all<br />
interested in the memorabilia of<br />
Early American building. Included<br />
in the package is a description of<br />
the history of Cut Nail making in<br />
America.<br />
Mass. residents add 5% sales tax<br />
20 Nail Kit $3.00 ppd.<br />
SEND FOR OUR<br />
P.O.<br />
FREE<br />
Box<br />
CATALOG TODAY<br />
TREMONT<br />
Wareham, III Mass. Dept. FW<br />
NAIL CO.<br />
02571<br />
127<br />
DAVID POWE LL & JOHN TI ERNEY ANNOUNCE<br />
THE LEEDS DESIGN WORKSHOPS<br />
The Leeds Design Workshops houses Residents<br />
and the Intern Program . RES IDE N C Y is an<br />
opportunity for the designer / maker of fine<br />
furniture whose work is aimed toward individual<br />
commissions to operate his or her own business in<br />
the stimulating environment created by proximity<br />
to a number of others w<strong>orking</strong> in the same field.A<br />
resident has a private workbench space with ready<br />
access to an unusually well equipped machine<br />
shop 'THE I NTERN PROGRAM is a course of study<br />
and practice for the serious student in the design<br />
and making of fine furniture ' We are currently<br />
interviewing for both<br />
1<br />
Residency and Internship.<br />
01027'<br />
For further information please write or call Leeds<br />
Design Workshops, Cottage Street · Easthampton<br />
Massachusetts '<br />
413-527-4718<br />
Tel.<br />
First, a number of recent questions<br />
concern moisture, warp and shrinkage.<br />
Richard O. Phipps of Gilbertsville, Pa. ,<br />
who builds early American furniture of<br />
select white pine in a small shop without<br />
heavy machinery, summarizes the<br />
problem : "To my frustration , almost<br />
every piece of wood I pick up is warped<br />
either in length or width ... I see all this<br />
beautiful furniture on the market and<br />
just toss up my hands in disgust-it<br />
seems impossible to obtain a perfectly<br />
straight board."<br />
Marlow replies : " The major cause of<br />
cupping is improper seasoning-the<br />
wood is not in equilibrium with the<br />
moisture contained in the air ("Water<br />
and Wood," Fall '76, p. 20). Pine is<br />
particularly susceptible because of the<br />
speed with which it is hurried through<br />
its journey from standing tree to the<br />
board in your shop. After the tree is<br />
felled and sawn it is shoved through a<br />
kiln for about half the time it should<br />
be. Then the boards are graded and<br />
planed and often stacked directly onto<br />
a freight car, one board right on top of<br />
another with no air in between.<br />
" When you buy pine, take it indoors<br />
and sticker it well for several weeks so it<br />
can dry and adjust. If you have to use it<br />
soon after purchase, cut the lumber to<br />
rough length and stand it on end with<br />
several inches of air all around. Hold it<br />
upright and away from the wall by<br />
tacking a thin, pliable strip to the end.<br />
" These are measures for preventing<br />
cup and warp . Flattening cupped<br />
boards is another matter, and there are<br />
twO ways to do it permanently. One,<br />
rip each board into a number of strips,<br />
joint the sawn edges square, and glue<br />
back into a single unit. Two , handplane<br />
the concave side until a straightedge<br />
placed across the board will touch<br />
both edges and the center. Then the<br />
board may be fed through a thickness<br />
planer, ftrst smoothing the convex side,<br />
then the hand-planed side. This will do<br />
22
PARKS 12" THICKNESS<br />
PLANER<br />
MORE •<br />
40,000 THAN<br />
IN USE<br />
OVER ALL<br />
WORLD THE<br />
The PARKS No. 95 is a com pac t .<br />
sturdy thickness planer that offers mill planer<br />
precision and ruggedness at a sensationally low<br />
price! Write for complete descriptive literature on<br />
the No. 95<br />
THE PAR<br />
Planer.<br />
K S<br />
as<br />
WOOOWORKING<br />
well as on PARKS<br />
MACHINE<br />
wood·and<br />
CO.<br />
metal·cutting Band Saws; Planer·Jointer Combination<br />
Machines; horizontal and vertical. manual and auto·<br />
matic Panel Saws.<br />
Manufacturers Dept 01 FW, Quality Since 1501 Knowlton 1887 Woodw<strong>orking</strong> 45223 S1. Machines<br />
Cincinnati, Ohio<br />
OLSON<br />
Precision Made<br />
Scroll Wood Coping Band & Jig Saw Saw Saw Blades Blades<br />
CustOIIl Specialty Saw Blades Blades<br />
Finest Quality. Highest Accuracy.<br />
J.,., THE OLSON SAW COMPANY<br />
A Bethel. DIVISION CT OF BLACKSTONE INDUSTRIES. INC<br />
Longest Cutting Life.'<br />
Write Willard A.<br />
06801 •<br />
Nelson,<br />
(2031<br />
SIs.<br />
792·8622<br />
Mgr.<br />
16"<br />
PLYWOOD<br />
'I." Vo"-$ Furniture<br />
4.00 3.00 Oak<br />
and Cabinet Grade<br />
W- 6.00 '/11" Vo" -$4.00<br />
"-<br />
Birch Multl·Ply<br />
B.OO Ash ." - 4.SO<br />
W -$4.00 9.00 %" 'II" 'I." -$3.00 4.00<br />
Mahogany<br />
(Waterproof)<br />
." 'I."-$ 10.00 5.00 'I." ." -$4.75<br />
." W' - 6.00 7.00<br />
9.75 'II" -53.00 9.SO<br />
Bauwood<br />
'14" "-$ -$<br />
pes.<br />
6.00<br />
of 7.SO %" 'II" 'I." -$2.50<br />
3.SO<br />
Ramln<br />
- 4.50 'II" 'II" -$3.00<br />
'/11"<br />
Poplar<br />
'I." --$2.25<br />
2.75 3.25<br />
Walnut<br />
(For Doll Houses)<br />
'II",'I,,", Lauan<br />
V,"<br />
Maple<br />
Please add 15% your total for mailing. Will quote on cut<br />
to size and aircraft plywood. Stock price list on reo<br />
quest.<br />
$6.9"x12" $7.9"x16" pes. $5.9"x12" Mlled)<br />
- Hobby Package Specl., Po.tpald -<br />
Ramin<br />
I<br />
M •••.<br />
$4.9"x<br />
01462 Box 141-W<br />
pes.<br />
pes.<br />
8" pes.<br />
VIOLETTE PLYWOOD CORP.,<br />
Lunenburg,<br />
." - 10.00<br />
Cherry<br />
of & (25 pes. Birch. Lauan<br />
" - 9.00<br />
Knotty·Plne<br />
x 48" sheets.<br />
BANJO<br />
)()TS &.. PARTS<br />
for a free catalogue. write:<br />
STEWART<br />
MACDONALD<br />
BOX 900 ATHENS. OHIO<br />
45701<br />
Q & A (continued)<br />
a perfect job, if enough wood thickness<br />
remalllS.<br />
"If a large power jointer is available,<br />
it may be used to flatten the concave<br />
side. But do not even hope to remove a<br />
warp with the thickness planer alone.<br />
The pressure of the feed rolls will<br />
flatten it, but on leaving the planer it<br />
will spring back to the original warp.<br />
Both measures are worthless if the wood<br />
isn't thoroughly seasoned first.<br />
''Longitudinal bow can be solved<br />
only by making up a panel width from<br />
two pieces with about the same bow.<br />
Edge.glue the two pieces together with<br />
one bow facing up, the other down.<br />
Use slow·setting glue and start clamp·<br />
ing in the center. Work toward each<br />
end, using a block and a heavy hammer<br />
to pull the joint even. Good luck."<br />
To Dennis S. Kinnel, whose resawn<br />
stock cups : Marlow explains that al·<br />
though the board may have seemed<br />
dry, the interior must have been wetter<br />
than the surface. The newly sawn<br />
surfaces therefore dry until they are in<br />
equilibrium with the original surface ,<br />
shrink, and pull the board concave.<br />
One solution is to season the wood<br />
thoroughly before resawing, thereby<br />
eliminating these stresses . Reader Guy<br />
Bradt of San .Carlos, Calif. , suggests an<br />
opposite approach : "Store the lumber .<br />
in a damp place for several days before<br />
resawing to equalize the moisture in<br />
the middle and outside." In either<br />
case, after resawing sticker the wood on<br />
a flat place to allow it to stabilize.<br />
Reader Marcella Hudek, of Platte,<br />
S. D., writes : "I'm making a large,<br />
rolltop bread box. My problem is find·<br />
ing a sealer for the wood that won't retain<br />
an odor, so it doesn't contaminate<br />
my breads."<br />
Frank replies : " Buy a good brand of<br />
shellac, white for light wood, orange<br />
for dark. Make sure it is fresh since old<br />
shellac won't dry properly, and keep it<br />
in a glass container. Cut it one measure<br />
of shellac to three of alcohol, and apply<br />
two or three even coats with a soft<br />
brush. Let each coat dry thoroughly and<br />
sandpaper with a fine grit between<br />
coats. When the third coat is dry, cut<br />
the finish with 4/0 or 5/0 steel<br />
wool-rub until it is very smooth to the<br />
touch. Then apply a thin coat of paste<br />
wax, let it dry and rub clean with an old<br />
wool sock. The secret is to use very little<br />
DREMEL<br />
VARIABLE SPEED<br />
MOTO-TOOL.<br />
•<br />
Drills, carves, saws, shapes, routs,<br />
sands.<br />
Cuts in any direction In any kind<br />
• wood<br />
of wood.<br />
through knots and Imperfections<br />
as easily as clear .<br />
Dial fast s peed s forworklng in hard<br />
Goes<br />
woods, slow speeds for softwoods.<br />
Consists of Mota-Tool 381 with built-in<br />
fingertip<br />
see 5<br />
speed control, 34 accessorles<br />
and storage case. other kits<br />
available.<br />
your favorite<br />
Co.,<br />
w ood carving<br />
supply store, hobby,<br />
53406. FW-12<br />
cran or hardware<br />
dealer. Dremel Mfg. Division of<br />
Emerson Electric Dept.<br />
Racine, Wisconsin<br />
DREMEL:<br />
If you're really serious<br />
about w ood carving.<br />
23
Exp.<br />
Two indis pensable<br />
tools only from<br />
'1CONOVER<br />
art<br />
course,<br />
back<br />
Blind nailing is the woodcrafts man' s of<br />
hiding a nail hole by<br />
will<br />
raising up a curl or chip with<br />
a chisel, driving the nail into the groove thus<br />
created, and gluing the chip down. Conover<br />
2H<br />
has developed a unique tool that make you<br />
an instant master of this tricky technique.<br />
is<br />
It's<br />
called, of the Conover Blind Nailer.<br />
The tool is only long, cast of brass and<br />
ing<br />
fitted<br />
until<br />
with<br />
you This<br />
a warranted steel blade. It easily and<br />
positively adjusted by means of a captive screw<br />
under the blade. ensures constant position<br />
change it.<br />
from<br />
The Conover Blind Nailer has many other<br />
uses in marguetry, veneering, inlaying and<br />
inJetting small escutcheons. And it's available<br />
only Conover.<br />
$18.50<br />
Another priceless<br />
correct<br />
2lj.(<br />
addition to the Conover<br />
screw.<br />
line<br />
of small tools is the precision scraper plane.<br />
This remarkable little tool is only long. It<br />
has heavy brass side plates, multi-riveted and<br />
permanently bonded to a cheny wood core. The<br />
warranted steel blade travels<br />
will<br />
up and down the<br />
vertical channels milled into the side plates. It is<br />
locked into the position by<br />
also<br />
a set<br />
This predsion scraper bring your fine<br />
work to perfect smoothness with no danger of<br />
marring or scoring the surface. It is excellent<br />
for removing old finishes.<br />
And it's available only from Conover.<br />
PleBe<br />
$20.50<br />
___ Plane<br />
4%<br />
ship the<br />
Blind<br />
:<br />
(OIrW Nailer rrsidms @ odd $18.50 OIrW Salts T lUI<br />
Conover Scrape r<br />
Conover each<br />
@ $lO.50<br />
my<br />
each<br />
with first order.<br />
___<br />
_ _-refundable full for<br />
Visa _<br />
Send me your roIor<br />
__<br />
catalog<br />
__<br />
only $1.00<br />
check<br />
Mastercharge<br />
Charge No. date<br />
As NMne<br />
_<br />
_____________ __ __<br />
Oty State __<br />
44080<br />
___ Zip ___ _ Conover Woodcraft Parlunan. Inc. Specialties,<br />
18124 Mldison (216) S48-SS91<br />
ROiltd.<br />
phone<br />
Ohio<br />
Q & A (continued)<br />
finishing materials and a lot of rubbing<br />
and sanding."<br />
To Daniel Milano, who needs a tool<br />
to make the slots for fiche hinges :<br />
Trevor Robinson of Amherst; Mass.,<br />
says the tool is called a Fischbandeisen<br />
in German. "It is used in Europe to<br />
make slots for the hinges used in casement<br />
windows. There are several designs<br />
; the simplest is sketched below.<br />
The thickness of the blade is equal to<br />
the thickness of the hinge leaf. "<br />
To Van Wagner, who needs a non·<br />
toxic finish for a butcher-block countertop<br />
: George Frank replies : "I finished<br />
my butcher block with polyurethane<br />
varnish. Cut the first coat three parts to<br />
one of thinner, apply it generously to<br />
all sides of the block, let sit for about<br />
ten minutes and rub off vigorously with<br />
a cloth. Let it dry overnight. Then<br />
brush on two coats of varnish diluted<br />
about two parts to one of thinner, with·<br />
out rubbing it off. This produces a thin<br />
coating but still a solid protection, and<br />
no smell whatsoever. Or, mix two parts<br />
of boiled linseed oil with one of turpen·<br />
tine and one of some good brand of<br />
spar varnish, apply three or four<br />
coatings and energetically rub off the<br />
excess each time."<br />
Eric Rasmussen of Berkeley, Calif. ,<br />
says butchers use melted paraffin .<br />
"Paint the surface of the block, and<br />
scrape off the excess wax with a cabinet<br />
scraper. Repeat three or four times.<br />
Then rub a little mineral oil into the<br />
surface from time to time to keep it<br />
looking beautiful. To clean it, scrape it<br />
lightly and wash with hot water and<br />
ammonia."<br />
To Kenneth Carl, who wants to<br />
finish birds carved in vermilion wood<br />
without darkening its bright color : Al·<br />
though Frank is not familiar with vermilion<br />
wood, he suggests you try an old<br />
method for finishing bright-colored<br />
woods without darkening them. " The<br />
answer lies not with the finish material,<br />
but with the tricky way of applying it.<br />
My choice would be fresh white shellac ,<br />
but you can use picture varnish or<br />
m WE<br />
WON'T TELL<br />
YOU THAT WE ARE<br />
A GOOD HARDWOOD<br />
COMPANY . . .<br />
I just don't see why someone would want to buy hard·<br />
We'll let one of our customers tell you.<br />
&<br />
wood lumber from anyone else."<br />
Jon Sloan<br />
Grafton S1.<br />
San Franciscc, Cal.<br />
AUSTIN HARDWOODS, 78704<br />
Fine Domeslic Imported<br />
2125 INC.<br />
Hardwood lumber only.<br />
Calalogue 50¢<br />
GOODRICH-MAil ORDER DEPT.<br />
AUSTIN, TEXAS<br />
. . . your prompt. personal service and quality lumber<br />
is a welcome surprise. Add to that the larger number of<br />
diNerent woods and the ccmparatively lower prices, and<br />
Duo Pneumatic<br />
1500<br />
Drum Sander<br />
Sands convex and concave parts.<br />
Pump in enough<br />
SAND-RITE<br />
air to conform to shape<br />
and sand on<br />
Ogden<br />
a "puff of air."<br />
Write for free brochure,<br />
60610<br />
MFG. CO.<br />
North<br />
Chicago, Ill.<br />
Avenue<br />
A GREAT NEW<br />
CATALOG FOR<br />
SERIOUS<br />
WOODWORKERS.<br />
Educational Lumber Company has<br />
specialized in Appalachian hardwoods<br />
since 1951 . We sell kiln dried, cabinet<br />
grade wood and guarantee every<br />
board foot we ship.<br />
We have a good supply of hard-tofind<br />
veneers and turnings.<br />
We offer exceptional values in<br />
instructional books on woodw<strong>orking</strong>.<br />
We sell at delivered prices.<br />
50
Q & A (continued)<br />
water-white lacquer. The trick is to get<br />
the finishing material to contact the<br />
wood and dry at the same time, so the<br />
carrying agent (alcohol, thinner or turpentine)<br />
has no time to enter the pores<br />
of the wood and darken it . I would use<br />
an air brush of the type commercial<br />
artists use, or a mouth sprayer, which<br />
you can buy for a couple of dollars at an<br />
art-supply store. Regulate it to spray as<br />
much air and as little finish as possible,<br />
and hold it far from the work. The rust<br />
coat must be infinitely light and thin.<br />
Succeeding applications can be a little<br />
heavier, but you must not rush. It will<br />
take a certain amount of skill and a<br />
great deal of patience. You could also<br />
try two coats of a dilute, lukewarm solution<br />
of bleached hide glue, well<br />
sanded, under any clear finish ."<br />
To Harold Kauffman, who makes<br />
clock cases of pine and is plagued by<br />
pitch streaks breaking through his walnut<br />
stain and varnish : George Frank<br />
replies, "This is an age-old problem<br />
and the easiest way to deal with it is to<br />
select a better grade of pine with less<br />
pitch. The second solution, which I<br />
learned in school but have never tried,<br />
is to wash down the pine before finishing<br />
with a fairly strong solution of lye,<br />
rinse with clear water, let dry and sand.<br />
The lye should remove most of the<br />
pitch, and it would increase the contrast<br />
between the hard and soft grain,<br />
making the pine more attractive. A<br />
third way, which I have done, is to set a<br />
match to the pitch and burn it out,<br />
then clean the hole and fill with tinted<br />
plaster or stick shellac. The difficulty is,<br />
you can do it only when a teardrop of<br />
pitch is visible on the wood."<br />
Guy Bradt of San Carlos, Calif. , believes<br />
the problem is caused by improper<br />
seasoning, " since it takes a minimum<br />
of 1380 F to crystallize pitch in<br />
ponderosa and sugar pine. I suggest<br />
putting the blanks for the case parts in<br />
the oven at 1500 F for half an hour.<br />
This seems to eliminate bleeding."<br />
Reader Jonathan Wagman of Ulster<br />
Park, N. Y., asks : "How shall I finish<br />
my redwood picnic table and benches?<br />
The store advised a redwood stain,<br />
which turned out to be mostly paint<br />
and flaked off. We've sanded it down<br />
to the bare wood."<br />
Frank replies : " Redwood is so beautiful<br />
it doesn't need any stain to en-<br />
U.sA. Headquarters, for<br />
of the highest quality clock kits and parts.<br />
Solid American hardwood clock case kits,<br />
finest West German clock movements, exceptional<br />
dials,<br />
&<br />
clock hardware, hands, parts,<br />
tools, books, etc. Choose from replicas of<br />
grandfather, grandmother, wall, mantel,<br />
shelf, school novelty clocks.<br />
largest selec the tion<br />
NEW 100 PAGE<br />
CATALOG<br />
Completely revised .....<br />
more clock<br />
75¢<br />
kits ... more<br />
hardware ...... fm ished<br />
clocks ... barometers ...<br />
Dept. 14, St. Charles,<br />
music boxes ... etc., etc.<br />
Send to:<br />
CR AFf PRODUCTS CO.<br />
IL 60174<br />
Your finesl proJed ••.<br />
a console for<br />
thegreal<br />
Scholle r Organl<br />
Building a console to house one of the<br />
world's fine organs is an especially rewarding<br />
experience for any woodworker.<br />
Schober woodwork is supplied in kit<br />
form-pre-cut and drilled wood pieces with<br />
step-by-step assembly and easy finishing<br />
instructions. Or you may prefer to build<br />
your own console from scratch, using our<br />
full set of cabinetmaker's drawings.<br />
But before doing any woodwork-you<br />
assemble the electronics and mechanics.<br />
With our clear, nontechnical instructions,<br />
anyone can do the simple, enjoyable<br />
printed-circuit soldering and screw-and-nut<br />
fastening. And you'll have one ofthe world's<br />
finest musical instruments. The pride and<br />
pleasure of assembling the organ and building<br />
its console yourself is something you<br />
couldn't buy at any price!<br />
When the organ is complete, Schober<br />
will help you learn to play, even if you've<br />
never played a note before! The Schober<br />
Organ compares favorably with<br />
T- HH<br />
Super Epoxy Adhes ive<br />
-88<br />
The finest wood binding<br />
epoxy adhesive on the<br />
F. 350<br />
market. T will cure at<br />
1<br />
temperatures as low as<br />
without shrinking. This<br />
strong, durable 1: mix will<br />
adhere to moist surfaces<br />
and is very easy to use<br />
even if you're inexperienced.<br />
Clear amber formula<br />
forms virtually invisible<br />
joints.<br />
Introductory offer<br />
For<br />
P. P.O. U.S. only.<br />
fine more Chem· information Tech products, on T ·88 and other<br />
pt. $6.65 Qt. $1 0.50 gal.<br />
write to:<br />
$31 .50<br />
liN 4481 GREENWOLD<br />
116 CANADA ROAD DEPT. CLEVElAND. II.<br />
IIH 7PI<br />
OHIO .•. 44121 INC.<br />
GHcm'YCGH<br />
WRIT' TO:<br />
IIIWI. " OTHII5 INTI.,.ISI, DIPT<br />
MIlVIN IYINUI<br />
HAMILTON, ONTA.IO<br />
"ready-<br />
two<br />
made" organs costing twice as much. (The<br />
five models range from $650 to $2850.)<br />
Yo u can purchase Schober kits in sections<br />
to spread costs out, or you can have<br />
---------------------<br />
year time payments.<br />
You can have all the details, without<br />
FW-2<br />
cost or obligation. Just send the coupon for<br />
the fascinating Schober color catalog (or<br />
enclose $1 for a record that lets you hear<br />
the Schoberquality.) Mail the coupon NOW!<br />
43 Organ Corp., Dept. ; WIest Slreel, New York, N.Y. 10023<br />
Ttte<br />
0<br />
ffclwle'l :<br />
I<br />
music.<br />
81.1 I<br />
I Please send me Schober Organ Catalog. I<br />
I Enclosed please lind $1.00 lor 12·inch L.P. I<br />
Schober Organ ADDRESS<br />
I I<br />
NAME<br />
CITY STATE ZIP I<br />
I<br />
I record 01<br />
'----<br />
---------------------<br />
I<br />
25
NO-RISK TRIAL GUARANTEE<br />
US. or wrlle: COUpon<br />
Twice<br />
The<br />
Turning<br />
Power.<br />
Major hand break tools thru<br />
In<br />
ratchets<br />
The Easydriver® ratchet tool<br />
system. Ball head with<br />
9ivell you twice the turning<br />
power of conventional screwdrivers<br />
or nutdrivers. Insert<br />
shaft in one end to drive-other<br />
to loosen.<br />
Interchangeable shafts, bits<br />
and socket adapters give you<br />
six tools in one! Lets you<br />
handle even the most stubborn<br />
screws, nuts anc bolts. Also<br />
solves problems of grip since<br />
ball allows straight arm torque.<br />
And with the unique ratchets<br />
"'''".,;., OYer SIX TOOLS 7" IN ONE! &<br />
there's no need to red uce<br />
pressure or change position.<br />
two 30<br />
Complete<br />
kit. diflerent .,.;"." II I<br />
Kit NOW ONLY<br />
$14.95<br />
Incls: ball, steet shall, three<br />
I<br />
industria' bits (Phillips<br />
01 Londonderry, Vt. II<br />
'lOlled), screwdriver shall.<br />
socket adapters and<br />
I<br />
sloraoe<br />
• I<br />
05148<br />
days. If not satisfied,<br />
30 Whit. Product. Inc.<br />
ORDER NOW! Try for<br />
__<br />
return for refund.<br />
Rush me Easydriver®KIt(s) at $14.95<br />
each, Includes shipping/handling.<br />
_________ & &<br />
DSend me FREE brochure.<br />
Send Dcheck (no COD's) or charge to: D Bank<br />
Am. DMaster Ch. DAm. Ex. Include bank<br />
___<br />
card numbers, expo date signature.<br />
Name(Print)<br />
Address<br />
City State Zip<br />
Delmhorst Model G·22<br />
Wood Moisture Detector<br />
SOLID STATE<br />
COM PACT<br />
LIGHT WEIGHT<br />
DIRECT READING<br />
6% TO 30% WOOD<br />
MOISTU RE RANGE<br />
This is an excellent all-purpose instrument<br />
for use in plants, mills, or by the<br />
individual craftsman.<br />
It is normally sold with the Type 4E<br />
Electrode, 4-pin, 5/16" penetration. However,<br />
any other electrode can be used<br />
pocket-size<br />
with it, either in place of, or in addition<br />
to the 4E, thus making it a very versatile,<br />
efficient tool in the hands of anyone concerned<br />
with the best utilization of wood.<br />
Other Delmhorst wood<br />
moisture testers include<br />
the Model-J<br />
series and the standard<br />
wide-range RC-1C and<br />
RC-2.<br />
All inquiries are welcome.<br />
<strong>Free</strong> literature.<br />
Q & A (continued)<br />
hance it. It also resists fungus and<br />
weather quite well. Mix equal amounts<br />
of boiled linseed oil and any good<br />
brand of varnish. Spread this mixture<br />
generously on the furniture, but before<br />
it dries-about 15 minutes ro a halfhour<br />
later-wipe off all that you possibly<br />
can . Use a burlap-type rag, and<br />
plenty of elbow grease. The very thin<br />
coating that remains in the wood will<br />
offer surprisingly good protection and<br />
it can be still improved by repetition.<br />
Give each application a week to dry and<br />
put the emphasis on the rubbing-that<br />
is what makes it beautiful."<br />
To W. H. Baldwin, who is looking<br />
for bulk abrasives : Charles Haber of<br />
Huntington Beach, Calif. , notes that<br />
hobby shops catering ro rock hounds<br />
sell bulk carborundum in a variety of<br />
grits.<br />
More about earlier questions : Several<br />
readers warn that vegetable oils used<br />
to finish salad bowls eventually turn<br />
rancid in the wood and taint the food.<br />
Although mineral oil in large quantities<br />
may rob the body of vitamins, the<br />
tiny amount that might enter the salad<br />
is harmless. Marty Sweet of Fairfax,<br />
Calif. , adds : ' 'One can also use<br />
coconut oil or lemon oil, neither of<br />
which will decay. Of course any oil<br />
finish will be far better if it is applied<br />
hot and rubbed with 600-grit paper<br />
soaked with the oil of choice. I ,<br />
Re the difficulty of bonding veneer<br />
to particle board : Henry Kramer of<br />
Somerville, N. ]., says , "Give it up.<br />
Don't try to put nice veneer on particle<br />
board." Marlow agrees : "I wouldn't<br />
use the stuff on a doghouse. Bond veneer<br />
to a good grade of plywood."<br />
But George Kahn of Potsdam, N. Y. ,<br />
writes that tight finances have forced<br />
him to experiment with particle board.<br />
He has concluded that the critical problem<br />
is moisture-veneer lifts because<br />
the wood chips in the board weren't dry<br />
at the time of manufacture. His answer<br />
is, "First make sure your particle board<br />
is dry-air dry it for at least a month at<br />
room temperature. Second, seal it with<br />
shellac sealer or lacquer cut 50% with<br />
thinner, and add a tablespoon of Japan<br />
dryer per half-gallon of mixture. Three<br />
light coats make a superb gluing surface<br />
; roughen the lacquer with 220-grit<br />
paper before applying contact cement. "<br />
POLYETHYLENE Gl YeOl,<br />
the new wood stabilizer and<br />
chemical seasoning agent.<br />
Make crack-free table tops<br />
from log cross sections and<br />
flawless bowls and carvings<br />
from green scrap wood. Also<br />
wood finishes, clock kits and<br />
related products. Illustrated<br />
catalog and brochure 50c.<br />
The Crane Creek Company<br />
Box 5553<br />
Madison, Wisconsin 53705<br />
Superior.<br />
The Mason &' Sullivan<br />
Clock y ou build.<br />
diffe rent styles<br />
19<br />
The finest woods and<br />
imported movements<br />
distinguish Mason &<br />
Sullivan's<br />
FWD. /39 02655.<br />
fo r catalog alone to:<br />
MASON &SULLIVAN CO.<br />
Dept. Blossom Ave.<br />
Osterville, Mass.<br />
offloor, waiL and mantel<br />
clocks-all replicas of classic<br />
antiques. Send $1 fo r catalog<br />
and plans to build grandfa<br />
ther clock shown, or 50c<br />
Cherry - Oak - Walnut -<br />
Mahogany -- Teak -- Sugar<br />
Pine and many more. Our<br />
prices and quality will please<br />
you. No Mail Orders. Come to<br />
our warehouse - pick and see<br />
what<br />
Ask<br />
you want. Our<br />
McCarthy<br />
stocks are<br />
large and varied .<br />
for Tom<br />
INTERSTATE HARDWOOD<br />
LUMBER CO. , INC.<br />
850 FLORA STREET<br />
ELIZABETH, N.J. 07201<br />
Tel. (201) 353-5661<br />
262 CENTRAL AVE. HOT SPRINGS, AR 71901<br />
If you use woodw<strong>orking</strong> tools,<br />
you owe it to yourself to use<br />
a Smith Stone.<br />
We have the largest selection of<br />
Natural Arkansas Stones<br />
to be found anywhere.<br />
ZIP<br />
Full Color Mail Order Catalog Available on Request.<br />
___ __<br />
CITY STAT"-.<br />
NAME ________________________<br />
_<br />
______________________ __<br />
ADDRESS<br />
E ____<br />
26
BOOKS ____ _<br />
SINCE 1937<br />
K·LlNE<br />
ER<br />
YAGER<br />
• fed _ • 3<br />
BAll BEARING CUTIERHEAD<br />
The perfect thickness planer tor cabinet makers,<br />
home wor1
-171<br />
general<br />
WCDdcraft<br />
15 species of Hardwood<br />
in stock<br />
Hard wood Plywood ,<br />
-New<br />
and Veneers.<br />
100 Blinman St. London, Ct . 06320<br />
(203) 442-3445 (203) 442-2545<br />
LARGE<br />
DOVETAIL<br />
TEMPLATES<br />
J 14"<br />
Producing<br />
3"<br />
a through-dovetail join t<br />
rapidly and accurately in stock up<br />
to thickness. One-inch dovetails<br />
on cen ters for fine fu rniture.<br />
With carbide router bits.<br />
DA VID A. KELLER<br />
STAR ROUTE, BOLINAS, CA 94924<br />
The lathe that made the English<br />
woodturners great <br />
smooooth running because it<br />
is made on the same equipment<br />
that makes cylindrical grinders.<br />
Choice of all the famous<br />
English woodturners. We ship<br />
immediately. Phone orders accepted<br />
on your charge card.<br />
HAND 50¢<br />
BIG TOOL CATALOG!<br />
Send with name, address<br />
and zip.<br />
Send for free literature.<br />
(312) 644-5999.<br />
FROG TOOL CO. LTD<br />
L, 541<br />
N. Franklin<br />
IL 60610<br />
BOOKS (continued)<br />
quence on making a French Provincial<br />
tea-table leg with a scroll ornament.<br />
This section is particularly useful to<br />
furniture makers as well as carvers.<br />
Brunner also shows several clever ways<br />
to secure the work through all the form<br />
changes the leg takes. The book finishes<br />
with several patterns for three-dimensional<br />
sculptures with instruction<br />
on how to saw out waste to save time.<br />
Brunner's manual is not a slick book<br />
destined for the coffee table. It is a selfpublished,<br />
unpretentious book in a<br />
plastic spiral binder designed to lie flat<br />
on the workbench. Brunner makes carving<br />
so alive that one has the urge to put<br />
down the book and start w<strong>orking</strong>. Almost<br />
a substitute for an apprenticeship,<br />
it is Brunner's invitation to come carve.<br />
-Rosanne Somerson<br />
How to Build Shaker Furniture by<br />
Thomas Moser. Drake Publishers, Inc.,<br />
801 Second Ave., New York, N. Y.<br />
1001 7, 1977. $6. 95 paper, 209 pp .<br />
The title of this book is somewhat<br />
misleading. What Moser, a cabinetmaker<br />
in New Gloucester, Maine, has<br />
done is take fifty pieces from the<br />
collection offered in his catalog and<br />
provide a photograph and measured<br />
drawings with construction details for<br />
each. The pieces themselves are not<br />
Shaker reproductions but "adaptations<br />
which have a genesis in the 'mood' of<br />
the Shaker style. " And as far as the<br />
rather murky, poorly reproduced photographs<br />
allow one to see, the furniture<br />
is perfectly reasonable stuff, although<br />
quite a bit closer to contemporary in its<br />
construction details and general appearance<br />
than many moody lovers of<br />
Shaker furniture might like.<br />
Preceding the drawings is "a short<br />
course on tools and woodw<strong>orking</strong><br />
methods" that includes a discussion of<br />
wood structure, drawings of circular saw<br />
blades, instructions on drilling holes,<br />
and so on. Most of this seemingly obligatory<br />
filler material has been covered<br />
many times and more thoroughly by<br />
some of the books listed in Moser's own<br />
bibliography, and it seems unnecessary<br />
to have it repeated in this and every<br />
other how-to-build book. The section<br />
on joinery and casework techniques is<br />
more pertinent because it deals directly<br />
with the pieces Moser produces, and<br />
the drawings that accompany the text<br />
here are very informative. Curiously,<br />
FOREDOM<br />
MINIATURE<br />
POWER TOOLS<br />
Flexible shaft machines and accessories<br />
for<br />
_ Bethel,<br />
grinding,<br />
Connecticut 06801<br />
polishing,<br />
deburring, routing, buffing, engraving,<br />
sanding, drilling, sawing,<br />
and more.<br />
z; vOE!A!S!D?T/:N<br />
PLANS TO BUILD<br />
YOUR OWN<br />
FINE FLOOR CLOCK<br />
Show your skill and craftsmanship by<br />
building a superb quality traditional<br />
floor clock. Our<br />
50'<br />
••<br />
detailed plans or semiassembled<br />
kits complement<br />
AlIma,<br />
your expertise.<br />
Prem ium quality German<br />
movements, dials, accessories<br />
&<br />
available.<br />
Send for complete illustrated<br />
catalog .<br />
200 Clockmlk Morbi Ottrt. FW PIIll, rr, Elllbll.hod P.O. lex CA 68, 1947 94507<br />
H. OeCovnick Son<br />
Art<br />
Rochester Institute of Technology<br />
College of Fine and Applied Arts<br />
School of and Design<br />
Communlcallon DeSign<br />
Industrial-Environmental DeSign<br />
Painting/Printmaking<br />
S.lB<br />
Art Education<br />
Medical Illustration<br />
School for American Craftsmen<br />
14623 H S T<br />
Ceramics<br />
Metalcrafts and Jewelry<br />
WeaVing/Textile Oeslgn<br />
Woodw<strong>orking</strong>/Furniture DeSign<br />
GlassblOWing<br />
Degrees A A F A.lM F A 1M<br />
Wrtte c/o Dean Robert JOhnston<br />
One Lomb MemOrial Drive<br />
Rochester. New York<br />
Handy Grinding<br />
2Y2"<br />
Jig<br />
Perfect Hollow ground<br />
bevels on blades to<br />
4Y.<br />
MOrley-back<br />
wide, aluminum<br />
$6.95<br />
guarantee<br />
cons't,<br />
brass screws,<br />
49¢<br />
nylon<br />
washers and rubber noslip<br />
damp surface. Only<br />
ozs. ppd.,<br />
Conn. res. add s.<br />
tax,<br />
Quaker P.O.<br />
ck.<br />
Hili, BOl99 CO.,<br />
or m.o.<br />
Conn.<br />
only.<br />
06375<br />
RIMA MFG.<br />
Professional Programs/<br />
Unparalleled Facilities<br />
28
2. 10.<br />
A treasury of plans for every home work·<br />
shop. school . library. 19 series of<br />
individually<br />
B. 12.<br />
printed. easy· read drawings for beginner to advaoced<br />
craftsman. Each series with 10 or more<br />
lB. &<br />
complete plans.<br />
1. Colonial Series Wall Accessories<br />
Early American 11. Wall Furniture<br />
3. Gun Cabinets Miniature Chests<br />
4. Spice Cabinets 13. Wall Shelf Clocks<br />
5. Wall Shelves 14. Contemporary Series<br />
6. Grab Bag (15 plans) 15. Old Salem Series<br />
7. Cape Cod Series 16. Garden Proiects<br />
Modern Series 17. Shaker Furniture<br />
9. Outdoor Proiects Country Kitchen<br />
19. This 'n That .(15 plans)<br />
WOODWORKING 200 PLANS<br />
4 $5<br />
FU LL SET $16.50 or order desired series. $1.50 per series (10<br />
plans). series (40 plans). Postpaid. Catalog 25¢. Satisfac·<br />
tion guaranteed. Write COLONIAL WORKSHOP. P.O. Box<br />
103·F. Angwin. CA 94508.<br />
The<br />
Mechanick's<br />
Workbench<br />
• • &<br />
Large inventory of all<br />
& &<br />
types of wooden<br />
planes, including . Cabinet Architectural<br />
mouldings, Beading - sets<br />
singles, Hollows Rounds - sets,<br />
pairs, singles, skewed blades.<br />
$1.00 &<br />
Variety of other quality woodw<strong>orking</strong><br />
tools for craftsmen collectors.<br />
Catalogue<br />
P2 Dept.<br />
Front Street<br />
Marion, MA 02738<br />
<br />
<br />
MUSICAL<br />
INSTR UMENT<br />
woods, suppl ies, and<br />
accessories of the<br />
finest quality.<br />
FREE CATALO G<br />
GURIAN<br />
GUITARS<br />
DEPT B<br />
HINSDALE, NH 03451<br />
" ,...." r'\ _ -<br />
&<br />
The finest imponed Genman steel tools available in<br />
IMPORTERS<br />
the United States. Listed are thousands of tools and<br />
shop accessories. CH ISELS, GOUGES , PARTING<br />
TOOLS. etc. Hardened and tempered to hold a keen<br />
sharp edge to give a lifetime of service. Liberal Dis·<br />
counts to Schools Dealers.<br />
Eo<br />
SEND FOR A NEW FREE 24·PAGE FOLDER.<br />
FRANK MITTERMEIER, INC.<br />
3577 Tremont Avenue<br />
Bronx, N.Y. 10465<br />
BOOKS (continued1<br />
chairmaking is not mentioned, even<br />
though several chairs and benches are<br />
shown in the measured drawings.<br />
Moser's comments and the photographs<br />
of the tools and machines in his<br />
shop make the book more interesting,<br />
if only because most woodworkers love<br />
poking around other people's shops.<br />
Chris Becksvoort's drawings are excellent,<br />
providing the kind of details<br />
one needs to reproduce these pieces.<br />
-David Landen<br />
Classic Furniture Projects by A. W.<br />
Marlow. Stein and Day, Scarborough<br />
House, Briarcliff Manor, N. Y. 10510,<br />
1977. $12.95 cloth, 210 pp .<br />
Classic Furniture Projects is Marlow's<br />
latest book on fine cabinetmaking. This<br />
celebrated author and experienced<br />
craftsman attempts to take the mystery<br />
out of making fine classic inlaid furniture<br />
and, for the most part, succeeds.<br />
Marlow details 13 separate projects<br />
ranging from small boxes to foldingtop<br />
tables to a chest of drawers. The<br />
dominant style is American FederaL He<br />
follows his earlier formula, using plan<br />
drawings and photographs keyed to a<br />
step-by step text. Marlow focuses on<br />
inlay, including banding, inlay ovals<br />
and miscellaneous decoration. He pays<br />
less attention to basic cabinetry than in<br />
his earlier books. He concludes with an<br />
excellent chapter on dovetail joints and<br />
a brief discussion of finishing.<br />
I have always had great admiration<br />
for Marlow's earlier book Fine Furniture<br />
for the Amateur Cabinetmaker<br />
and find it impossible not to make<br />
comparisons. (Years ago I found Fine<br />
Furniture to be a tour de force as a<br />
teaching text in the sophisticated<br />
aspects of basic cabinetry for the serious<br />
amateur woodworker.) By my estimate,<br />
Classic Furniture Projects uses somewhat<br />
less than half the text and photographs<br />
than Fine Furniture might for a<br />
comparable project. It seems the author<br />
is assuming more knowledge of basic<br />
cabinetmaking and the fine points of<br />
hand tools. Further, I found the sectional<br />
drawings not quite as thorough<br />
as those in Fine Furniture. These are<br />
minor problems, however, since Classic<br />
Furniture Projects is a fine book and<br />
brings inlay work, which has always<br />
puzzled me, into the realm of the possible<br />
for the average cabinetmaker.<br />
-Garretson W. Chinn<br />
1'Ii \<br />
Natural<br />
Wood Finishing<br />
famous<br />
SEALACELL<br />
<br />
77,<br />
•<br />
1-2-3 Process<br />
Penetrates<br />
wood. durable.<br />
long-lasting<br />
•<br />
Protects and Preserves<br />
Wipes-on, No brush marks<br />
Eliminates dust problems<br />
Works for first finish or<br />
refinishing<br />
Enhances beauty of any<br />
wood<br />
Used by professionals<br />
and instructors<br />
A IFull-Featurel<br />
Workbench. at an<br />
Affordable<br />
Price!<br />
_/ I \ ,\\ ,<br />
/,<br />
2<br />
, \}.<br />
30" 50"<br />
I<br />
Made of solid rock maple.<br />
this extremely versatile 225 lb.<br />
workbench oilers you a massive<br />
laminated 2" thick x<br />
work surface (a full 12V:z sq.<br />
"'l' Bench comes complete<br />
wi h extra large capacity<br />
doubl&-position vises that can<br />
be set either flush with bench<br />
surface or 1 '/2" above. to act as a workshop or for<br />
surface clamping. Vise faces are 18" long to<br />
clamp even the largest projects! A unique boll<br />
and rod nut fastening system will hold bench<br />
rigid over years of hard use, yet can be disassembled<br />
shoufd you need to move it.<br />
Unlike Imported benches, these benches are<br />
made in the U.S.A. and are ship directly to<br />
you with no<br />
W.y<br />
middlemen Involved.<br />
7440DW<br />
This allows us<br />
to price our workbench far below others available.<br />
The Garden Way Home Workbench also oilers<br />
you an exclusive LIFE-TIME warranty.<br />
- - - - - - ----<br />
To: G.rden<br />
.. Dept.<br />
Ch.rlott., V.rmont<br />
R_r<br />
1r.I445<br />
I Please send me your free Information about I<br />
the New Garden Way Home Workbench Includl<br />
ing details on the build-It-yourself kits.<br />
I<br />
I Name<br />
I Address<br />
___ --<br />
I City<br />
l! t <br />
_____ <br />
t<br />
J<br />
29
BRAZILIAN ROSEWOOD<br />
SPECIAL<br />
20 sq. ft. for $10.00 pp.<br />
All pieces 3 ft. or longer.<br />
Included with order our 50 page<br />
catalog of hardware and supplies<br />
for antique restoration and reproduction,<br />
including locks, drawer<br />
pulls, hinges, casters, and chair<br />
cane. Catalog separately $1.00.<br />
NOEL WISE<br />
LA<br />
ANTIQUES<br />
Antique Restoration Supplies<br />
PO Box 404F, 6503 SI. Claude Ave.<br />
Arabi, 70032<br />
Kiln-Dried<br />
HARDWOODS!<br />
Ash-Bu tternut-Cherry<br />
Maple-Red Oak-White Oak<br />
Yellow Birch-Walnut<br />
By The Board Or The<br />
Truckload. Cabinet<br />
Quality. Write For<br />
Prices Or Stop By And<br />
See Us-We Like To Talk.<br />
Sterling Pond<br />
HARDWOODS<br />
412 Pine Street<br />
Burlington, Vermont 05401<br />
802-8635820<br />
PFERD<br />
Highest Quality<br />
Chain Saw<br />
FILES<br />
~<br />
MADE IN GERMANY<br />
By German Craftsmen<br />
Mercedes Benz<br />
. These Quality<br />
Manufacturers .<br />
along with PFERD<br />
manufacture quality<br />
products.<br />
Write or contact<br />
PFERD Chain Saw<br />
Files United States<br />
and Canada<br />
Representative<br />
at once!<br />
Sold to Distributors<br />
Only.<br />
PFERD Chain Saw<br />
Files like the<br />
Mercedes-Benz,<br />
the Volkswagen,<br />
the Porsche . . .<br />
are all made in<br />
Germany by<br />
efficient highly<br />
skilled German<br />
Craftsmen.<br />
PFERD Files<br />
are made from<br />
the finest steel<br />
for professional<br />
quality<br />
chain<br />
sharpening.<br />
PFERD---<br />
*<br />
___<br />
~<br />
E. VERBLE, Inc.<br />
HAL<br />
1 2<br />
ts__ ..J<br />
2 es<br />
Kea<br />
_<br />
_<br />
_<br />
_<br />
5<br />
w<br />
Fresno, California 9371 1<br />
Phone (209) 227-0737<br />
t<br />
ADDENDA, ERRATA<br />
Our Questions I Answers column acquires<br />
a new format in this issue, now<br />
that cabinetmaker Andy Marlow and<br />
furniture finisher George Frank have<br />
joined us as consulting editors. In the<br />
past, we have published readers' questions,<br />
leaving the answers to the next<br />
issue. Now we forward all the questions<br />
to Marlow and Frank for answering ;<br />
then the editors select those of general<br />
interest for publication. As always, we<br />
encourage readers to expand on or take<br />
issue with the advice provided by our<br />
experts, and we'll pass on reader<br />
experiences in subsequent columns.<br />
We're grateful to all the woodworkers<br />
who have responded to the column so<br />
far ; often, we receive a letter containing<br />
not just one answer but a detailed<br />
response to a whole list of questions.<br />
We hope readers will continue to take<br />
time out from their own work to share<br />
their knowledge with others.<br />
Every quarter, we receive several<br />
hundred letters to the editor. The ones<br />
that comment on magazine articles and<br />
the woodw<strong>orking</strong> arts in general are<br />
excerpted for the Letters columns ;<br />
those asking and answering questions<br />
to the QIA columns, and those offering<br />
tips and techniques go to Methods<br />
a/ Work.<br />
Many letters suggest topics for future<br />
articles, information about craftsmen<br />
who might be the subject of an article,<br />
or are from readers offering to write an<br />
article. We are particularly grateful for<br />
all of these, and we follow up on them ,<br />
because they are our primary source of<br />
editorial material. Finally, our favorite<br />
letters come from readers who pungently<br />
criticize the magazine itself or<br />
who simply want to say they enjoy it,<br />
and which articles they found most<br />
useful. We don 't publish these letters,<br />
because they don't add to the store of<br />
knowledge of woodw<strong>orking</strong>. Instead,<br />
we pass them around the office and<br />
savor them.<br />
With this issue, John Makepeace<br />
joins Colin Tipping as editorial correspondent<br />
in England. Makepeace is one<br />
of Britain's foremost furniture designers<br />
and proprietor of a workshop and<br />
school at Parnham House, Beaminster,<br />
Dorset.<br />
As Christmas looms, so grows the<br />
stack of new fall catalogs from the mailorder<br />
tool merchants. The many new<br />
firms that have entered the market in<br />
recent years vastly increase the range<br />
FREE!<br />
I VEN EER CRAFT<br />
CATALOG PLUS<br />
SIMPLIFIED<br />
INSTRUCTIONS<br />
_<br />
90 varieties world's rarest veneers, pre'joined ve·<br />
MORGAN,<br />
neers, checkerboards,<br />
Oopt.<br />
broad choice wood band and<br />
art inlays. Illustrated in full color - at reason·<br />
able prices. Learn how to create beautifully ve·<br />
neered furniture quickly, easily. Re·veneer old<br />
tables, chests, cabinets, clocks, with ease. Trans·<br />
F04K 10,915<br />
form cracked and chipped veneered surfaces instant·<br />
Iy! Illustrated catalog shows new contact cement<br />
tech nique that you learn fast. Send for FREE sim·<br />
plified instructions<br />
LETTERS YOUR<br />
plus color catalog today.<br />
OLD CHOICE FASHION UP TO<br />
E. Ky., Lou., Ky. 40204<br />
BRANDING FIVE OR COPPER NUMBERS 3/8" IRON Plus handling 75<<br />
CREAT CIFT<br />
$5.00<br />
ADDITIONAL LETTERS OR PUNCTUATIONS<br />
$1.50 EACH<br />
I. MILLER ENTERPRISES<br />
BOX 772-FW<br />
MANCHESTER MO. 6301 1<br />
PROFESSIONAL TURNING TOOLS<br />
Fittings and accessories<br />
Catalog on request<br />
PETER CHILD<br />
The Old Hyde, Little Yeldham,<br />
Halstead, Essex, England.<br />
•• ••<br />
Make Natural, Beautiful Crackfr<br />
54212 $4.00. SOC.<br />
Bowls. Lamps, rabies and so on in<br />
Ie time by chemically seasoning<br />
your own wood with the new<br />
ThermoVat<br />
.•<br />
and Peg. Great craft<br />
business potential. Thermostatically<br />
controlled 5.S. Heaters, Related<br />
supplies. Information<br />
Instruction-Project Booklet<br />
Spielmans Wood Wortcs. l88F<br />
Gibraltar Rd Fish Creek. Wi.<br />
I: [1]\'1 I ge .L1 jll :I <br />
HOMECRAFT VENEER, Box 3.<br />
••<br />
50 SQ. FT. PERSIMMON VENEER<br />
$1 2.00 intad<br />
Over 140 varieties of Veneers. Complete Une of Tools for<br />
Veneering.<br />
3056<br />
Laminating and Marquetry. - Cements and Glues.<br />
Simplified Veneering Instructions and price list for 50c.<br />
64 Y 5541675'<br />
Dept. F. Latrobe. Pa. 15650<br />
ANNOUNCING<br />
WOOD CARVERS SUPPL CO. has moved to<br />
larger fa cilities:<br />
Excelsior Blvd., Minneapolis, MN<br />
Our new page catalog is now available, for .<br />
Registrations for summer sessions for The Wood<br />
Carving School are now being accepted. Write for<br />
free brochure.<br />
Rustic<br />
3<br />
$3.00 our<br />
WOODEN LANTERNS<br />
Gothic. Early American and Colonial deSign.<br />
lkIusual functional conversation pieces.<br />
Send plans and get<br />
P.O. Box Langhorne, Dept. Pa.<br />
Sconce plan free.<br />
BINGAMAN PLANS<br />
500<br />
74, 19047<br />
3 for Ihe<br />
30
TH E WORLD'S MOST UNUSUAL<br />
DO·IT·YOURSElF CATALOG.<br />
POOR MAN'S<br />
CATALOG 3<br />
e<br />
... ,.r'" """",.,<br />
U-Build engraving machine<br />
.<br />
o<br />
,,*b Q b •<br />
i"'fI . U-Build power tools at a fraction of<br />
store costs<br />
t:: '-<br />
U-Build antique furniture<br />
Money making ideas, energy saving<br />
"1<br />
$1.00 to N.J. 07649<br />
plans. time saving ideas, unusual<br />
ways to use tools, arts and ·crafts,<br />
poor woman's section, plan for the<br />
tt rtJ man with everything ... plus much,<br />
much more.<br />
Send for Catalog Dorsav,<br />
::J n i:r::a a 'd e J':a,<br />
ROCKING<br />
HORSE PLANS<br />
.6.50<br />
FULL SIZE<br />
TRACE and CUT<br />
EASY TO FOLLOW<br />
PLANS per<br />
203<br />
set<br />
Send check or money order<br />
45177<br />
to<br />
A.and W. Products<br />
Wil mington , Ohio<br />
No C.O.Ds<br />
p. Box O.<br />
BETTER THAN WASHITA!<br />
CERAMIC BENCH STONE<br />
x x<br />
is harder, stronger, and sharper than<br />
any natural stone. Faster cutting,<br />
more uniform and durable, finegrained<br />
industrial ceramic creates the<br />
same<br />
$8.95 6"<br />
ultra-sharp edge at ONE-HALF<br />
the cost.<br />
Large 2" I" Bench Stone only<br />
plus 30¢ postage<br />
Rt.<br />
and handling.<br />
Send check or money order to:<br />
ANDISCO<br />
Box 63 1-F, 2<br />
Shelley, Idaho 83274<br />
3% Idaho Res. add sales tax. Master Charge<br />
and Visa accepted. Please allow 2-4 weeks<br />
for delivery.<br />
elb Borlb rk $bOp tlrobucts<br />
ARTUNG OIL FINISH<br />
A<br />
be<br />
new and exciting oil type finish that<br />
you apply with a cloth. More versatile<br />
than any finish you have ever used. Can<br />
applied over existing finishes or on<br />
new wood, indoors or outdoors. Unex<br />
4 $1.25.<br />
celled for coating wood carvings. Fast<br />
01 drying, hard finish and moisture resistant.<br />
*<br />
8 $1.50<br />
OZ. SAMPLE SIZE<br />
CREAM L CLEANER OZ ..<br />
WA LNUT OIL POLISH OZ .<br />
,$2.95<br />
.<br />
PADDING<br />
ANI LINE DYE STAIN CONCEN·<br />
TRATE -ALL CO<br />
3211<br />
LORS 8 OZ .<br />
CATA LOG AVAILABLE ON REQUEST<br />
33450<br />
K P DISTR I BUTORS<br />
P.O. BOX DEPT. W<br />
FORT PIERCE, FLORIDA<br />
LACQUER 8 OZ . . $2.95<br />
ADDENDA (continued)<br />
and quality of available tools and<br />
supplies. Those catalogs that have<br />
reached this office, and their prices, include<br />
: Barap Specialties, $.50; Bimex,<br />
$2 ; Brookstone, $.50; Conover Woodcraft,<br />
$1; Constantine, $.50; Craftsman<br />
Wood Service, $.50; Frog Tool ,<br />
$.50; Garrett Wade, $1; Leichtung,<br />
$1; Minnesota Woodworkers Supply,<br />
$1; Princeton, free ; Sculpture House,<br />
$1; Silvo Hardware, $1; U. S. General<br />
Supply, $1; Wood Carver's Supply,<br />
$.75; Woodcraft Supply, $.50; Woodworker's<br />
Supply, $1. Most refund the<br />
catalog price with the first order ; their<br />
addresses can be found in their advertisements<br />
elsewhere in this issue.<br />
After a brief flirtation with volume<br />
numbers for each issue of Fine Woodw<strong>orking</strong>,<br />
the contents page of this issue<br />
sensibly switches to sequential whole<br />
numbers. Thus our first issue, Winter<br />
'75, is No. 1, and this issue, Winter<br />
'77, is No. 9. Back issues may be<br />
ordered by date or by whole number,<br />
and life in our subscription department<br />
will be much simpler.<br />
In Fall ' 77 , p. 33, grain raised by water in<br />
refinishing should be sanded with 220-grit<br />
paper or finer, not with 80 or 100 grit.<br />
In Fall '76, p. 22, the legend under the<br />
graph showing seasonal variations in mois·<br />
ture content slips out of phase at the third<br />
summer. Ir should continue to alternate<br />
WInter-summer.<br />
Gerald R. Ward, assistant curator of the<br />
Yale University Art Gallery, notes that in'<br />
"Painted Furniture," (Fall '77, p. 48) we<br />
neglected to credit the Empire-style couch<br />
to Yale's collection. We also take this occasion<br />
to note that in the same article, the<br />
small sewing box belongs to the Greenfield<br />
Village and Henry Ford Museum of Dearborn,<br />
Mich.; the blanket chest came from<br />
the Metropolitan Museum of Art, New<br />
York ; the music cabinet was lent by Gary<br />
Moody of St. Paul, Minn.; "Face Chair"<br />
was lent by Nancy Hoffm an Gallery, New<br />
York ; "Maple Mable" was lent by the art·<br />
ist ; the painted cupboard came from the<br />
Minneapolis Institute of Arts ; and the Boston<br />
rocker was lent by the Museum of Fine<br />
Arts, Boston.<br />
Art credits: 12, 21, 24, 35-37, 41-43, 49'<br />
51, 59, 61, 66, Stan Tkaczuk, Image Area ;<br />
17, 19, 45-48, 64-65, 70-71, Joe Esposito ;<br />
73-74, Roger Barnes. -<br />
Photo credits: 32, Providence Sunday<br />
Journal ; 38, Philadelphia Museum of Art ;<br />
39, Museum of Art, Rhode Island School of<br />
Design ; 44, 46, Ben Davies ; 49-51, Bengt<br />
Carlen ; 52, Rob Ely ; 52-53, Richard Starr ;<br />
58-60, John Meyers ; 62, Ann Pappert ; 63,<br />
Canadian National Exhibition ; 64-65, W.<br />
Kaphaem , J r. ; 66-67, Peter Britton ; 68, ).<br />
Kassay , Derek Balmer ; 72-74, W. Smith.<br />
THE<br />
JAPAN<br />
WOODWORK.<br />
CATALOGUE<br />
Complete details on this and many<br />
50
THE WOODCRAFT SCENE ____ _<br />
Repair and Restoration<br />
A visit with Ek and Tucker<br />
by Richard E. Preiss<br />
Ek, left, and Tucker<br />
Knut<br />
I.,<br />
L. Ek and Kenneth R. Tucker rebuild and refinish<br />
antique furniture. The sign outside their door in Rumford,<br />
R. simply reads "Ek Antiques." Ek and Tucker have<br />
worked together here since 1938, restoring many Newport,<br />
Goddard and Townsend pieces as well as unique items such as<br />
John Brown's chair and table. Their methods are not complex<br />
or secretive, just practiced with the patience; honesty and<br />
know-how that only time can perfect.<br />
Most of their work is furniture that has been acquired by<br />
Ek, sold as is and then brought back to stylish life. The buyer<br />
knows exactly what he is starting with, before any repairs are<br />
made. "We could look across the room and date a piece of<br />
furniture, " says Tucker. Subtle variations in curves , moldings<br />
and finish colorations are quick clues to the age of a piece.<br />
The hardware, joinery and drawer construction give further<br />
information about an object's history.<br />
Appraising a Windsor chair, Tucker first twists his hand<br />
rapidly around the turned legs. "We love to feel something<br />
like this," he says, noting the out-of-roundness that has developed<br />
over the years. The extent of shaping that went into<br />
the seat is checked, the bent back is admired and a date and<br />
value are affixed. "Shows are filled with phonied stuff because<br />
the sellers don't know what they have ," says Tucker.<br />
After an item has been sold, the first step usually is removing<br />
the old finish. Tucker mixes varnish and shellac remover,<br />
partly out of habit and partly because it costs less than commercial<br />
preparations. To mix 10 gal., he adds 1-114 lb. of<br />
paraffin wax to 5 gal. of benzol (benzene), mixes it well, and<br />
adds this solution to 5 gal. of denatured alcohol. The wax<br />
keeps the mixture from drying up. After disassembling the<br />
major elements of the piece of furniture, he applies remover<br />
with a brush, keeping the surfaces wet until the finish comes<br />
away . On flat areas he carefully removes the sludge with a<br />
putty knife. He wipes off carved and turned sections with a<br />
rag. No scrapers are used, so as not to damage the oxidized<br />
surface patina of the wood itself. The wood is then rubbed<br />
with denatured alcohol and 3-0 steel wool until no trace of<br />
old finish remains. This remover will not work on most finishes<br />
used after 1925; newer finishes are generally lacquerbased<br />
and are therefore removed with acetone.<br />
Reconditioning, which sometimes means starting with a<br />
spindle or a seat and reconstructing a chair, requires a feel for<br />
the " tolerable variances" that must be incorporated into a<br />
period piece to make it look and feel old. Rebuilt furniture<br />
must look as authentic as possible, not only in styling and design,<br />
but also in style of workmanship.<br />
To simulate a period look, Tucker must first find a suitable<br />
piece of wood to replace a missing part. This is often difficult,<br />
because wood like the dark, dense Santo Domingan mahogany,<br />
preferred in American Queen Anne, is virtually gone.<br />
Often, collected segments from similar period objects are recut<br />
and incorporated into a restoration . For a drawer bottom<br />
in an old chest, only a piece of wood with an accent of rubbed-in<br />
dirt would appear proper. Other markings that give an<br />
antique its flavor are overrun scribe lines and saw kerfs, edges<br />
worn down by- sanding, and carefully developed stress marks.<br />
When extensive refinishing is needed, such as to match<br />
lighter and darker pieces of wood within one cabinet, the<br />
whole unit is scraped and sanded quite thoroughly. There is<br />
less concern at this point with retaining the patina colors,<br />
because one way or another a complete coloring and blending<br />
of tones will be required. Tucker fills holes and dents with<br />
stick shellac, melted with a small soldering gun. He prefers<br />
shellac to linseed-based putty fillers because "it sticks better."<br />
After the shellac hardens, he pares the surface flush with<br />
a chisel before moving on to the next hole. Where a special<br />
color of filler is required, the stick is dipped in liquid shellac<br />
and then into a powdered pigment before being melted in<br />
place . Tucker and Ek use Lansco dry powdered pigments,<br />
which they buy at the local paint store.<br />
To blend the color of a dark patch or a newly added piece<br />
of wood to the original, Tucker first lightens the darker area<br />
with Spe-De-Way bleach, a two-part liquid made especially<br />
for bleaching wood. Then he mixes his powdered colors with<br />
water or alcohol and rubs the color into the surface until it<br />
matches the surrounding areas . Jars of color fill the finishing<br />
area ; the correct blending results from practice and "just<br />
knowing the way it's supposed to be," says Tucker. He also<br />
uses liquid penetrating stains to return a piece to its correct<br />
stylistic era. A little bit of alcohol applied to a rag used for<br />
staining and then rubbed on the work is a fast way to cover a<br />
small light spot.<br />
A very light sanding prepares the freshly cleaned surface for<br />
its new finish. With the old finish removed and the surfaces<br />
dry, the wood is completely hand-sanded with 220-grit paper,<br />
with care not to penetrate the existing patina unevenly. No<br />
sanding blocks are used, although Ek switches to a slightly<br />
coarser grit paper to smooth out stubborn areas. Rust or ink<br />
stains are removed with oxalic acid, which usually can be<br />
bought from the drugstore in crystal form. To mix the acid<br />
solution, Ek puts a 2-in. layer of crystals into a quart jar,<br />
stands the jar in a hot water bath, and fills it three-quarters<br />
full with water. He spills a little solution onto the stain, rubs<br />
Rich Preiss, 25, is resident instructor at Leeds Design Workshops<br />
in Easthampton, Mass.<br />
32
It In and wipes it off. Then he rubs the area with a cloth<br />
dampened in vinegar (borax will do the same job) to neutralize<br />
it and prevent shellac from bubbling up later on.<br />
For a protective finish, Ek uses either varnish or shellac ; his<br />
rule is, " If you can set a glass of water on it, use varnish. " He<br />
mixes shellac from flakes because its color is more consistent<br />
than prepared shellac, and the viscosity can be controlled.<br />
Also, following the final rubbing, bought shellac tends to<br />
retain an undesirable gloss, whereas shellac mixed from flakes<br />
will remain flat. Ek uses only orange shellac, never white,<br />
because it has less tendency to turn milky in high humidity,<br />
and because he contends that white often doesn't dry properly.<br />
He applies three or four brush coats of shellac, generally<br />
proceeding from a dilute to a heavier mixture. Each application<br />
is allowed to dry thoroughly-at least 24 hours-and<br />
then sanded evenly with 220-grit silicon-carbide paper. After<br />
the final coat has been sanded, he rubs the surfaces uniformly<br />
with a mixture of pumice and oil until the gloss is taken off<br />
and the piece has an even glow. This is the finished<br />
surface-no wax or polish.<br />
On horizontal surfaces that may suffer glasses of water,<br />
Tucker and Ek spray two coats of Behlen's Rock Hard<br />
Varnish, with a light fine sanding between coats. When the<br />
first application is completely dry, pimples are rubbed out<br />
I with 400-grit wet dry<br />
sandpaper used with water. They are<br />
careful not to sand through to the previous layer. The surface<br />
is then wiped off and allowed to dry before proceeding. Following<br />
the second coat, the wood is rubbed with 3-0 steel<br />
wool in long, sweeping strokes until the sheen is gone. Rubbing<br />
with pumice and light oil completes the work.<br />
After I left Tucker and Ek, the relaxed feeling of the shop<br />
stayed with me for hours. Eight dollars an hour is not much to .<br />
charge for such painstaking work and timeless techniques by<br />
two master artisans.<br />
CLASSIFIED<br />
The CLASSIFIED RA TE is $ 1. 50 per word, mini·<br />
mum ad 15 words. Payment must accompany Ot·<br />
der. The WOOD AND TOOL EXCHANGE rate<br />
is $1.00 per line, minimum three lines. The ex·<br />
change is for private use by individuals only.<br />
Commercial accounts must use Classified. The<br />
SITUATIONS WANTED ratt is $1.00 per line,<br />
minimum three lines. Allow 45 letters or spaces<br />
per line, including name and address. Send to:<br />
The Taunton Press, Advertising Dept., Box 355,<br />
Newtown, CT 06470.<br />
Fine quality WORMY FLAMED MAPLE 5 years<br />
air dried, $3.50/bd. ft. D. Cook, Route 5, Mans·<br />
field, OH 44903.<br />
LOCAL LUMBER CO. Fancy hardwoods, custom<br />
milling and kiln drying. 161 Bowers Hill Road,<br />
Oxford, CT 06483.<br />
2000 FRENCH WALNUT RIFLE and SHOT·<br />
GUN BLANKS. Plain, $25, to 1st grade, $125.<br />
Come to select. Roy Vail, Warwick, NY 10990.<br />
(9 14) 986· 1 686.<br />
Old and scarce books on woodw<strong>orking</strong>, wood·<br />
carving, turnery and forestry. <strong>Free</strong> catalog. R.<br />
Sorsky, Bookseller, 520 E. Garland, Fresno, CA<br />
93704.<br />
HARDWOOD LUMBER. Wholesale prices, kiln<br />
dry, best grades, surfaced or rough. Walnut,<br />
Cherry, Oak, Maple, Ash, Poplar, Cocobolo,<br />
Padauk, Zebrawood, Mahogany, Teak, etc. One<br />
dollar for price list. WOODENWARE, Box 10,<br />
Brownsville, MD 21715.<br />
FURNITURE MAKING INSTRUCTION. Five·<br />
day workshop February 20 ·24 with Stephen<br />
Crump. Crafts Center, Cedar Lakes, Ripley, WV<br />
25271.<br />
EXOTIC HARDWOODS · kingwood, rosewood,<br />
tulipwood, pernambuco, sucupira, others.<br />
Planks, turning squares and carving blocks. For<br />
free price list write Kingwood Enterprises,<br />
Box 320, EI Portal, CA 95318. (209 )379-2413,<br />
379·2301. For samples please include $2.00.<br />
REMARKABLE MACHINERY OFFER. Hardly<br />
used, new·condition Oliver 194 Mortiser, tilting<br />
table, three· phase. $1,100 FOB NY. Joinery Tool<br />
Div. , 641 Hudson Street, ew York, Y 10014,<br />
(2 12) 924·1913.<br />
HARDWOOD LUMBER · CARVING STOCK ·<br />
TURNI G SQUARES, kiln dried, 22 different<br />
species. No minimum, free catalog. Marietta<br />
Hardwood Center, Box 803, Marietta, OH 45750.<br />
ANTIQUE W O ODWORKING TOOLS: Collec·<br />
tors and Craftsmen · 4 issues per year · $2.00. The<br />
Tool Box, 5005 Jasmine Drive, Rockville, MD<br />
20853.<br />
Burnt sawmill forces hardwood LIQUIDA nON<br />
SALE. Walnut $1. 10, cherry $.75, curly maple<br />
$2.2, bubinga $1.30, oak, etc. $.55. All nice<br />
boards. Only 20,000 bd. ft. , so first come first<br />
served. Min. 20 boards. Albert LeCoff, Elkins<br />
Park, PA, 19117, (2 15) 635·6475.<br />
CABINETMAKER wanted for pipe organ shop.<br />
Varied work; all aspects of fine woodw<strong>orking</strong><br />
possible with progressive small company. Ronald<br />
Wahl, Organ builder, 804 E. South Street,<br />
Appleton, WI 54911.<br />
PROFESSIONAL WORKSPACE AVAILABLE,<br />
Boston area, 200 sq. ft. and up, from $IOO /mo.<br />
Includes use of heavy machinery, spray booth,<br />
bench, discount wood buying. Irving Fischman,<br />
262 Harvard, Cambridge, MA 02139. Call even·<br />
ings (6 17) 868·89 53.<br />
HARDWOOD CARVING BLOCKS 3x3x6·in.<br />
"Whittle Awhile" $. 50. Animal, bird blanks $2.<br />
AC (F6), Cherokee, NC 28719.<br />
HARD· TO·FIND TOOLS. Specializing in un·<br />
used, discontinued quality hand tools, parts,<br />
irons, cutters. Many ·rare. Send for lists. Joinery<br />
Tool Div., 64 1 Hudson Street, New York, NY<br />
10014, (2 12) 924-1913.<br />
WOODWORKING CLASSES. Evenings and<br />
Saturdays. For more information write or call:<br />
John Harra Woodw<strong>orking</strong> Studio, 39 West 19th<br />
Street, New York, NY 10011, (2 12) 741·0294.<br />
FINE WOODS - domestic hardwoods including<br />
persimmon, holly, sassafras, beach, poplar, ash,<br />
red oak, locust, cherry, Kentucky coffee tree, cypress<br />
and more. Send $.50 for catalog to Ruston<br />
Lumber & Supply, Inc., PO Box 823, Ruston, LA<br />
71270.<br />
WOOD &TOOL EXC<br />
HANGE<br />
For Sale<br />
Violin wood. Beautifully flamed, seasoned maple,<br />
back (2 Pc.) large enough for viola, $35. C. Mills,<br />
3509 W. 72nd Place, Chicago, IL 60629.<br />
Stanley 13050 com bination plane, 25 cutters.<br />
This plane new, never used, $65 ppd. J. W.<br />
Olson, 4507 Saul Road, Kensington, MD 20795.<br />
New Delta Rockwell 10-in. Unisaw 34·466 table<br />
saw. 3 hp single-phase, magnetic controls, uniguard,<br />
comb. blade. List price $1200, selling at<br />
$975. D. Devlin, River Road, Lyme, NH 03768,<br />
(603) 795-2461.<br />
4/4 red oak, unsurfaced, $ 1.35 bd. ft. 200 bd. ft.<br />
available ; 50 ft. min. Also orton Bear multisrone,<br />
3 mounted sharpening stones (p. 73, new<br />
Silvo catalog), $30. Rod Howell, 625 3rd Avenue,<br />
San Francisco, CA 94 118.<br />
Rockwell power block plane kit: model 9167,<br />
includes 167 plane, sharpening attachment and<br />
case. Used, $75. C. Brooks, Box 323, Selah, WA<br />
98942.<br />
W ill exchange Honduras Rosewood pieces for<br />
Zebrawood- pound for pound. T. Desler, Box<br />
40, Dolton, IL 604 19.<br />
Stanley 55 with cutters, all in good condition.<br />
Will trade for<br />
Planer<br />
two-man crown molding plane. ).<br />
Hamilron, 1 Bates Road, Morgantown, WV<br />
26505.<br />
a in good condition. Singlephase<br />
motors, extra<br />
Pennsauken, knives wave. and Gary grinding Handel, appara·<br />
17 -in. Prybyl<br />
tus. Cuts without 2230<br />
Scovel A ven ue, NJ 08 110,<br />
(609) 662-790 1, 662-7264 evenings.<br />
Stanley 55 plane with 54 cutters in four wood<br />
boxes, all in original box. Good condition, $160.<br />
A. Prandoni, 560 1 Ogden Road, Washington,<br />
DC 200 16, (301) 229-5599.<br />
Stanley 45 plane with cutters and book. In excellent<br />
condition and complete, $115. Also Stanley<br />
46, 71-112 and 80. Make an offer. Write: Ron<br />
Kendall, 284 Bradford Drive, Canfield, OH<br />
44406.<br />
Wanted to Buy<br />
Belsaw planer WIth 4 or 5-hp single-phase, motor.<br />
Frank Koegler, Route I, Box 217-A, jane Lew,<br />
WV 26378.<br />
12 to 24-in. planer. Send description, condition<br />
and price. Frank Curran, Eichybush Road,<br />
Kinderhook, NY 12106.<br />
Stanley planes new or old. Also woodw<strong>orking</strong><br />
hand tools, Sargent planes, wood planes. Price,<br />
describe. None for sale. Ivan E. Bixler, 6943<br />
Cozaddale Road, Goshen, OH 45 122.<br />
Left fence for Stanley 55 plane, complete including<br />
tilting iron. W. L. Grimm, Jr. , 1008 Green<br />
Hill Farm, Reistersrown, MD 21136.<br />
Seeking Stanley No. 52 chute board and plane.<br />
Photo and/or description to ). N. Rogers, 327<br />
Amador Court, Pleasanton, CA 94566.<br />
SITUATIONS WANTED<br />
Seek job as apprentice ro mastercraftsman in<br />
cabinetmaking/ sculpture. Basic skills known;<br />
some carving. Presently refinishing and repairing.<br />
Will relocate. Please call or write: Michael Marcinkowski,<br />
2673 Carnegie Road, #T-I, York, PA<br />
17402, (7 17) 757-682 1.<br />
ROUGH-HEWN LUMBER, straight with good<br />
grain, seeks maSter woodworker presently work·<br />
ing or retired in metropolitan New York area,<br />
who will shape me through instruction in cabinet-making,<br />
furniture making or sculpture. I am<br />
a conscientious 25 yr. old with 5 yrs. expo in<br />
machine-shop practices and mechanics. W ill exchange<br />
work in your shop, home or yard for<br />
knowledge of the tools and techniques. Call<br />
Thomas R. Crissinger after 4 pm. (5 16) 354-4721.<br />
Write 1461 Rosser Avenue, Elmont, NY 11003. I<br />
don't want to be just a chip off the old block.<br />
33
Designing for Dining<br />
Dutch pull-out extends table for guests<br />
by Tage Frid<br />
There are several different systems to choose from when<br />
making an extension dining table. Some you can purchase<br />
ready-made ; they are usually quite expensive. Of the ones<br />
you can make yourself, I prefer the ' 'Dutch pull-out" dining<br />
table. It is both simple and fast to make.<br />
The tabletop consists of two pieces of plywood, both the<br />
same size, one mounted right above the other on the base.<br />
The lower piece is cut into three sections-two of them are<br />
the leaves, and the third is a fixed center piece. The top rests<br />
on the center piece and the leaves and is held there by two<br />
vertical dowels sitting loosely in guide holes. Thus it is free to<br />
move up and down but not from side to side. The leayes are<br />
mounted on long tapered slides that allow them to be pulled<br />
out from the ends. The slides travel in grooves in the end<br />
aprons and in a supporting rail across the center of the table<br />
base. As a leaf is extended, the taper makes it rise slowly<br />
throughout its travel to the level of the top . As the leaf rises,<br />
so does the top , until the leaf is fully extended and clear of<br />
the top. Then the top drops down again, flush with the leaf.<br />
Before the leaf can be pushed back in the top has to be lifted<br />
high enough to clear, then the top settles back down onto the<br />
center piece as the leaf travels back to its original position.<br />
I made the table illustrated here 25 years ago, and it took<br />
four or five days, including veneering and edging plywood for<br />
the top. Once you understand the system, the work is easy<br />
and should go very quickly. You'll have to make four slides<br />
and only eight mortise-and-tenon joints. Other than wood for<br />
the base and the slides, you need hardwood-veneered plywood,<br />
two 3/4-in. dowels and edging for the top .<br />
In addition to being easy to make, the leaves store right inside<br />
the table and are easy to pull out, even with the table set .<br />
If uninvited guests show up just when the food is on the table<br />
and you are ready to sit down, and they apologize for interrupting<br />
your meal but hint that they haven 't eaten yet themselves,<br />
before you know it they are invited to join you. With<br />
most extension systems you would have to clear the table before<br />
you could enlarge it . But with the Dutch pull-out you<br />
can pull out the leaves without disturbing the setting at all.<br />
There are several important dimensions you must consider<br />
when designing a dining table. Since the seat height of a<br />
dining chair is usually about 18 in ., the height of the table<br />
should be between 29 in. and 31 in. I usually use 30 in .-this<br />
seems to be most comfortable for the average person . And<br />
since people differ in height more from the hip down than<br />
from the seat up, the distance from the floor to the bottom of<br />
the table apron should be at least 24 in ., so that someone' s<br />
long legs or fat legs aren 't the legs holding up the table. In<br />
the length, I like to allow 24 in. for each person, so no one<br />
feels squeezed in. I try ro place the legs so that no one ends up<br />
with a table leg between his or her own . (The easiest way to<br />
avoid that situation is to make a pedestal or trestle table.)<br />
A place setting-dishes, glasses , and so on-is about 14 in.<br />
deep. So the minimum width of the table must be 30 in., or<br />
else you may drink the wine of the person across from you.<br />
Whenever possible, I make dining tables 42 in. wide, to leave<br />
space in the center for food, wine, flowers and condiments.<br />
Leaves of Dutch pull-out store right inside table and can be extended from either or both ends without disturbing dishes.<br />
34
Table at rest. Shaded<br />
end aprons, center<br />
supports are fixed.<br />
As leaf is extended,<br />
tapered slide lifts top.<br />
Top drops down flush<br />
when leaf is clear.<br />
----""""= Left leaf starts<br />
outward, lifting top.<br />
-<br />
-<br />
<br />
<br />
<br />
I<br />
14 .<br />
L<br />
F·<br />
50·112 in.<br />
-- --=--=.=.-- -:.; +i':---=-..:-=-:-:-- - ---= ..<br />
1<br />
1-1<br />
,<br />
l<br />
11<br />
In.<br />
28·112<br />
<br />
4 In.<br />
t<br />
u<br />
J<br />
I ------32·114 in. ----1-1<br />
7/8<br />
I<br />
_ w<br />
24·112 in.<br />
___<br />
1 in'1<br />
<br />
<br />
----I<br />
,- 43·1/2 in.<br />
:<br />
42·112 in.<br />
3/4.in . dowe17<br />
.. .<br />
__<br />
!<br />
!._.-<br />
WA<br />
: .! II<br />
I<br />
! !<br />
:<br />
I<br />
1<br />
I<br />
I 7/8-<br />
·114<br />
/ -- I<br />
I<br />
i i <br />
1_' :<br />
t I<br />
II<br />
!<br />
.. --<br />
:<br />
<br />
I i<br />
I ( 18<br />
!<br />
+<br />
I<br />
___<br />
1 in'1 1-<br />
1-. . - 25·114 in.----'l-I<br />
4 in.<br />
_-":.J ..>.'<br />
<br />
4 i n.<br />
" -<br />
r<br />
I Joint detail<br />
r-"-, t--:-<br />
2·112<br />
I<br />
24-114 in.<br />
-C.:--<br />
...... ... .....<br />
__ ..1-.• ____ I<br />
!<br />
l- 12.1I2 .1. 19 in.----J<br />
add up to 9-3/4 in . Deduct that from 50-112 in . and you get<br />
40- 3/4 in., the inside length of the base. Divide that in half<br />
(20-3/8 in.) and deduct 1-3/8 in. for the stop and half the<br />
thickness of the center support, and you get 19 in . for each<br />
leaf. Thus the table will extend 38 in., its open length will be<br />
the sum of the leaves and top, or 88-1/2 in ., and the width of<br />
the center piece will be the difference between the leaves and<br />
the top, or 12-112 in .<br />
If I had started with both the open and closed lengths, I<br />
would follow the same calculation in reverse to find the overhang.<br />
Since my table measures 50-112 in . closed and<br />
88-1I2 .in. open, simple subtraction gives 38 in. for the combined<br />
length of the leaves. Add the thickness of the two<br />
aprons (1-3/4 in.), both stops and the center support<br />
(2-3/4 in.) and you get 42-112 in . Deducting this from the<br />
length of the top gives 8 in . So the top would be allowed to<br />
overhang the base by 4 in. at each end .<br />
The table base consists of four tapered legs joined to an<br />
apron that is 4 in . deep. I used haunched tenon joints in the<br />
legs. If the tenon came up through the leg in a slip joint, you<br />
would have to clamp across the cheeks when you glue the<br />
pieces together. By leaving the leg solid on top this is not<br />
necessary ; you need clamps only in the direction that will pull<br />
the tenon into the mortise. To get as much strength as possible,<br />
I let the two mortises meet and cut the ends of the tenons<br />
to 45°, but left a 1I8-in. space between them for expansion.<br />
Use a tongue and groove to join the center support across the<br />
base . This piece will guide the slides and serve as a place to<br />
run the stops against to keep the leaves from falling out .<br />
Because the tabletop is loose and the slides are glued and<br />
screwed to the leaves, the top and leaves must either be made<br />
out of plywood or be made using frame-and-panel construction<br />
. If you use plywood, you should get a top grade. You can<br />
buy it already veneered, or veneer it yourself, or you can paint<br />
it , stencil it or finish it however you like. I veneered the top<br />
and leaves together, so the grain would follow when the table<br />
is open , applied solid wood edging and beveled it . There are<br />
two reasons to bevel it . First , if the table gets used a lot, there<br />
might be a little play in the dowels and the beveled edge will<br />
help to hide discrepancies ; second, when the leaves slide<br />
down , they will slide more easily.<br />
The success of your table will depend on your accuracy in<br />
laying out and cutting the four slides. Be sure that the wood<br />
you use is straight. I usually cut the slides oversize and leave<br />
them for a few days to give them a chance to warp. Then I<br />
joint and thickness-plane them to size , in this case 7/8 in.<br />
thick and 1-1/2 in. wide. Their length is the inside measurement<br />
of the base (40-3/4 in.) plus the 7/8-in . thickness of the<br />
apron plus the 4-in . overhang, or 45-5/8 in. The slides will be<br />
trimmed shorter later, for looks, but they have to be full<br />
length now, for measuring.<br />
The ends of the slides that hold the leaves must be cut at an<br />
angle so that they will wedge the leaves up to the level of the<br />
tabletop as they are being extended . On this table, the top<br />
and leaves are 3/4 in. thick. Thus each leaf must rise 3/4 in.<br />
when it has traveled 19 in., its full extension . From one end<br />
of one of the slides, measure down 19 in . and square the line<br />
off. Then make a point 3/4 in. over on the same end. A line<br />
36
connecting this point with the edge of the 19-in. mark will<br />
give the angle at which to cut the slides.<br />
To be sure that all the slides will have the same angle and<br />
be cut exactly the same, you should construct a jig. Square a<br />
piece of plywood about 6 in. wide and a foot longer than the<br />
angled portion. Place the slide over the plywood with both<br />
marks (the ends of the line you have drawn) just touching the<br />
bottom edge of the plywood. Then trace the end and the<br />
other side of the slide and bandsaw out the shape.<br />
With the table-saw fence still at the same setting you used<br />
to cut the plywood jig to width, insert the slide into the jig<br />
and make the cut. Use the same setup for all four slides and<br />
you can be sure they will all turn out the same.<br />
The slides run in slots in the end aprons and the parallel<br />
center support. One pair of slides travels inside the other pair,<br />
and the two run side by side in the slots in the center support.<br />
To lay out these grooves, mark lines on top of the apron at<br />
both ends, 1-114 in. from the inside edge of all four legs.<br />
With a long straightedge, transfer these lines to the center<br />
support. Mark the thickness of the slide to the ozttszde of the<br />
table from these lines on one apron, and to the inside of the<br />
table from the lines on the other. On the center support,<br />
mark the thickness of a slide to both sides of the center line.<br />
The grooves on the end aprons must be the same depth as<br />
the slide at that point, so that the leaf will clear the apron as it<br />
is extended. To fi nd this depth, measure in 4 in. from the<br />
tapered end of the slide and cut the groove to the exact depth<br />
of the slide at this point, in this case 7/8 in .<br />
To find the depth of the grooves in the center support, f{rst<br />
mark its location onto the slides, in this case 25 -1/4 in. from<br />
the tapered end, or half of the length of the closed table.<br />
Then push the tapered side down flat and measure the depth<br />
at the marked point, in this case 1-7/8 in. This is the minimum<br />
depth that will allow the leaf to rise 3/4 in. in its travel ;<br />
the grooves may be cut a little deeper if you wish.<br />
Now that all the measurements and cuts have been made,<br />
the tapered ends of the slides can be trimmed. I wanted the<br />
closed slides to extend 1 in. beyond the apron , so I cut off 3 in.<br />
To assem ble the table, place the slides in the grooves with<br />
the angled sides up. Put the leaves in position (don't forget<br />
that you just trimmed 3 in. off the end of each slide) , and<br />
glue and screw the slides to the leaves. To locate the stops, extend<br />
the leaves 19 in. and mark where the slides pass through<br />
the center support. Then screw on the stops at this point.<br />
The central plywood piece is screwed to the base above the<br />
central suppOrt. It prevents the leaves from falling down<br />
when they are pulled out and locates the tabletop. Drill two<br />
3/4-in. holes in the central plywood piece between the slides<br />
and the apron ; these are the guide holes for the top .<br />
Now push the leaves in and locate the top in its correct<br />
position . Clamp it down to the leaves and mark the location<br />
of the guide holes on the underside of the top. Then drill and<br />
gl ue two 3/4-in. dowels into these holes. The dowels should<br />
be about 2 -1/4 in. long, since the top has to move up a full<br />
3/4 in . while the leaves are being extended .<br />
When you push the leaves back in you have to lift the<br />
tabletop. To prevent scratches that would result from the<br />
tabletop sliding on the leaves, I glued two strips of felt to the<br />
bottom of the top . Use hot hide glue or rubber cement.<br />
f----45-5 / 8 in.-----'<br />
1 9 in·-l J<br />
Lay out slide, then transfe r marks<br />
to plywood to make tapering jig .<br />
f----30 in.<br />
----o-i<br />
51,",)<br />
Jig<br />
Blade<br />
Slide<br />
Ripping the taper: Jig guarantees fo ur identical slides.<br />
Push taper flat to measure depth of slot at center support line.<br />
Contributing Editor Tage Frid is professor of woodw<strong>orking</strong><br />
and indltStrial design at Rhode Island School of Design.<br />
Slots fo r slides are cut in aprons, center STtpport.<br />
37
Tall Chests<br />
An appreciation<br />
by Lester Margan<br />
It is remarkable that so many cabinetmakers from various<br />
sections of the Colonies gathered in Philadelphia during the<br />
latter part of the 18th century. The roster includes such<br />
famous names as Thomas Mfleck, William Savery, John Gillingham,<br />
Benjamin Randolph, Jonathan Shoemaker, Jonathan<br />
Gostelowe and a long list of equally skilled artisans.<br />
These men worked independently, but produced furniture of<br />
similar design and tremendous proportions. The result was a<br />
Chippendale-inspired school that was so fIrmly knit it seems<br />
as if they worked together. They made tall cabinets, secretaries,<br />
desks, mirrors and dining and living room furniture. But<br />
their greatest achievement was the highboy and tall chest of<br />
drawers, pinnacles in the history of cabinetmaking.<br />
This extraordinary explosion of talent began around 1680<br />
when William Penn squired a group of craftsmen from the<br />
Rhine Valley who settled near Philadelphia. These artisans<br />
were not willing merely to copy the European prototypes.<br />
They considered them too detailed with many intricacies that<br />
were foreign to the free-thinking conceptions of the colonists.<br />
Their work was of highest quality, even surpassing their contemporaries<br />
in England, and Philadelphia became one of the<br />
world's principal centers of cabinetmaking.<br />
One of the foremost Philadelphia cabinetmakers was<br />
Thomas Affleck, a Scott, who was trained in England and<br />
emigrated to America in 1763. He made furniture for many<br />
wealthy and important people, among them the governor,<br />
who bought Mfleck's beautiful Chinese Chippendale furniture.<br />
Affleck was the paramount fIgure in the cabinet and<br />
chair-making crafts and the leader of the Philadelphia Chippendale<br />
school.<br />
Dozens of pieces of furniture have been attributed to<br />
Affleck. Today his work is considered the fInest example of<br />
the Philadelphia Chippendale style. During the Revolution<br />
he sympathized with the Royalists, but this did not seem to<br />
affect the continued demand for his furniture. The important<br />
thing was his ability to produce elegant furniture for the<br />
stately manor houses then being built.<br />
After Affleck's death in 1795, his son Lewis advertised in<br />
the Philadelphia papers that he would carry on in his father's<br />
shop. However, Lewis was not successful and soon gave up .<br />
In the latter part of the 18th century, as people became affluent,<br />
the manor house found favor in the cities. This stately<br />
classical form of architecture featured living-room ceilings<br />
that reached a height of 10 ft. or more. The cabinetmakers of<br />
the day tried to satisfy the increasing demand for elegant<br />
furniture to fIt into these interiors. One result was the high<br />
chest, which often reached 9 ft . tall, including the carved<br />
center ornaments. These cabinets contained many drawers to<br />
This impressive Chippendale-style chest-an-chest, now part of the<br />
Phtiadelphia Museum of Art collection, is attributed to Thomas<br />
Affleck, c. 1775. The bonnet top features a double scroll with<br />
pierced fretwork. At the center, an arrangement of oak leaves and<br />
acorns grows out of a basket. The flamelike pattern of the mahogany<br />
veneer is particularly elegant.<br />
hold the necessary service articles for gracious entertaining.<br />
The demand for these highboys was tremendous and as they<br />
became the center of attention in the fashionable living<br />
room, their prices became astronomical. This trend continues<br />
today : A highboy recently brought $40,000 at auction. The<br />
appraised value of the original Kittinger high chest, which<br />
some experts attribute to Affleck and now part of the Yale<br />
University collection, is $100,000.<br />
Each part of these Philadelphia highboys was expertly<br />
made. Aprons were fashioned in cyma curves ; stretchers<br />
flowed in graceful lineation. Flowers, rosettes, urns and principal<br />
pinnacles were exquisitely turned and often included<br />
graceful cartouches. Featured at the top of the crown were<br />
38
pediments perforated at the center to receive flaming torches,<br />
turned finials, baskets of flowers or perhaps the bust of a fair<br />
lady. Chippendale fretwork was often applied around the<br />
upper portion along with carved festoons, drapery effects and<br />
stalactites. Pilasters were fluted and corners chamfered or<br />
decorated with carved flowers and leaves.<br />
Caribbean mahogany was perfect for carving and the<br />
Philadelphia cabinetmakers were masterful carvers. The precise<br />
scale and placement of the carving was a matter that received<br />
careful study. Restraint was mandatory. Carving is like<br />
the icing on a cake : It must be just right or it will appear<br />
superfluous.<br />
Lester Margan, 85, is the author of five books on American<br />
fu rniture. His More American Furniture Treasures, Architectural<br />
Book Publishing Co., New York, 1971, contains measured<br />
drawings of the tall chests pictured here.<br />
This high chest from the collection of the Museum of the Rhode Island<br />
School of Design is also attributed to Thomas Affleck, c. 1765 .<br />
The two applied carved panels on the drawers at top and bottom<br />
contain concave shell carvings for depth. Convex shell carvings<br />
appear at the knees of the cabriole legs.<br />
Tall Chests<br />
The art of proportioning<br />
by Timothy Phzlbrick<br />
As colors can evoke emotions within us, or combinations of<br />
notes and tempos suggest joy or sorrow, so can proportions in<br />
furniture produce a desired effect on viewers. Objects built to<br />
the same proportions, although different in period, style and<br />
composition, can still evoke similar reactions. Proportions set<br />
up and define the framework within which the furniture<br />
maker expresses himself. The very selection of proportions, or<br />
lack of selection, affects the success of the maker's intention<br />
as perhaps no other single factor can . In furniture studies, the<br />
often-used term "integration of design " must be explained<br />
in proportional terms, as well as in terms of structure and<br />
decoration.<br />
The esthetics of proportion is today a lost, or at best a wellhidden<br />
, science because of the current clinical separation of<br />
science from art . The following investigation is an attempt to<br />
uncover proportioning systems used by 18th-century cabinetmakers.<br />
It should be of use to designers and connoisseurs<br />
today.<br />
Most texts on 18th-century furniture contain comments<br />
such as, " The old workmen had an instinct for good design ."<br />
Their authors assume that master cabinetmakers and craftsmen<br />
had some mysterious, built-in instinct for proportioning.<br />
While this may be true of some country cabinetmakers,<br />
great design is not just a "feeling," but a carefully planned<br />
and consciously applied system of relationships, learned in a<br />
rigorous apprenticeship to an old tradition.<br />
Proving that a system of proportions has been deliberately<br />
applied in a piece of furniture is no easy task. In studying a<br />
piece of furniture, one can easily be misled into finding those<br />
ratios one sets out to find. Unfortunately, little research has<br />
been done on the subject and few written records of proportioning<br />
systems exist. Ratios were passed on verbally during<br />
the cabinetmaker's seven-year apprenticeship. The phrase<br />
"Art and Mystery of the trade," seen in the apprenticeship<br />
contracts of the period, refers to the study of proportions and<br />
geometry, together with skills and techniques. Unfortunately,<br />
the "Arts and Mysteries" were a verbal tradition and are<br />
now extinct.<br />
Naturally, all furniture has some proportions in common<br />
for it must conform to the proportions of the human body. If<br />
furniture is to be functional sculpture, its height must relate<br />
to its purpose and this measurement will serve as a starting<br />
point in calculating proportions. The Danish furniture de-<br />
Timothy Phtfbrick, 25, is studying furniture design fo r a certificate<br />
of mastery at Boston University. He has served a fiveyear<br />
apprenticeship restoring and reproducing 18th-century<br />
fu rniture and owns a cabinet shop in Narragansett, R. I.<br />
39
style. The major dimensions are made divisible by a common<br />
integer, 5 or 6 usually, in the basic com bin at ions of 2 : 3, 3: 4,<br />
and 4: 5. Press cupboards for example, tend ro be in the ratio<br />
of 4: 5, width to height (e.g., if the width is 48 in ., the height<br />
is 60 in.). In the early 18th century, with the advent of the<br />
Queen Anne style, visual proportion and geometric ratio are<br />
expressed in both furniture and architecture. In Queen Anne<br />
chairs, for example, heights to widths of backs, and heights of<br />
legs to widths of seats are directly proportional.<br />
The Con'nthian order, from Chippendale (Dover repn'nt, 1966).<br />
Column is scaled in 'modules ' that equal its diameter, moldings at<br />
right are dim ensioned in sixtieths of a module.<br />
signer Kaare Klint has defined optimum chair height at 16 to<br />
18 in., table height 28 to 30 in., standing w<strong>orking</strong> height 40<br />
to 42 in., maximum vision height 54 to 56 in., and maximum<br />
reach 76 to 84 in. These measurements are not new ; they<br />
served the 18th century as well as modern society.<br />
Great American high-style furniture designers also used<br />
traditional proportions long known in buildings, paintings<br />
and furniture. Whole numbers have been important since<br />
classical times : Whole numbers and their simple relationships<br />
(1 :2, 2:3, 3:4, 4:5, 5:6, 6:7, etc, and 3:5 etc) were<br />
the expression of perfection and, therefore, the divine. These<br />
simple relationships have been the framework for a vast<br />
amount of artistic creation. The medieval artist had little<br />
mathematical knowledge, but knew well how to use his<br />
compass, so the basic division of the square and circle naturally<br />
was his proportioning vocabulary.<br />
As Arabic geometry began to permeate the decorative arts<br />
of the 13th century, the tools for the Renaissance were<br />
provided. A reverence for geometry and mathematics as the<br />
ultimate expression of perfection was even more pronounced.<br />
The basis of the Renaissance desire for simple, measurable relationships<br />
was the concept of universal proportions. These<br />
concepts from Renaissance Italy first began ro affect American<br />
furniture in the late 17th century in the William and Mary<br />
The Chippendale style<br />
In the second half of the 18th century, an increasingly pervasive<br />
emphasis was placed on the importance of classicism.<br />
From James Gibb's Rules Jor Drawing the Several Orders<br />
(1731), Chippendale's Director (1754) and The Carpenter's<br />
Co. oJPhtfadelphia 1786 Rule Book, to the work of Thomas<br />
Sheraton (1791-1794), the proportions of the five classical<br />
orders of columns became one of the most widely<br />
written-about ropics. Thomas Chippendale, in his introduction<br />
to the first edition (1754) of his Gentleman and Cabinetmaker's<br />
Director, says : "I have prefixed to the following<br />
designs a short explanation of the five orders. These ought to<br />
be carefully studied by everyone who would excel in this<br />
branch, since they are the very soul and basis of his art."<br />
Chippendale felt these orders and their proportions important<br />
enough ro devote the first eight plates of his book to<br />
drawings and descriptions of their proportioning. Throughout<br />
Chippendale's work, emphasis is constantly placed on the<br />
ratio of height to width. Even the contours and form of<br />
moldings are worked out by a specific system. In Chippendale's<br />
drawings Rococo decoration and ornament are united<br />
with disciplined geometrical principles.<br />
In the work of Thomas Sheraton, classical proportion is<br />
given an even more elaborate role. His drawings, like Chippendale's,<br />
are presented in a precisely proportioned framework.<br />
His introduction informs us that the first part of his<br />
book "provides the workman with geometrical lines applied<br />
to various purposes in the cabinet branch , (which) can not be<br />
subject to alteration any more than the principles of reason<br />
itself. " The fust 146 pages of Sheraton's Drawing Book are<br />
devoted to geometry, including 30 pages on the five orders ;<br />
the remainder are studies of perspective, showing how to<br />
obtain w<strong>orking</strong> measurements from perspective drawings.<br />
The importance of the five orders to these men is hard for<br />
us to understand today. Sheraton explained it this way :<br />
" Many cabinetmakers are found desirous of having a knowledge<br />
of the five orders, and the proportions of the several<br />
frontispieces ...<br />
I believe that the orders are now brought to<br />
such perfection in their proportions as will bear the strictest<br />
mathematical examination ...<br />
I consider them incapable of<br />
improvement." He also wrote that nothing more worthy can<br />
appear in a drawing book and that a knowledge of these<br />
moldings and proportionings is necessary to any man of<br />
culture and to all craftsmen.<br />
The golden section is probably the most ancient and widely<br />
revered proportional system. It has been used for such diverse<br />
purposes as establishing the date of Easter and proportioning<br />
Jacques Villon' s paintings and Le Corbusier's buildings. In<br />
antiquity, Egyptian and Druid builders alike used the golden<br />
section to plan their temples and to proportion other artwork.<br />
The golden section represents the division of a line into two<br />
parts such that the smaller part is ro the larger as the larger is<br />
40
= to the whole. In the diagram below, BC : AB AB : AC. The<br />
geometrical division of a line into these proportions is fairly<br />
I<br />
B<br />
straightforward with compass and rule. But if the length<br />
= BC 1,<br />
algebraic determination of the length AB requires<br />
solution of a quadratic equation and produces an endless<br />
decimal whose ftrst few terms are 1.61803. A rectangle with<br />
sides 1 and 1.618 is known as the golden rectangle. Among its<br />
many interesting properties is the fact that if a square is cut<br />
off one end, the smaller rectangle that remains is the same<br />
shape as the original, that is its short side is still related to its<br />
long side as 1 is to 1.618. For most practical purposes, the<br />
golden section may be expressed as the ratio 5: 8.<br />
Great mysticism surrounded this proportion until recent<br />
times. Described as being like God because it is unique, and<br />
like the Trinity in that it is one proportion in three terms, the<br />
construction of the golden section has always been among<br />
the secrets of the Masonic GUilds. Gibbs, Hogarth, Burlington,<br />
Thornhill, Washington, Jefferson, Harrison and many<br />
other famous men of the 18th cenrury were <strong>Free</strong>masons, an<br />
order which still claims to have preserved through the ages the<br />
secrets of perfect and ideal proportions.<br />
One of the few surviving records of an American cabinetmaker's<br />
predetermination of proportions is found on an<br />
unclear sketch by Samuel Mickle, who was apprenticed to<br />
Philadelphia cabinetmaker Shoemaker in 1765. On the<br />
sketch is the notation, " The Heighth of ye Book Case is 3: 6<br />
inclusive of ye top, ye width of ye Book Case is 3: 5. " It is difficult<br />
to know just where and how the cabinetmaker is applying<br />
these proportions from this cryptic bit of information.<br />
However, this sketch stands as a major document, for it conclusively<br />
proves the consideration of proportion in the design<br />
of a piece of furniture .<br />
Examples of proportioning<br />
In the following study, two drawings from Mickle's sketchbooks<br />
and three 18th-century American highboys are examined<br />
for proportional relationships. In looking for such relationships,<br />
one should not expect to ftnd absolute mathematical<br />
precision: A drawing is flat and a pencil line has no<br />
thickness, while wooden furniture exists in three dimensions<br />
and every piece of wood has thickness. Thus a proportional<br />
scheme worked out on paper, no matter how elegant, can't be<br />
exactly translated to solid wood. In sketching a piece of furniture,<br />
the cabinetmaker would ftrst set up a proportional<br />
framework, then detail the drawing within the grid. Once the<br />
cabinetmaker has chosen his proportions, nothing compels<br />
him to follow them rigidly. Variations would be made for<br />
esthetic reasons, and to solve mechanical problems.<br />
Confusion also occurs because immigrant cabinetmakers<br />
trained in different national traditions would have used different<br />
reference points to set out their proportions, and the<br />
style of furniture made in 18th-century Philadelphia would<br />
not be exactly the same as that made far away in Newport,<br />
R. 1. It is nonetheless remarkable that so many definite relationships<br />
that reduce to small, whole-number ratios can be<br />
found within each piece, and can be found in common<br />
among several ftne antiques.<br />
I believe the examples on this page and the following two<br />
pages demonstrate that 18th-century artisans were well aware<br />
of proportions, and provide sufftcient evidence for serious<br />
Chippendale dressing table, from Mickle sketchbook, 1765 . Handwritten<br />
notes are transcribed in the text below.<br />
4<br />
3<br />
2<br />
2 3<br />
Traced fro m Mickle ;<br />
each module equals 7 in.<br />
contemporary study. I cannot describe my own excitement,<br />
after studying an antique for several hours and measuring<br />
from many points, upon suddenly seeing a relationship.<br />
The photograph above, of a page in Mickle's sketchbook<br />
(Philadelphia Museum of Art, gift of Walter M. Jeffords) ,<br />
shows a Chippendale dressing table. The front elevation has<br />
been traced from the original to display the proportions.<br />
Mickle's notes say, "Top 2 feet 11 inches long and 17 -112<br />
inches wide ; the draw 2 feet 3-112 inches long and 5-112<br />
inches wide ; the frame 2 feet 6 inches long and 24 inches<br />
wide from out to out."<br />
The drawer width, 5-112 in . added to the- 3/4-in. thickness<br />
of the rails above and below it, produces a module of 7 in.<br />
The principal dimensions of the table may be expressed in<br />
terms of this module.<br />
The top is 35 in. by 17-1/2 in ., or 5 modules by 2-112<br />
modules, a 2: 1 ratio. The table is 28 in. high (4 modules) ; its<br />
height to its width is as 4 is to 5. The legs are 3-112 in. wide,<br />
half a module, and thus the height of the table is to the width<br />
of the leg as 8 is to 1, exactly the same as the classical Corinthian<br />
column pictured on the opposite page.<br />
4<br />
41
.' .<br />
,"', .... <br />
.(<br />
2 3 4 5 6 I 7 I<br />
7<br />
6 5<br />
4 3<br />
2<br />
6 5<br />
4 3<br />
2<br />
[ II<br />
2 3 4 5 6 7<br />
The exactly proportioned front view of a handsome cheston-chest<br />
above is also taken from Mickle's sketchbook (Philadelphia<br />
Museum of Art) . The original was drawn at 3/32 in.<br />
to the inch. The overall height of the chest (from the floor to<br />
the rop of the pediment) is 90 in. ; the overall width (measured<br />
at the knees) is 45 in.-a 2: 1 ratio. Within this rectangle<br />
are two boxes, defined by the mid-molding. The lower chest<br />
is 36 in . high, 42 in. wide (from the sides) and 21 in. deep<br />
(from an auxiliary view) . The upper chest is 42 in. high from<br />
molding to cornice, 54 in . high to the top of the pediment,<br />
and 40 in . wide. Thus the lower chest is twice as wide as it is<br />
deep, and its height is related to its width as 6 is to 7. The<br />
upper chest is exactly as high as the lower chest is wide, which<br />
is to say the height of the upper is to the height of the lower as<br />
7 is to 6. The height of the upper chest, including pediment,<br />
is related to the height of the lower chest to the mid-molding<br />
as 9 is to 6, or 3: 2. The width of the chest has been divided<br />
into seven equal parts (a module of 6 in .) and the height has<br />
been stepped off in the same increments.<br />
This drawing, because of its authenticity and lack of confusing<br />
detail, is an excellent subject for speculative exploration<br />
with a pair of dividers and a scale. For example, the<br />
height of the legs is just half the height of the curved braces<br />
that form the pediment, and very close to twice the height of<br />
the cluster of moldings and rails that divides the chest. The<br />
height of the feet plus the bottom moldings is the same as the<br />
height of the bottom drawer front. And each drawer front,<br />
plus the rail on which it sits, is just as high as the drawer front<br />
below it , without rail, except at the mid-molding itself.<br />
The front-view drawing above is a photo tracing of the<br />
majestic Philadelphia highboy pictured on the magazine's<br />
front cover (Yale University Art Gallery, Mabel Brady Garvan<br />
collection) . It is the original of the well-known Kittinger reproduction<br />
and has been appraised at $100,000 . Its dimensions<br />
and basic proportions are virtually identical to those<br />
found in the Mickle drawing : overall 90 in. high and 45 in.<br />
wide, a 2 : 1 ratio. The lower chest is 43 in . wide, 21-112 in.<br />
deep (2 : 1) and 36 in. high (width-to-height is almost 7: 6) ;<br />
the upper chest is 42 in. high to the cornice and 42 in . wide<br />
(1 : 1), and the upper chest is exactly as high as the lower is<br />
wide. The upper chest from mid-molding to the top of the<br />
pediment is 54 in ., as in the Mickle drawing, a 3: 2 ratio to<br />
the height of the lower chest. Each increment along the bottom<br />
and left side represents a 6-in. module.<br />
Furthermore, the legs are 15-112 in. high and the lower<br />
case is 20-112 in. high, a ratio of 3 : 4. The small lower side<br />
drawers are each one-quarter of the total width between the<br />
corner posts, and the central carved drawer is just as wide as<br />
the engaged fluted quarter-columns are high . The drawers in<br />
the upper case progress as before : Each drawer front , plus the<br />
rail on which it sits, is as high as the drawer below it .<br />
42
The photograph above is of yet another revolutionary-era<br />
Philadelphia highboy (Museum of Fine ArtS, Boston). At first<br />
glance this antique chest appears identical to the previous<br />
one, but close examination reveals that not only does it differ<br />
in details of ornamentation, but also it is a fu ll 4-112 in.<br />
shorter. Yet if the overall measurements are taken at the sides<br />
of the base rather than at the mid-molding, the ptoportional<br />
scheme is virtually identical. For while the chest is only<br />
85-112 in . high, the base is 43 in . wide (2 : 1) and 21-1/2 in .<br />
deep (also 2: 1). The height of the base is 36 in ., as before a<br />
ratio of almost 6: 7 to its width, and the height of the leg is<br />
related to the height of the lower case as 3 is to 4. The upper<br />
chest is 41 in. high to the cornice and 41-1/2 in. wide, a virtual<br />
square ; its height measures 49-112 in. from the midmolding<br />
to the top of the pediment, very close to a 4 : 3 ratio<br />
to the height of the lower chest. If the width of the lower<br />
chest is swung up vertically from the mid-molding, it lands at<br />
the base of the finials and at the bottom of the pediment cutouts,<br />
while before it landed at the cornice itself.<br />
The central carved drawer is 16-3/4 in. wide and the fluted<br />
quarter-columns are 16-3/4 in. high. And once again the<br />
drawer fronts seem to progress : Each ftont, plus the rail on<br />
which it sits, is as high as the drawer ftont below it .<br />
Finally, the photograph of a 1760 Newport highboy at<br />
right (Museum of Fine Arts, Boston) has been converted to a<br />
photo tracing, above. While this chest is uite different trom<br />
the Philadelphia examples, and at 81 in. high is smaller, proportional<br />
relationships can still<br />
be found. Its overall width at<br />
the knees is 40-314 in., the usual<br />
1: 2 ratio to overall height.<br />
But here the similarities end.<br />
On one hand, the mid-molding<br />
can be considered part of the<br />
base, as in the Philadelphia<br />
chests, giving a base height of<br />
37 -112 in . The lower case is<br />
39 in . wide, a height-to-width<br />
ratio very close to square, and<br />
the leg height, 18-112 in ., is<br />
about half the base height. On<br />
the other hand, the mid-molding<br />
is actually fastened to the<br />
upper case and therefore may be<br />
considered a part of it. This assumption<br />
makes the base the<br />
usual 36 in . high , and the upper case 45 in . high, a 4: 5 ratio.<br />
Furthermore, notice that the pediment is three times as<br />
wide as it is high, the lower drawers are as wide as the upper<br />
case, the small square drawers are a fifth as wide as the case,<br />
and the upper drawers follow the familiar ptogression.<br />
43
Entry Doors<br />
Frame-and-panel construction is sturdy , handsome<br />
by Ben Davies<br />
Exterior doors are the problem child of architectural<br />
design. They are required to perform three functions : seal off<br />
an opening from the exterior air, open to allow passage and<br />
then reseal, and be attractive. All this from wood, a material<br />
that can change in size as much as an inch over the width of a<br />
typical opening. While each of these functions might be separately<br />
accomplished with ease, their combination into one<br />
design creates problems.<br />
Single-panel board-and-batten constructions of edge-glued<br />
lumber are generally too unstable for exterior doors. They cast<br />
or wind unless great care is taken in the selection and seasoning<br />
of the lumber. They also expand and contract so much<br />
with the seasons that sealing against the weather is impossible.<br />
These shortcomings can be overcome by using frameand-panel<br />
construction and, in fact, most doors are made this<br />
way. The style is relatively stable and offers great flexibility of<br />
design. Even the familiar commercial veneered doors are a<br />
variation of the frame and panel-the panel is reduced in<br />
thickness to veneer and glued over the frame rather than inserted<br />
into grooves, and cardboard honeycomb or wood cores<br />
support the veneer. These doors succeed admirably in the first<br />
two functions a door must perform, but fail miserably at<br />
being attractive.<br />
The frame-and-panel door has been in use for so long that<br />
its construction is well understood, and variations on its designs<br />
have been thoroughly explored. When any construction<br />
method remains dominant for hundreds of years it can mean<br />
only that it works quite well.<br />
The standard size for entrance doors of new construction in<br />
the United States is 3 ft . wide by 6 ft . 8 in. high. A walnut<br />
door of this size can weigh 80 lb. to 100 lb. or more, depending<br />
on the thickness of the panels and the amount of glass.<br />
This is considerably heavier than a softwood or hollow-core<br />
door of the same size, and great care must be taken to ensure<br />
that the joints are well designed and well constructed.<br />
I have seen a number of doors fail that were constructed<br />
Routed sticking stops short of corners in raisedpanel<br />
door, left, but continues around corners of<br />
flat-panel door, center. Both are Honduras mahogany.<br />
Detail from oak door, above, shows rout·<br />
ed sticking combined with molding.<br />
44
Machine-made tenon<br />
with blind dowels,<br />
left, is as strong as<br />
traditional haunched<br />
and wedged joint.<br />
Left, the parts of a<br />
door; right, a<br />
diagram of the<br />
fo rces involved. In<br />
effe ct, the entire<br />
weight of the door<br />
is transmitted to<br />
the hinge stile<br />
through point A.<br />
Every pound of<br />
door weight adds<br />
five pounds of<br />
strain to the tenon<br />
on the hinge side .<br />
A<br />
Handmade through tenon,<br />
haunched and wedged, may<br />
eventually protrude.<br />
Seasonal movement and stress<br />
may split pinned tenon along<br />
grain, making holes into slots.<br />
with a mortise-and-tenon joint pinned through the cheek<br />
with dowels. A stronger joint is one with blind dowels inserted<br />
into the end of the tenon and bottom of the mortise. I<br />
use a 3-in. deep mortise and tenon with three or more 1 I 2-in.<br />
diameter blind dowels to join the stiles with the rails. Interior<br />
parts of the frame, such as muntins, are joined to the rails<br />
with smaller tenons, usually made to fit the groove cut for the<br />
panels, and are also blind-doweled. For flat panels I ordinarily<br />
use a 1I2-in. deep groove in the rails and a 3/4-in. deep<br />
groove in the stiles. This difference is to compensate for the<br />
greater shrinkage that occurs across the grain of the panels.<br />
Several factors make blind dowel pins preferable to<br />
through-the-cheek pins. The first is visual. Dowels through<br />
the cheek are often chosen because they give the same sense of<br />
rigidity to frames as dovetails give to casework. While they do<br />
make a door look sturdy, the time will surely come when that<br />
particular effect is not wanted.<br />
More importantly, I believe the blind-doweled tenon to be<br />
stronger than one pinned through the cheek. A tenon with<br />
blind dowels need not be haunched because the dowel pins<br />
not only make the tenon effectively longer, but also transform<br />
a stub tenon into a haunched tenon. Thus the glue area of the<br />
tenon becomes about one-third greater. And a stub tenon can<br />
be made more quickly than a haunched tenon.<br />
Dowels perform two main functions. One is to prevent the<br />
tenon from sliding out of the mortise and the other is to<br />
counteract the bending moment of the weight of the door<br />
about the point where the tenon enters the stile. The lever<br />
arm through which the through-the-cheek dowel must act is<br />
necessarily about 3 14 in. shorter than that of the blind<br />
dowels. In a 3-in. tenon this difference translates into 25%<br />
greater strain on the pins. It is very important to understand<br />
that on a 36-in. door with stiles 6 in. wide, every pound of<br />
door weight adds about 5 lb. of strain to the dowels on the<br />
hinge side of the door. The wider the door and the narrower<br />
the stiles, the more intense the leverage. The maximum<br />
length of a through-the-cheek dowel is the thickness of the<br />
Ben Davies makes doors and furniture at Muntin Woodworks<br />
in Chattanooga, Tenn. He has taught phzfosophy.<br />
door, while the blind dowel can be twice as long as the width<br />
of the stile minus the tenon length. The extra dowel length is<br />
significant because part of the glue line between the dowels<br />
and their holes is end grain joined to long grain.<br />
I have not discussed the through wedged tenon because<br />
this joint must be made by hand, a relatively time-consuming<br />
operation. However, the joint is strong, although in the long<br />
run the tenon will protrude slightly from the stile.<br />
The total strength of a blind doweled mortise-and-tenon<br />
depends on two factors : the shear strength of the glue line<br />
that joins the cheek of the tenon to the wall of the mortise,<br />
and the lesser of the tensile strength of the wood in the<br />
dowels and the shear strength of the glue line around the<br />
dowels. The dowel joint is strongest when the outside dowels<br />
are as far apart as possible without getting so close to the end<br />
that the tenon is split by hydraulic pressure from the glue.<br />
A mortise and tenon can be strengthened by increasing the<br />
size of the tenon, thereby increasing the glue area. The thinness<br />
of the glue line is also quite important-the thinner the<br />
better. The smoother the walls of the mortise and the sides of<br />
the tenons, the better the adhesion of glue to wood. I use a<br />
chain mortiser to make the mortise, and for the tenons, either<br />
a tenoning jig on the table saw or a single-end tenoner, which<br />
cuts with a cylindrical head like a jointer. But the tools used<br />
are not as important as getting a close fit.<br />
While the decline and fall of Western civilization is widely<br />
anticipated, these things do take time, and until the event<br />
actually occurs there are few circumstances in which a door<br />
will be exposed to moisture other than that which is in the air.<br />
Therefore I generally use aliphatic resin (yellow) glue on doors<br />
that will be protected by a porch. This glue has worked out<br />
well in practice. In order to be classified ' 'waterproof, " a glue<br />
joint must withstand boiling water for some hours without<br />
losing strength. If you plan to boil your doors, phenol<br />
resorcinol glue is what you want. No matter what glue is used,<br />
be sure to seal both ends of the door with polyurethane<br />
varnish, even if the door is to be delivered unfinished. This is<br />
often neglected by the painter.<br />
Wooden panels for a door can be flat or raised. Raised panels<br />
are somewhat easier to fit, because with flat panels the fit<br />
45
Federal law requires manufacturers to use tempered glass, but permits<br />
leaded glass panels as long as no single piece of glass is larger<br />
than 30 sq. in. and no opening is large enough to pass a baseball.<br />
Beveled octagonal glass, left, is a framed panel within a panel.<br />
must be precise-very nearly tight enough to split the stile or<br />
rail but not so tight as to actually do it. Something can be<br />
gained by slightly tapering the edge of a panel by a hand<br />
plane or belt sander but this requires a very light touch. Any<br />
irregularity or dip left by the plane will show up distinttly<br />
where the panel enters the frame. When using panels of<br />
glued-up stock, it is a good idea to design the door so that no<br />
panel is wider than about 12 in. This is particularly true where<br />
there is a cutout in the center for glass. If the panel and glass<br />
fit tightly, the wood of the panel may split at its nartow point<br />
when contracting, rather than moving in its grooves. Of<br />
course, don't fragment a design just to obtain narrow panels.<br />
If a wide panel is necessary, flat-cut veneer over plywood<br />
will give great stability. Or large panels themselves can be<br />
made up as another frame within the frame of the rails and<br />
stiles, if the changing grain directions do not do violence to<br />
the design. A number of coats of polyurethane varnish on the<br />
door will inhibit the transfer of moisture from wood to air and<br />
reduce the shrinkage-expansion oscillations.<br />
Often an integral part of the doors I design is a piece of<br />
stained glass that is curved or in some other way not<br />
rectangular. Installing the glass in the irregular opening can<br />
be a problem. The easiest solution is to let the glass into a<br />
groove1when gluing up the door, in the same manner as for a<br />
wooden panel. This is quick and convenient, but impossible<br />
to repair. It is best to avoid this method unless the door is going<br />
to lead a quiet life in the interior of a mausoleum. Gentle<br />
curves can be glazed with moldings of steamed wood. First, a<br />
rabbet is cut with the router, then the glass is bedded in glazing<br />
compound, and finally the molding is steamed and put<br />
into place. I sometimes make a virtue of the necessity for fasteners<br />
to hold the molding and work brass screws into the de-<br />
sign. Silicone caulk is excellent and long lasting, but it is also<br />
a glue and the window will have to be cut loose with a razor<br />
blade if it has to be removed. If curves are too acute for<br />
steam-bent wood, an extremely flexible brown plastic panel<br />
retainer can be used. It is available from Minnesota Woodworkers<br />
Supply, Rogers, Minn. 55374.<br />
If neither steam bending nor plastics is appealing, you can<br />
use the band saw or sabre saw to cut a molding out of solid<br />
stock to fit the line exactly where glass and wood meet. This<br />
works well, but is time-consuming. Leave the stock 1 /2 in. or<br />
more thick, make the cutout, then fashion some detail on the<br />
edge complementary to the sticking (the shape cut into the<br />
inside edge of the frame) on the door.<br />
The sticking on all commercial doors is done so that the<br />
detail runs the full length of the stile. Its mirror image, called<br />
the cope cut, is then made on the shoulder of the tenon. The<br />
corner resulting when the door is assembled is a crisp line,<br />
much like that made by mitered molding.<br />
The most economical way for a small shop to make these<br />
cuts is with matched coping and sticking cutters for the<br />
shaper. Knives can be purchased with standard copes and<br />
stickings already ground and many companies will grind a set<br />
to your specifications. I use a single-end tenoner with cope<br />
heads, which is somewhat more cumbersome to set up than<br />
the shaper but has the advantage of easily cutting a tenon as<br />
long as 3 in. and making the cope at the same time. Also,<br />
matching beading and coping bits are available for the router,<br />
and one could fashion a set of wooden hand planes to do the<br />
job. Skill and patience with hand tools can make a joint as<br />
well as a ton of machinery can, and also will lead one in the<br />
direction of simpler, less cluttered designs.<br />
Relying on sticking to provide the detail on the inside edge<br />
46
of the frame works well if the panel design is rectangular and<br />
raised panels are used. However, when the design includes<br />
curved or flat panels, it is often better to eliminate crisp corners<br />
by cutting the sticking with a router after the frame is<br />
clamped up without the panels. The effect is to soften the<br />
corner, draw the eye away from the frame and emphasize the<br />
shape of the panels. Although subtle, the difference is<br />
important to the overall feeling of the door. Attention is diverted<br />
from the outline to the interior, for the most part unconsciously.<br />
Generally, soft corners are best suited to less<br />
formal designs, although this is not a hard-and-fast rule.<br />
Making use of this detail can be a powerful tool for the<br />
designer in trying ro achieve a desired effect.<br />
Moldings around the panels give' a similar effect to<br />
conventionally cut sticking, but far more depth and detail are<br />
possible. The door can be made up with everything square<br />
and the moldings then glued into place. There is a problem<br />
here of wood movement, best solved by fastening the<br />
molding to the frame, leaving the panels free to expand and<br />
contract. Silicone-type glues will stretch a great deal while still<br />
holding their bond. Better yet, put the molding around the<br />
panel like a picture frame, with a channel or a tongue on its<br />
outer edge to fit to the door frame. No glue is needed to hold<br />
the panel or the molding in place.<br />
Lately I have been experimenting with a molding that is<br />
H-shaped in cross section, with excellent results. The open<br />
ends of the H are cut to fit the stiles and rails on one side, and<br />
to fit the thickness of the panel on the other.<br />
It is difficult for me to say anything really useful about<br />
design because only its superficial aspects can be discussed<br />
meaningfully. Much nonsense is spoken and written in an<br />
attempt to intellectualize style and lump it together with<br />
technique. More often than not, good design is a matter of<br />
trial and error combined with the designer's ability to<br />
recognize those combinations of color and form that succeed<br />
and, just as important, those that do not.<br />
A number of design techniques, although they will not<br />
generate successful designs all by themselves, are nonetheless<br />
helpful from time to time. One of these techniques is to use a<br />
geometric form where possible rather than a free form.<br />
Beveled glass takes on a multifaceted gemlike appearance<br />
when used in openings that are regular or irregular polygons.<br />
These same polygons around a free-flowing piece of stained<br />
glass give a visual reference that controls the curves on its<br />
interior. I suspect this explains why Art Nouveau was less<br />
successful in architecture than it was on a smaller scale. Its<br />
paintings were bounded by rectangular frames and its small<br />
objects and furniture by rectangular walls. Its architecture had<br />
no regular boundary and consequently appeared grotesque.<br />
Descriptions of space will go where they will but the human<br />
mind is Euclidean. And why should these geometric devices<br />
not succeed? Much of the diversity and beauty found in nature<br />
has as its foundation the geometric, crystalline structure<br />
of inorganic materials. A designer can do a lot worse than to<br />
mimic nature. At least it helps avoid appearing contrived.<br />
Another interesting tool comes from the arithmetic series<br />
0, 1, 1, 2, 3, 5, 8, 13, 21, 34, and so on. These are called Fibonacci<br />
numbers and each number in the series is the sum of<br />
the two preceding numbers. After the series has progressed<br />
for a while, the ratio between any two adjacent numbers stabilizes<br />
at 1.618. All this would be only of academic interest if<br />
someone had not noticed that the Parthenon fits neatly into a<br />
Matched sets of shaper cutters make coping and sticking.<br />
Panels are commonly held by grooves in rails and stiles, left,<br />
or in rabbet by applied molding, right.<br />
Moldings with more depth and de tail may be tongue-andgroove,<br />
left, or H-shaped in cross section, right.<br />
rectangle whose width is 1.62 times its height ; that the exquisite,<br />
logarithmically spiralled shell of the chambered<br />
nautilus can be generated with this ratio ; that the proportions<br />
of some of Leonardo da Vinci's paintings, as well as<br />
those of Mondrian, seem to be determined by this ratio. A<br />
rectangle of this proportion, known as the golden rectangle, is<br />
frequently used in art and architecture. It has obvious applications<br />
to both doors and casework. Of course we do not want<br />
every rectangle to have these proportions, but it can be helpful<br />
to know the relationship.<br />
These examples do not begin to scratch the surface. They<br />
are from one category of one mode of our awareness. That is,<br />
they are visual and oriented toward form. Within the visual<br />
mode there are also techniques for generating color and<br />
texture. And most often neglected are the other senses :<br />
smell, touch and hearing. The interplay and blending of<br />
techniques with a material as diverse in its nature as wood<br />
allows limitless possibilities for design.<br />
And yet, when a door or piece of furniture succeeds, it is<br />
due to the designer's sensitivity rather than to manipulation<br />
and awareness of techniques. In much of the work where the<br />
golden rectangle has been found, the designer was unaware of<br />
the mathematics involved ; the proportion just looked right.<br />
No doubt it is very easy to do a perfectly hideous piece based<br />
on the golden rectangle, or on any geometric figure for that<br />
matter. Techniques are just toys with which to play-they do<br />
not guarantee good design. Good design is simply done, not<br />
generated by formula.<br />
47
The Right Way to Hang a Door<br />
by Tage Frid<br />
When I make a door I first make the doorcase (frame). I make<br />
the inside of the doorcase 3/16 in. larger in height and width<br />
than the door itself. If the door is to be painted, I allow a little<br />
more for the paint. I bevel the edges of the door a little toward<br />
the closing side, so that if dirt or paint should fill up the corners<br />
of the frame, the door will still close tightly.<br />
If I am using two hinges, I place them approximately one-sixth<br />
of the height of the door in to the center of the hinge. With three<br />
hinges, I center one and move the other two out closer to the top<br />
and bottom . The hinges should be mortised half into the door<br />
and half into the frame. Here is where the mortising plane (Fine<br />
Woodw<strong>orking</strong> , Fall '77, p. 18) comes in handy, as it will fit into<br />
the lip of the frame.<br />
When fitting the hinges to the jamb, inlay the top hinge so<br />
that the door will fit tightly against the jamb when it is closed.<br />
But inlay the bottom hinge a little less, so there will be a gap of<br />
1/8 in. or so in the back. Setting the hinges this way will leave<br />
the whole door cocked at a slight angle, which is much exaggerated<br />
in the drawing. The space will not be the same the whole<br />
way around. I do this because as a hinge starts wearing the door<br />
will begin to droop down. Hinges set as described will allow for<br />
this droop and the door will fit much better throughout the life<br />
of the hinge. It is especially necessary to do this with modern<br />
stamped and rolled hinges. You can see in old doors that haven't<br />
been hung this way the extent ro which drooping occurs.<br />
When I install the door frame I have all the hardware-hinges,<br />
locks, latches-already installed in the frame. I use wood shingles<br />
as shims ro level the frame and fasten the hinge side first. Then I<br />
hang the door inro the frame, close it and shim it until I get the<br />
spacing I want all the way around the door. Then I fasten the rest<br />
of the frame ro the studs on the wall.<br />
If I really want to do it right, I use a door-frame dovetail on all<br />
four corners, with the pins in the horizontal pieces. The joint is<br />
designed so that when you fit the door you can make the frame<br />
narrower or wider without a gap showing. Also, if the door<br />
should shrink or expand, I can take the outside molding off and<br />
wedge in or shim out the door frame ro fit the door without<br />
getting a gap and without having ro plane the door and refit the<br />
hardware. And this joint is much stronger than the usual method<br />
of nailing the corners together.<br />
f--<br />
- - - --<br />
Door hung askew, here<br />
exaggerated fo r clarity,<br />
allows fo r droop as hinges<br />
wear. Door-frame dovetad<br />
makes opening adjustable<br />
without ugly<br />
gaps. Drawing at right<br />
shows joint in widest position;<br />
three sections<br />
below show joint going<br />
together, fully closed and<br />
fu lly open. Bottom sketch<br />
shows how sloping tads<br />
on vertical pieces /it undercut<br />
between pins.<br />
I Z. / /"<br />
;<br />
; ;<br />
-. ----<br />
I, " I, 'r<br />
--'- ---<br />
48
Drawer Bottoms<br />
Six variations on a theme<br />
by Alan Marks<br />
Drawers have long been considered<br />
one of the most difficult elements in<br />
cabinetry, probably with justification.<br />
Done in traditional fashion, they are<br />
time-consuming and require exacting<br />
work if they are to operate properly.<br />
This accounts on the one hand for<br />
industry's preference for stapled particle<br />
board, hot-melt glues, and ballbearing<br />
steel suspension glides ; and on<br />
the other hand for the tendency of today's<br />
craftsmen to avoid traditional<br />
drawers in favor of compartments,<br />
shelves or pigeon holes. Dovetailed<br />
construction, however, remains the<br />
strongest way of making a drawer, and<br />
also the most attractive.<br />
The many types of construction possible<br />
using dovetails allow for innovation<br />
and flexibility, as witnessed by<br />
these six examples from Malmstens<br />
Verkstadsskola in Stockholm. Although<br />
the Swedes agree that the dovetailed<br />
drawer is the sturdiest, they often consider<br />
the decorative aspect incidental.<br />
All of the front dovetail joints shown<br />
here are half-blind. The conservative<br />
Swedes generally eschew through dovetails<br />
in drawer fronts because they<br />
interfere with the design requirements<br />
and overall style of traditional pieces.<br />
Drawer fronts on such cabinets often<br />
are delicately inlaid with veneers or<br />
carved or profiled around their edges,<br />
all unsuitable situations for through<br />
dovetails. Also, problems of uneven<br />
swelling and shrinkage can occur with<br />
through dovetails, when the wood of<br />
the solid drawer front shrinks while the<br />
end grain of the tails does not. Through<br />
dovetails are , however, used in the<br />
backs of drawers, where the unevenness<br />
ordinarily remains unnoticed.<br />
French bottom<br />
The traditional drawer bottom is<br />
made of solid wood, as opposed to<br />
Masonite or plywood. Thought to have<br />
originated in France, the so-called<br />
"French" drawer bottom floats with its<br />
grain running parallel to the drawer<br />
Exploded view from rear, with side and glide removed, shows how<br />
French-bottom drawer is put together. Section at left shows bottom<br />
screwed to front rabbet; right, section shows side, glide and bottom.<br />
The little chest shown here is used to teach drawer construction at<br />
Malmstens Verkstadsskola (workshop and school) in Stockholm,<br />
Sweden. It was made in 1960 by master cabinetmaker Artur jonerot,<br />
from drawings by guitarmaker Georg Bolin, then rector of the<br />
school. Of mahogany, it stands 65 cm (25 in.) high, 25 cm (10 in .)<br />
wide and 31 cm (12 in .) deep . From the top, the drawers are kitchen,<br />
NK, false French, French, NK with ply bottom, and side-hung.<br />
The work of Carl Malmsten, who died in 1972 at age 83, was an inspirational<br />
source fo r the commercial fu rniture style now known as<br />
Scandinavian or Danish modern. Many of his designs are sttll in pro·<br />
duction; his school, which he fo unded in 1930, is now state-owned.<br />
In preparing drawings for manufacturers, he usually offered alternative<br />
constmctions and indicated the one he thought sttperior. The<br />
second would be accompanied by a comment such as, 'This construction<br />
probably won 't even last a hundred years. '<br />
49
Full-size sections through drawer sides<br />
and bottoms (medium grey) : Carcase<br />
sides and rails are lig ht grey ; glides are<br />
darkest grey.<br />
I<br />
French bottom<br />
False French bottom<br />
Kitchen drawer<br />
I<br />
J<br />
front, grooved into a two-piece frame<br />
formed by the glides. The drawer front<br />
is rabbeted to receive the bottom ,<br />
which is slid home after glides have<br />
been glued to the drawer sides. Then<br />
the borrom is secured at the front with<br />
screws or a few brads, thus allowing<br />
later removal for cleaning, refinishing<br />
or repair, or else it is simply glued at<br />
the front edge. Either way, the wood<br />
bottom is free to expand and contract<br />
in its grooves. On a drawer this small,<br />
the borrom need be only 8 mm (5116<br />
in.) thick ; it is raised 1-112 or 2 mm<br />
(1116 in.) above the borrom of the<br />
glides to get around problems of sagging<br />
and scraping. The tongues should<br />
be made about 2 mm (3 /32 in .) thick<br />
and 3 mm (118 in.) long.<br />
The back of this drawer-and all the<br />
drawers discussed here-is made 5 mm<br />
(5116 in.) lower than the sides ; this<br />
keeps the back from scraping as the<br />
drawer is pulled out.<br />
The bottom edge of the drawer front<br />
4 protrudes about mm<br />
(5/32 in.) below<br />
the drawer side to act as a stop. This<br />
overhang slides into a corresponding<br />
rabbet in the carcase rail ; the drawer<br />
may be made to close flush or to recess<br />
by varying the depth of the rabbet.<br />
False French bottom<br />
Because the French bottom is somewhat<br />
complicated to make and not<br />
compatible with large series production,<br />
the obvious shortcut is to take<br />
advantage of such dimensionally stable<br />
materials as plywood and Masonite.<br />
The resulting false French bottom<br />
simplifies construction and saves time.<br />
It looks the same at the front, but from<br />
the back the scalloped profile of the<br />
genuine French borrom is missing and<br />
three plies, two of veneer and one of<br />
Masonite or plywood, show up. This<br />
procedure creates a problem : The bottom<br />
might warp upward or become<br />
uneven if it is not restrained in some<br />
way ; a tongue cut in Masonite or<br />
plywood would be much too weak. The<br />
solution is a glide with a groove wide<br />
enough to accommodate the whole<br />
thickness of the bottom, glued to the<br />
sides and butted against the front, as<br />
before. This creates a ledge inside the<br />
drawer, like the edge of the frame in<br />
conventional panel construction, which<br />
can be rounded. The final firring of the<br />
glides is left until sides, front and back<br />
have been assembled. Then the glides<br />
are held in place at the front, marked at<br />
French bottom, back view.<br />
the back, and rabbeted with a chisel the<br />
small amount needed to make the bottom<br />
of the glide flush with the borrom<br />
of the side, enabling the bottom to be<br />
slid home. The drawer bottom projects<br />
into a rabbet in the drawer front and is<br />
fastened there with brads or screws and<br />
a bit of glue.<br />
Kitchen drawer<br />
The kitchen drawer bottom carries<br />
the cheapening of quality construction<br />
to its extreme. It is nothing more than a<br />
veneered plywood or Masonite bottom<br />
held by grooves in the sides and front<br />
and glued in place. There are disadvantages<br />
: rubbing on sides, little torsional<br />
strength, a small gluing surface, sides<br />
weakened by the groove, and a tiny<br />
gliding surface that eventually wears<br />
grooves in the rails.<br />
NK drawer<br />
The traditional French bottom and<br />
its counterfeit version share a weakness<br />
with most drawers made ever since<br />
NK glide ; pins are pared flush with side .<br />
50
chests of drawers replaced lidded<br />
chests : the sides present a large scraping<br />
surface. This is noisy and can make<br />
the drawer difficult to extract. A solution<br />
is found in the so-called NK (pronounced<br />
enco) drawer.<br />
NK is the abbreviation for a large<br />
store with several branches, Nordiska<br />
Kompaniet. Founded in Stockholm in<br />
1902, a time of revolution against clutterery.<br />
overdecoration in Swedish interiors,<br />
NK set up its own furniture facto<br />
It was able to design , build and<br />
market tasteful contemporary pieces<br />
more in keeping with the timeless<br />
advice of William Morris : "If you want<br />
a golden rule that will fit everybody,<br />
here it is : Have nothing in your homes<br />
that you do not know to be useful, or<br />
believe to be beautiful ."<br />
The glides, usually 10 to 12 mm<br />
(1/2 in.) thick, are glued to the bottom<br />
of the sides and protrude about 3 mm<br />
(118 in.) beyond them. This is done by<br />
cutting the pins on the drawer front<br />
about 3 mm deeper than the thickness<br />
of the sides. Thus the drawer is steered<br />
by the narrow side surfaces of the glides<br />
alone. After assembly, the protruding<br />
full pins are pared flush with the sides,<br />
while the half-pins at the top and<br />
bottom of the front are trimmed to horizontal.<br />
A solid bottom is screwed or<br />
glued into a groove in the drawer front.<br />
This construction gives ultimate ease<br />
in sliding, especially when used for<br />
high drawers, and is quite strong because<br />
of the bracing the glides provide<br />
by being glued across the corner.<br />
NK ply bottom<br />
The one drawer that provides all<br />
possible strengths is the NK style with a<br />
veneered Masonite or plywood bottom,<br />
although it may offend those who insist<br />
upon solid wood. The version shown<br />
here has a half-open front, intended for<br />
use inside large cabinets with doors or<br />
within secretaries with drop leaves.<br />
Since it needs no pull, the cabinet door<br />
can close quite close to the drawer<br />
front, an optimal use of space. The<br />
bottom of the front entirely overlaps its<br />
supporting rail.<br />
In construction, the veneered bottom<br />
is cut to width such that its edges on<br />
either side lap the drawer sides by half<br />
their thickness. It is then glued into a<br />
rabbet in the glides. The glides butt<br />
against the front, where the bottom<br />
enters a rabbet. This assembly, if<br />
squared properly, automatically ensures<br />
NK glide with low /ront, recessed side.<br />
that the drawer front closes parallel to<br />
the cabinet. Excellent fits are easily<br />
made possible if the bottom and glide<br />
assembly is first fitted to the drawer<br />
opening before it is glued to the front,<br />
sides and back.<br />
Side-hung<br />
The side-hung drawer slides on<br />
runners inset into the cabinet sides and<br />
screwed in place. These runners also<br />
butt the end of the groove in which<br />
they ride and act as stops for the<br />
drawer. Thus the drawer front need<br />
have no overhang . .The grooves may be<br />
made with a router, shaper or dado<br />
head , and squared up with a chisel .<br />
The veneered Masonite or plywood<br />
bottom acts as a cross brace for the<br />
front, back and sides. The sides are<br />
rabbeted, leaving a lip of about 3 mm<br />
(118 in .), and the bottom is glued, or<br />
glued and screwed, to them. At the<br />
same time it is glued to the back and let<br />
into a rabbet in the drawer front.<br />
Side-hung drawer, back view.<br />
NK glide, solid bottom<br />
NK glide,<br />
plywood bottom<br />
Side-hung drawer<br />
51
School Shop<br />
Teaching far more than manual skills<br />
by Richard Starr<br />
'Dovetails are very<br />
hard joints and you<br />
need a lot of practice<br />
to get them<br />
just right. My mother<br />
really likes it ..<br />
-Scott King, 8th<br />
grade.<br />
I like to think that we teach woodw<strong>orking</strong> in school for the<br />
same reasons we teach music. We try to help students develop<br />
an appreciation and love for the craft, though we expect few<br />
of them to become professional musicians or cabinetmakers.<br />
If attractive to children, woodw<strong>orking</strong> can be a vehicle for<br />
teaching far more than basic manual skills. We can help them<br />
learn how to make intelligent choices, to work with care, integrity<br />
and pleasure, and to deal constructively with mistakes<br />
and frustration.<br />
Our quiet shop reflects my preference for the old methods.<br />
Students use only hand tools, including a large variety of<br />
planes, drawknives and spokeshaves, carving tools and a footpowered<br />
lathe. Children who might be intimidated by power<br />
tools are comfortable and productive here. Our major concern<br />
is to support their efforts to make projects of their own<br />
design, not to teach them specific skills. The skills they learn<br />
are a by-product ; their reward is enjoyment of the work and<br />
satisfaction with the finished object.<br />
Author discusses chair construction with Breena Brodsky, 8th grade.<br />
Starr, 33, teaches woodw<strong>orking</strong> to grades 6 through 8 at Richmond<br />
(public) School, Hanover, N. H. These photos span several years.<br />
'Make the shape. Make fo ur wheels, put them on. Make windows and doors with a gouge. Then od it. '<br />
-Bobby Officer, 5th grade.<br />
52
'It's a barn fo r model horses. It's constructed like an old barn and pegged together.<br />
' -Cathy McFadden, 7th grade.<br />
'I still don 't know why I made thIs thing. What am I supposed<br />
to do with it?' -Michael Holland, 7th grade.<br />
'I finally finished it! '-Nita<br />
Pacillo, 6th grade.<br />
'It's a saddle rack. It folds. '<br />
Strohbehn, 8th grade.<br />
- Carolyn<br />
'I enjoyed bttlJding the guitar. The only bad part was all the sanding I had to<br />
do . I haven't learned to play it yet. ' -Scott Baughman, 7th grade.<br />
'It's a press. You turn the large round wheel to make the<br />
board go up and down. ' -Adam Tucker, 7th grade.<br />
53
Health Hazards in Woodw<strong>orking</strong><br />
Simple precautions minimize risks<br />
by Stanley N. Wellborn<br />
Industrial woodworkers have long recognized the risks of<br />
their trade. But it has been only in the past few years that artists<br />
and craftsmen have become concerned about-or even<br />
aware of- the many hidden dangers in woodw<strong>orking</strong>.<br />
Of course everyone recognizes those hazards that cause<br />
immediate and traumatic injury-blades that cut fingers and<br />
limbs, wood chips and fragments that fly into eyes, loose<br />
clothing or long hair that catches in whirling machinery,<br />
smashed fingers and toes, muscle strains from heavy lifting.<br />
But now medical authorities in the United States, Canada<br />
and England cite a number of insidious causes of disease that<br />
can be directly attributed to woodw<strong>orking</strong>. Their list includes<br />
wood dust, sap and oils, mold and fungus, chemical additives,<br />
toxic solvents and adhesives, vibration and noise.<br />
A diligent search of medical literature, or a chat with an<br />
industrial hygiene specialist, will turn up dozens of horror<br />
stories about the health hazards of woodw<strong>orking</strong>. For example,<br />
the 43-year-old woodworker who had operated a lathe<br />
for more than 25 years and became worried about a persistent<br />
sinus irritation and sore throat. His doctor prescribed a<br />
standard treatment, yet the condition did not improve . Finally,<br />
lab tests revealed cancer of the nasal passages. Or the<br />
art student who broke out in a rash, with blisters resembling<br />
second-degree burns, shortly after she began to sculpt wood.<br />
When she stopped woodw<strong>orking</strong>, her skin healed.<br />
The mere existence of a medical case history doesn't mean<br />
every woodworker will succumb to serious disease ; the biggest<br />
unknown is often the size of the risk. In most cases, woodworkers<br />
can take adequate precautions for relatively little cost.<br />
Common protective measures are described in the box on<br />
page 56. Woodworkers who notice something wrong with<br />
their health would be wise to suspect something in the shop ;<br />
some potential problems are discussed below.<br />
Respiratory ailments<br />
Health authorities warn that woodworkers should be most<br />
on guard against inhaling foreign substances.<br />
To most woodworkers, concern about the cancer-causing<br />
potential of wood dust overrides all other health worries.<br />
Indeed, this concern appears justified, at least on the surface.<br />
Woodworkers are 500 times more likely to have certain types<br />
of nasal cancer than non-woodworkers. However, the risk of<br />
developing cancer solely through exposure to wood dust is<br />
quite low.<br />
Stan Wellborn, who writes on educational and social trends<br />
for a national news magazine, is Washington correspondent<br />
for Fine Woodw<strong>orking</strong>.<br />
" The statistics on cancer in woodworkers can be made to<br />
sound quite alarming," says Dr. Julian A. Waller of the University<br />
of Vermont Medical School and an authority on health<br />
hazards in the arts. " But the actual risk advances only from<br />
'extremely rare' to 'rare.' Only one woodworker in 1,400 will<br />
get this cancer, and at that after an average of 40 years of exposure.<br />
"<br />
Nevertheless, in various health hazard evaluations conducted<br />
by the National Institute of Occupational Health and<br />
Safety (NIOSH) in Cincinnati, Ohio, investigators have concluded<br />
that wood dust is at least a contributing factor in the<br />
development of some other types of cancer. In a report prepared<br />
after an evaluation of the Cooper Union School of Art<br />
in New York City, the Institute cites studies pointing out that<br />
"cancers of the larynx, tonsils, tongue and lung have been<br />
reported to have resulted from inhalation of wood dust"<br />
among furniture workers in England and Sweden.<br />
In addition, the NIOSH report mentions that many researchers<br />
have found that the normal functions of the mucous<br />
membranes in the nose, throat and lungs were impaired in<br />
workers exposed to wood dust for more than ten years.<br />
Among the most recent and thorough research on this<br />
problem is a study done by Dr. Samuel Milham, Jr., of the<br />
State Department of Social and Health Services in Olympia,<br />
Wash. He reviewed the death records of more than 16,000<br />
members of the United Brotherhood of Carpenters and Joiners<br />
of America, and found that the results supported the hypothesis<br />
that wood contains carcinogens. The study also<br />
found an above-average incidence of leukemia and lymphoma<br />
among millwrights, lumber workers and cabinetmakers.<br />
Although risk of cancer from exposure to wood does appear<br />
to be low for most woodcrafters, the incidence of other forms<br />
of respiratory illness is high. At one time or another, virtually<br />
all woodworkers have suffered irritation of the upper respiratory<br />
tract after breathing sawdust. The condition is usually<br />
transient and produces coughing, wheezing and tightness in<br />
the chest. Frequently, however, long-term exposure produces<br />
" fogged lungs" on X-rays and a type of occupational asthma<br />
that can become virtually permanent.<br />
Redwood dust, for example, is the cause of sequoiosis, an<br />
acute illness that resembles pneumonia. It usually appears<br />
within a few hours after exposure, and its symptoms are<br />
shortness of breath, bronchio-constriction, dry coughing,<br />
chills, sweating, fever and general malaise. Repeated episodes<br />
of this ailment can cause permanent scarring of lung tissue.<br />
Wood dust from another tree, the Western or Canadian<br />
red cedar, causes similar symptoms that can develop into<br />
asthma or rhinitis, an inflammation of the nasal passages.<br />
54
Medical researchers believe the causative agent in red cedar is<br />
plicatic acid, which is thought to give the wood its characteristic<br />
fragrance. Lumber workers in the Pacific Northwest are<br />
frequently affected by cedar dust. One medical case history<br />
tells of a 30-year-old worker who could breathe at night only<br />
by kneeling on his hands and knees. When he left the woodw<strong>orking</strong><br />
industry, he regained his health.<br />
Another source of respiratory difficulties is the mold and<br />
fungus that grow in damp areas of the shop, particularly in<br />
piles of sawdust. Mold has also been known to cause serious<br />
reactions in skin and fingernails after continuous exposure.<br />
Occupational health experts agree that the obvious and<br />
best way to prevent respiratory problems is to cut down the<br />
amount of airborne dust in the shop. Although no specific<br />
environmental standards for allergenic wood dust have been<br />
established by the federal Occupational Safety and Health<br />
Administration (OSHA), the American Conference of<br />
Governmental Industrial Hygienists has set a provisional (and<br />
very low) limit on " nuisance dust" of 5 mg per cubic meter of<br />
air space. A few minutes of steady hand-sanding normally<br />
produce about 15 mg per cubic meter in the immediate work<br />
area ; a portable or stationary belt sander will generate about<br />
150 mg per cubic meter. Without ventilation, the dust will<br />
remain airborne for hours and spread through the shop.<br />
Skin irritations and allergies<br />
A large number of wood species will produce skin irritation<br />
or glandular swelling in sensitive individuals who are directly<br />
exposed to their dust, oil or sap. Some woods, such as West<br />
Indian satinwood and mansonia, are classified as " primary irritants"<br />
because they are highly toxic and are likely to produce<br />
skin eruptions or blisters in most people on first contact.<br />
Others, such as cocobolo, are "sensitizers" that may cause<br />
allergic dermatitis only after repeated exposure.<br />
A number of domestic U. S. woods have been mentioned .<br />
in medical literature as causing skin irritations, such as hives<br />
and rashes, but such skin reactions are actually quite infreq<br />
uen t, occurring in less than 2 % of the population. However,<br />
the problem becomes much more serious with tropical or exotic<br />
woods. A partial list of toxic timbers is given in the box<br />
on this page.<br />
Dermatologists who have investigated wood allergies note<br />
several common characteristics. Allergic reactions are more<br />
pronounced during the summer, or when a person's skin is<br />
moist from perspiration, or when the wood dust itself is<br />
damp. Reactions are more frequent among persons older than<br />
40. Freshly cut wood is much more likely to be an irritant<br />
than older, seasoned wood. Occasionally, a wood species from<br />
one geographic area will not affect a woodworker, while the<br />
same species grown somewhere else will.<br />
In most cases, it is the heartwood rather than the sapwood<br />
that is responsible for skin allergies, and it is the accessory<br />
substances, or "extractives," from the heartwood that produce<br />
the toxic effects. Extractives are whatever can be leached<br />
out of the wood (with water or other solvents) without<br />
changing its structure. These powerful chemical components-resins,<br />
alkaloids, tannins, acids, salts and gums-vary<br />
widely from species to species and even from log to log. In<br />
some trees they make up as much as 20% of the wood structure.<br />
Most woods contain about 4% to 10% extractives. The<br />
effect of extractives can be devastating. One report cited a<br />
serious outbreak of dermatitis among workers at an English<br />
Toxic Woods<br />
This list includes woods that are known to cause allergic,<br />
tOxic, infectious or respiratOry reactions. Although researchers<br />
point our that not everyone is sensitive to these woods, they<br />
warn that woodworkers should be particularly cautious when<br />
sanding or milling them. The category "respiratOry ailments"<br />
includes btOnchial disorders, asthma, rhinitis and mucosal<br />
irritations ; "skin and eye allergies" includes contact dermatitis,<br />
conjunctivitis, itching and rashes.<br />
{'I C'l<br />
, ,1,<br />
... " .1," <br />
Nt<br />
. <br />
.<br />
c <br />
c1<br />
-So N. W.<br />
i;<br />
);.'I! <br />
Arbor vitae (Thuja standishii)<br />
Ayan (Distemonanthus benthamianus)<br />
Blackwood, African (Dalbergia melanoxylon)<br />
Boxwood, Knysna (Gonioma kamassi)<br />
Cashew (A nacardium occide r/tale)<br />
Cedar, Western red (Thuja plicata)<br />
Coco bolo (Dalbergia retusa)<br />
Cocus (Brya eben us)<br />
Dahoma (Piptadeniastrum africanlim)<br />
Ebony (Diospyros)<br />
Greenheart (Oeotea rodiaei)<br />
Guarea (Guarea thompsonii)<br />
Ipe [Iapacho] (Tabebuia ip e)<br />
Iroko (Chlorophora exeelsa)<br />
KatOn (Sandorieum indicum)<br />
Mahogany, African (Khaya ivorensis)<br />
Mahogany, American (Swietenia 1llaerophylla)<br />
• Makore (Tieghemella heckelii )<br />
Mansonia (Mansonia altissima)<br />
Obeche (Triploehiton se/eroxylon)<br />
Opepe (Nalle/ea tnilesii)<br />
Peroba rosa (Asp idosperma peroba)<br />
Peroba, white (Paratecoma peroba)<br />
Ramin (Gonystylus bancanus)<br />
Rosewood, Brazilian (Dalbergia nigra)<br />
Rosewood , East Indian (Dalbergia latlfolia)<br />
Satinwood, Ceylon (Ch/oroxylon swietenia)<br />
Satinwood, West Indian (Fagara /la·va)<br />
• •<br />
Sequoia Redwood (Sequoia se1llpervirens)<br />
Sneezewood (Ptaeroxylon obliquum)<br />
Stavewood (Dysoxylu1ll muelleri)<br />
Sucupira (Bowdichia nitida)<br />
Teak (Teetona grandts)<br />
Wenge (Millettia laurentii)<br />
This information has been taken ftOm :<br />
National Institute of Occupational Safety and Health<br />
International Labor Organization Encyclopedia of Occupational<br />
Safe ty and Health<br />
Sculpture in Wood by Jack C. Rich, Da Capo Press, New<br />
York, 1977.<br />
"Toxic Woods" by Brian Woods and C. D. Calnan , British<br />
Journal of Dermatology , Vol. 95, Supplement 13, 1976 (an<br />
excellent source on skin reactions to woods, with case histOries<br />
and an inclusive list of toxic species) .<br />
55
furniture plant that used mansonia wood. The entire operation<br />
had to be shut down for weeks.<br />
Obviously, the occasional case of dermatitis won't discourage<br />
woodworkers from continuing to use exotic woods.<br />
The best path to follow is one of prevention, including dust<br />
control , protective clothing, washing and shower facilities and<br />
barrier creams, such as DuPont's Pro-Tek. Persons who suspect<br />
they are sensitive to certain woods should have a doctor<br />
do a skin-patch test to find the cause of the allergy.<br />
Pesticides and preservatives introduced to wood while it is<br />
being timbered, processed and shipped may also cause dermatitis.<br />
These include everything from the highly toxic pentachlorophenol<br />
to the relatively innocuous polyethylene glycol<br />
(PEG) and denatured alcohol. Other chemicals often used<br />
in domestic wood processing are potassium dichromate, ethyl<br />
triethanol amine, glycol humectant, naphthenic acid, copper<br />
hydrate and zinc naphthenate. Standard threshold limit<br />
values (TLV's) based on current medical knowledge have<br />
been established for many of these chemicals, with the intention<br />
of protecting people whose jobs expose them constantly<br />
to these substances. But many chemicals banned in<br />
this country are routinely used by foreign loggers and shipping<br />
companies to prevent insect infestation, mold growth<br />
and dry rot in transit.<br />
It is almost impossible for a woodworker to ascertain which<br />
additives have been used. Michael McCann, an industrial hygienist<br />
and chemist with the Center for Occupational Hazards<br />
Preventive Measures<br />
Few occupational health experts would advocate gtvmg up<br />
one's craft unless there were overwhelming evidence that a<br />
person's health was being seriously impaired , or that an irreversible<br />
allergy to materials had developed. In virtually all cases,<br />
simple modifications of the w<strong>orking</strong> environment and a few<br />
changes in work habits will resolve any hazards to health.<br />
Dr. Julian A. Waller believes that "a reasonably good margin<br />
of protection" can be obtained in most shops for under $100. He<br />
and other authorities in the field suggest the following preventive<br />
measures for woodworkers :<br />
Adequate ventilation is the basic, and probably most important,<br />
requirement of a safe shop. The exhaust system should begin<br />
as close as possible to the source of dust or fumes, so they<br />
cannot accumulate and will flow rapidly away from the worker's<br />
face. The exhaust should be vented to the outside whenever<br />
possible, and dust should be collected in a bag or bin. A shop<br />
vacuum with a homemade clamp that holds the nozzle near the<br />
source of dust and chips is a relatively inexpensive way to remove<br />
particles from the air. Fresh air should be allowed ro enter the<br />
w<strong>orking</strong> area freely.<br />
Shop cleanliness is another fundamental. A general cleanup is<br />
recommended at the end of each w<strong>orking</strong> day. When not in use,<br />
jars, cans and bags should be sealed, and spills should be wiped<br />
up promptly. For fine sawdust and sanding dust, the best cleanup<br />
methods are wet cloths, wet mopping or industrial-type wet<br />
vacuuming. Dry sweeping or blowing with an air hose only stirs<br />
up the dust.<br />
Personal hygiene also plays an important role. Dirty clothes,<br />
long fingernails and unwashed skin and hair can trap du'st, sqlids<br />
and dried liquids, and thus exposure continues even when the<br />
woodworker leaves the shop. Plastic disposable coveralls, gloves<br />
in New York City, says, "The best procedure to follow is to<br />
assume that the wood being used has been processed with<br />
dangerous chemicals and take the necessary precautions. It is<br />
also important to remember that it is not uncommon for<br />
woodworkers to toil 12 or more hours a day for weeks on end<br />
when preparing for a show or fair, or just plain getting caught<br />
up with a work order. Under these conditions, it becomes<br />
doubtful that established ny's for an eight-hour work day<br />
are applicable."<br />
Dr. Bertram W. Carnow, professor of occupational and environmental<br />
medicine at the University of Illinois, points out<br />
that the key factor in determining toxic levels for an individual<br />
is what he calls " total body burden" -the sum that each<br />
person's metabolism and general health will accommodate.<br />
" Liquid or solid particles such as fumes or vapors in aerosol<br />
form, cigarette smoke and other exposures in addition to<br />
those from materials used at work all contribute to the burden<br />
on the lungs, skin and other organs, and should be minimized,"<br />
says Dr. Carnow.<br />
Many skin irritations are caused by contact with adhesives<br />
and solvents that dry the skin and make it more subject to infection.<br />
In addition, fumes from such chemicals often are not<br />
only toxic if inhaled or swallowed, but also highly flammable.<br />
Epoxies, for example, can cause severe blistering and<br />
scaling. Liquid, uncured epoxy resin and hardener will cause<br />
adverse reactions in more than 40% of all workers who come<br />
in contact with it. Synthetic adhesives, such as urea-formaldeand<br />
hats can help reduce these hazards. Work clothes and equipment<br />
should be washed separately from other household items.<br />
Protective equipment such as face masks, respirators, eye<br />
goggles, ear plugs or muffs , and plastic or rubber gloves are essential<br />
for certain operations. Many safety devices, such as respirators<br />
and ear protectors, are rated for effectiveness by the federal<br />
government or the American National Standards Institute in<br />
New York City. A simple filter-type respirator will keep exotic<br />
dusts out of your lungs.<br />
Recent workshops on health hazards in the arts have placed<br />
heavy responsibility on craftsmen for maintaining awareness<br />
about medical matters related to their work. Most doctors are not<br />
well informed abour occupational hazards associated with the<br />
crafts, and many of the cumulative diseases do not become apparent<br />
until their damage is fairly extensive. Symptoms of slowdeveloping<br />
occupational diseases are often attributed to another<br />
cause or dismissed as psychosomatic.<br />
For these reasons, health authorities suggest four guidelines for<br />
wood workers :<br />
-Know as much as possible about the woods and other materials<br />
you use, what diseases they can cause, and what the danger signs<br />
are.<br />
-Suspect that a health problem may be related to woodw<strong>orking</strong><br />
if it improves after a layoff of a few days and gets worse when<br />
work is resumed.<br />
-Have a physician arrange a pulmonary-function test every two<br />
or three years. This test detects lung problems much sooner than<br />
X-rays can.<br />
-So<br />
-If a docror's diagnosis or treatment does not seem satisfactory,<br />
consult specialists on particular problems.<br />
N. W.<br />
56
hyde and phenol-formaldehyde resin, are other irritants with<br />
which woodworkers commonly come in contact. Although<br />
few woodworkers have occasion to use uncured formaldehyde<br />
or phenol resins, they should be aware that "thermal degradation"<br />
of these compounds has been reported when heat<br />
produced during high-speed machining of wood breaks down<br />
glues into separate components, or produces entirely new<br />
compounds.<br />
Vibration disease<br />
Another woodw<strong>orking</strong> hazard, well-defined over the years<br />
by occupational health specialists, is a disease that develops<br />
and spreads slowly through the muscles and circulatory system<br />
of the fingers, hands and forearms. Vibration disease is closely<br />
related to an affliction known as Raynaud's phenomenon,<br />
and is triggered by lengthy use of machinery that vibrates in<br />
the 40 to 3,000 cycle-per-second frequency range.<br />
Most woodworkers have experienced a rhythmic tingling in<br />
the hands and arms after using such vibrating tools as orbital<br />
sanders, chain saws and pneumatic chisels. In most cases, the<br />
spasms disappear within an hour. Now, recent medical research<br />
among lumbermen in Canada has shown that serious<br />
side effects of this reaction may develop, although the process<br />
may take from several months to ten years. Smoking and cold<br />
weather tend to hasten the onset of the problem. In some<br />
cases, tendonitis of the elbow and shoulder may set in. Eventually,<br />
numbness and a heightened sensitivity to cold and<br />
humidity will occur, and the fingers and palms of the hands<br />
will become extremely pale-giving the condition its more<br />
common name of "white hand" or "dead fingers." In a few<br />
extreme cases, it has been necessary to amputate the fingers.<br />
"We know that vibrations may cause definite lesions to the<br />
hands with serious potential consequences," says Dr. Gilles<br />
Laroche, a cardiovascular surgeon with the Hotel-Dieu Hospital<br />
in Quebec City, in the March 7, 1977, issue of the Canadian<br />
periodical Maclean 's. "Once severe occlusive arterial<br />
disease is established, the condition is permanent and little or<br />
no improvement will result from cessation of work. In fact,<br />
the condition may worsen in a large proportion of patients."<br />
Safety experts advise that cutting down on extensive use of<br />
vibrating tools is the best way to prevent this condition,<br />
although some authorities have urged tool manufacturers to<br />
build shock absorbers into vibrating equipment. Many chain<br />
saws now have rubber bumpers between the engine and the<br />
handles, and users report them nearly vibration-free. OSHA<br />
has not set a vibration standard for tools.<br />
Noise<br />
High levels of noise have long been recognized by industrial<br />
safety technicians as unsafe to workers. In a typical wood<br />
shop, decibel levels often exceed industry limits and may<br />
cause hearing loss.<br />
One study cited by NIOSH found that nearly one shop<br />
worker in four had suffered some pemanent damage to hearing<br />
because of high noise levels from operating machinery.<br />
Other studies have found that excessive noise can also contribute<br />
to heart problems and gastrointestinal disorders.<br />
Noise levels are measured in decibels (dB) on a logarithmic<br />
scale on which every increase of 10 dB means a tenfold increase<br />
in noise intensity. Ordinary conversation averages<br />
about 60 dB.<br />
OSHA has set a maximum permissible average noise level<br />
of 90 dB per eight-hour w<strong>orking</strong> day. The permissible noise<br />
exposure rises to a maximum of 115 dB, a level that can be<br />
tolerated for only 15 minutes or less per day. A circular saw<br />
produces between 100 and 109 dB, a medium-sized woodw<strong>orking</strong><br />
shop in full operation averages about 110 dB, and a<br />
chain saw may peak at 130 dB. One report cited by NIOSH<br />
states that ' 'operators of saws, planers, routers, molding machines,<br />
shapers, jointers and sanders are exposed to average<br />
overall sound-pressure levels that exceed 95 dB. For several of<br />
these operations, the average may be as high as 115 dB."<br />
Protection from noise involves damping machinery with<br />
mufflers and sound-absorbing material, keeping machines in<br />
good repair and well-oiled, and mounting machines on rubber<br />
bases to reduce vibration and rattling. In addition,<br />
OSHA-approved ear muffs and ear plugs-rather than improvised<br />
cotton or wax devices-are recommended. In<br />
general, industrial hygienists recommend ear muffs as the<br />
most effective sound reducer.<br />
Fire hazards<br />
Although most woodworkers are extremely cautious when<br />
using flammable materials, the danger persists. The National<br />
Fire Protection Association reports that the combination of<br />
machinery, wood, volatile fumes and finely dispersed dust in<br />
woodw<strong>orking</strong> shops results in scores of fires and explosions<br />
annually. Small grains of wood dust, when scattered throughout<br />
a confined area, can explode with tremendous force if ignited<br />
by a spark or match. If flammable solvents are present,<br />
the hazard becomes much greater.<br />
Fire prevention authorities agree that the best way to curb<br />
the possibility of fire is adequate ventilation. If dust and<br />
fumes are vented by a vacuum or "cyclone" air cleaner, and<br />
fresh air is continually available, most fire hazards will be<br />
sharply reduced.<br />
Campaign begins<br />
Although many potential hazards have been identified, a<br />
great deal remains unknown. Several state and national art<br />
and craft groups have begun a campaign to inform their<br />
members about occupational risks, and to seek more government<br />
assistance in improving the health and safety of the<br />
craft community. Gail Barazani of Chicago, editor of "Hazards<br />
in the Arts" newsletter, terms these dangers a "silent<br />
enemy" that can seriously harm the health of artists, craftsmen,<br />
hobbyists and their families. A national conference is<br />
being planned for mid-1978 to bring interested persons together<br />
for a thorough discussion of the issue.<br />
Most of the hazards that woodworkers encounter in their<br />
craft are obvious ones that will be recognized and dealt with<br />
immediately. The less obvious ones require more diligence<br />
and a determined effort to learn as much as possible about<br />
the materials being used. Dr. Waller, a craftsman himself,<br />
sums up by observing that the general rule of thumb should<br />
be " common sense and simple precautions. That will eliminate<br />
virtually all the hazards anyone is likely to experience."<br />
[Author's note : Clinical Toxicology of Commercial Products by<br />
Gosslin, Hodge, Gleason and Smith is a standard medical reference<br />
text. Other sources of more detailed information are Health Hazards<br />
Manual fo r Artists by Michael McCann , Center for Occupational<br />
&<br />
Hazards, 56 Pine St., Rm. 1405, New York , N. Y. 10005, $2.75<br />
postpaid ; and Health Hazards in A rts and Crafts by Bertram W.<br />
Carnow, to be published in the spring of 1978 by John Wiley<br />
Sons, 605 3rd Ave., New York, N. Y. 10016.]<br />
57
Basic Blacksmithing<br />
What a woodworker needs to forge tools<br />
by Ray Larsen<br />
Author files weld on shell auger.<br />
The furniture maker ruins a mahogany table base while<br />
trying to cut a deep mortise in it. He is using the wrong chisel<br />
because the right one has been out of stock for eight months.<br />
The instrument maker applies pressure to the shell auger<br />
buried deep in the boxwood clamped in front of him. The bit<br />
snaps in his hand. The turner walks from his lathe, shaking<br />
his head. A poorly designed gouge has just ripped through<br />
the tulipwood bowl he's been w<strong>orking</strong> on all day. The sculptor<br />
lays down his mallet and puts his work aside in frustration.<br />
He can't get the effect he wants, although he's tried every<br />
tool in the catalog.<br />
Such incidents, all too common in woodw<strong>orking</strong>, have led<br />
to a resurgence of interest in hand forging high-quality tools,<br />
at least those special tools unavailable from even the best<br />
supply houses. This has developed a number of skilled blacksmiths<br />
able to produce special tools of the highest quality,<br />
and woodworkers need only avail themselves of their services.<br />
In addition, a growing number of serious woodworkers are<br />
taking up blacksmithing themselves. They are discovering<br />
that with a little perseverance they can forge their own tools.<br />
It takes a substantial investment to set up a forge an9 a<br />
substantial block of time to locate equipment and learn the<br />
necessary skills. Each woodworker should ask himself how<br />
serious his need is for special, high-quality tools before<br />
deciding to make them. The devoted craftsman will quickly<br />
resent the time taken from his first love to produce tools he<br />
really doesn't need.<br />
Once a woodworker learns blacksmithing, he never again<br />
need worry about tools breaking, or not holding an edge, or<br />
ruining the work. Less time struggling with tools means more<br />
time producing high-quality work. And the most exotic tools<br />
are readily available. Need a special shape for turning the inside<br />
of a box? It's there for the making. Many woodworkers<br />
find that a tool especially designed for a job enables them to<br />
produce pieces others can't, or to produce them faster or more<br />
economically. The right tool for the job means superior work.<br />
Mter the initial investment, the blacksmith-woodworker<br />
saves time and money ; others must wait until special tools<br />
become available, or run around searching them out, or pay<br />
the relatively high cost of having them made by a specialist.<br />
The woodworker who can make tools can also repair and<br />
modify them. A chipped screwdriver is reshaped at a fraction<br />
of the cost of replacing it; an old parting tool is reworked to<br />
turn a special configuration. In addition, the blacksmith-<br />
Ray Larsen, 37, of Hanover, Mass. , is a professional blacksmith<br />
who makes high-quality tools on special order through<br />
Woodcraft Supply Corp.<br />
woodworker can also forge special pulls, latches, hinges and<br />
other hard-to-fInd hardware. This ability is especially important<br />
to specialists in antique reproductions.<br />
Equipment<br />
I began blacksmithing with a homemade forge, two borrowed<br />
pairs of tongs, a $35 anvil and a beat-up grindstone.<br />
Most serious woodworkers already have several pieces of<br />
equipment essential to toolmaking, including a good grinding<br />
wheel or other sharpening system, high-quality bench<br />
honing equipment and a heavy-duty drill press. But<br />
additional equipment is required, including a forge, anvil,<br />
tongs, hammers, punches and chisels, fullers and hardies,<br />
swages, vise and quench tub. Start with a few pieces of<br />
equipment and master them before buying more.<br />
The heart of the blacksmith shop is the forge, in which a<br />
blast of air applied to a coal, coke or charcoal fire heats steel to<br />
the elevated temperatures required for forging. There are<br />
many sizes and styles, from big, permanent types costing well<br />
over $1,200 to small, portable types found in junkyards and<br />
secondhand shops for $50 to $200 depending on size, quality<br />
and the buyer's ability to bargain . The thrifty craftsman can<br />
make a forge using a discarded barbecue grill for the bed and<br />
the guts of an old vacuum cleaner or hair dryer for the blower.<br />
Forging generates soot, smoke and dust that must be<br />
vented away from clean areas of the shop. I recommend<br />
buying a hooded, ventable forge over an open type for this<br />
reason . Some manufacturers have substituted stamped metal<br />
for cast iron in recent years, but cast iron remains best for the<br />
job because of its superior fue-resistant properties. Cranking<br />
the blower by hand may be romantic, but it isn't as efficient<br />
or as easily managed as an electric one. Buffalo Forge Co.,<br />
& Buffalo, N. Y., and Champion Blower Forge,<br />
Inc., Roselle,<br />
Ill., are respected forge manufacturers.<br />
Do not use the forge without fi rst lining it with a suitable<br />
refractory, a non-metallic, ceramic material with heat-resisting<br />
properties that protects the forge bed from burning out.<br />
It comes in many forms but a powdered type, Kast-Set, made<br />
by A. P. Green Refractories Co., Mexico, Mo. , is excellent ; it<br />
is mixed with water like cement and cast in place. Such refractory<br />
will protect the forge and greatly extend its life at minimum<br />
cost (less than $20 for approximately a cwo-year<br />
supply) .<br />
If the forge is the heart of the blacksmith shop, the anvil is<br />
its soul. No other single piece of equipment (save perhaps a<br />
favorite hammer) inspires blacksmiths to such heights of<br />
enthusiasm and such depths of despair. Like forges, anvils<br />
come in a wide variety of types, styles and sizes, from new but<br />
58
ed<br />
I grill<br />
A serviceable fo rge can be constructed from readily avadable<br />
materials. The bed is budt from a new or used stamped-metal<br />
outdoor gn/I. A hooded type (not shown here) makes essential<br />
venting easier. Or a hood can be made from sheet metal and a<br />
stovepIpe. The fa ctory-made tubular legs are discarded in<br />
favorofa heavy-duty 2x4 frame with braced 2x4 legs. The bed<br />
should be at workbench height. The center hole in the bed is<br />
enlarged to accept a 2-in. pIpe flange; a T-fitting introduces<br />
air blast and a plug is loosely fitted beneath fo r ash clean-out.<br />
A vacuum-cleaner or hair-dryer motor with heating element<br />
removed is affixed to the frame; the blower outlet is linked to<br />
the T-fitting with vacuum-cleaner or hair-dryer hose. Adjustable<br />
clamps and duct tape ensure an airtight fit. A vacuumcleaner<br />
suction regulator or similar device regulates the blast.<br />
Refractory is troweled around a suitable fo rm, such as a plastic<br />
bleach bottle with 2-in. pIpe inserted through its bottom,<br />
placed over the center hole (as above). A tue iron cut from<br />
heavy-gauge sheet metal and drilled or punched is laid over<br />
the 2-in. blast opening in the bed.<br />
Vacuum-cleaner n'M-'-<br />
2x4 frame--_<br />
expensive all-steel types available from such supply houses as<br />
Centaur Forge Ltd., Burlington, Wis., (about $200 for a 125-<br />
pound size) to traditional, steel-faced types available from<br />
secondhand dealers for $75 and up. The anvil should be<br />
mounted on a heavy tree stump.<br />
When selecting an anvil, look for a smooth, flat face and<br />
unflawed horn. Use a steel straightedge to spot valleys. The<br />
quality of the work depends to a great extent on the condition<br />
of the anvil. Don't buy a used one with badly chipped edges<br />
on the face, a sure sign of misuse over the years. And don't<br />
buy an anvil whose steel face is separating from its cast or<br />
wrought-iron base. Improper welding of face to body is a clue<br />
to inferior manufacture. Two respected brands are Peter<br />
Wright and Hay-Budden ; both companies are out of business<br />
but their anvils may be purchased through dealers or at<br />
junkyards.<br />
Anvils come in many sizes, but the 125 to 150 lb. range is<br />
good for toolmaking. Anything smaller is too light to stand<br />
up to tool steels, while heavier anvils are too expensive and<br />
hard to transport. Before buying, strike the face moderately<br />
with a hammer. A good ring and strong bounce are signs of a<br />
strong, well-made anvil. Avoid limp clunkers.<br />
Tongs, the long-handled tools used to hold steel while it is<br />
heated and forged, come in a bewildering range of sizes and<br />
styles. Early trade manuals, such as Hand Forging by Thomas<br />
F. Googerty (Popular Mechanics Co., Chicago, Ill.), suggest<br />
making one's own as a good way to learn the blacksmith's<br />
craft. There is a great deal of sense in that. But because tongs<br />
are readily available at junk shops and flea markets for as little<br />
as 50 cents, it is easier for the woodworker to buy them-at<br />
least at the outset. Pick a few simple sizes and shapes and<br />
purchase more pairs as needed.<br />
There also are hundreds of new and used blacksmith, me-<br />
chanic, farrier and other hammers on the market these days<br />
and each blacksmith has favorites (my own are an odd, onepound<br />
cross-peen type that I use for delicate finish work and<br />
an old electric sharpening hammer that is excellent for<br />
hammering in blade edges). Start simply with several ballpeen<br />
and mechanic's hammers ranging from one to three<br />
pounds and fill in with special types as required. Buy only the<br />
highest quality (Sears' Craftsman mechanic's hammers are<br />
excellent) .<br />
Punches and chisels are special long or handled types which<br />
come in hot and cold versions for punching and cutting<br />
heated or unheated steel. They are available used from supply<br />
houses such as Centaur or manufacturers such as Diamond<br />
Tool and Horseshoe Co., Duluth, Minn. Prices vary. As with<br />
tongs and hammers, buy a few simple ones and fill in as requirements<br />
dictate.<br />
Fullers and hardies fit in the hardie or square hole at the<br />
heel of most anvils. Fullers are used to draw steel, hardies to<br />
cut it. The metal is heated to forging temperature, then<br />
placed over the tool and struck with a hammer. Start with a<br />
few simple types from reputable supply houses or<br />
manufacturers and supplement as needed. Expect to pay<br />
about $10 each.<br />
Swages come in two types. Bottom swages fit into the<br />
hardie hole and come in various round, square and other<br />
shapes. They permit the toolmaker to hammer hot steel to a<br />
desired configuration. Sets consist of matched bottom and<br />
top swages. The bottom fits in the hardie hole, and the top is<br />
handled like a hammer. Hot steel is held between the two<br />
and the top swage is struck with a hammer. This procedure<br />
generally requires a helper.<br />
Supply houses stock only a limited number of swages.<br />
Secondhand shops, junkyards and tool dealers specializing in<br />
59
lacksmith equipment are better sources. Expect to pay $5<br />
and up apiece. An alternative to buying a large number of<br />
swages is the swage block, a large block of cast steel with a<br />
variety of shapes on its four sides. The block is fitted to a<br />
special stand or placed on a heavy stump in the same manner<br />
as an anvil. Swage blocks, unfortunately, are expensive new<br />
and extremely rare used.<br />
A good machinist's vise is satisfactory for the beginning<br />
toolmaker but he should consider buying a blacksmith's type<br />
as soon as possible. This vise has a steel leg that sets into the<br />
floor of the shop. The leg dissipates the shock of hammering<br />
steel in the vise. New blacksmith's vises are expensive compared<br />
to readily available used ones. Pay about $50 for one<br />
with five-inch jaws in very good condition.<br />
Finally, a reservoir of water is essential for quenching tools.<br />
A large , galvanized washtub will do. Half a whiskey barrel is<br />
better.<br />
Fuel<br />
Some blacksmiths in England prefer coke for forging.<br />
Blacksmiths at Old Sturbridge Village in Sturbridge, Mass.,<br />
use charcoal for authenticity. But the rest of us use "blacksmith<br />
coal," a soft, low-sulfur type especially suited for forge<br />
work. Blacksmith coal is available from Centaur and other<br />
supply houses but these are expensive sources. Try phoning a<br />
coal supplier in your area. Most dealers know who sells blacksmith<br />
coal and will quickly suggest a source. Buy 200 pounds<br />
(less than $10 worth) to start. Pick it up at the yard-it'S<br />
cheaper that way.<br />
Steel<br />
Domestic and overseas producers make a wide range of<br />
steels suitable for woodw<strong>orking</strong> tools. New steel is preferable<br />
to used because the toolmaker knows what to expect when<br />
w<strong>orking</strong> it and can select the right type for the job. No matter<br />
how good the smith is at identifying used steel, there is always<br />
an element of risk in forging it. Because of producer restrictions<br />
on minimum order sizes, woodworkers will have to rely<br />
on local service centers or warehouses for the small amounts<br />
they require. If in doubt, select a company that advertises itself<br />
as a member of the Steel Service Center Institute (SSCI) ,<br />
an organization of highly reputable steel suppliers. Two basic<br />
families of steel are used in toolmaking: carbon and specialty.<br />
Carbon steel is the single largest type of steel produced in<br />
this country and comes in many grades. There are two good<br />
reasons for using carbon steel : It costs considerably less than<br />
specialty steel, and it comes in many toolmaking shapes not<br />
readily available in specialty steels. Prices of carbon steels<br />
vary, depending on market conditions.<br />
The amount of carbon determines the steel 's hardenability<br />
and ability to do work. Only the high-carbon steels are of<br />
concern to the woodworker, those types whose carbon content<br />
exceeds 0.50% . High-carbon steel ranges from American Iron<br />
and Steel Institute (AISI) classification 1055 (containing<br />
Author at work. Note rack of tongs by the fo rge and hardies<br />
mounted in slip s around base of anvil, a 350-lb. Hay Budden.<br />
Below, fuller in hardie hole of anvil speeds drawing down steel. Bottom,<br />
swage block gives steel round or gouge-like shape.<br />
60
Spark patterns<br />
identify steels<br />
A "<br />
r-----,_..,..-:;=: ;<br />
' \il '\<br />
'-=:x-'Z '\ (<br />
High-carbon steel: Considerable bursting,<br />
sparking around wheel. Gold/white color.<br />
Medium-carbon steel: Some exploding or<br />
bursting sparks. Some sparking around periphery<br />
of wheel.<br />
Low-carbon steel: Streamers thrown from<br />
wheel are straight, light straw in color.<br />
Some small amount of sparking.<br />
Cast iron (not fo rgeable) : Short, thin,<br />
brick-red streamers. Very slight sparking.<br />
High-speed tool steel: Similar to high-carbon<br />
steel but with fine explosions. Reddish<br />
streamers. No sparking around wheel.<br />
Wrought iron (inappropriate fo r blades) :<br />
Very simziar to low-carbon steel. Long<br />
yellow streamers. Practically no sparking.<br />
0.55 % carbon) to AISI classification 1095 (containing 0.95 %<br />
carbon).<br />
Decent, general-purpose tools can be forged from AISI<br />
1055 steel, but its use is not strongly recommended. A smith<br />
forging high-carbon steels should work with the highest<br />
grades, 1085 and above. If these are unavailable, move up to<br />
a specialty steel rather than down to a lesser grade. Highcarbon<br />
steel is recommended for screwdrivers, chisels, turning<br />
chisels and gouges, plane irons and carving tools.<br />
Most of the specialty steels used in toolmaking are tool<br />
steels. They are expensive, some more than $3 a pound. Configuration<br />
is limited and finding small quantities can be a<br />
problem. They do make excellent tools, however. Commonly<br />
used types :<br />
AISI W2 is a high-quality, water-hardening tool steel. As<br />
with high-carbon steel, it relies on carbon content (up to<br />
1.40%, depending on producer) for hardness. Use it for tools<br />
that must hold an exceptional edge.<br />
AISI 01 is a low-alloy, oil-hardening tool steel. It will not<br />
harden to quite the same degree as W2, but is easier to forge,<br />
harden and temper. Use it as an alternative to W2 where<br />
shape presents heat-treating problems.<br />
AISI D2 is a high-carbon, high-chromium, air-hardening<br />
steel. Some cutlers consider it the best material for long, thin<br />
blades. It is especially good for bench knives and similar tools.<br />
AISI S5, an oil-quenched, silicon-manganese tool steel<br />
specially designed for shock resistance, is difficult to forge but<br />
unsurpassed for tools subject to high impact. It makes excellent<br />
cold chisels.<br />
AISI M2 is a molybdenum-type tool steel. Smiths report<br />
that it makes excellent planer and shaper knives.<br />
AISI 440C Stainless is a high-carbon steel favored by most<br />
blade makers where exposure to the elements is a major consideration.<br />
It relies on high chromium content for its corrosion<br />
resistance. It will not hold as fine an edge as W2.<br />
Used or recycled steel is attractive because it is cheap and<br />
some woodworkers may want to try it. Look for a scrap yard<br />
specializing in identified grades of high-carbon and specialty<br />
steels. These yards charge a premium, but knowing the exact<br />
qualities of the steel is worth it. Toolmakers can also rework<br />
certain steel implements manufactured from known types of<br />
high-carbon steel. Some rypical items and the AISI steel they<br />
are made from :<br />
Plow discs, plowshares and harrow discs, 1080 ; hay-rake<br />
teeth, 1095 ; leaf springs, 1085 to 1095 ; mower blades, 1055<br />
to 1085 ; clutch discs, 1060 to 1070 ; and most heavy coil<br />
springs, 1095.<br />
Toolmakers can apply the grinding wheel or spark test to<br />
steels of unknown composition. Steel is put in contact with a<br />
rotating grinding wheel and the resulting spark pattern is<br />
studied for clues to the nature of the steel.<br />
Technique<br />
There is no substitute for experience and woodworkers interested<br />
in making their own tools should seek training from<br />
an experienced smith. Most local smiths are willing to work<br />
out arrangements for instruction and forge time. In addition,<br />
several colleges and universities offer courses in blacksmithing<br />
and farriery (horseshoeing) . Reading also is helpful and the<br />
following bibliography offers several excellent starting points.<br />
The Making of Tools and The Modern Blacksmith, both by Alexander<br />
G. Weygers (Van Nostrand Reinhold Co., 450 W. 33rd St.,<br />
ew York ; $4.95 each, paperback). Weygers, a sculptOr, began<br />
making his own tOols when he became dissatisfied with available<br />
types. His suggestions for setting up shop economically, improvising<br />
equipment and using secondary materials are particularly good.<br />
Blacksmithing fo r the Home Craftsman by Joe Pehoski (Stuhr<br />
Museum, Grand Island, Nebr. ; $1.75, paperback). Pehoski is a<br />
w<strong>orking</strong> smith who believes in plain speaking and his book is packed<br />
with good advice. His ttOubleshooting section is especially useful.<br />
Blacksmiths ' and Fam'ers ' Tools at Shelburne Museum by H. R.<br />
Bradley Smith (Shelburne Museum, Inc., Shelburne, Vt. ; $5.00<br />
paperback). To understand blacksmiths' tOols is to gain insight intO<br />
the subtlest techniques for using them. This is the best available<br />
book on tOols.<br />
The Blacksmith 's Craft (Council for Small Industries in Rural<br />
Areas [CoSIRA] , 11 Cowley Street, London, SWIP 3NA ; $3.50<br />
hardcover) . Absolutely the finest book available on the techniques<br />
of blacksmithing for the beginner.<br />
Drake 's Modern Blacksmithing and Horseshoeing by J. G. HolsttOm<br />
(Drake Publishers, Inc., ew York ; $4.95 hardcover)<br />
&<br />
. Holstrom<br />
is disarmingly folksy but his book contains a great deal of<br />
down-tO-earth advice.<br />
The Art of Blacksmithing by Alex W. Bealer (Funk Wagnalls<br />
Publishing Co., Inc., New York ; $12.45 hardcover).<br />
Z.<br />
This book has<br />
come in for criticism in some circles for occasional inaccuracies and<br />
oversimplifications but still contains a wealth of good information.<br />
Decorative and Sculptural Ironwork by Dona Meilach (Crown<br />
Publishers, Inc., New York ; $7.95 paperback) . An excellent survey<br />
of the latest work and techniques of the country's best smiths.<br />
Blacksmith 's Manual Illustrated by J. W. Lillico (The Technical<br />
Press Ltd., London ; $7.75 hardcover). An excellent advanced course<br />
in smithing with special emphasis on large, complex forgings.<br />
61
Carving<br />
Cornucopia<br />
by Ann Pappert and Ray Jenkins<br />
When the First Canadian Agricultural International Wood<br />
Carving Exhibition was announced, it seemed certain to be<br />
one of the most important carving shows held in North<br />
America this year. As part of Toronto's Canadian National<br />
Exhibition (the largest annual fair in the world, with over<br />
three million visitors) and with $13,000 in prize money, 86<br />
categories for carvers and participation from both the U.S.<br />
National Wood Carvers Association and the North American<br />
Wild Life Carvers Association, it was a show that promised<br />
something for everyone. During its three-week run from<br />
August 17 to September 5, the show featured daily carving<br />
demonstrations, manufacturers' representatives and 1,800<br />
entries submitted by 475 carvers from all over Canada, the<br />
United States and England.<br />
"The Buffalo Hunter," carved by Dixie Lea Muir of Oak<br />
Grove , Mo., won Best of Show Prize, $1,000 and fust place<br />
on the John Matthews Trophy.<br />
British carver Matthews, general adviser and developer of<br />
the show, said the Muir figure was chosen for its meticulous<br />
detailing and skill in execution.<br />
Mrs. Muir, 35, has been carving professionally for four<br />
years. She estimates that she has $8,000 worth of carving tools<br />
in her shop, most purchased through the sale of her carvings.<br />
She entered eight carvings and seven of them won prizes or<br />
judge's mention.<br />
Entries were judged on originality and design , skill and execution<br />
in tool techniques, suitability of construction, surface<br />
finish and final presentation. The judges were Michael<br />
DeNike, director of the American Wood Carving School,<br />
Wayne, N.J. ; Robert Butler, sculptor and biology professor<br />
at Pennsylvania State University ; and Benoit Deschenes, a<br />
carver from St. Jean, Port Joli, Quebec.<br />
One of the daily demonstrators was Ohio carver Huber<br />
King, winner of the Best of Show at the International Wood<br />
Carvers Congress four years running (1972-1975). King enjoys<br />
the research he does for a piece almost as much as the actual<br />
carving. "It's a real rich experience. You run into things you<br />
never realized." For his carving "The Young Settlers," the<br />
research was minimal-primarily the type of tools and<br />
clothing pioneers used. The piece meets one of King's prime<br />
criteria : that a carving be interesting from every angle. He<br />
does most of his work with a carving knife with different<br />
Top, overall view of roped-off wildlife carving display . All the<br />
carvings were simliarly displayed. Center, Huber King proudly displays<br />
his 'Young Settlers, ' carved fro m laminated 8/4 basswood. It<br />
took him 400 hours, including research. Bottom, rear view of<br />
'Young Settlers ' shows fine detali and flowing lines.<br />
62
lades and gouges, and never uses power tools. ''I'm just<br />
chicken , I guess," he said. He also never uses steel wool because<br />
he finds it leaves a residue that discolors his stains,<br />
which he makes from whatever paint he happens to have.<br />
British Columbia carver Arnold Mikelson , another demonstrator,<br />
was especially popular with visitors. He specializes in<br />
spectacular fantasy animal forms, carved in a species of eucalyptus.<br />
Since this show was heavy with realistic pieces,<br />
Mikelson's carvings seemed even more fantastic, and his<br />
demonstrations were always crowded. Through it all,<br />
Mikelson never lost his intense concentration on his work.<br />
The organizers of the show had arranged to ship several<br />
hundred carvings directly to Toronto from the International<br />
Wood Carvers Congress, a major annual show held in early<br />
August at the Great Mississippi Valley Fair in Davenport,<br />
Iowa. This connection and the promise of big cash prizes<br />
helped produce the avalanche of 1,800 entries, more than<br />
anyone had expected. Show officials were frankly stunned.<br />
"As more and more carvings arrived, we kept throwing up<br />
shelves for some place to put them," one organizer said. The<br />
result was a jam-packed display area, which was roped off<br />
from visitors. Thus pieces crowded together on wall shelves<br />
were often 10 ft . away from viewers. The combination of distance<br />
and sheer numbers of carvings made it impossible to get<br />
a clear view of most of the work, much less to appreciate the<br />
high quality of craftsmanship.<br />
Nonetheless, all those connected with the show agreed it<br />
was a huge success, and Canadian National Exhibition officials<br />
plan to sponsor it again next year.<br />
Ray Jenkins is a Toronto cabinetmaker and Ann Pappert is a<br />
free-lance journalist. They are writing a book about Canadian<br />
furniture makers.<br />
Dixie Lea Muir's 'The Buffalo Hunter, ' above, carved from a single<br />
block of black walnut and 15 in. high, won Best of Show prize.<br />
'Snowy Owl, . carved by William Schulz of Scandinavia, Wis., won<br />
Best of Class prize fo r Itle-size decorative birds.<br />
63
Carving Lab<br />
A basic exercise for beginners<br />
by Robert L. Buyer<br />
Woodcarving classes are usually unstructured meetings<br />
where a teacher advises and helps a student with a carving<br />
project. This method has the advantage of enabling a student<br />
to produce a finished carving immediately. The disadvantages<br />
are needless time spent fumbling around, often discouraging<br />
results, and at times the creation of poor work habits. This is<br />
how I learned to carve . I've often thought that some simple<br />
exercises in basic tool handling would have helped me tremendously,<br />
and would have reduced the time it took to learn.<br />
Therefore, in preparing to teach woodcarving last year, I<br />
developed a tool lab to introduce the basic techniques. It<br />
went rather well, and I hope it will help both novice carvers<br />
and other teachers. I am not advocating hours of tedious exercises,<br />
one after another, which must be mastered and yet<br />
produce only chips. These exercises concentrate on the gouge,<br />
parting tool and veiner, and how the various cuts are affected<br />
by the grain of the wood. Just experiment with it and observe<br />
carefully<br />
lO<br />
at each step.<br />
You'll need a piece of soft wood (pine or bass) at least 6 in.<br />
wide, in. long and 1/2 in. thick ; two clamps for holding<br />
the wood to the bench ; one or more carver's mallets,<br />
preferably of different weights and styles ; a carpenter's<br />
square, soft pencil and a broad felt-tip marker ; and three<br />
straight (not bent) carving tools-one gouge (such as a<br />
5-sweep, 20 mm) , one veiner (about 12 mm) and one parting<br />
tool (about 6 mm) .<br />
Please don't rush out and buy a kit of tools just for this exercise.<br />
If you have access to professional tools through a school<br />
or a friend, by all means use them. If you don't have access to<br />
tools and are sure you want to take up carving, then the three<br />
Carving lab equipment includes (left to right) gouge, veiner, parting<br />
tool and mallet. Clamps hold down board marked fo r cutting; lines<br />
parallel to grain are drawn on underside of board.<br />
tools needed for this exercise constitute a beginning set and<br />
should be bought individually. You will be ahead of the<br />
game, both artistically and financially, if you buy full-size,<br />
professional-quality tools one at a time. As you gain skill, you<br />
will learn exactly which ones to buy next. A few fine tools are<br />
much better than a roll of small, clumsy ones. Swiss tools (my<br />
favorites because of their iron, shape and octagonal handles)<br />
currently cost between $5 and $10 each, and the three specified<br />
here can be purchased for about $20 total.<br />
1. Draw a series of parallel lines on<br />
11<br />
the wood, about an<br />
inch apart. Draw some lines parallel to an edge, some perpendicular<br />
to this edge and some at 45· angle. With the<br />
marker, shade berween the lines to make a band parallel to<br />
the edge of the board, another band perpendicular to the<br />
edge and a third band on the diagonal. Now clamp the wood<br />
securely to the top of the workbench, with the clamps as close<br />
as possible to the ends of the board.<br />
2. Use the gouge and mallet to cut across the grain and remove<br />
the shaded band perpendicular<br />
to the edge of the<br />
board. Hold the gouge in<br />
your minor hand (left if you<br />
are right-handed) and the<br />
mallet in your major hand.<br />
Drive the gouge across the<br />
board from near to far, first<br />
cutting one edge of the<br />
shaded band, then the other.<br />
3. Make a cut along the<br />
grain to remove the shaded<br />
band parallel to the edge of<br />
the board, again holding the<br />
gouge in your minor hand.<br />
Use the mallet to drive the<br />
gouge along the board from<br />
right to left, first cutting<br />
along one edge of the shaded<br />
band, then the other.<br />
4. Now remove a diagonal<br />
band of wood, still holding<br />
the gouge in your minor<br />
hand. Use the mallet to drive<br />
the gouge across the board<br />
from near to far , cutting along one edge of the shaded band,<br />
then the other.<br />
5. Observe the edges of the diagonal cut you just made,<br />
and note which edge is smooth and which feathered. Repeat<br />
the cut that made the feathered edge, but this time drive the<br />
64
,,!S<br />
Above, gouge cut across the grain, made toward the carver. Minor hand powers cut, while<br />
major arm rests on stock fo r control. Right, major hand powers gouge cut across the grain,<br />
made away from the carver, with minor fo rearm as anchor and elbow pivot.<br />
gouge from far to near. Now this edge will be smooth.<br />
6. Carve away another diagonal band, this time using the<br />
veiner to cut each edge line. Drive the veiner from far to near<br />
for one edge and from near to far for the other, so that both<br />
edges are smoothly cut. Then use the gouge and mallet to<br />
clean out the wood between the veiner cuts. Carefully compare<br />
these results with the band cut by the gouge alone. Repeat,<br />
but this time use the parting tool instead of the veiner.<br />
7. Use the felt-tip pen to<br />
draw an arch-like design on<br />
the wood, as in the diagram.<br />
The band should be about an<br />
inch wide, and the design<br />
-<br />
should begin and end at the<br />
edge of the board. Carve out<br />
the band, using the veiner or<br />
parting tool followed by the<br />
gouge, as in step 6. Change direction as necessary to get<br />
smooth edges all around the design.<br />
8. Now repeat all of the preceding steps, but change<br />
hands-carving tool in the major hand, mallet in the minor<br />
hand. Try the exercises again, this time without a mallet.<br />
9. If you have more than one mallet, or access to other<br />
carving tools, try the same exercises with them and carefully<br />
compare the results using large and small tools of the same<br />
shape, or tools of different shapes, but the same size.<br />
By now it should be very clear that a carving tool produces a<br />
smooth edge on the side that cuts with the grain, and a feathered<br />
edge on the side that cuts against the grain. The tools<br />
can cut toward you or away from you. You can hold them in<br />
either hand, and you should be able to select the proper tool<br />
for a task. You are well on your way to becoming a carver.<br />
The following is advice about using carving tools. These<br />
points are presented not as gems of wisdom cast off by the<br />
sages, but as the condensate of the blood, sweat and tears of a<br />
dozen years of carving.<br />
-Drive parting tools and veiners without rocking motion.<br />
Drive gouges with one rock per cut, to get a slicing action.<br />
-Use the proper-size tool. Never "bury" the corners of a<br />
carving tool in the wood. If both corners are not visible you<br />
are cutting too deep or using the wrong size or shape of tool.<br />
-Always keep two hands on tools : either one on the carving<br />
tool and one on the mallet, or both hands on the carving tool.<br />
Never use the palm of the hand as a mallet.<br />
Mallet powers gouge; guiding hand holds center of tool and pivots<br />
from elbow.<br />
-For easy identification, position the carving tools on the<br />
bench (not on the work) so the cutting edges face you.<br />
-To rough out carvings in-the-round or remove the ground<br />
of a relief carving, cut across the grain, usually with a veiner<br />
and mallet.<br />
-Draw lines on the carving with a parting tool.<br />
-Finish cut with gouges, using a slicing cut and no mallet.<br />
-In lettering : First, incise the center ; second, cut from each<br />
side to the center ; then cut serifs.<br />
-In relief carving : First, remove ground ; second, set in<br />
edges ; third, smooth ground close to final depth with no. 3<br />
spoon and / or carver's router ; fourth, model carving.<br />
-Use a soft pencil and dividers frequently to check dimensions<br />
on the plans and redraw on the stock.<br />
X.<br />
-Whenever possible establish "points" of measure on the<br />
carving and plans. Mark these points with an Points are<br />
usually extremities (such as the tip of the nose, center of the<br />
head, bottom of the throat) and joints (ankle, knee, hip,<br />
shoulder, elbow, wrist).<br />
-Begin the carving at the place containing the most excess<br />
wood. Continue by carving away layers of wood-do not work<br />
on one area until it is complete, then move on to another. Instead,<br />
work on the carving as a whole, going around and<br />
around and making smaller and smaller cuts as you approach<br />
the final dimensions.<br />
Bob Buyer, 45, is a technical writer who also teaches woodcarving<br />
and runs a sawmtfiliumberyard in Norton, Mass.<br />
65
Routed Edge Joint<br />
Fence guides router for seamless fit<br />
by John Haria<br />
joint is invisible.<br />
66<br />
<br />
-I<br />
<br />
ROil Ie<br />
-;<br />
I<br />
r ..-----I<br />
A<br />
Ro"ter<br />
RO"ler<br />
A<br />
A<br />
Top View<br />
RO/lter<br />
<br />
r--- f.- A<br />
Al<br />
<br />
¢<br />
Top View<br />
<br />
A basic task of woodw<strong>orking</strong> is joining two or more pieces<br />
of wood to make a wide piece, with no apparent seam , for<br />
things like tabletops. It can be a difficult, time-consuming<br />
job and one that does not always turn out well . I have developed<br />
a system for edge-joining pieces of wood using a router,<br />
several clamps, a jig, a ruler and a fence. The results are consistently<br />
near-perfect and, with a little practice, can be<br />
achieved in a few minutes.<br />
Ideally, two pieces of wood would mate perfectly if they<br />
were held edge-to-edge and both edges were cut smooth with<br />
a single pass of the router. Any variation from a straight line<br />
would be mirrored on both pieces. The router is a most versatile<br />
tool, but even at 22,000 rpm it isn't powerful enough to<br />
cut that way. My system uses a fence to guide the router along<br />
the edge of the fust piece to be joined ; then the second piece<br />
is clamped facing the first and routed against the same fence.<br />
Thus any bumps or hollows in the fence are imparted to the<br />
first piece and transferred in reverse to the second piece. A<br />
hill in one piece will have a corresponding valley in the<br />
adjoining piece. The two pieces of wood are perfect mirror<br />
images and when joined, look like a single piece of wood.<br />
This router system of edge-to-edge lumber joining can be<br />
used to match two pieces with "S" curves or irregular compound<br />
curves, as well as straight pieces, as long as the curves<br />
are gentle. Thus beautiful grain patterns don't have to be<br />
disrupted by straight-line cuts. By joining along the natural<br />
flow of the grain, rather than through the grain pattern, you<br />
can build a large table apparently constructed from a single<br />
piece of wood.<br />
The species and thickness of wood are really not critical .<br />
I've routed everything from pine to ebony. Anything from<br />
114 in. to 2 in. thick can be routed easily. I have routed 3-in.<br />
thick maple using a special bit. With soft woods it is more<br />
difficult to get a clean edge because the grain doesn't shear<br />
and cut as easily and often rips away . Harder woods have<br />
more resistance and break away cleanly.<br />
For this kind of routing, a straight bit is used because the<br />
twO edges to be joined must be perpendicular to the surface<br />
of the wood and parallel to each other. Convoluted or fluted<br />
bits won't work . Nor will a bit with a narrow cutting area.<br />
The cutting surface of the bit has to be at least 1/2 in. in diameter-3/4<br />
in. is best because the peripheral speed makes<br />
the smoothest cut with minimum friction. Also, the chips are<br />
the right size for the router motor to blow away. With larger<br />
bits, the chips are larger and tend to pile up. The bit should<br />
be long enough to cut at least 1/4 in. deeper, and preferably<br />
1/2 in. deeper, than the thickness of the wood. The shank<br />
size of the bit is important, too. A 112-in. shank is pref-<br />
/
erable. If you have a small router with only a 1I4-in. collet<br />
capacity, you'll have to rout very slowly because of the<br />
tremendous strain on the bit. If the bit bends-and it can-it<br />
becomes eccentric and can whip itself out of the machine.<br />
Now on to the process of achieving a flawless edge joint.<br />
You'll need to construct a routing jig to hold the edge of the<br />
wood off the bench so the router can cut the entire surface to<br />
be joined. Cut a piece of 3/4-in. thick flakeboard, 18 in. wide<br />
and longer than the longest boards you plan to join. Glue or<br />
nail two more pieces of flake board or plywood on top of this<br />
piece, one about 6 in. wide and the other about 10 in. wide,<br />
leaving a 2-in. space between them. This gap not only allows<br />
the router to cut below the surface of the wood, but also<br />
provides a path of escape for the sawdust. This is important<br />
because unexpelled sawdust can work around the bit, fill up<br />
its normal clearance space and cause it to whip dangerously<br />
back and forth.<br />
Rest the jig on sawhorses, rather than your workbench.<br />
Four large c1amps-I prefer wooden jaw clamps-will be<br />
needed to hold the lumber on the jig. The routing fence can<br />
be made from any piece of 3/4-in. material such as<br />
flake board or plywood. It should be at least 6 in . wide and at<br />
least 4 in . longer than the lumber you 'll be routing.<br />
Mark the pieces of wood to be joined (A -AI, B-BI, etc.) so<br />
it will be easy to identify matching pieces. It's best to match<br />
all the lum ber you'll need for the whole tabletop fi rst, and<br />
then join it together. Take either piece from a pair to be<br />
joined and place it-let's say it's A-on top of the jig so that<br />
the edge to be routed is over the slot in the jig. Then place the<br />
fence on top of A. The key to the operation is the distance<br />
between the leading edge of A and the front edge of the<br />
fence. It must be a little<br />
more than the distance from<br />
the cutting flute of the router<br />
bit to the outer edge of the<br />
router base. To determine<br />
this distance, first insert and<br />
tighten the router bit. (Be<br />
sure the router is unplugged<br />
and the off-on switch is off.) With a ruler flush against the<br />
bottom of the router, rotate the bit by hand so that it just<br />
ticks the end of the ruler, and read the distance to the edge of<br />
the router base. The distance varies from router to router, but<br />
let's say it's 2-112 in. The fence is then clamped down at both<br />
ends so that it is exactly this distance from the edge to be<br />
routed plus 1 1 16 in. This means the router will be cutting<br />
away 1116 in. from the leading edge of the lumber.<br />
To begin routing, stand between the clamps with the fence<br />
in front of you . Hold the router with the left hand and turn it<br />
on with the right hand. Place the router flat on piece A with<br />
the bit just off the wood to the right. You will rout from right<br />
to left so that the blade, which is rotating clockwise when seen<br />
from above, is cutting into the wood. Holding the router<br />
firmly, bring it toward you against the fence, and move it<br />
slowly into and along the wood from right to left.<br />
After routing A, turn the router off and leave A clamped in<br />
place. Place the adjoining piece of wood, AI, on the jig so<br />
that the edges to be joined are facing each other and<br />
separated by the diameter of the bit (in this case 3 14 in.).<br />
Now, move piece Al 1116 in . closer to piece A-the amount<br />
of wood you will remove from AI. Clamp Al down and check<br />
both ends to be sure that the distance from A is exactly the<br />
Operator guides router along fe nce from his left to right to cut<br />
1/16 in . from second piece of wood.<br />
diameter of the bit less 1 116 in. If the gap is too narrow, the<br />
router may stall. And if you have to interrupt the cut, you are<br />
almost certain to ruin it.<br />
Now turn on the router and, standing in the same position ,<br />
place it at the left end of the jig, with the bit just off the edge<br />
of the wood. You'll be routing from left to right this time.<br />
The router rests on both A and AI, and is held against the<br />
fence. In this position it will cut off 1116 in. from AI, but<br />
nothing from A.<br />
After you've finished routing AI, turn the router off. Unclamp<br />
Al and bring it forward to A (which is still clamped in<br />
place) to check for errors. If the pieces don't quite match, you<br />
can rout another 1116 in. If there are gaps, you haven't<br />
routed deeply enough. If the pieces have been routed<br />
correctly, there is only one position in which the boards will<br />
join. When the right alignment is found, the seam will virtually<br />
disappear. Pencil a fine line across the joint to help match<br />
the pieces again when you're ready to glue them.<br />
The same procedures can be used to join wood along<br />
curves . Visually match the grain of the pieces to be joined.<br />
Mark the faces of the pieces P and Pl . Draw the desired cutting<br />
line on P and using a band saw, sabre saw or hand saw,<br />
cut along this line. Place P over the mating piece Pl . Trace<br />
along the line you've cut and cut piece Pl . You'll now have<br />
two roughly-mated pieces. Again using P, trace along a new<br />
piece of wood to be used as a fence and saw along this line.<br />
Follow the same procedures for setting up the wood and routing<br />
as for a straight-line joint. Curved edges routed in this<br />
manner will not be perfect mirror images, especially when the<br />
curve is severe . But a slow curve or a gentle "S" curve will fit<br />
together nicely to form a clean joint.<br />
Flaws in this system are caused by flaws in the wood. Avoid<br />
severely twisted wood, narrow boards and wood with knots.<br />
Cupped or bowed wood can be clamped flat for routing and<br />
planed level after glue-up. Rout the flatter board first, tacking<br />
a piece of plywood on top of it to obtain a stable surface.<br />
Finally, a word about grain. What you have to do is stop and<br />
think, which way is the grain going? Then if the router is<br />
tearing it up flip the wood over to reverse the grain .<br />
John Harm, 33, owns the John Harm Woodw<strong>orking</strong> Studio, a<br />
cabinetmaking shop and school in New York City.<br />
67
All three Shaker round stands are made of cherry and finished in<br />
clear varnish. Stand at left (The Shaker Museum, Old Chatham,<br />
N. Y.) is subject of this article ; center stand (Metropolitan Museum<br />
of Art) has tapered Sheraton-style convex legs dovetailed into urnshaped<br />
pedestal; right, top of early 19th-century stand (The American<br />
Museum in Britain, Bath, England) is 16 in. in diameter.<br />
Shaker Round Stand<br />
Three legs are dovetailed to turned pedestal<br />
by John Kassay<br />
Round stand is a name given by Shakers to the pedestal,<br />
tripod candle stand. These stands were derived from the<br />
English Queen Anne and Sheraton styles. American cabinetmakers<br />
made them less ornate and Shaker cabinetmakers further<br />
simplified the stands in line and form , in accordance<br />
with their religious doctrines.<br />
The stands shown here were all made in the fust half of the<br />
19th century, when the Shaker sect was at its peak. They were<br />
used to furnish the retiring rooms of the Shaker's communal<br />
dwellings, which often housed 100 or more people. Today,<br />
these graceful stands make lovely accent tables. To duplicate<br />
the one shown, you need about 7 board feet of cherry.<br />
Construction of the stand should start with the legs (A in<br />
measured drawing) . Draw a full-size pattern of the leg,<br />
including the dovetail pin, on a piece of thin cardboard and<br />
carefully cut it out. Mill the stock for the legs to the required<br />
3/4-in . thickness and position the pattern on the wood with<br />
the grain of the leg in the longest direction, as in the<br />
front-view drawing. Trace the pattern three times and then<br />
separate the legs with rough cuts ; make no attempt to cut to<br />
size. The ends of the blank that will form the dovetail and the<br />
bottom of the foot are now cut precisely to length and per-<br />
John Kassay, 58, teaches cabinetmaking in the Department of<br />
Design and Industry at San Francisco State University.<br />
pendicular to each other. Sandwich the legs together and<br />
fumly nail two scrap pieces of 1I4-in. plywood on these end<br />
surfaces. This assembly is now sawn to final shape and sanded<br />
as a single unit. Separate the legs, lay out the dovetail pins<br />
very precisely and cut the shoulders and sides with a dovetail<br />
saw. Of course they can be cut on the table saw, but that<br />
makes the operation less personal. Clean up with a chisel.<br />
To make the pedestal (B), turn a piece of cherry, 2 -118 in.<br />
square and 20-3/4 in. long, to a 2-in. cylinder. Lay out the<br />
pedestal with its upper end at the tailstock. To make an exact<br />
reproduction of the original stand, mark pencil lines along<br />
the cylinder at I-in. intervals to locate parting tool cuts at the<br />
diameters shown. The experienced turner, like the craftsman<br />
who made the original, will find it sufficient to part the<br />
smallest and largest diameters. Remove the excess wood with<br />
a gouge. Then the pedestal is rough and medium-sanded.<br />
A tenon, 1 in. in diameter and 11116 in. long, is established<br />
on the upper end of the pedestal to hold the disc (C).<br />
On the original table, wood threads fasten the pedestal to the<br />
disc. If you have a I-in. wood threading tap-and-die set, by<br />
all means use it. Otherwise, the tenon is simply glued into a<br />
hole in the disc. At the lower end of the pedestal, turn an absolutely<br />
straight cylinder, 1-7/8 in. in diameter and 3-112 in.<br />
long. This is where the legs will be dovetailed to the pedestal.<br />
Finish sanding the pedestal while it is in the lathe. Be sure to<br />
68
..<br />
.., (y<br />
'" w < 0 ."<br />
0<br />
'"
dampen the wood to raise the grain, and sand along the pedestal<br />
with the lathe turned off in order to remove any circular<br />
scratches.<br />
Choose the most attractive grain pattern on the pedestal<br />
and locate one leg here. The other legs will be located 120°<br />
right and left from this point (detail 2). Index the legs to the<br />
pedestal with pairs of identification marks. Lines establishing<br />
the center of each leg are drawn on the bottom of the pedestal<br />
and extend along the sides. Then parallel lines 3/8 in . from<br />
these center lines are drawn on each side. To enable the legs<br />
to seat properly against the pedestal , absolutely flat surfaces<br />
must be cut within these outer lines. Cut a series of kerfs with<br />
a backsaw and pare away the excess wood with a sharp chisel.<br />
Redraw the center lines on these flat surfaces, using the center<br />
lines on the bottom as a guide. Draw lines 3/16 in. on each<br />
side of these center lines to indicate the thickness of the<br />
dovetail pins, 318 in., at their shoulders. Hold each leg in<br />
position against the bottom of the pedestal, and trace the<br />
outline of each dovetail pin (three lines for each) on the<br />
bottom of the pedestal. These three lines, along with the two<br />
parallel lines on the flats, determine the material to be removed<br />
to produce the dovetail sockets. With a brace and a<br />
5/16 auger bit, bore a series of holes along the center line of<br />
one leg. Count the number of brace revolutions to gauge the<br />
depth. The waste wood is removed with wood chisels.<br />
Patience along with much trial fitting is now necessary. Make<br />
certain right from the start that the leg is being committed<br />
perfectly straight ; do not force the leg in place. These dovetail<br />
sockets may be produced using a router, a dovetail bit and<br />
a home-designed jig for supporting the router while the piece<br />
is still in the lathe (see p. 20). On the other hand, by the time<br />
you have tooled up, you could be gluing up . After the legs<br />
are fitted to the pedestal, they are disassembled and a spokeshave<br />
and abrasive paper are used to form the curves on the<br />
upper and lower edges, as shown in section in detail 7. '<br />
Plane stock for the circular disc (C) to the finished 3/4-in.<br />
thickness. Mount it on a lathe faceplate and turn to the indicated<br />
diameter and chamfer. Finish-sand while the disc is on<br />
the lathe and bore a I-in. hole on center for the dowel end of<br />
the pedestal . The disc may instead be bandsawn as described<br />
below. Bore and countersink four equally spaced holes for<br />
flathead wood screws (F ), which fasten the disc to the top.<br />
Fabricate the top (D) from three or four narrow boards that<br />
have compatible grain patterns. The circular shape and undercut<br />
chamfer can be turned outboard on a lathe, made with<br />
a hand router or a homemade circle-cutting jig on the band<br />
saw, or cut by hand with a bowsaw or a sabre saw.<br />
Before assembly, the parts of the stand should be rough,<br />
then medium-sanded. Make a jig of plywood to hold the legs<br />
and pedestal in an upright position while the glue hardens.<br />
Apply glue to both pins and sockets.<br />
The disc is fust screwed to the top with its grain 90° to the<br />
grain of the top and then glued or threaded to the pedestal.<br />
Shakers often used a thin, sheet-iron plate (E) to reinforce<br />
and cover the dovetail joint. If your dovetails have been well<br />
made, the plate is not necessary.<br />
To finish the stand, raise the grain and fine-sand. Carefully<br />
dust and apply a coat of clear furniture varnish. If a stain coat<br />
is desired, it should be of a brown shade and is applied before<br />
the fust varnish coat. Three or four varnish coats are necessary.<br />
The final coat is hand-rubbed with fine (4F) pumice or<br />
rottenstone lubricated with lemon oil, and waxed.<br />
Cutting Corners<br />
How to mount marquetry<br />
by Peter L. Rose<br />
Many marquetarians still use white glue and a press to<br />
mount their pictures, because they aren't sure how to use the<br />
modern contact glues. And many who have advanced to contact<br />
glue use a brown-paper slip-sheet to align the picture and<br />
the board. Either way, it is very difficult to make mitered<br />
border veneers meet precisely at the corners of the mounting<br />
board. The methods described here are the least complicated<br />
and most direct solutions to these problems.<br />
Trimming veneer<br />
Once the marquetry picture is complete, the edges must be<br />
trimmed square and clean so the border veneers can fit tightly<br />
against them. Use a carpenter's square to mark two adjacent<br />
sides, and continue around the picture by lining up one arm<br />
of the square with one of the lines previously drawn. With a<br />
single-edge razor blade, make several passes against each<br />
edge. Do not try to cut through in one pass as this may damage<br />
the veneers.<br />
My $30 foreign-made veneer trimmer works well on<br />
straight-grained veneers but not on irregular-grained wood.<br />
This trimmer is difficult to operate because the blade has to<br />
be set at a fixed depth ; it is awkward to control when going<br />
over the veneer in several passes . Used in one pass, its cut is<br />
not perfectly straight and either splits the wood or follows the<br />
grain. This trimmer is not to be confused with a veneer saw,<br />
which works well, but for a perfectly flush cut (in matching<br />
veneers or making borders) sawn veneer must have a final<br />
sanding or planing in a wood jig.<br />
My own veneer trimmer costs almost nothing and for me it<br />
works better. The advantage is that several passes can be<br />
made, lowering the blade a little each time by a slight hand<br />
movement. Thus it is easier to trim irregular grains and hard<br />
Inexpensive homemade veneer<br />
trimmer is fashioned<br />
from scrap block and singleedge<br />
razor blade, attached at<br />
an angle. Perfectly even bottom<br />
permits scoring, then<br />
successively deeper cuts. Metal<br />
straightedge can be held<br />
against back side of block, as<br />
shown here, or against razorblade<br />
side .<br />
70
veneer. The 3/ 4-in . wide block of wood keeps the blade perpendicular.<br />
Because of the curved bottom, each pass can cut<br />
more deeply. The curved bottom can be cut with a sabre saw,<br />
or on a power jigsaw with the table perfectly flat. Medium<br />
sandpaper glued or attached with double-faced tape to the<br />
bottom of a metal ruler makes a guide that will not slide on<br />
the veneer. I change blades frequently-one blade can be<br />
used twice by turning it around. Dimensions of the trimmer<br />
aren't critical, but the bottom must be even, or it will stray<br />
away from the straightedge.<br />
Borders<br />
Four strips of veneer should be prepared for the borders,<br />
but a good inch wider than required and several inches longer.<br />
Lay them tightly along each side of the picture, front side<br />
up, with the corners overlapping, and tape to the front. Now<br />
turn the picture over, so the back side is facing up, as in the<br />
drawing at the bottom of this column. Put two small pencil<br />
marks on each border veneer an equal distance from the<br />
picture itself, cut the mounting board to size, and align it between<br />
these marks. Pencil a line around the board on the<br />
border veneers and write "back" on the board so you can replace<br />
it exactly the same way. Remove the board, and with<br />
straightedge and single-edge razor blade cut from each corner<br />
of the picture through the corners you just penciled on the<br />
borders. Do this very carefully, as you will be going through<br />
two layers of veneer. Remove the waste and the border miters<br />
should fit exactly together. Miters cut this way will always<br />
meet exactly at the corners of the board, even if the board is<br />
not cut quite to size or is a little out of square.<br />
Turn the picture over again, tape the entire face with<br />
masking tape butt-to-butt, and remove the tape from the<br />
back side. In a paper cup mix crack filler (sanding dust) with<br />
white glue until it is creamy and press it into any cracks with a<br />
putty knife. Remove excess filler and lay a board over the<br />
picture for several hours. When the filler is dry, the picture is<br />
ready to glue. I prefer Constantine's veneer glue because it is<br />
thinner and easier to work with than other brands of contact<br />
cement. Do not use water-based contact glues for marquetry,<br />
because the water will cause the veneers to expand, and gaps<br />
will be created in the picture.<br />
Back<br />
To veneer the back of the mounting board, choose a piece<br />
of veneer about an inch too large on all sides. Lay the back<br />
side of the mounting board on the veneer and pencil a line<br />
around the board. Spread contact cement thinly on both surmiter<br />
With reverse side up and oversize borders taped to picture, miters<br />
can now be cut through both borders at once to ensure perfect fit.<br />
Scrap pieces nailed to waste veneer outside penczl lines fo rm frame<br />
that aligns mounting board during glue-up with contact cement.<br />
faces. If the wood is porous it is best to let the first coat dry<br />
and apply a second coat. Go beyond the pencil line to make<br />
sure the edges will adhere. When the glue is dry, nail four<br />
pieces of lx2 or similar scrap wood to the veneer along the<br />
outside of the pencil lines. This creates a frame into which the<br />
mounting board can be dropped, to ensure perfect alignment.<br />
The scrap wood won't stick to the veneer because contact<br />
glue must be on both surfaces before it can make a bond.<br />
Carefully lift the board by its edges and turn it over, glue<br />
side down. Hold it over the veneer, a fraction of an inch<br />
below the surface of the four pieces of scrap wood, and drop it<br />
squarely into place. Apply a little pressure with your hands,<br />
then remove the nails holding the scrap to the bench. Turn<br />
the board over and roll down the veneer to ensure contact.<br />
Now with your veneer saw trim off the overhanging veneer.<br />
Veneer saw<br />
Always triple-check everything before gluing, because veneers<br />
once glued cannot be moved.<br />
Edges<br />
The edges of the board should be veneered next. Apply<br />
glue to two opposite edges and to two oversized veneer strips.<br />
When the glue has dried (usually about 20 minutes) , hold the<br />
mounting board over one of the veneers and slowly lower it<br />
into place. Roll to ensure good contact, then trim with the<br />
veneer saw. Do the opposite edge next, then the remaining<br />
two sides in the same manner.<br />
At last the board is ready for the picture itself. Lightly sand<br />
the back side of the picture, to make sure it is smooth and free<br />
of lumps. Lay the mounting board on the picture, with the<br />
back sides of both facing up, to verify that the miters, corners<br />
X and pencil marks line up properly. Mark an on<br />
the top edge<br />
of the board and of the picture so there will be no guessing,<br />
apply glue to both surfaces, let it dry, and tack down the<br />
guide strips, as when veneering the back of the board. Drop<br />
the board into place, roll down tightly and trim the edges.<br />
Your picture is ready for sanding and finishing.<br />
Pete Rose is a fo under of the Marquetry Society of America<br />
and writes fo r the Society 's newsletter.<br />
71
Small Turned Boxes<br />
Grain direction determines technique<br />
by Wendell Smith<br />
I<br />
Small wooden boxes offer the wood turner an excellent opportunity<br />
to try his hand at design. would like to describe<br />
some techniques I use to make boxes for storing small items<br />
such as jewelry. One approach to the design of such turnings<br />
that I particularly like is to inlay circular veneers into box lids.<br />
The availability of many figured veneers allows an almost<br />
unlimited number of attractive wood combinations. Some<br />
wood/inlay combinations I enjoy are : walnut/thuya burl,<br />
padauk/ ebony, maple / ebony, cherry / tulipwood, mahogany/<br />
madrone burl, mahogany/amboyna burl, walnut/Dalbergia<br />
sp. (rosewood, coco bolo , kingwood, etc.).<br />
Depending upon whether the grain is to run horizontally<br />
or vertically in the completed box, the sequence of operations<br />
in box turning is somewhat different. I've divided the discussion<br />
according to this difference.<br />
Grain is horizontal<br />
Turning boxes of horizontal grain involves primarily faceplate<br />
techniques . Useful lumber thicknesses are 2 in. and<br />
3 in. With 2-in. stock, I generally use the full thickness for<br />
the base, and resaw another piece from an adjacent section of<br />
the same board for the lid. This point is quite important, because<br />
differences in color and texture between boards can be<br />
very apparent if one is used for a base and another for a lid. A<br />
Wendell Smith, 46, is a research associate in color photography<br />
at Eastman Kodak in Rochester, N. Y. His turnings,<br />
which he sells through art galleries, have been exhibited in<br />
several juried craft shows. Smith uses a Rockwell-Delta lathe<br />
and Sorby gouges.<br />
Walnut box, 6-in. diameter.<br />
3-in. blank may be resawn into 2-in. and I-in. pieces for the<br />
base and lid, thus permitting the figure to carry through from<br />
top to bottom. Resawn lid blanks should be given ample time<br />
to return to equilibrium with the ambient humidity prior to<br />
turning. Then glue round waste blocks of 3/ 4-in. plywood<br />
with paper interleaving to the bottom of the base and the top<br />
of the lid. Polyvinyl acetate (white) glue and brown wrapping<br />
paper serve the purpose satisfactorily. The faceplate, of<br />
course, is screwed to the waste block.<br />
I turn and finish-sand the inside of the lid first. The lid is<br />
then removed from the lathe and the glue block split off. The<br />
base of the box is placed on the lathe, and a shallow recess<br />
turned to accept the lid with a snug fit. The base is now<br />
capped with the lid, and the two held together with a flat<br />
center in the ball-bearing tailstock. The support of the tailstock<br />
eliminates the necessity for a tight jam fit. Unless a jam<br />
fit is very tight, slippage may occur when turning the base<br />
and the lid together, which invariably burnishes the wood.<br />
And a very tight fit may require prying to remove the lid,<br />
which can easily damage the box. Before capping the base<br />
with the lid, the top edge of the base is sanded. Thus, those<br />
surfaces on the base and lid that contact each other are now<br />
complete, and so is the inside of the lid. With this arrangement,<br />
the side of the box and lid may be worked together,<br />
and then finish-sanded. Before removing the tailstock, the lid<br />
is " clamped" to the base by wrapping the joint with masking<br />
tape. I use 1-1I2-in. tape, which is amply strong.<br />
The top of the lid is now finished as desired. One precaution<br />
: If a knob is desired, it is usually better to add a separately<br />
turned one rather than to turn the lid and knob from the<br />
Grain is horizontal in 3-1 12-in. diameter cherry box, left, with koa<br />
veneer inlaid into its lid, center. Box at right is goncalo alves,<br />
4·114 in . in diameter. Although both boxes are plain cylinders,<br />
subtle changes in shape make each distinct.<br />
72
same piece. Because a large amount of wood must be removed<br />
from the top of the lid to leave a knob, re-equilibration<br />
of the lid with the ambient humidity may lead to<br />
CUppIng.<br />
Upon completion of the top of the lid, the masking tape<br />
and lid may be removed and the interior of the box finished.<br />
Boxes in which the grain runs horizontally rather than vertically<br />
are more prone to develop sticking lids with humidity<br />
changes. Consequently, the interior of the box should be<br />
sanded until the lid fits loosely. For this type of box, a loosely<br />
fitting lid is a properly fitting lid.<br />
There is a trick to removing waste plywood blocks that<br />
prevents damage to the bottom of the finished turning. The<br />
splitting wedge (an old plane blade) should be inserted between<br />
the two layers of the waste block closest to the paper<br />
interleaving-not between the waste block and the paper.<br />
This removes about 80 % of the plywood. The remainder, still<br />
glued to the paper, has no strength and is easily pried off with<br />
a chisel. Scraping and sanding complete the job.<br />
To inlay a veneer into a box lid, the fust step is to soak ,<br />
press and dry the veneer. Once dry, the veneer should be kept<br />
under moderate pressure ro keep it flat until ready for use. It<br />
is then clamped with a circular wooden block against a<br />
wooden faceplate previously flattened in the lathe. The<br />
wooden block is held in place with a ring center in the ballbearing<br />
tailstock. The ring center indexes the block for later<br />
re-centering at the gluing stage. The block should be about<br />
1/8 in. smaller in diameter than the desired circle of veneer.<br />
A tool rest is now brought as close as possible to the veneer<br />
and block. With the lathe running at a slow speed, the veneer<br />
is cut using a skew or diamond-point chisel. Using this<br />
method I have cut circles with undamaged edges even from<br />
recalcitrant veneers such as burls.<br />
To prepare the box lid for the veneer, I fi rst rum a slightly<br />
undersize recess. A " straight-across" scraper is used to flatten<br />
the bottom of the recess. The diameter of the recess is carefully<br />
enlarged by using a parting tool to pare off a small<br />
amount at a time. This means frequently stopping the lathe<br />
to test the fit, a tedi,)Us but necessary process. The fit should<br />
be snug-anything less results in an unsightly glue line. I<br />
remove the tightly fitting veneer for final gluing with the<br />
shop vacuum cleaner, using the last gentle gasp of suction<br />
after the vacuum has been turned off.<br />
To attach the veneer, I use a polyvinyl acetate (white) or an<br />
aliphatic resin (yellow) glue, both of which are water-based.<br />
Put the glue on the box lid-not on the veneer. A waterbased<br />
glue applied to the veneer will cause the veneer to<br />
expand rapidly and it will be difficult to fit it into the recess.<br />
Finally, the inlay is clamped in place in the lathe using the<br />
same circular wooden block (previously indexed with the ring<br />
center for re-centering) as was used in cutting the veneer, with<br />
waxed paper inserted between the veneer and block. After<br />
overnight drying in the lathe, the lid may be finished.<br />
I<br />
Grain is vertical<br />
generally turn vertical-grain boxes (such as a ring box)<br />
from 2x2 spindle-turning stock. Because the lid is separated<br />
from the base on the lathe, allowance must be made for some<br />
waste.<br />
The blank is fust placed in the lathe between centers and<br />
turned to a cylinder. A shoulder is then turned at one end to<br />
fit tightly into a homemade chuck, as shown in the diagram ,<br />
Horizontal-grain box in cherry, 10 in . diameter, 2-114 in . high,<br />
shows design possibt/ities permitted by the method diagrammed<br />
above. Lid is mostly finished with tat/stock for support, then taped<br />
in place fo r final shaping of knob.<br />
73
and securely fastened with two countersunk screws.<br />
The lid can be prepared in two ways. If the wood is figured,<br />
it is desirable to have the figure carry through from base to<br />
top in the completed box, as shown in the photograph. Consequently,<br />
when the lid is parted from the base, it must go<br />
back on the same way it came off. If the wood has little or no<br />
figure, it is somewhat easier to prepare the lid in the reverse<br />
sense ; that is, after parting from the base, the lid is turned<br />
around and refitted. Since the method for figured wood is<br />
more involved, I'll describe it in detail .<br />
The cylindrical blank, fastened to the chuck, is mounted in<br />
the lathe with a cone tailstock center supporting the free end.<br />
After truing so that the cylinder runs smoothly, a shallow<br />
notch is cut with the parting tool where the lid will meet the<br />
top of the base. A second shallow notch is cut at the bottom<br />
of the base, no closer than about 112 in . from the chuck.<br />
These notches assist in visualizing the relative proportions of<br />
the base and lid and other aspects of the design of the box. In<br />
estimating the height of the lid, about 3/16 in. extra should<br />
be allowed at the tailstock end for later removal of the cone<br />
center mark. Shrinkage and expansion are not much of a<br />
problem with vertical-grain boxes, so a knob may be turned as<br />
an integral part of the top.<br />
The knob and top of the lid are first roughly turned to the<br />
desired shape. Then the lid is parted from the base, the parting<br />
tool entering the cylinder about 118 in. below the notch<br />
previously cut between base and lid. The interior of the base<br />
is next partially roughed out to accept the inverted lid, which<br />
is fastened to the base by wrapping the two with masking<br />
tape. This automatically centers the lid, and its inside,<br />
including the shoulder, is now easily finished. A slicing cut<br />
with the skew is ideal for finishing the bottom of the lid, as<br />
this exerts little force and leaves a surface that requires a<br />
minimum of sanding. After sanding the bottom of the lid<br />
and shoulder, the masking tape and lid are removed.<br />
The turning of the remainder of the box is similar to the<br />
method for horizontal-grain boxes. The interior of the base is<br />
first enlarged so the lid will fit snugly. The tail stock is<br />
brought up, and the side of the box and lid are worked together.<br />
The joint is then taped, the tailstock removed, and<br />
the handle and top of the lid completed. One must take very<br />
thin slicing cuts at the end of the handle to avoid breaking it.<br />
Finally, the lid is removed and the interior of the box is<br />
completed.<br />
I remove the box with a parting cut that goes nearly to the<br />
center of the cylinder. To prevent fibers from being torn from<br />
the center of the base, I terminate the parting cut when about<br />
114 in. of wood remains. Parting is completed with a coping<br />
saw, leaving the 1I4-in . nubbin of wood on the box. The box<br />
is then turned around and snugly fitted to the approximately<br />
112 in. of waste wood still prottuding from the chuck, by<br />
turning the waste wood to size. The box is supported with the<br />
tailstock cone center touching the nubbin, and all but the<br />
very center of the base can be cleaned up with a slicing cut of<br />
the skew, followed by light sanding. The nubbin is then removed<br />
with a jeweler's saw and any remaining waste sliced off<br />
with a chisel. Hand sanding completes the base.<br />
Homemade chuck holds cylinder with vertical grain, photo at top,<br />
fo r turning sequence shown in the drawing . At left is soft maple<br />
box, 1-7/8 in . in diameter and 5 in. high, with separately turned<br />
knob of walnut. Myrtlewood box, right, is 2 in. in diameter and<br />
3-314 in . high.<br />
74
SOURCES OF SUPPL Y ____________________________ __<br />
Hardware Specialists<br />
Catches, latches, locks, escutcheons, casters, table slides, hinges . ..<br />
Readers often ask us for sources of specialty<br />
hardware, for example, a Chippendale<br />
door pull, miniature hinges, or fittings<br />
for a baby's crib. In order co respond, we<br />
sent a questionnaire co 49 retailers, wholesalers<br />
and mail-order firms. The information<br />
below is adapted from these questionnaires<br />
and from catalogs. This alphabetical<br />
listing cannot be inclusive : There are more<br />
firms than we know of, and we haven't tried<br />
co list every item offered. But it is a starting<br />
place for the craftsman looking for a particular<br />
mechanism or a period hardware<br />
style. We hope readers will tell us about<br />
other sources, and we'll pass the information<br />
along in a future report.<br />
Note : Some firms sell "wholesale only,"<br />
a term with various meanings. In some cases<br />
the buyer must be in business and purchasing<br />
for resale, not for personal use ; in<br />
others, meeting the minimum order is the<br />
only restriction. Check before ordering.<br />
The following fir.ms carry a complete line<br />
of hardware that includes cabinet hinges,<br />
hinges for clocks, pivot, knife and invisible<br />
hinges, reproduction hardware, pulls, locks,<br />
knobs, handles, escutcheons, casters, gliders,<br />
catches and latches, with specialties and<br />
hard-co-find items as noted.<br />
Anrique Hardware, 24 Birch Ave. , Toronto,<br />
Canada. (4 16) 962-0471. Caralog, $1.00 ; $5.00<br />
minimum order. Complere line ; custom bathroom<br />
fittings, grilles. This company does not export<br />
outside of Canada.<br />
Ball and Ball, 463 W. Lincoln Hwy. , Exton, Pa.<br />
19341. (2 15) 363-7330. Catalog, $2.00 ; $4.50<br />
min. Brass hardware ro customer specifications ;<br />
repair of furniture and house hardware. Very<br />
complete line of brass and iron reproduction<br />
hardware, cast and exttuded hinges, bed fittings,<br />
clock finials, much more.<br />
Ballsun Co. , 1953 S. Alameda, Los Angeles,<br />
Calif. 90058. (2 13) 749-7171. Wholesale only.<br />
Catalog, $5.00; $10.00 min. Complete line;<br />
shelf supports, bed fittings, knockdown fittings,<br />
table slides, drawer slides, lift and lid mechanisms,<br />
upholstery hardware.<br />
Barap Specialties, 835 Bellows Ave. , Frankfort,<br />
Mich. 49635. (6 16) 352-9863. Catalog, $0.50;<br />
no min. Complete line ; lamp hardware, drawer<br />
slides, lazy Susan bearings, Swiss musical movemenrs,<br />
upholstery hardware.<br />
]. D. Beardmore & Co. , Ltd., 3-5 Percy St. ,<br />
London WIP OE], England. (0 1) 637-7041. Catalog,<br />
$8.20 ; no min. Complete line ; French,<br />
Chippendale, Vicrorian, Colonial, wrought-iron<br />
reproduction hardware. Handmade grilles.<br />
A. Constanrine & Son, Inc. , 2050 Eastchester<br />
Rd. , Bronx, N.Y. 10461. (2 12) 792-1600. Catalog,<br />
$0.50; $5.00 min. Complete line ; bed fittings,<br />
drawer hangers, lift and lid mechanisms,<br />
upholstery hardware. Special hinges include concealed<br />
piano, lazy-rong, rising butt.<br />
Craftsman Wood Service Co., 2729 S. Mary St.,<br />
Chicago, Ill. 60608. (3 12) 842-0507. No wholesale.<br />
Catalog, $0. 50 ; no min. Complete line ;<br />
bed fittings, knockdown fittings, table slides, upholstery<br />
hardware, lift and lid mechanisms. Swiss<br />
music movements, chair swivels, wrought iron<br />
legs, sewing machine hinges, lamp hardware.<br />
18th Century Hardware Co. , Inc., 131 E. 3rd St. ,<br />
Derry, Pa. 15627. (4 12) 694-8421. Catalog,<br />
$2.00; $50.00 min. Complete line ; CUStom<br />
hardware. H, HL and card-table hinges. Full line<br />
of reproduction hardware includes Heppelwhite,<br />
William & Mary, Queen Anne ; bed fittings,<br />
porcelain casters.<br />
Faneuil Furniture Hardware, 94- 100 Peterborough<br />
St. , Boston, Mass. 02215. (6 17) 262-7516.<br />
Catalog, $2.00; ·$5.00 min. Reproduction hardware<br />
in many styles. Cast brass Chinese character<br />
pulls, leg ferrules, platform-rocker springs, lazy ,<br />
Susan bearings, finials. Hinges include car
Unhinged<br />
Many contemporary furniture<br />
makers strive to add a sculptural<br />
quality to the pieces they design and<br />
build. John McNaughton , an art<br />
teacher at Indiana State University<br />
Evansville, goes a step further-his<br />
furniture can be taken apart and rearranged<br />
as abstract sculpture. Or,<br />
his abstract sculptures can be rearranged<br />
as tables. The example<br />
shown here, known alternately as<br />
"The Hinge Table" and "Who<br />
Needs a Giant Hinge?," also exhibits<br />
the artist's fascination with<br />
simple hardware parts such as the<br />
spring, hinge or chain.<br />
McNaughton prefers to work in<br />
plywood because, like his pieces, it is<br />
neither traditional nor conventional .<br />
Thus he is not inhibited by reverence<br />
for fine hardwood or the compulsion<br />
to display its beautiful<br />
grain. And plywood comes in large ,<br />
relatively cheap sheets, allowing him<br />
to experiment freely.<br />
He favors 3/4-in . C/D fir ply because<br />
he finds it has fewer interior<br />
voids than AID or A/C grades. It<br />
also contains less cedar, which means<br />
exposed end-grain surfaces will be a<br />
lighter, more reliably uniform color.<br />
After bandsawing the layers and<br />
gluing up his forms, McNaughton<br />
shapes the wood with 7-in. discs of<br />
16-grit abrasive powered by an auto<br />
body grinder. He cleans up with<br />
progressively finer grits attached to<br />
soft-foam grinding heads, and finishes<br />
with satin urethane.<br />
-Linda). Davis