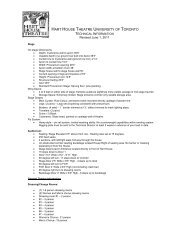
How-to's > Guidelines > Resources - Hart House
How-to's > Guidelines > Resources - Hart House
How-to's > Guidelines > Resources - Hart House

You also want an ePaper? Increase the reach of your titles
YUMPU automatically turns print PDFs into web optimized ePapers that Google loves.
Step 3: Setting up your workspace<br />
Open up your toolbars/palettes, you’ll need these to do the layout and design. You’ll need to use Character,<br />
Paragraph, Layers, Pages, Swatches and Links. You can select which ones to open by going to Window in the drop<br />
down menus at the top.<br />
Step 4: Changing the title or text<br />
To change the title on your poster, select the Type Tool from the toolbar on the left side of your screen (it looks like<br />
an uppercase letter T). Once you have selected this tool, highlight the title text and replace it with your event title.<br />
You can change all of the text on the poster the same way by selecting the type with Type Tool and replacing it with<br />
your info.<br />
Step 6: Making your title or text fit<br />
You may need to change the size or weight of the font to get your text to fit. Select the text with Type Tool, using<br />
either the Character palette or the toolbar at the top of your screen, and change the size of the text or change the<br />
weight of the font from bold to regular. You can also adjust the letter spacing in the Character palette (this is called<br />
tracking) to tighten it up.<br />
Step 7: Changing the colour of the text<br />
To change the colour of the text, select the Type Tool again and highlight the text you want to change. Select the<br />
colour you want to use from the Swatches palette.<br />
Step 8: Changing the background colour or image<br />
To change the colour of the background, use the Selection Tool to select the background (if the layer is locked<br />
and you can’t select it, go to your Layers palette and unlock the layer by clicking on the little lock icon). With<br />
the background selected, choose the colour you want to use from the Swatches palette. To add an image, use<br />
the Selection Tool and select the background. Go to File at the top left of your window and select Place, this will<br />
prompt you to choose an image file on your computer.<br />
Step 9: Changing the Club &<br />
Committee logos<br />
Select the Selection Tool from the toolbar<br />
on the left of your screen. Click on the logo<br />
in the bottom left corner of your document,<br />
then go to File in the top drop down menu.<br />
From here you will click Place and be prompted to choose the file you would like to place in that box. The Club &<br />
Committee logos are located in the template folder.<br />
Step 10: Adding logos for event partners<br />
If you have partner(s) for your event and need to include their logo, you will place it the same way as your Club<br />
7 <strong>Hart</strong> <strong>House</strong> Circle / Toronto, ON / M5S 3H3 / Canada / 416.978.2452 / www.harthouse.ca